As a continuation from the Beta Project, I decided to carry my exploration of patinas further to be applied to products. I wanted to focus on surface texture rather than a product form so I needed a simple shape. I decided to look at cups and bowls as they are common amongst all cultures and I thought it would be a nice continuation from my CP exploring place oriented design and culture.
After my research on cups around the world, I made a couple attempts at making cups out of copper in the metal workshop.
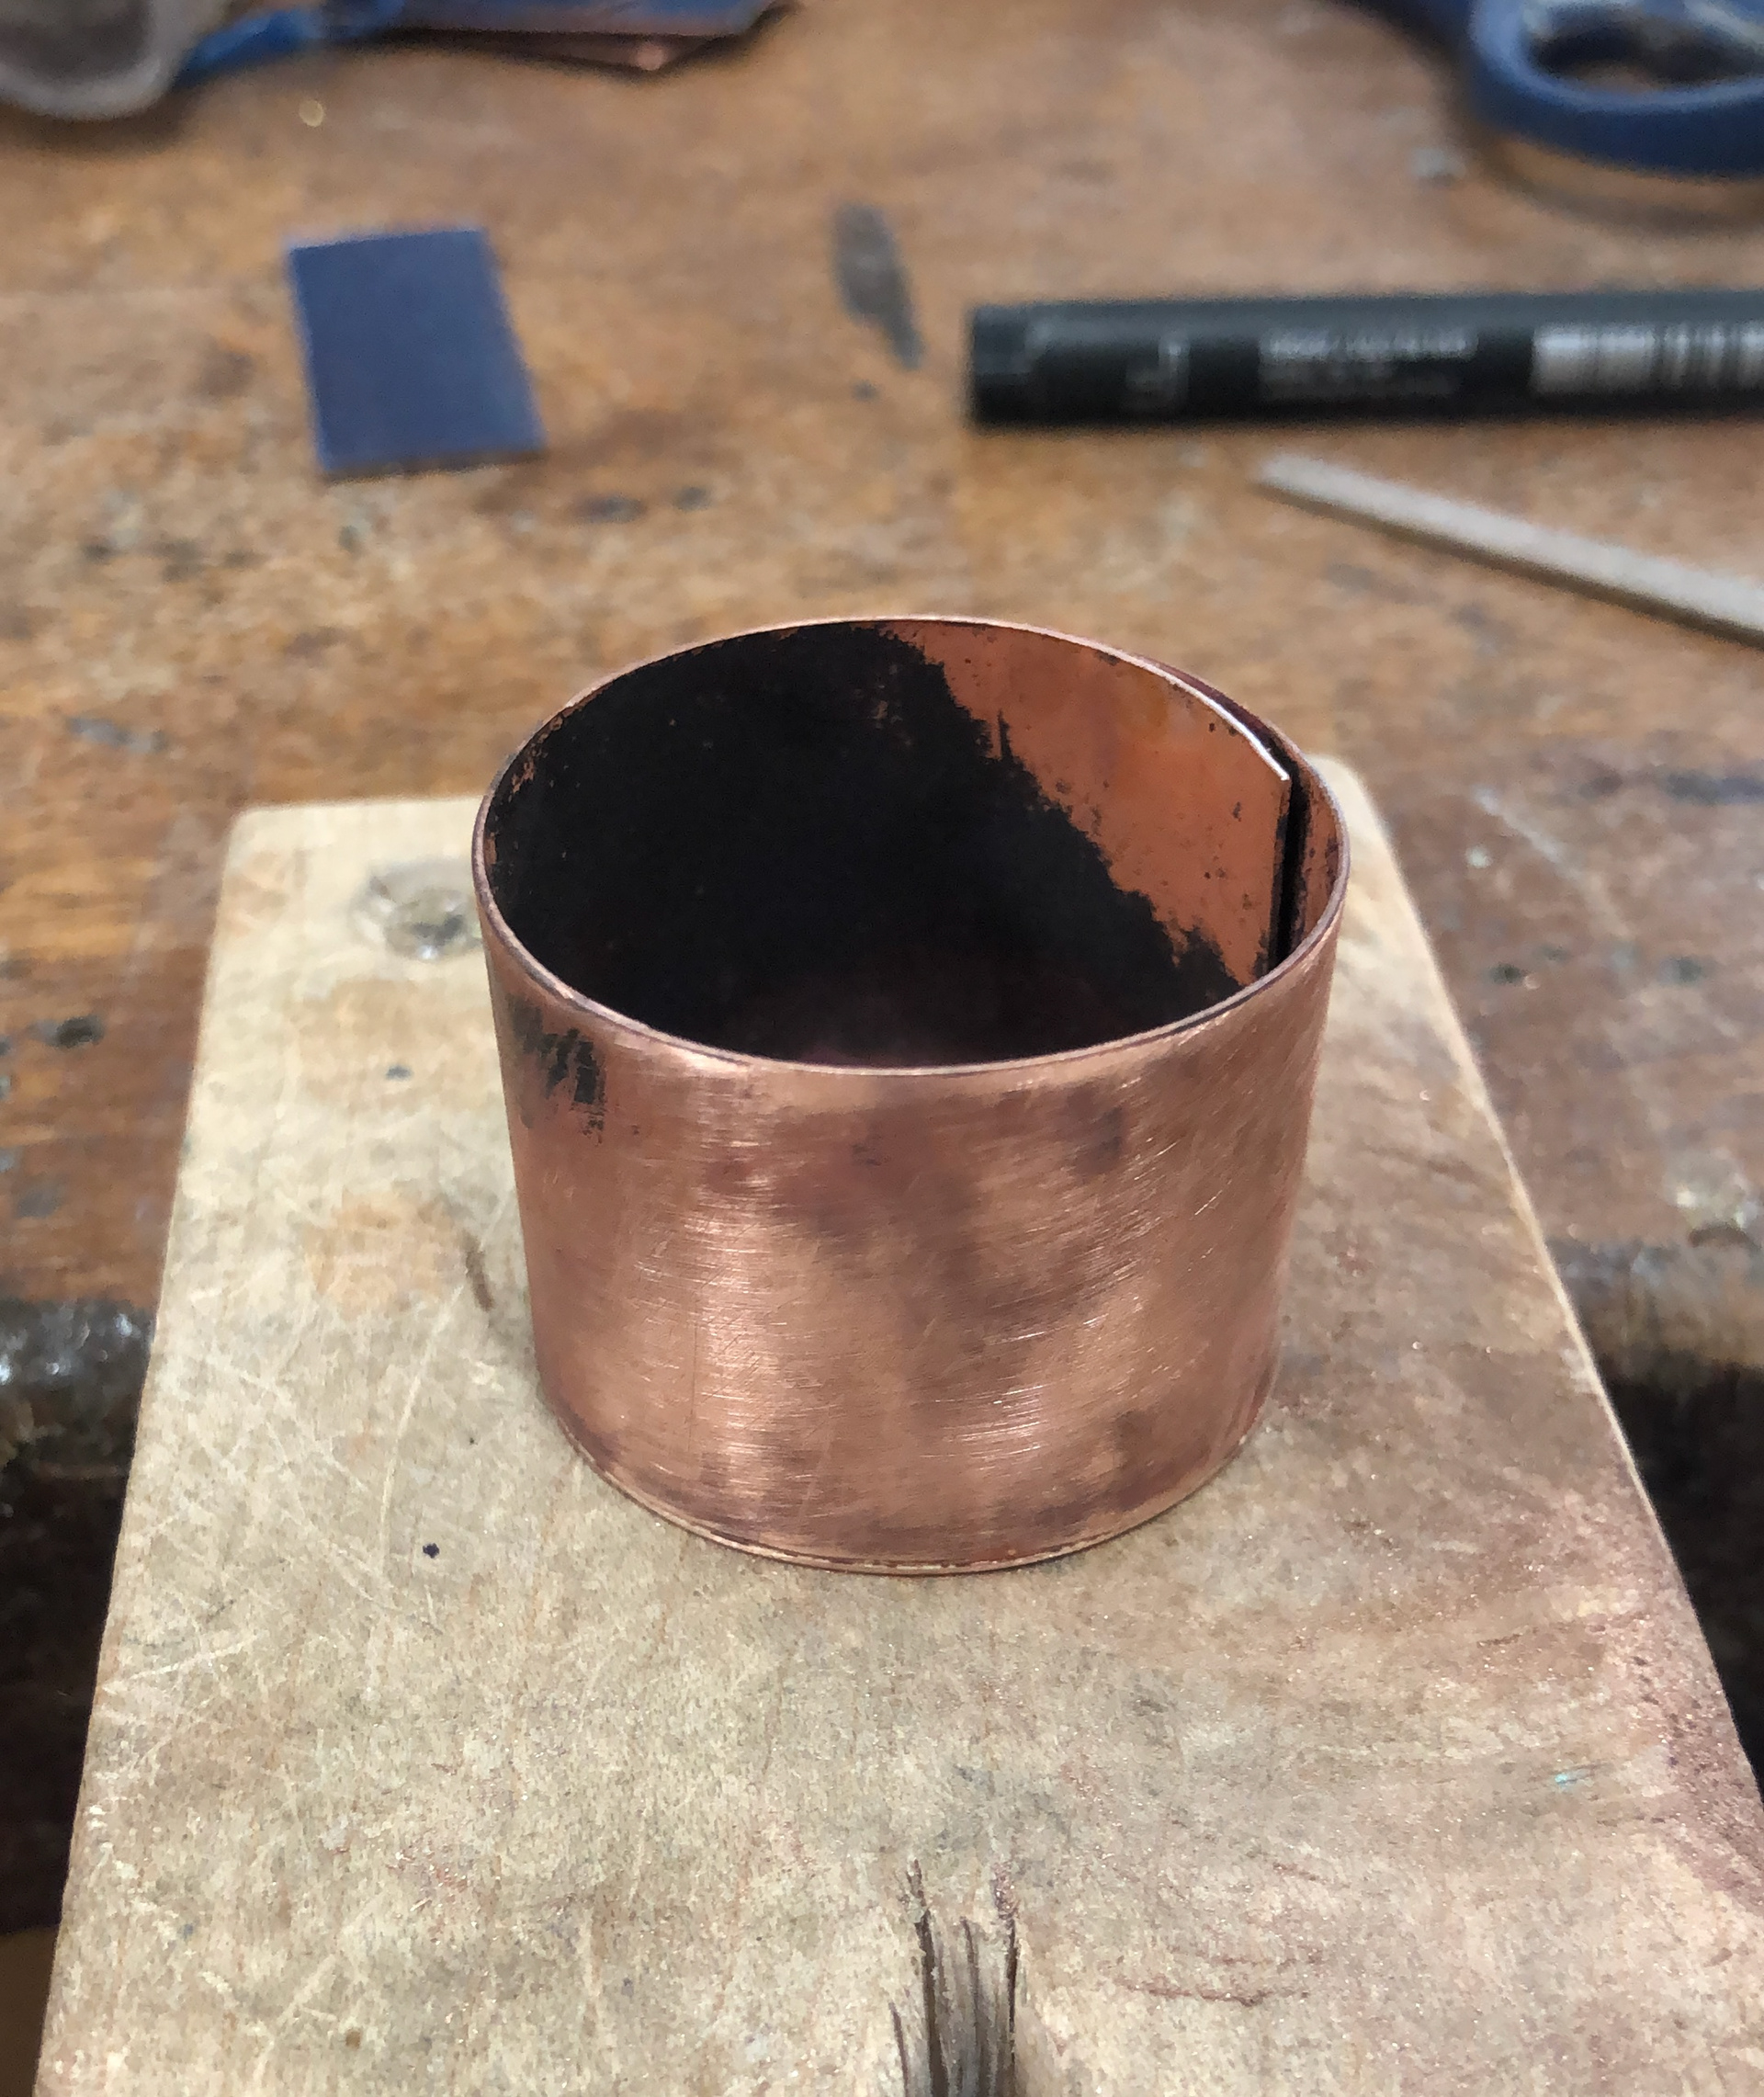
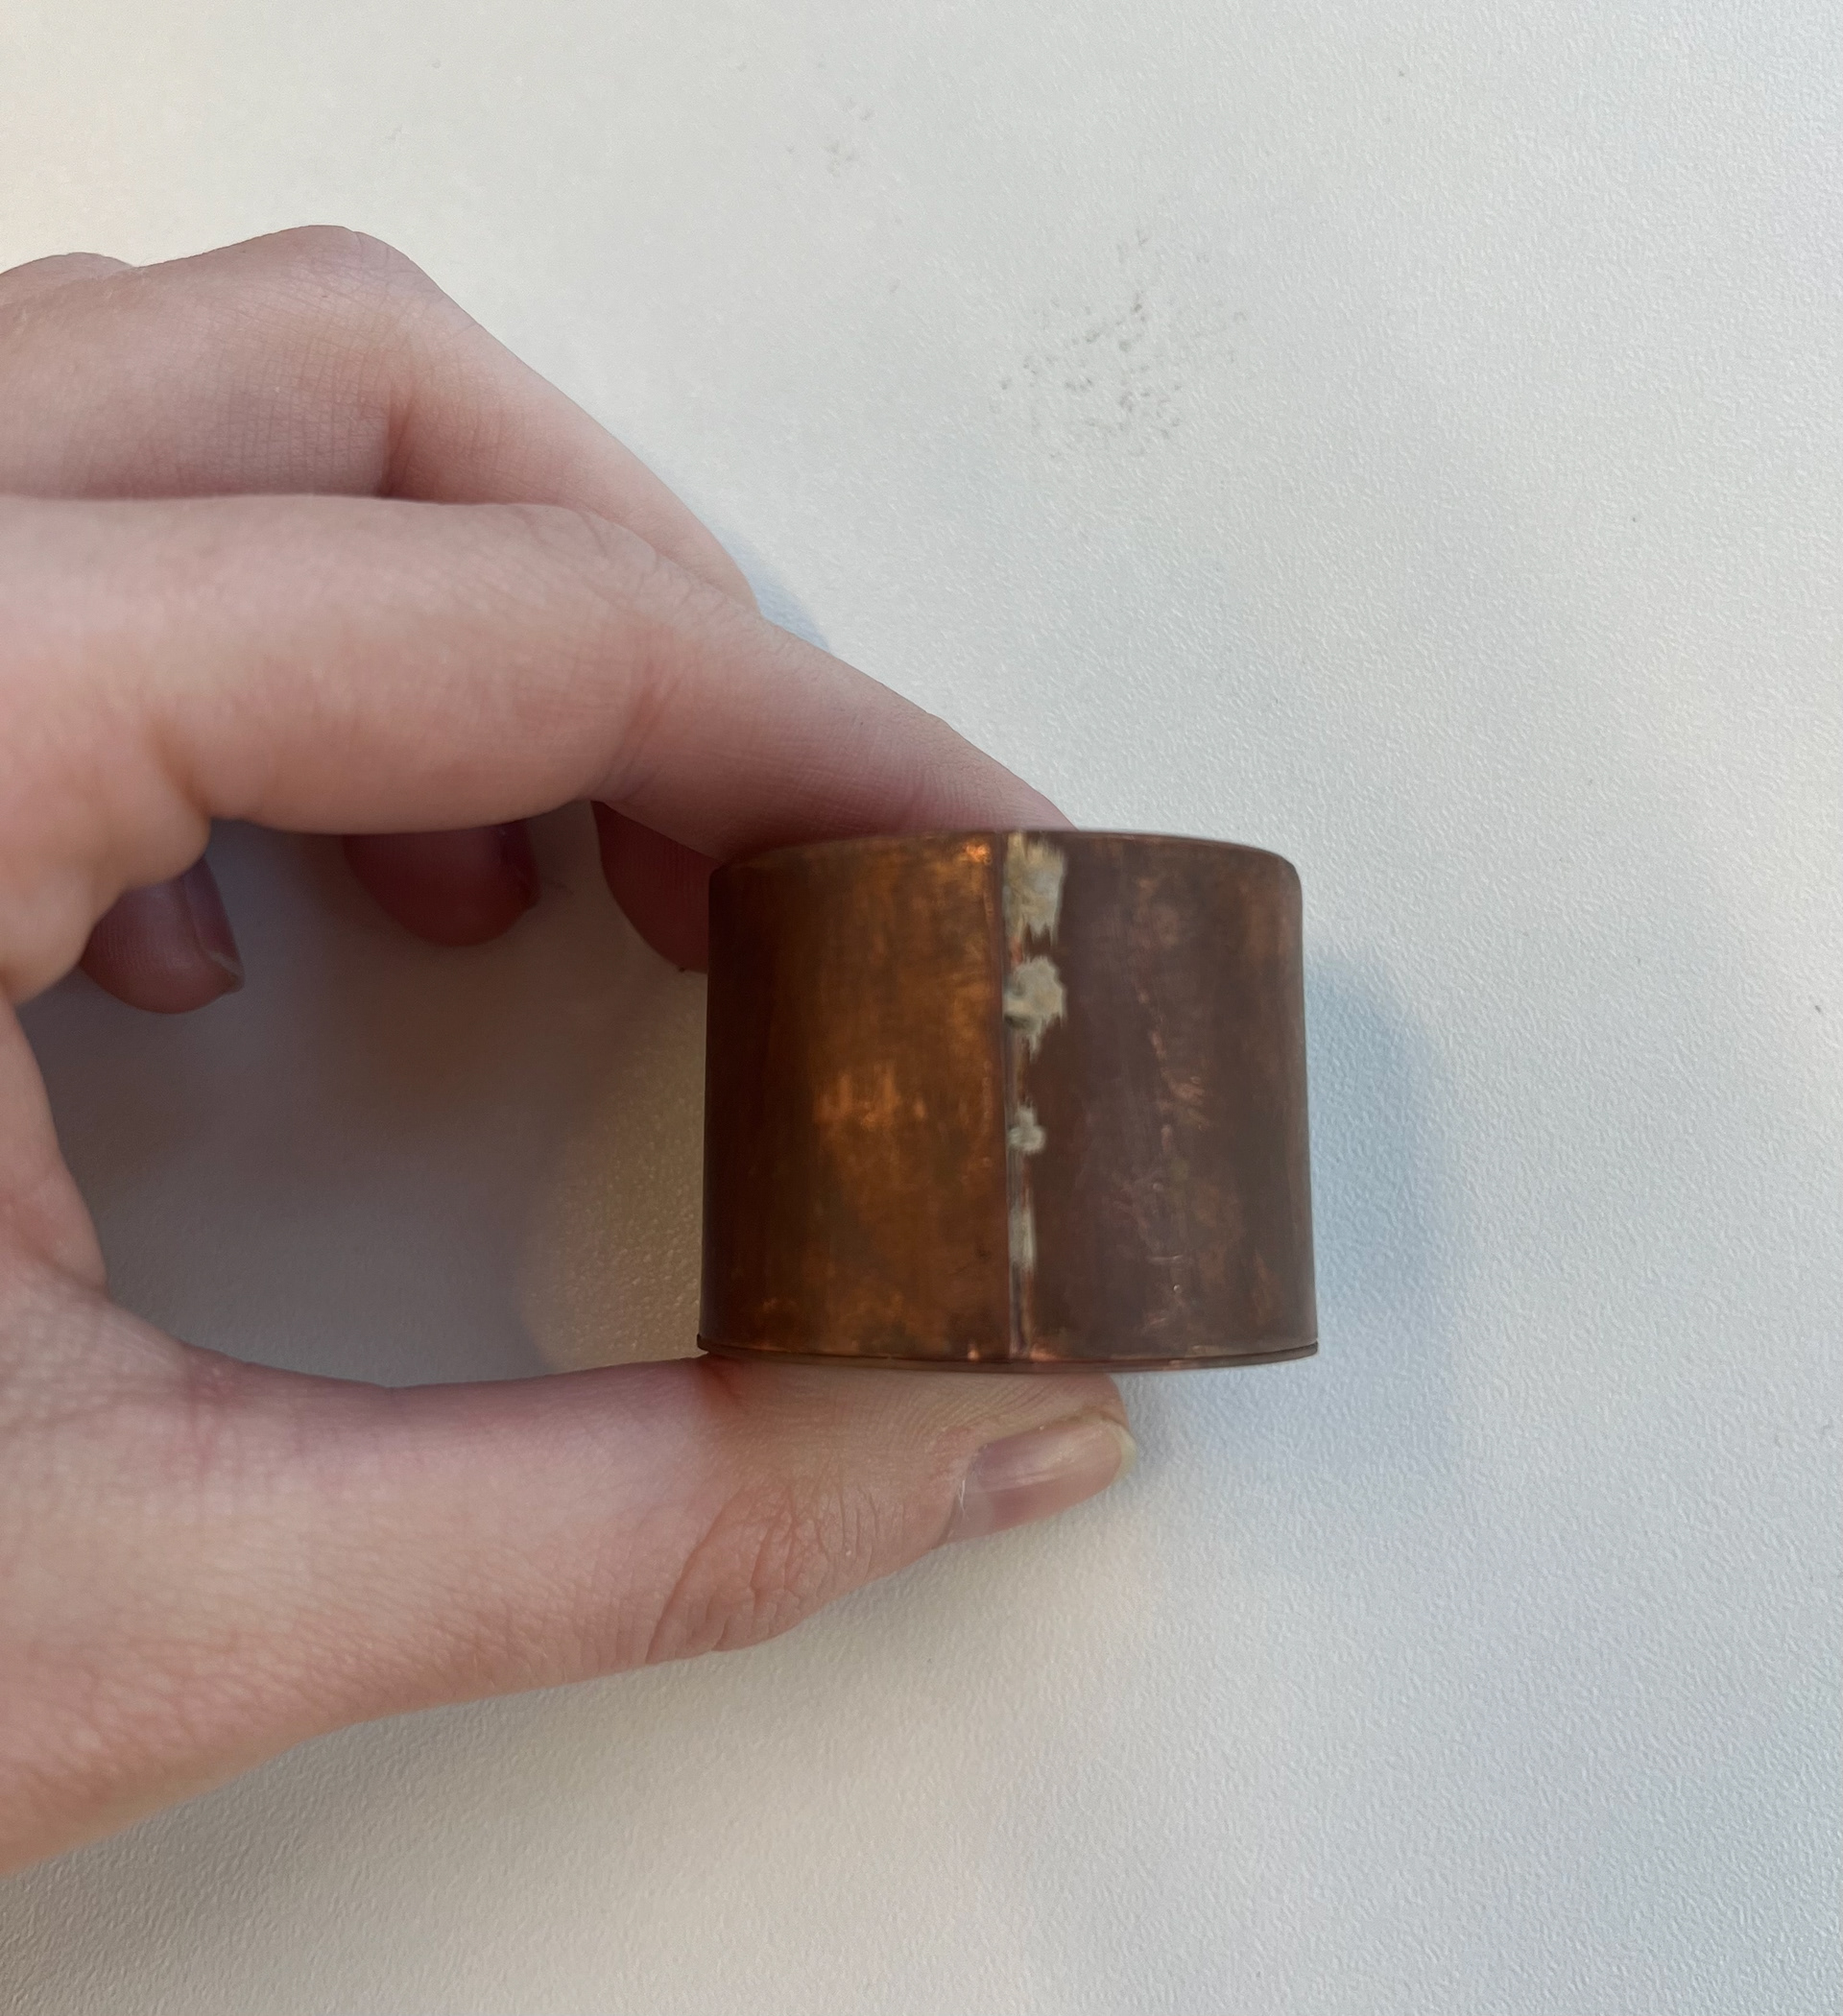

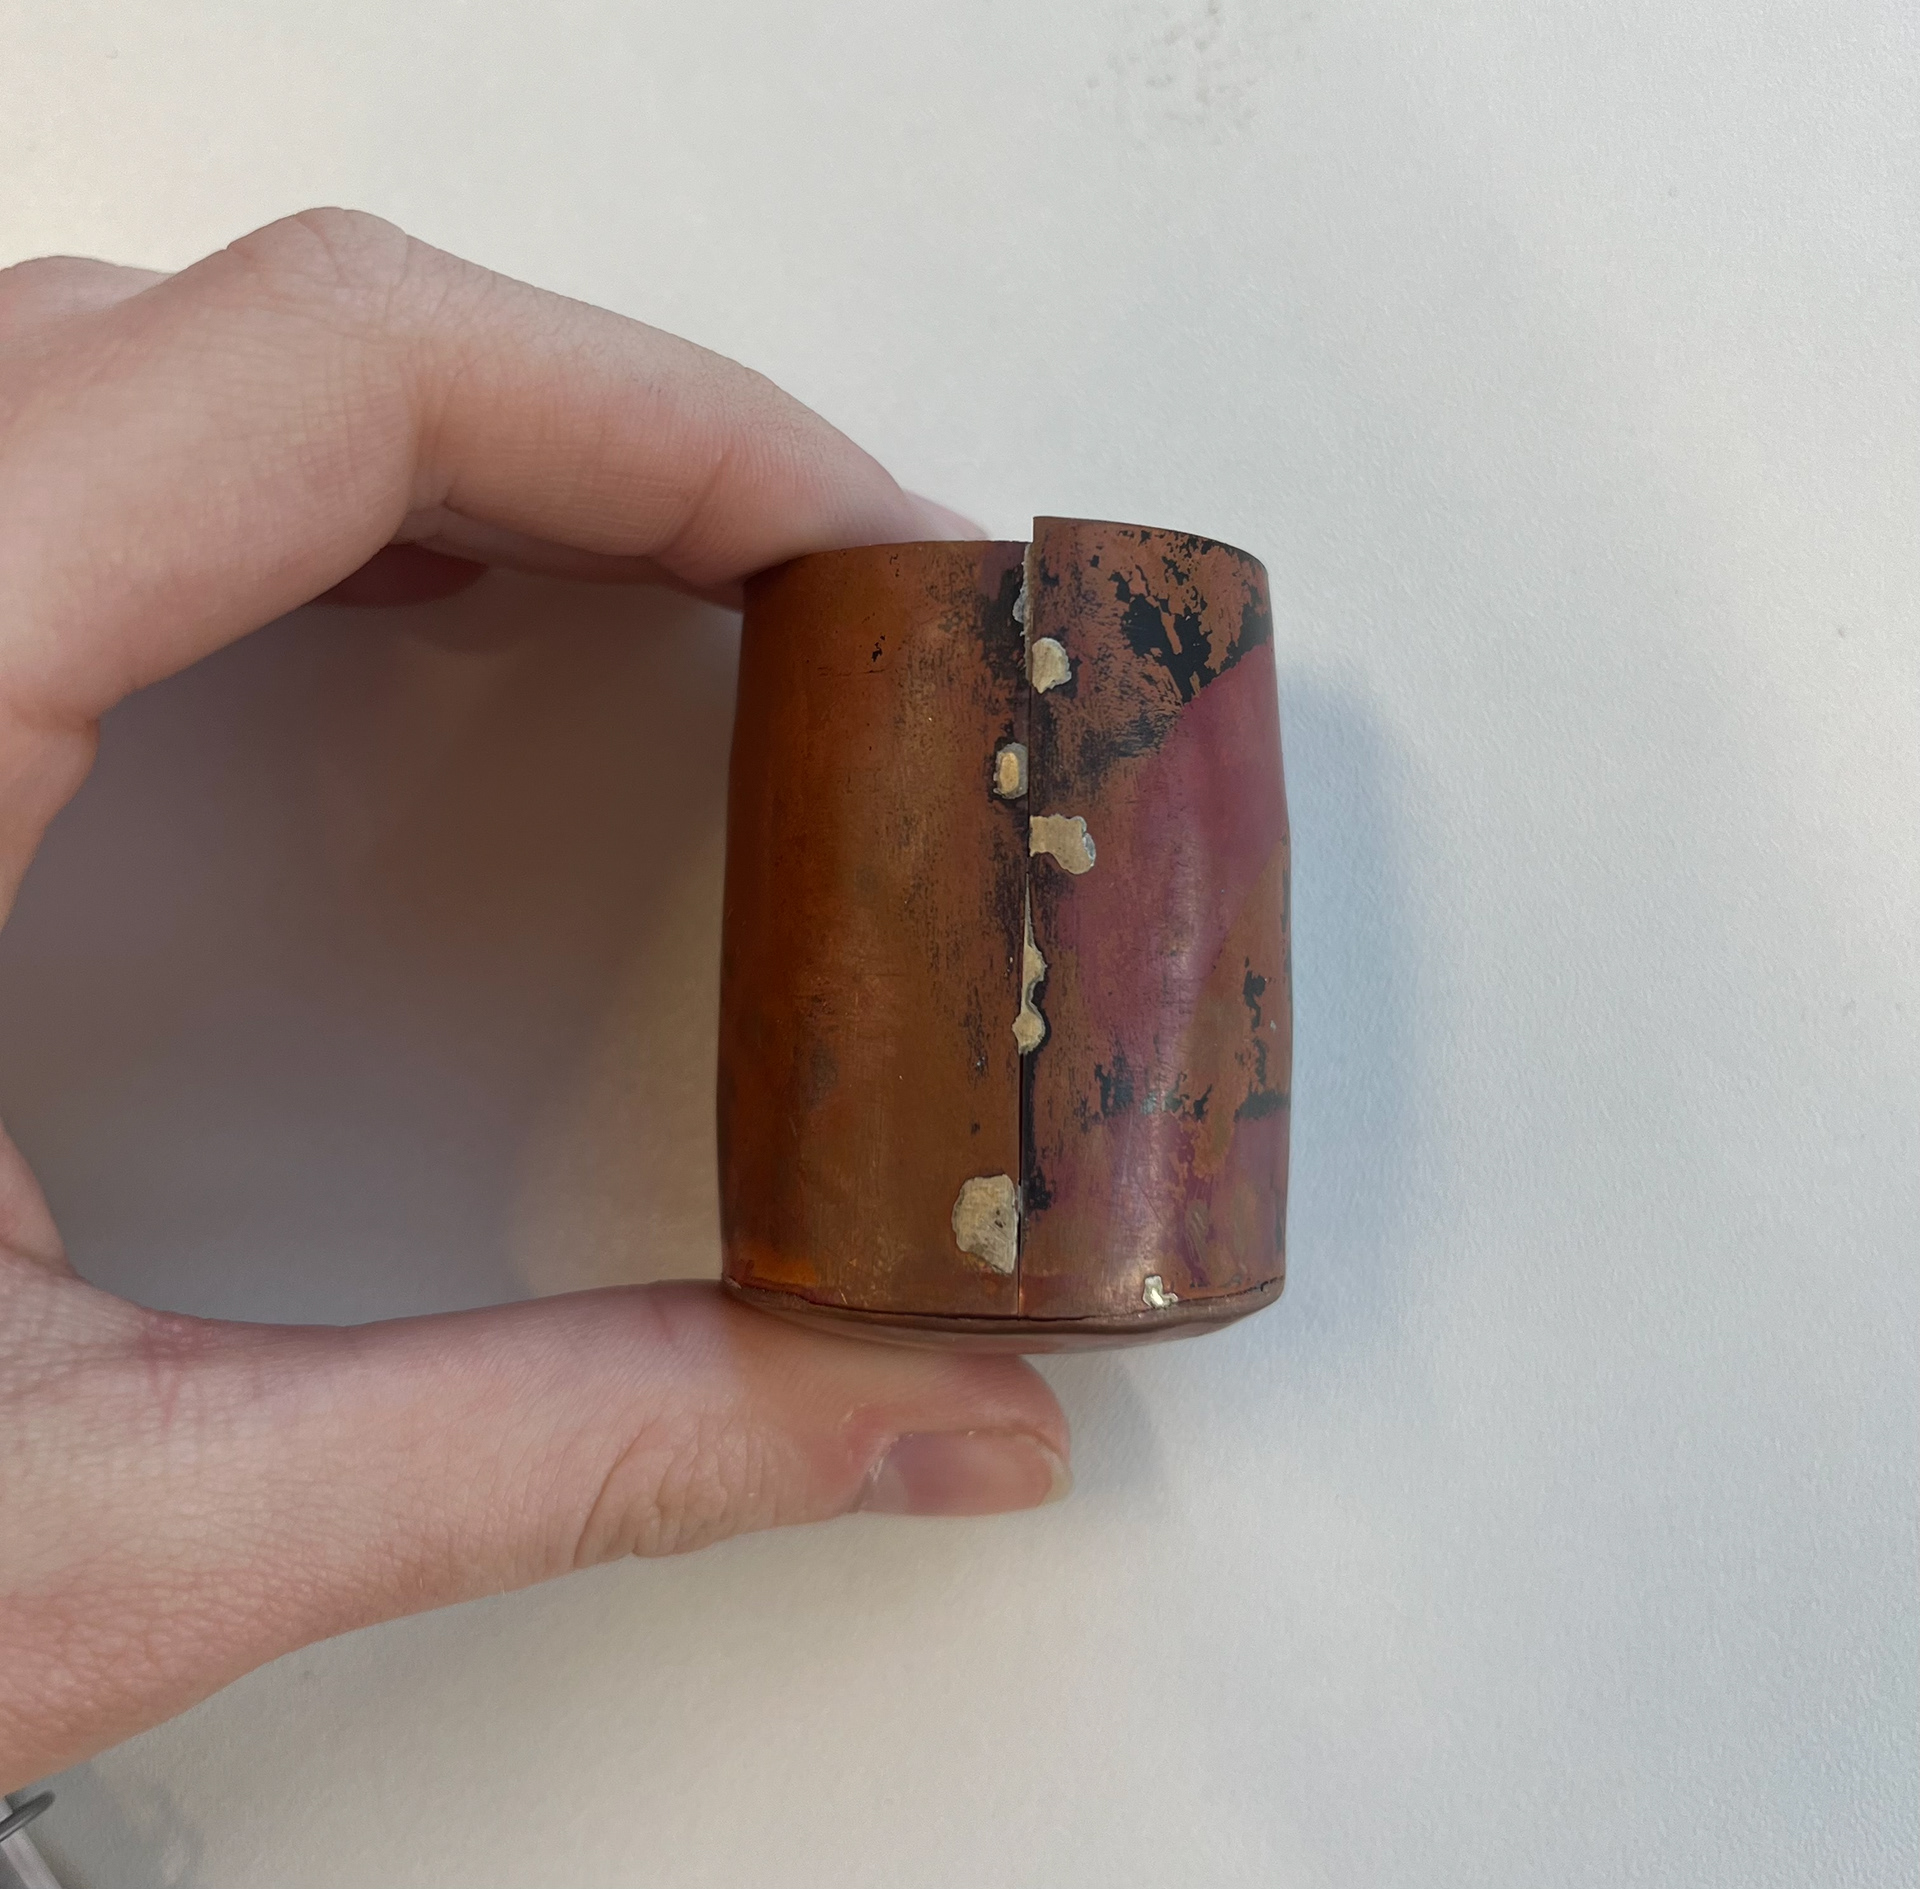
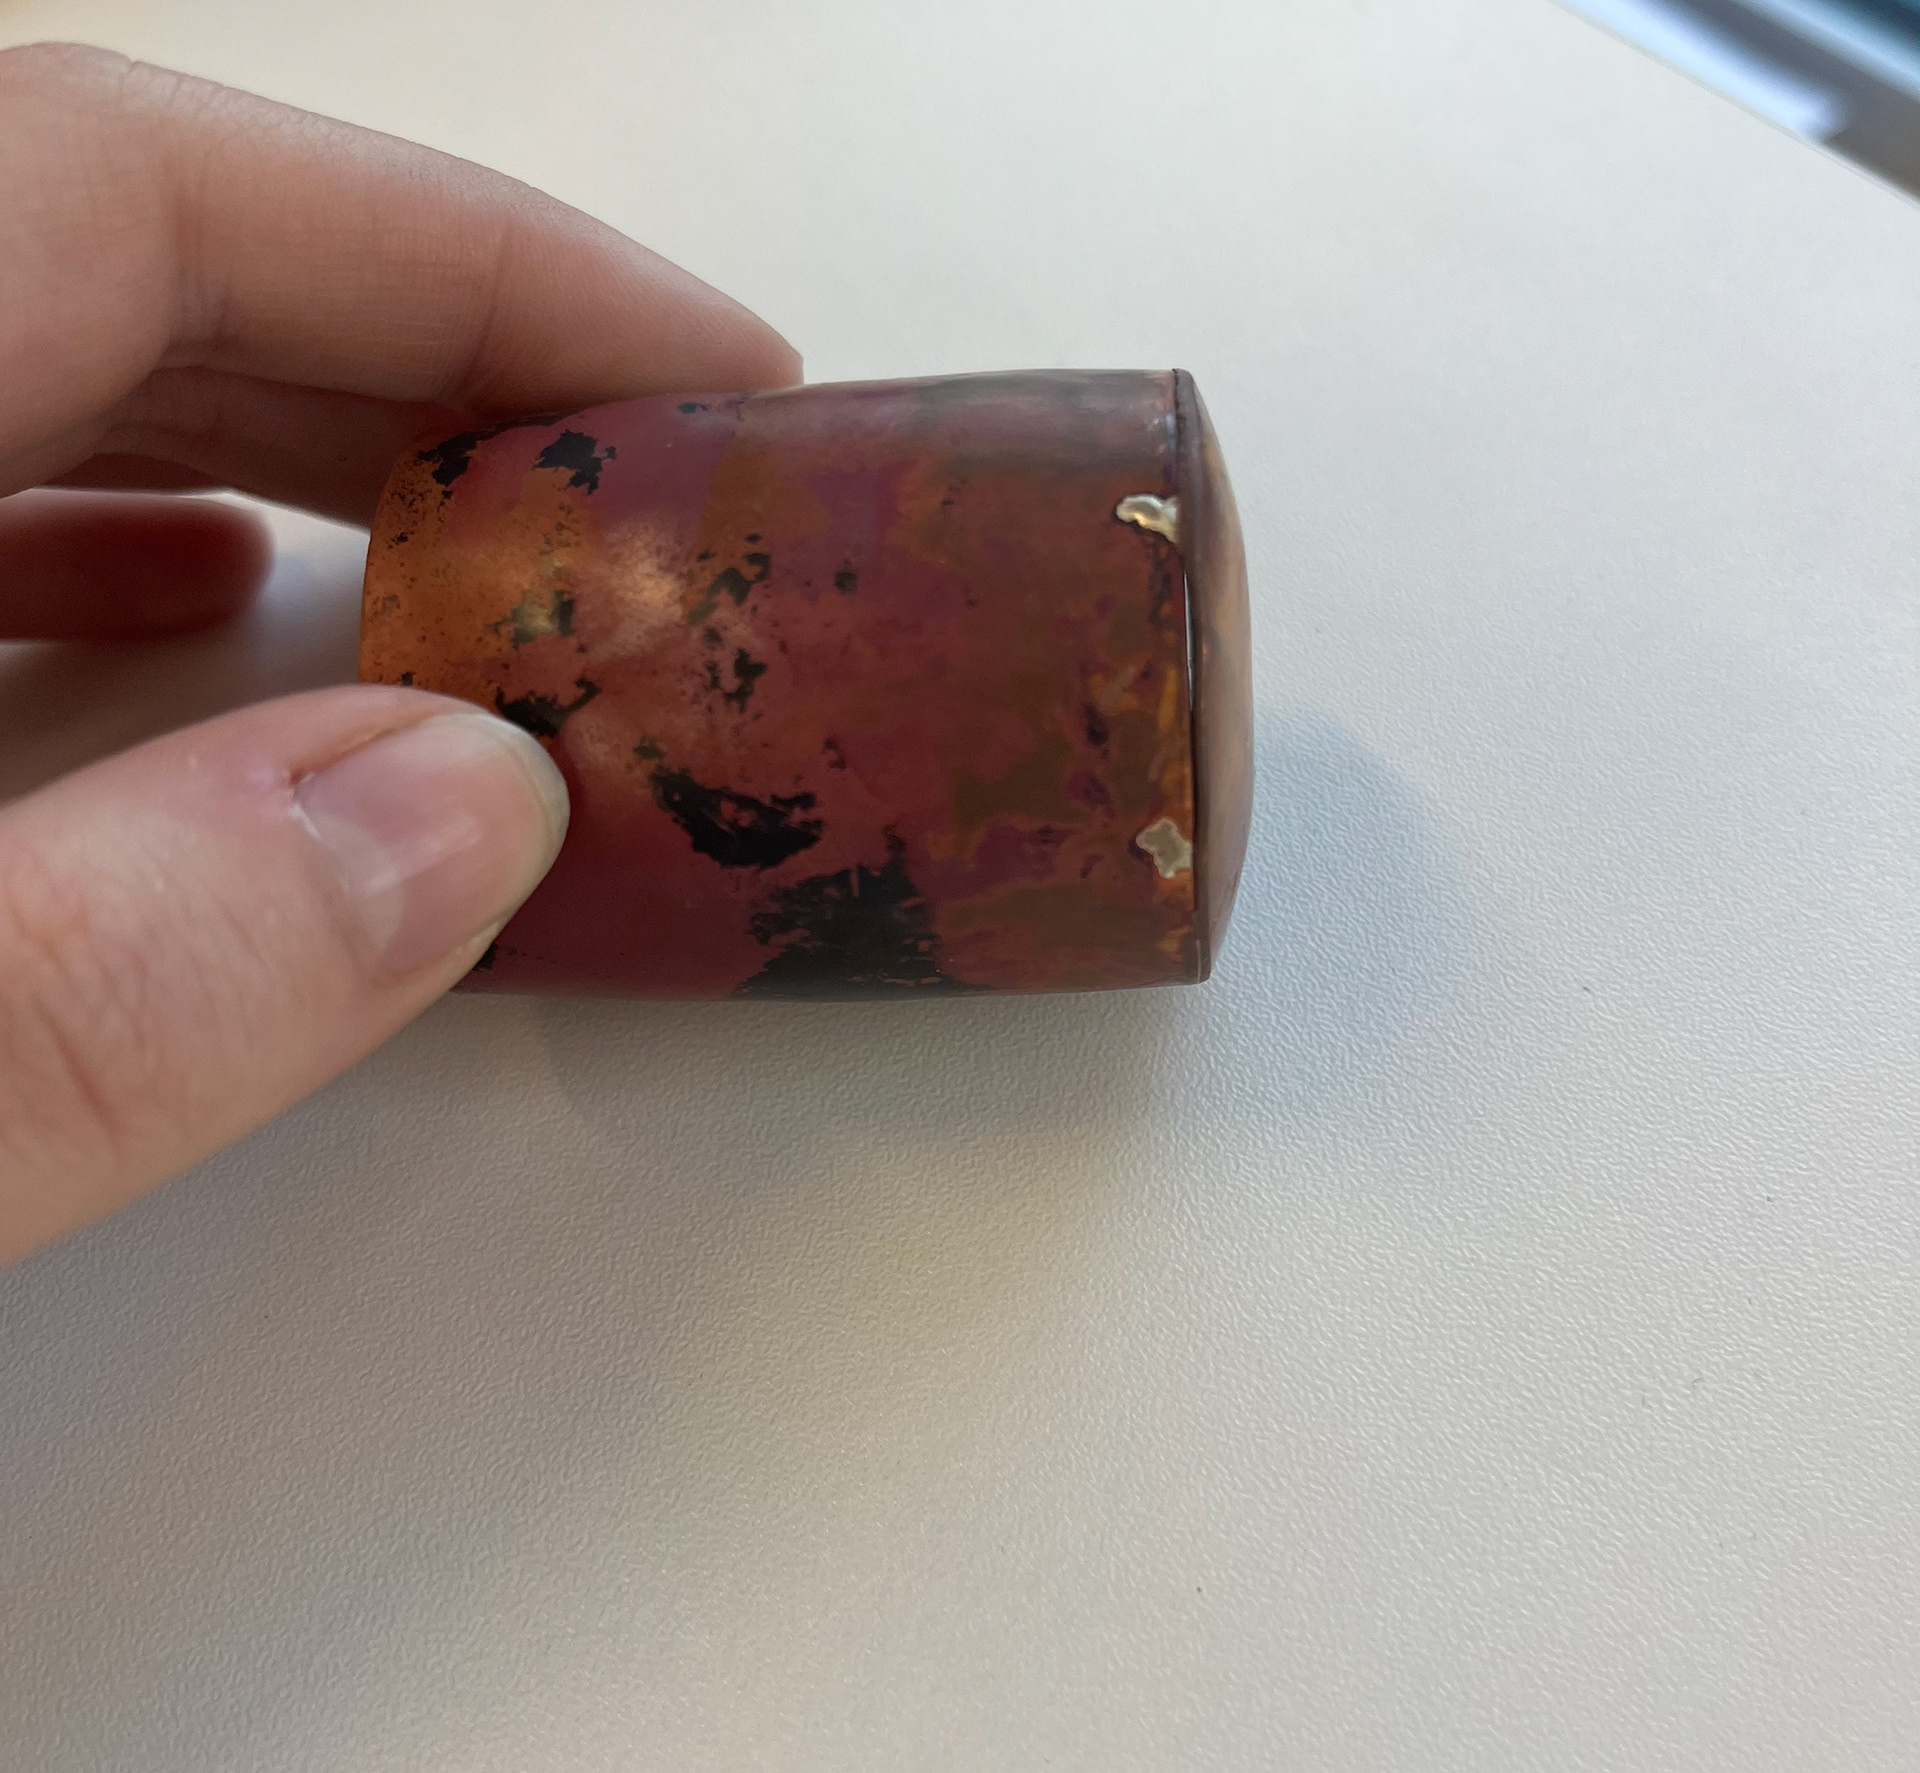
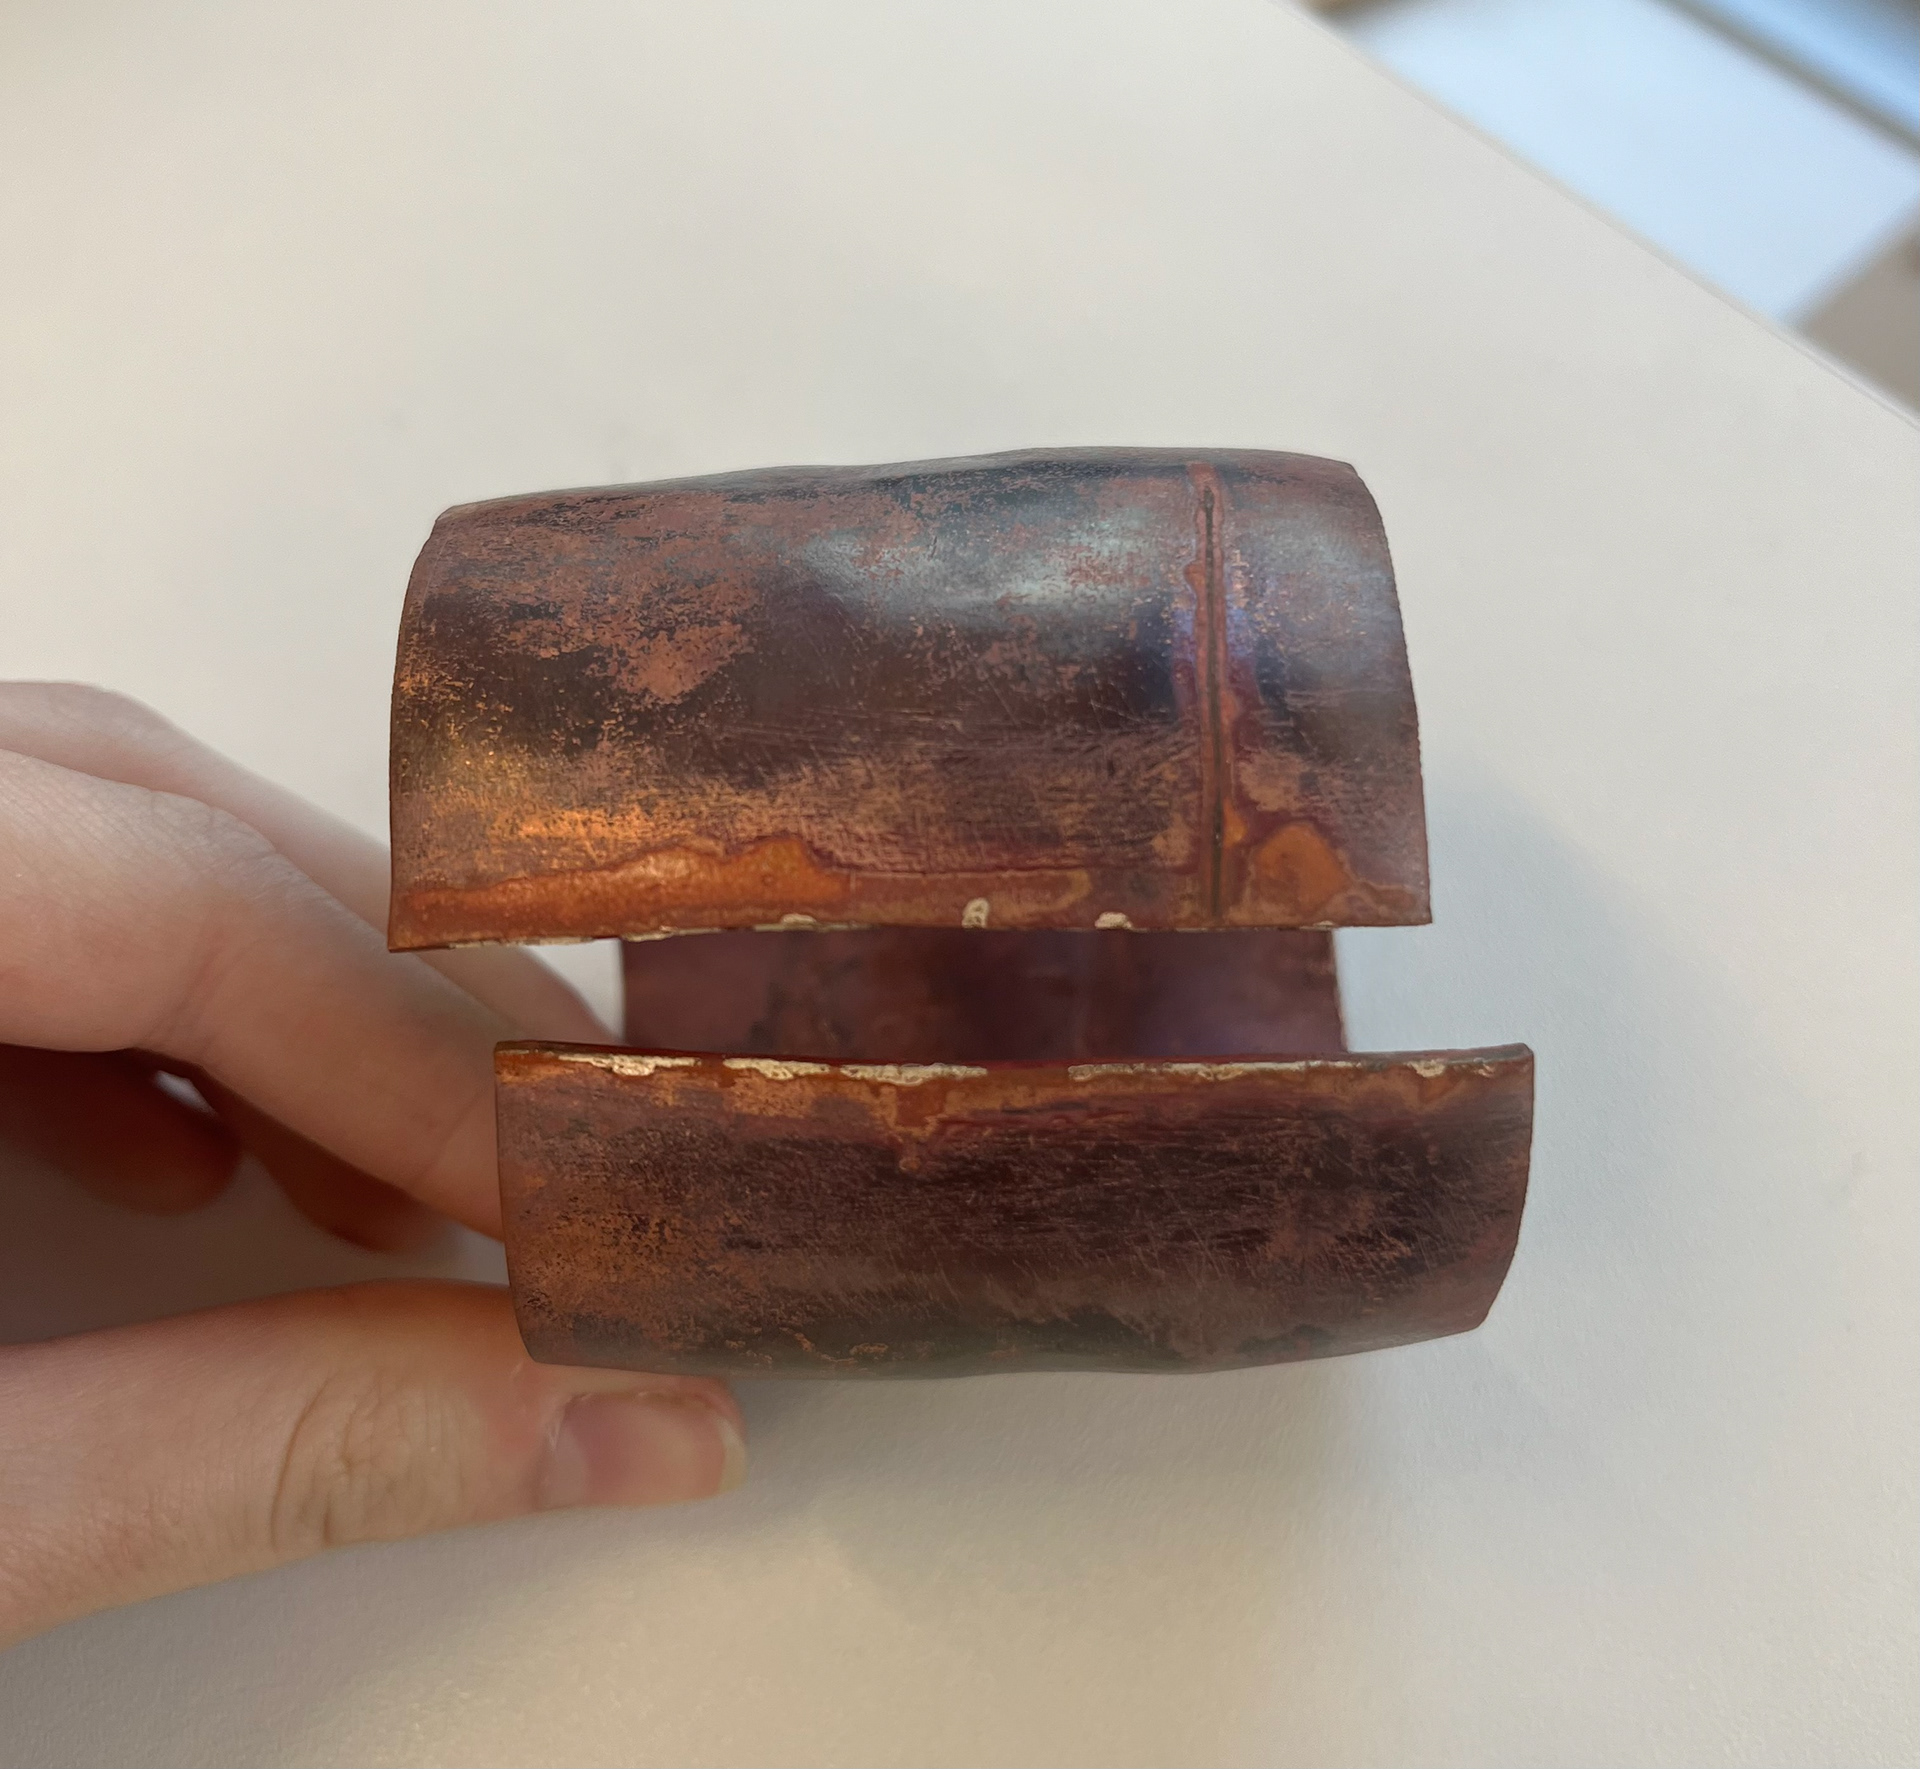

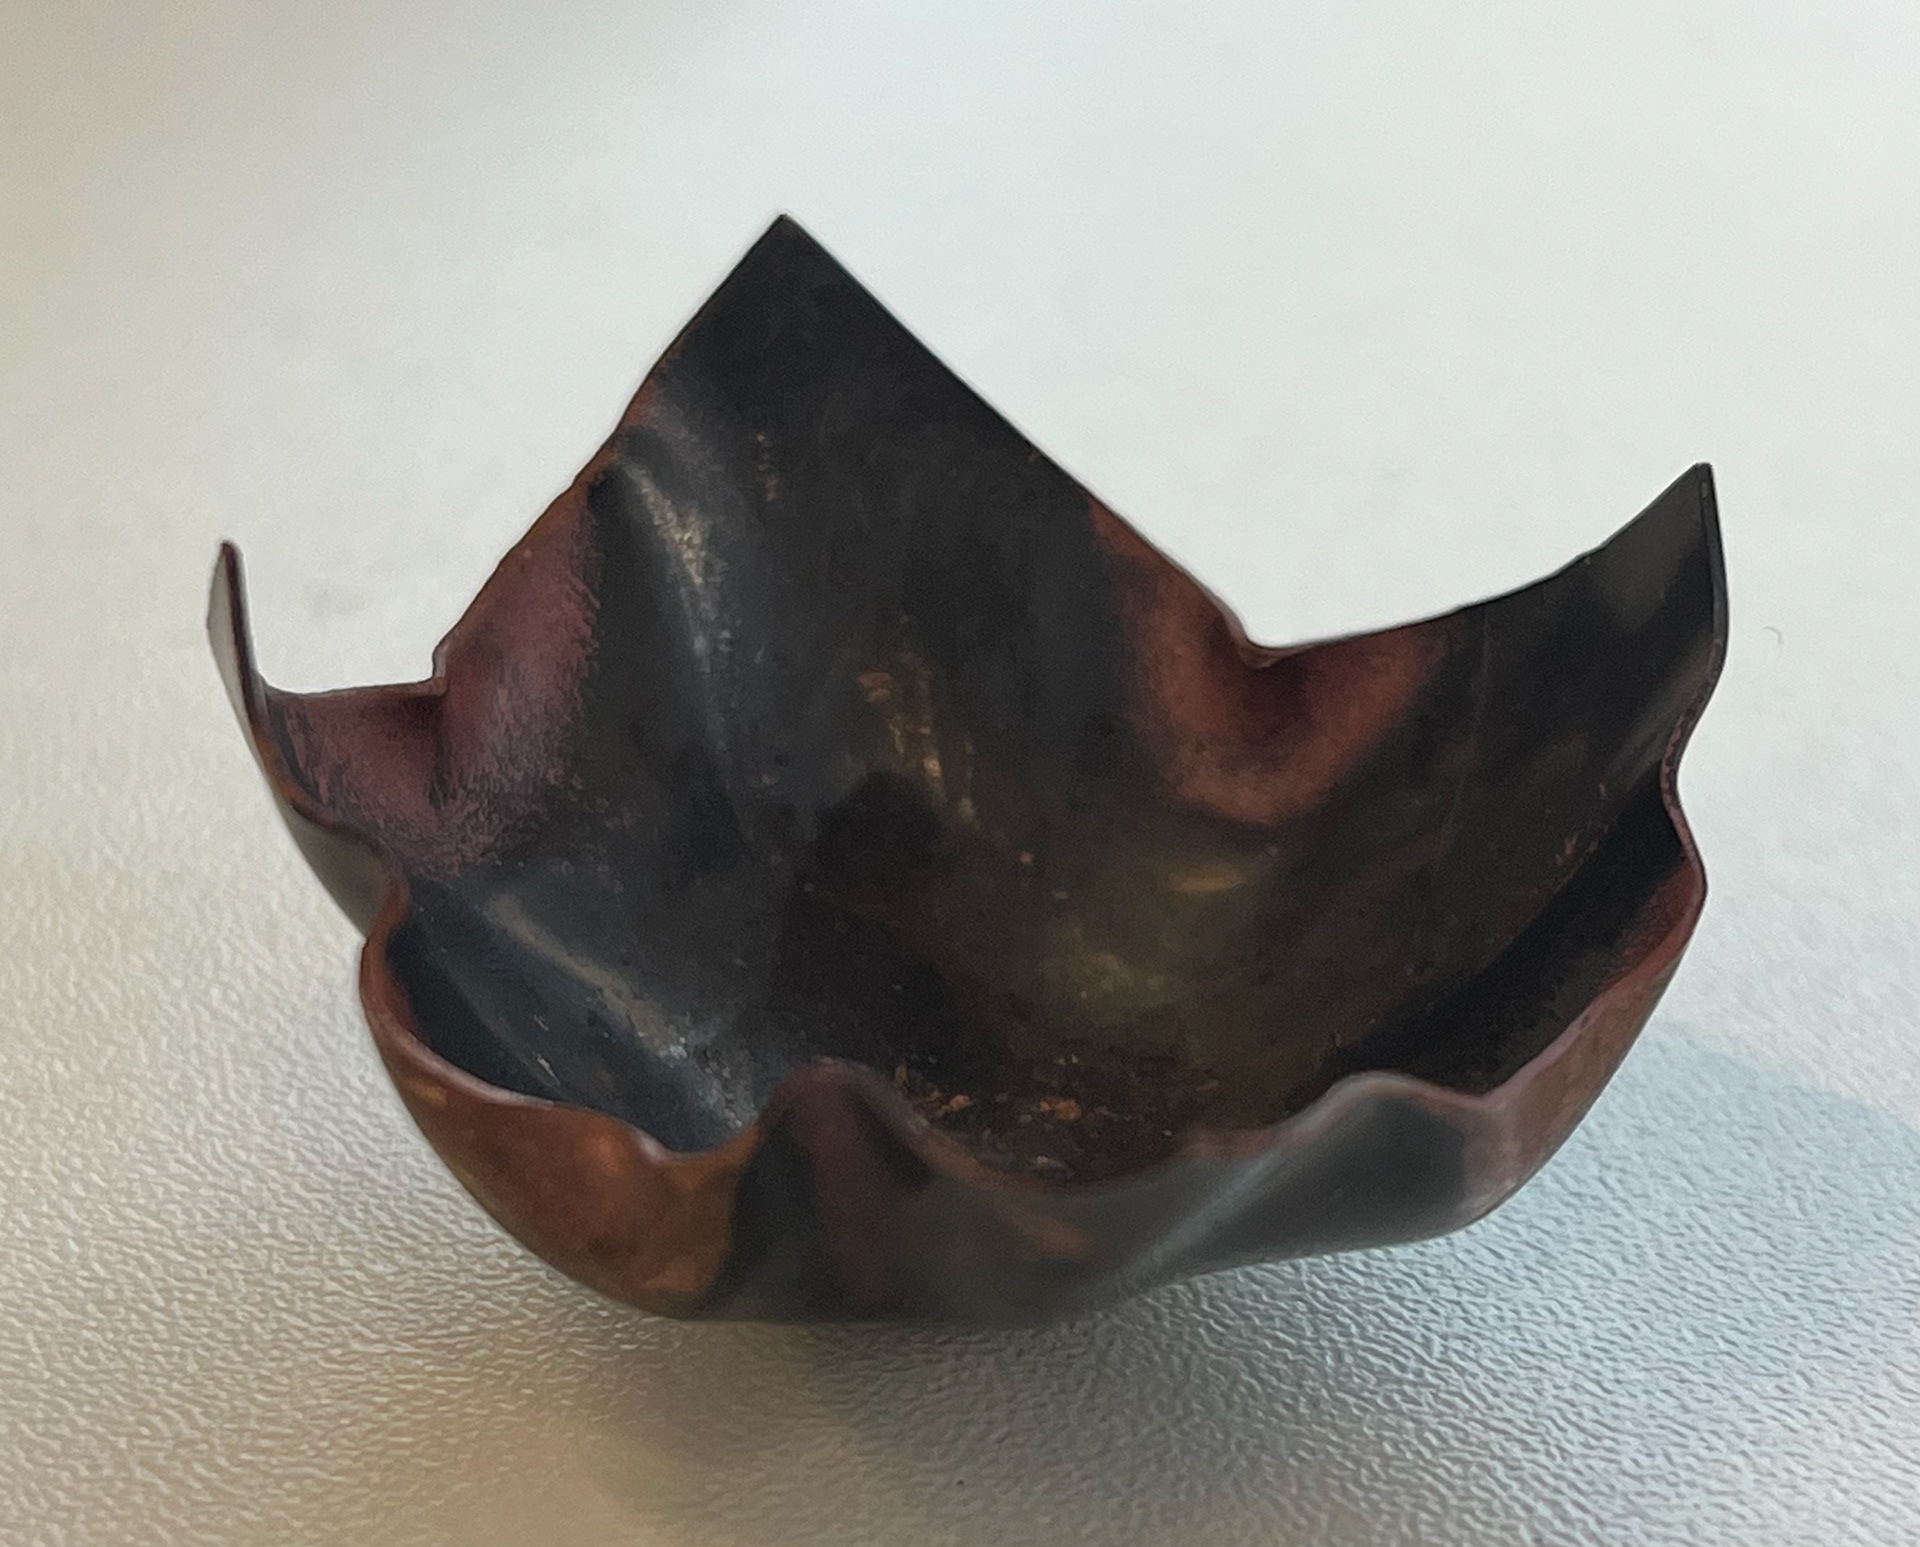
Although I learnt a lot from making these, they were quite challenging to make. Firstly, the solder wasn’t well done and it made the seams very messy. Secondly, when I tried to curve the copper to make a more rounded shape, I had to use a thicker sheet in order to displace the metal to prevent it from splitting but when I started hammering it, the solder line split and the piece could no longer be salvaged. With the last two images, I quite liked how I tested the materiality of the copper and really enjoyed how it bent and folded in a organic way. The second last image was created with a fly press that I swung a bit too hard and the last image I did by hammering a square piece of sheet metal into a wooden bowl former, focussing on one point.
Creating bowls and cups out of metal without the use of a former was quite difficult but I enjoyed learning about it and it made me realise that I had to find another way to create a bowl shape.
Paper Models
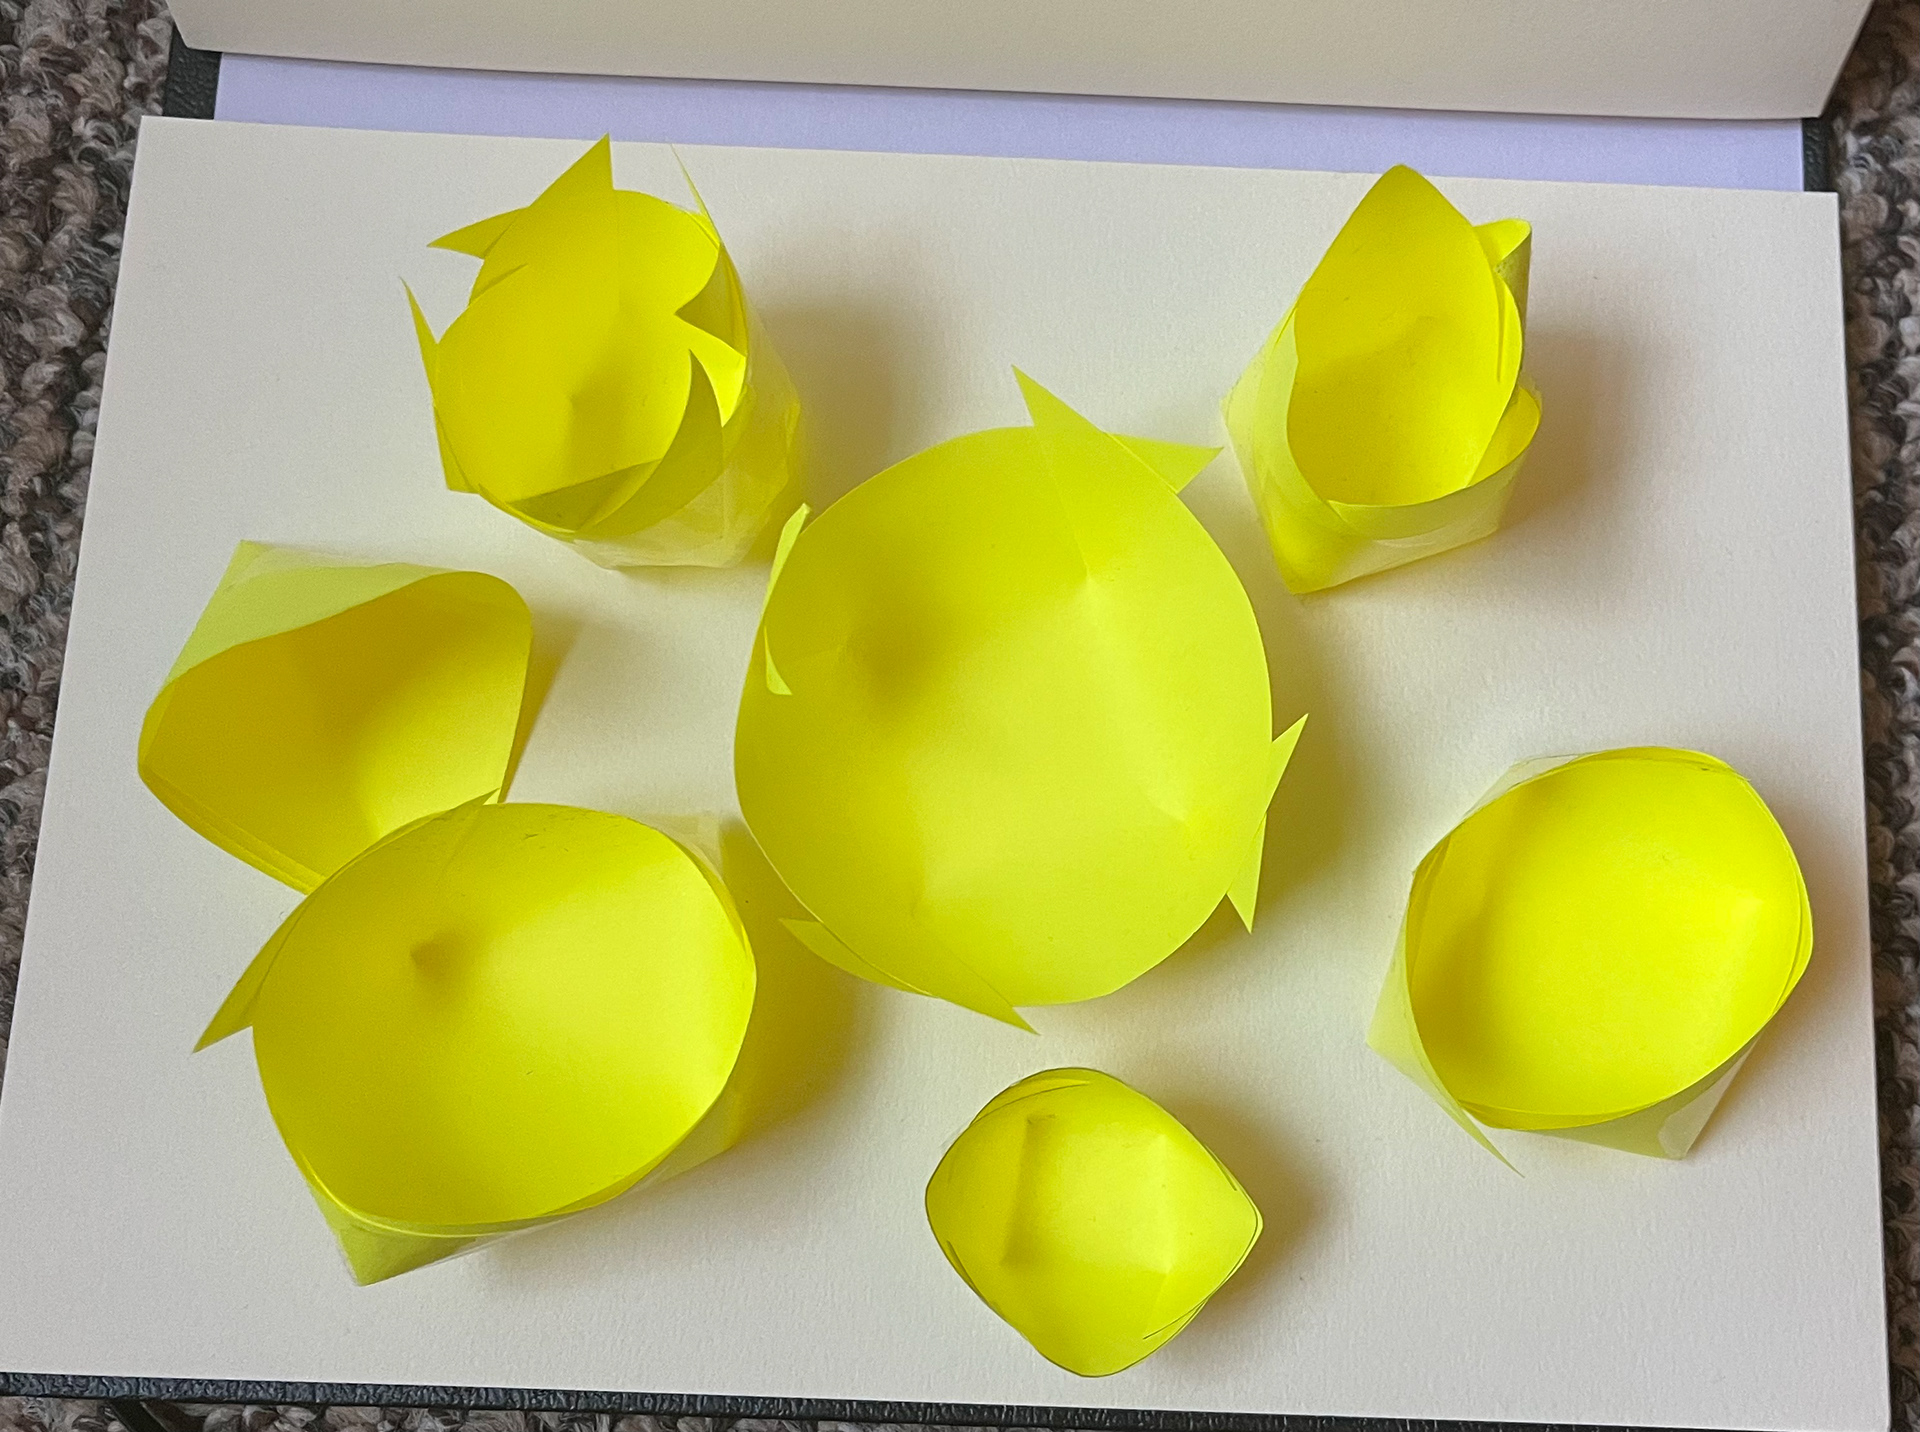
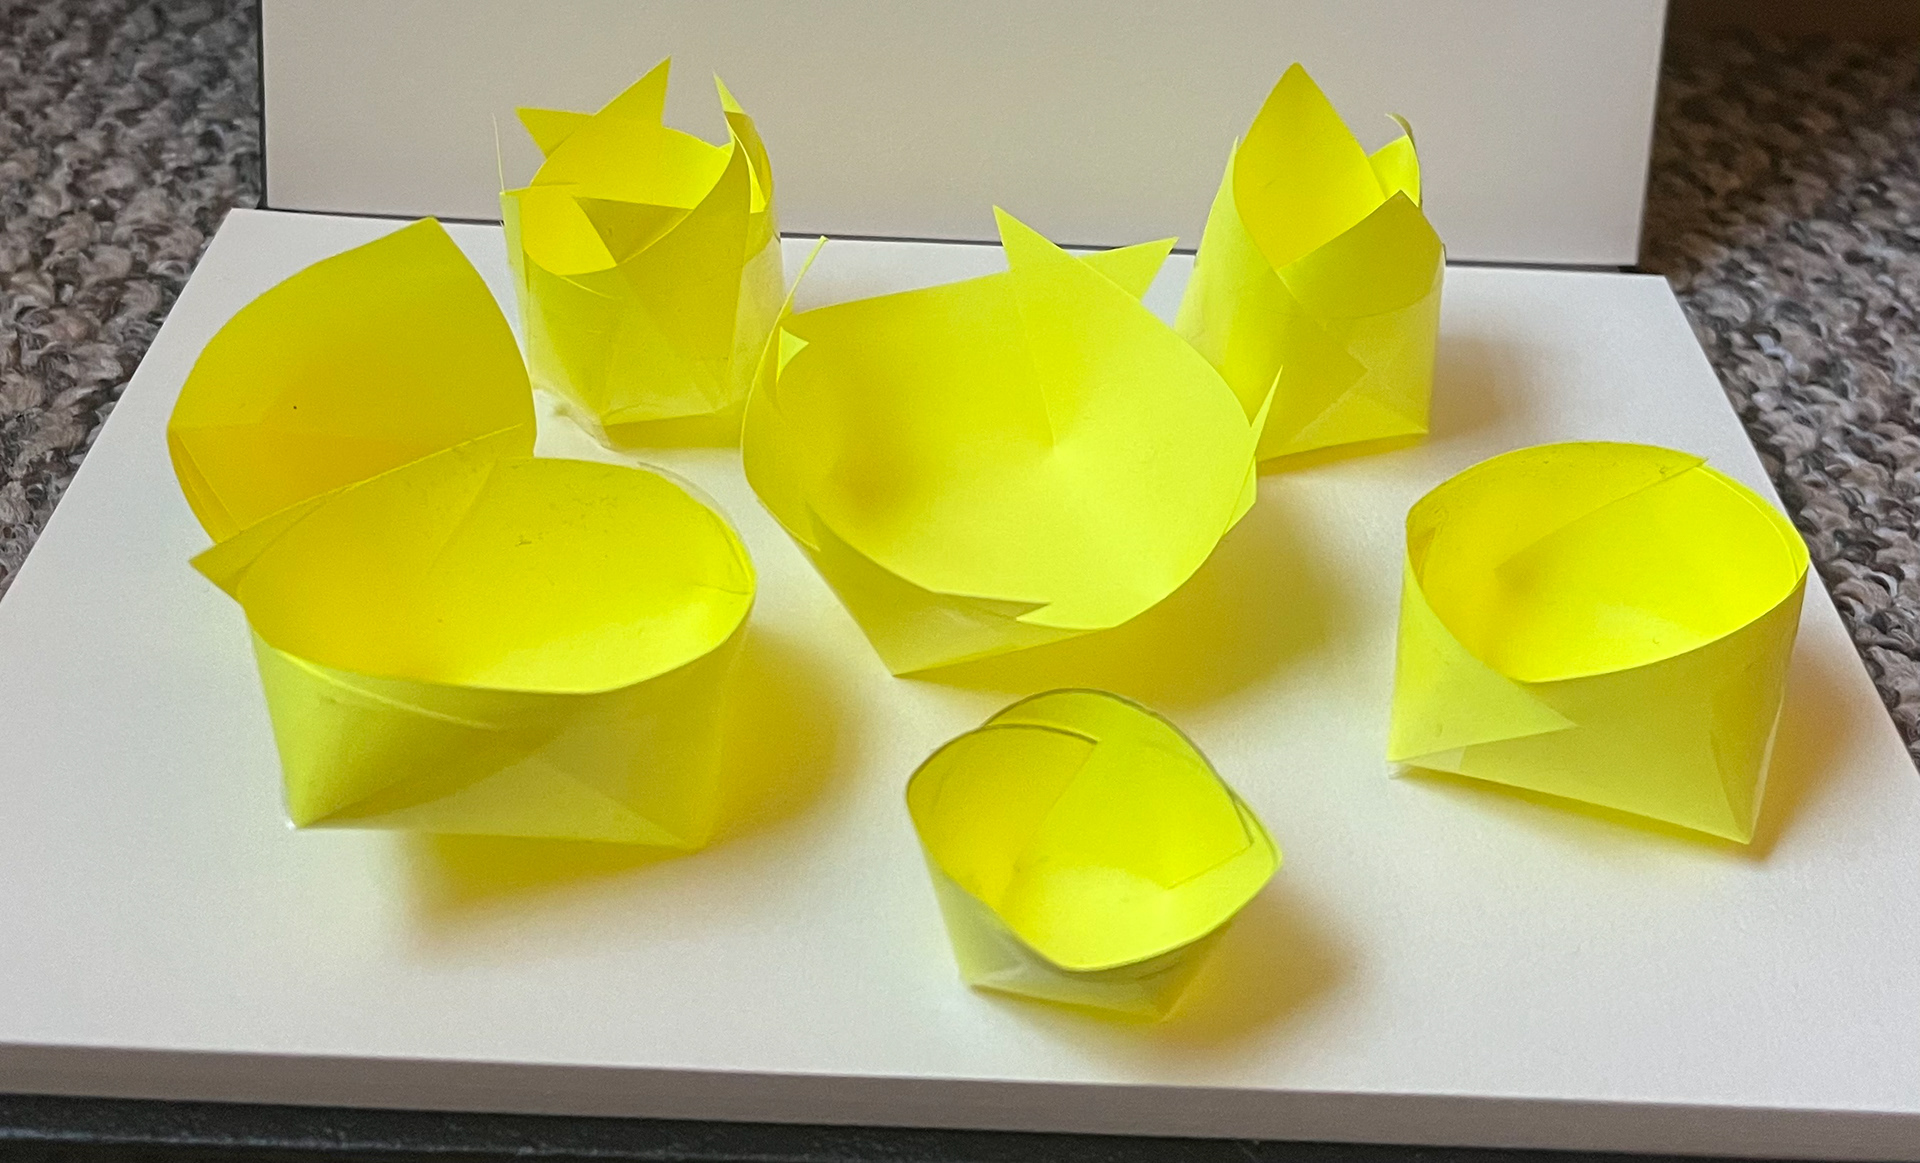
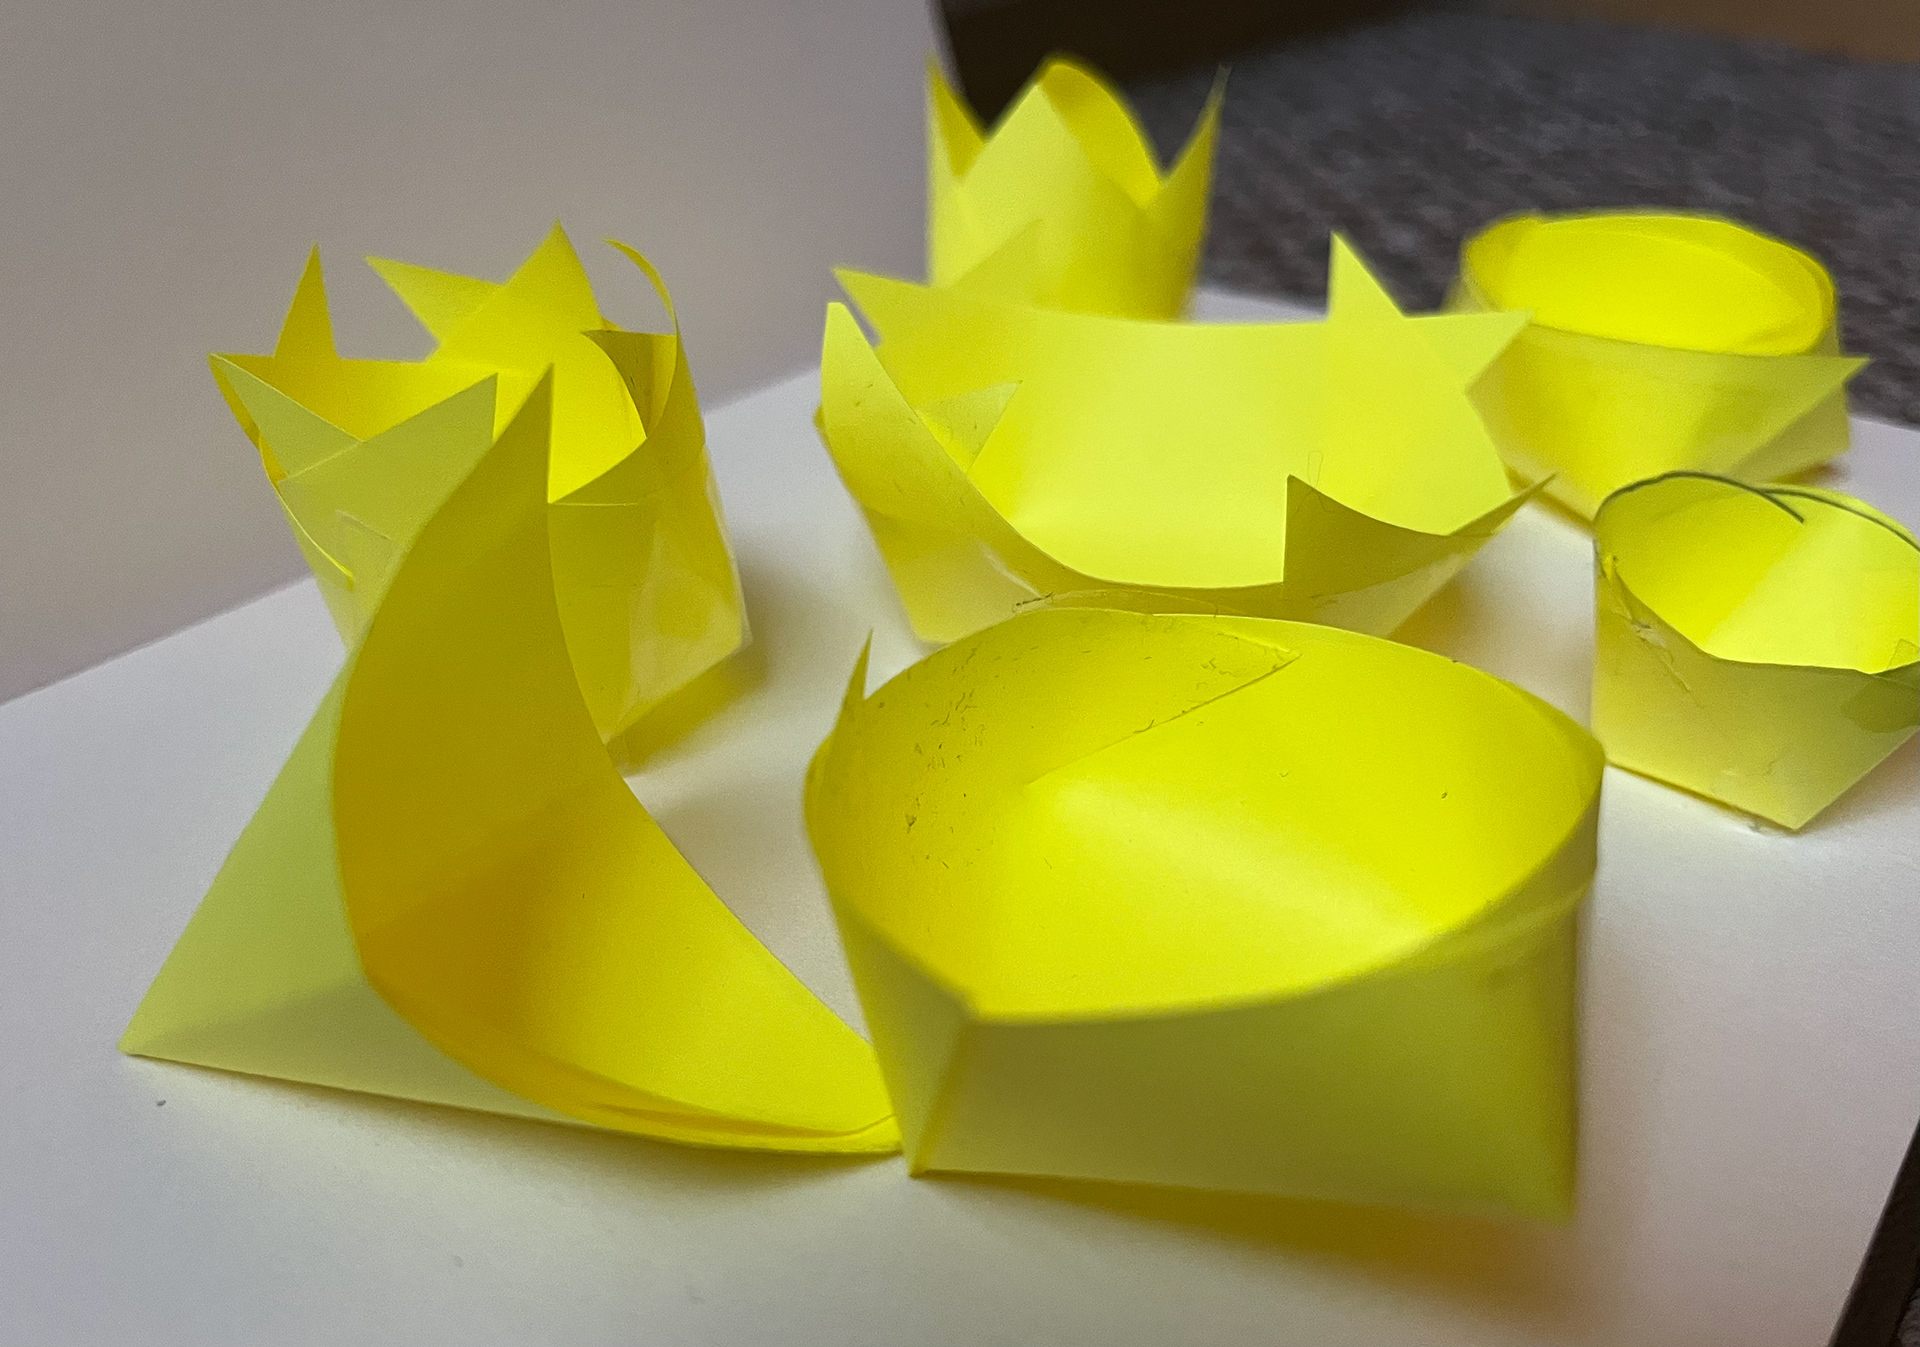
After my failed cup attempts, I decided to go back to basics and make some cup models out of paper. I took a stack of sticky notes from my desk and started cutting and folding round the edges to make cup shapes, using tape to stick them together. I found these to be quite interesting shapes and decided to replicate some in metal.
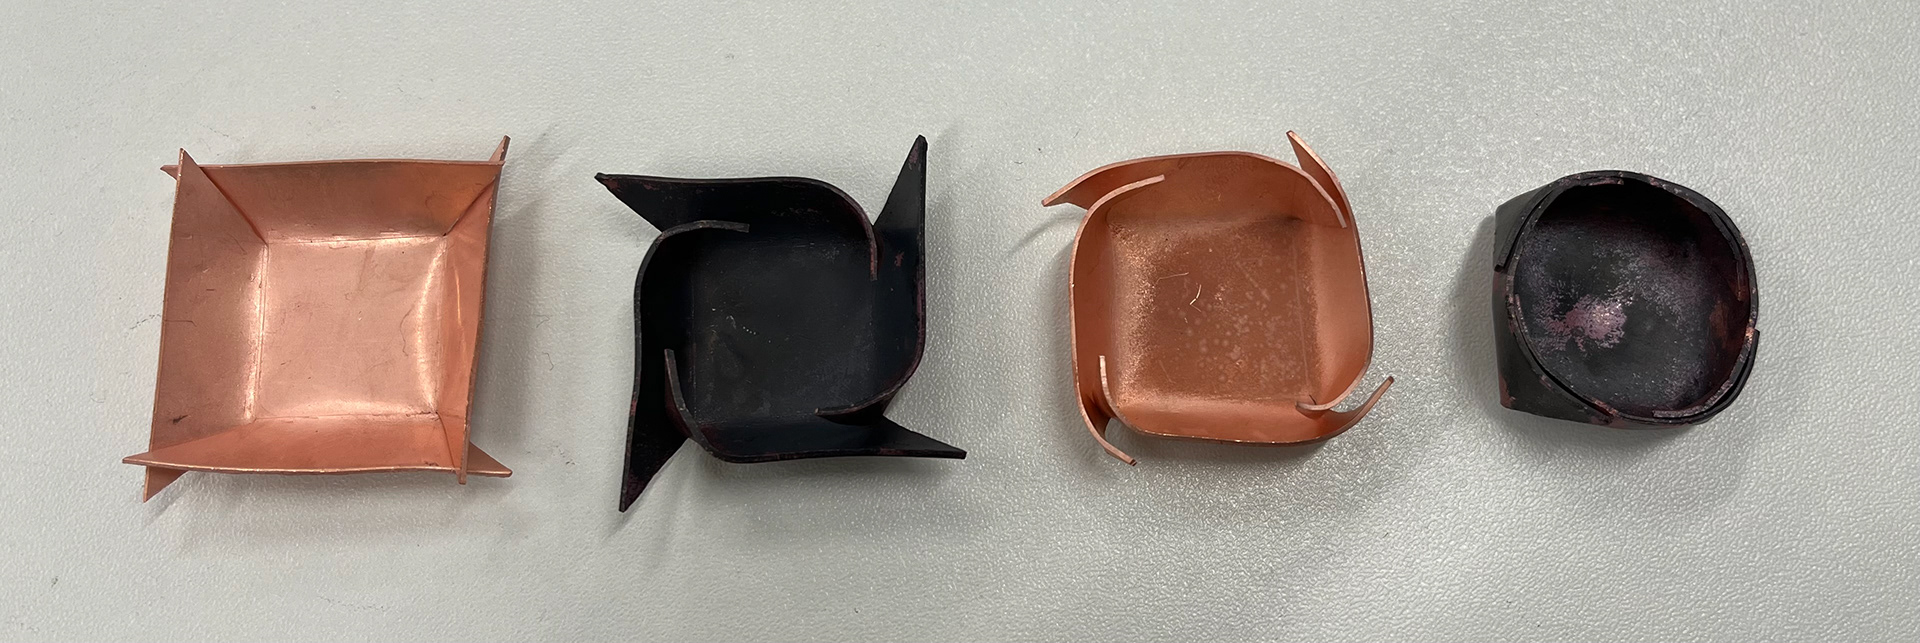
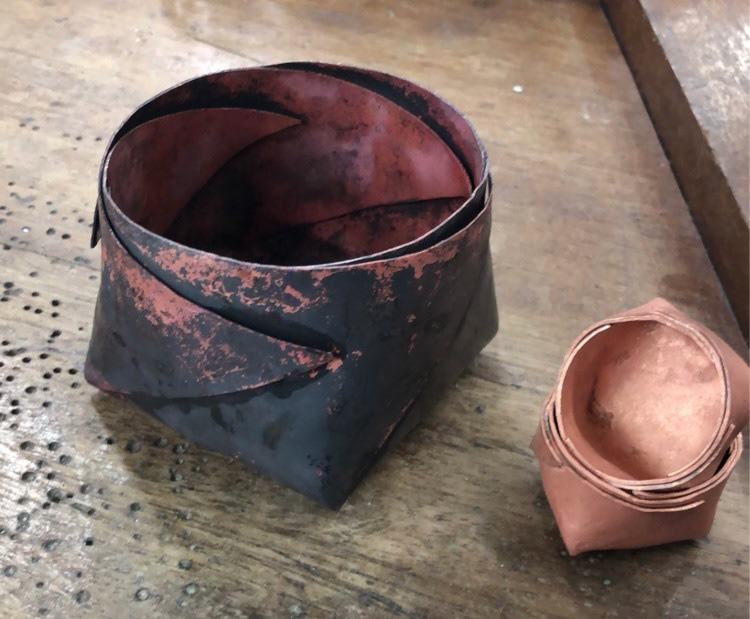
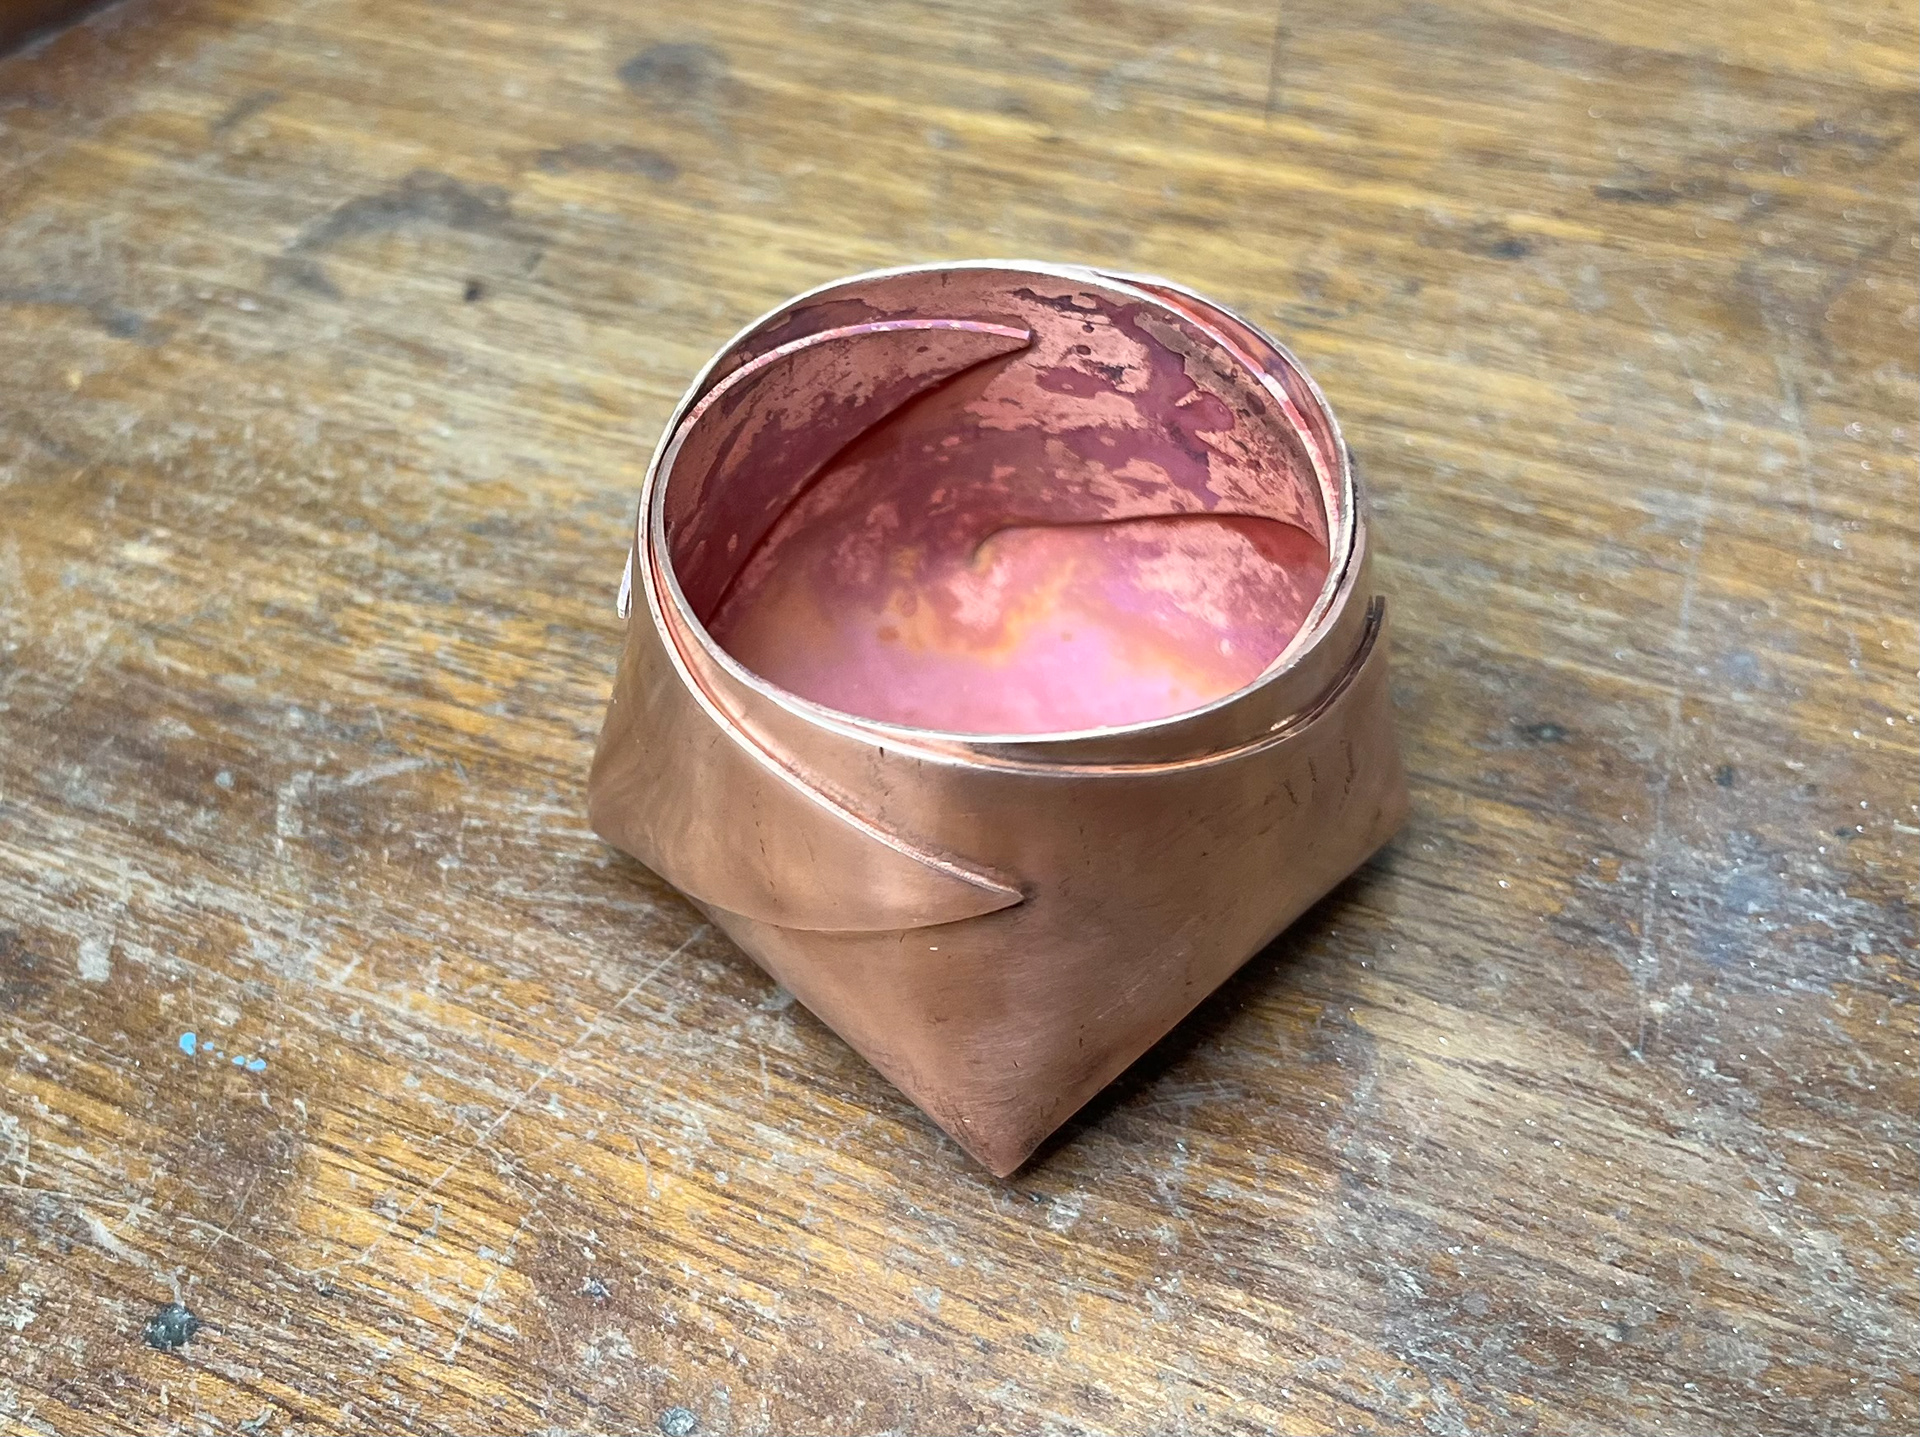
Above shows the process of how I made the bowls in metal. I really like the look of the shapes throughout the process.
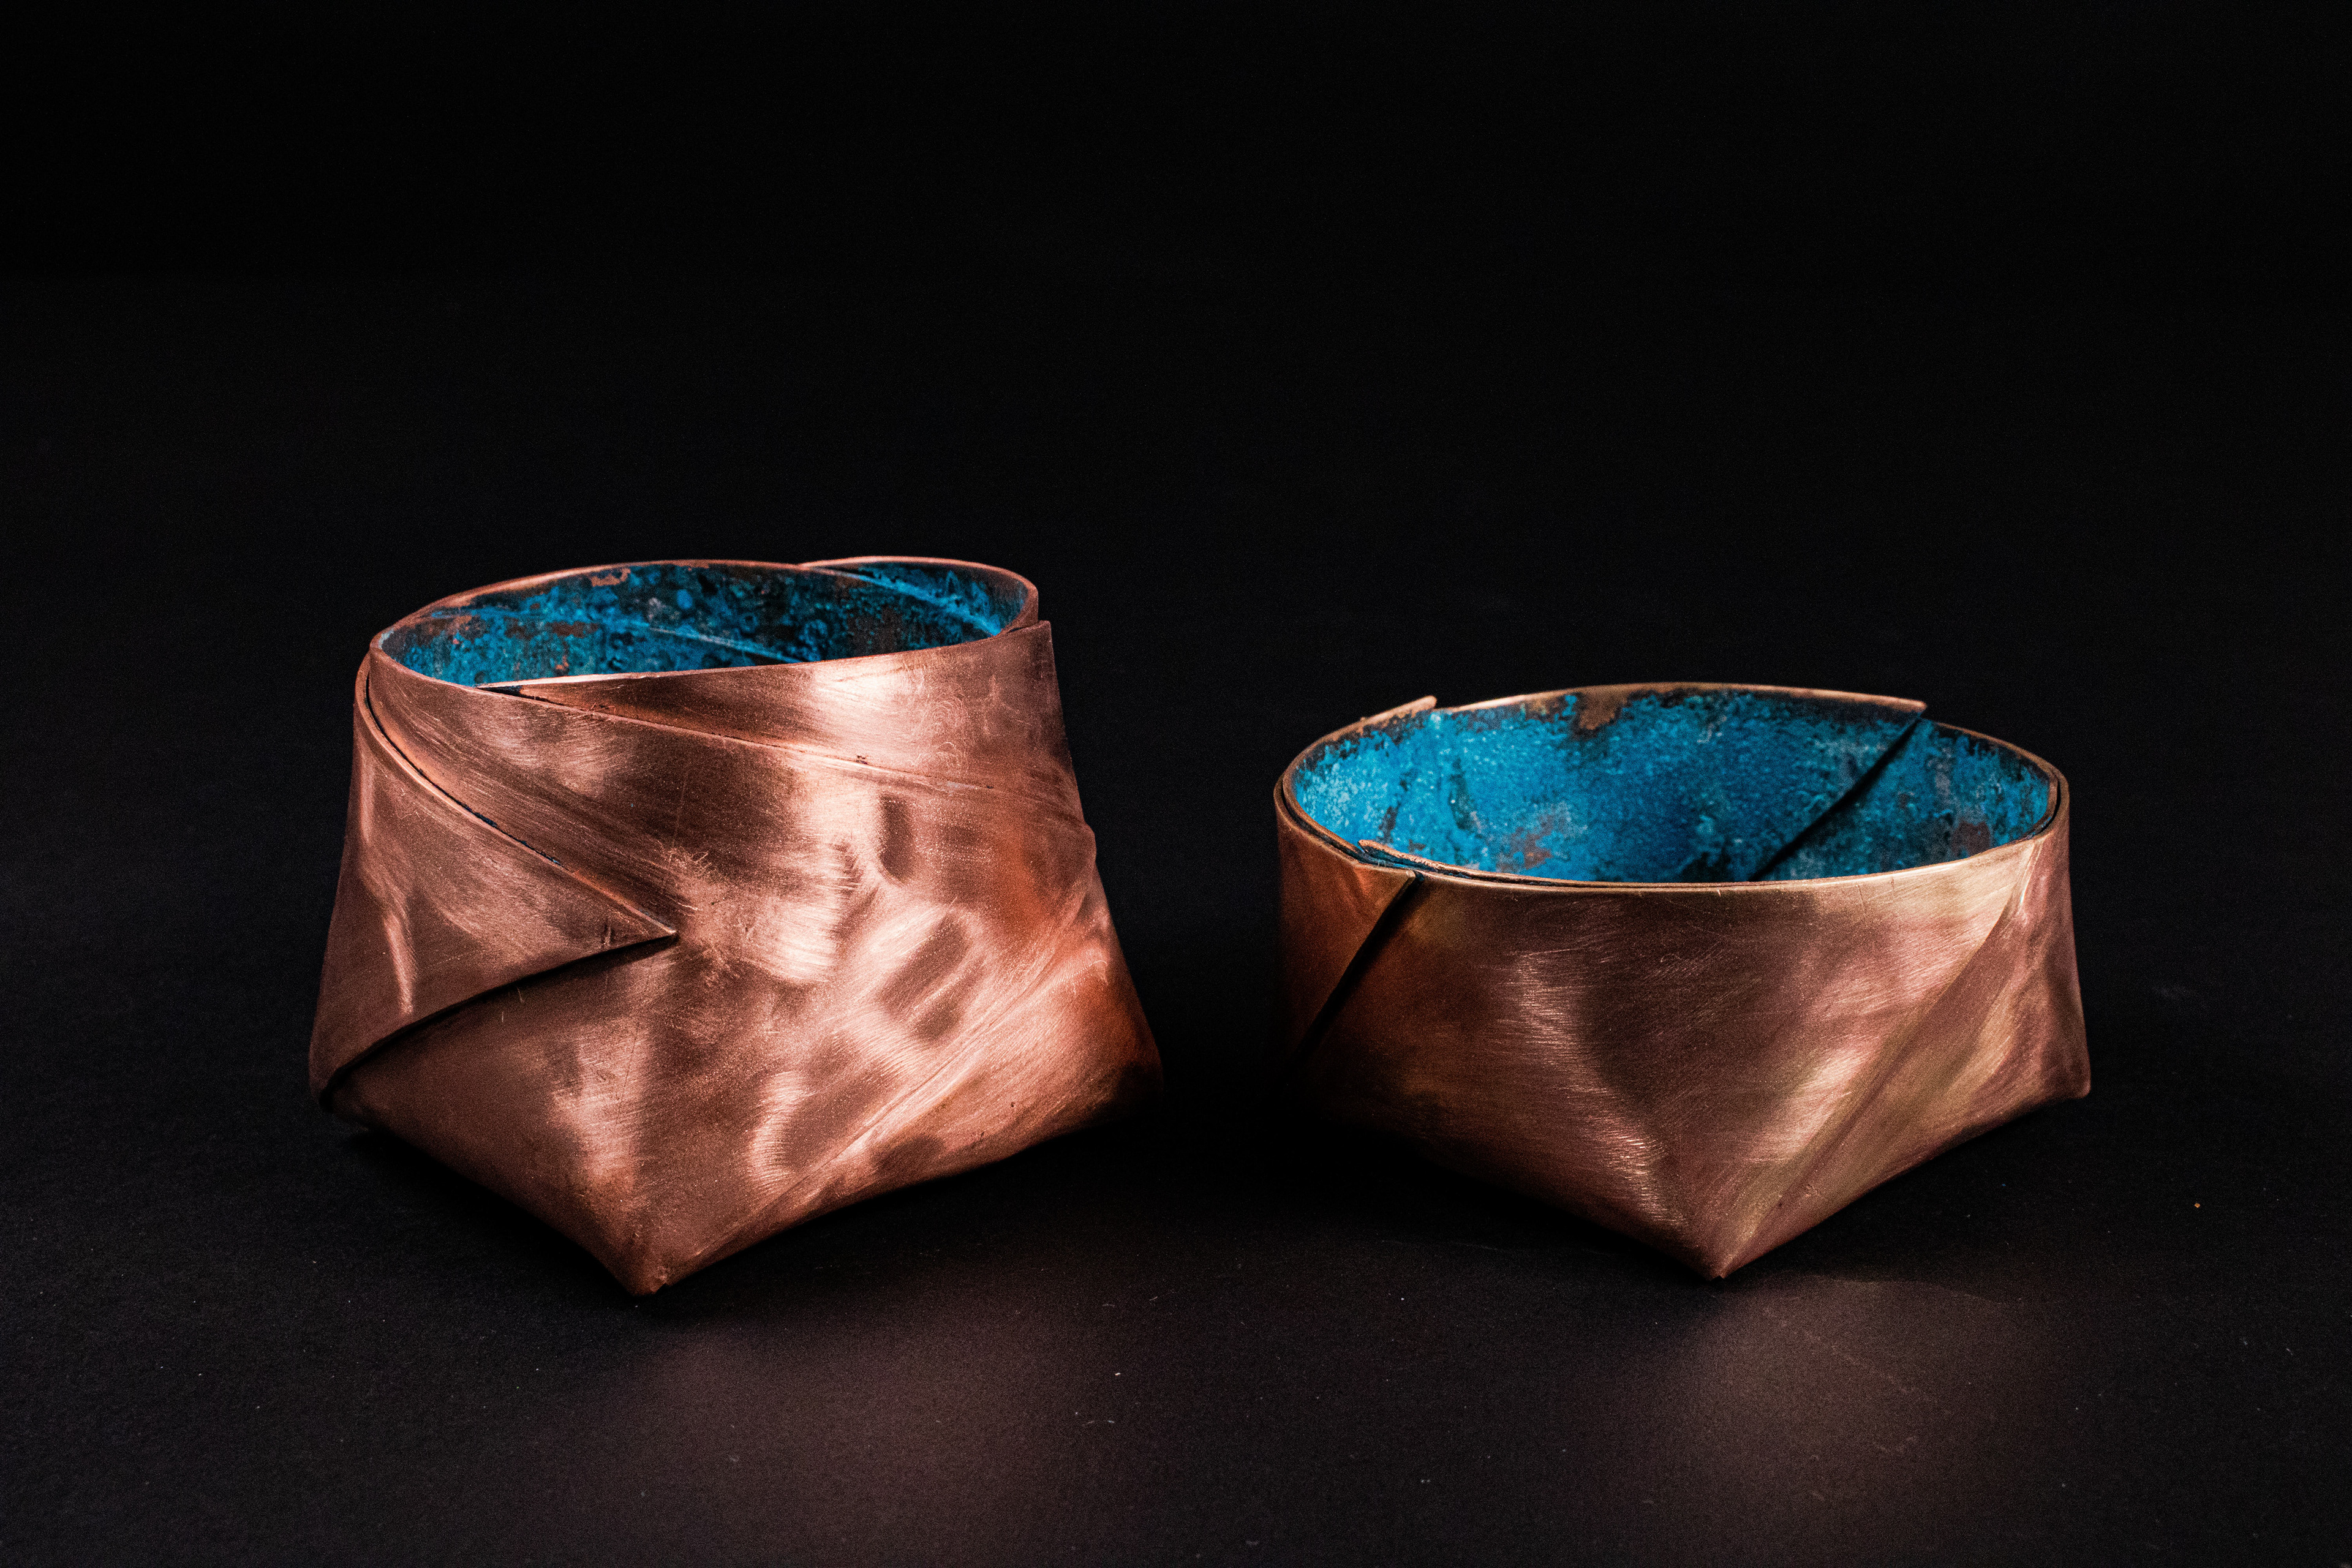
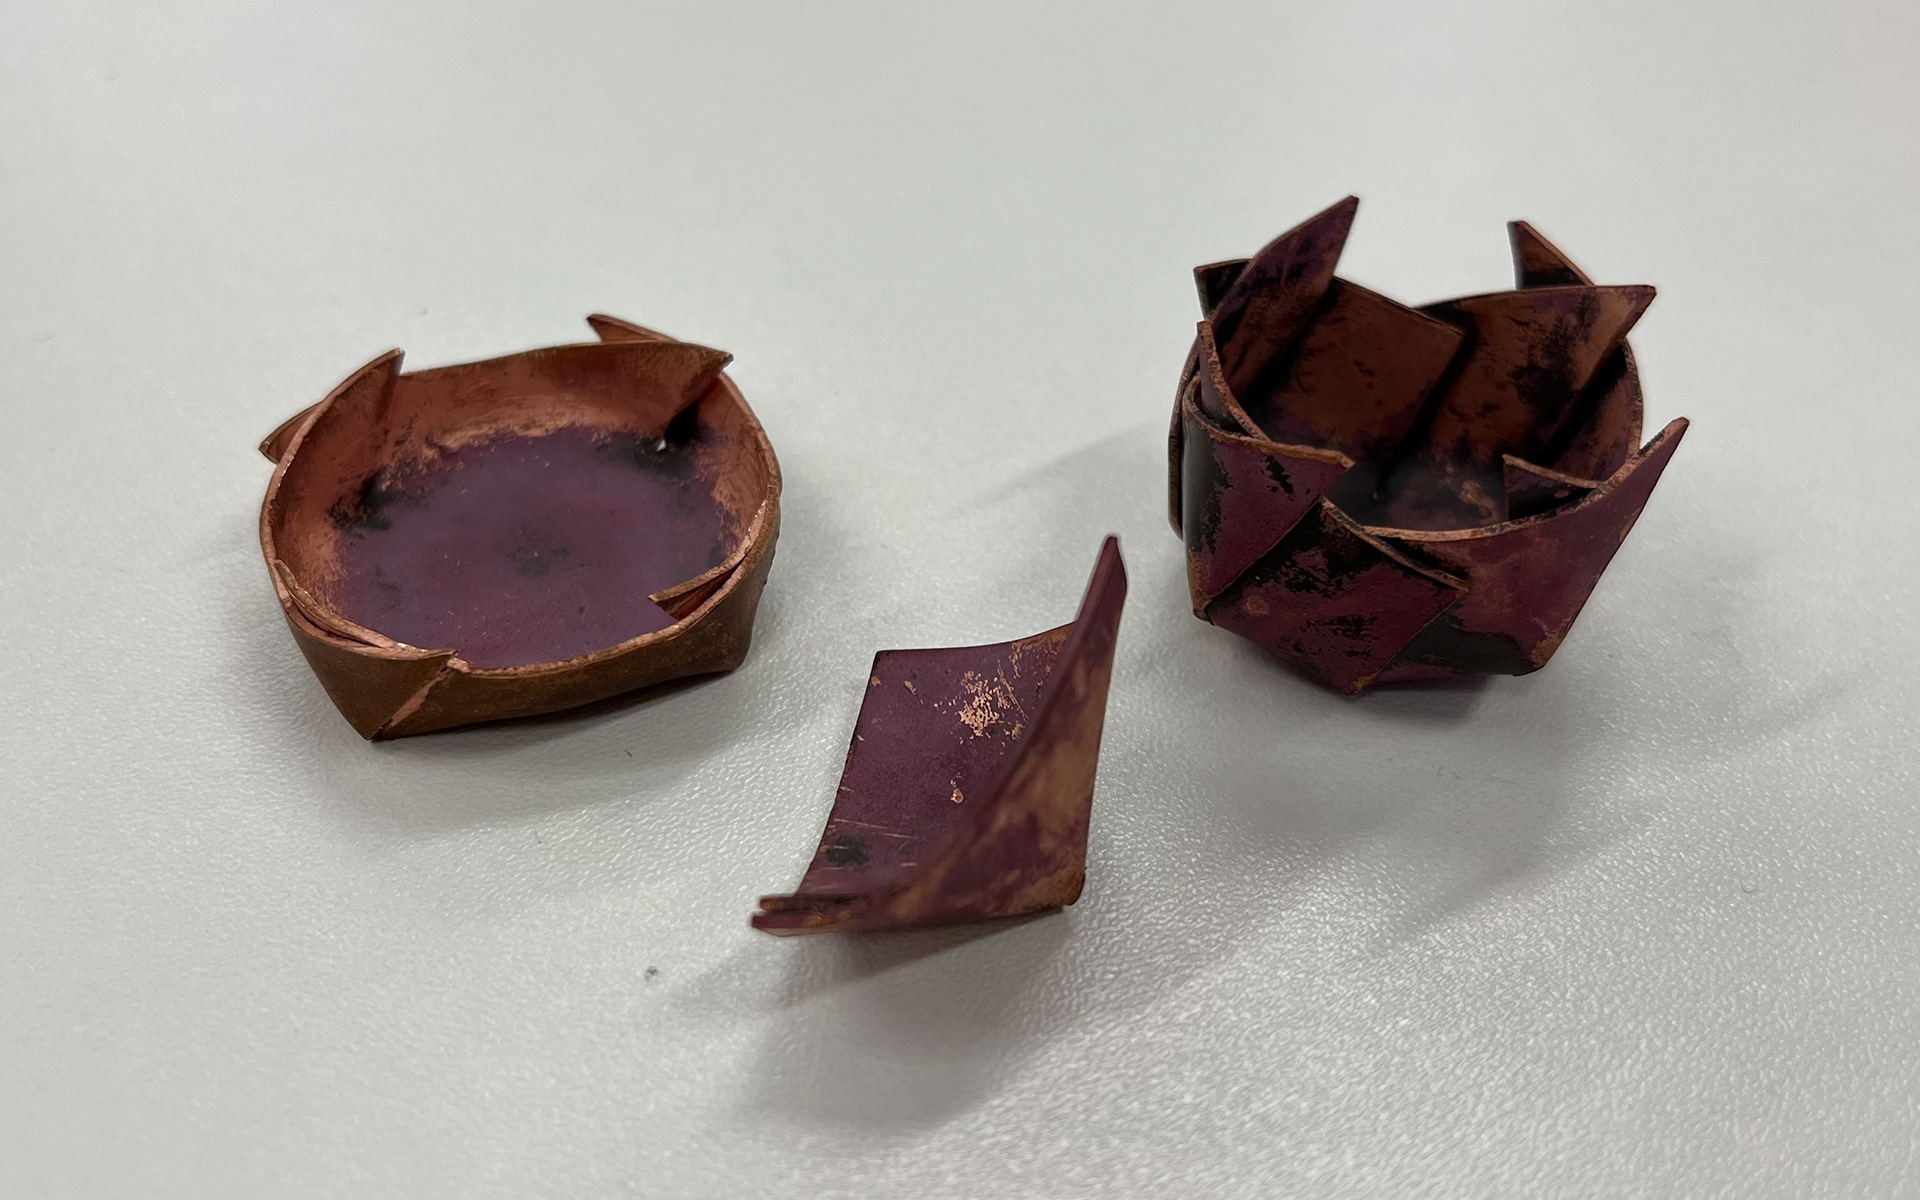
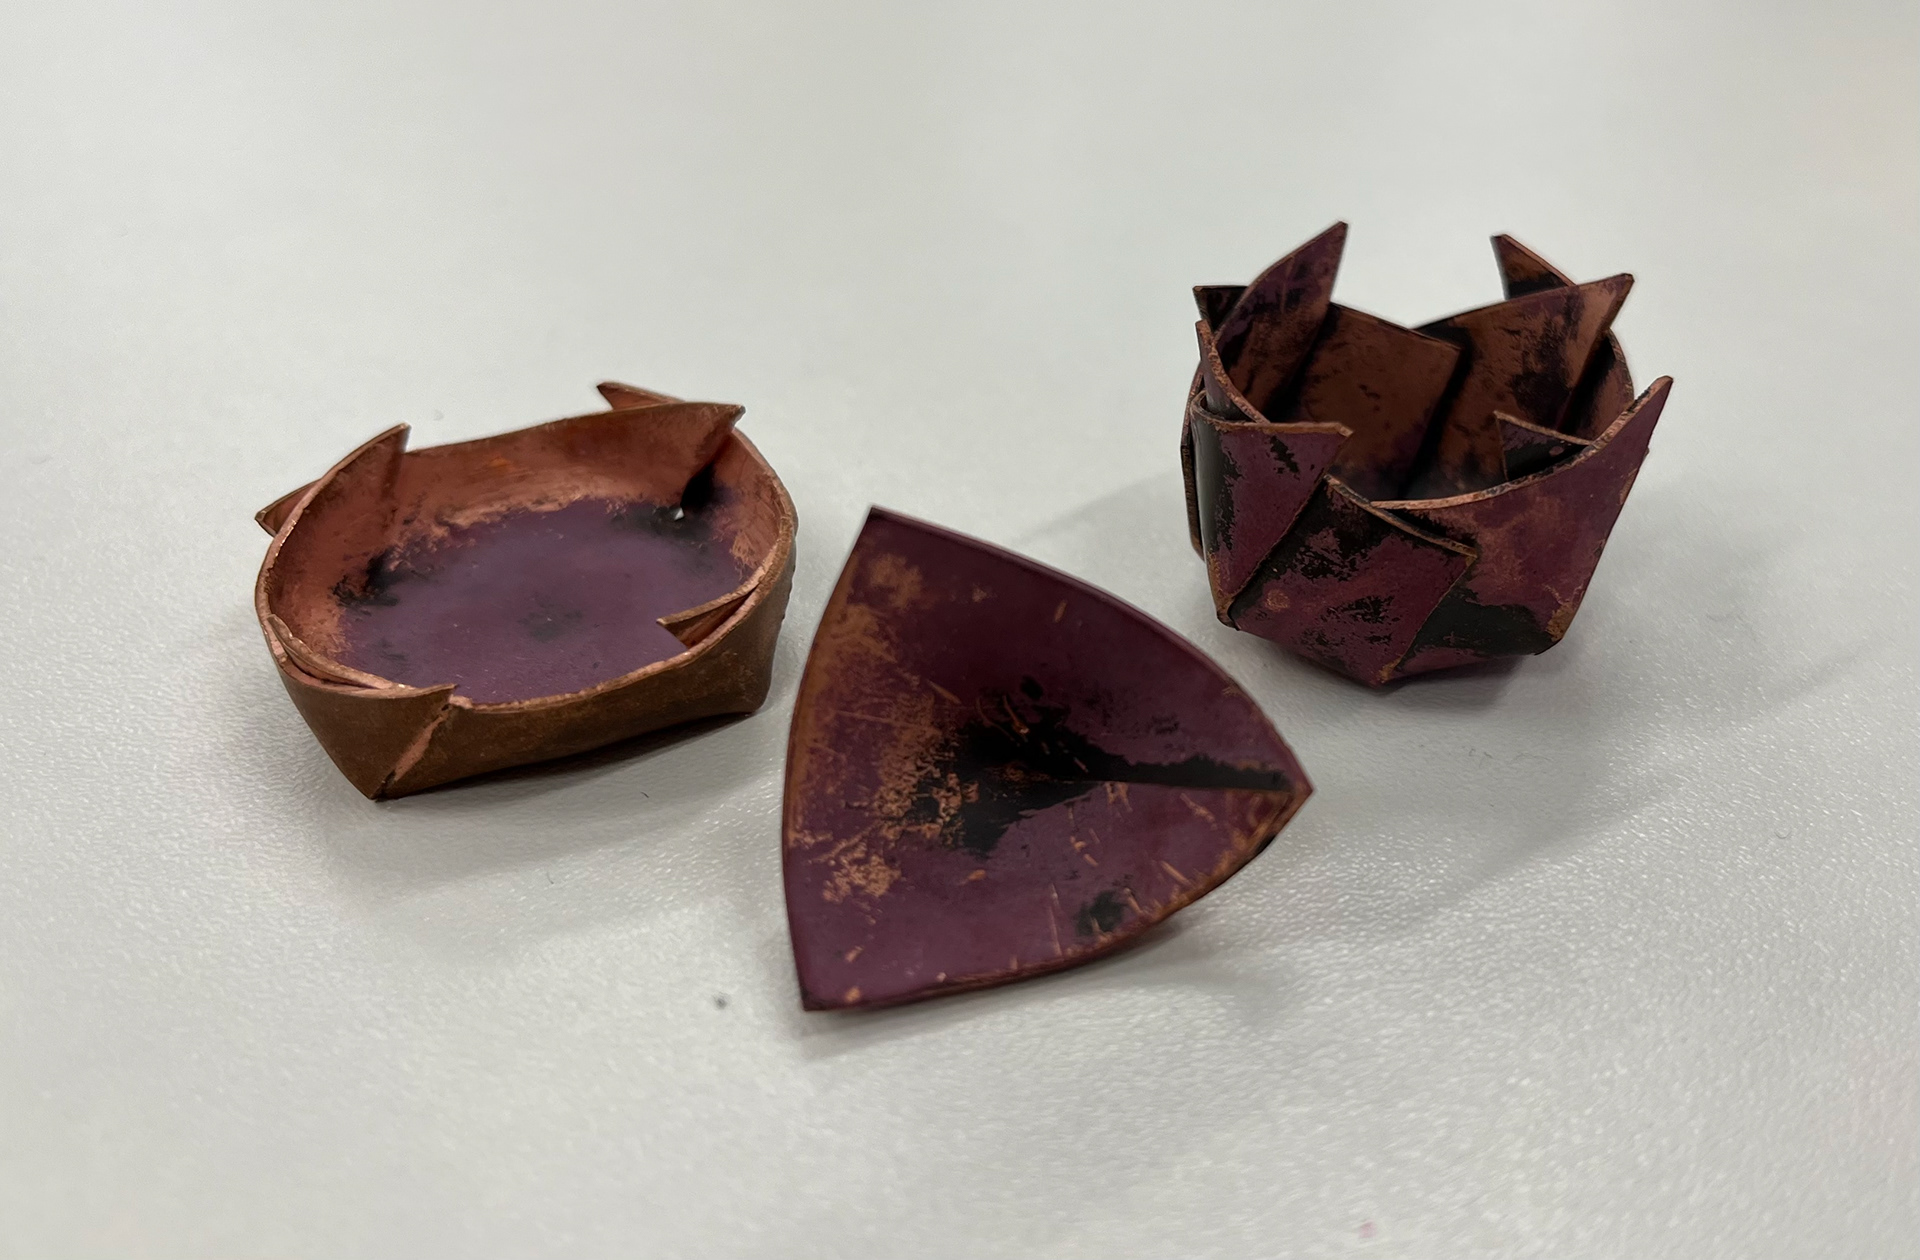
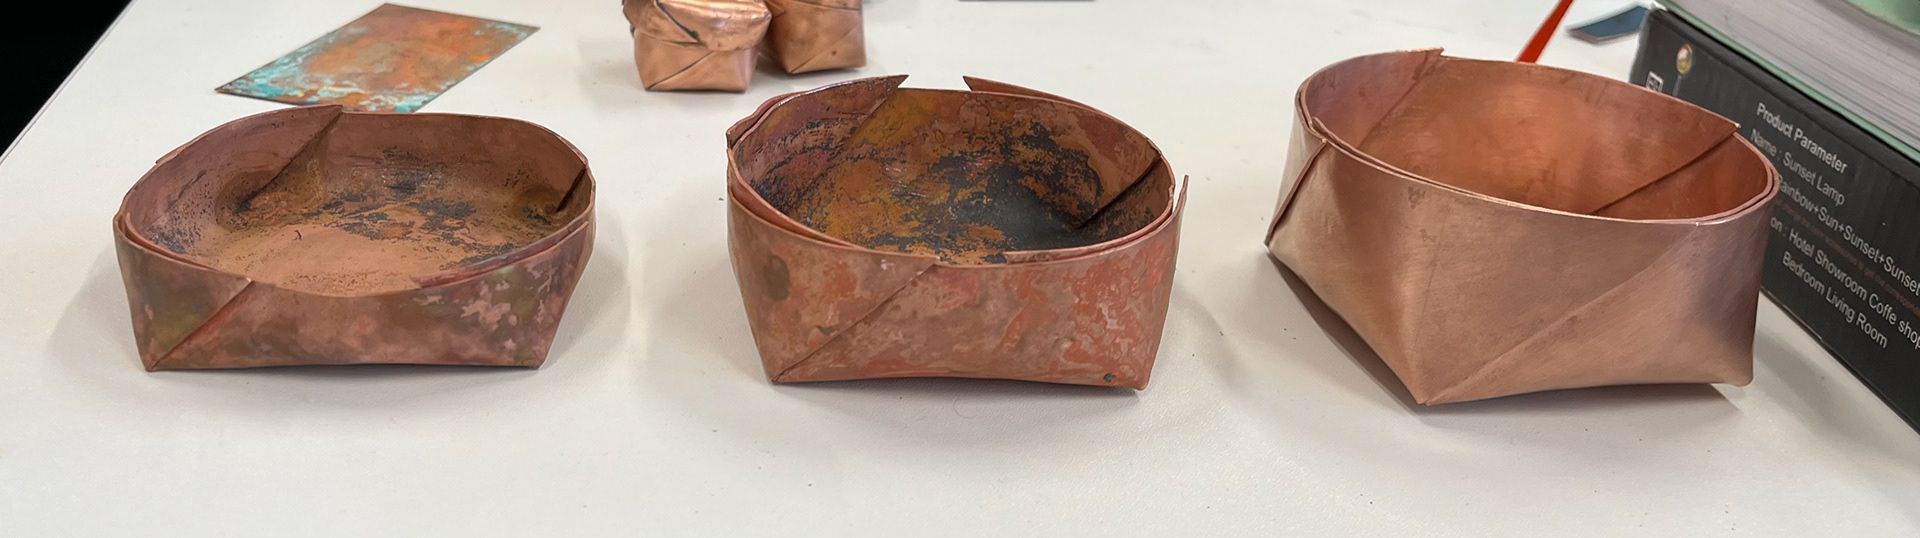
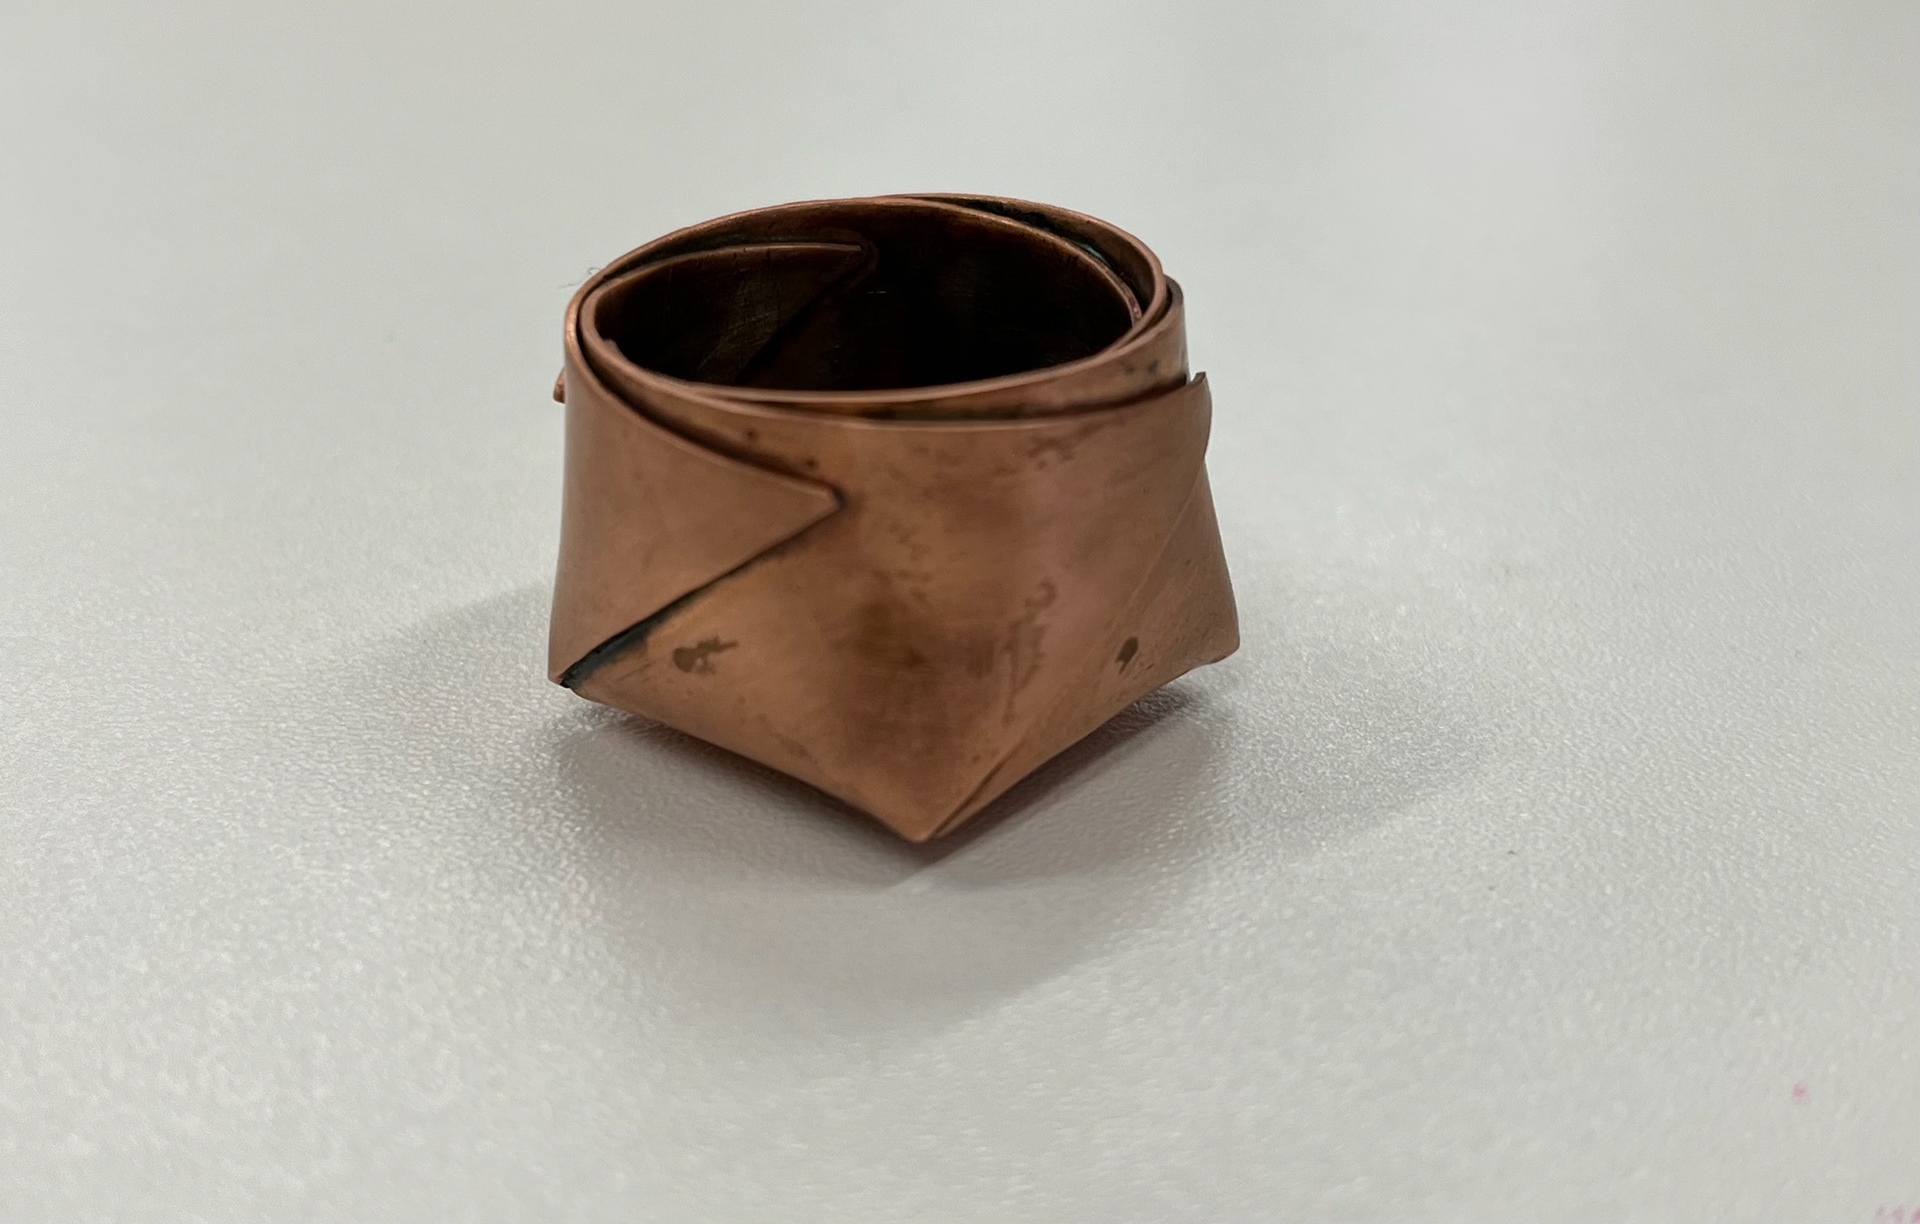
Bellow are the initial bowls and I like the last one on the right the most. What I love most about this process is that there is no soldering or any external piece required to keep the shape together. It is just a case of twisting and folding the sheet and the metal keeps itself together, creating a clean, smooth, repeatable shape. A simple process which is exactly what I was looking for.
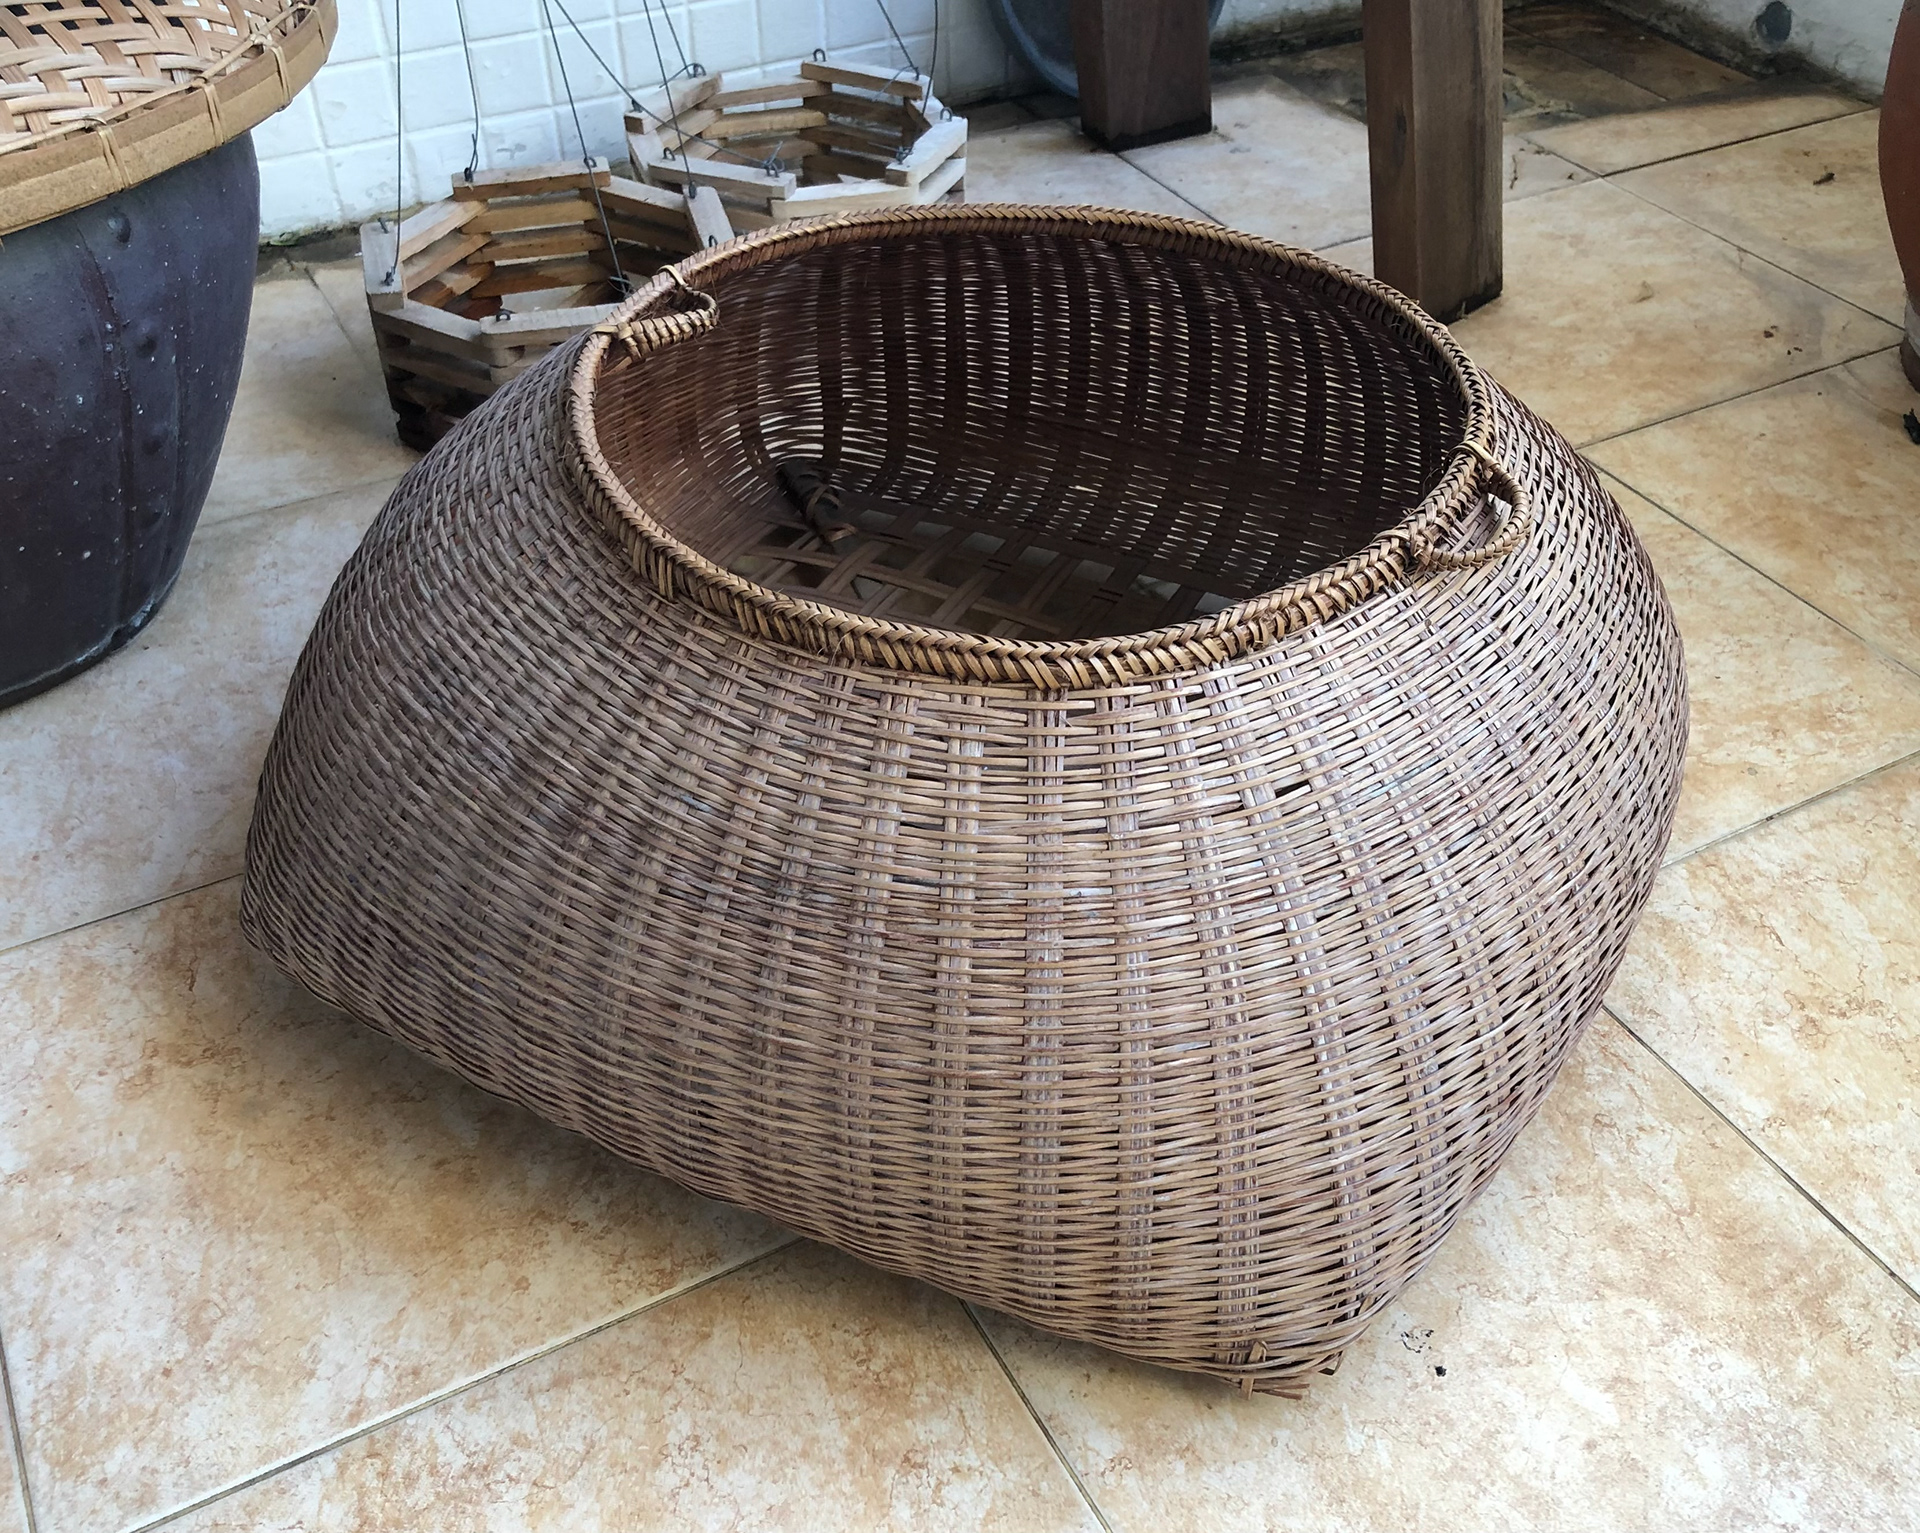
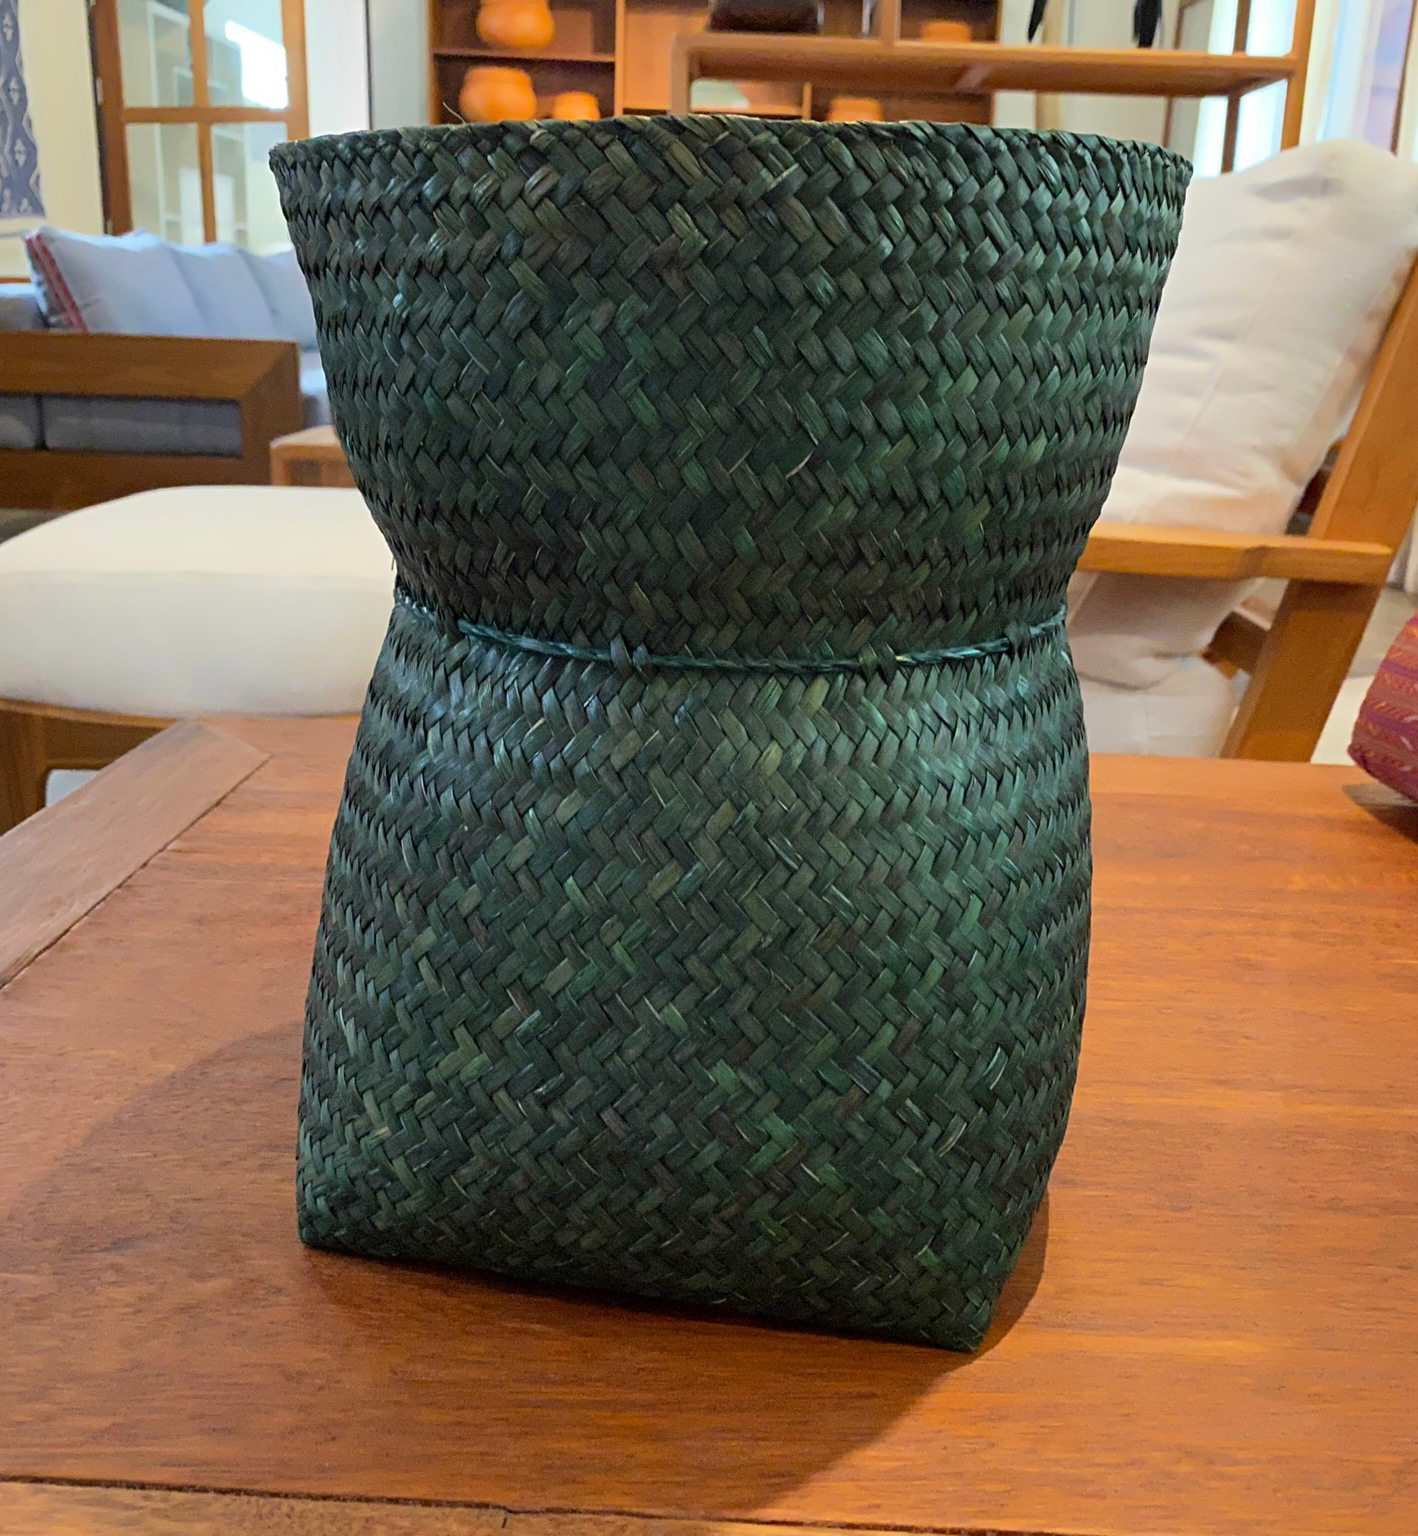
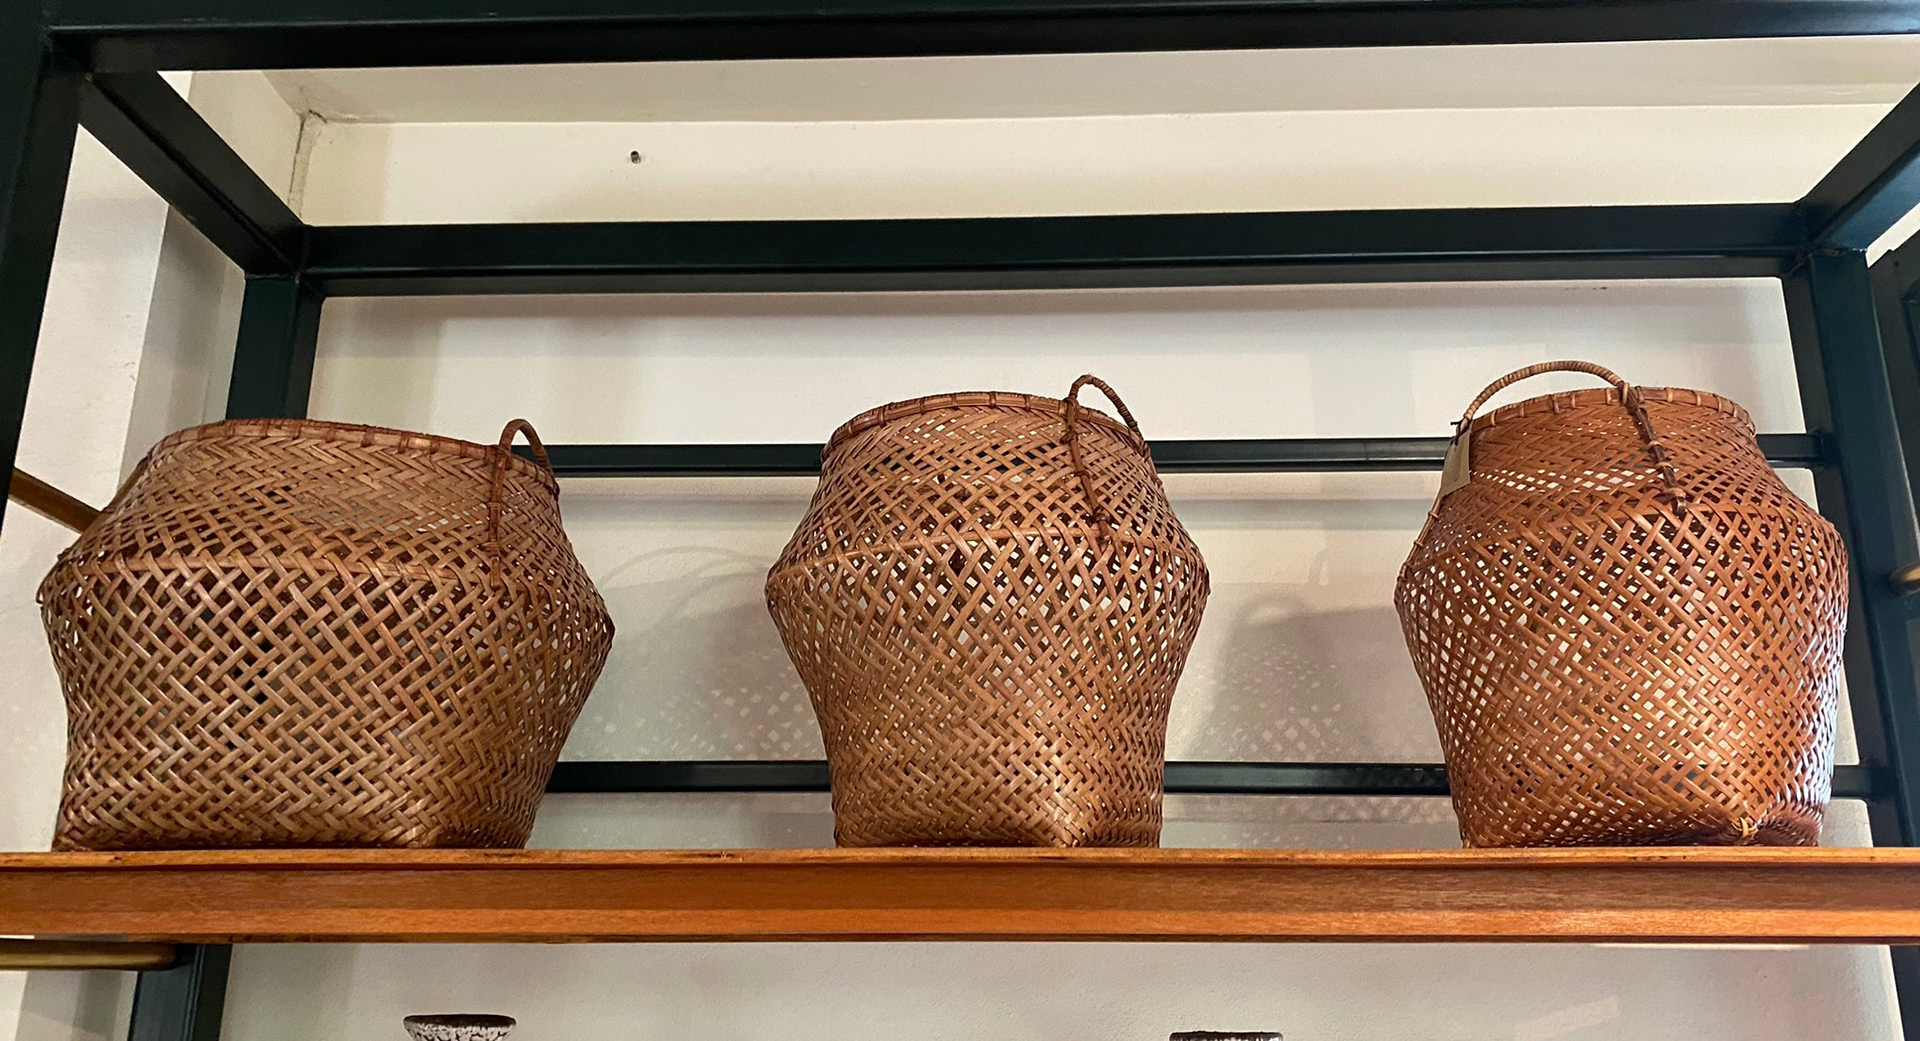
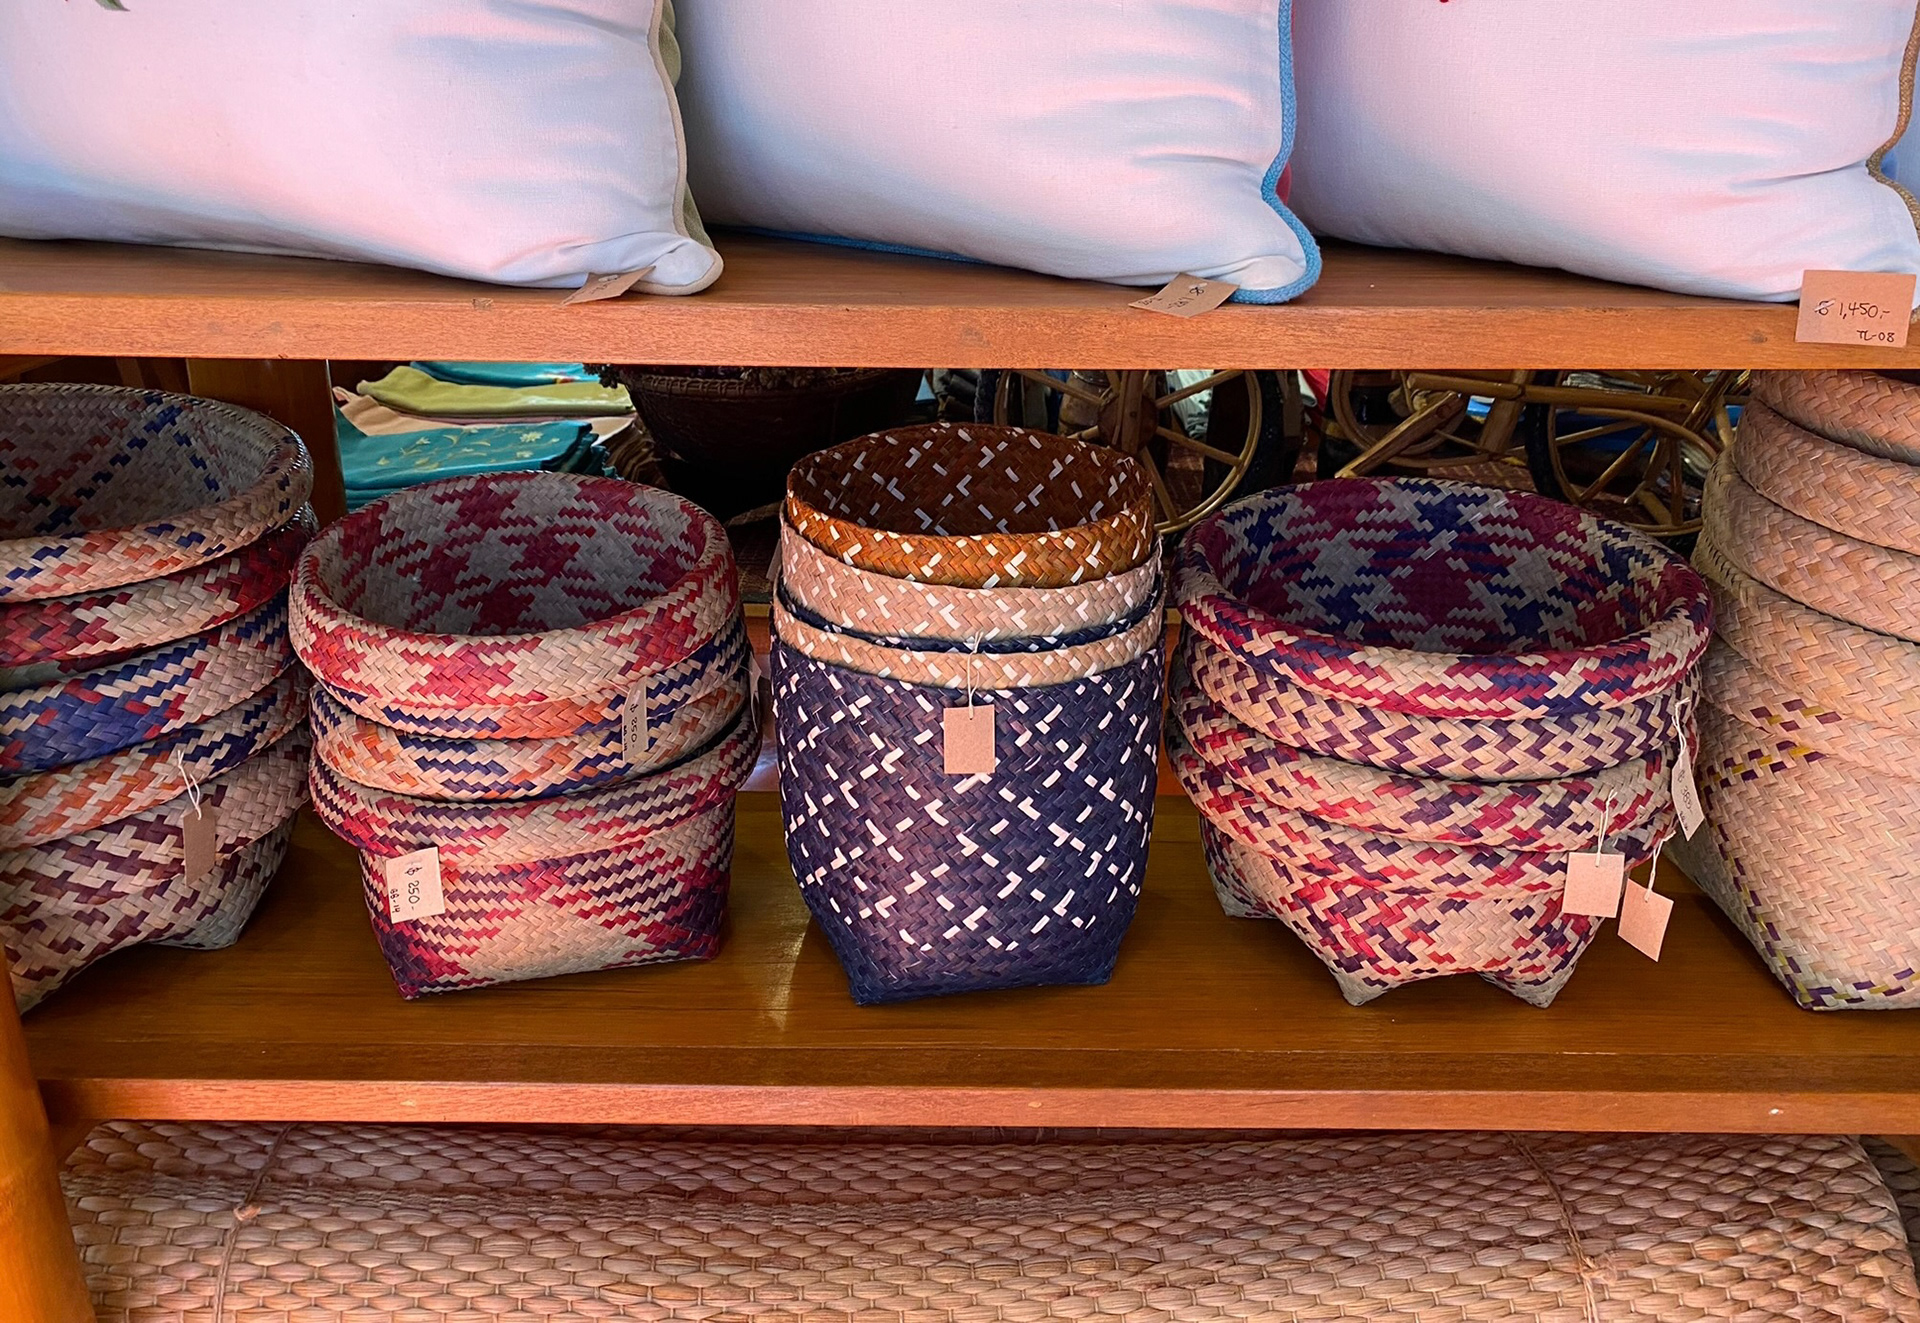
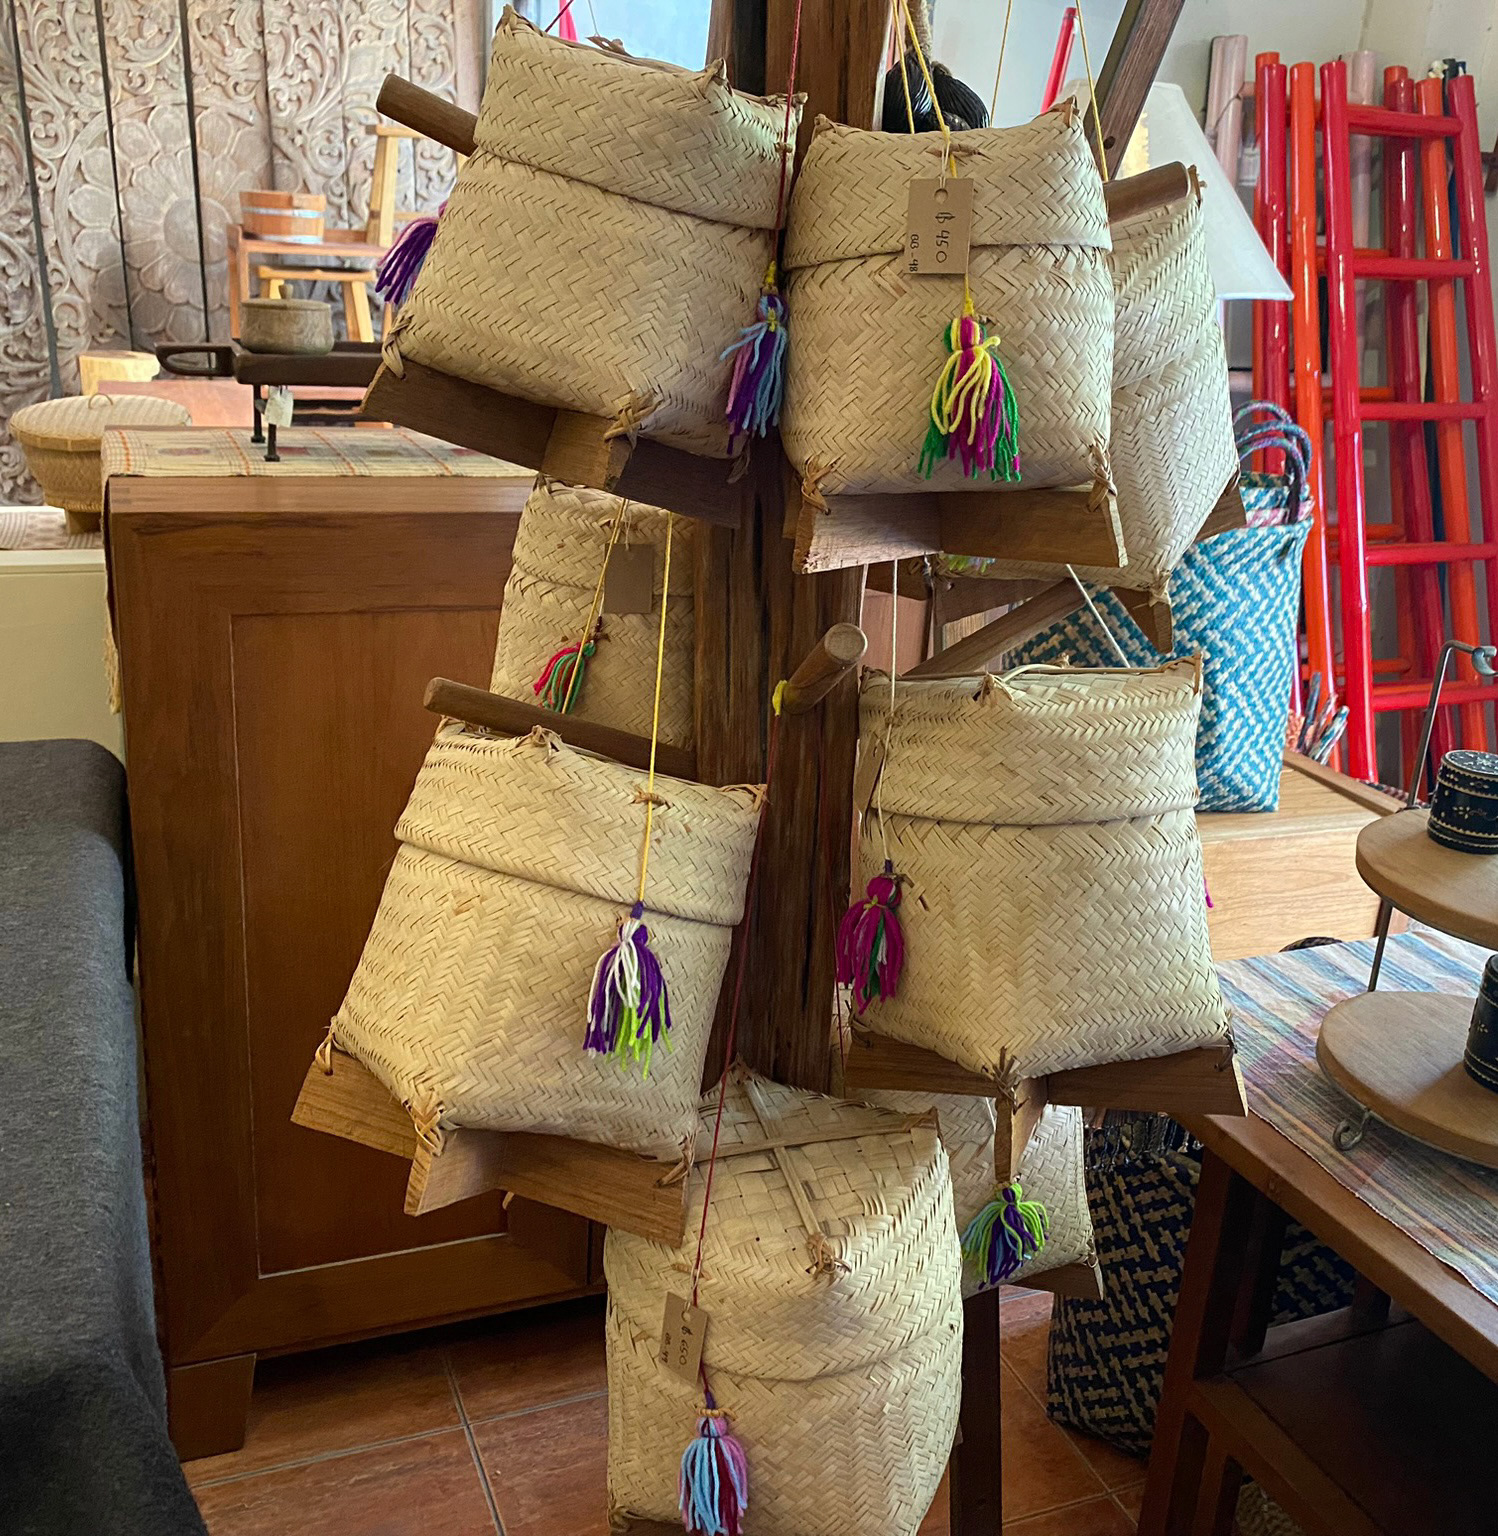
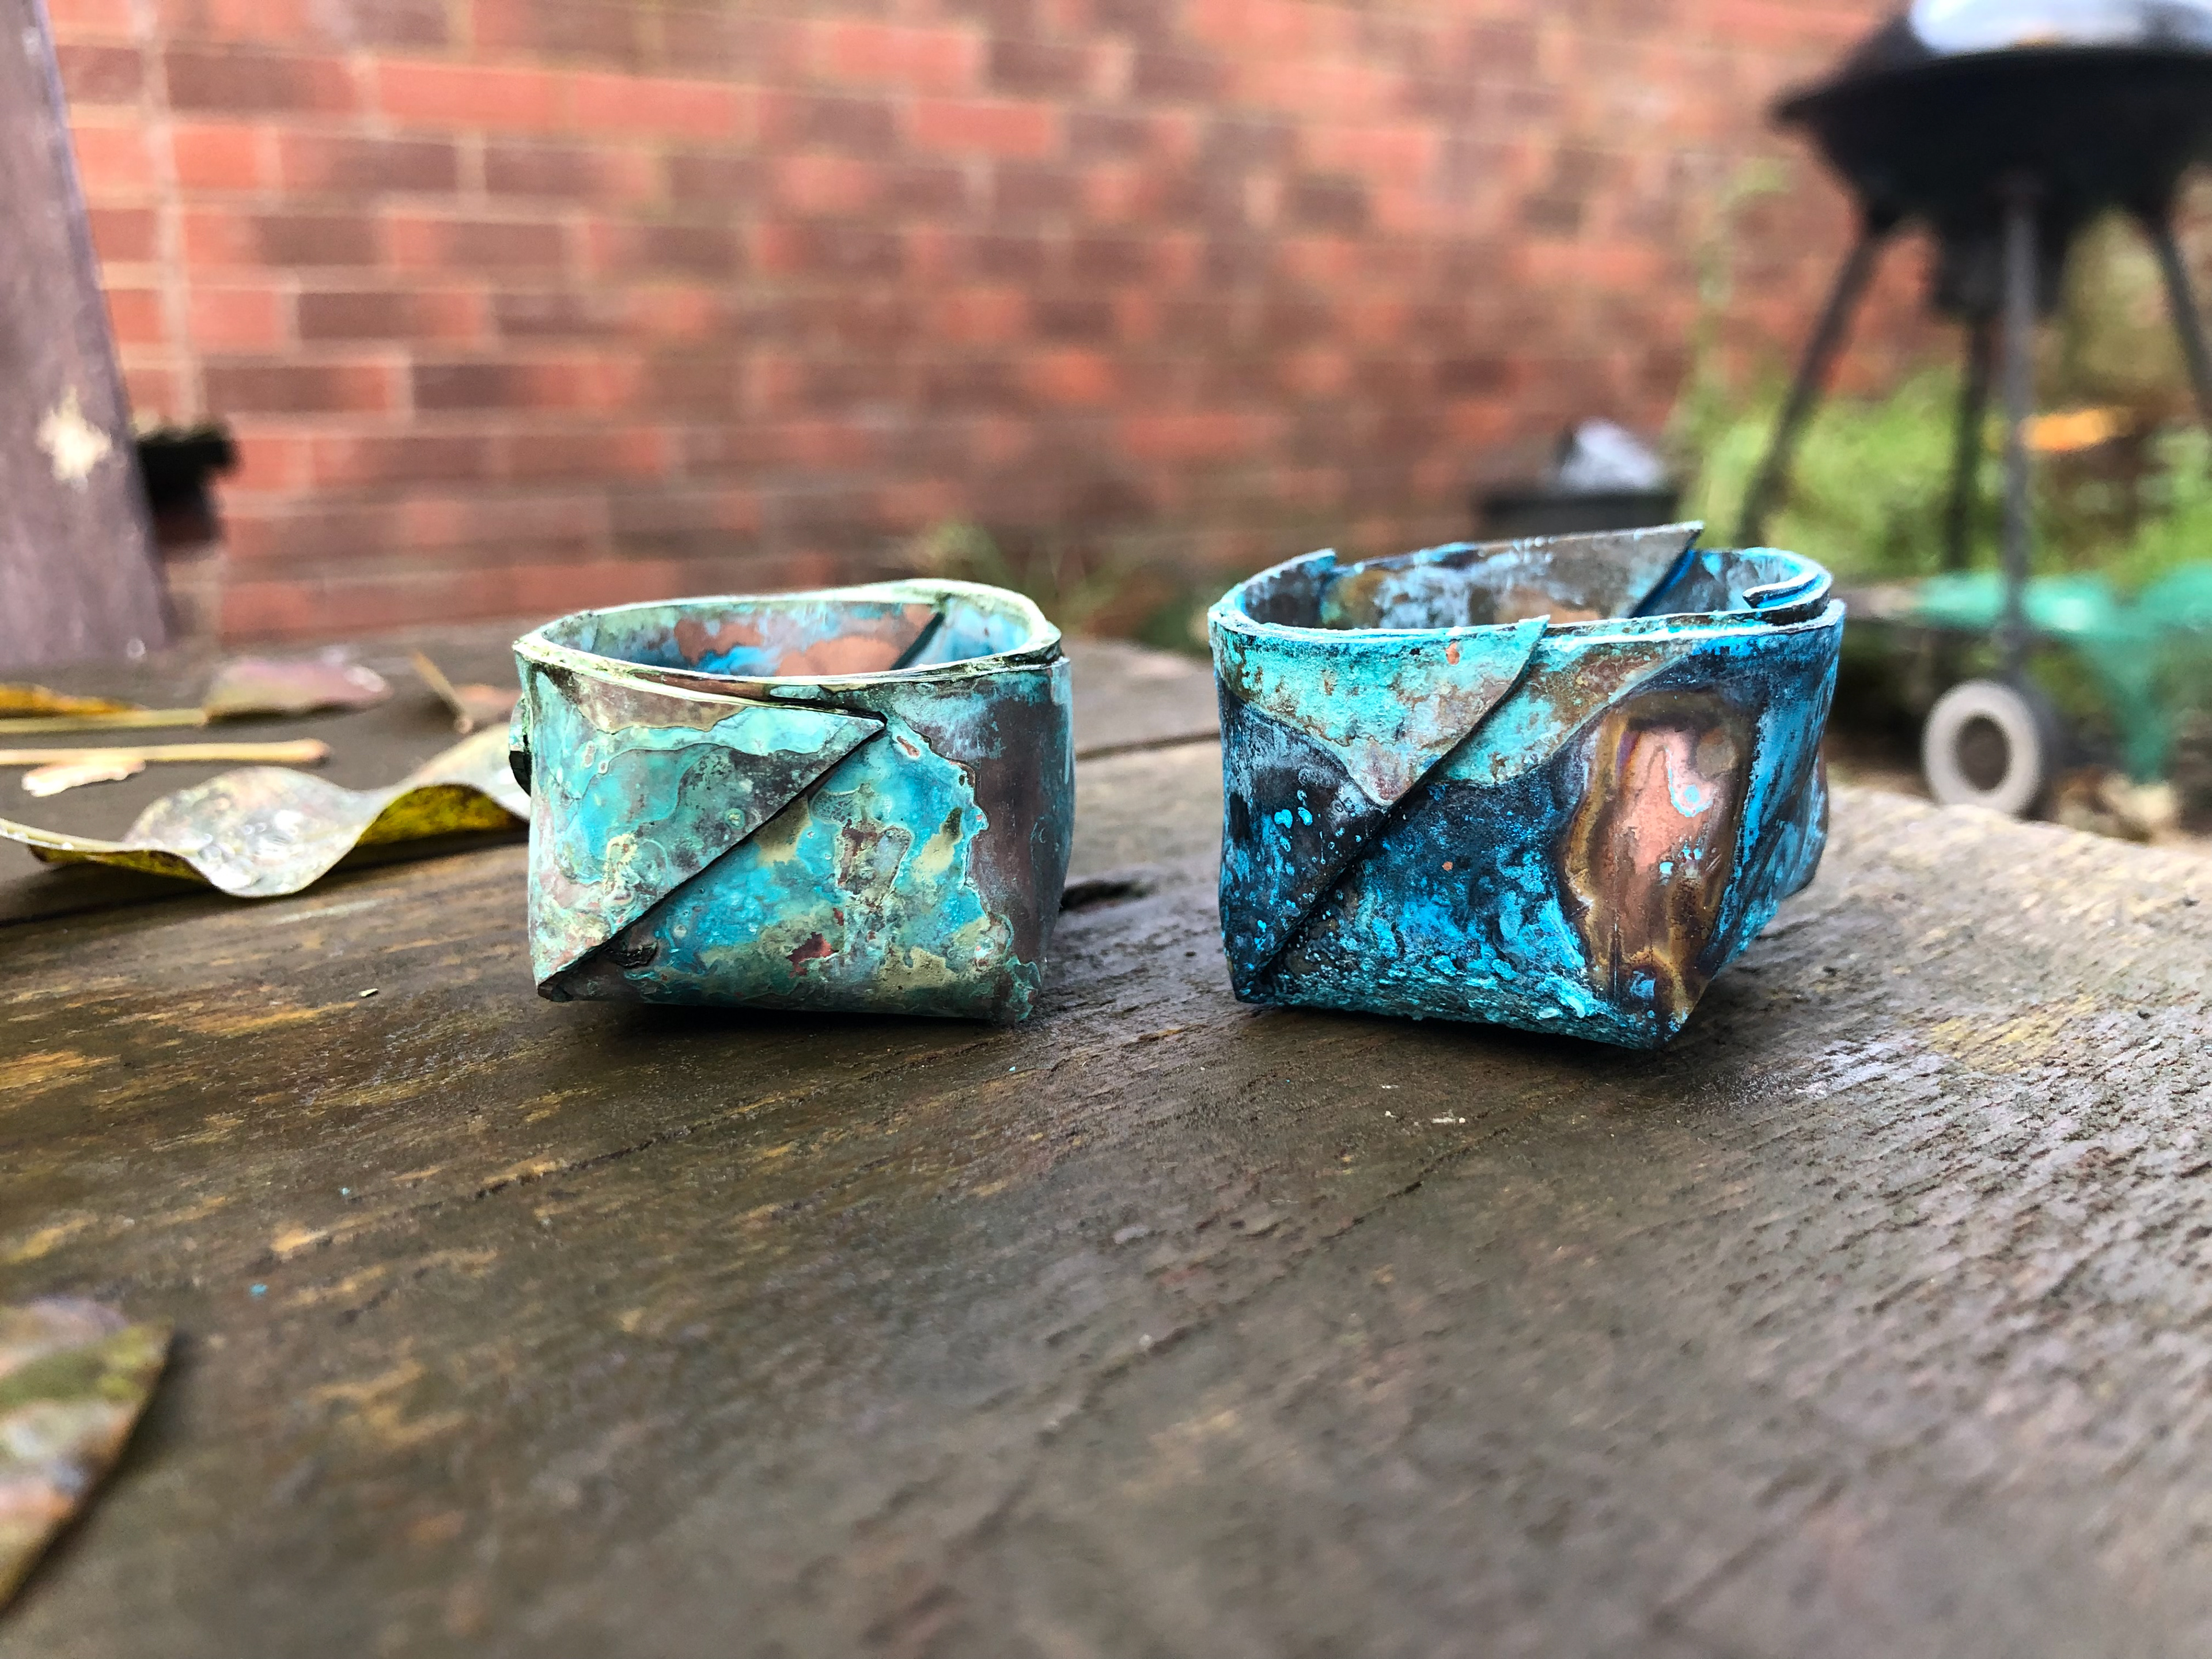
These shapes coincidently remind me of traditional woven baskets from Thailand. Bellow are some images I took from Paya, a shop where I conducted an interview with the owners to discuss traditional cultural designs for my CP3.
These images bellow are a couple more copper tests inspired by the paper models.
Patina Development
Through my research conducted for my CP3, I discovered that different elements present in soils around the world, influence the colour patina that forms on a metals surface. In relation to my essay, I discovered that this was the purist form of place oriented design as the ground from which a piece of metal is marinated, has unique characteristics that distinguish it to that place.
I wanted to focus on places that I feel a strong connection to and find the colours that patinas produce in the soils of that place: France (blue), Scotland (green), and Thailand (red/orange).
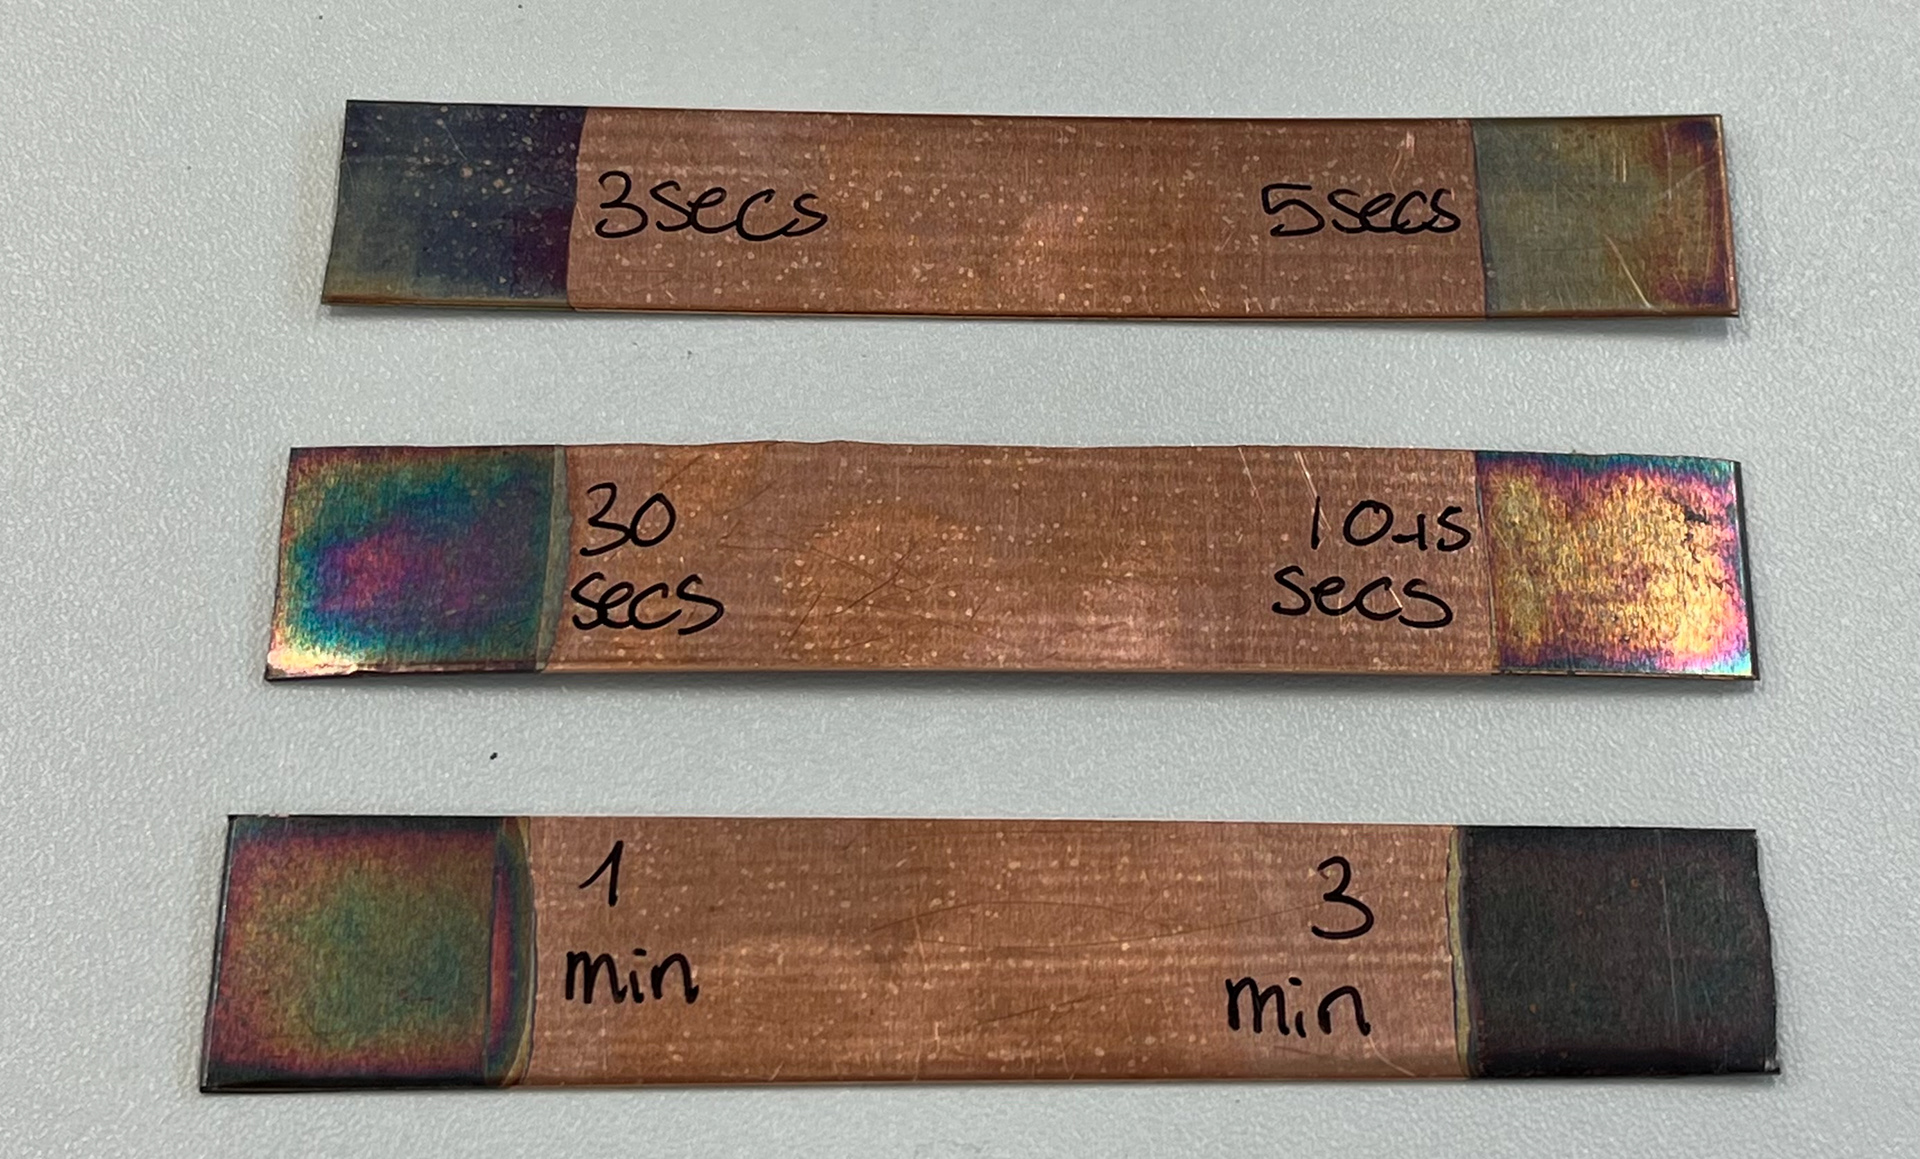
From the Beta Project, I felt confident creating blue and green colours but I hadn’t yet tested out a red patina… After further research, I found out you could use liquid flux and a torch to give a rich red that boarders on purple. Bellow are some of the test pieces.
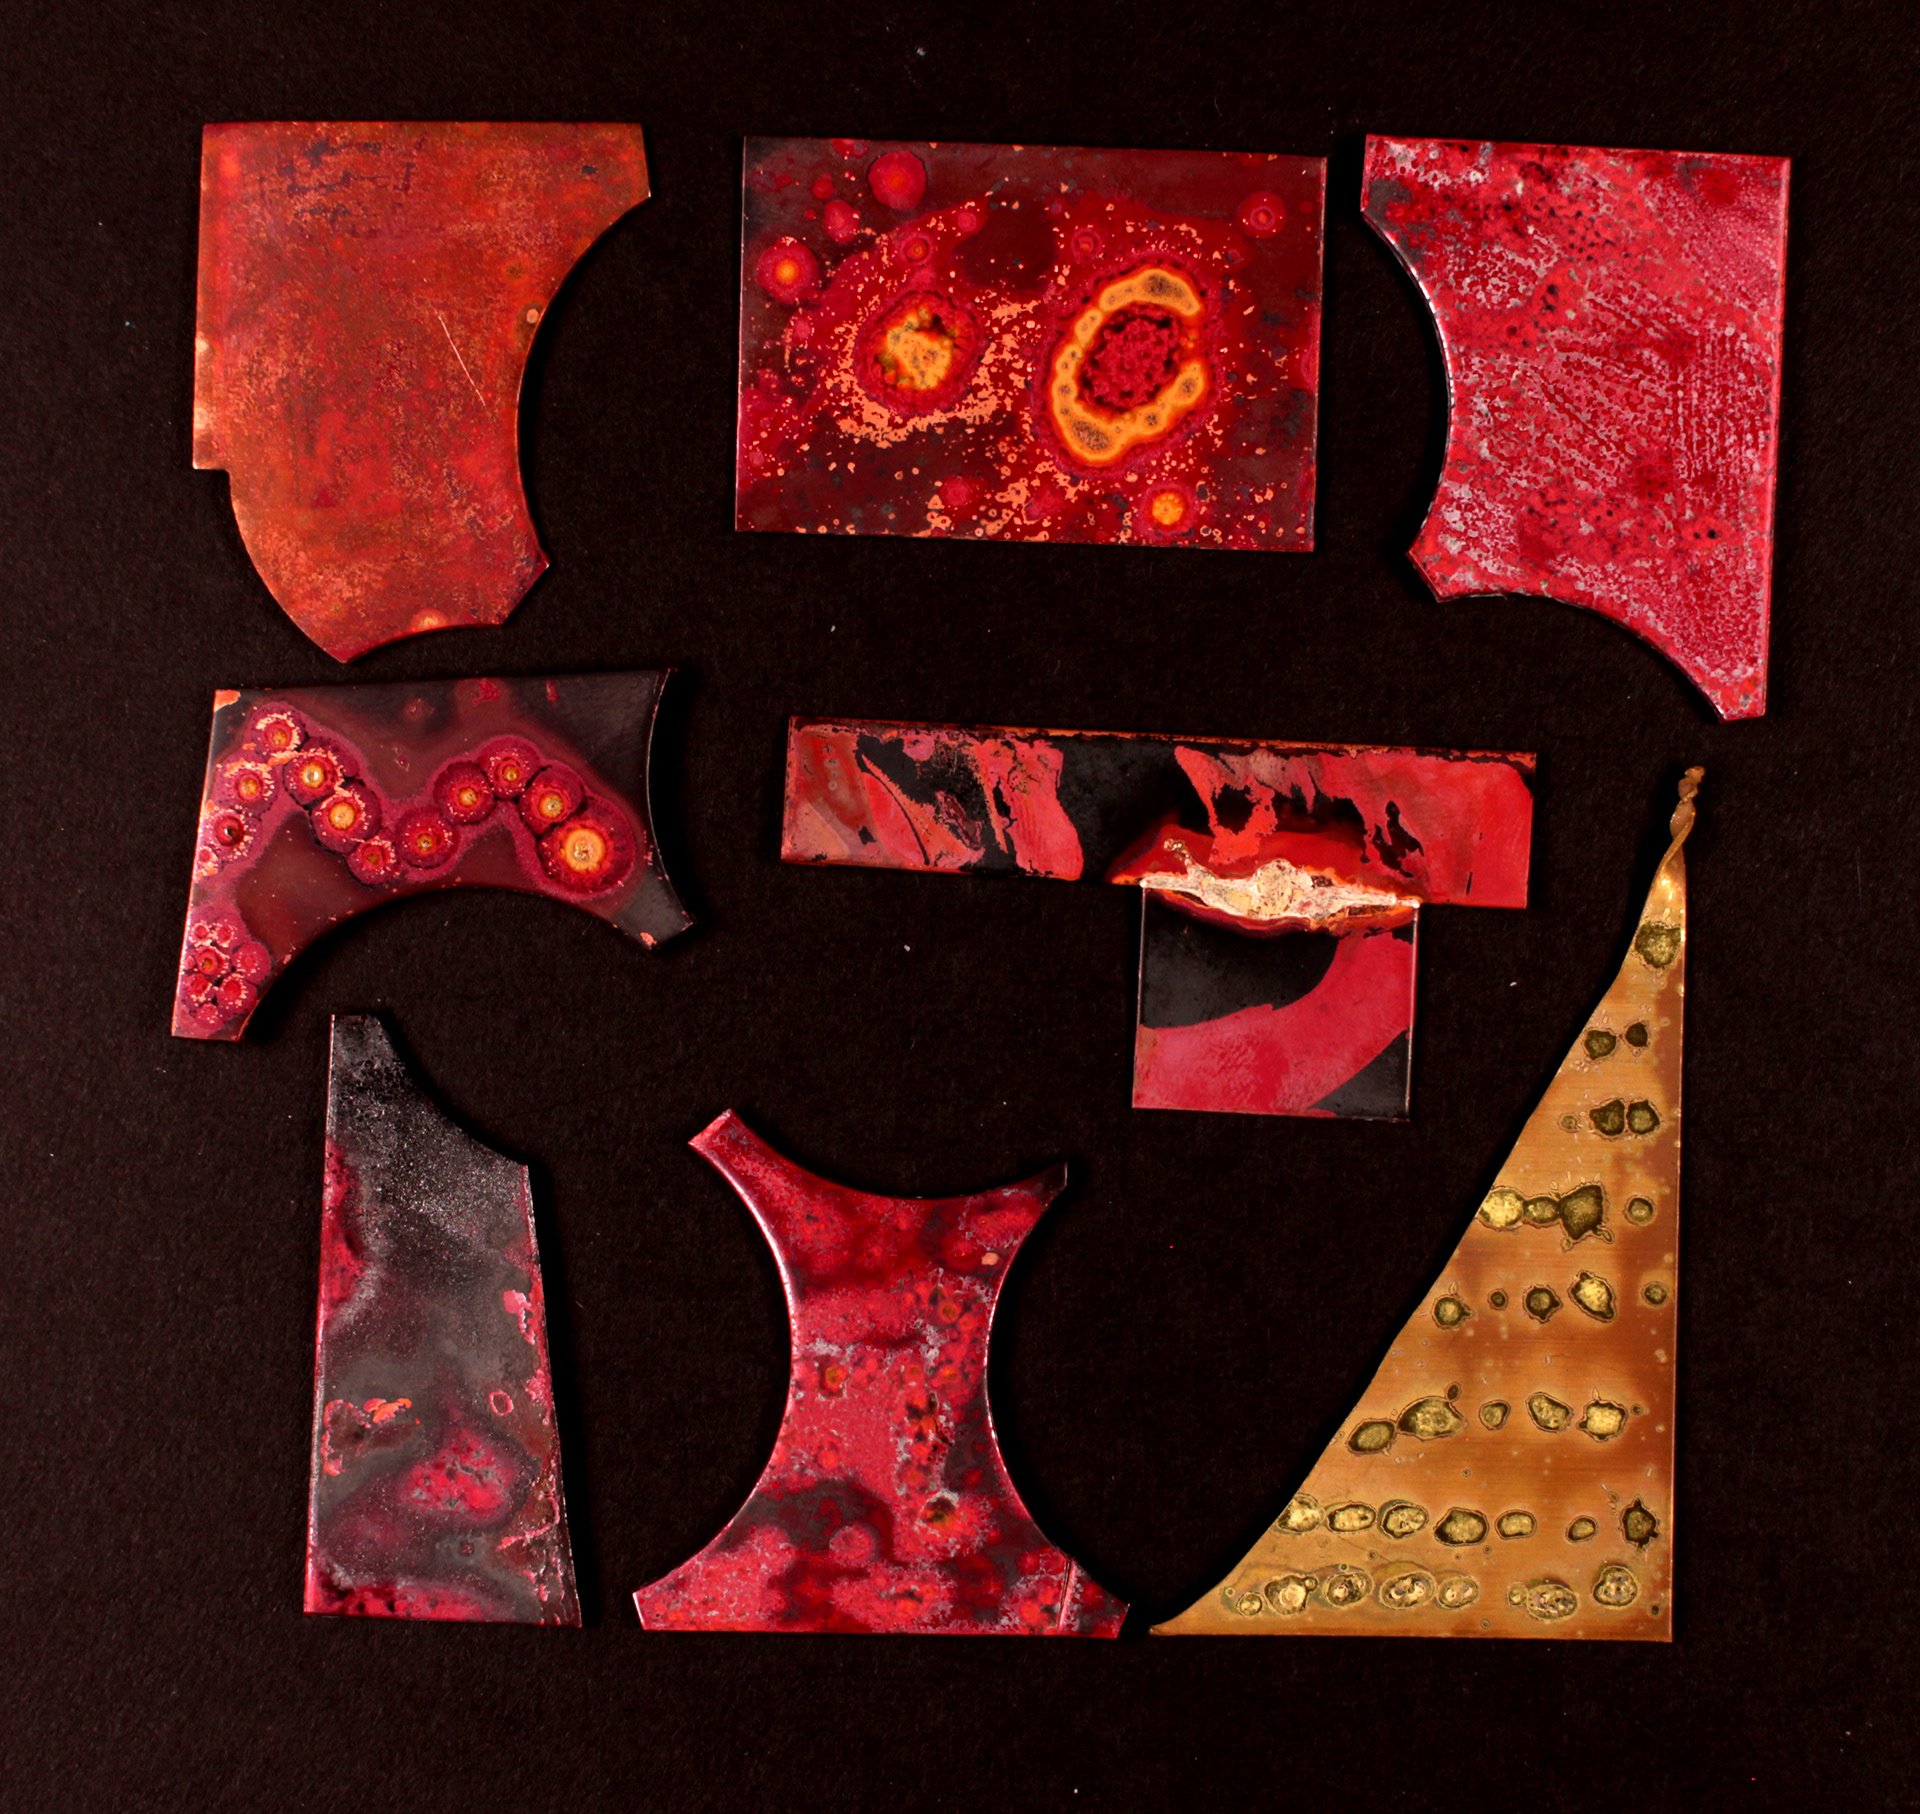
I loved the colours that came out of these tests and I also really liked how you could paint with the flux and carefully heat with a flame to make patterns.
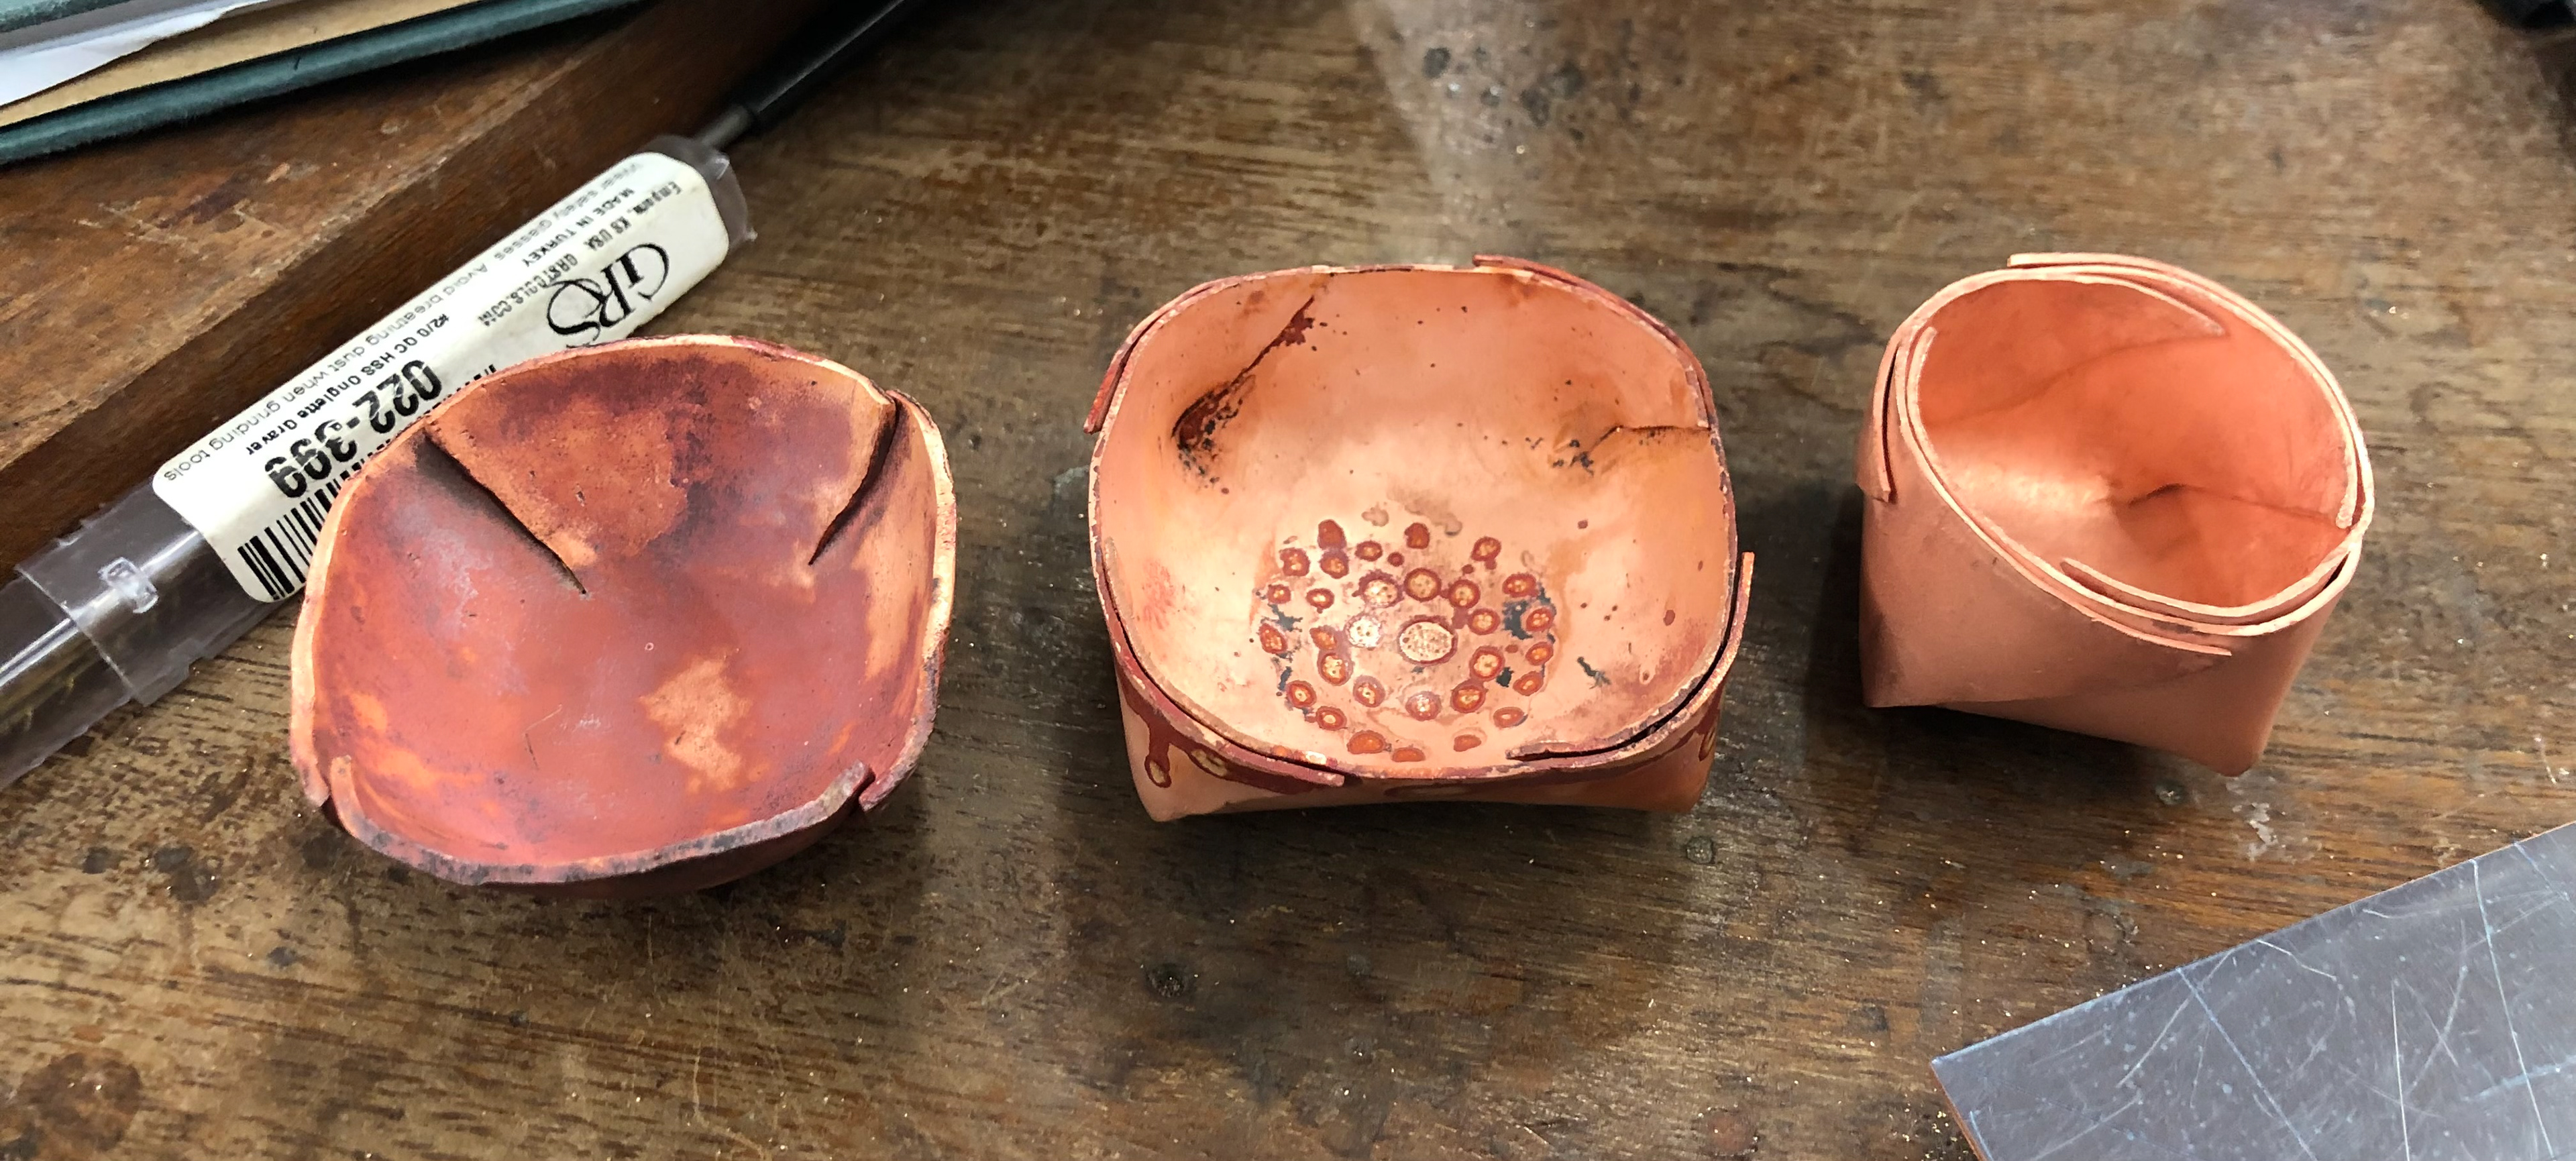
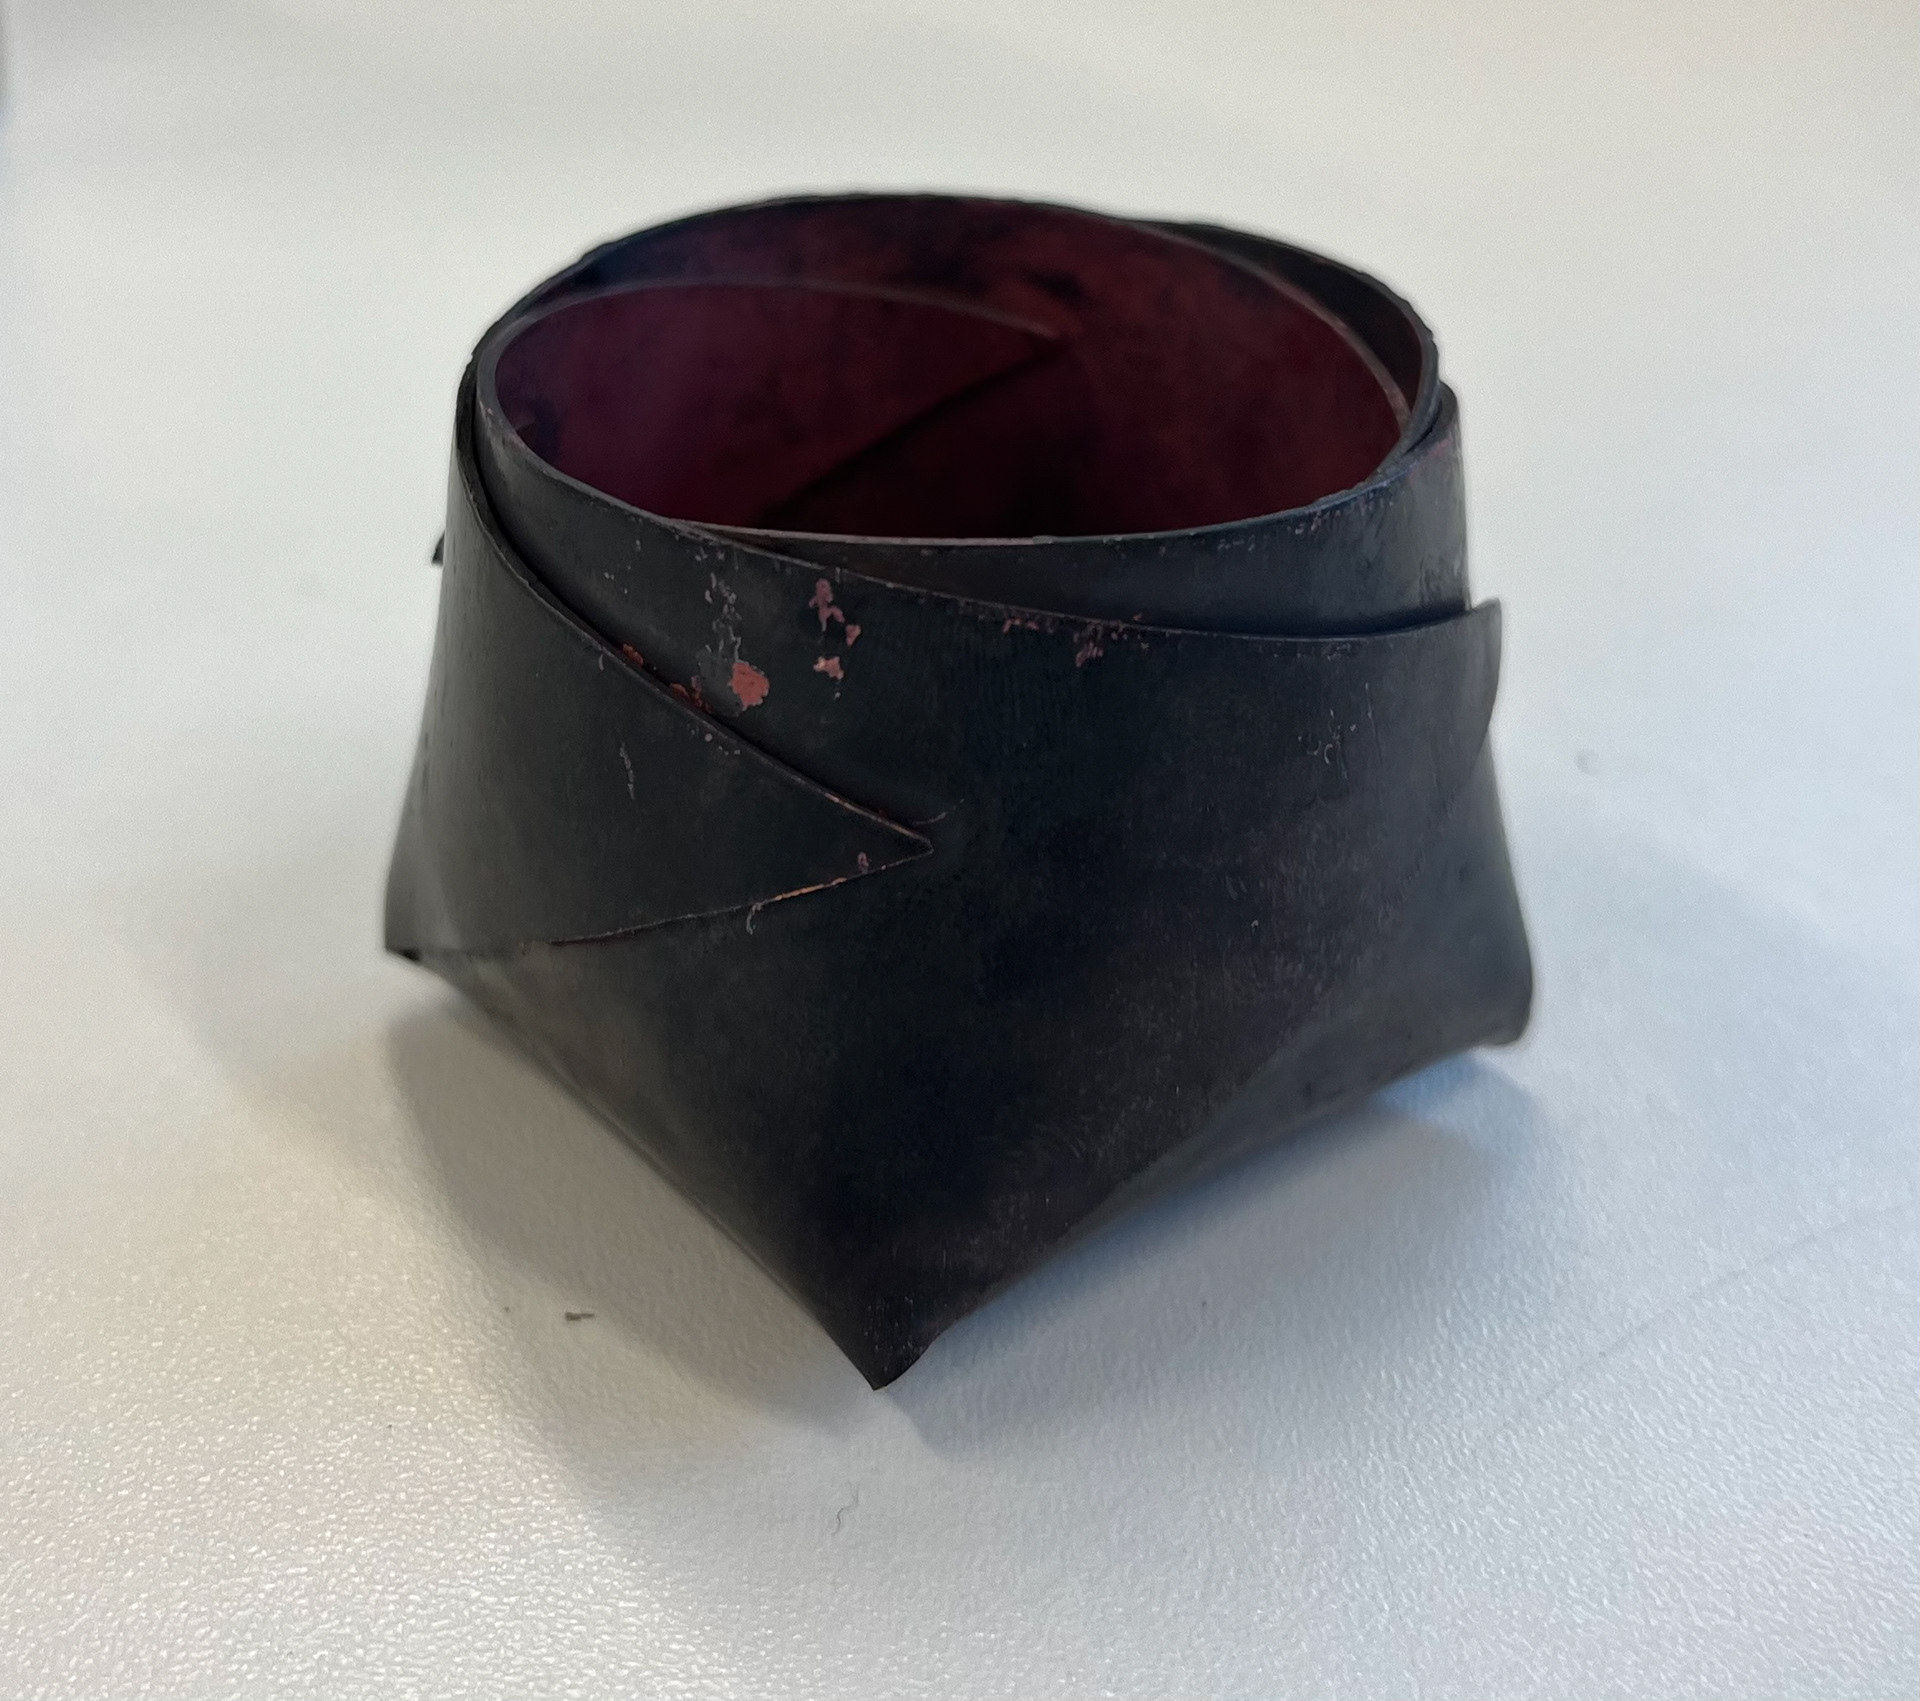
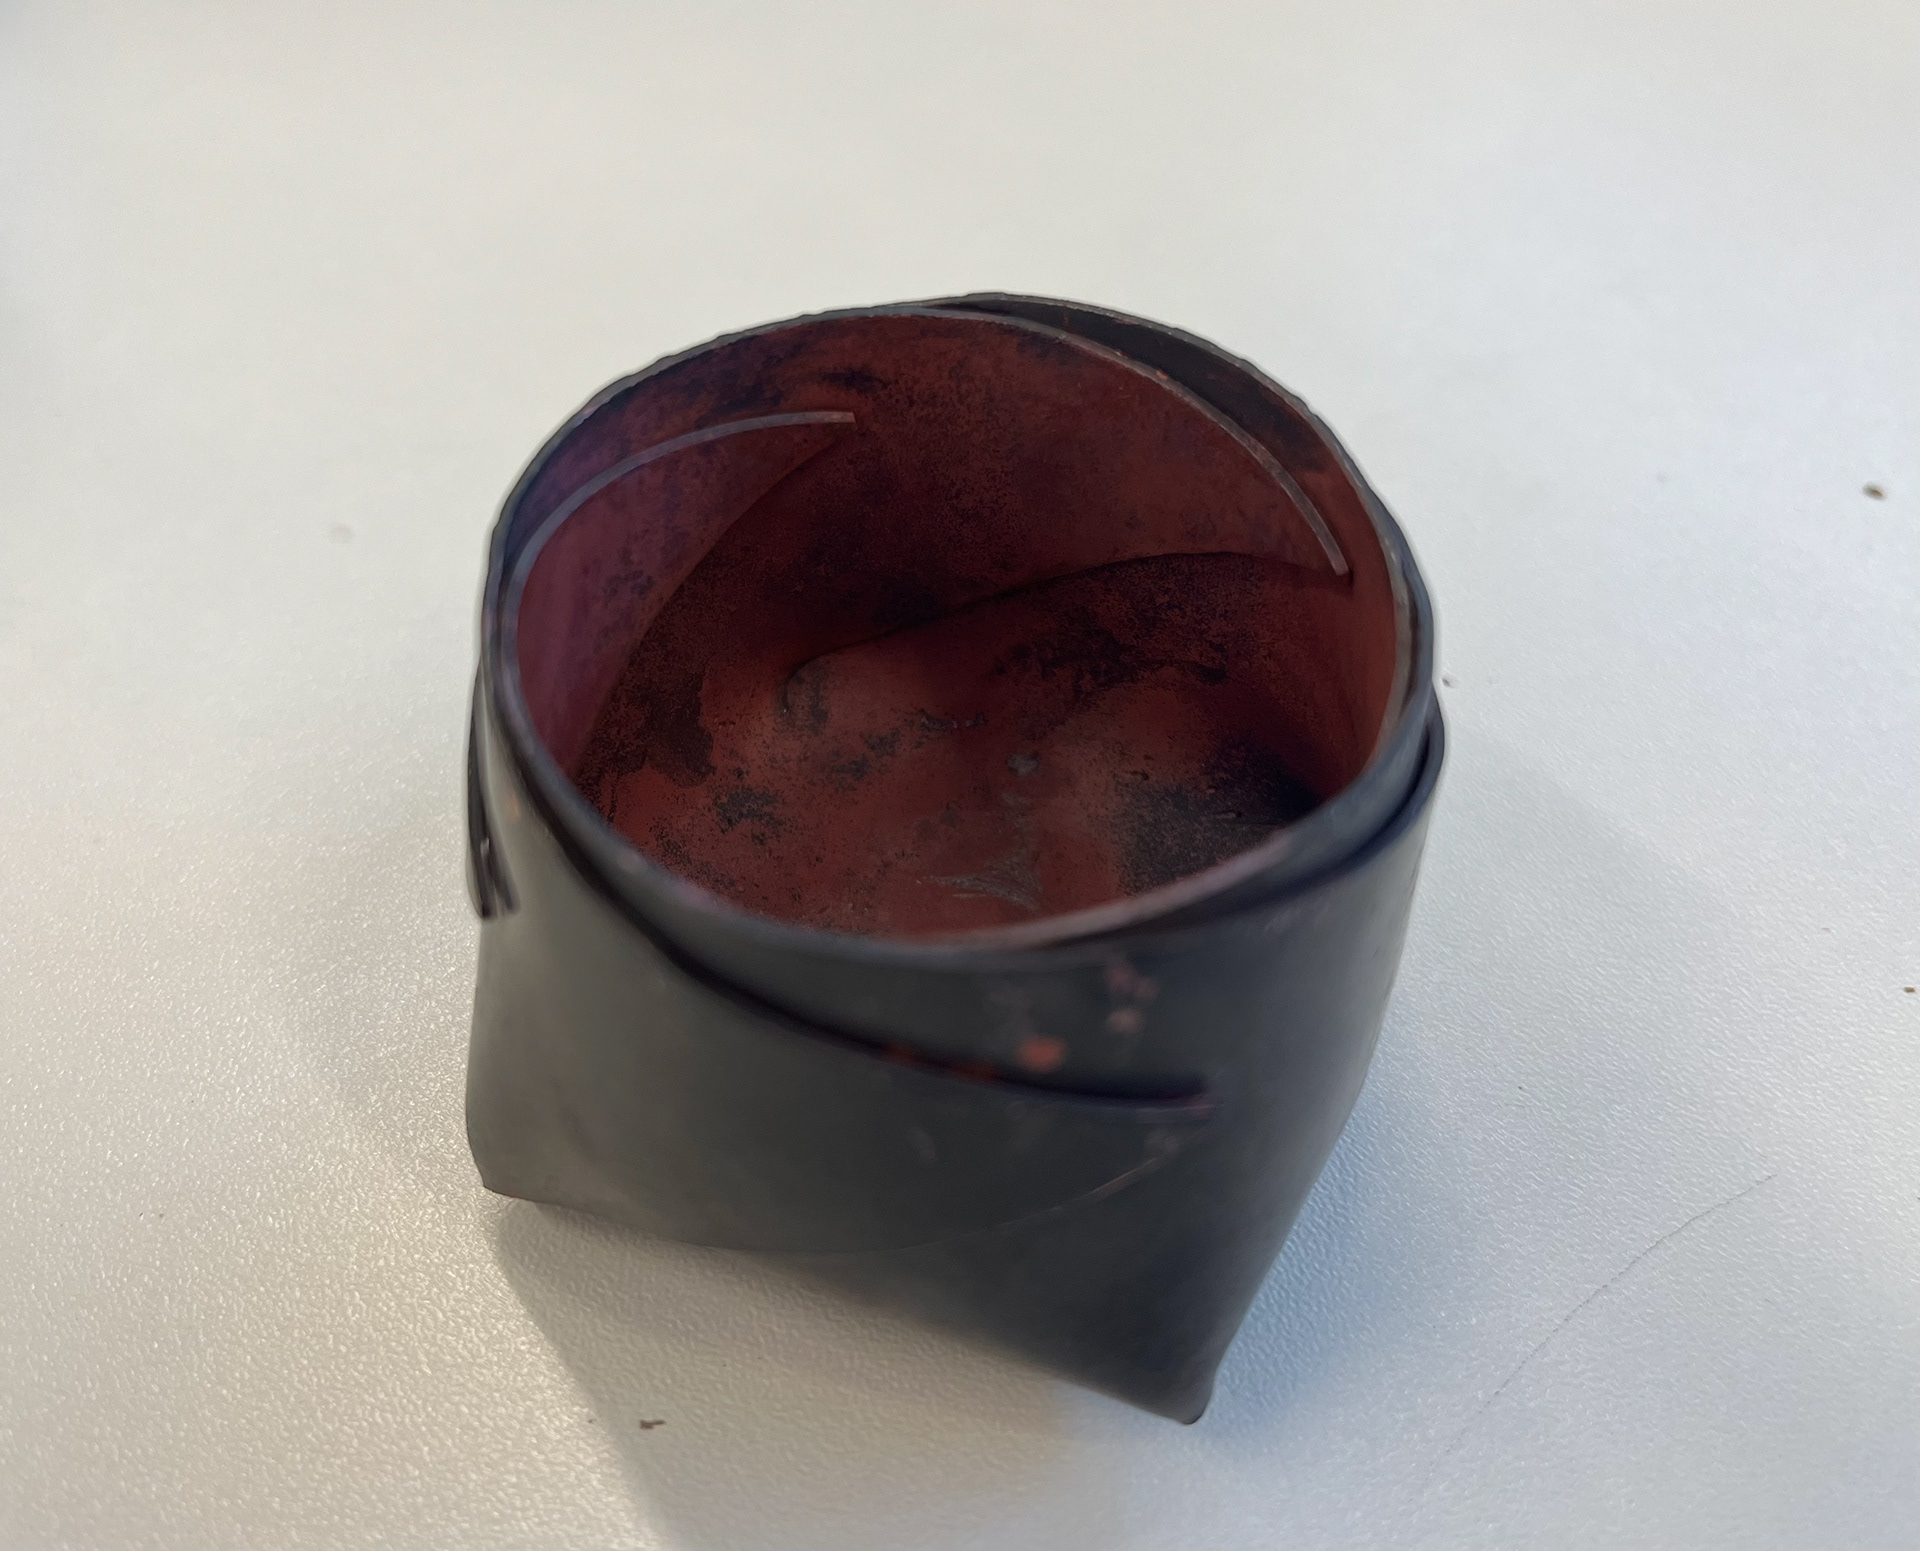
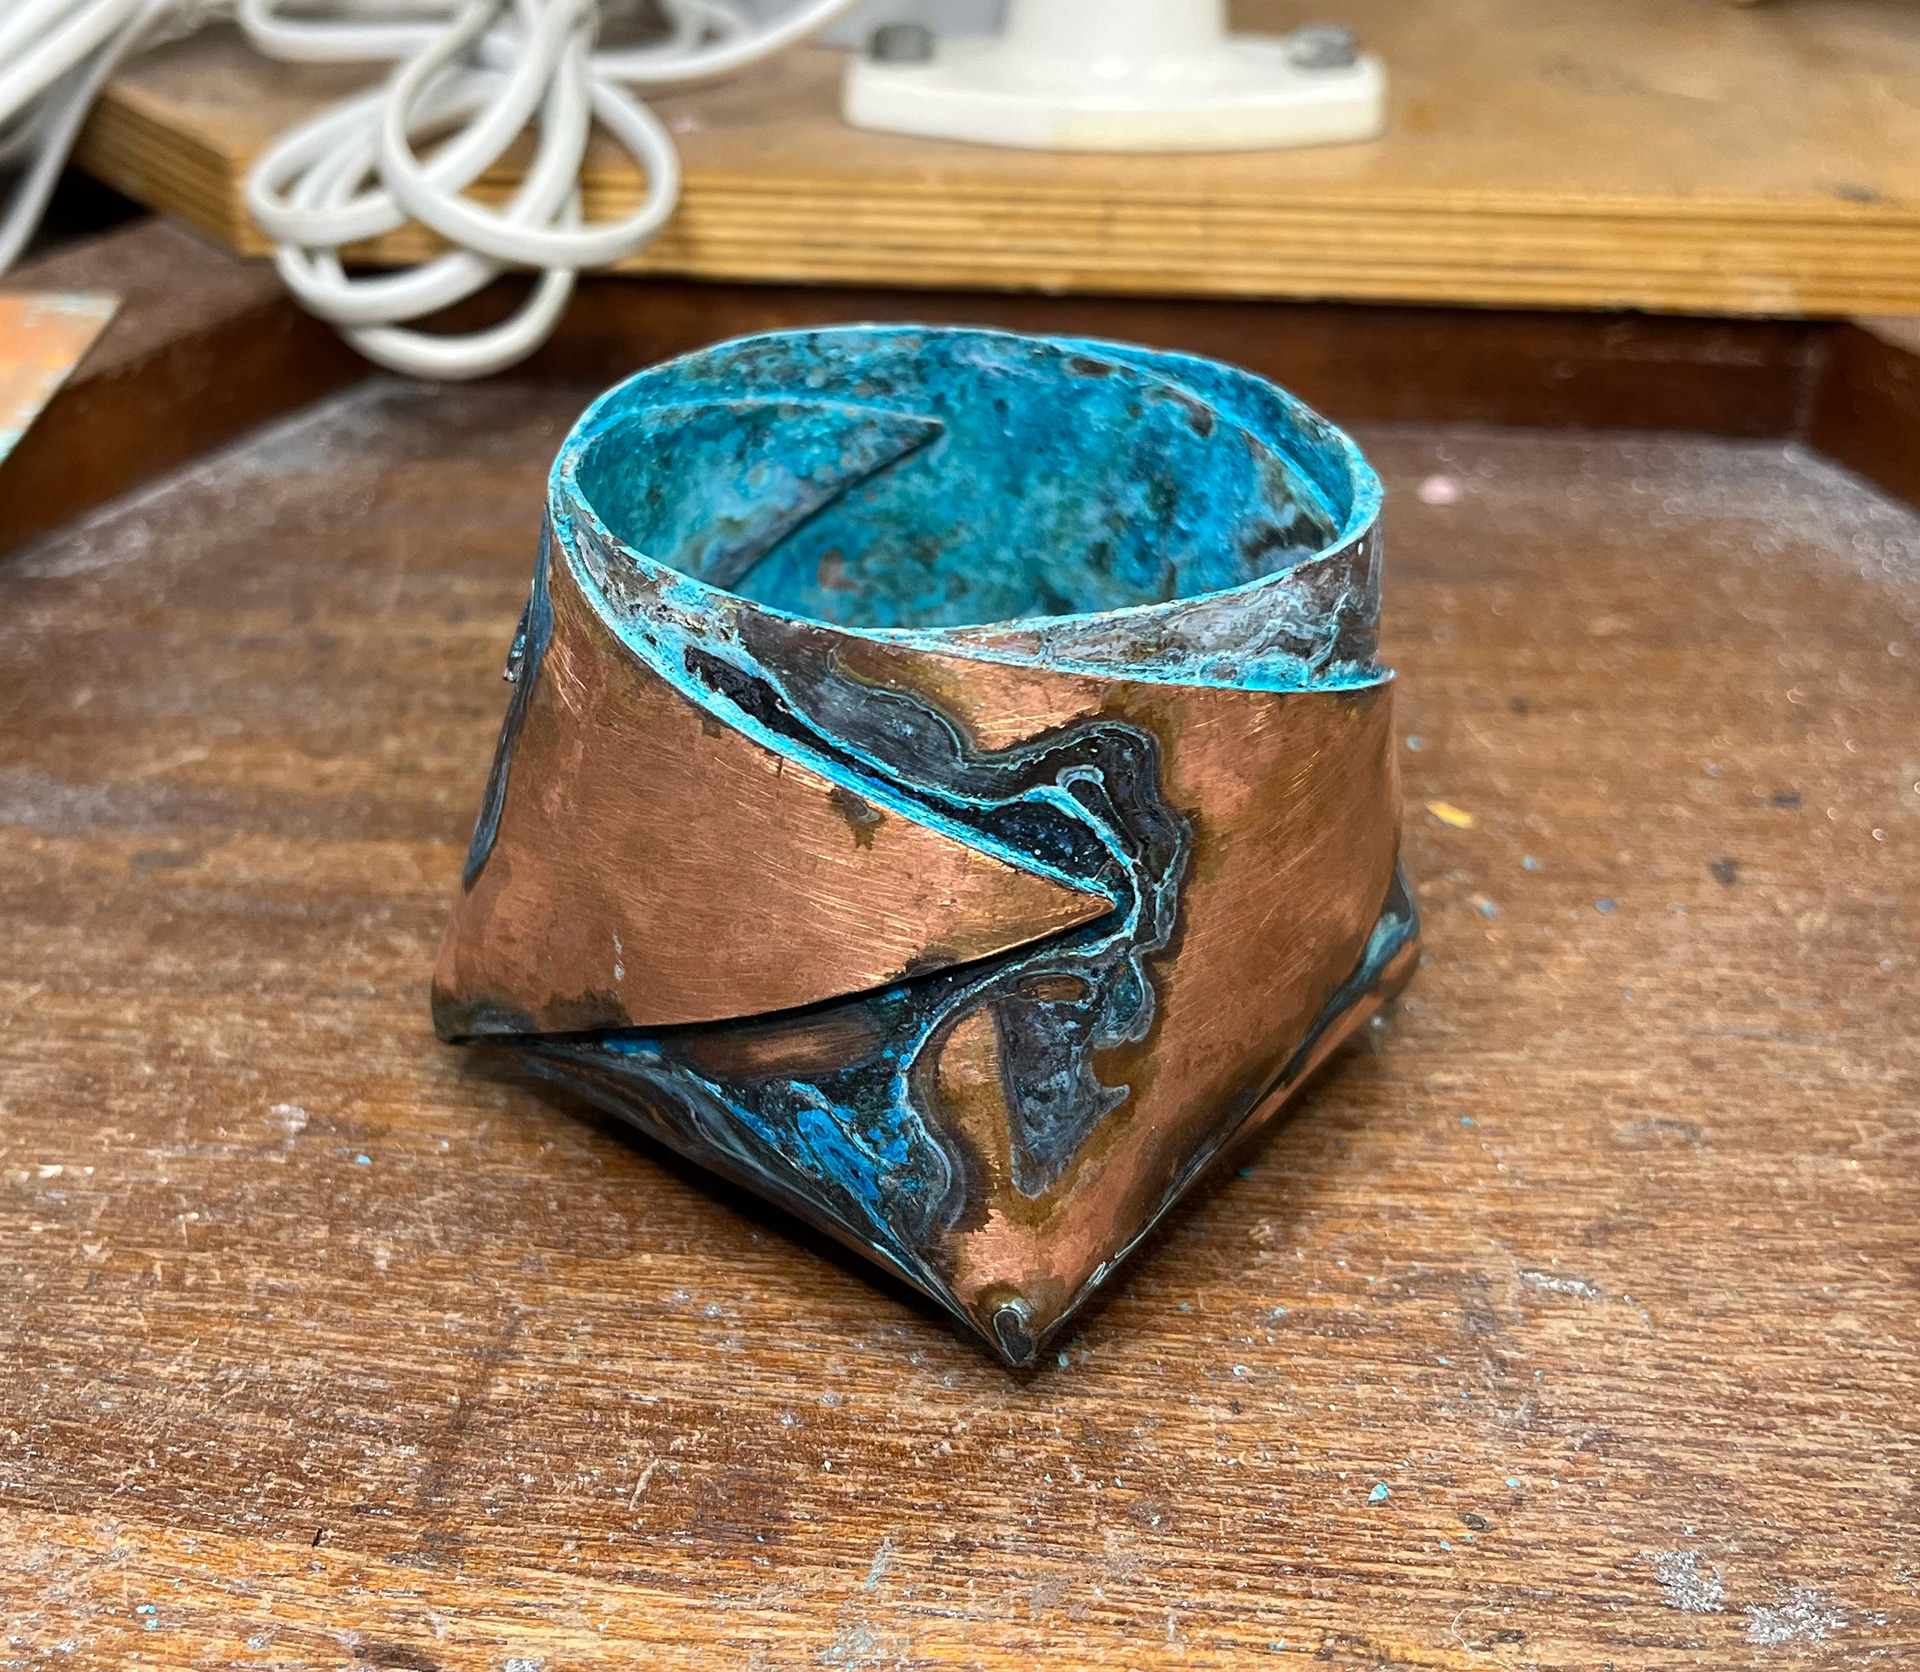
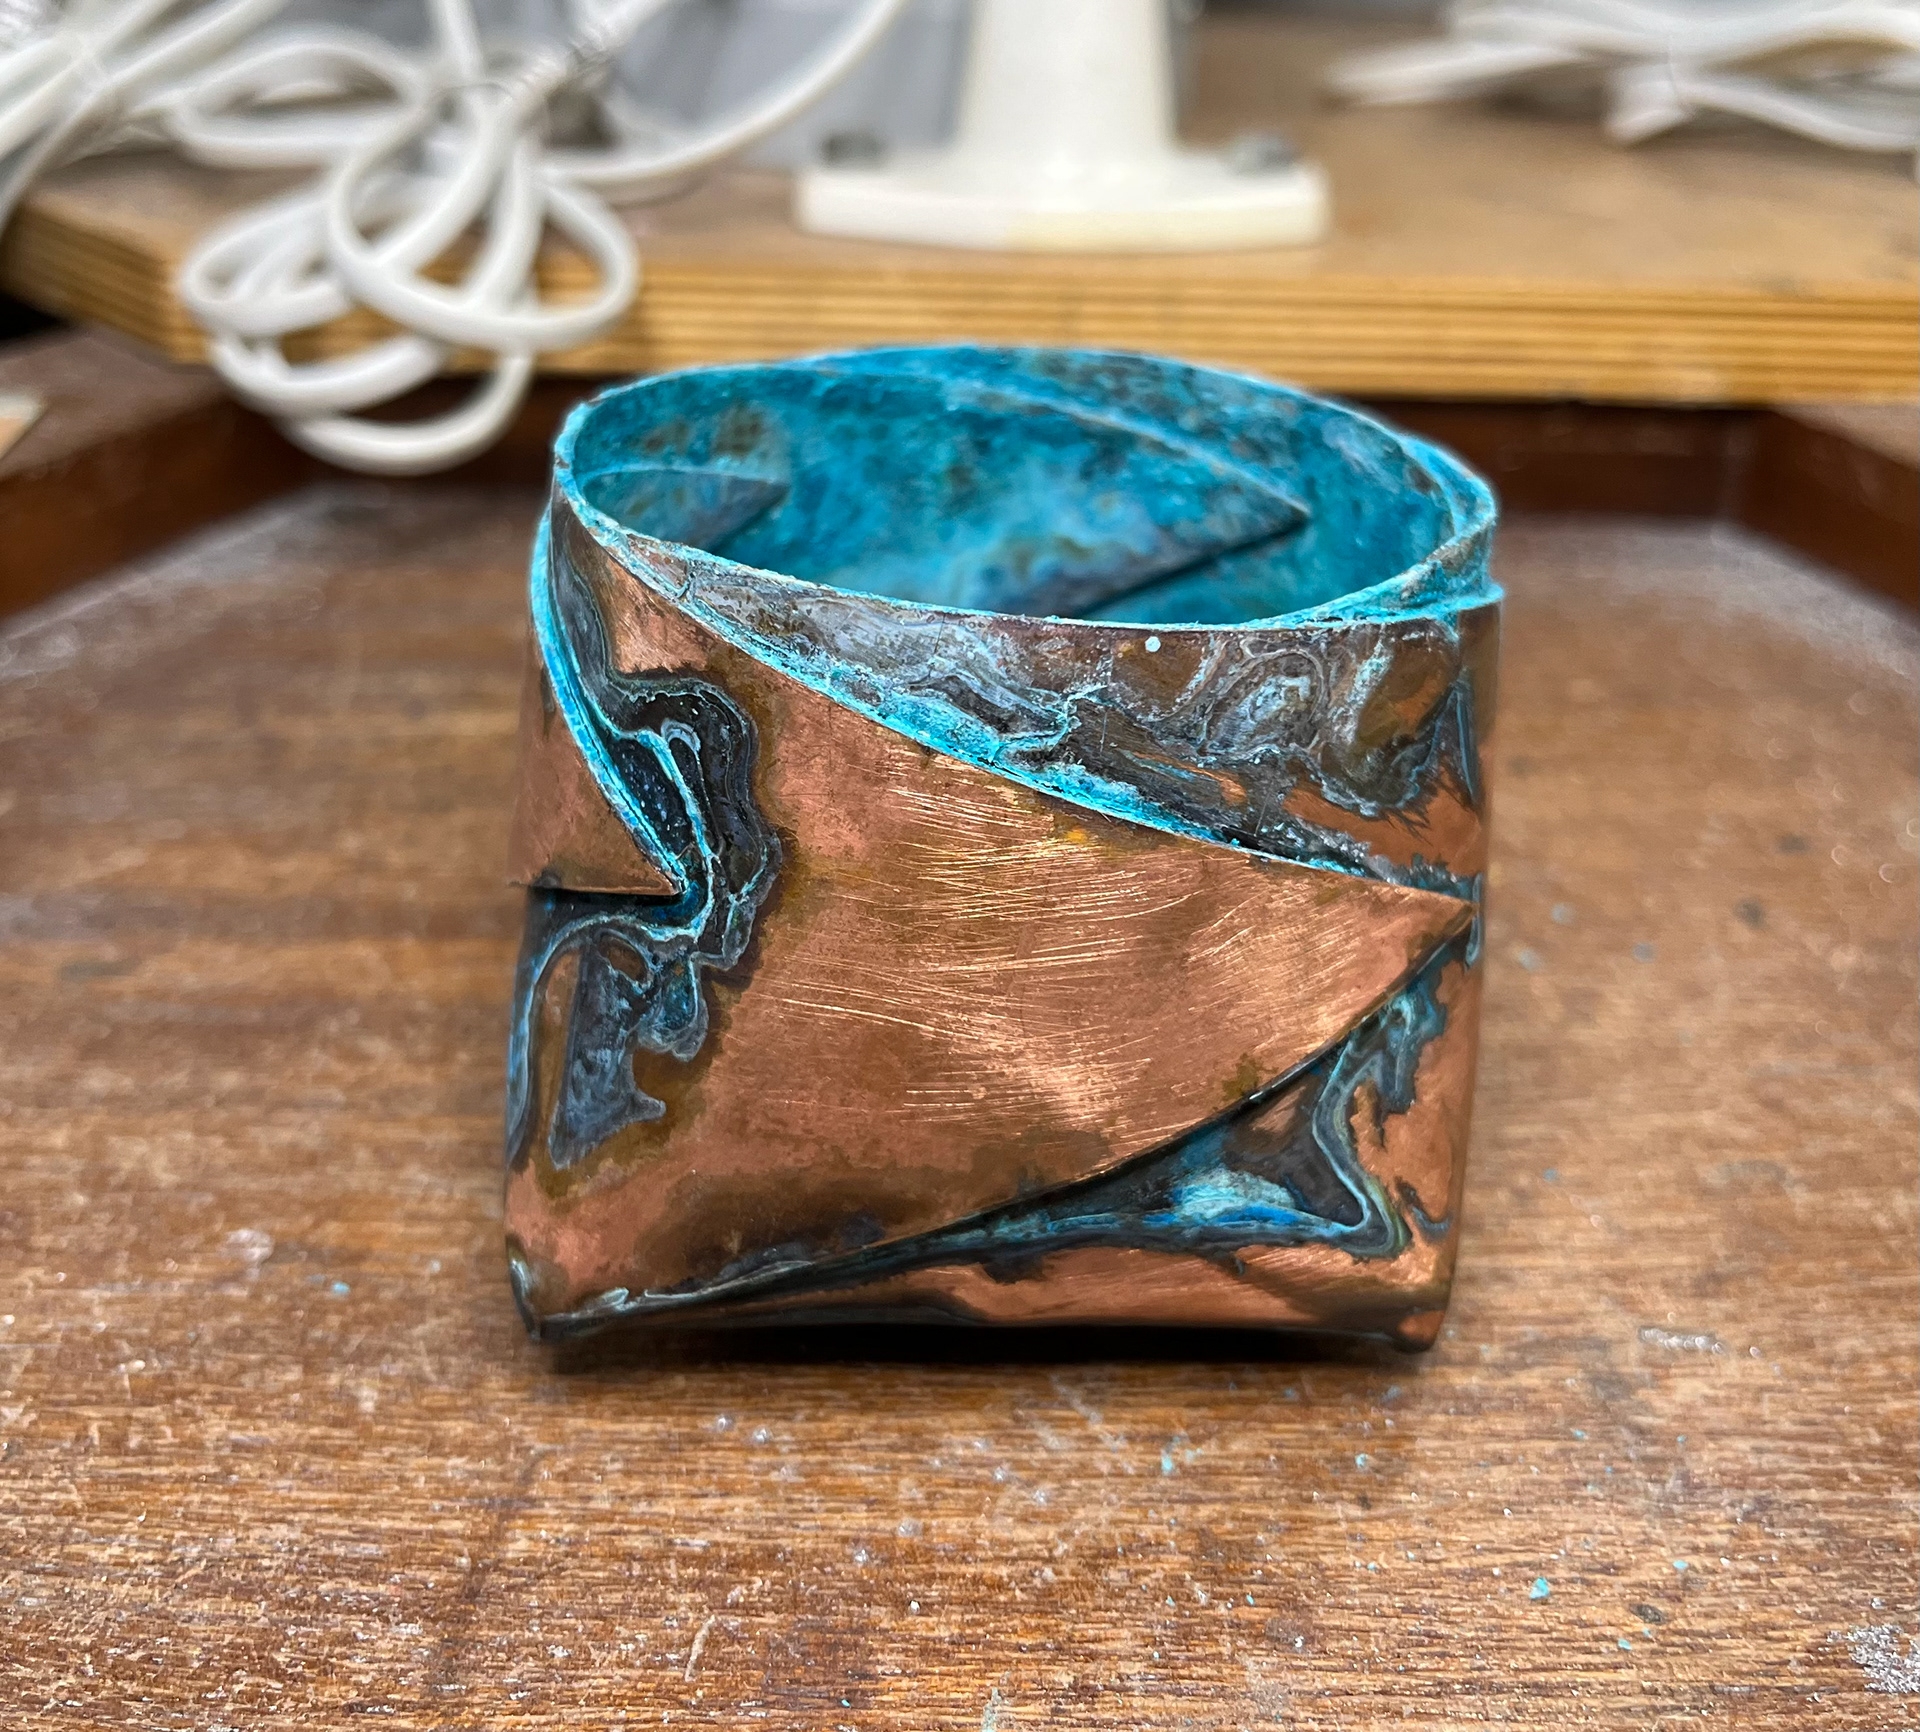
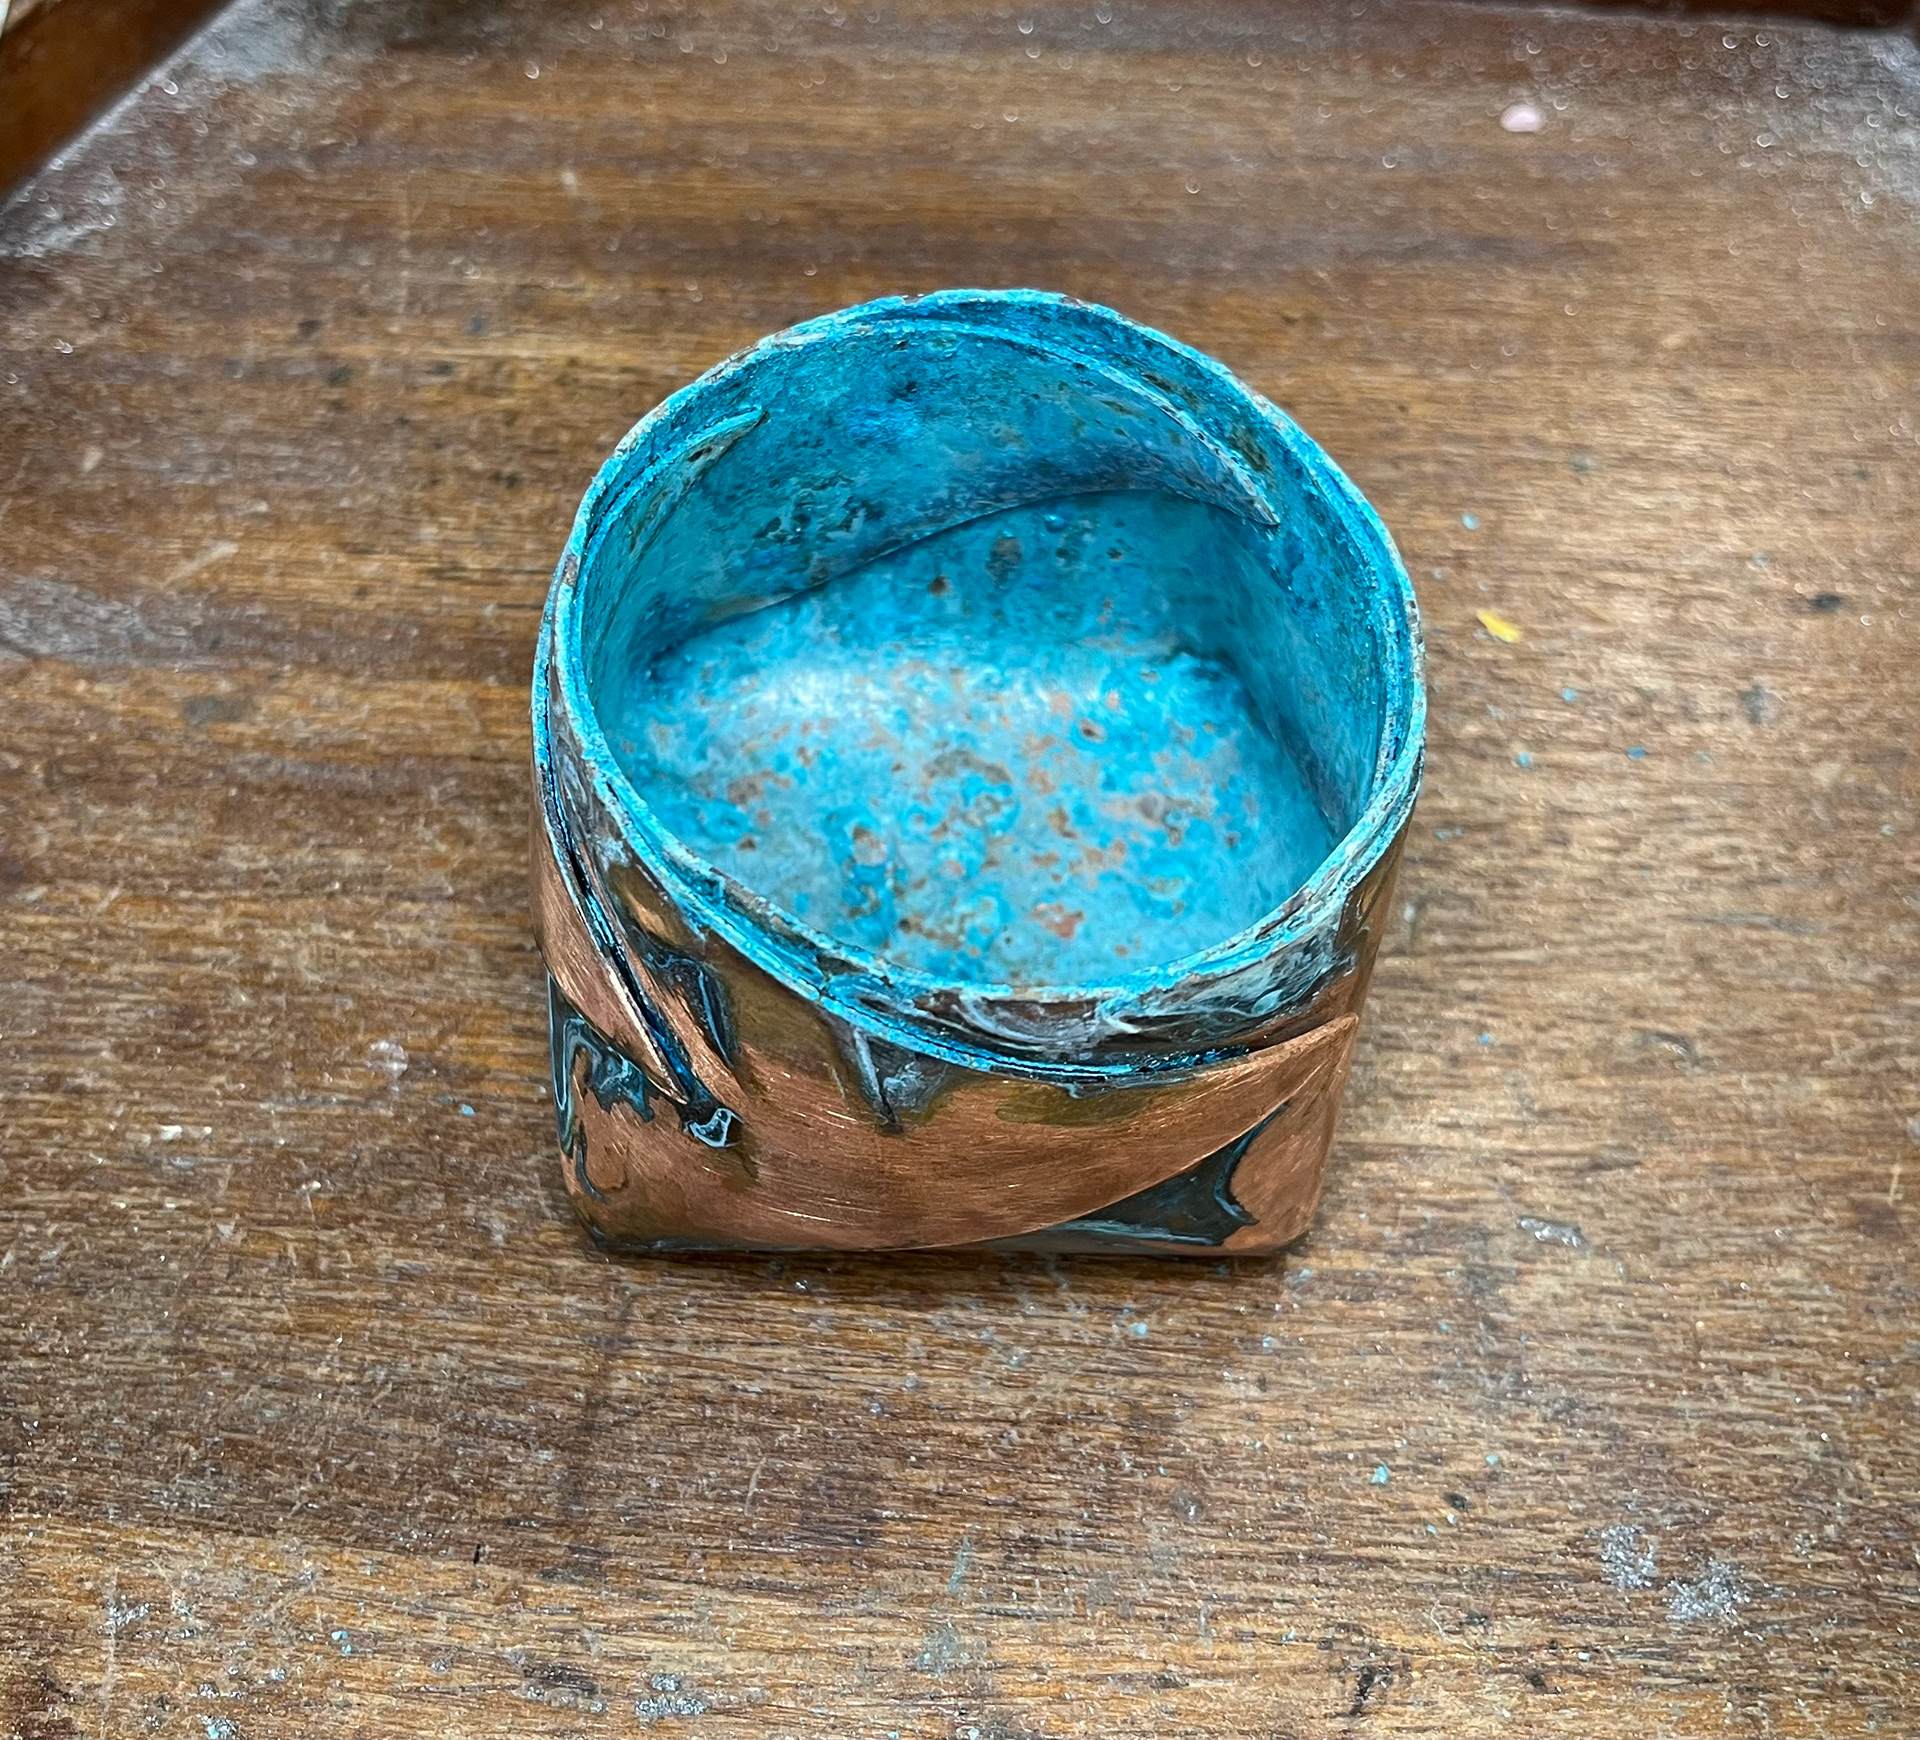
Bellow are images of 3 bowls with 3 different patinas representing 3 different countries.
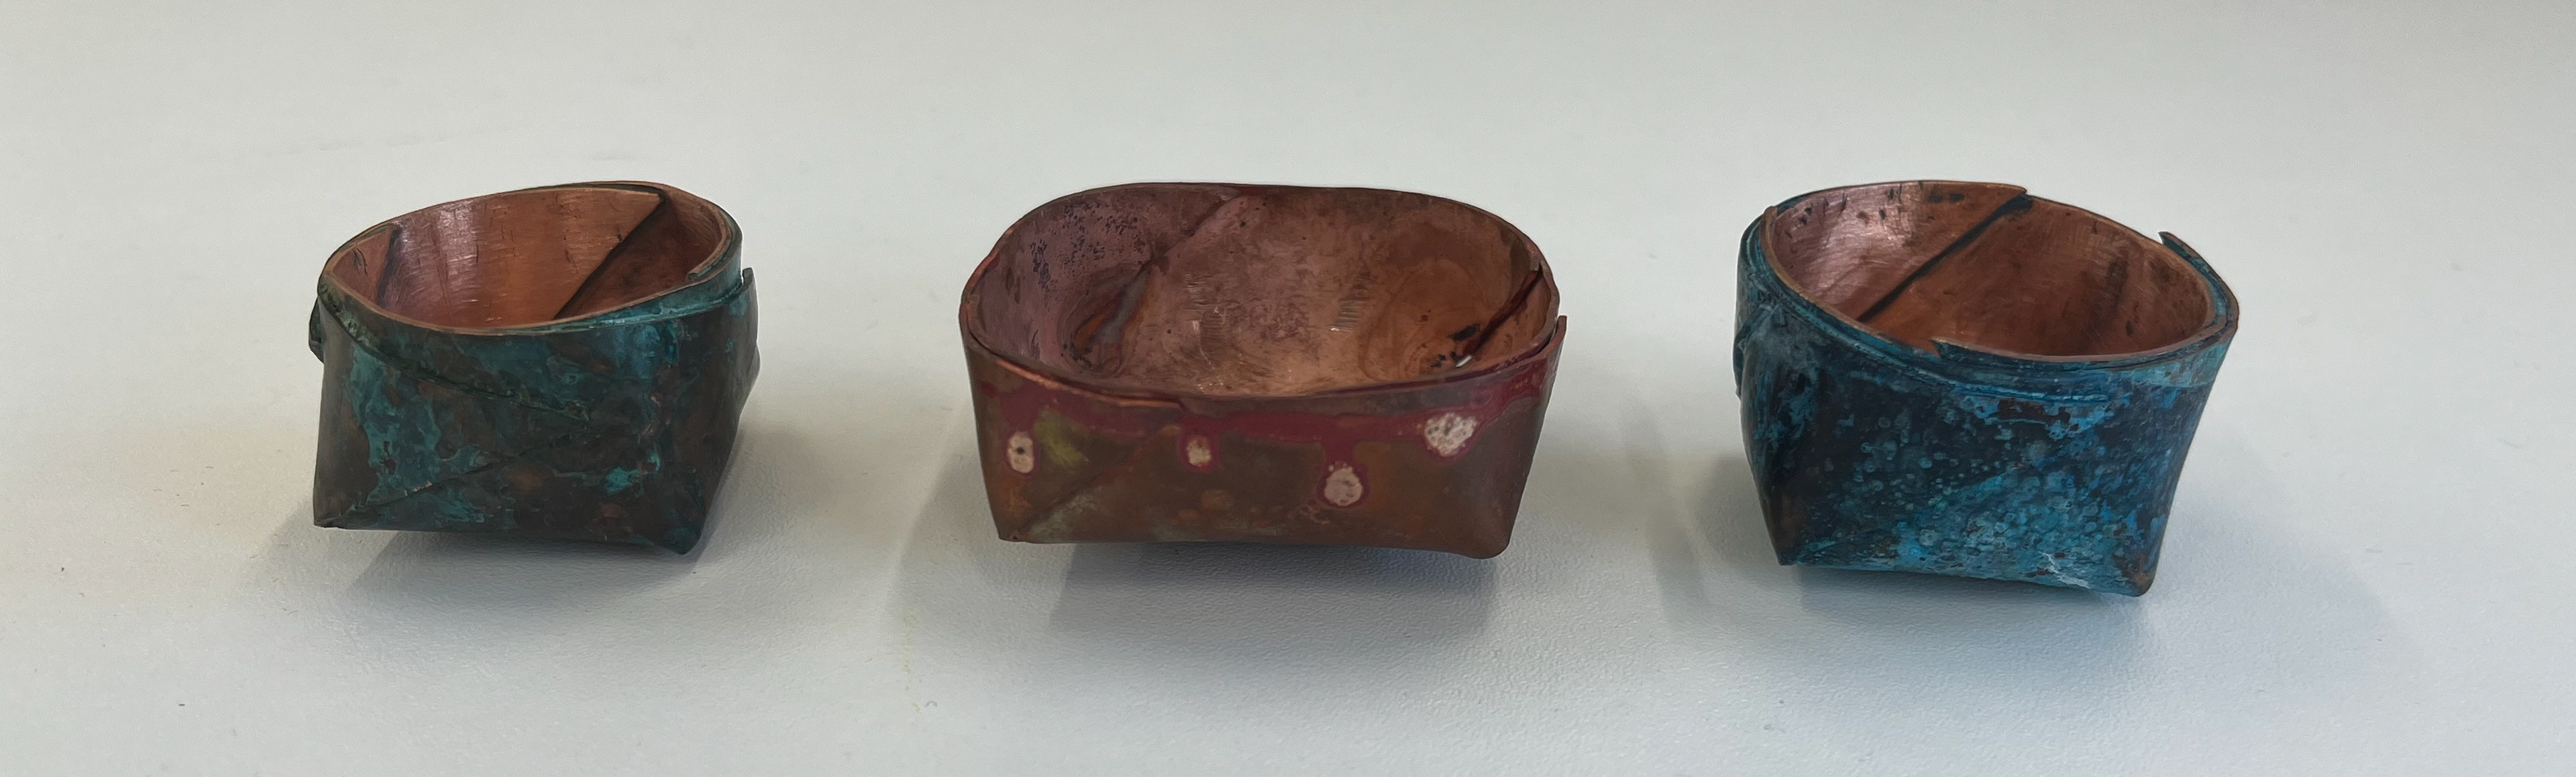
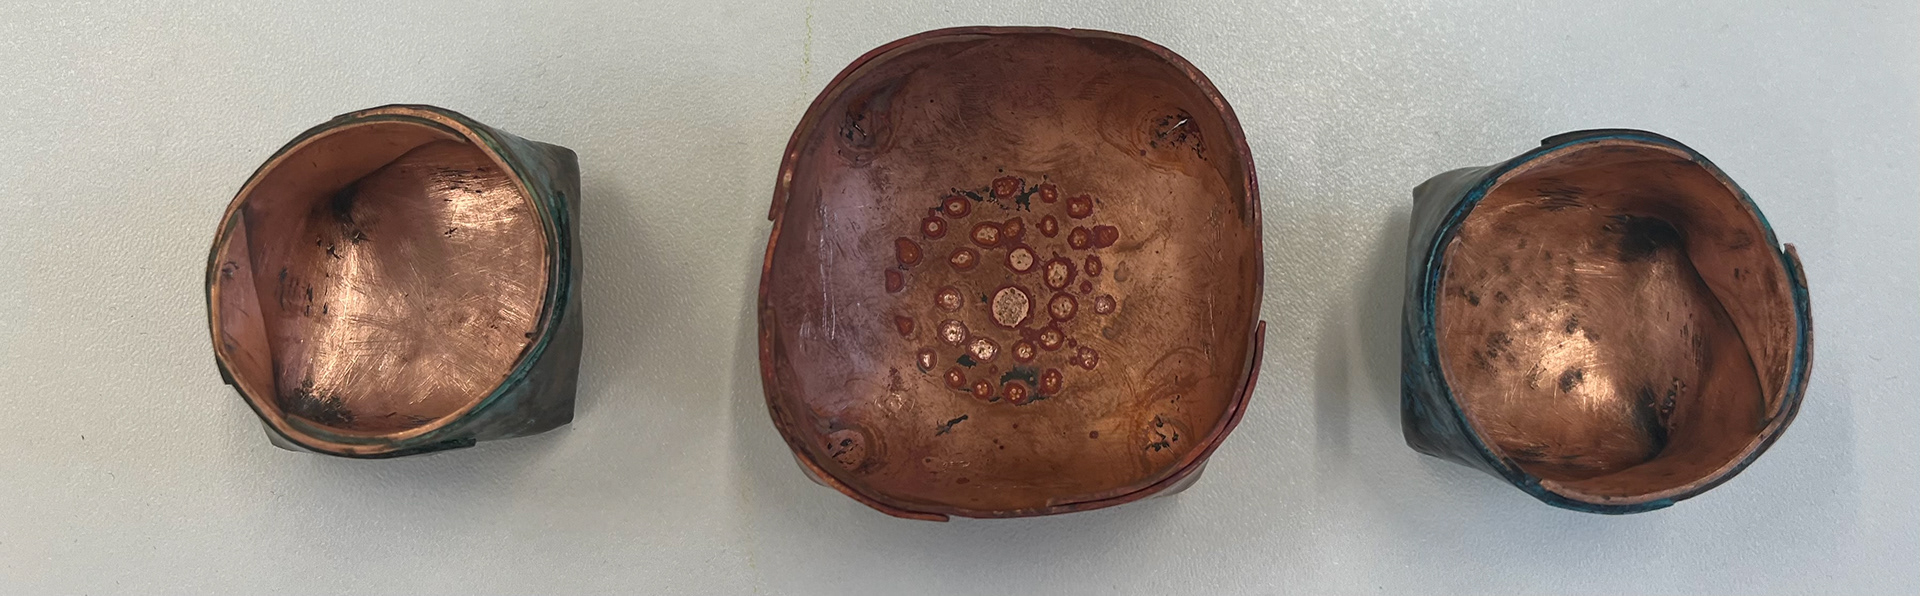
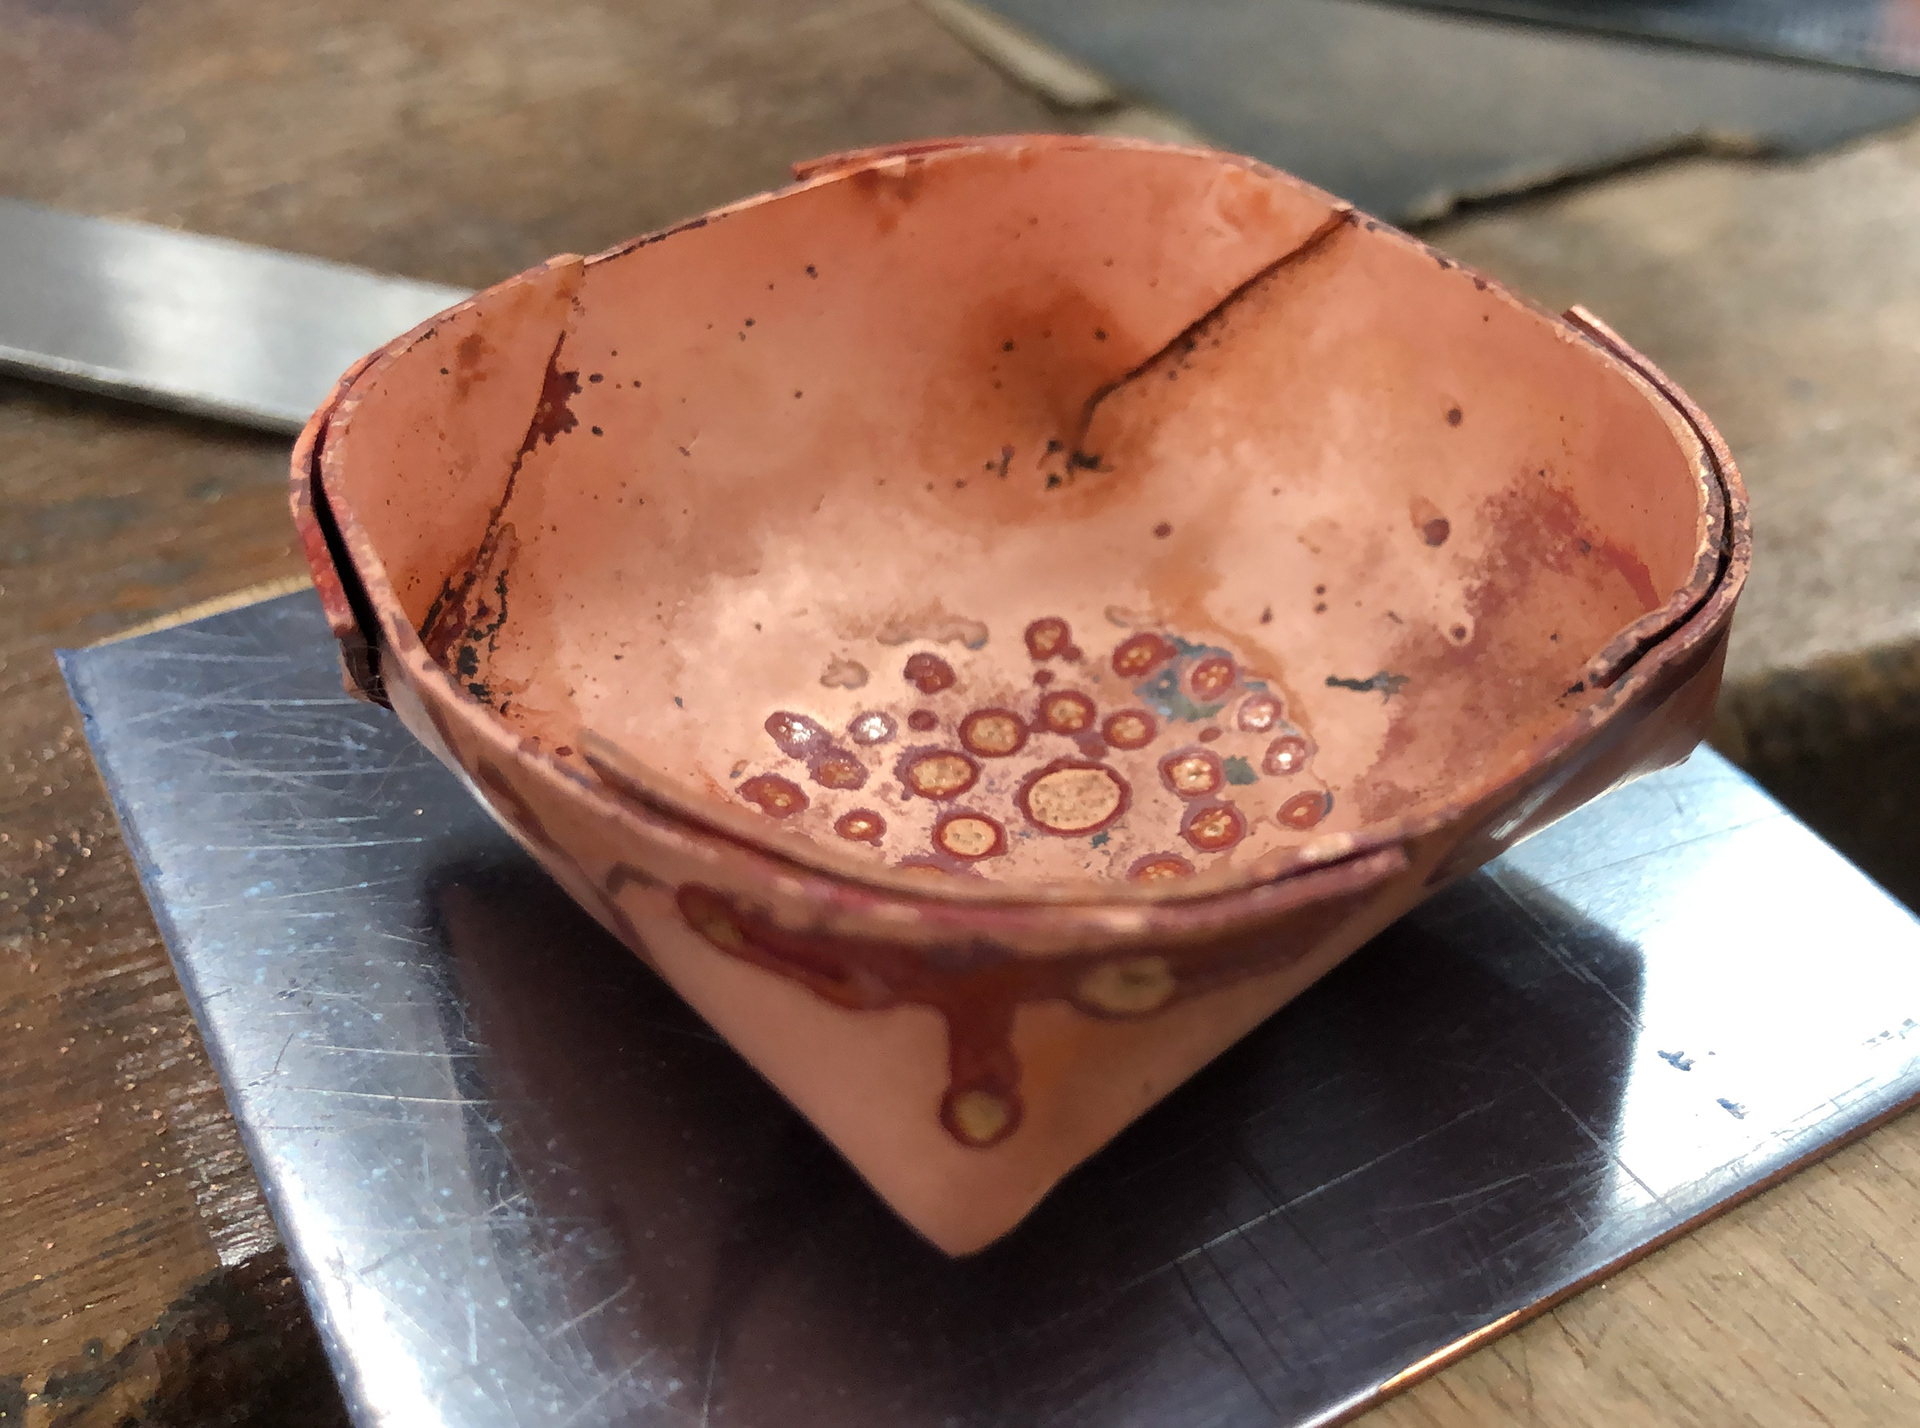
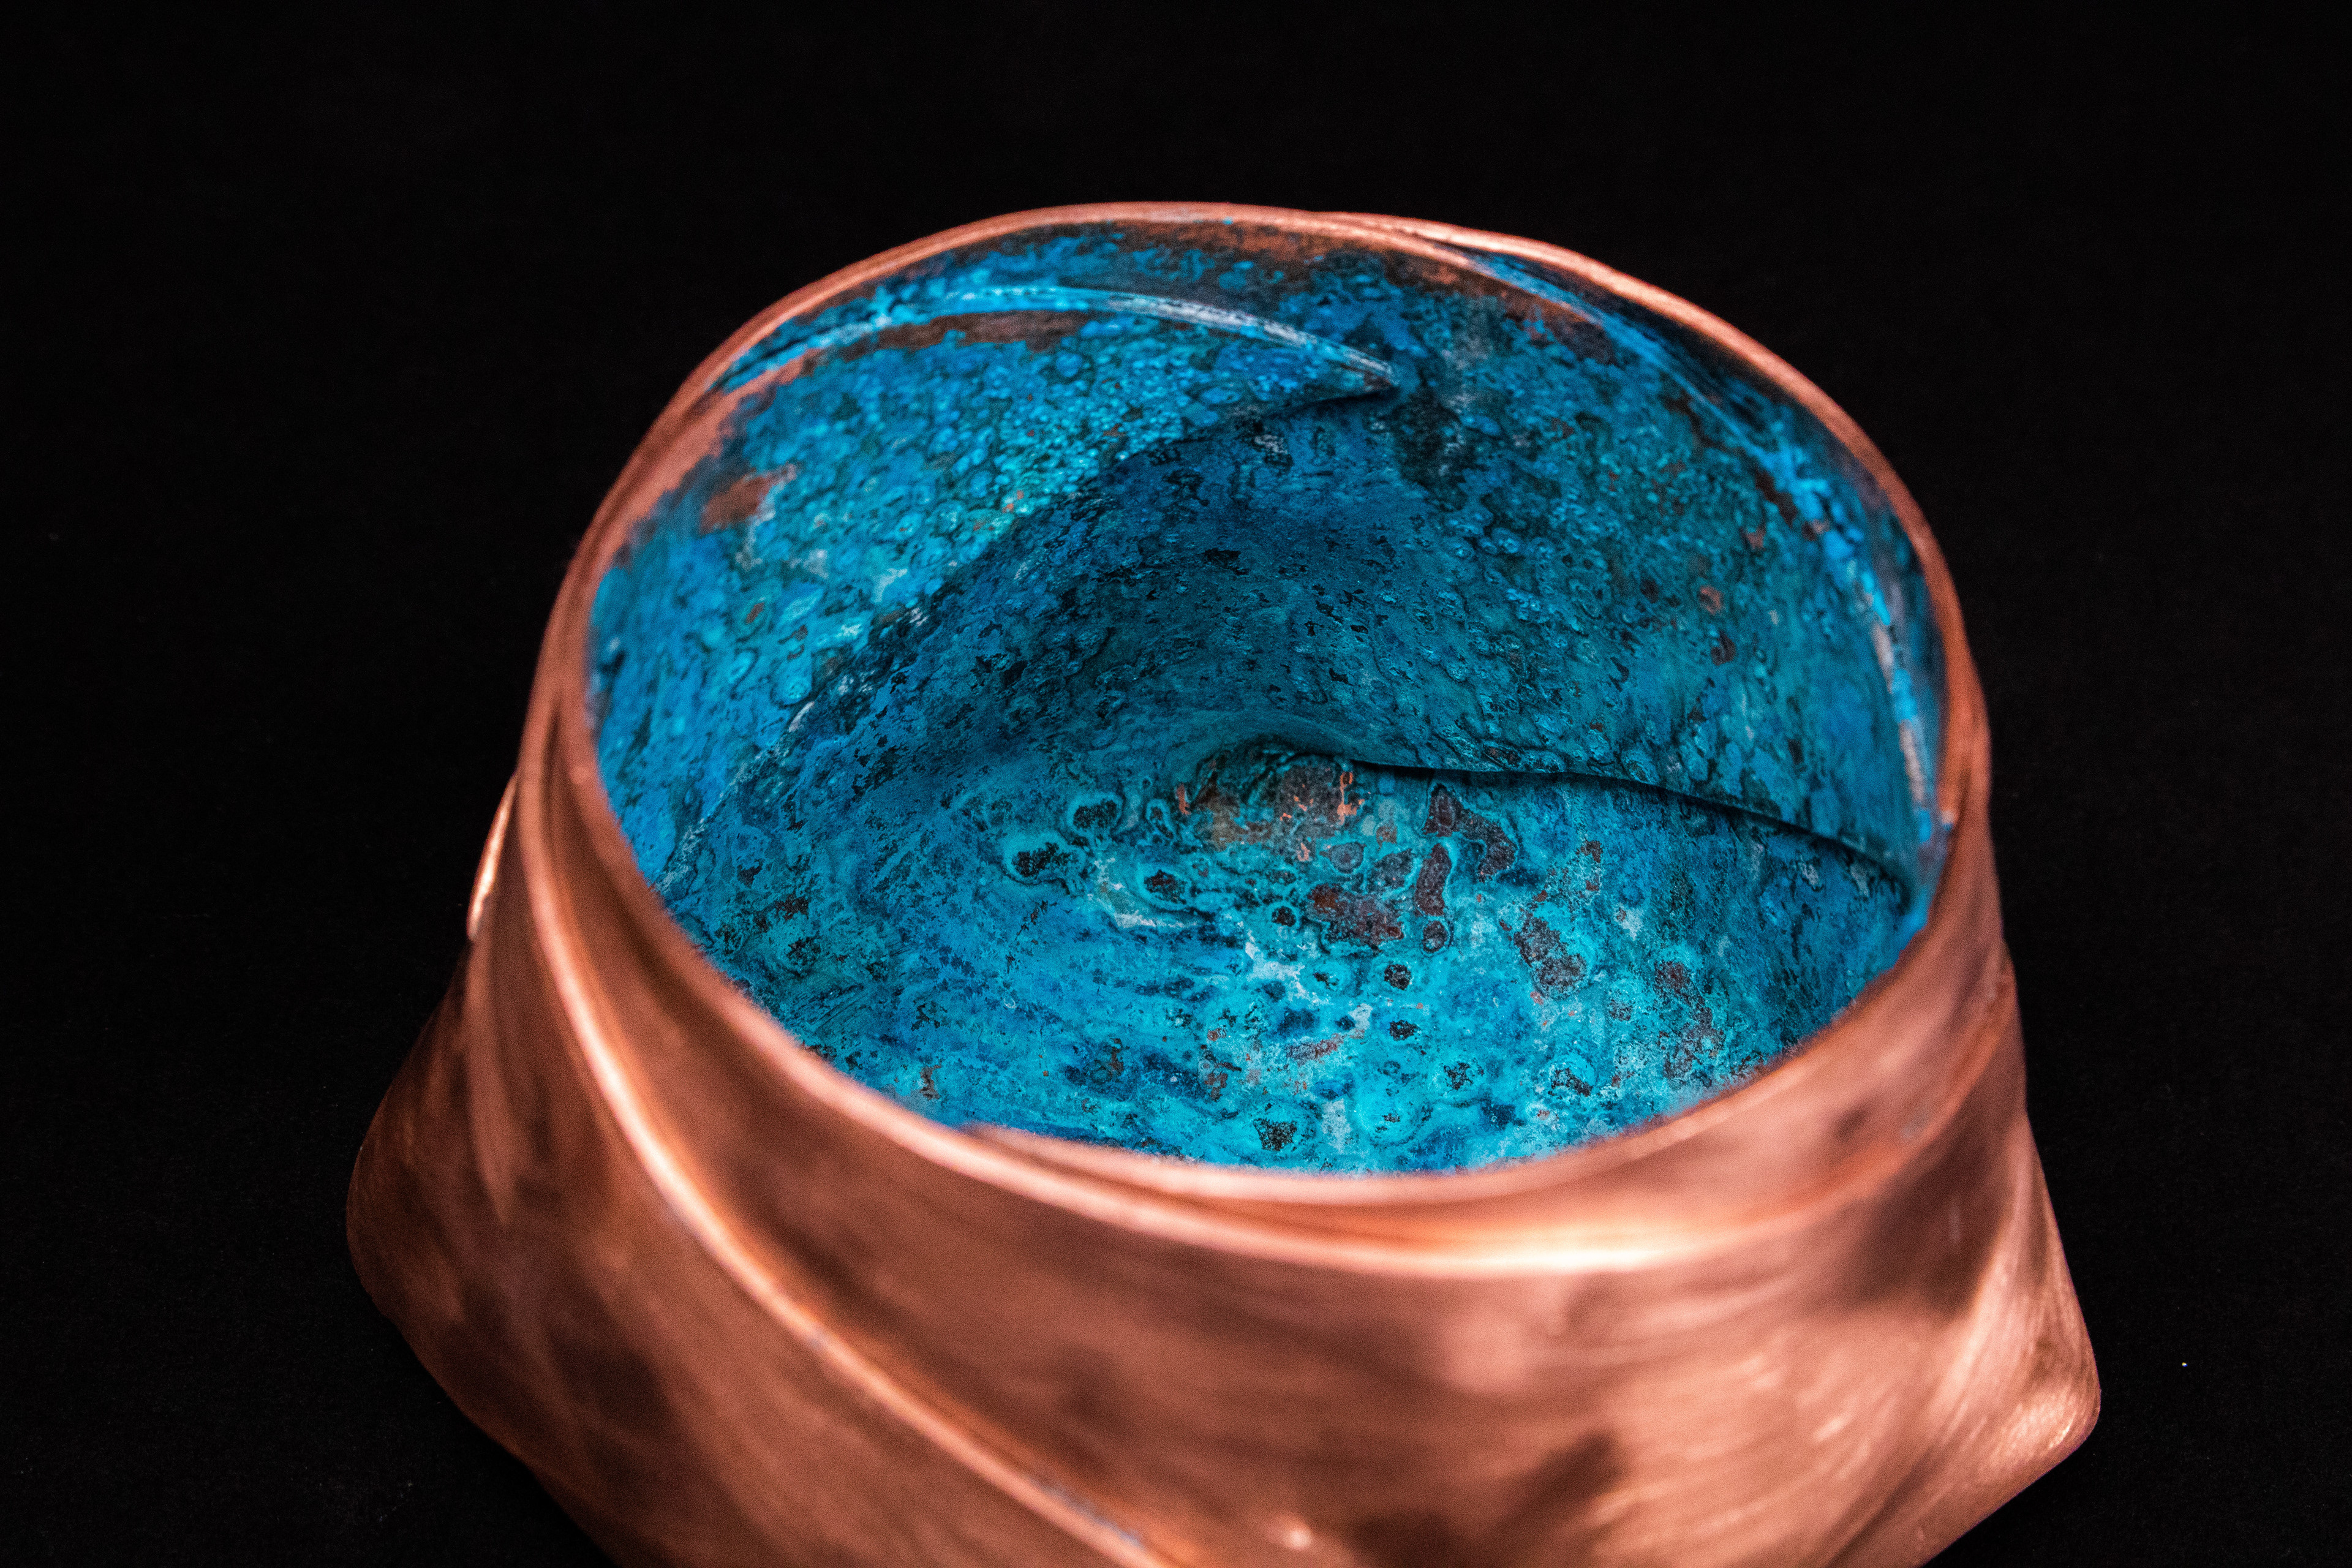
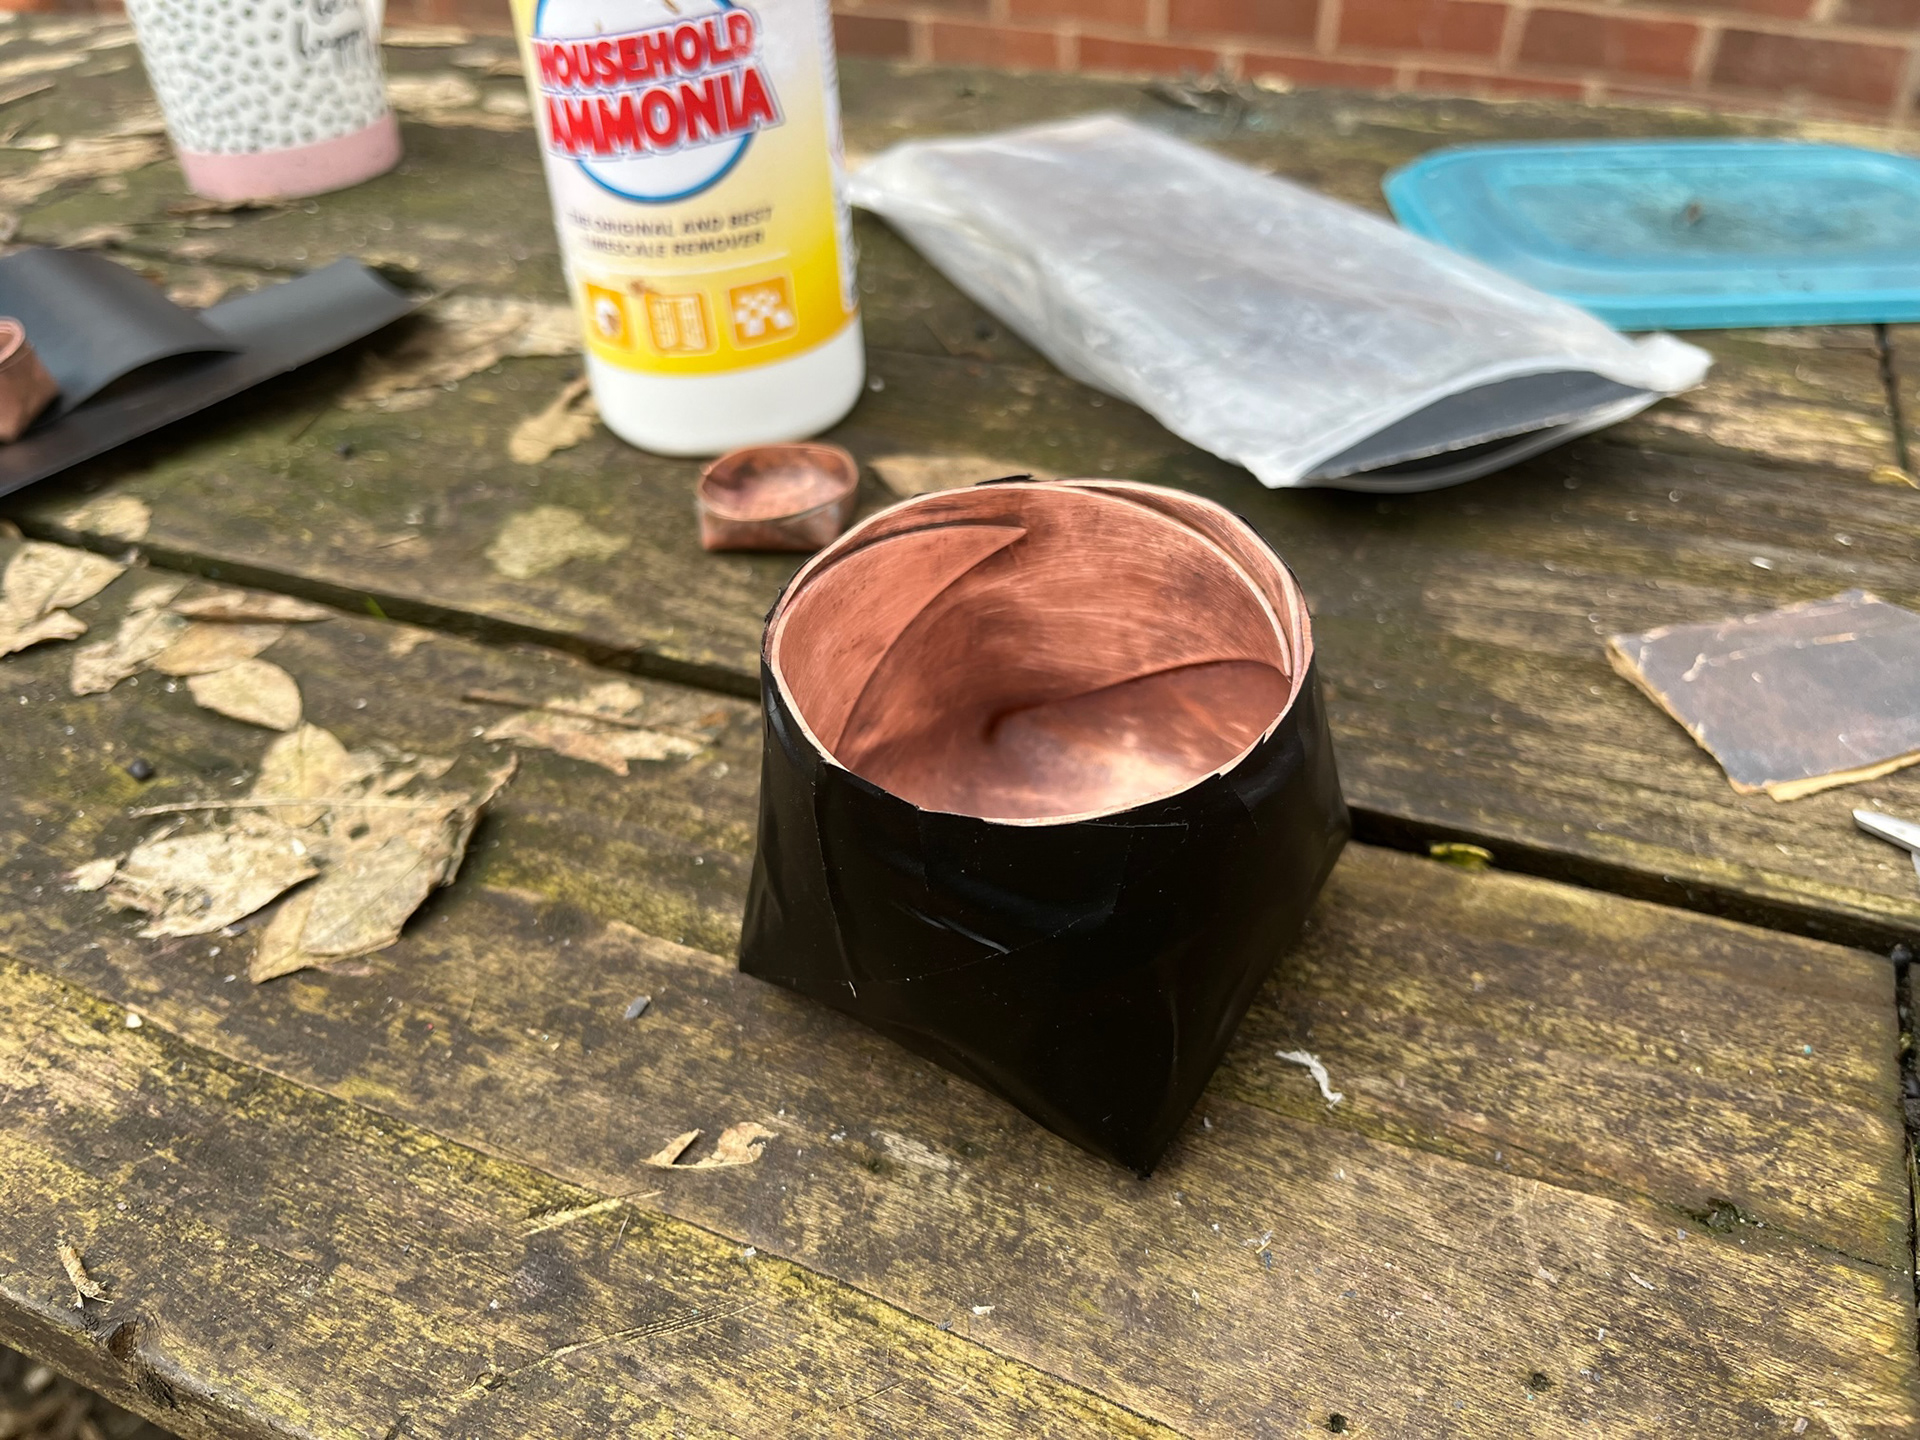
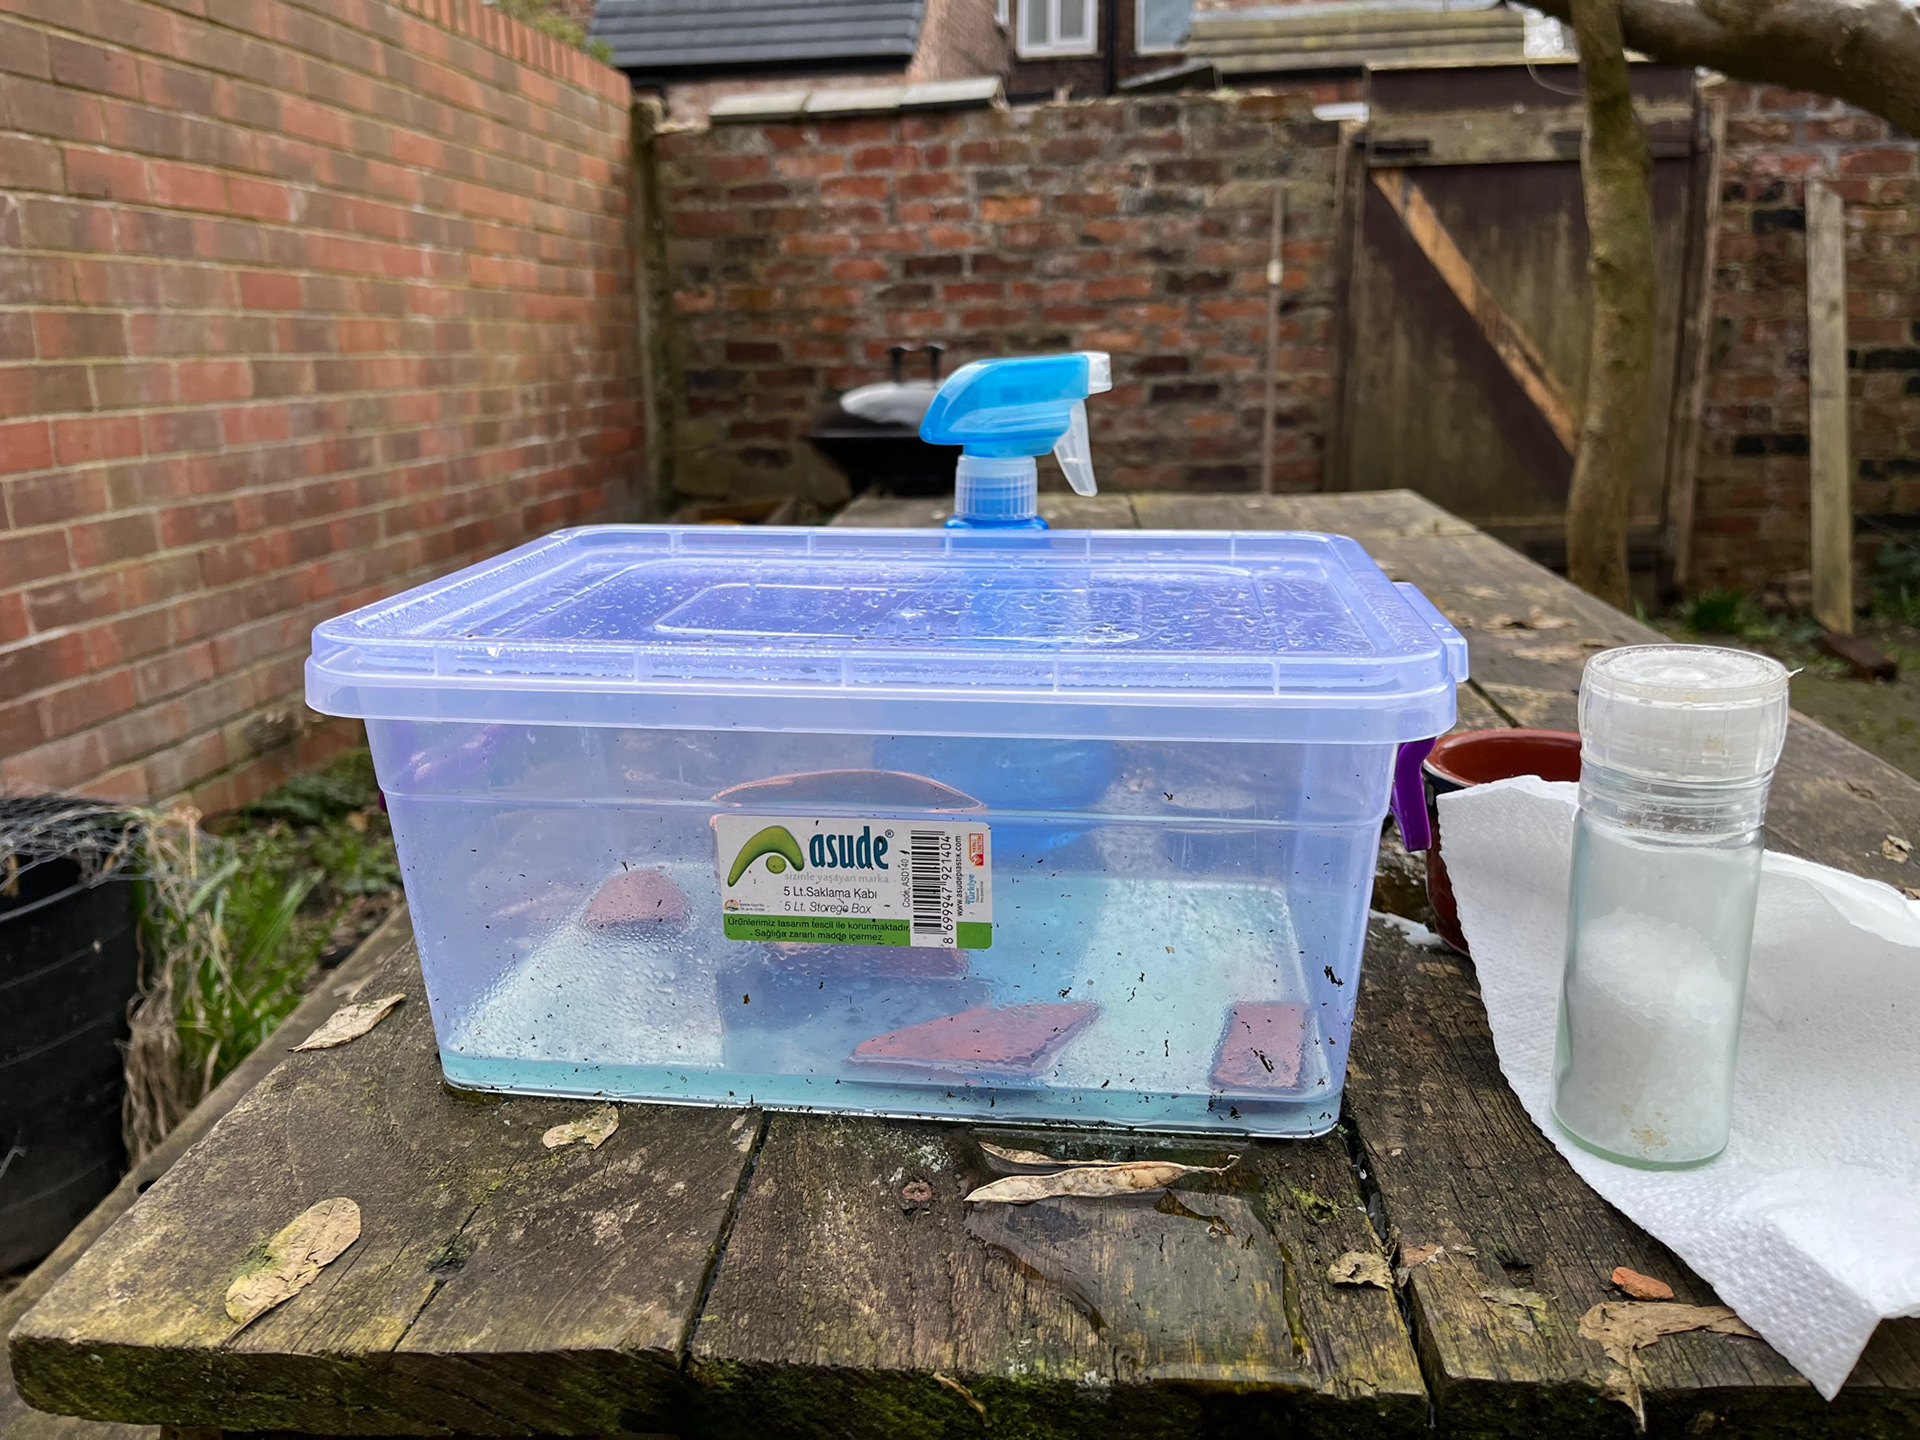
For the blue bowl I used my usual recipe of ammonia and salt. For the green bowl I tried a new mixture of tobacco, vinegar and ammonia. This I still need to perfect as it is not as green as I would have hoped. And for the red one I dripped liquid flux down the edges of the bowl and dotted a pattern on the inside. For this one I wished I had simply painted the bowl exterior because I don’t think the drips looked very nice in retrospect. Furthermore, the patina mixture for the green and blue bowl also got on the inside where I would have preferred to have the natural copper colour but sanding it down proved difficult because the seams prevented me from getting all the colour out of the inside and ended up looking messy with a lot of patina residue. I will need to find a way of preventing the patina to develop on the inside.
Vinyl Tests
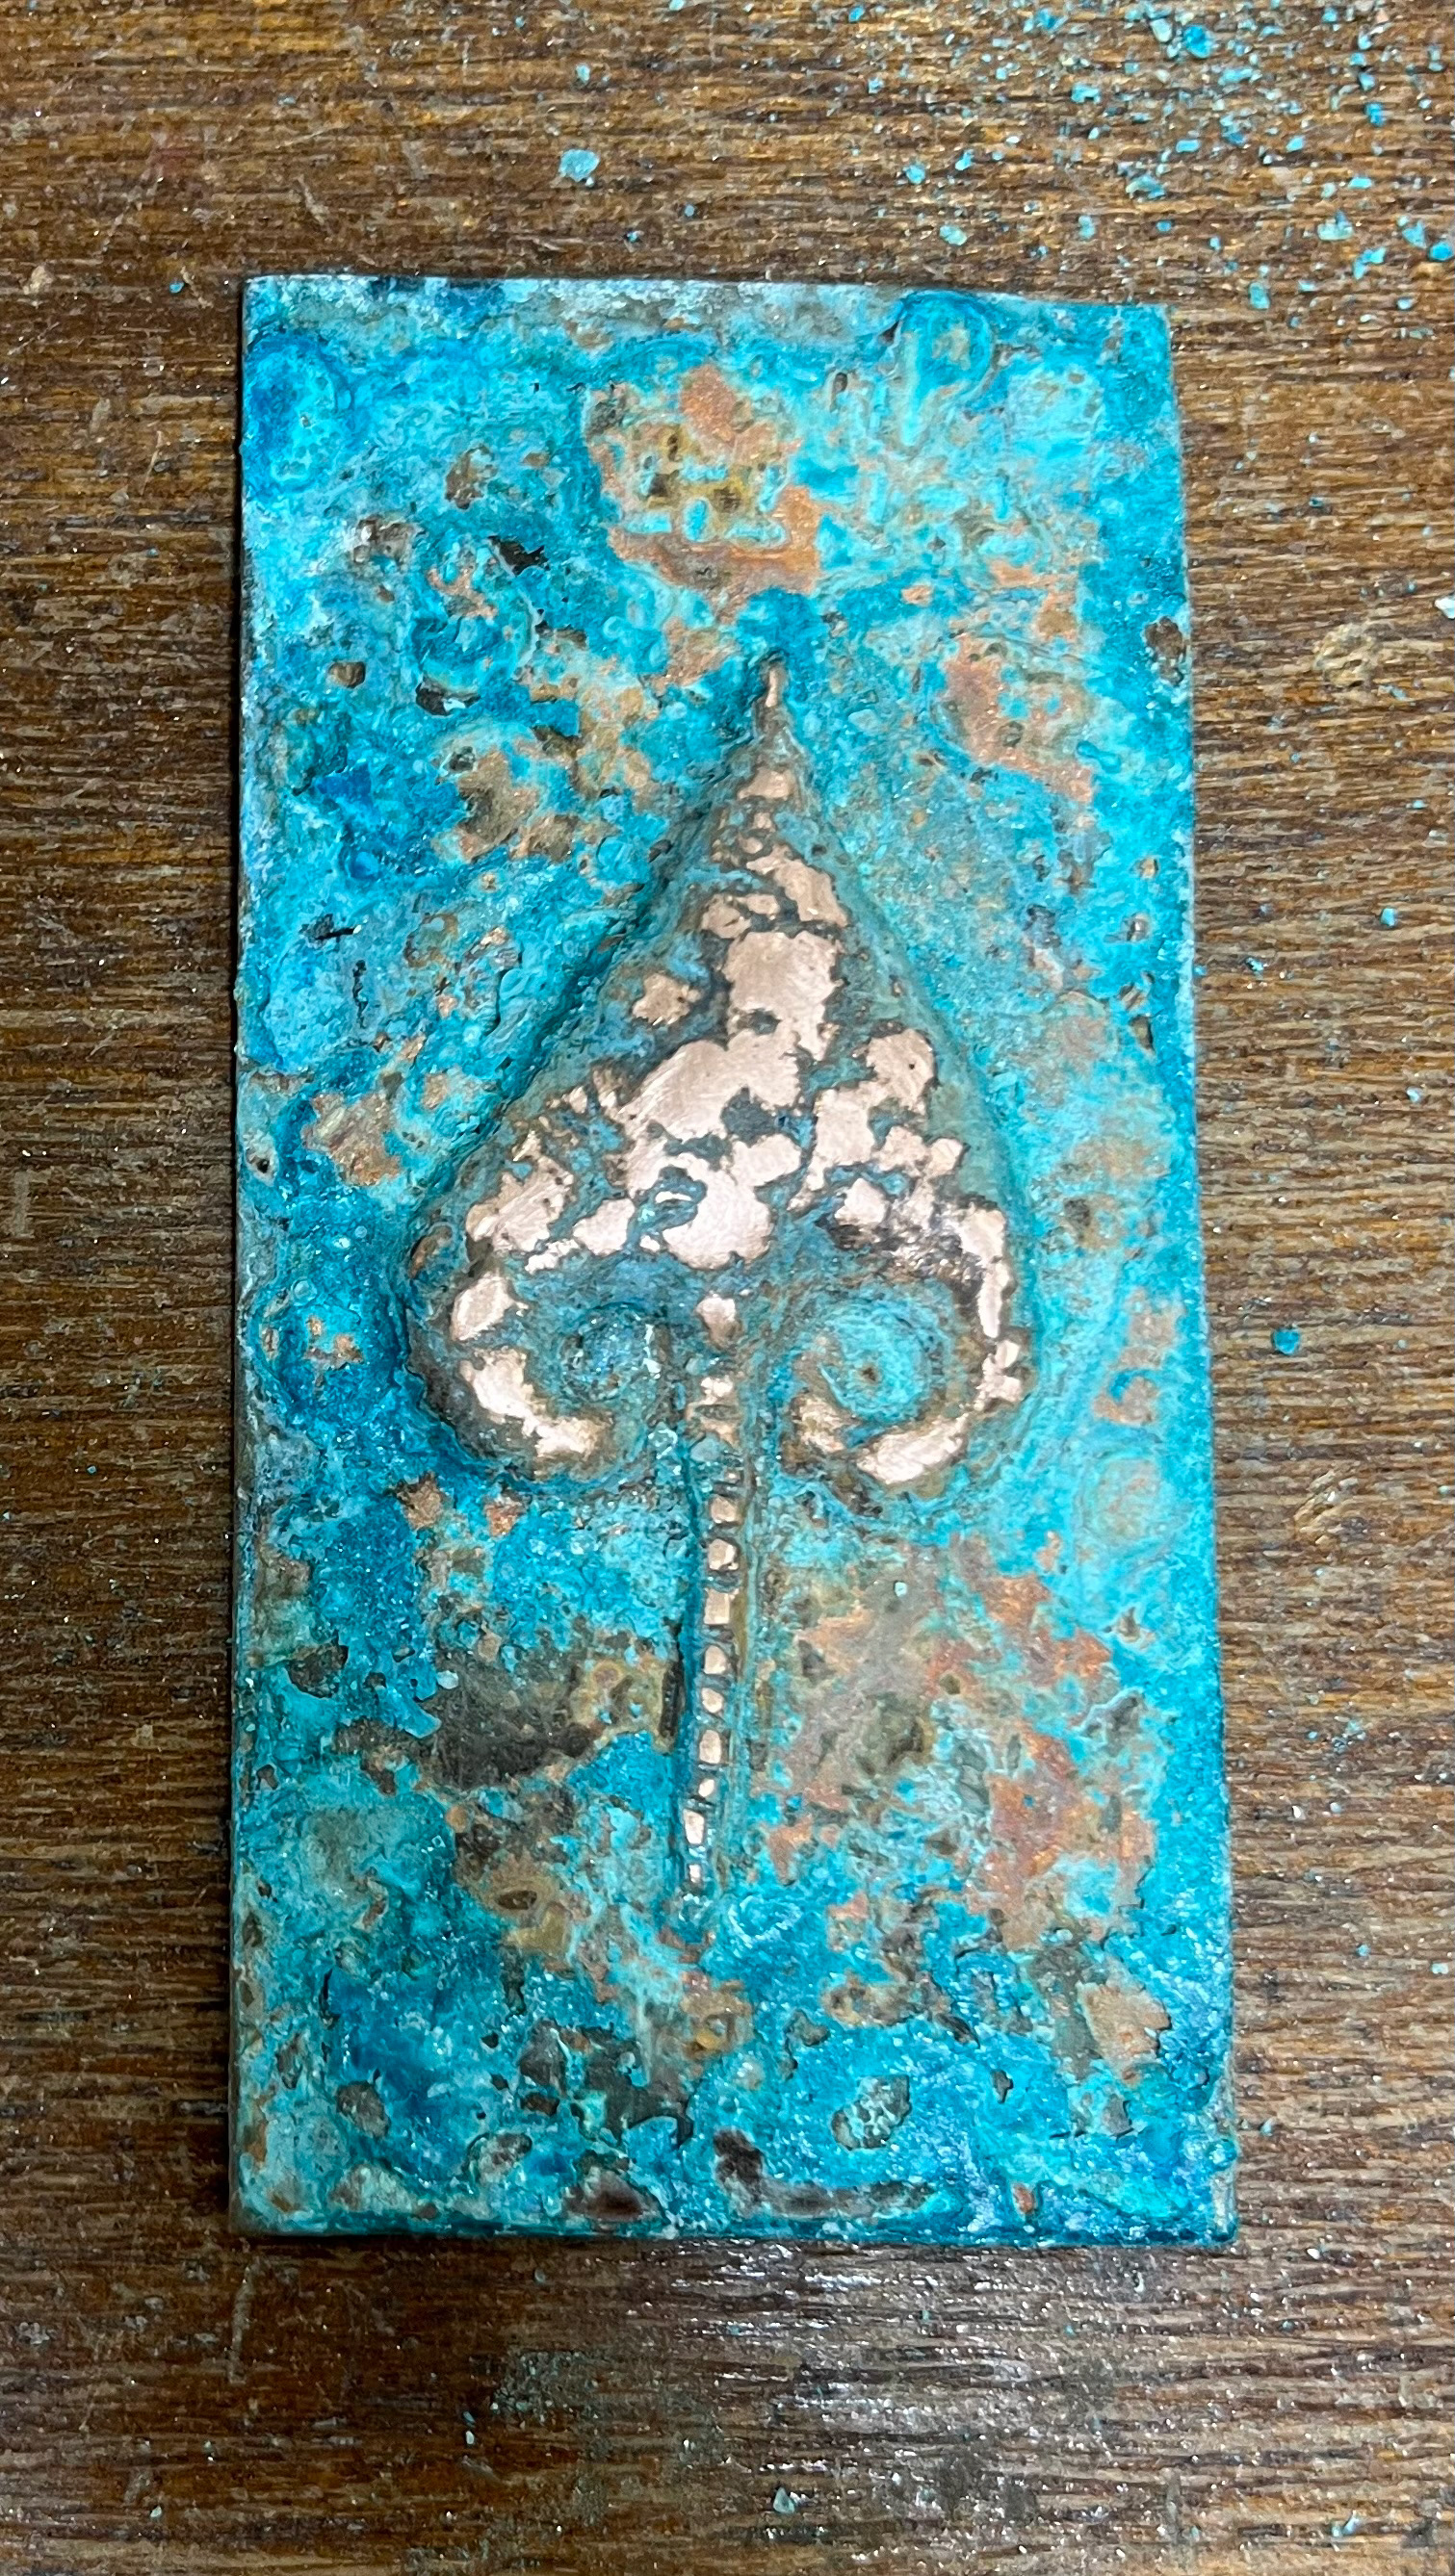
I also wanted to continue keeping up my patina skills with vinyl so I made a series of small panels to represent the Japanese symbols for fire, water, earth, air and space.
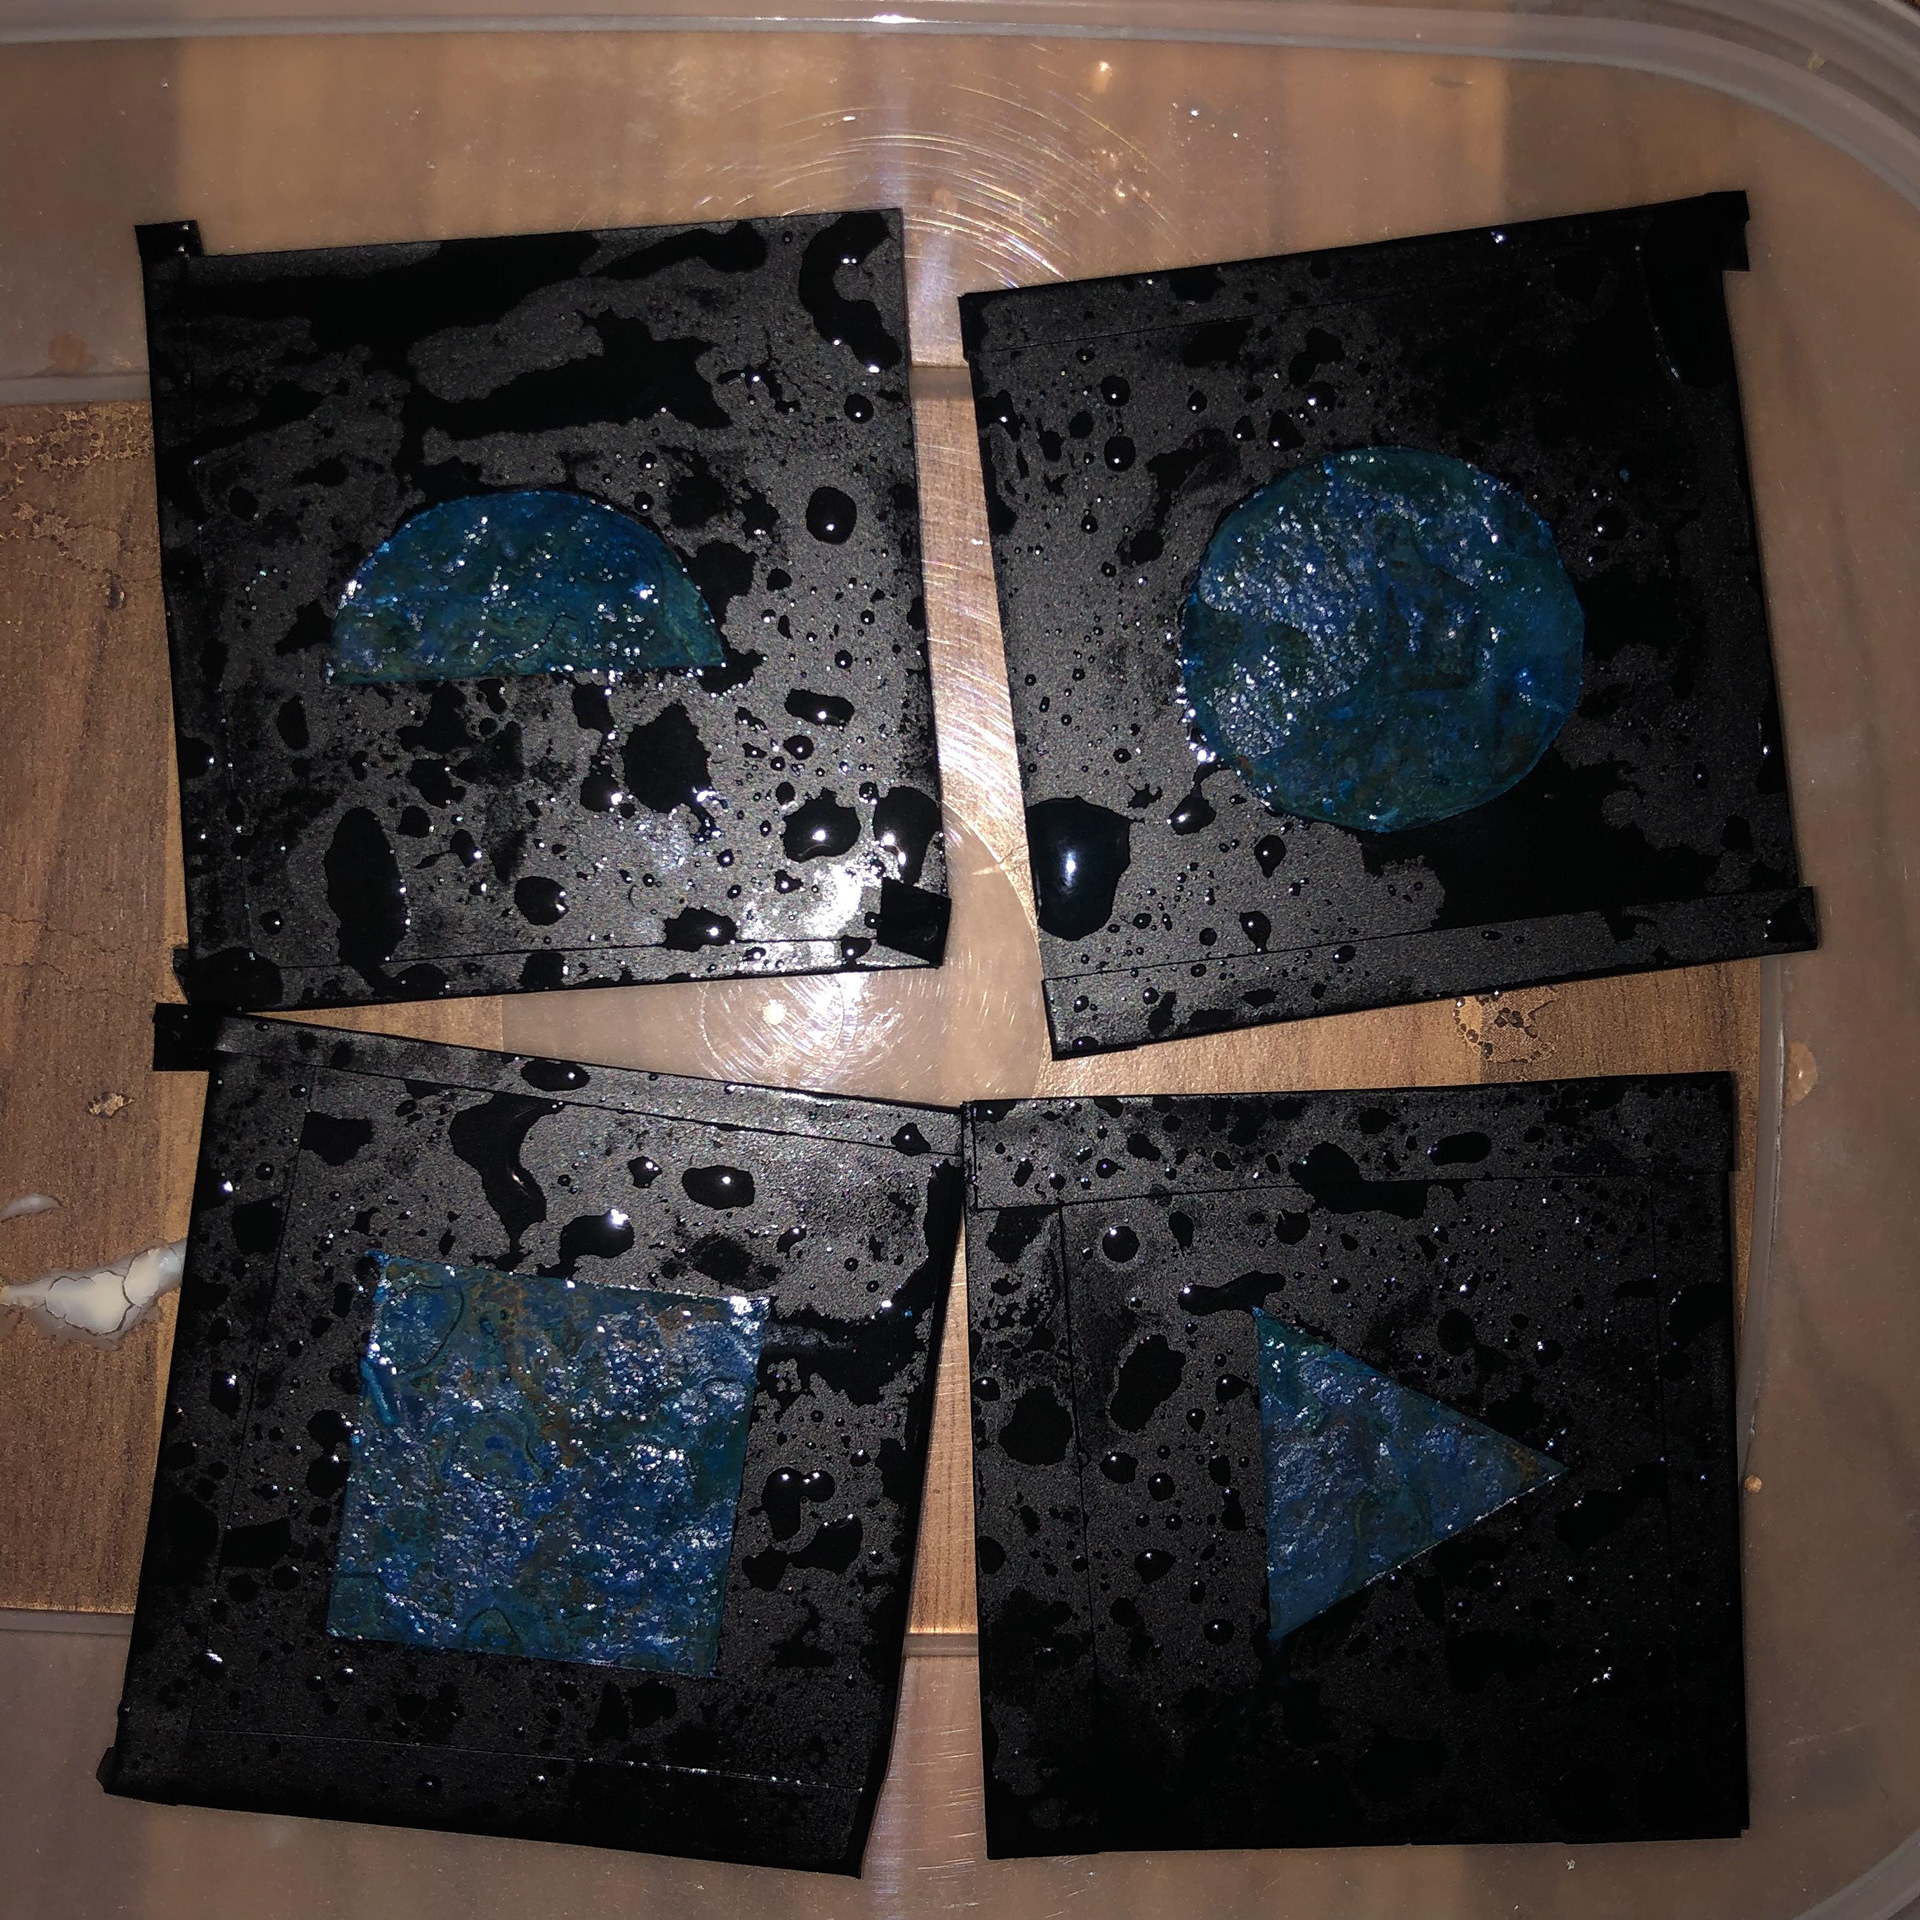
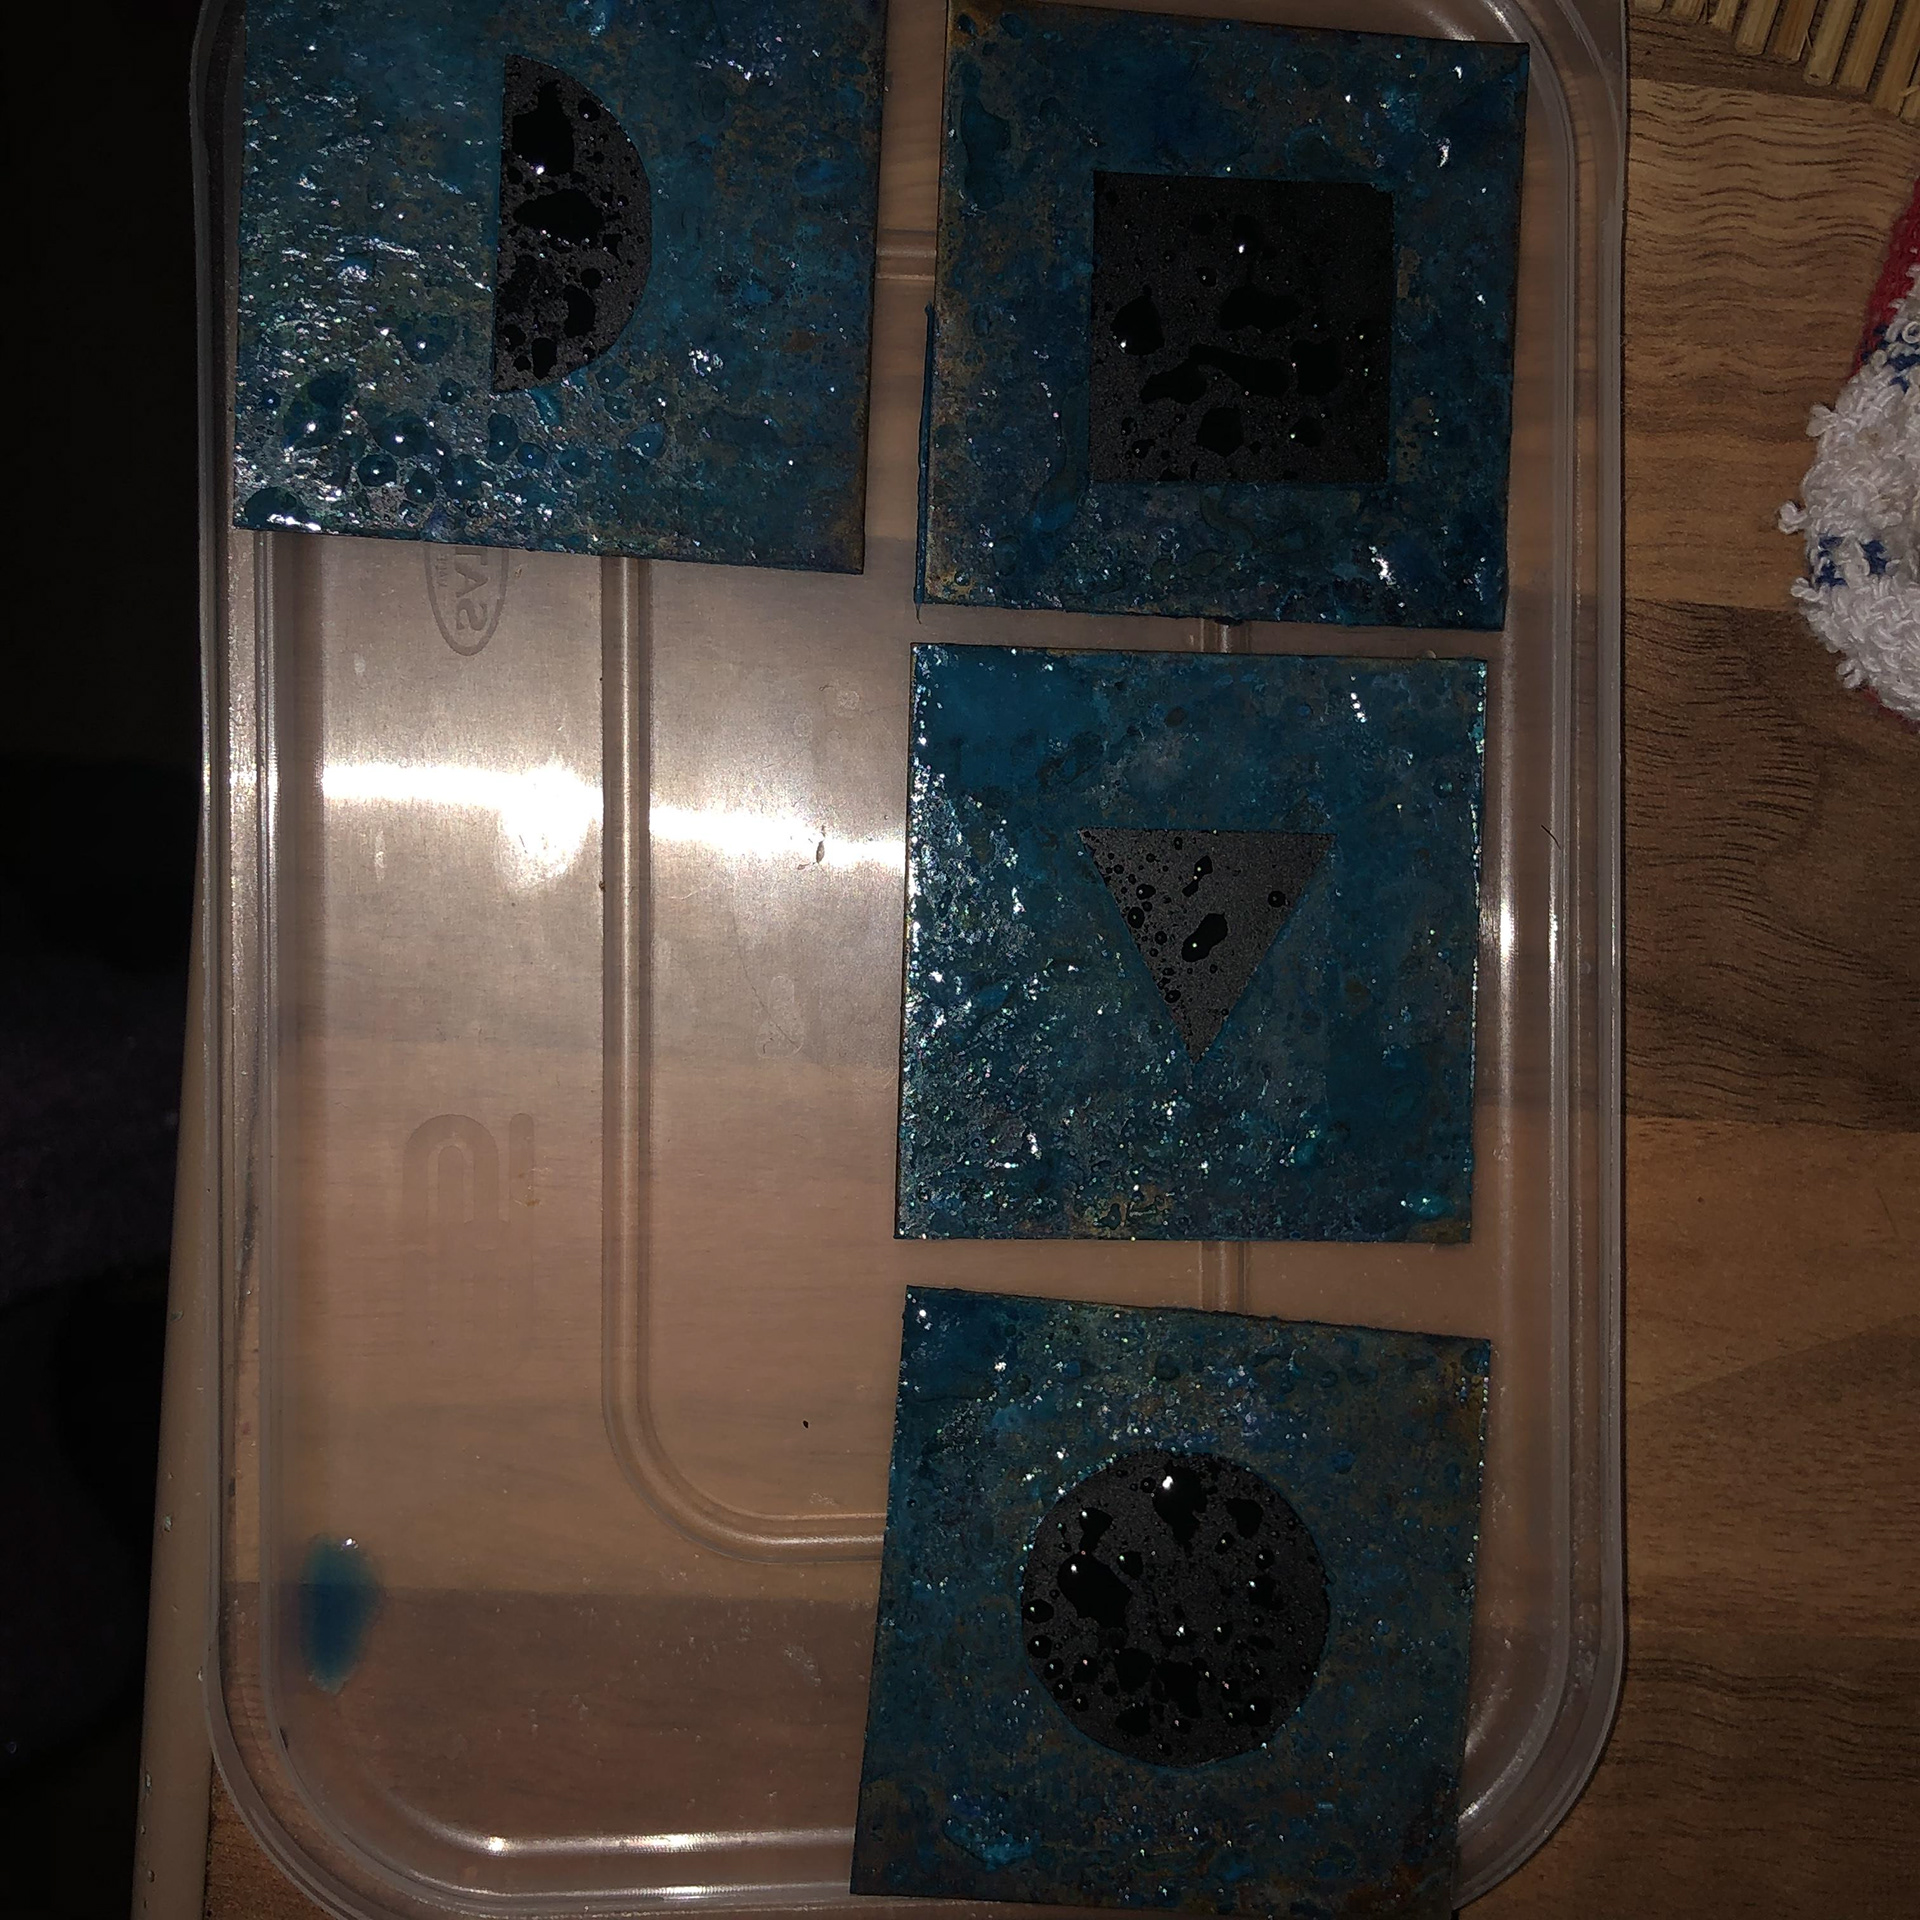
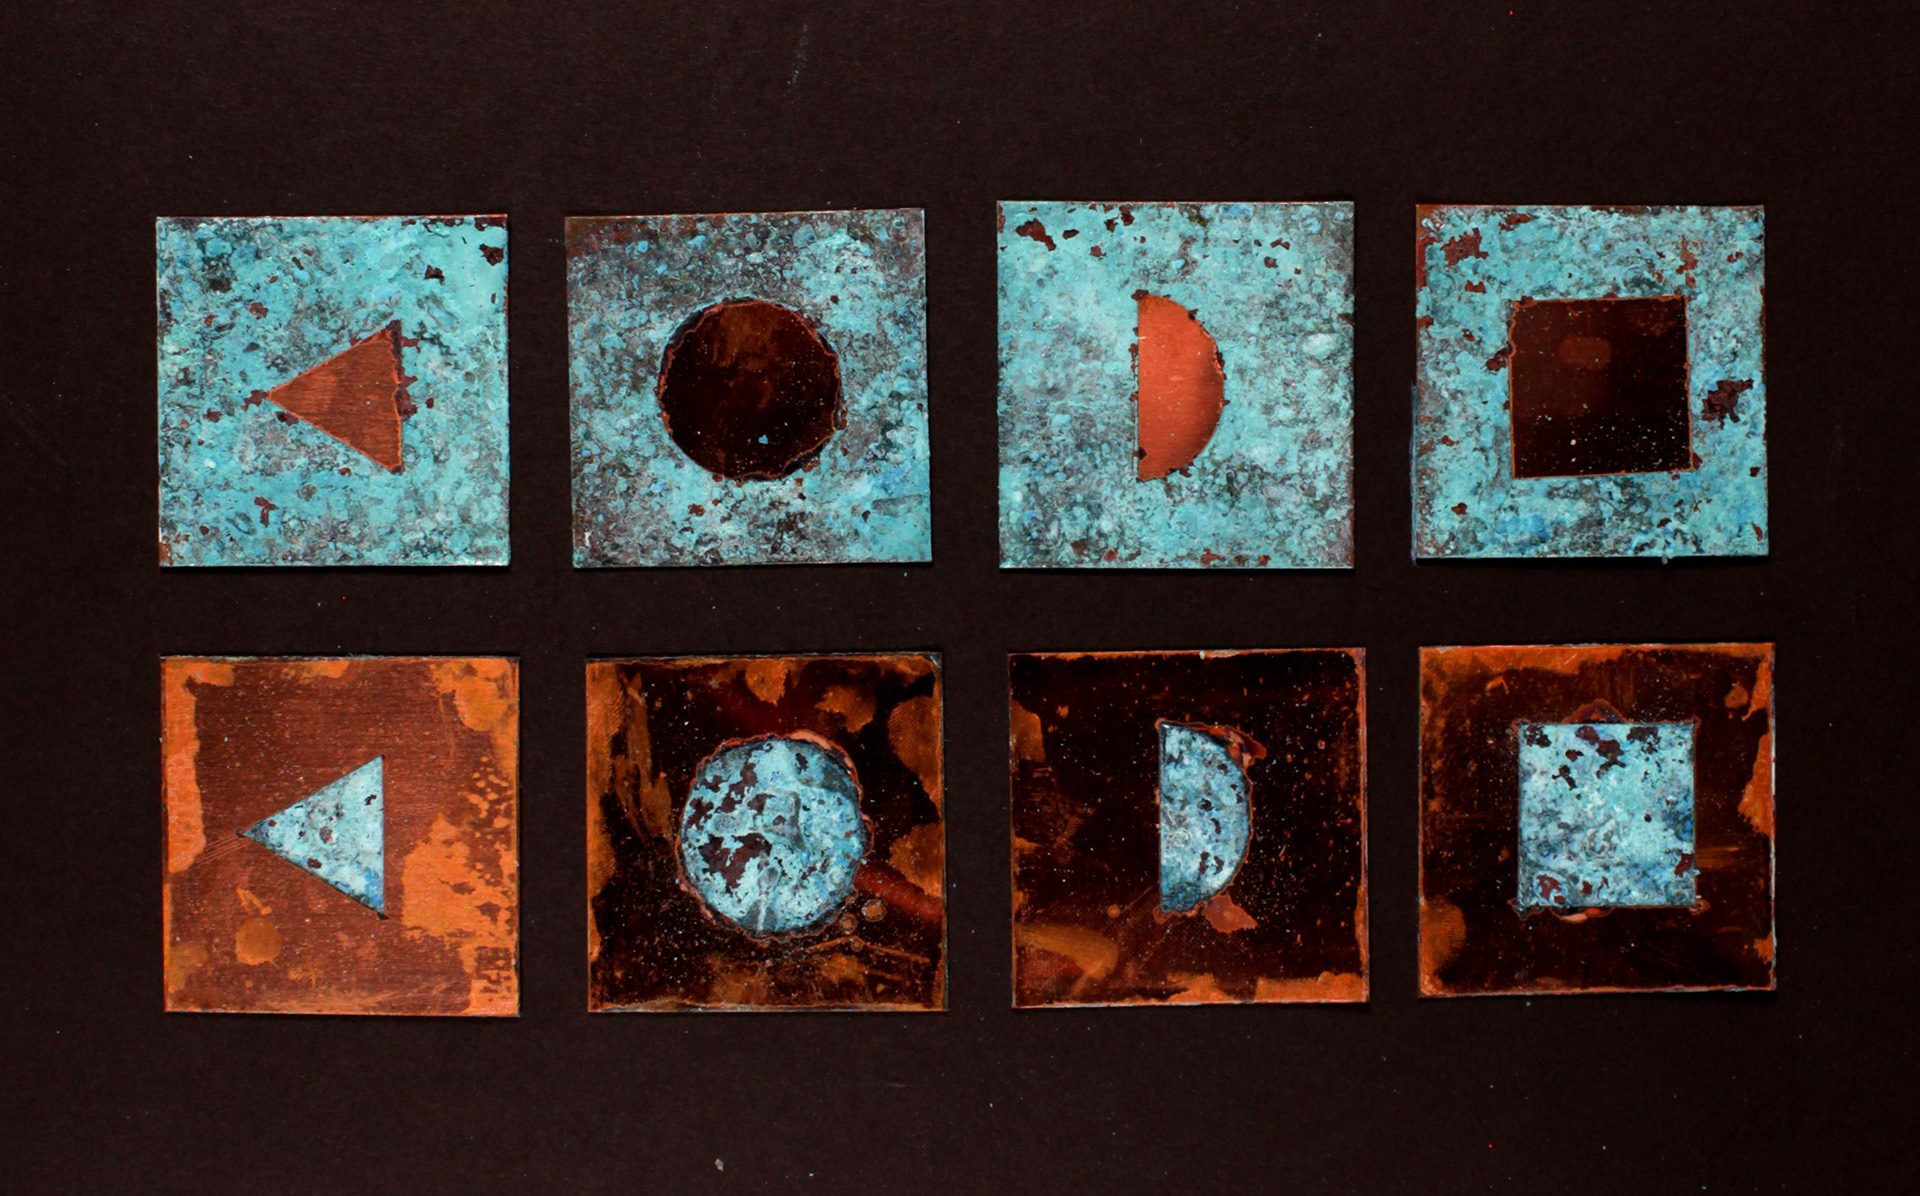
These images show the pieces when they have finished developing the patina. I wait until they are completely dry before taking the vinyl off. I want to be able to apply this technique later in my project to 3D forms so I thought it was important to keep this skill up. However I was a bit disappointed that the patina leaked through the vinyl slightly and I think it was due not very straight cuts in the vinyl.
Liver of Sulphur and copper nitrate
The image above shows some tests I did with liver of sulphur. When I had tried this previously at home, the only colour I managed to get was black, however when I tried the solution at uni, using a dipping technique, many more colours were revealed. I would like to see how I can use liver of sulphur in some of my boxes to get these fluorescent colours.
The video above shows a test of me trying out copper nitrate, a fairly dangerous chemical that produces a blue patina. The reason why I wanted to try this was because the patina is very strong and doesn’t crumble away like many others do. However, this chemical requires you to heat the copper and because of its slightly flammable qualities, it was deemed too dangerous to be conducted in the workshop. So I had to conduct this experiment in my back garden with a tiny chefs flame. Which had some complications. I was working with a very small scrap of metal so I could just about get it hot enough, but I couldn’t see how I would be able to replicate this on a larger scale, let alone a 3D shape.
Box Development
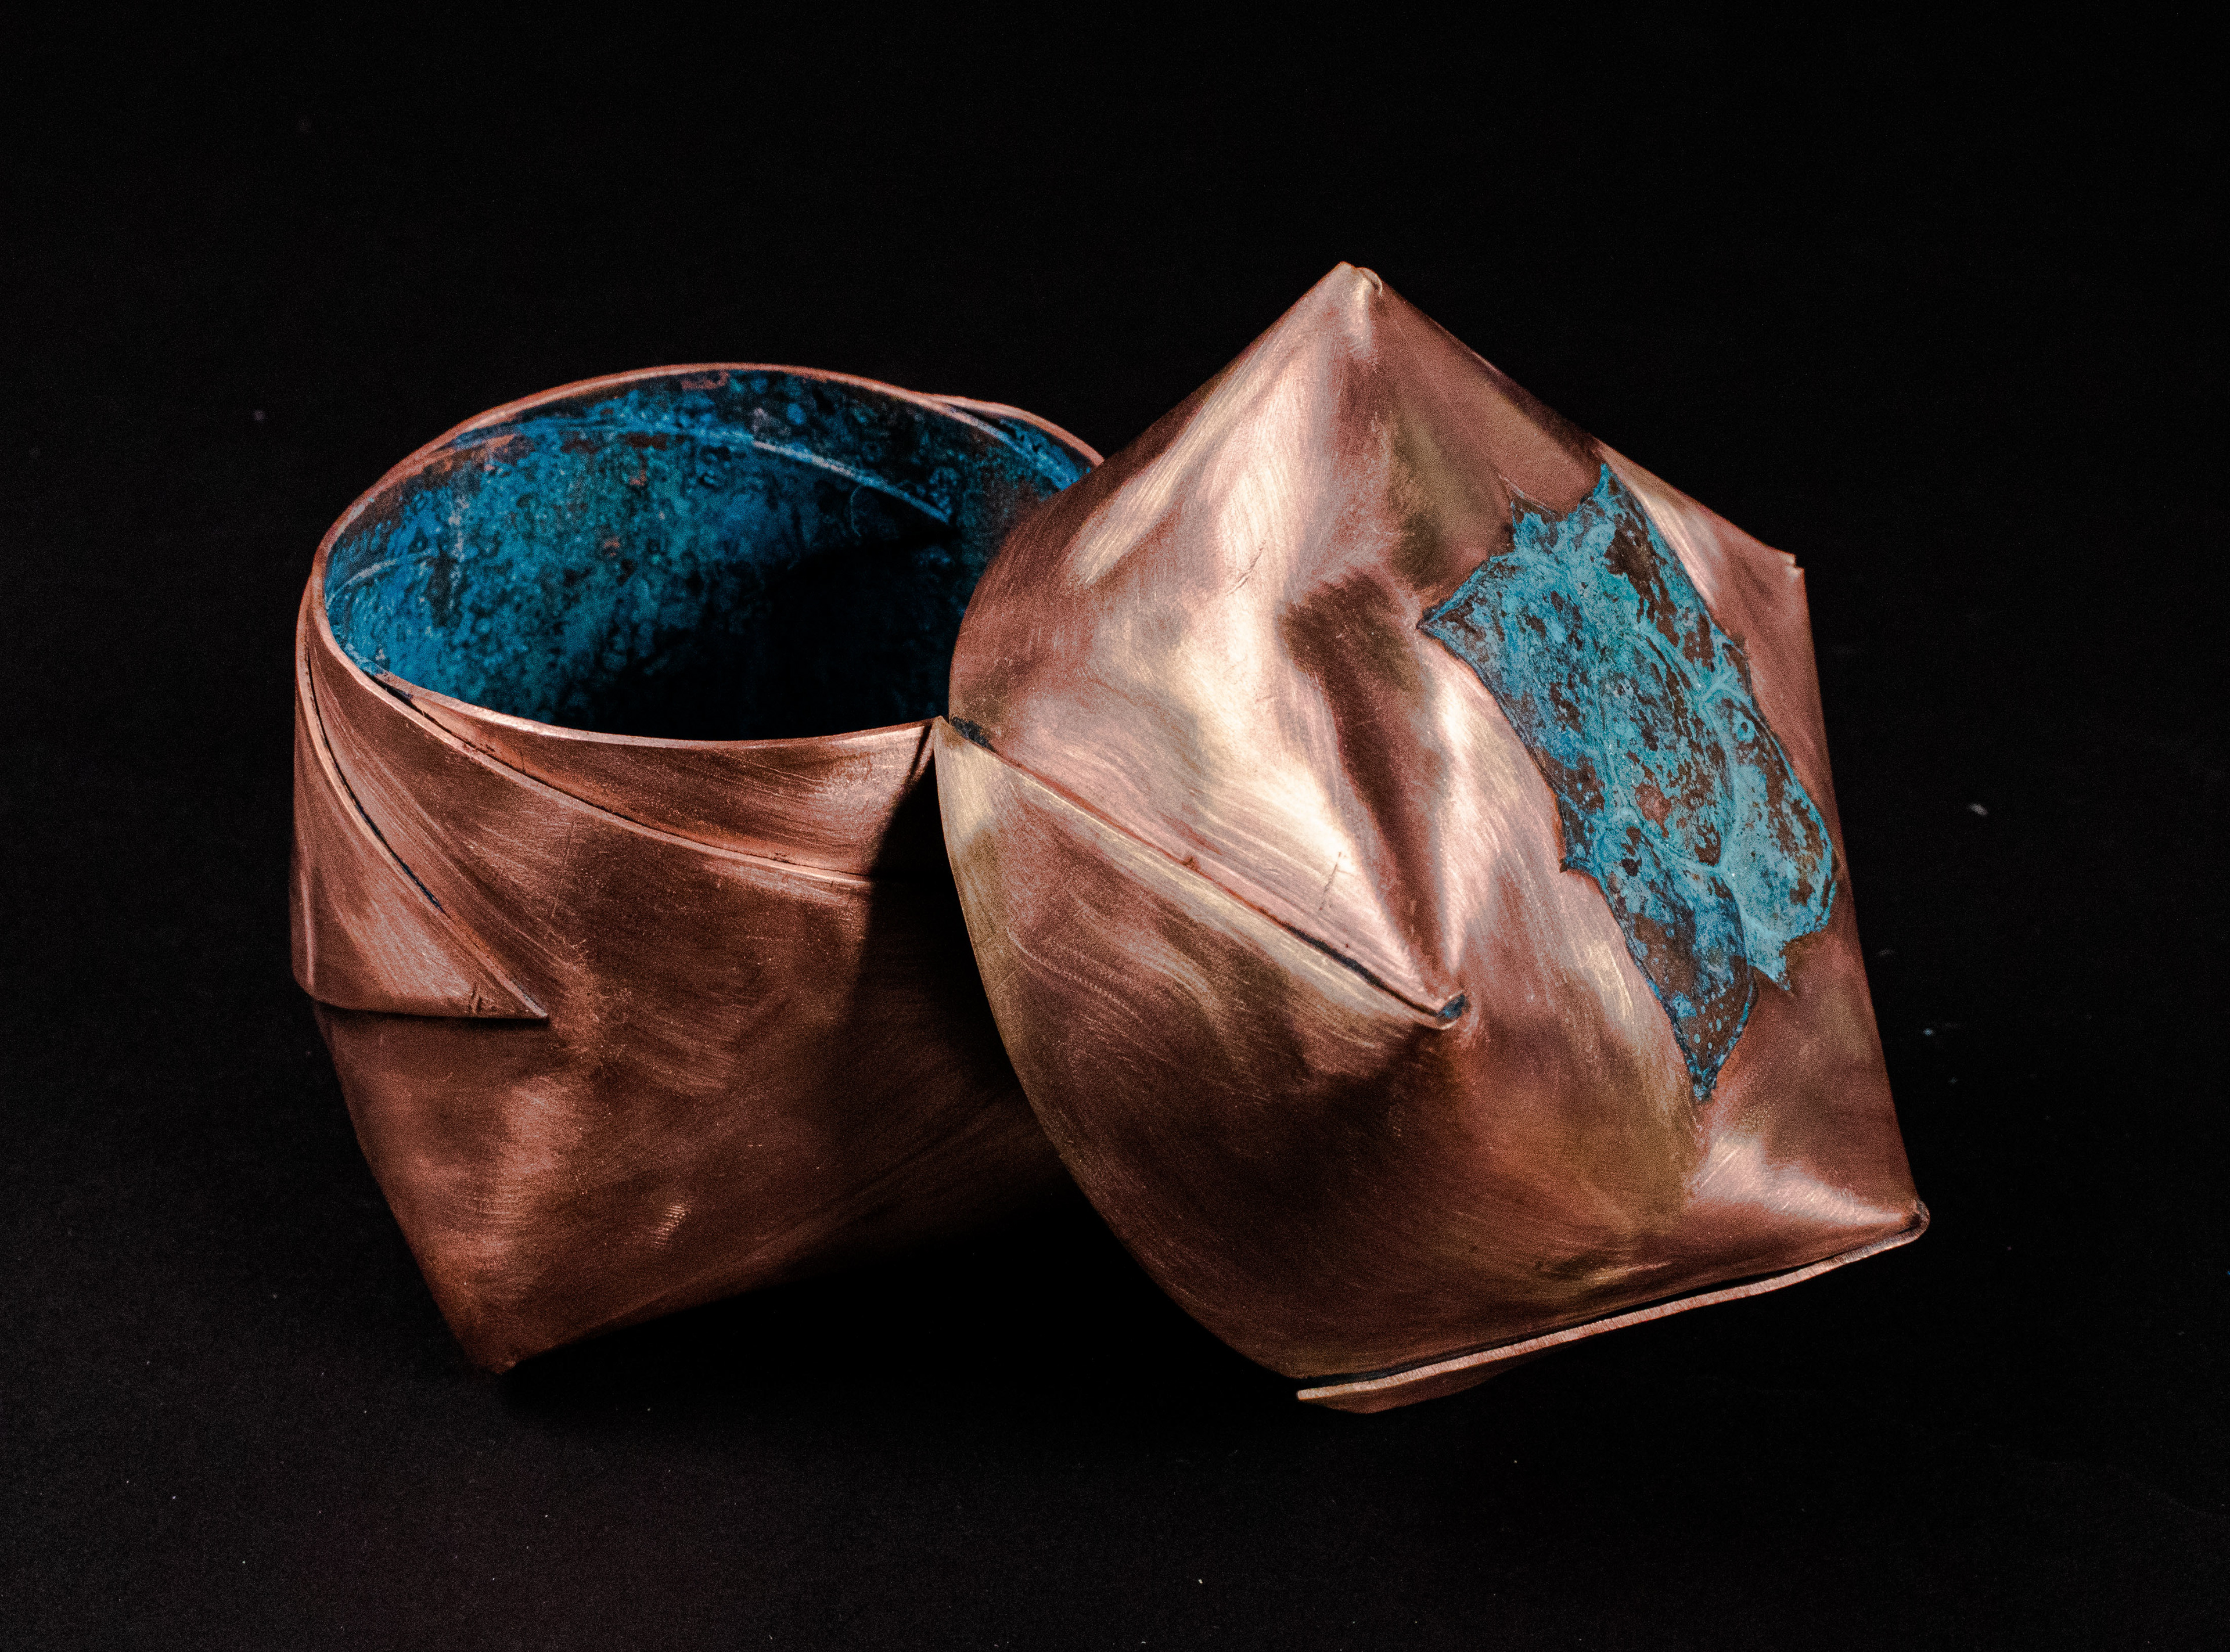
I wanted to develop my then bowls into boxes with a fitted lid to resemble the woven baskets from Thailand.
I really liked how this looked and thought the lid was a very nice addition to my pieces. However the lid I made was too small and I had to expand it out which created these points on the corners. I actually liked how this looked but I would like to make a lid that fits more comfortably on the base. The sketch book page on the right shows my thinking process on how to make a good fitting lid.

I also explored bigger box sizes with a thinner metal to see what effect that would give.
I enjoyed making the bigger box as it was easier to manipulate on a bigger scale and I like how it got narrower towards the top. However, what I found with the thinner sheet metal is that the metal wouldn’t hold its shape and was more springy. So for future boxes I will stick to 0.9mm copper and thicker.
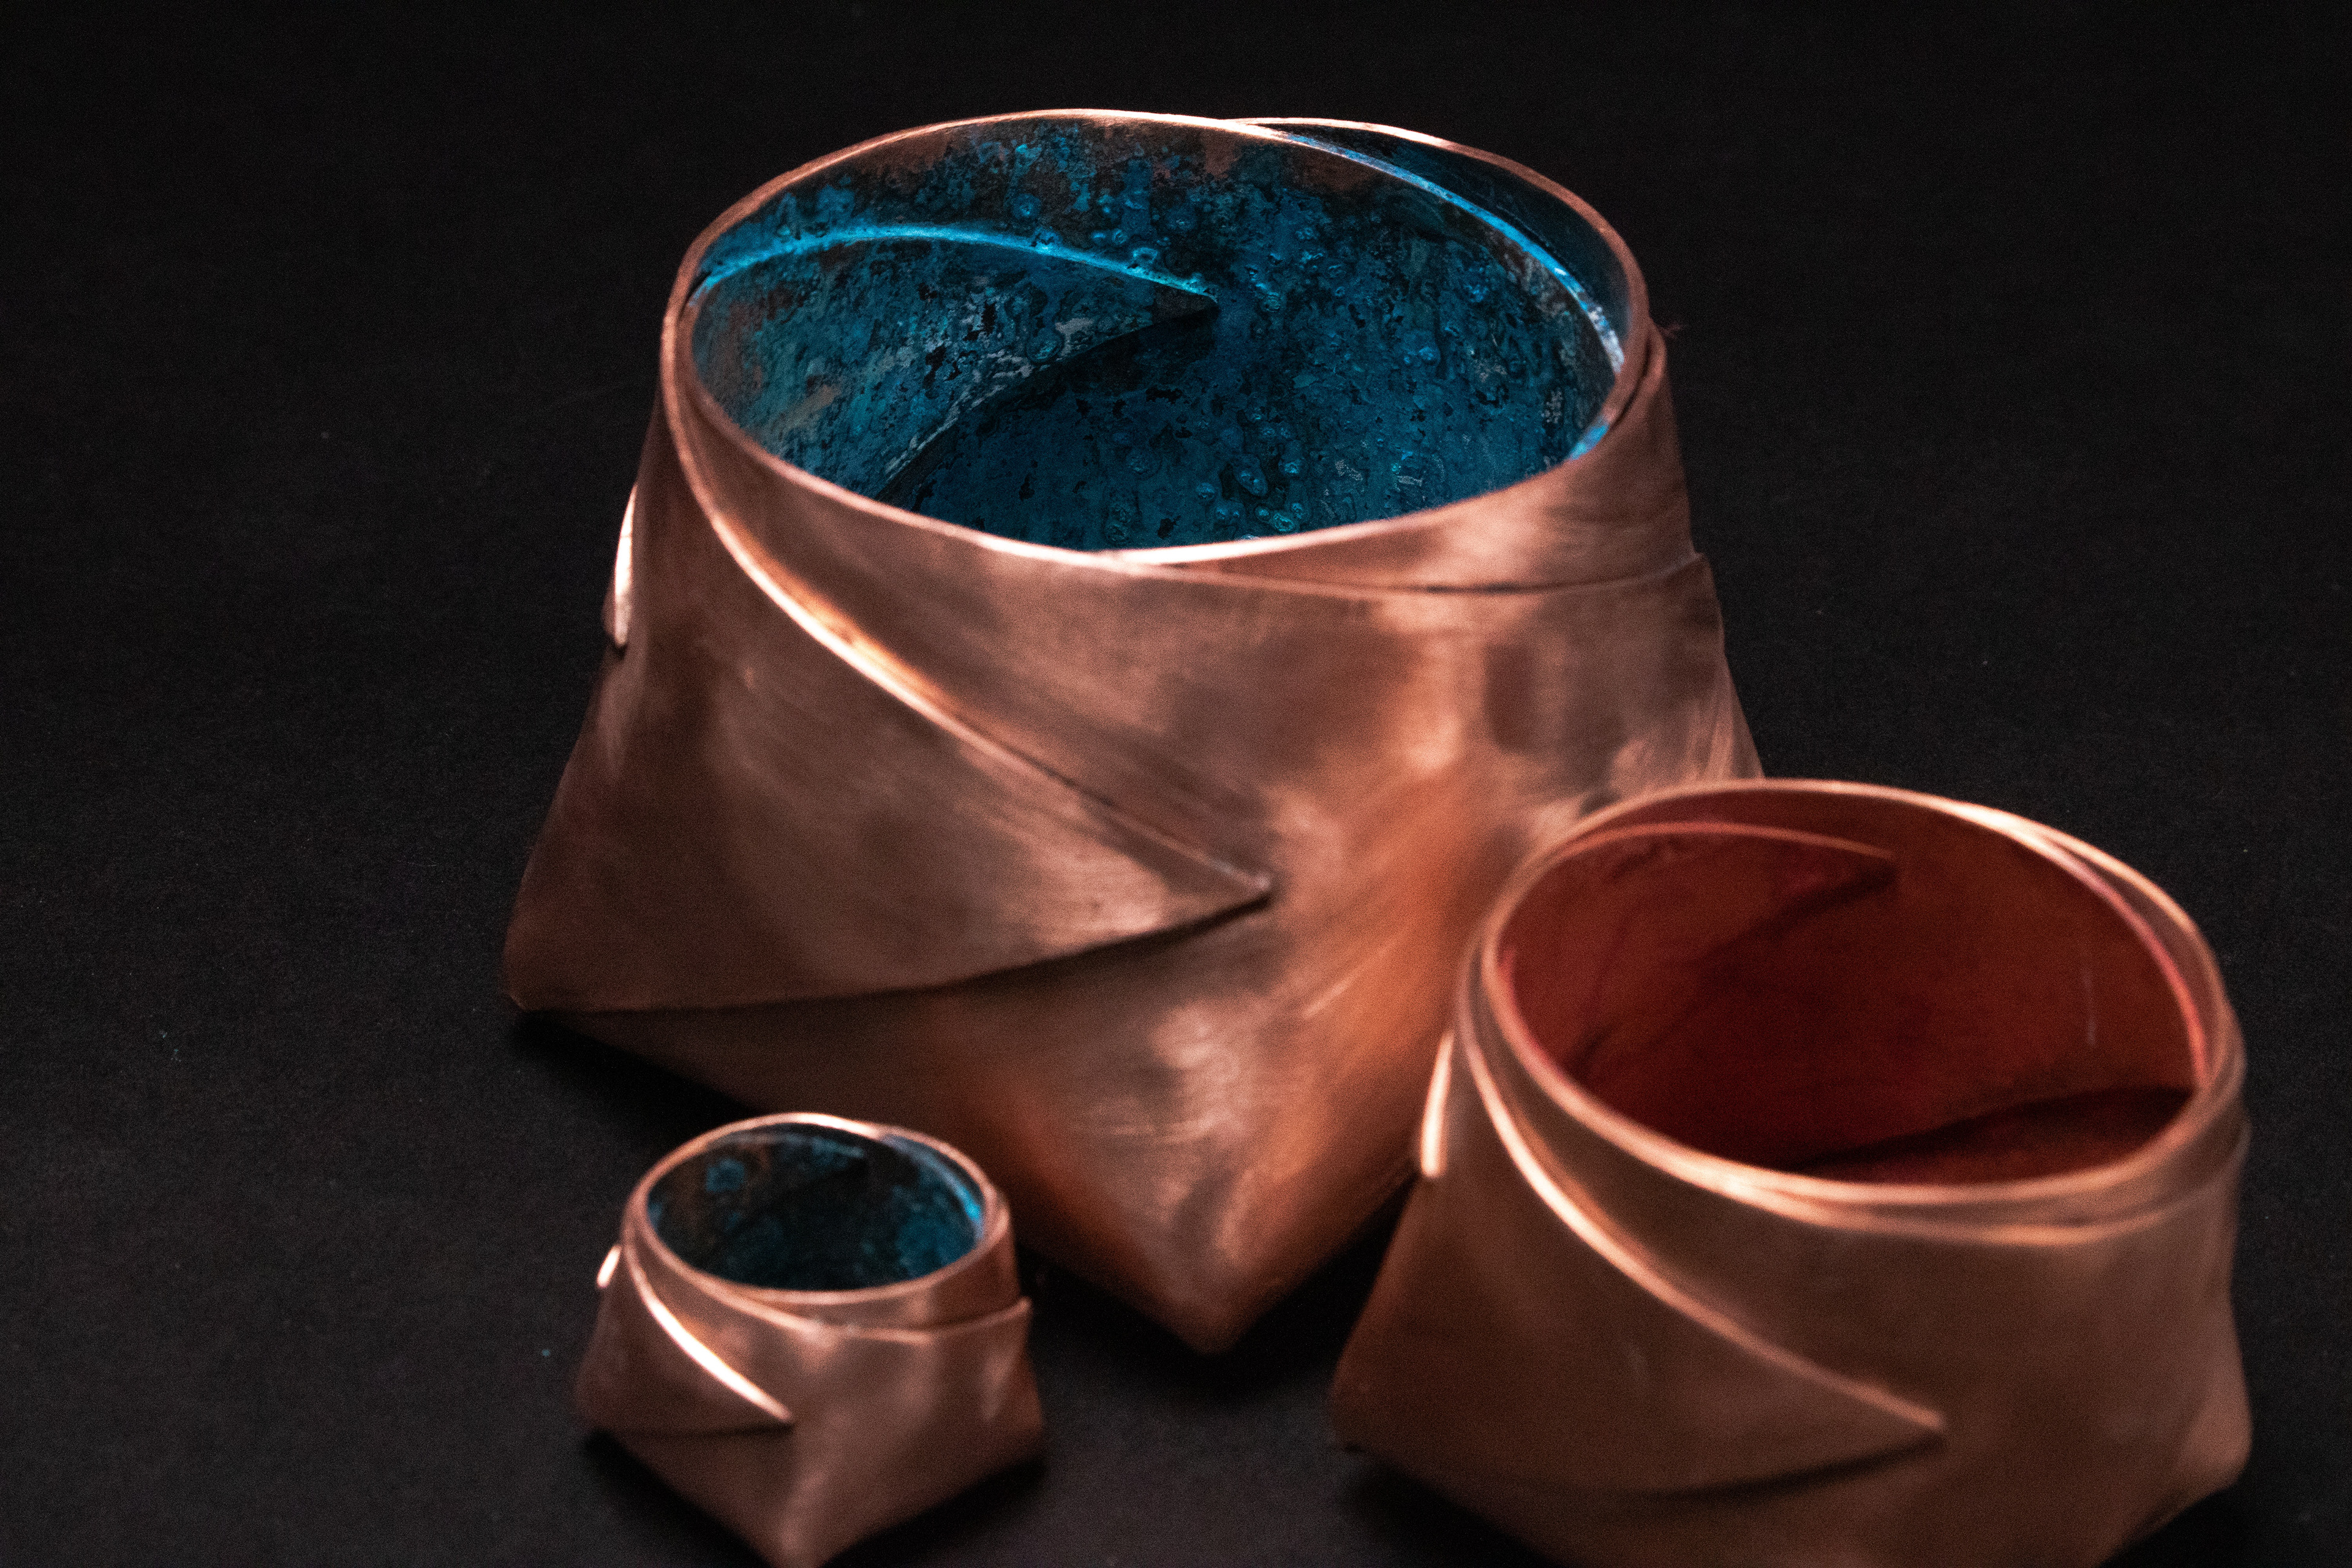
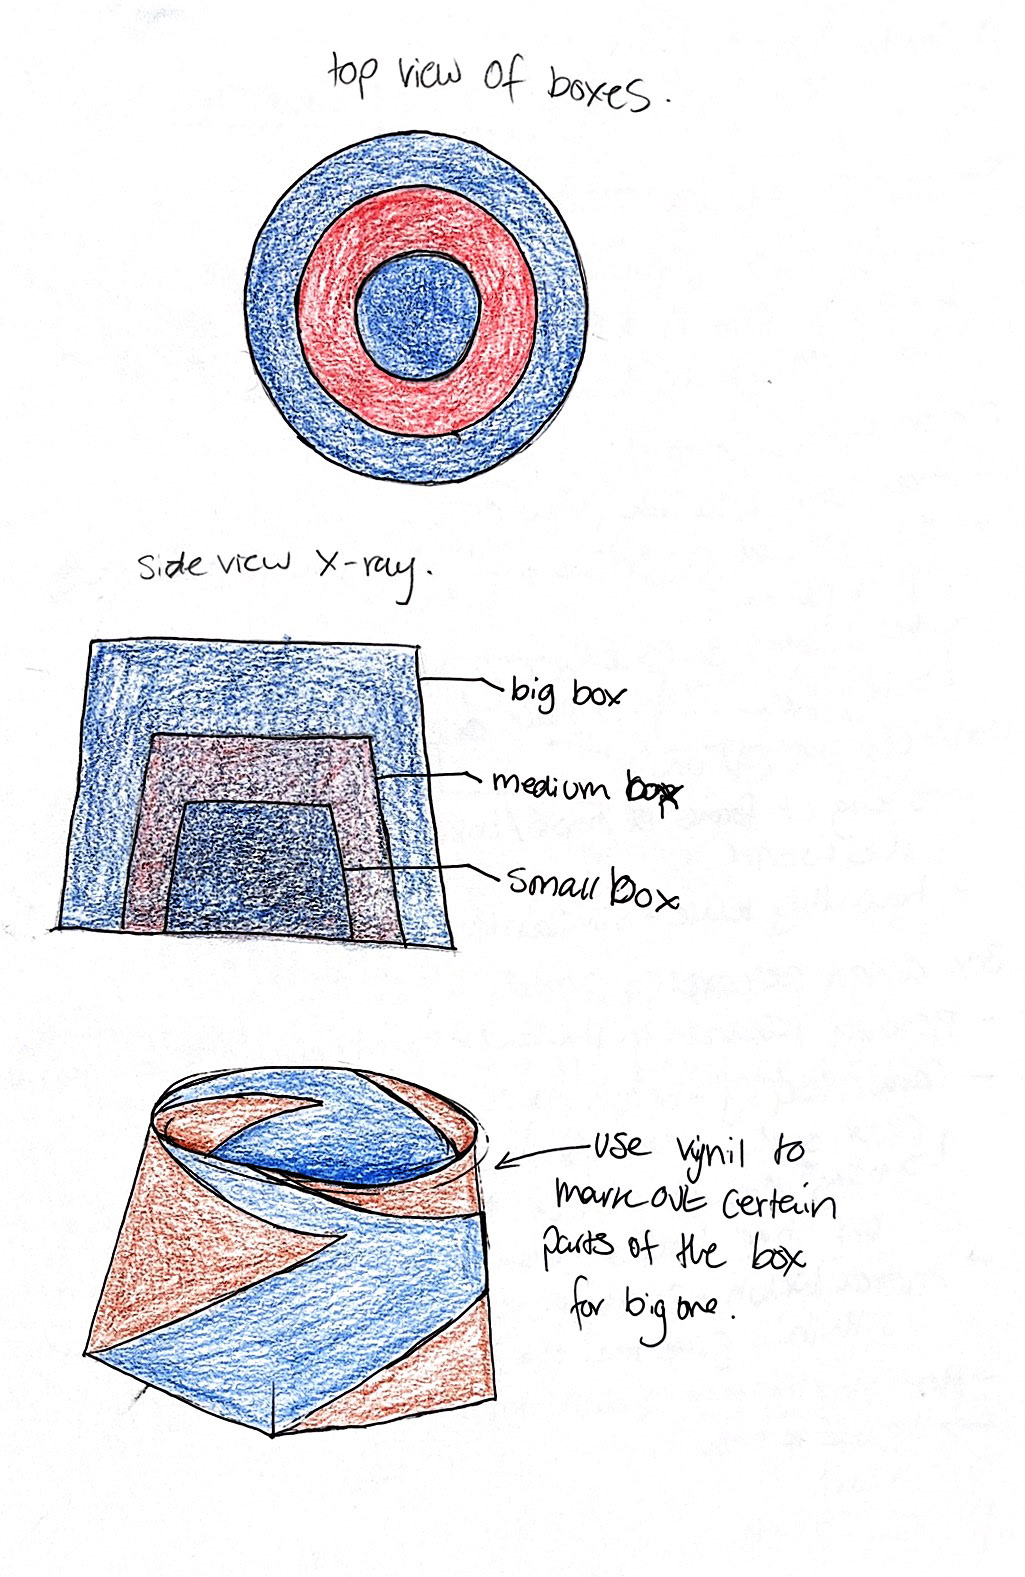
With this, I could explore stacked boxes like Russian dolls and have different coloured patinas within. This idea is taken from Andrea Walsh with her series of glass boxes with an obscured object within. With this, I could experiment patinas on the inside of the boxes and leave the outside plain copper. Furthermore, I could pierce a pattern on the lid to subtly reveal a patina beneath.
Repousse & Chasing
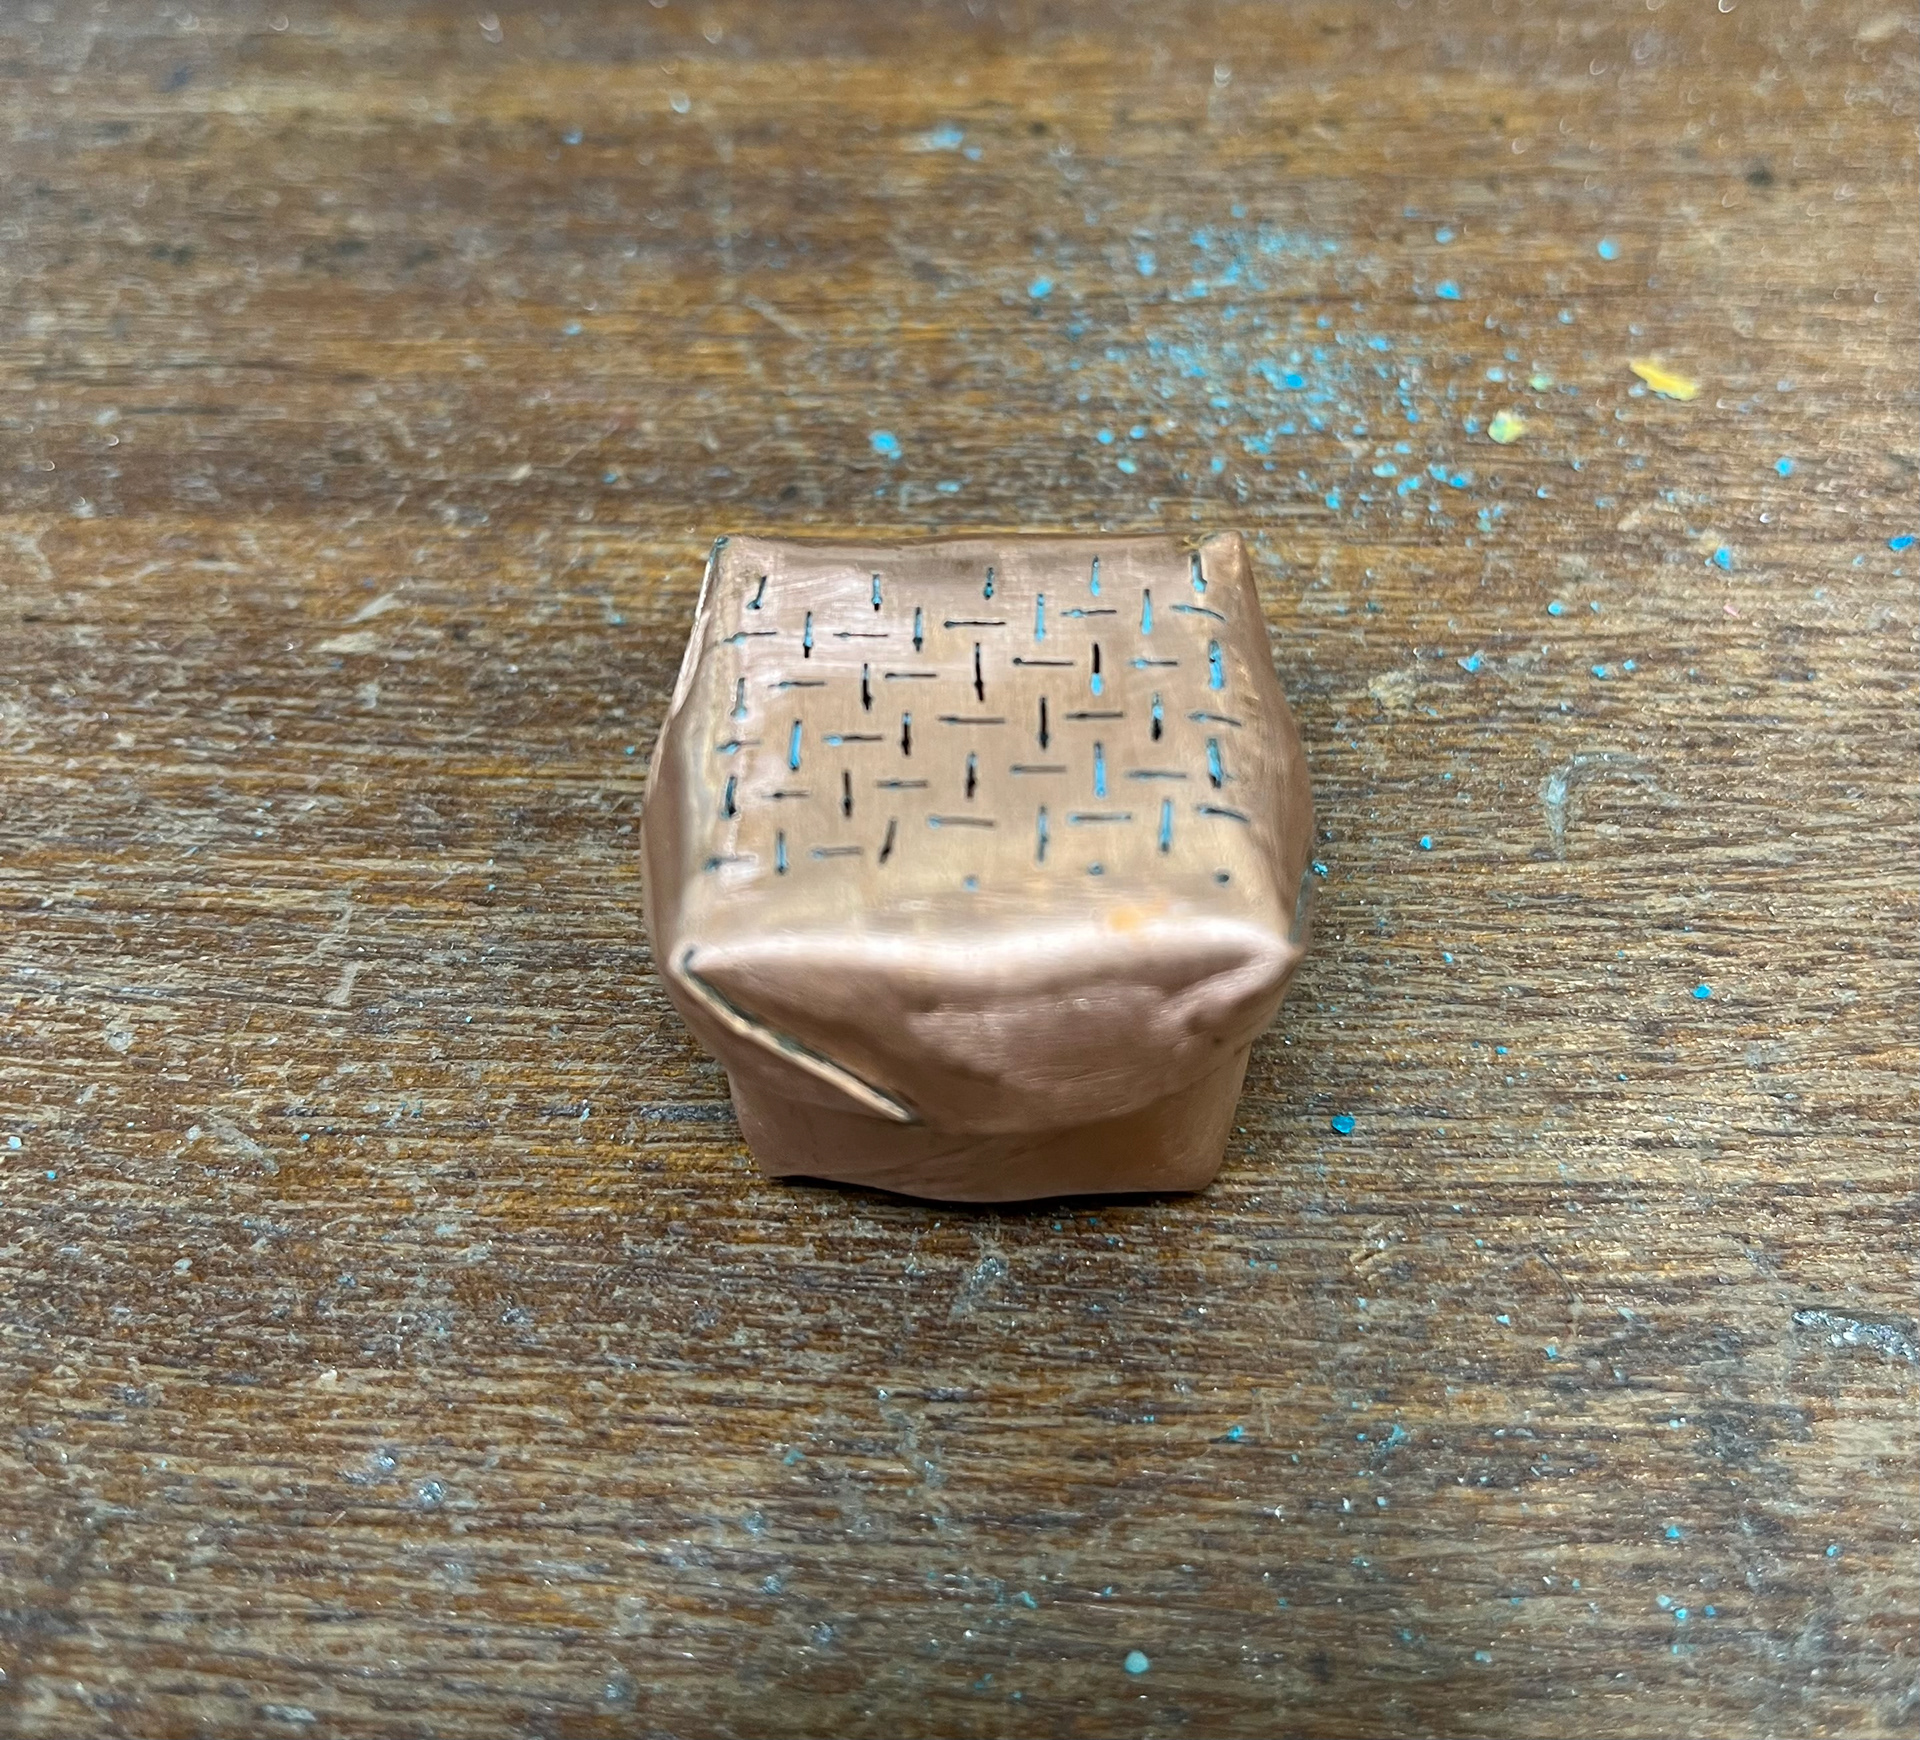
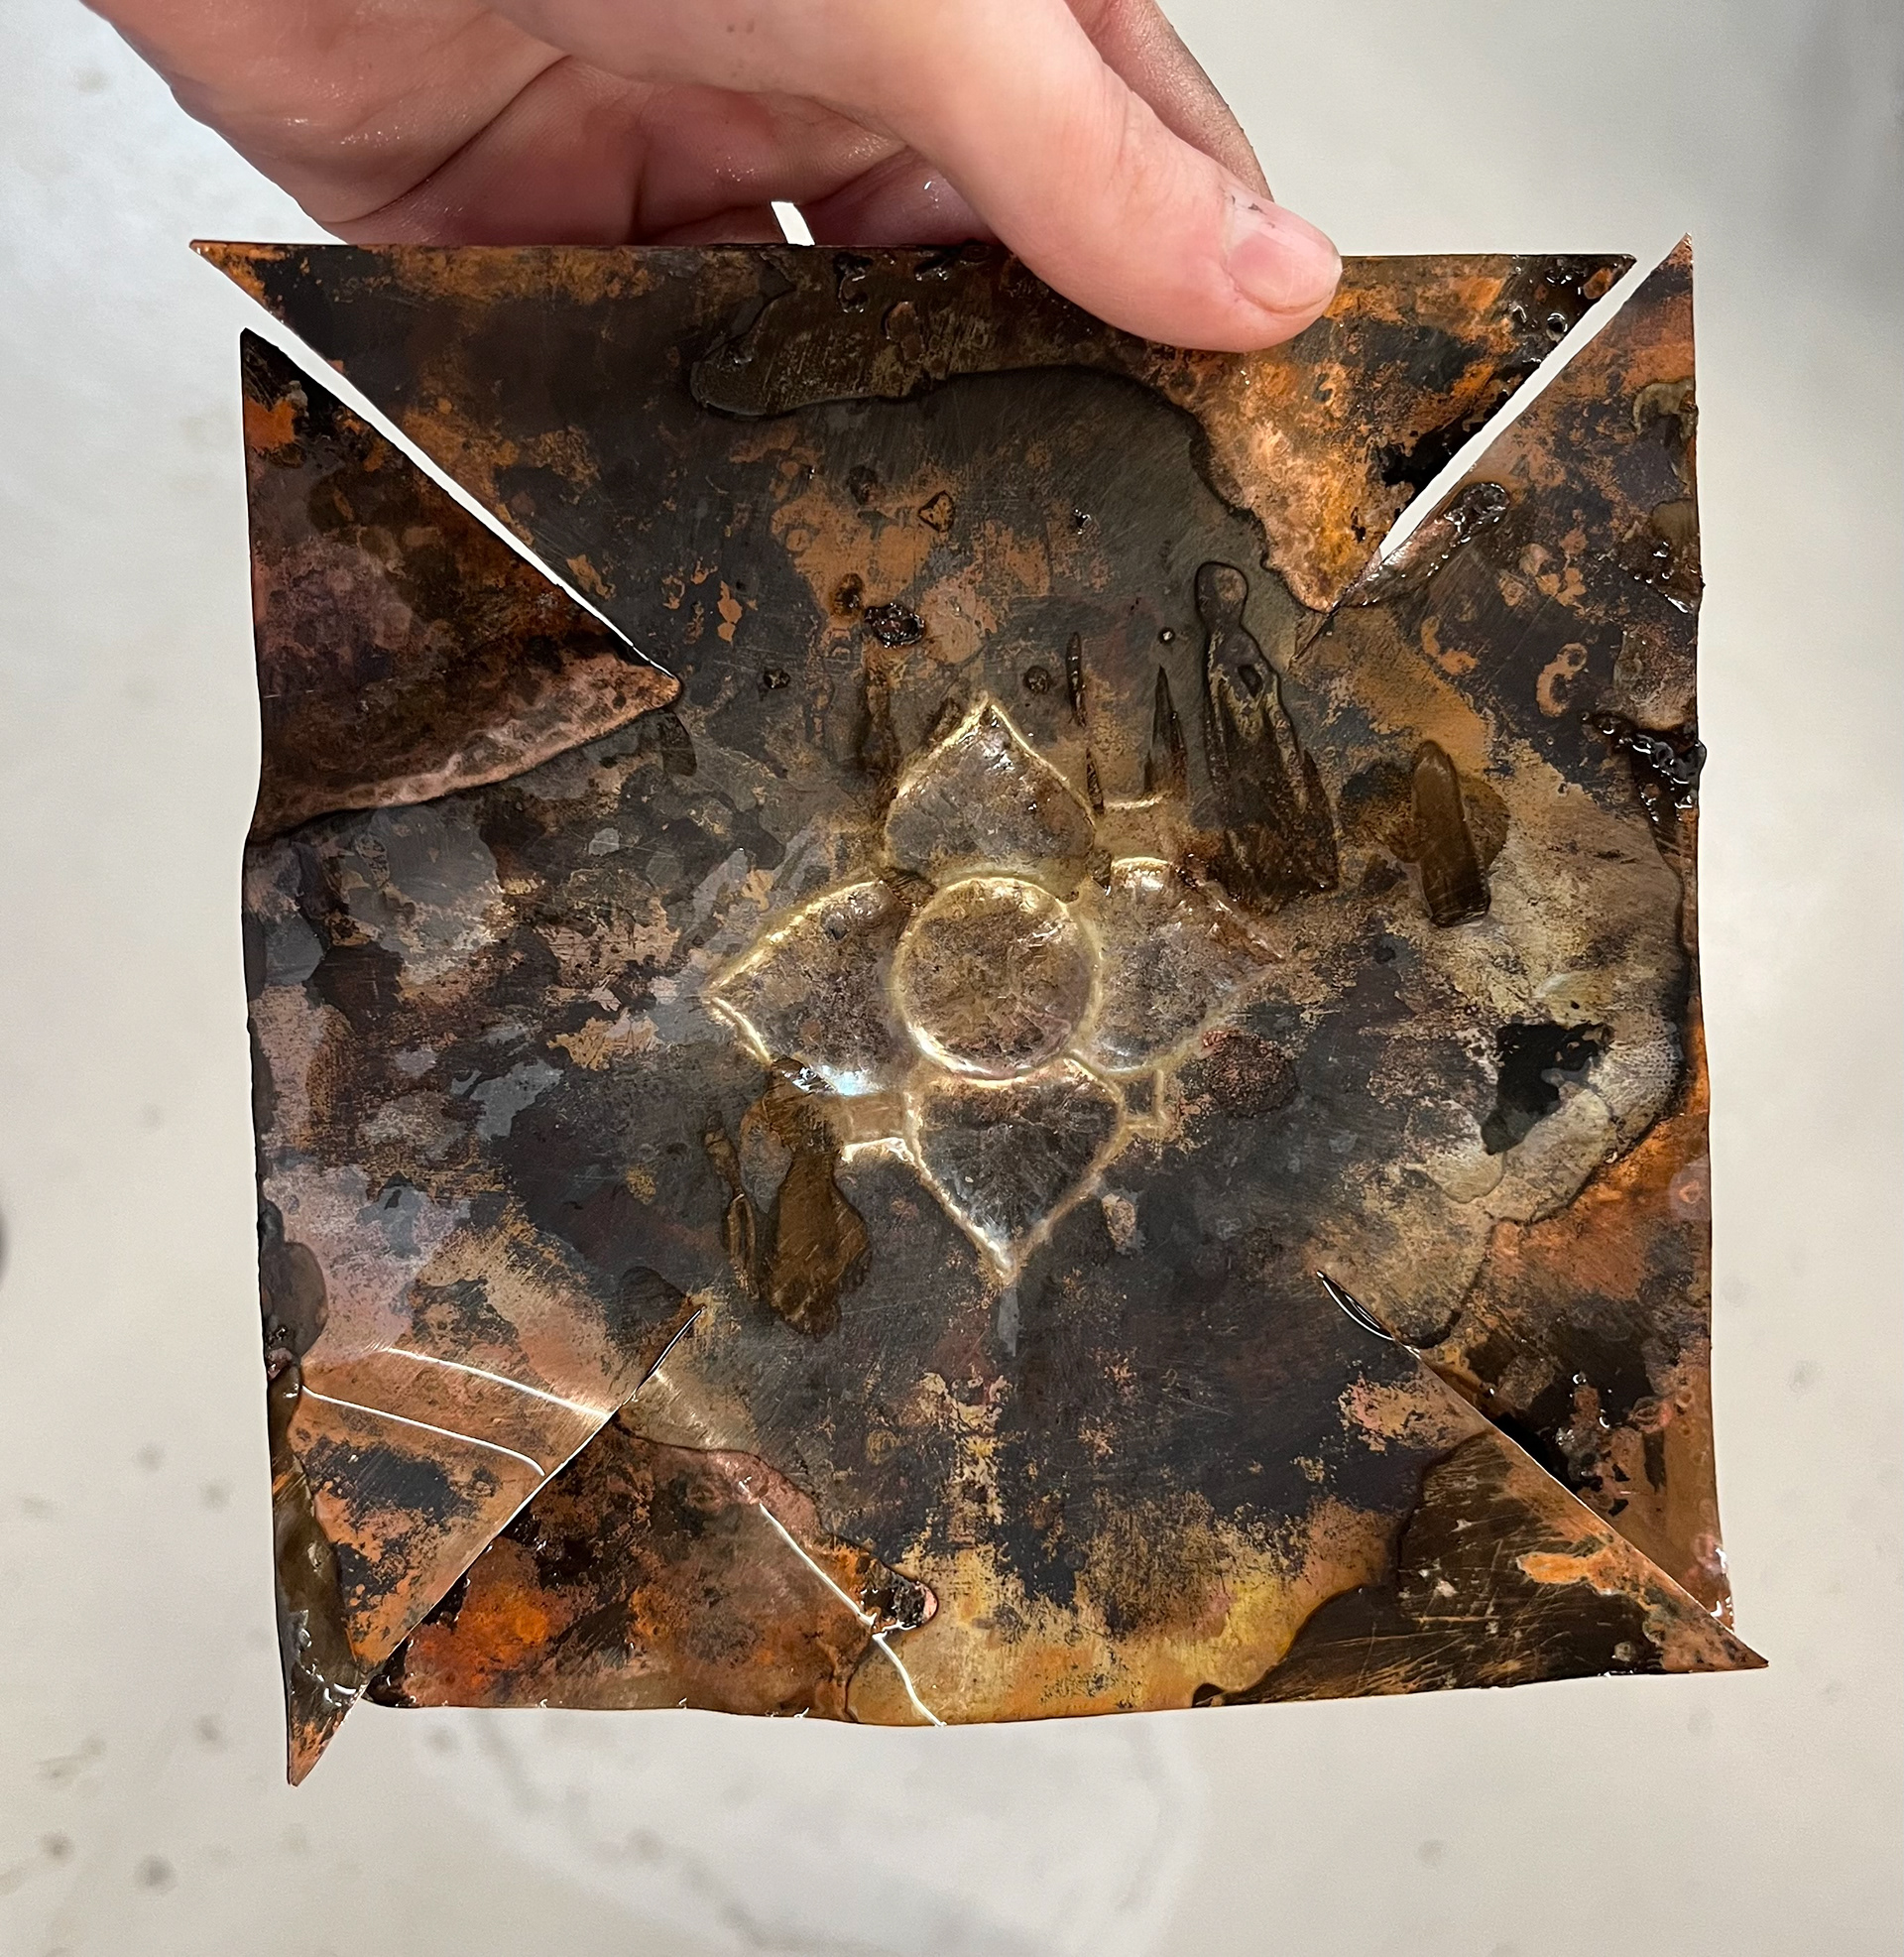
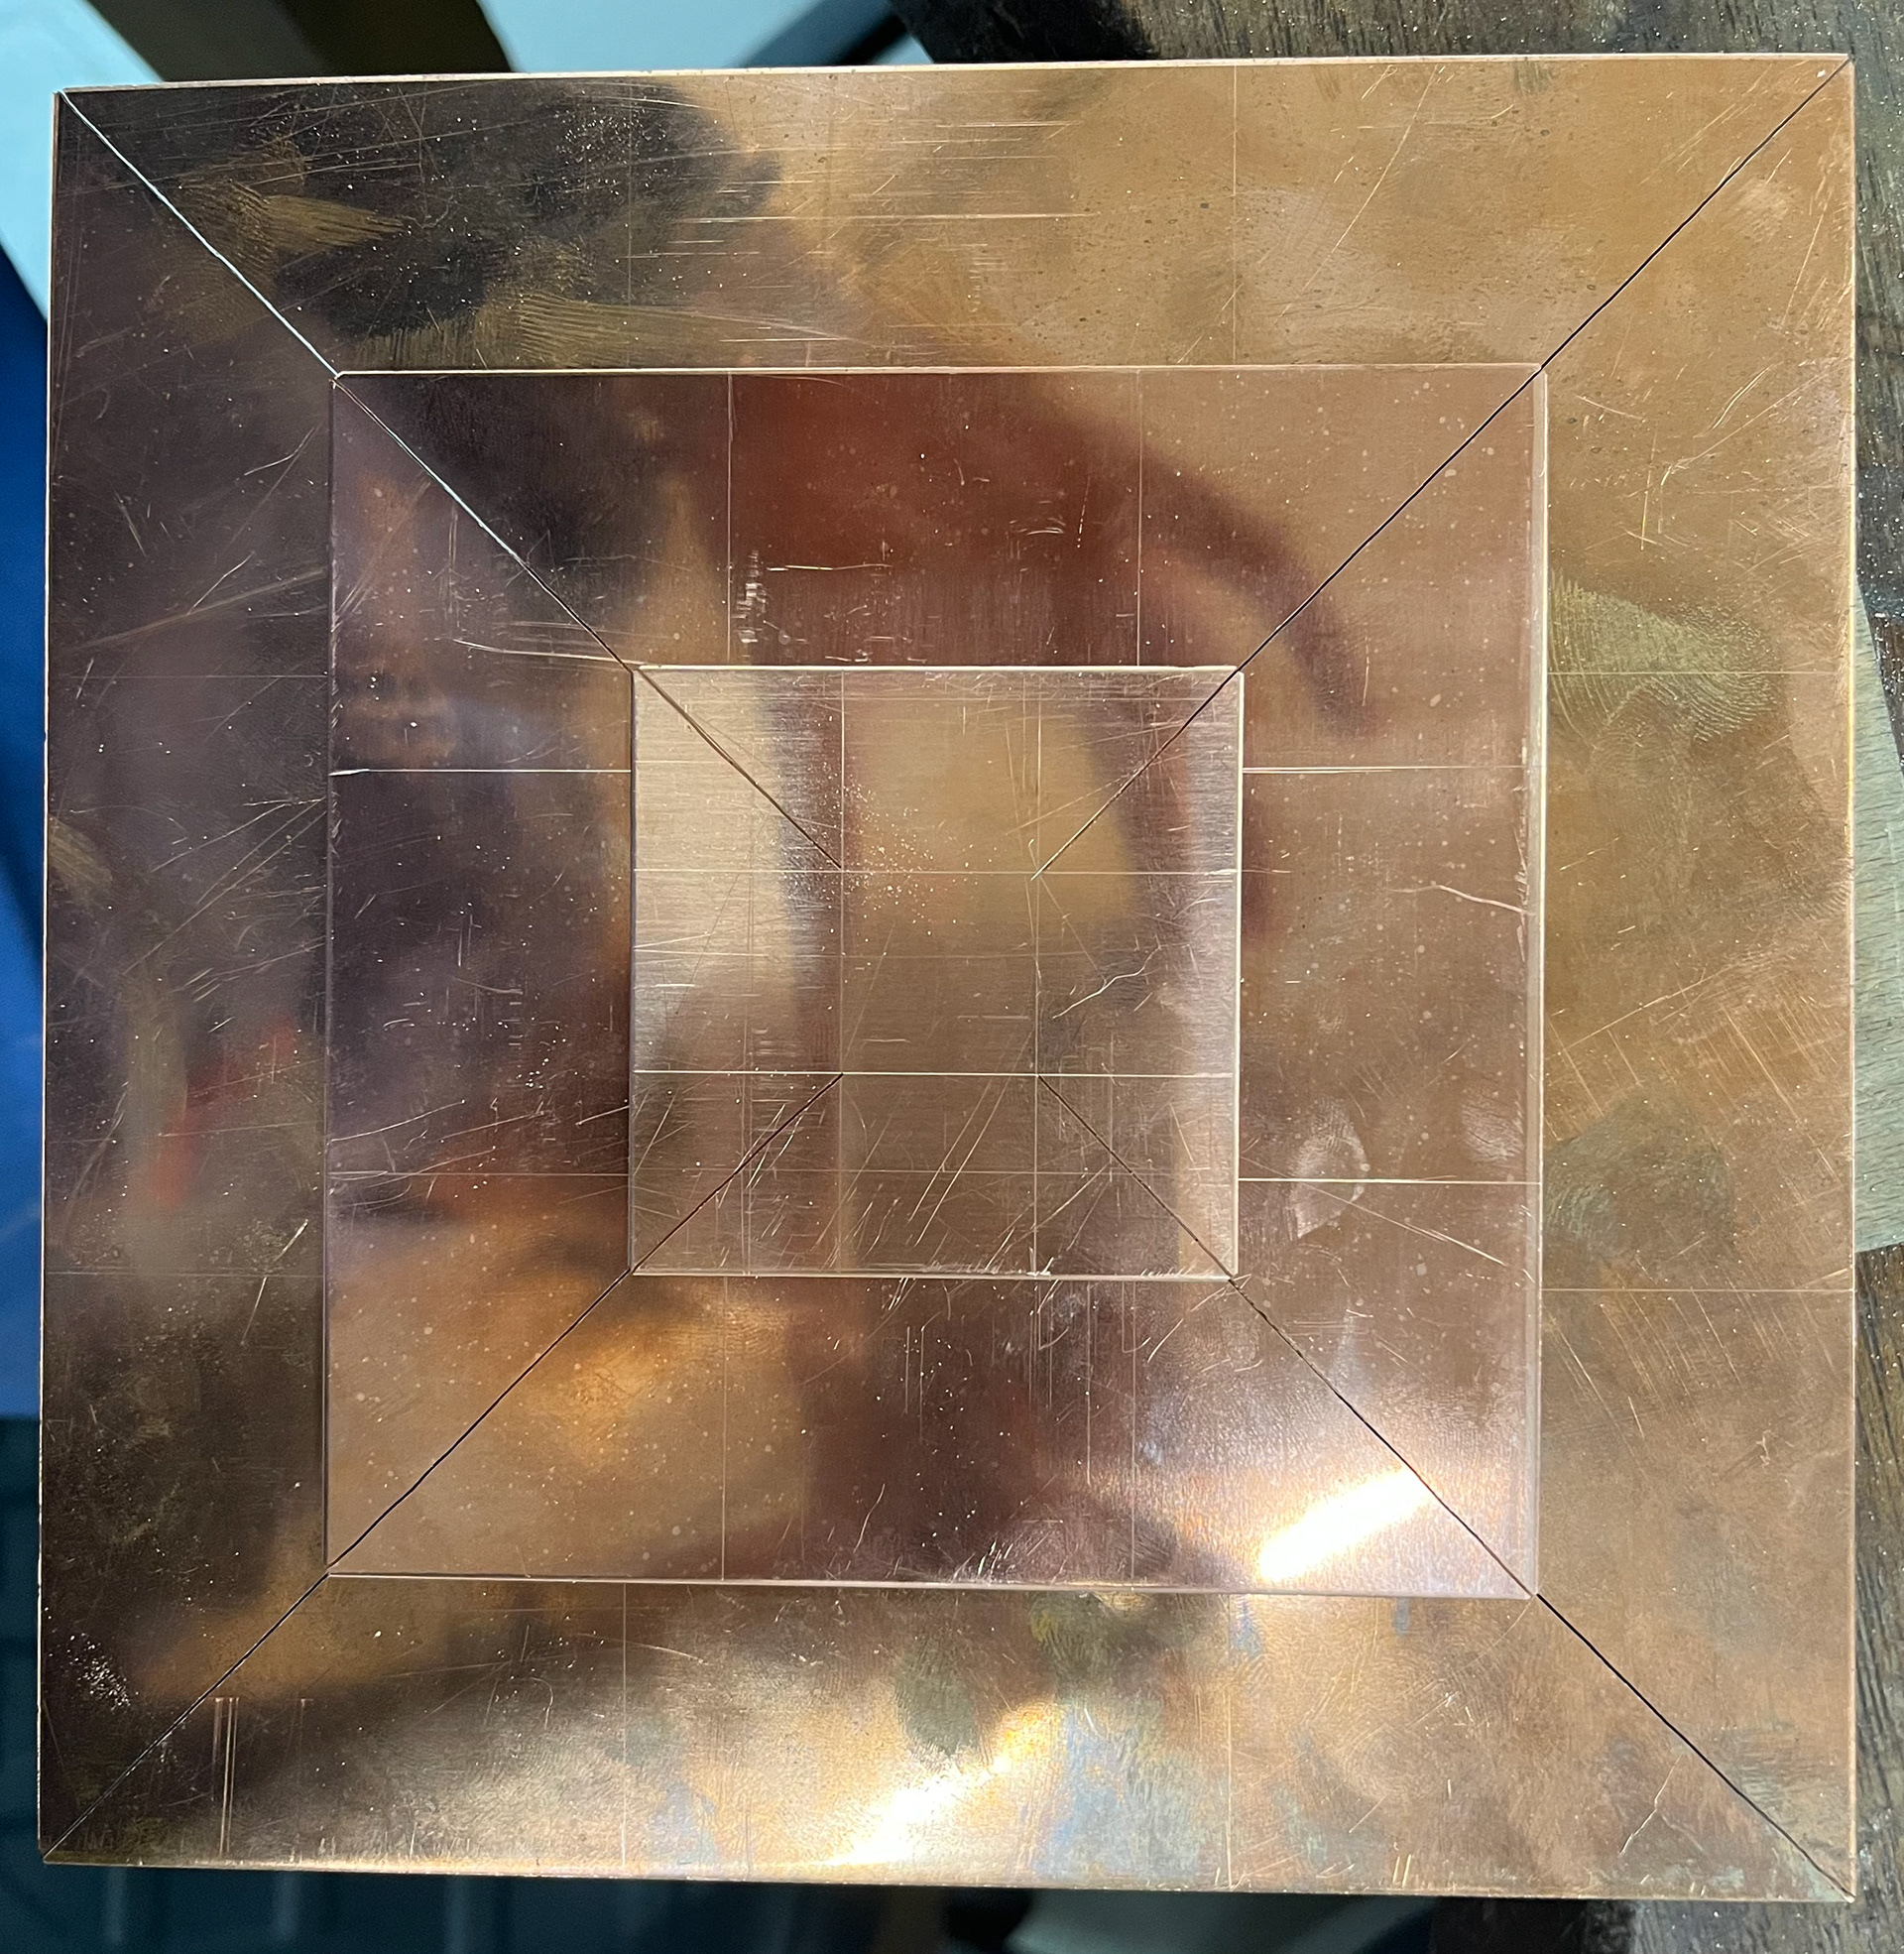
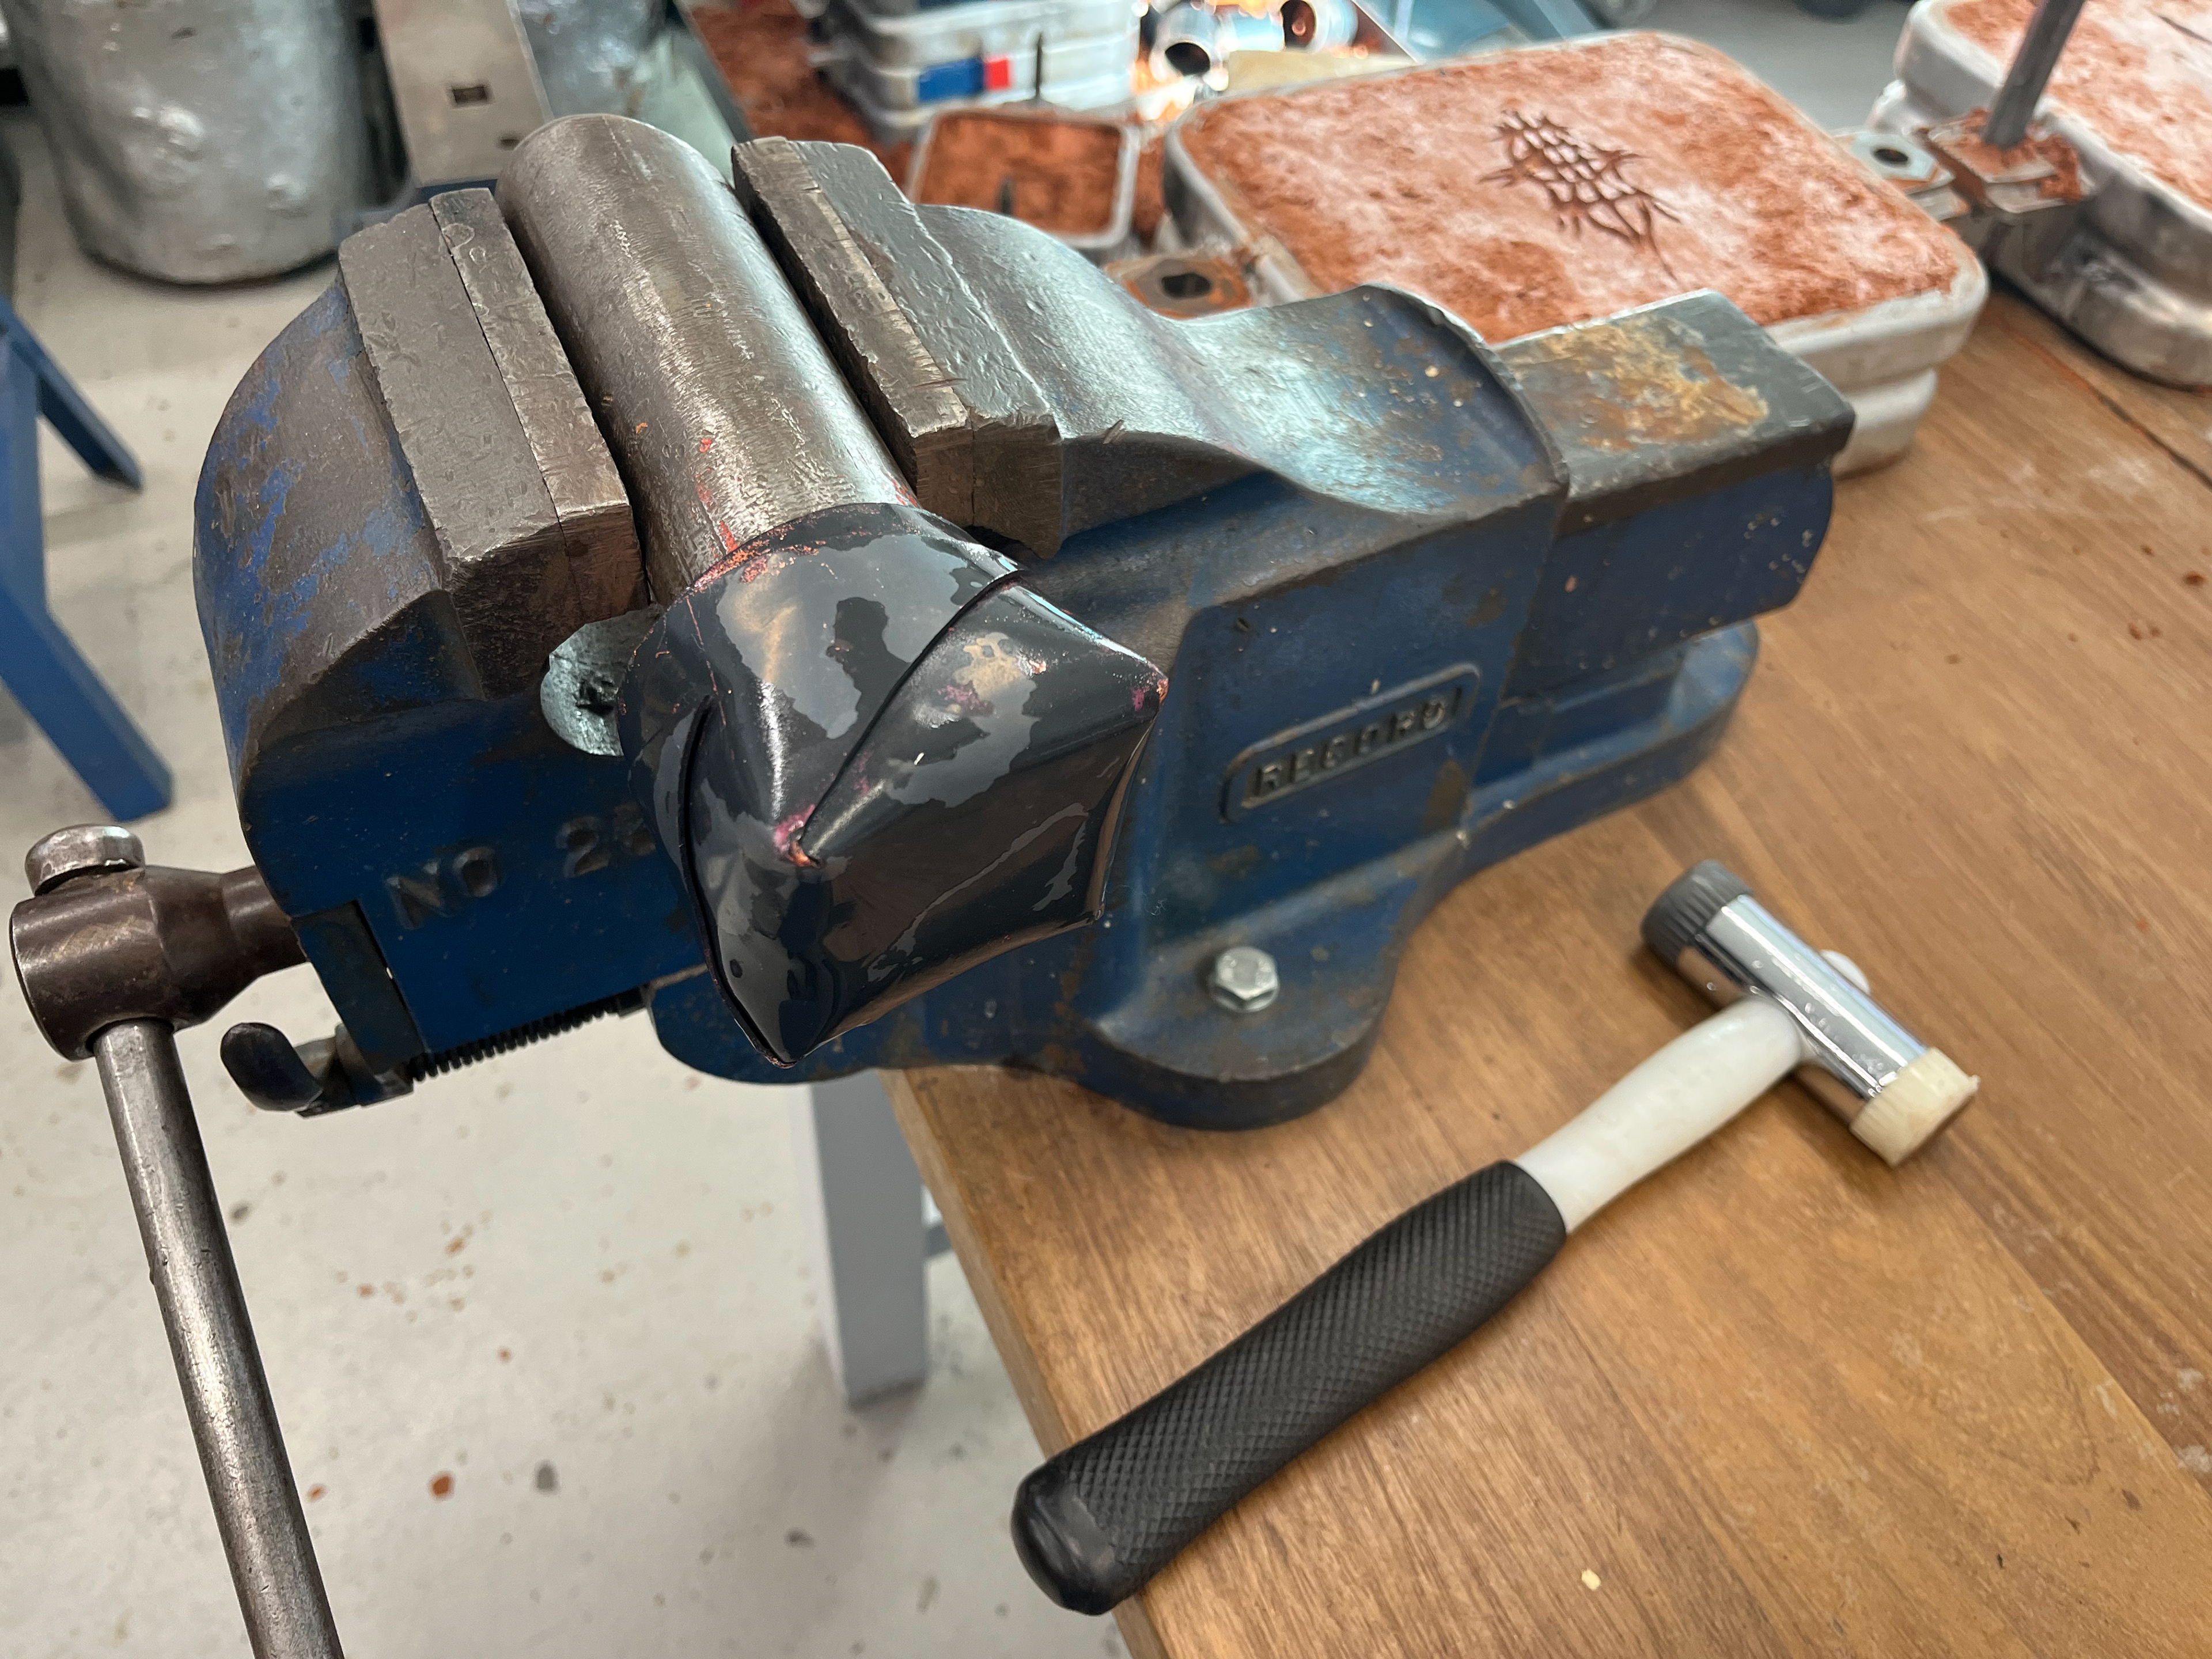
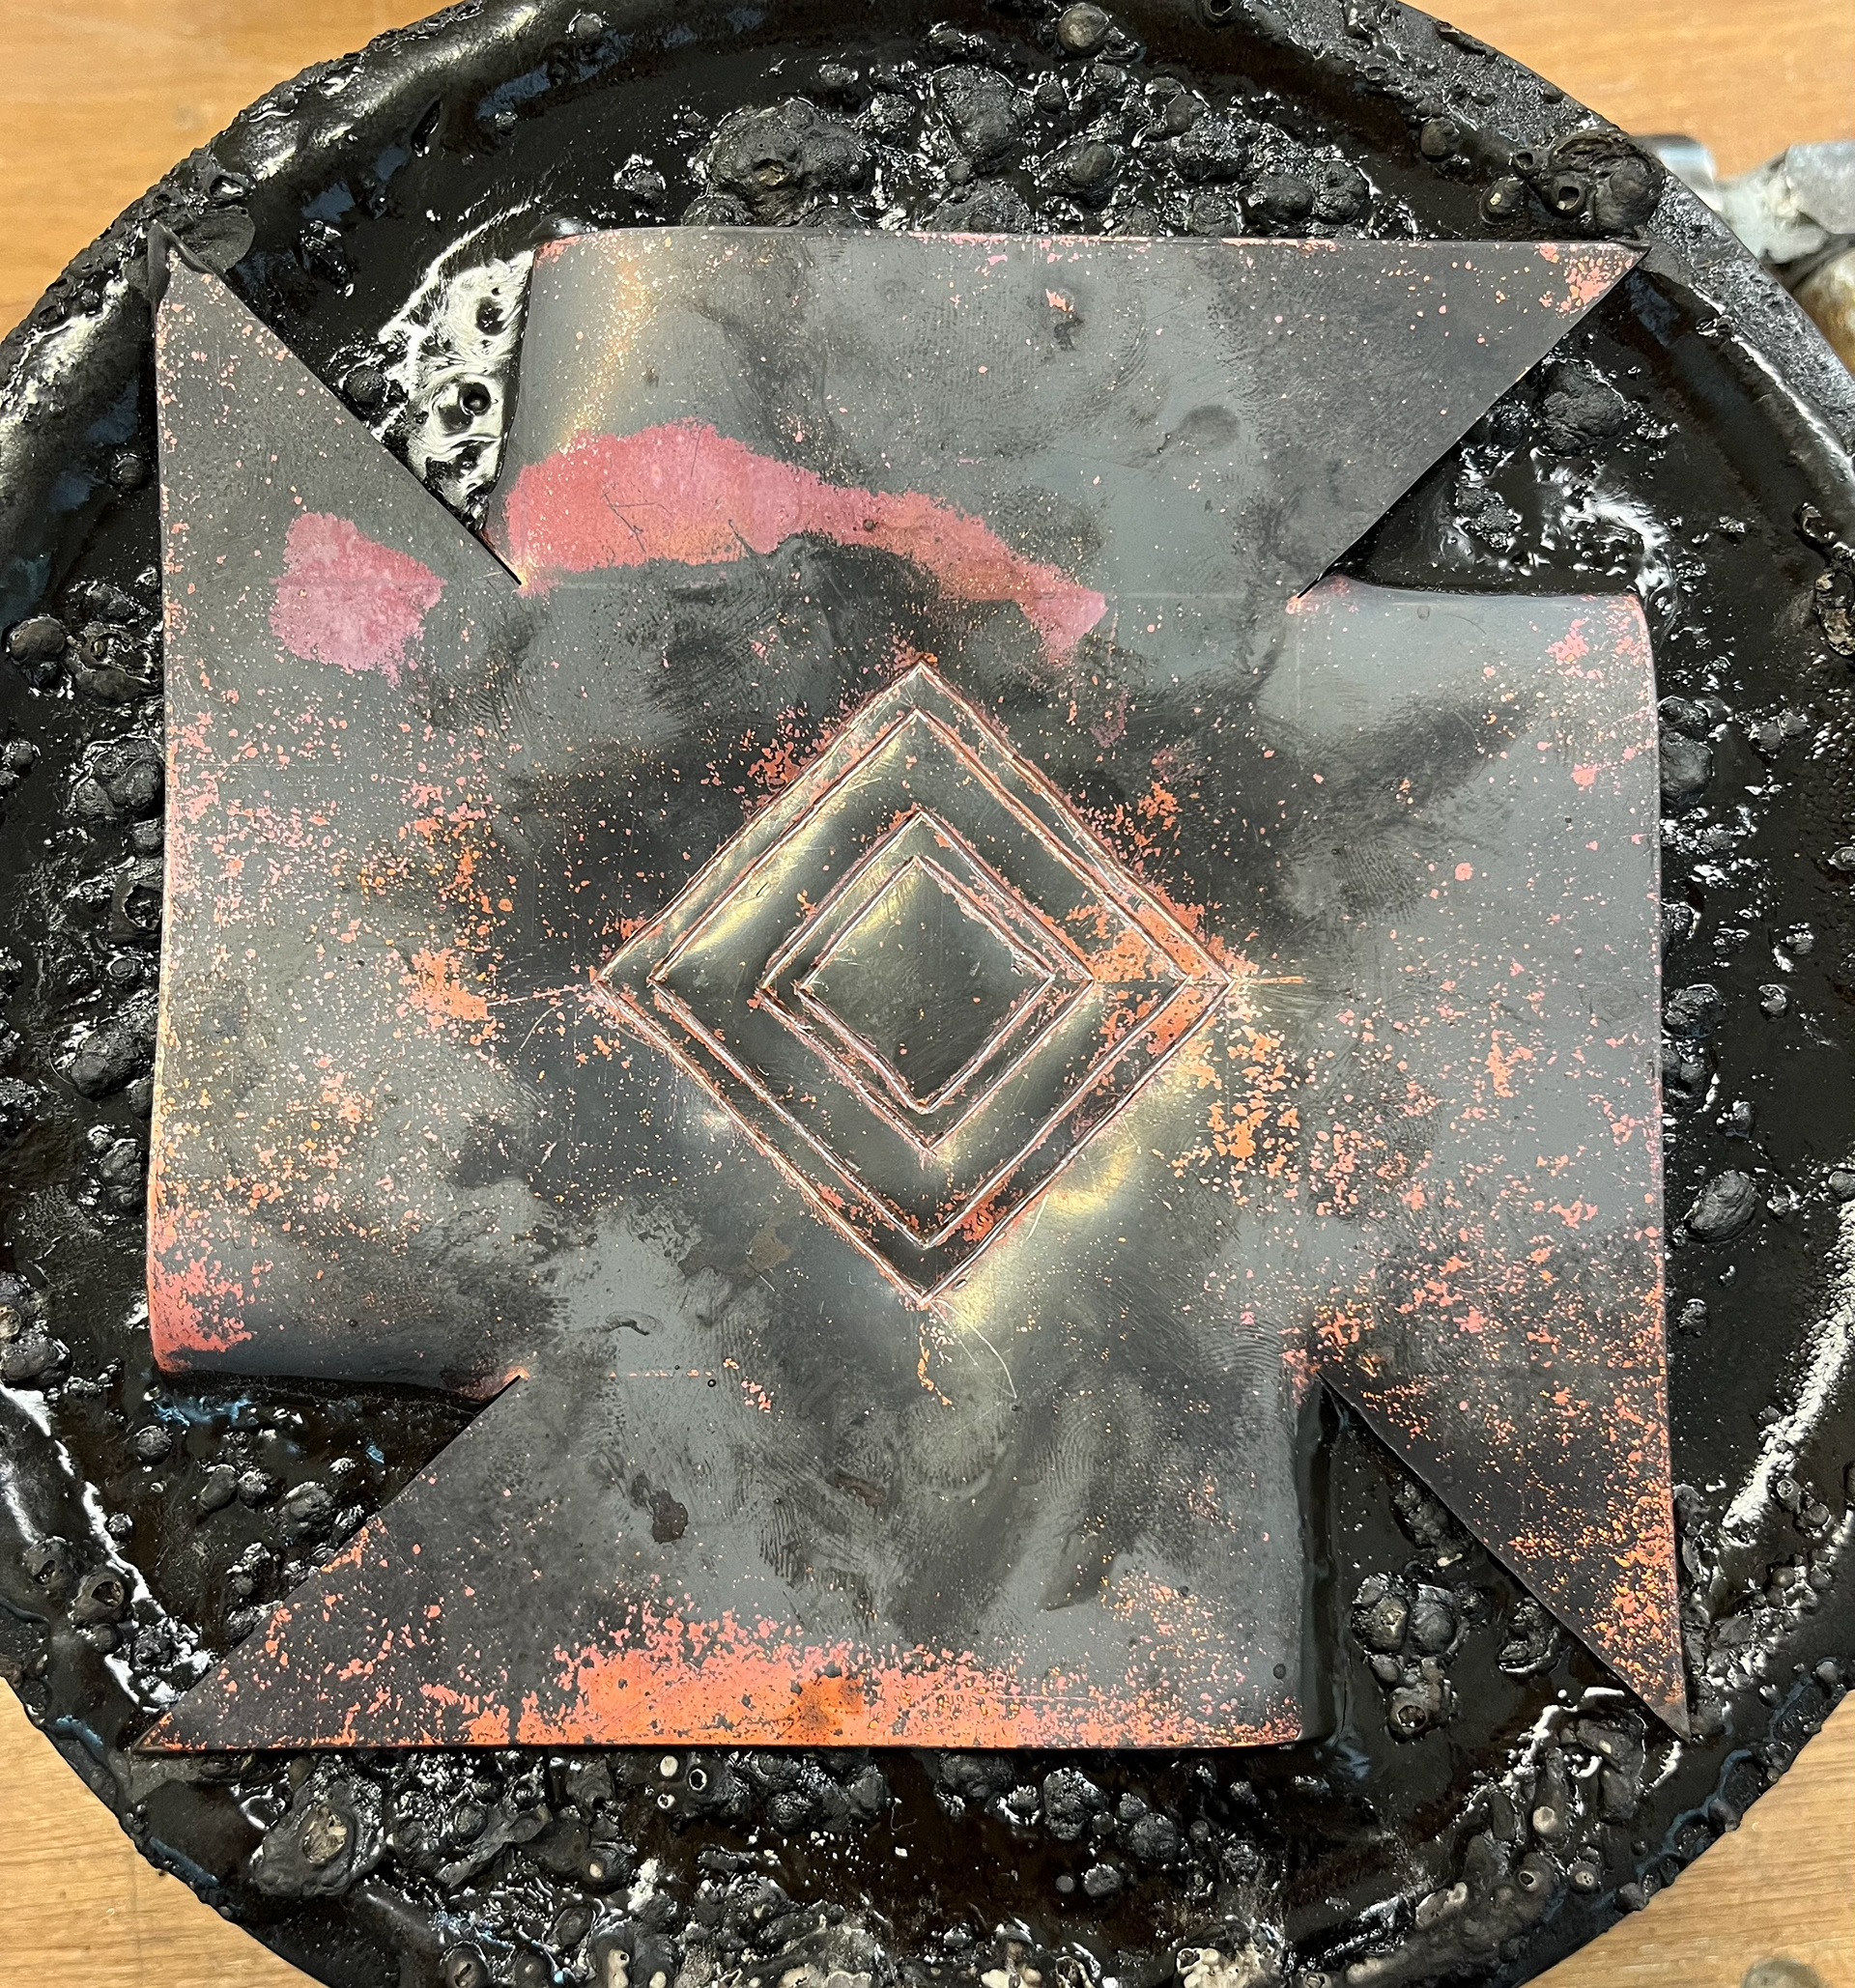
As my focus is now surface texture techniques, I thought I would explore how to do repousse and chasing, a metal working process where you use steel points to hammer in different patterns or images into a metals surface. In order to do this, you have to sink the piece in a bowl of molten pitch, which you heat with a flame and when you’ve folded down the corners, your piece is securely placed within the pitch and you can start hammering your pattern.
I thought it would be interesting to explore this and see its relationship with patinas. If I could find a way of incorporating it on the lids of my boxes, it could be an interesting feature to include. Bellow are some test pieces of me trialing the process.


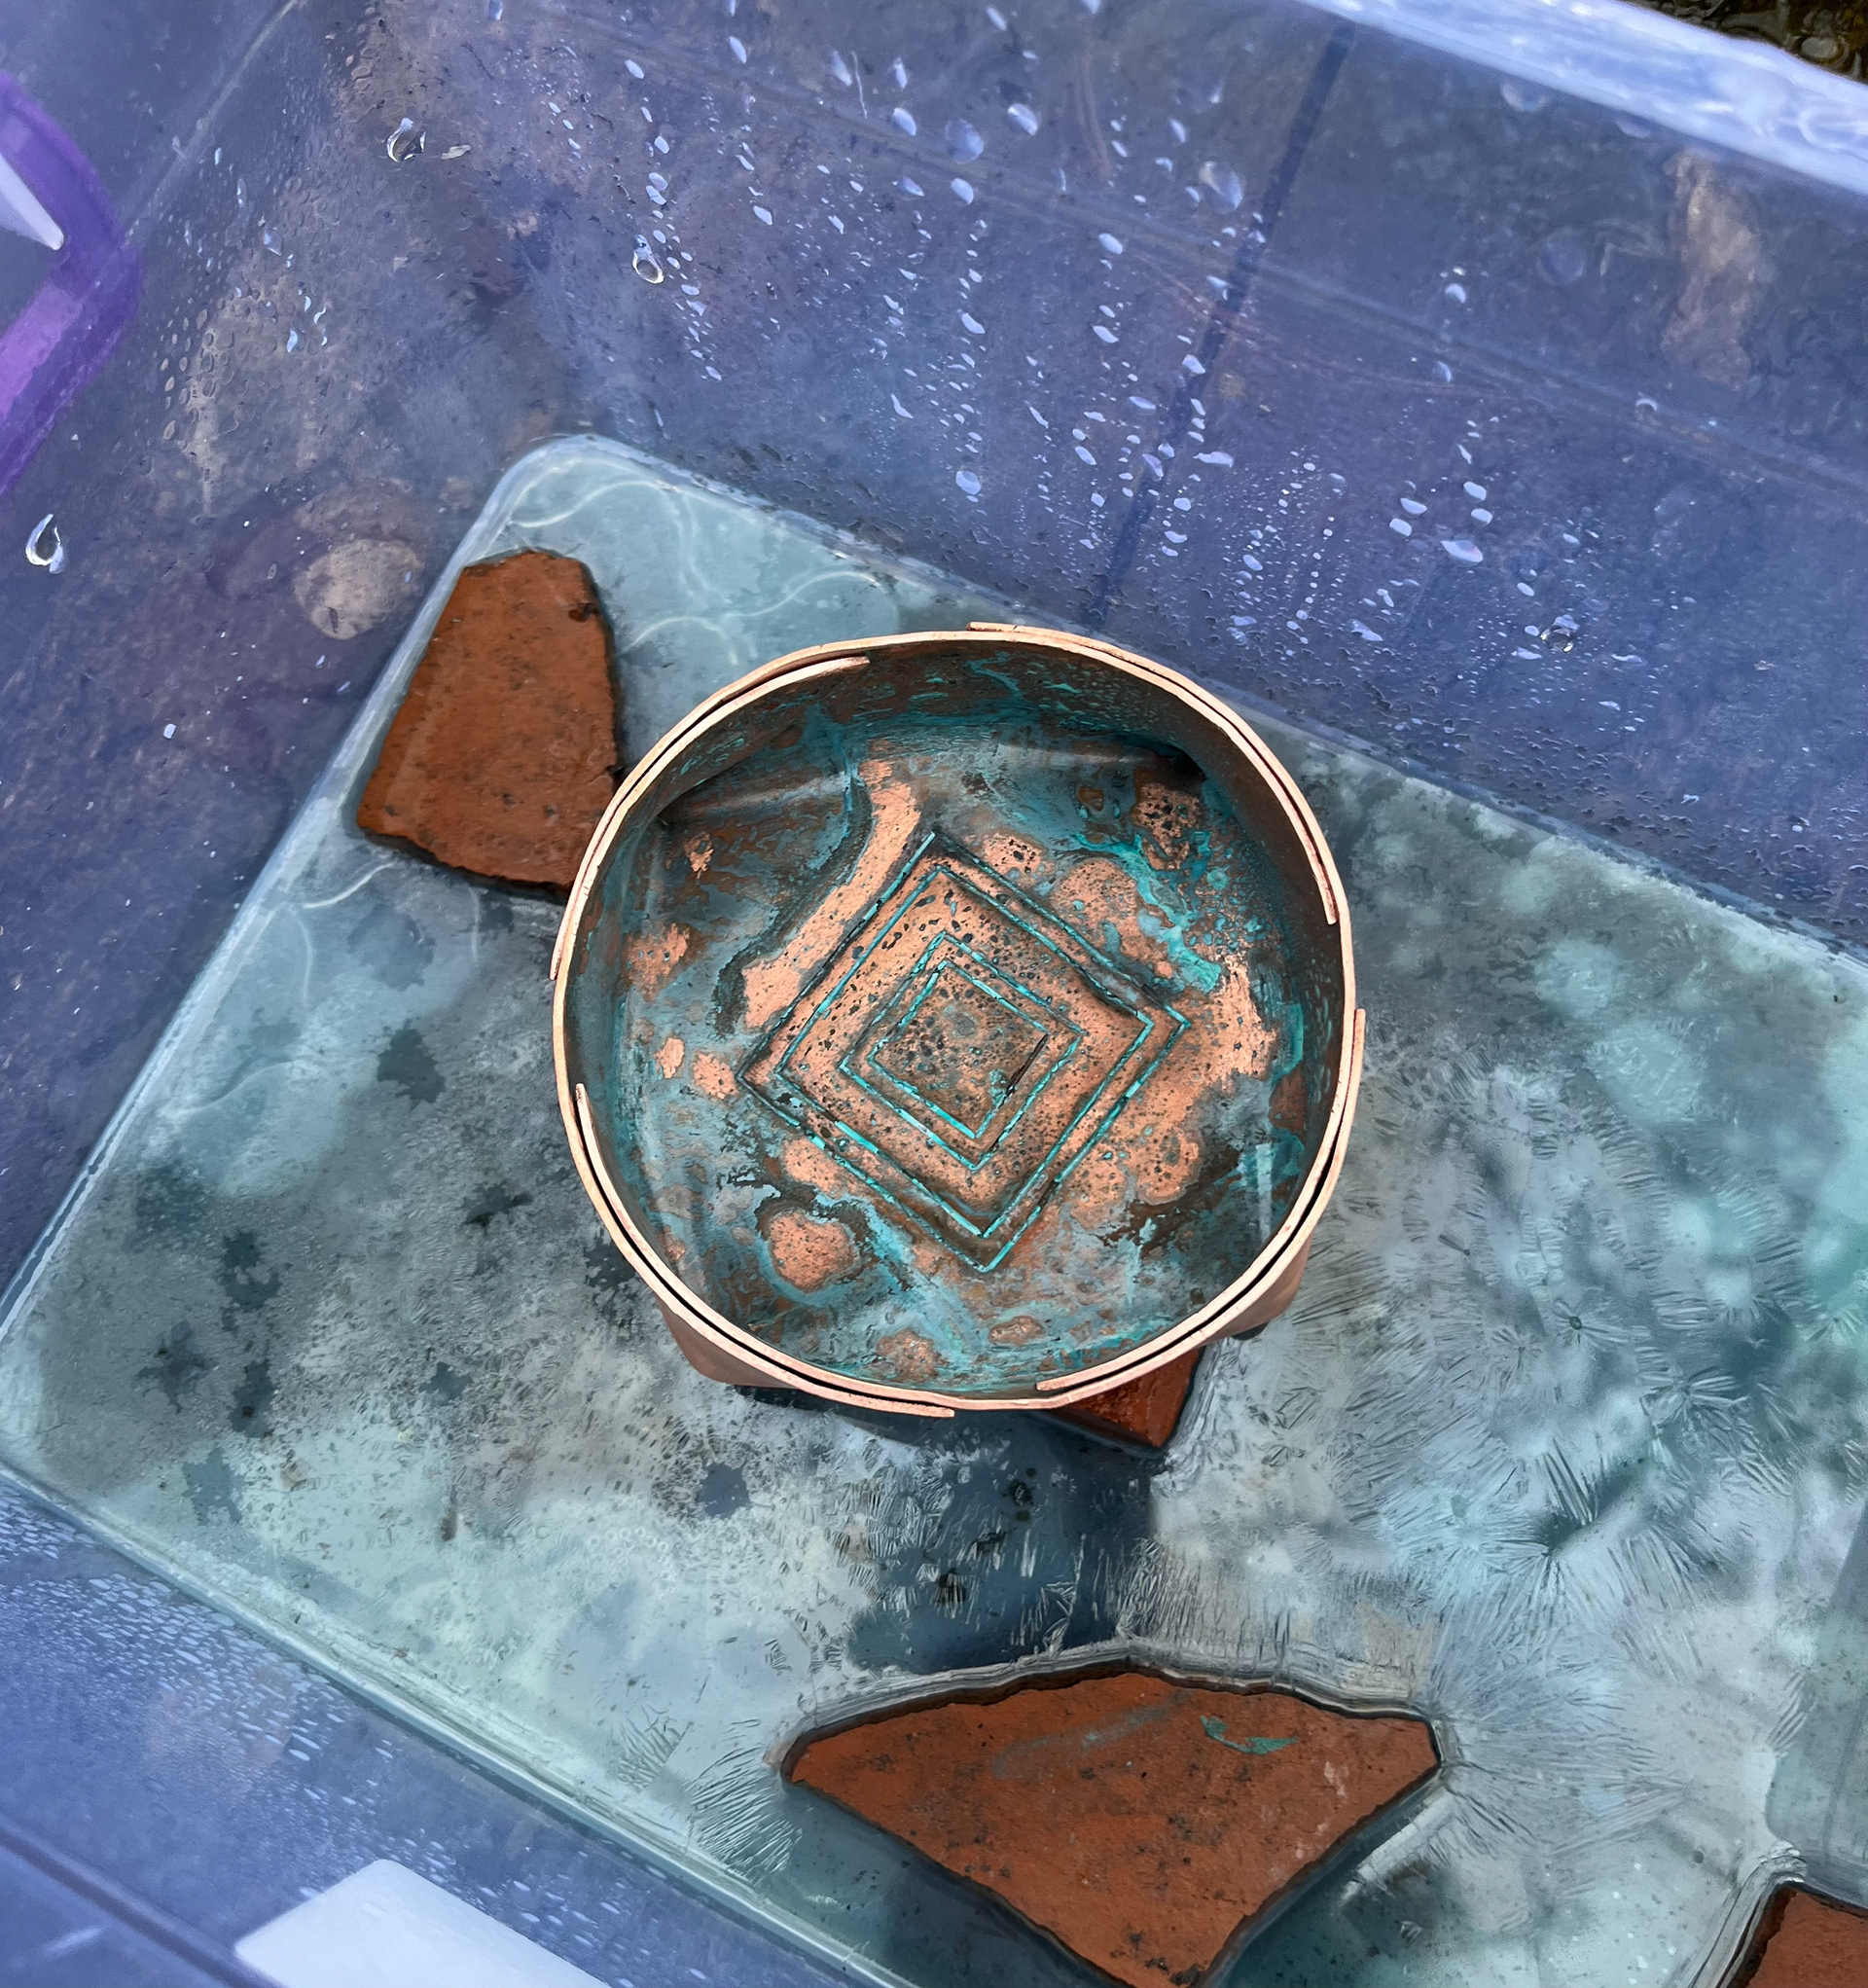
The image on the left shows my patina on the repousse piece I made and I really liked the effect the patina made on a change in relief as it looked like lichen, letting the patina develop in its own way like an organism. However, for reasons I am still trying to figure out, the patina started to crack and flake off. This was really upsetting as I had never seen the patina behave in this way but as soon as I took it out to dry it all started to fall off. I tried saving it with a sealant to make it all stick together, but that failed too and then I was left with a crusty looking piece.
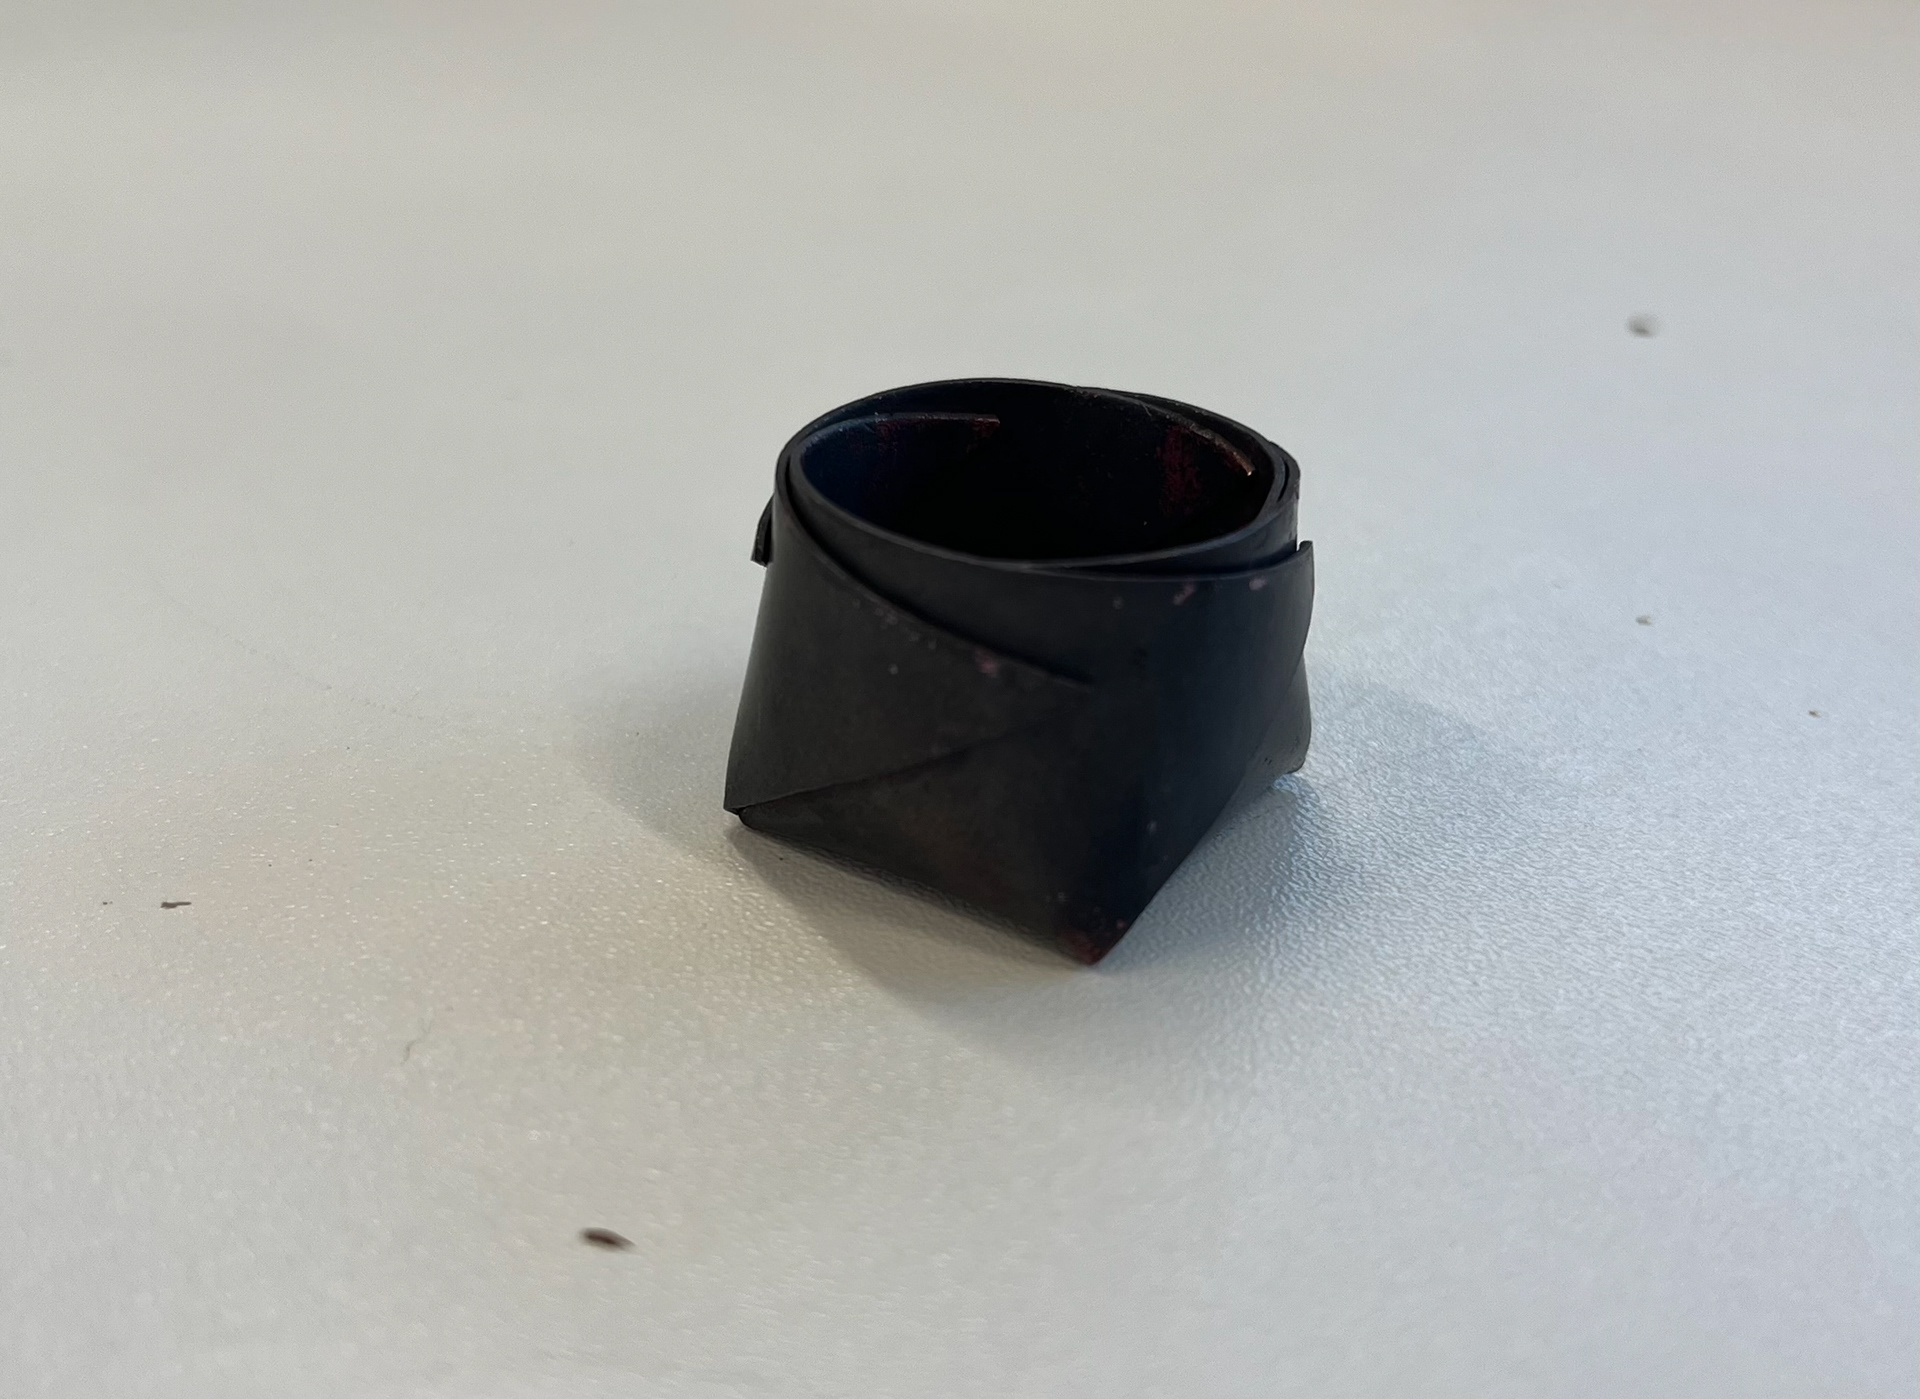
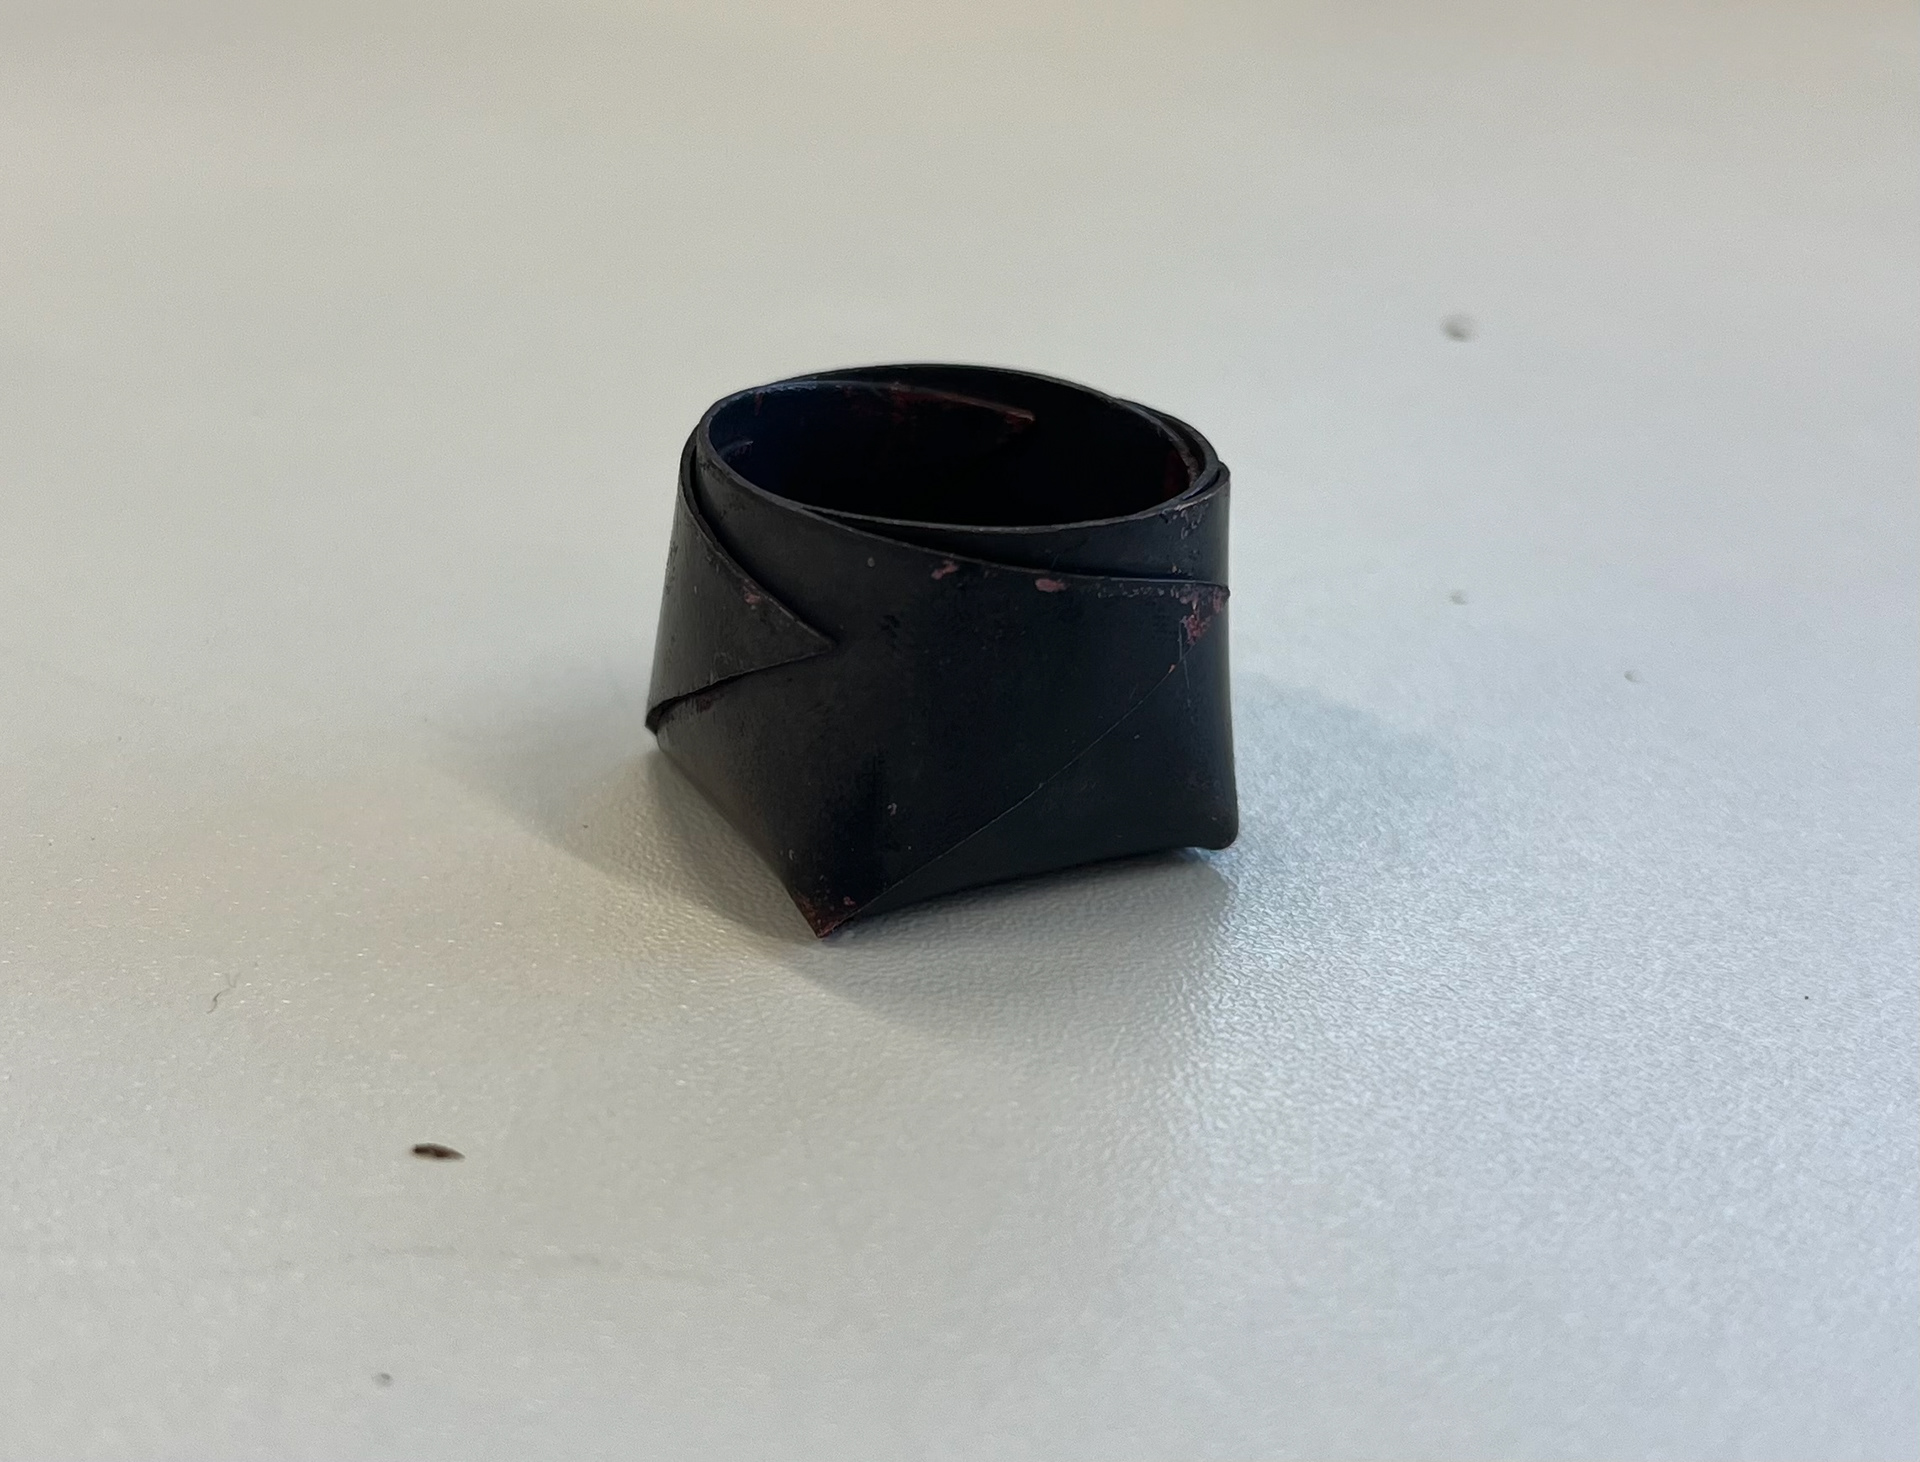
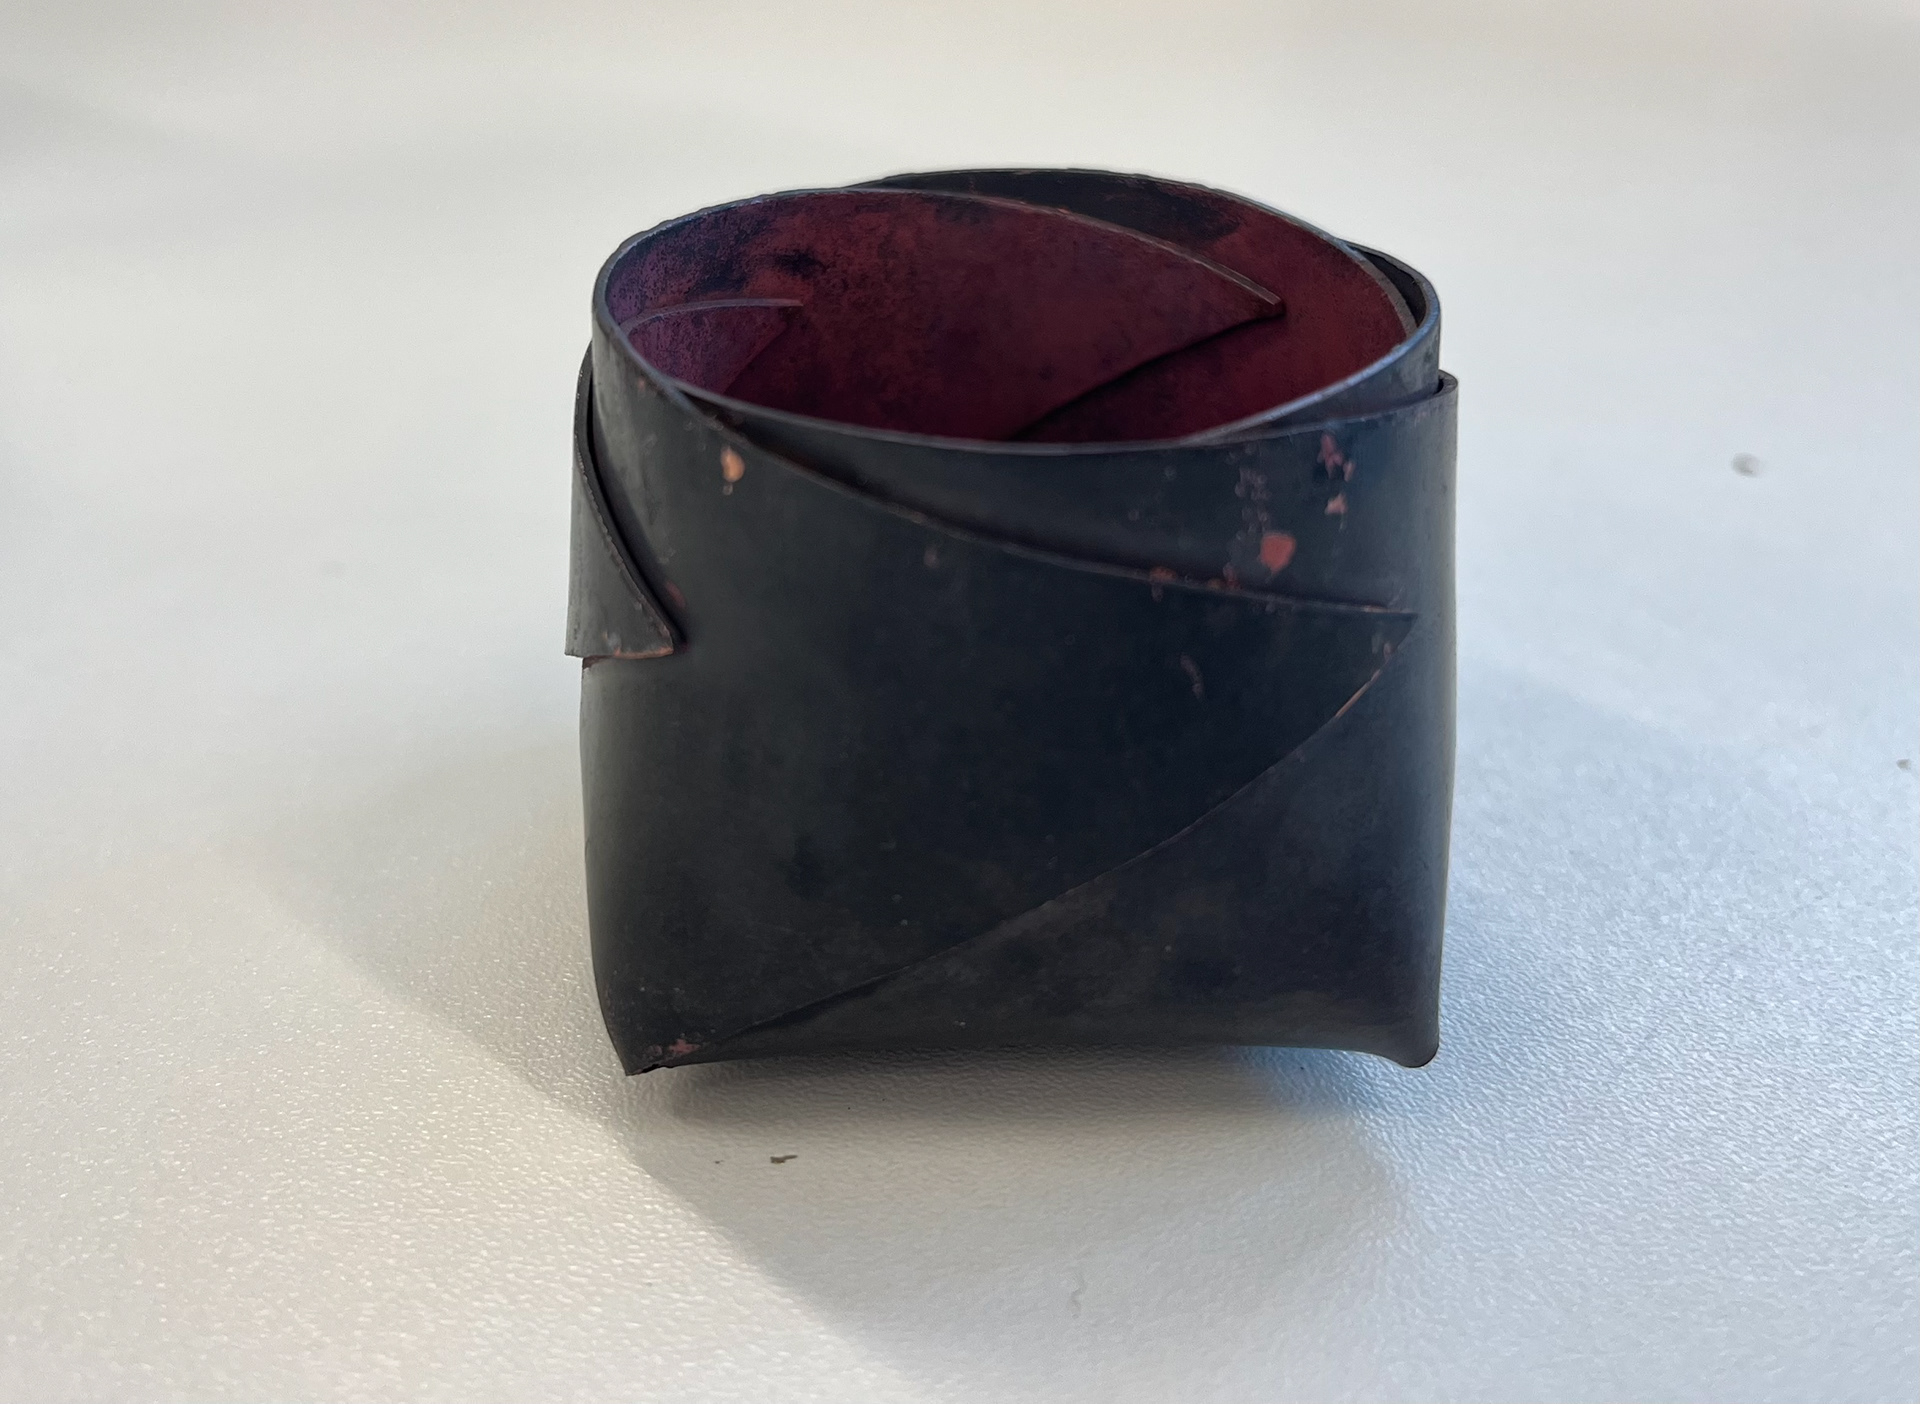
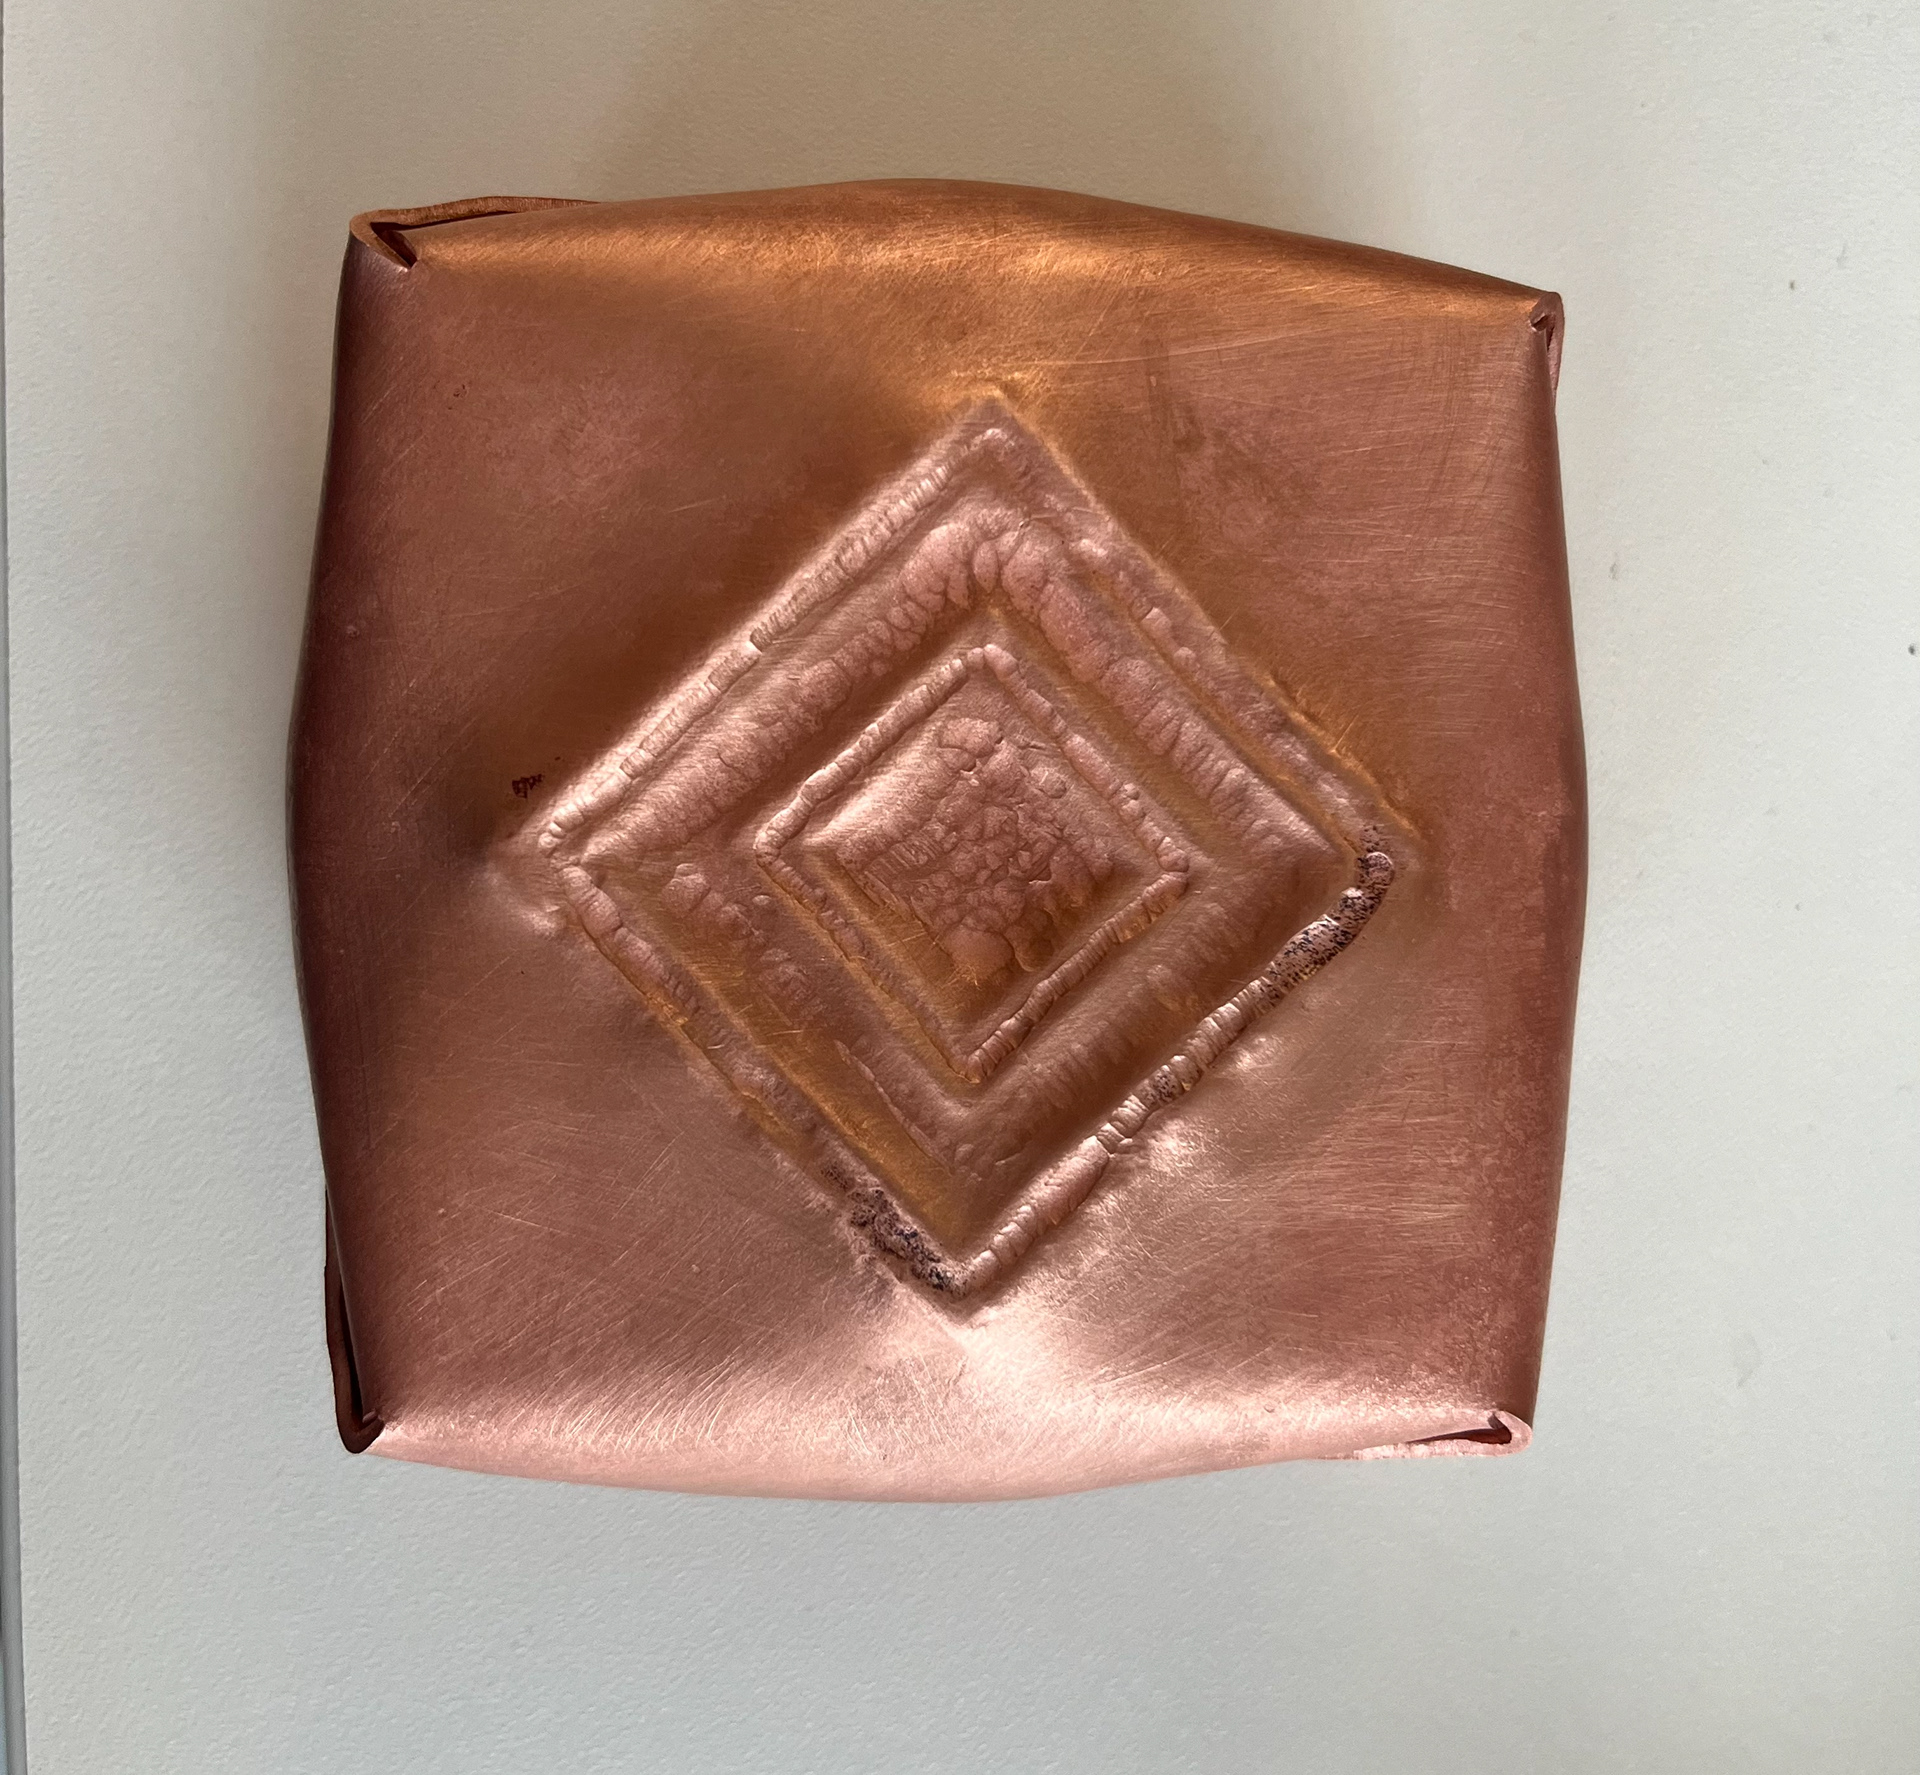
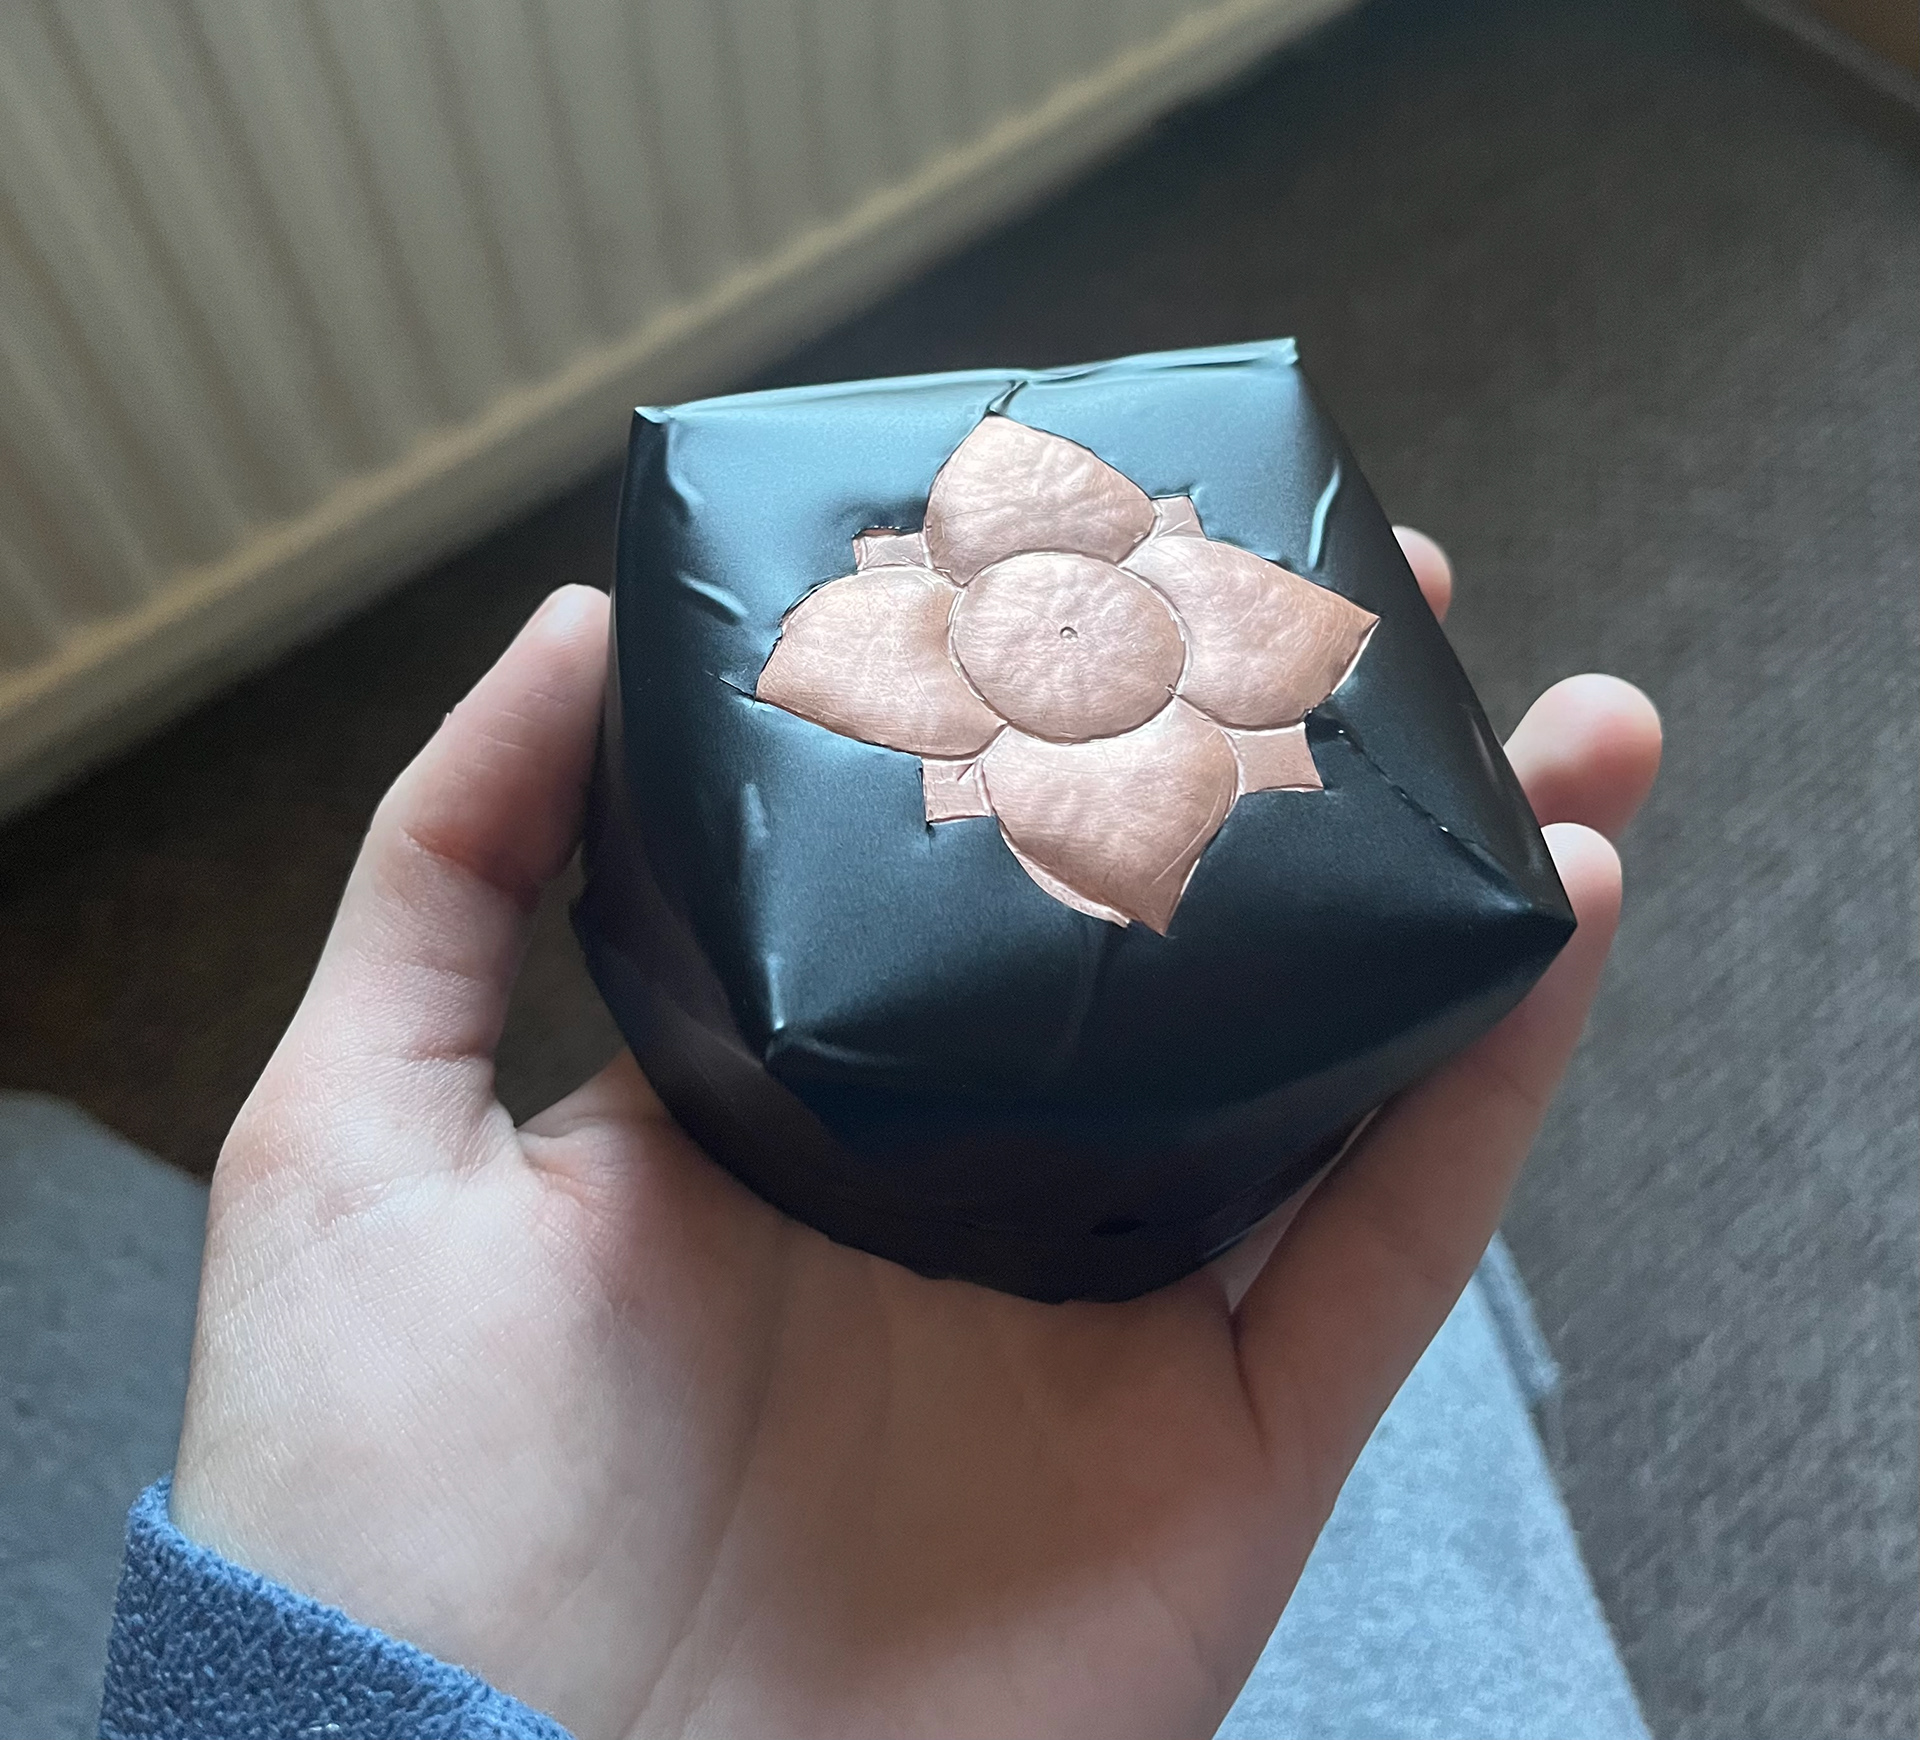
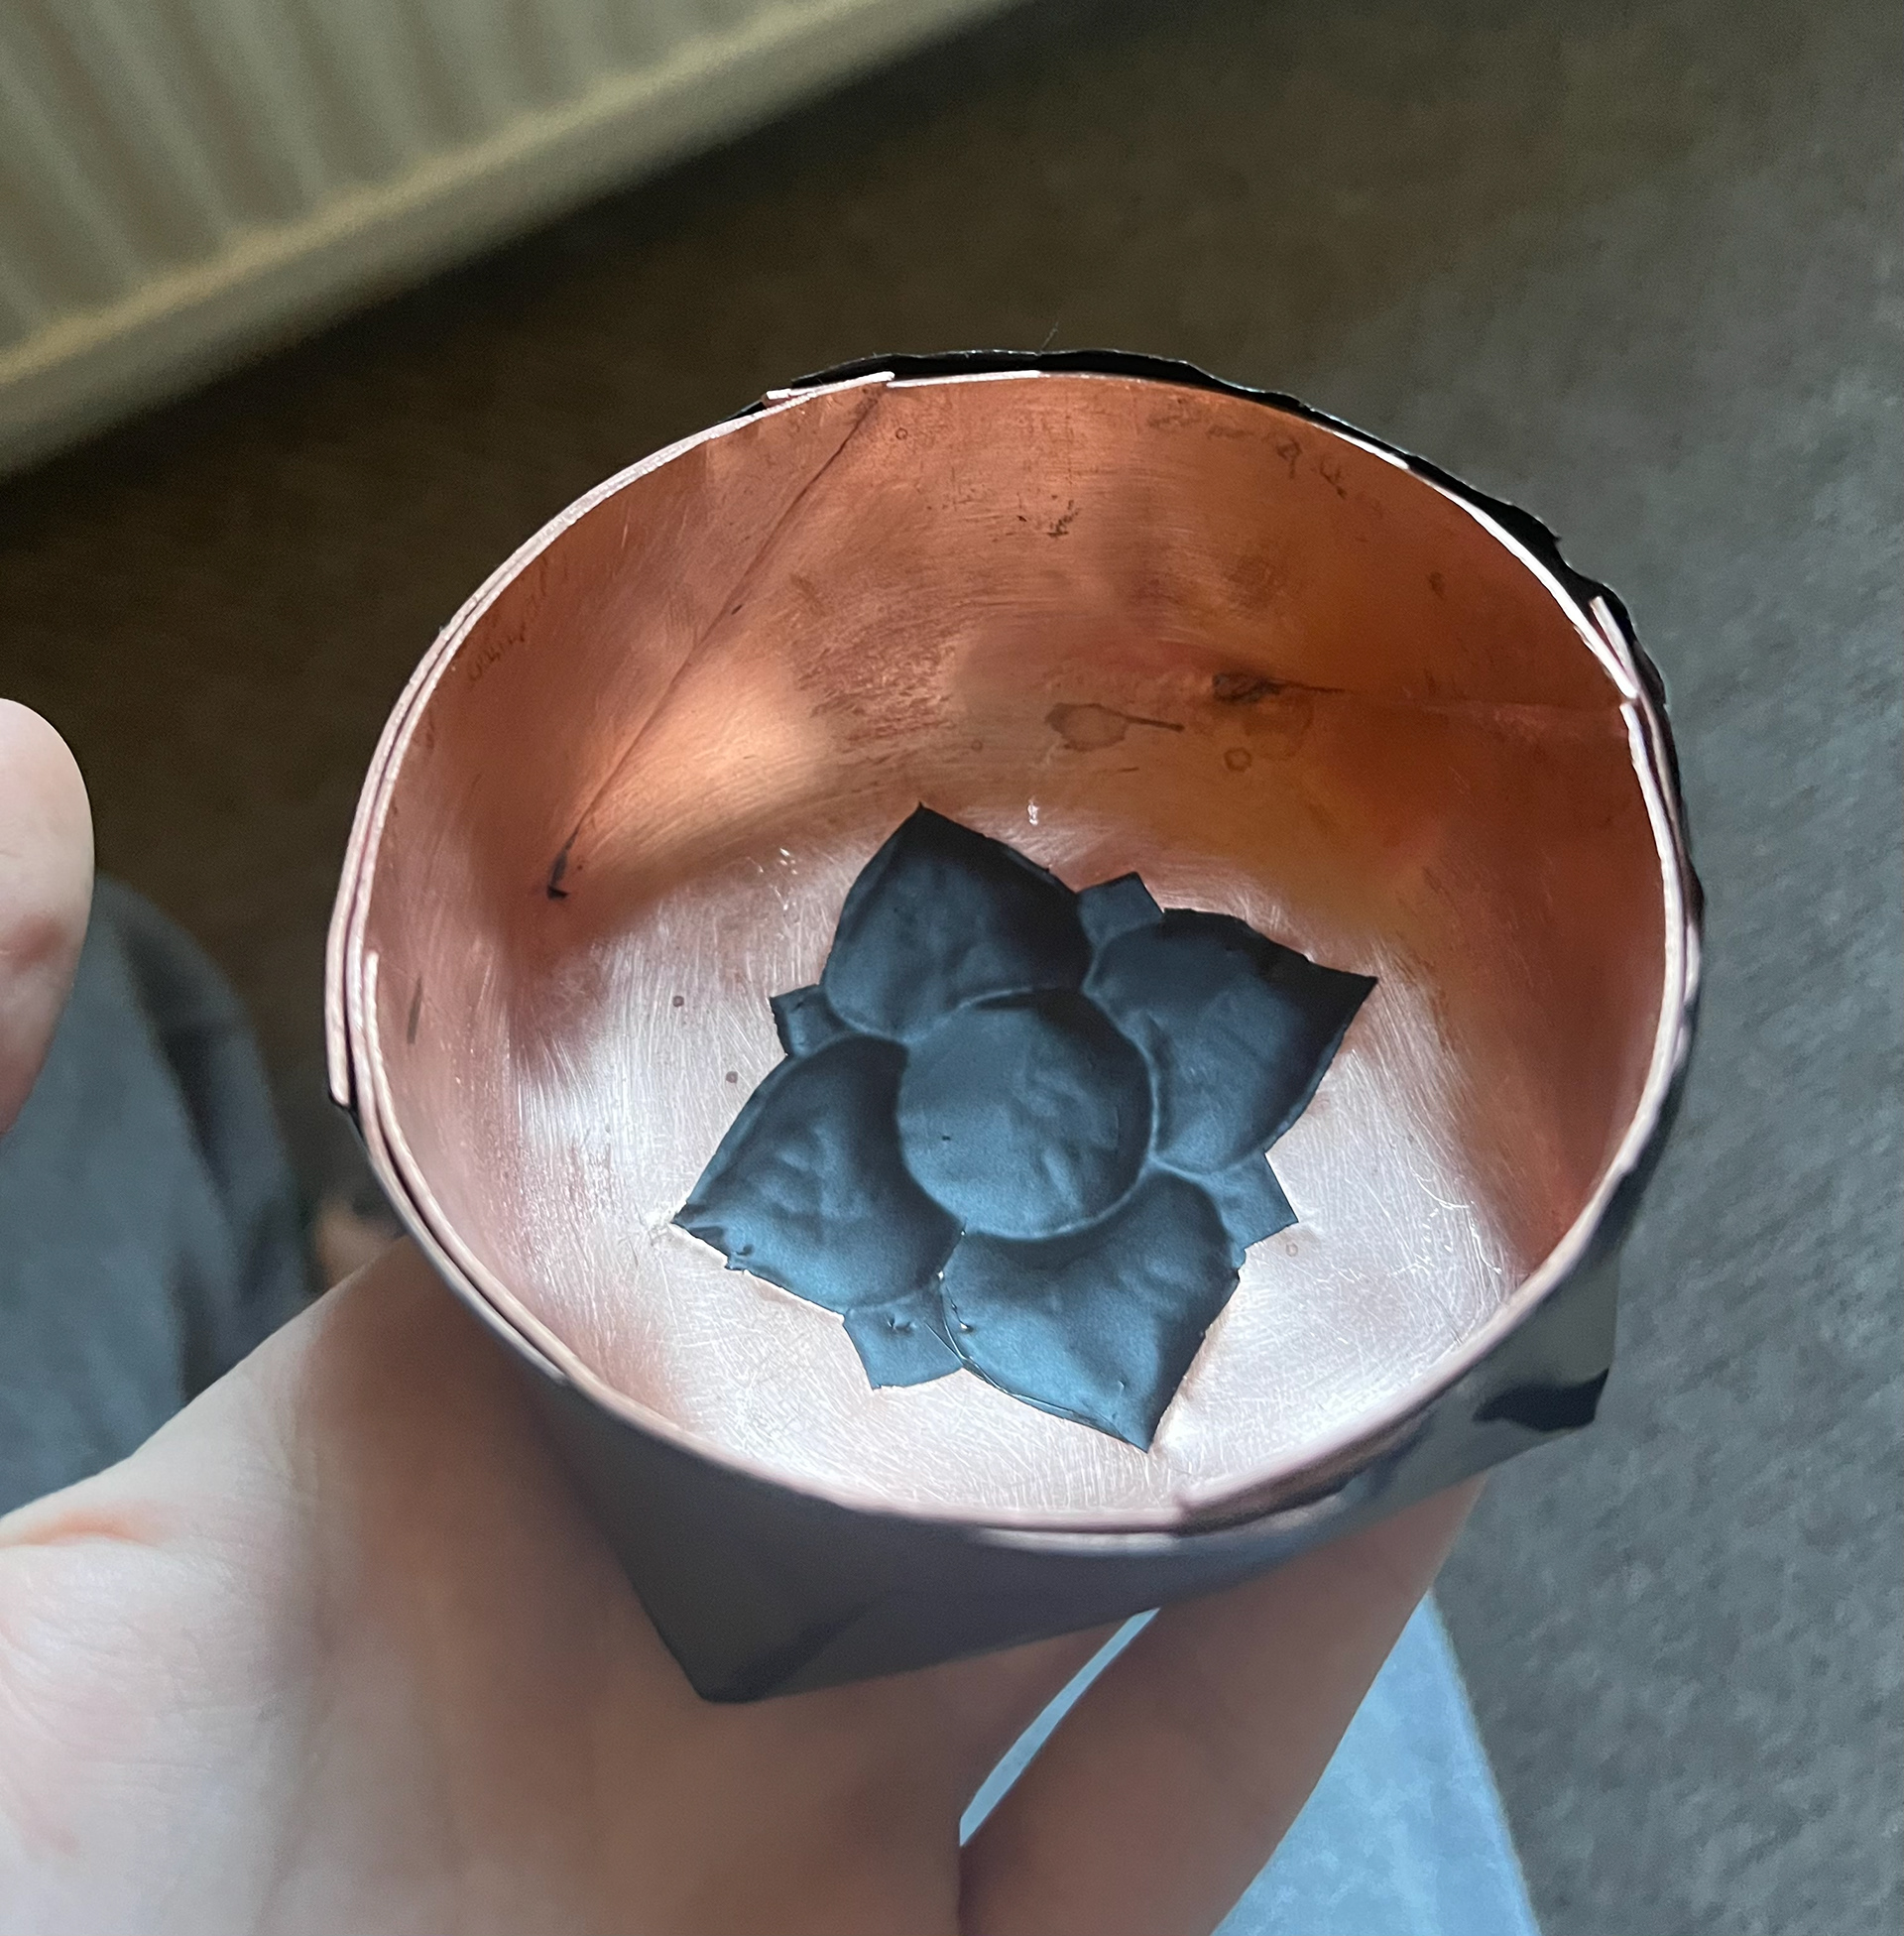
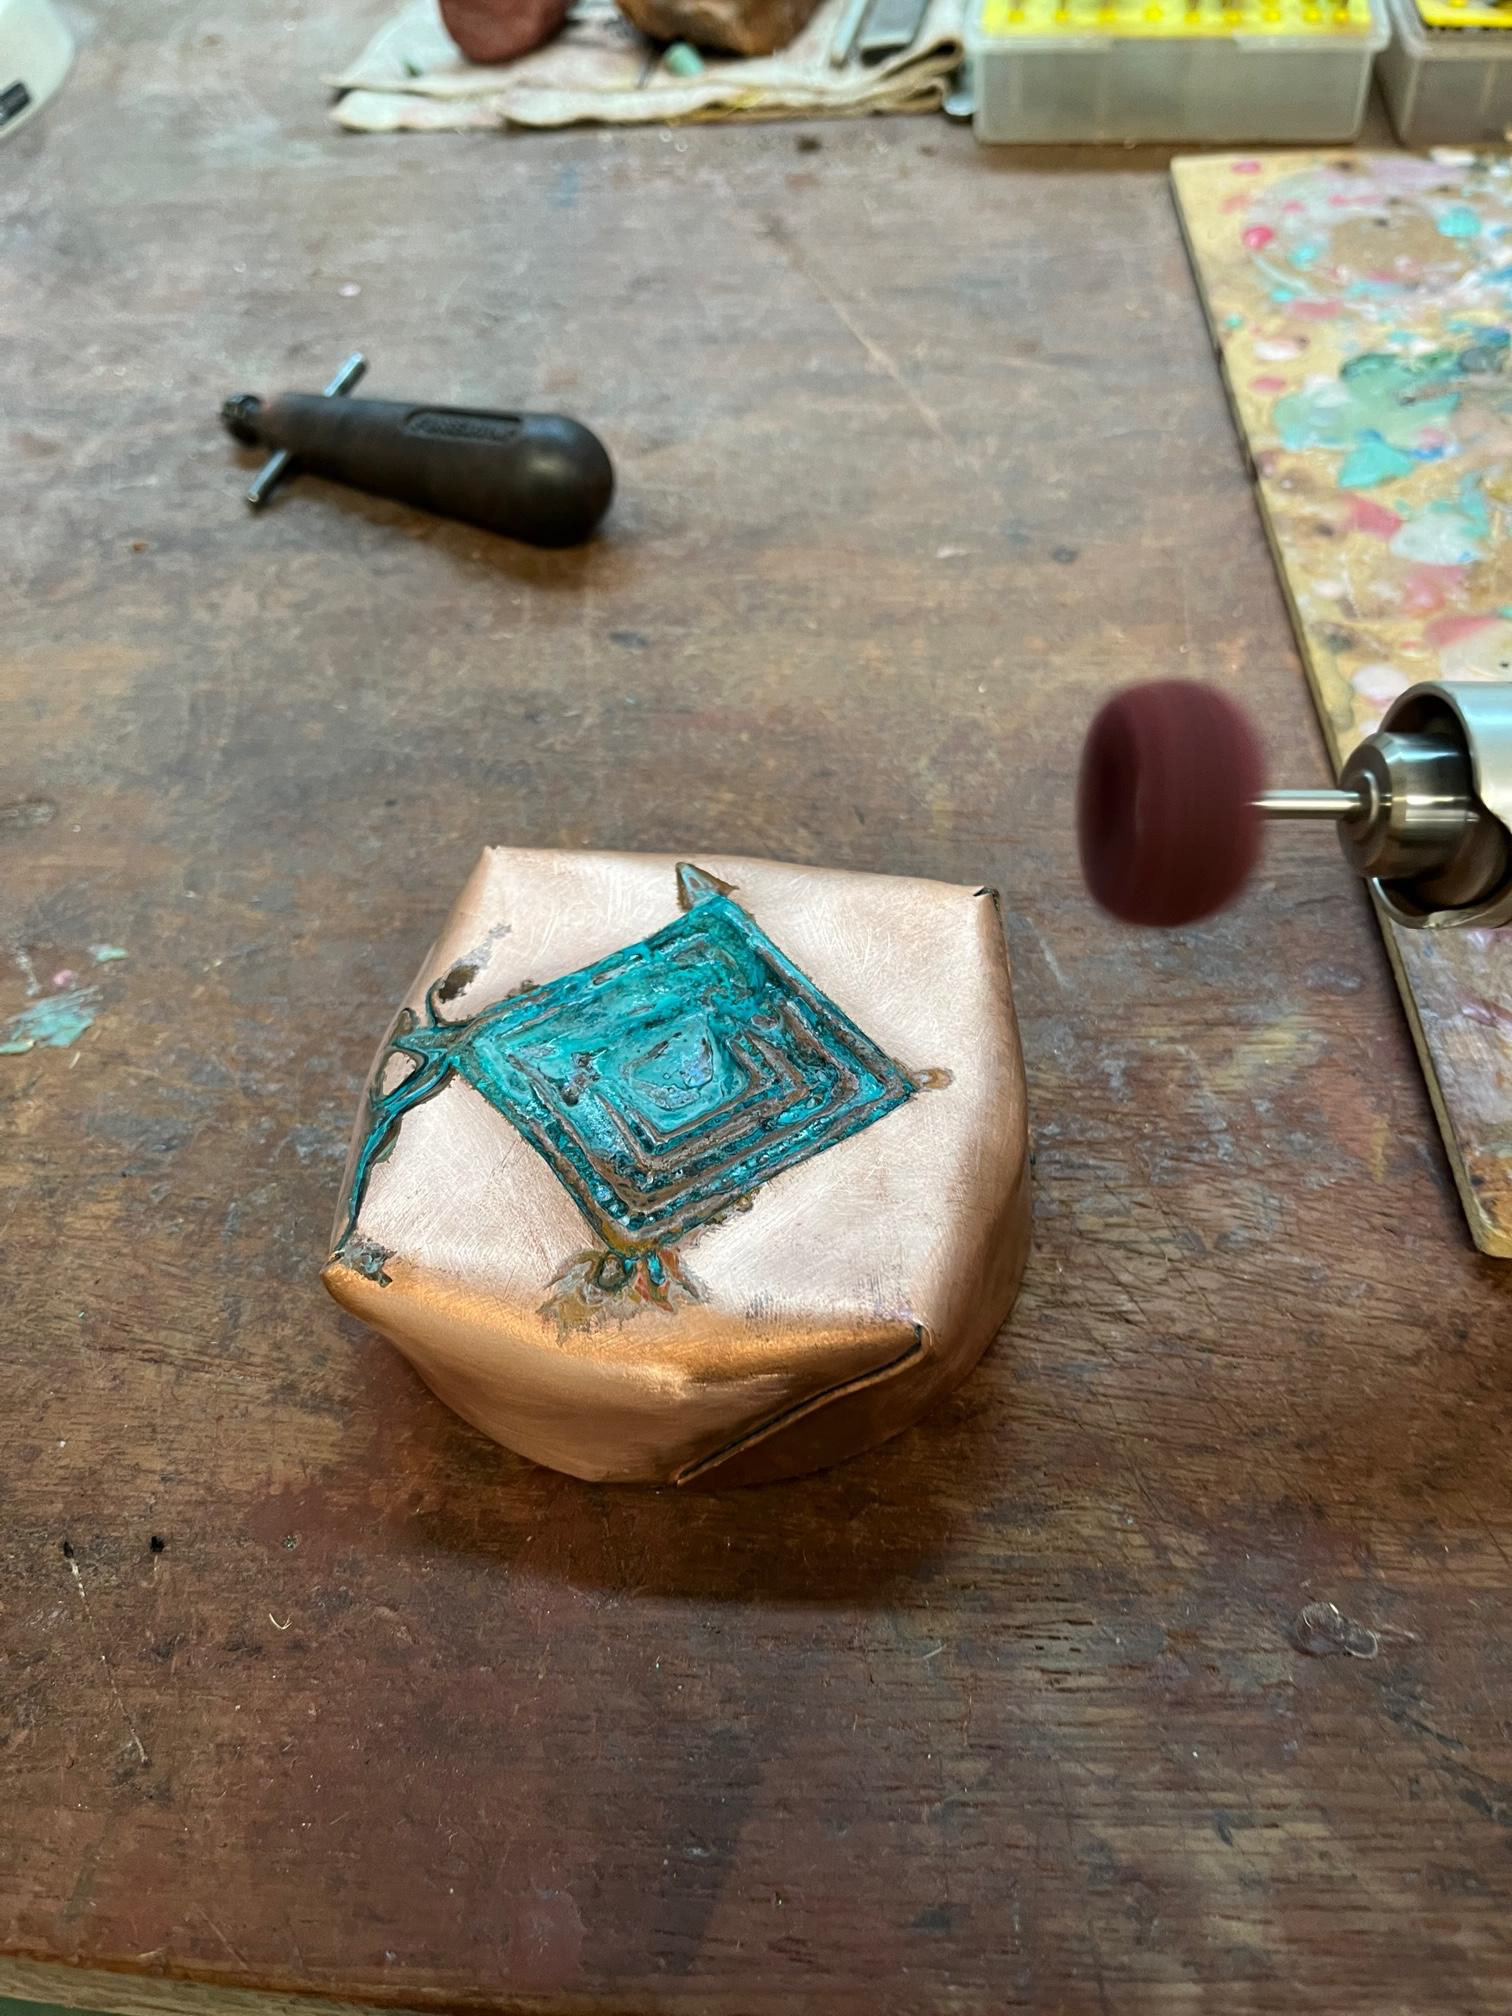
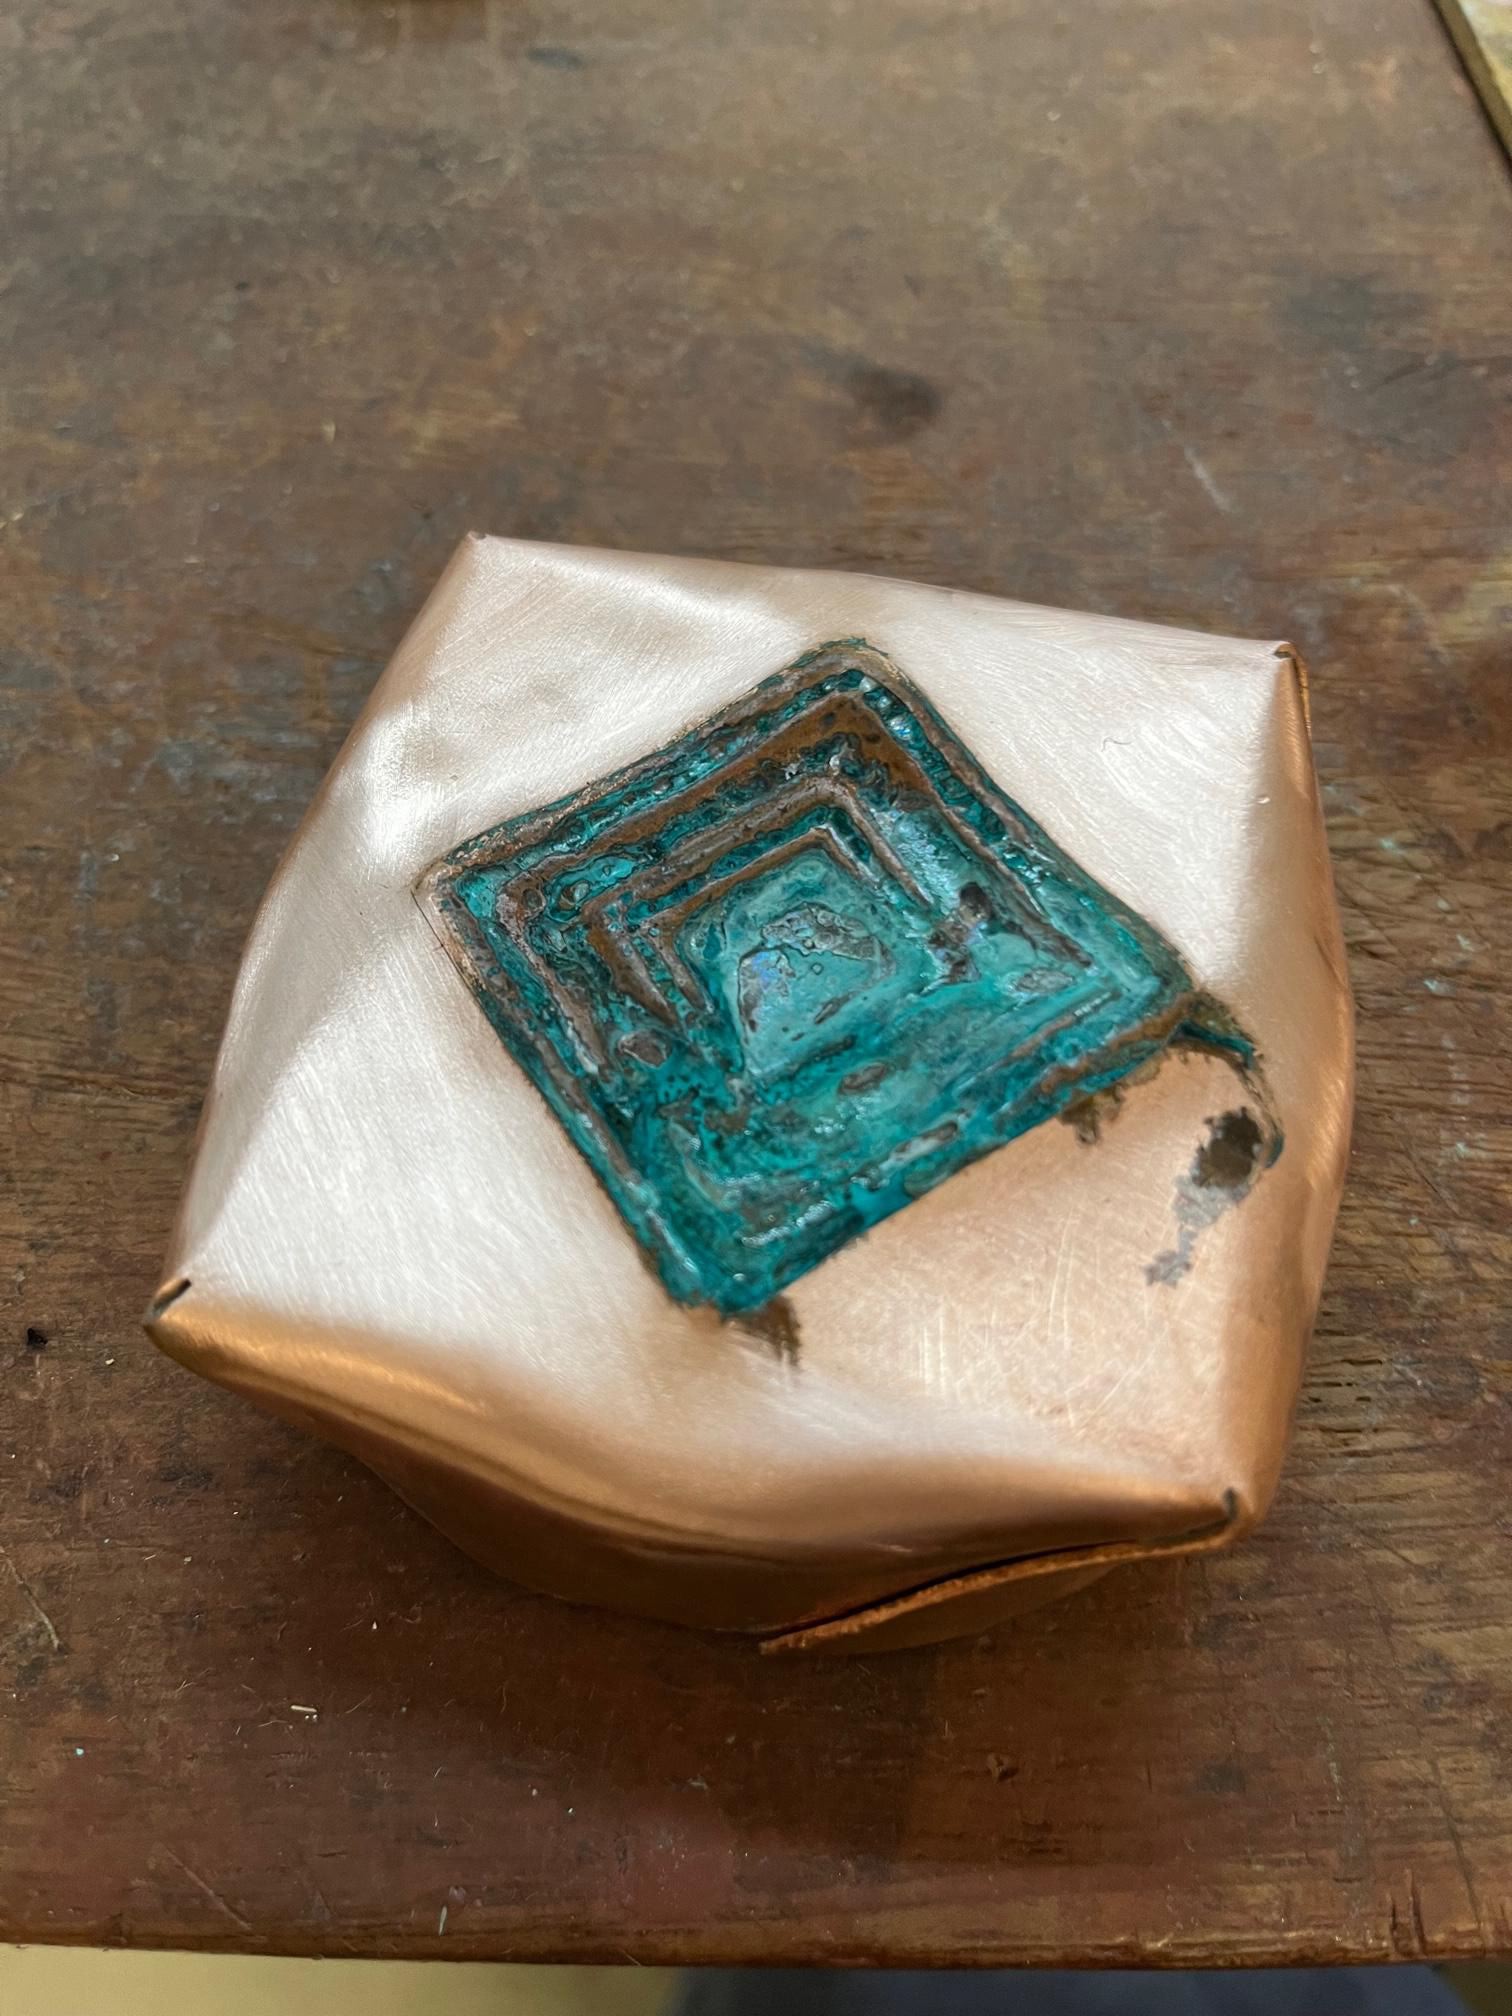
I tried the patina again, this time with Ammonia and salt and the results came out a lot better. Although I lost the lichen look seen on the previous test, the patina actually stuck this time and after sanding the surface down on the repoussed section, I really liked the effect this gave. With the tiny box, the patina worked well for this too and after sanding down the outside with a buffer on the Dremel, I really liked how you could just about see the patina peaking out through the gaps and upon opening the lid, a beautiful blue is revealed.

I really enjoyed this process and i think my skills improved a lot through making these test pieces. The one issue I did face however was how to make the surface of the repoussed area smooth? I realised the steel heads I was using had sharp edges which gave the surface a bubbly texture, not at all what YouTube videos where displaying. So with the help of the metal technician, I made my first steel head piece with smoother edges to avoid the bubbly look the current tools were making.
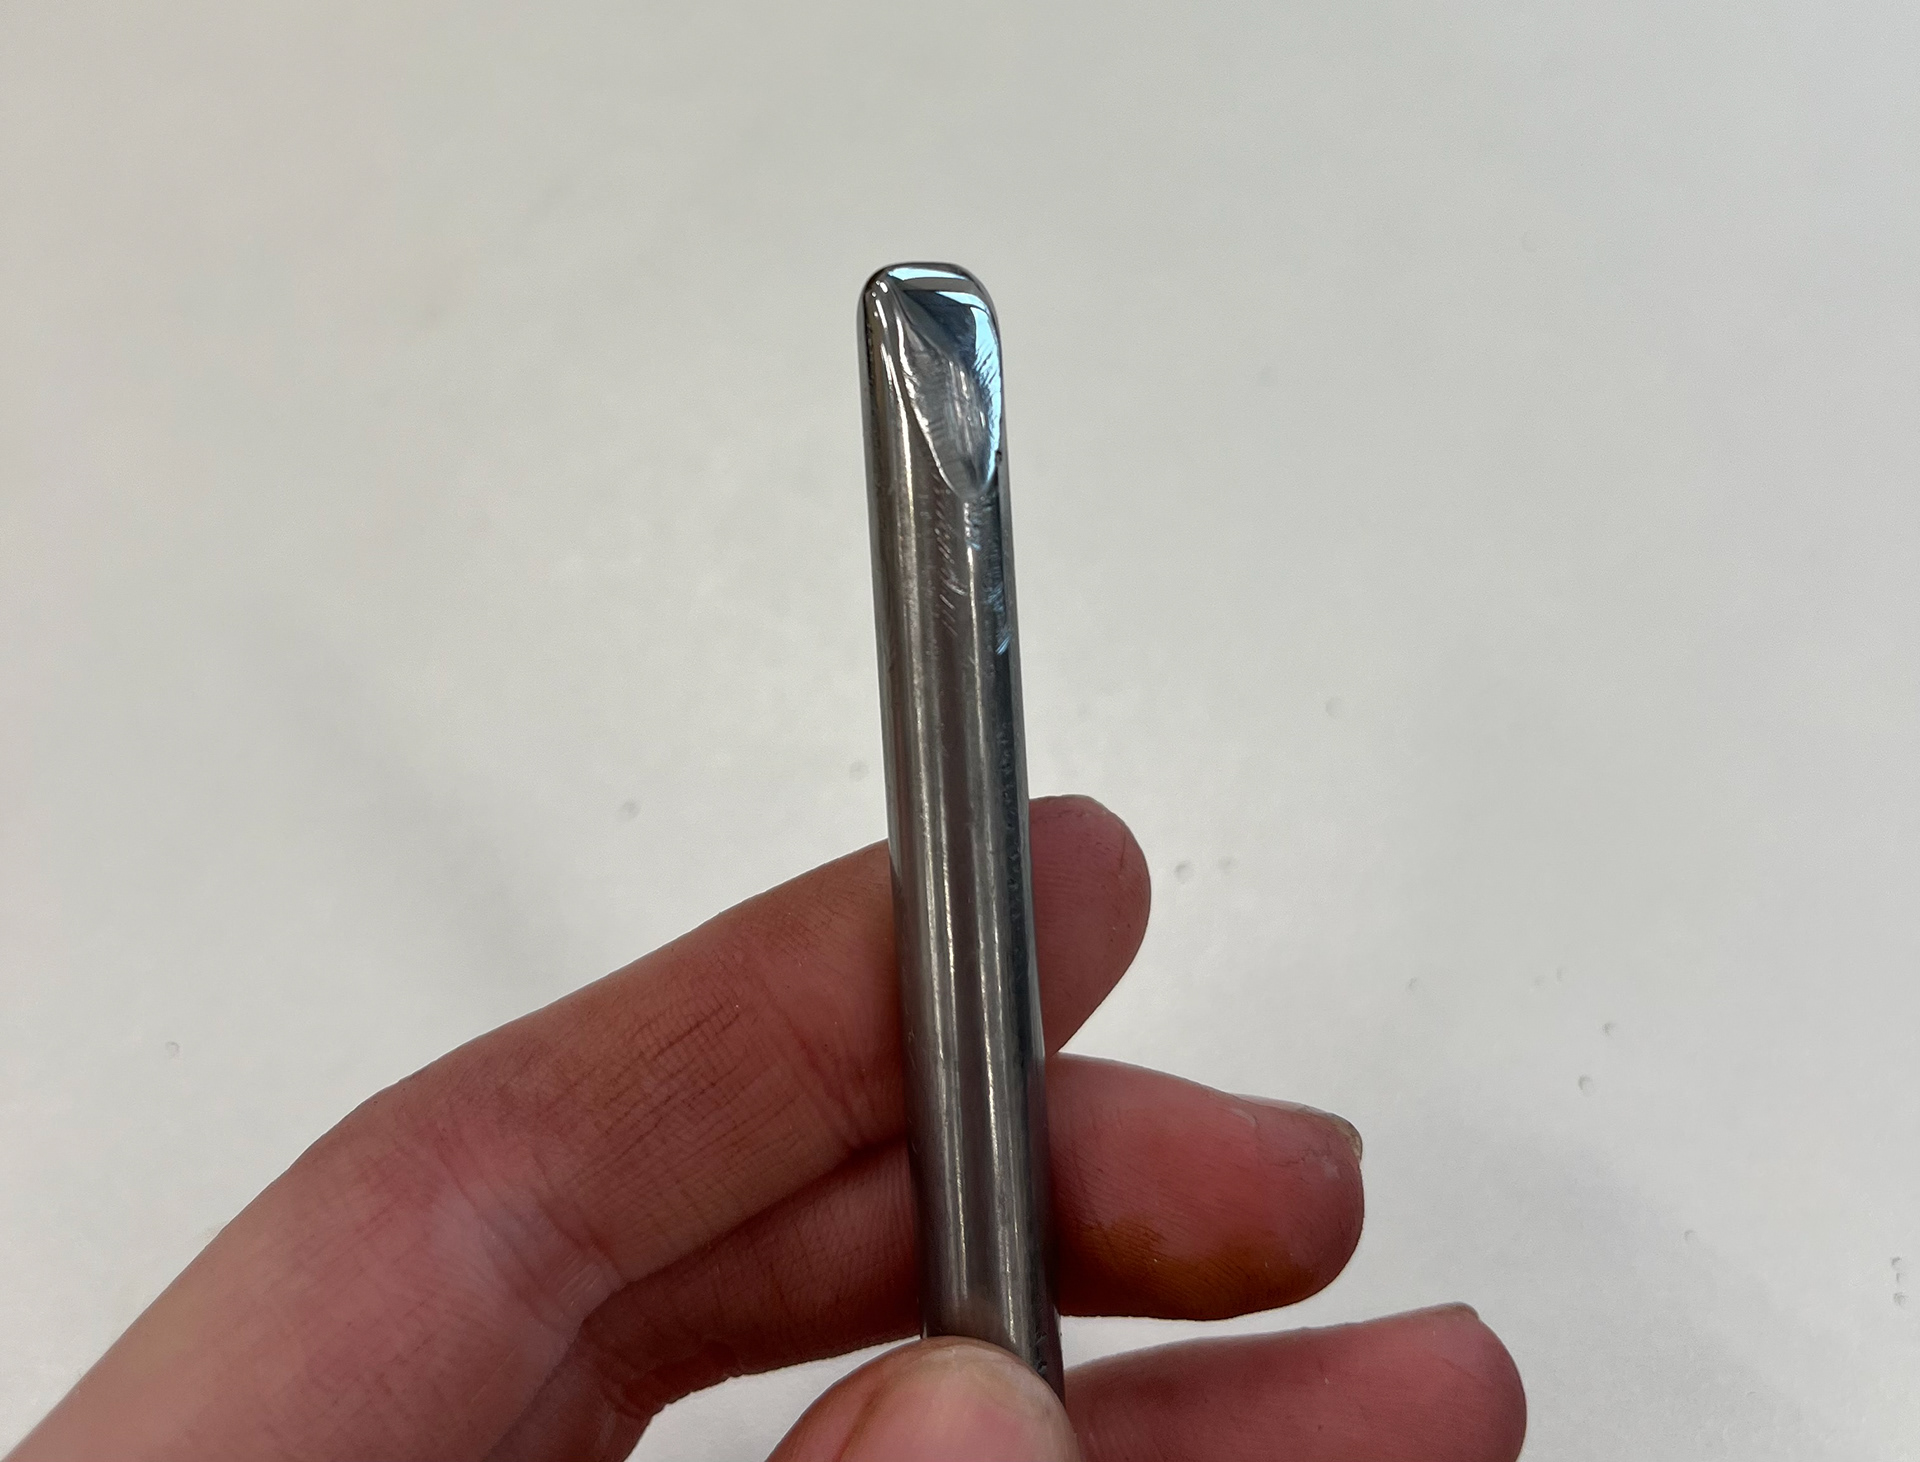
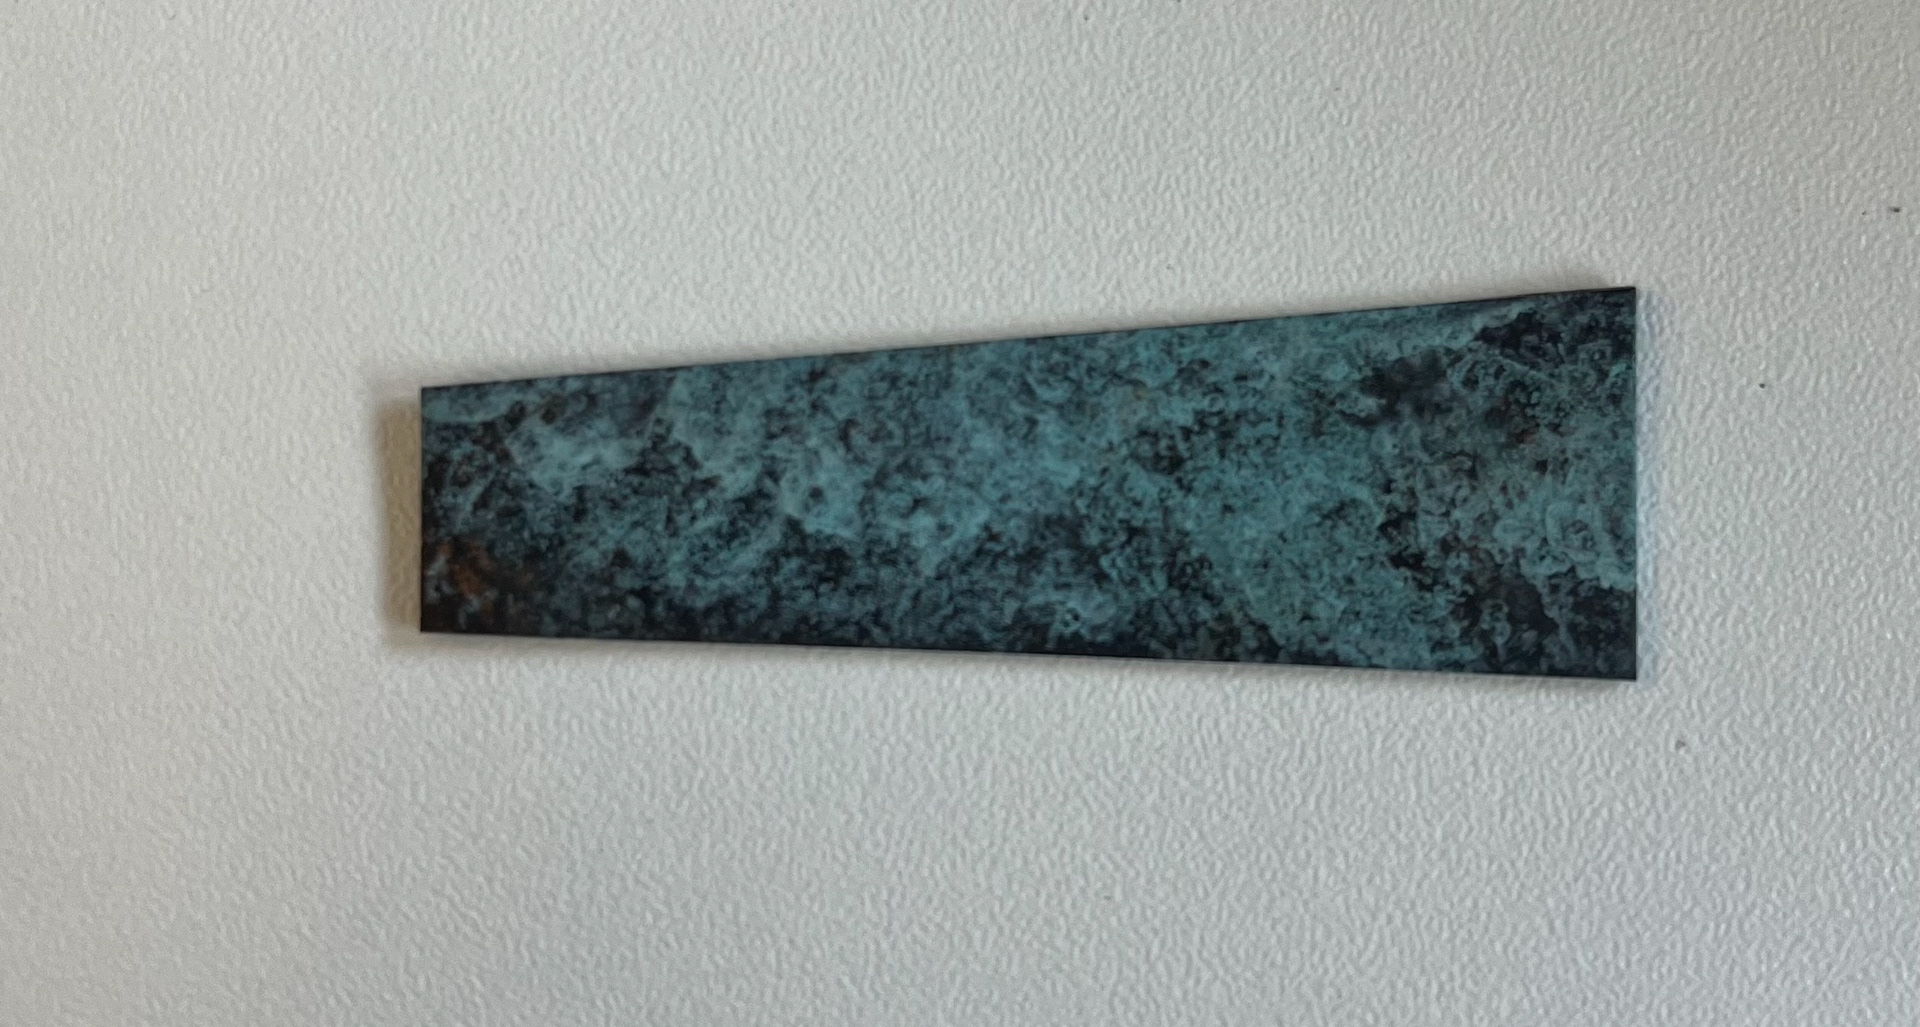
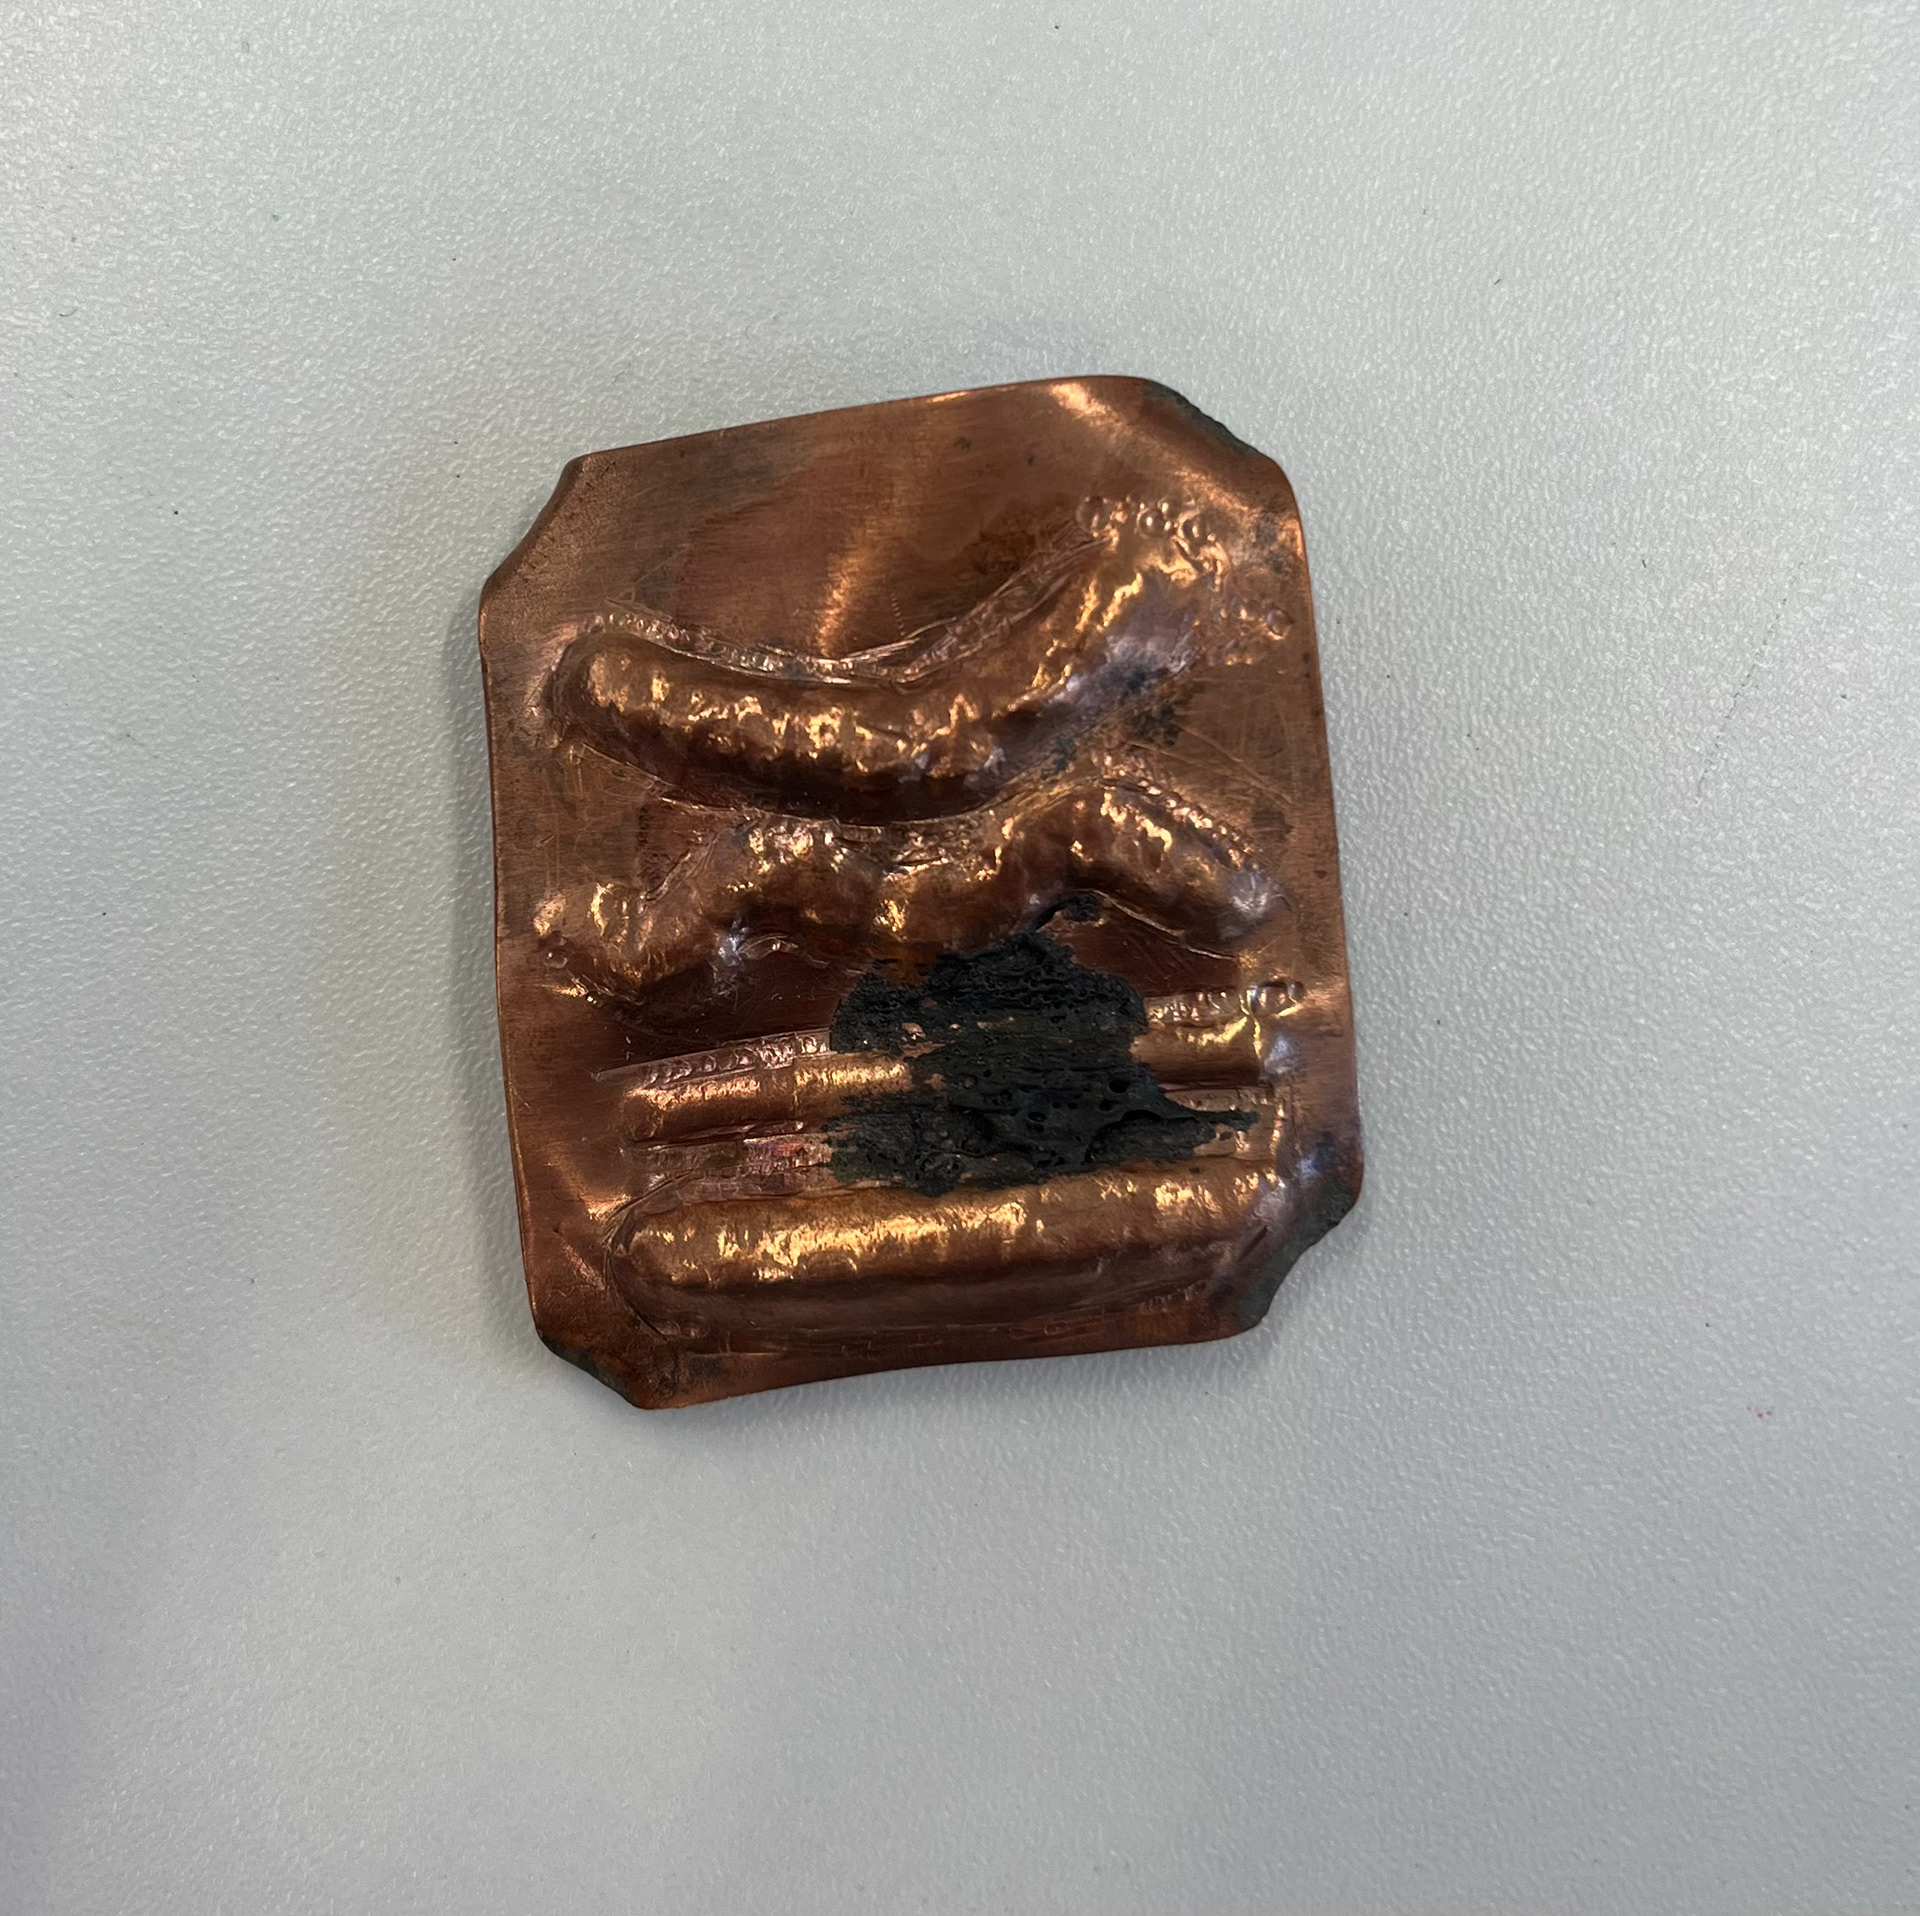
The image on the left is one of the tools I made for repousse which made my pattern a lot smoother. I would like to make more of these in the future to improve my technique and the designs that come out of repousse and chasing.
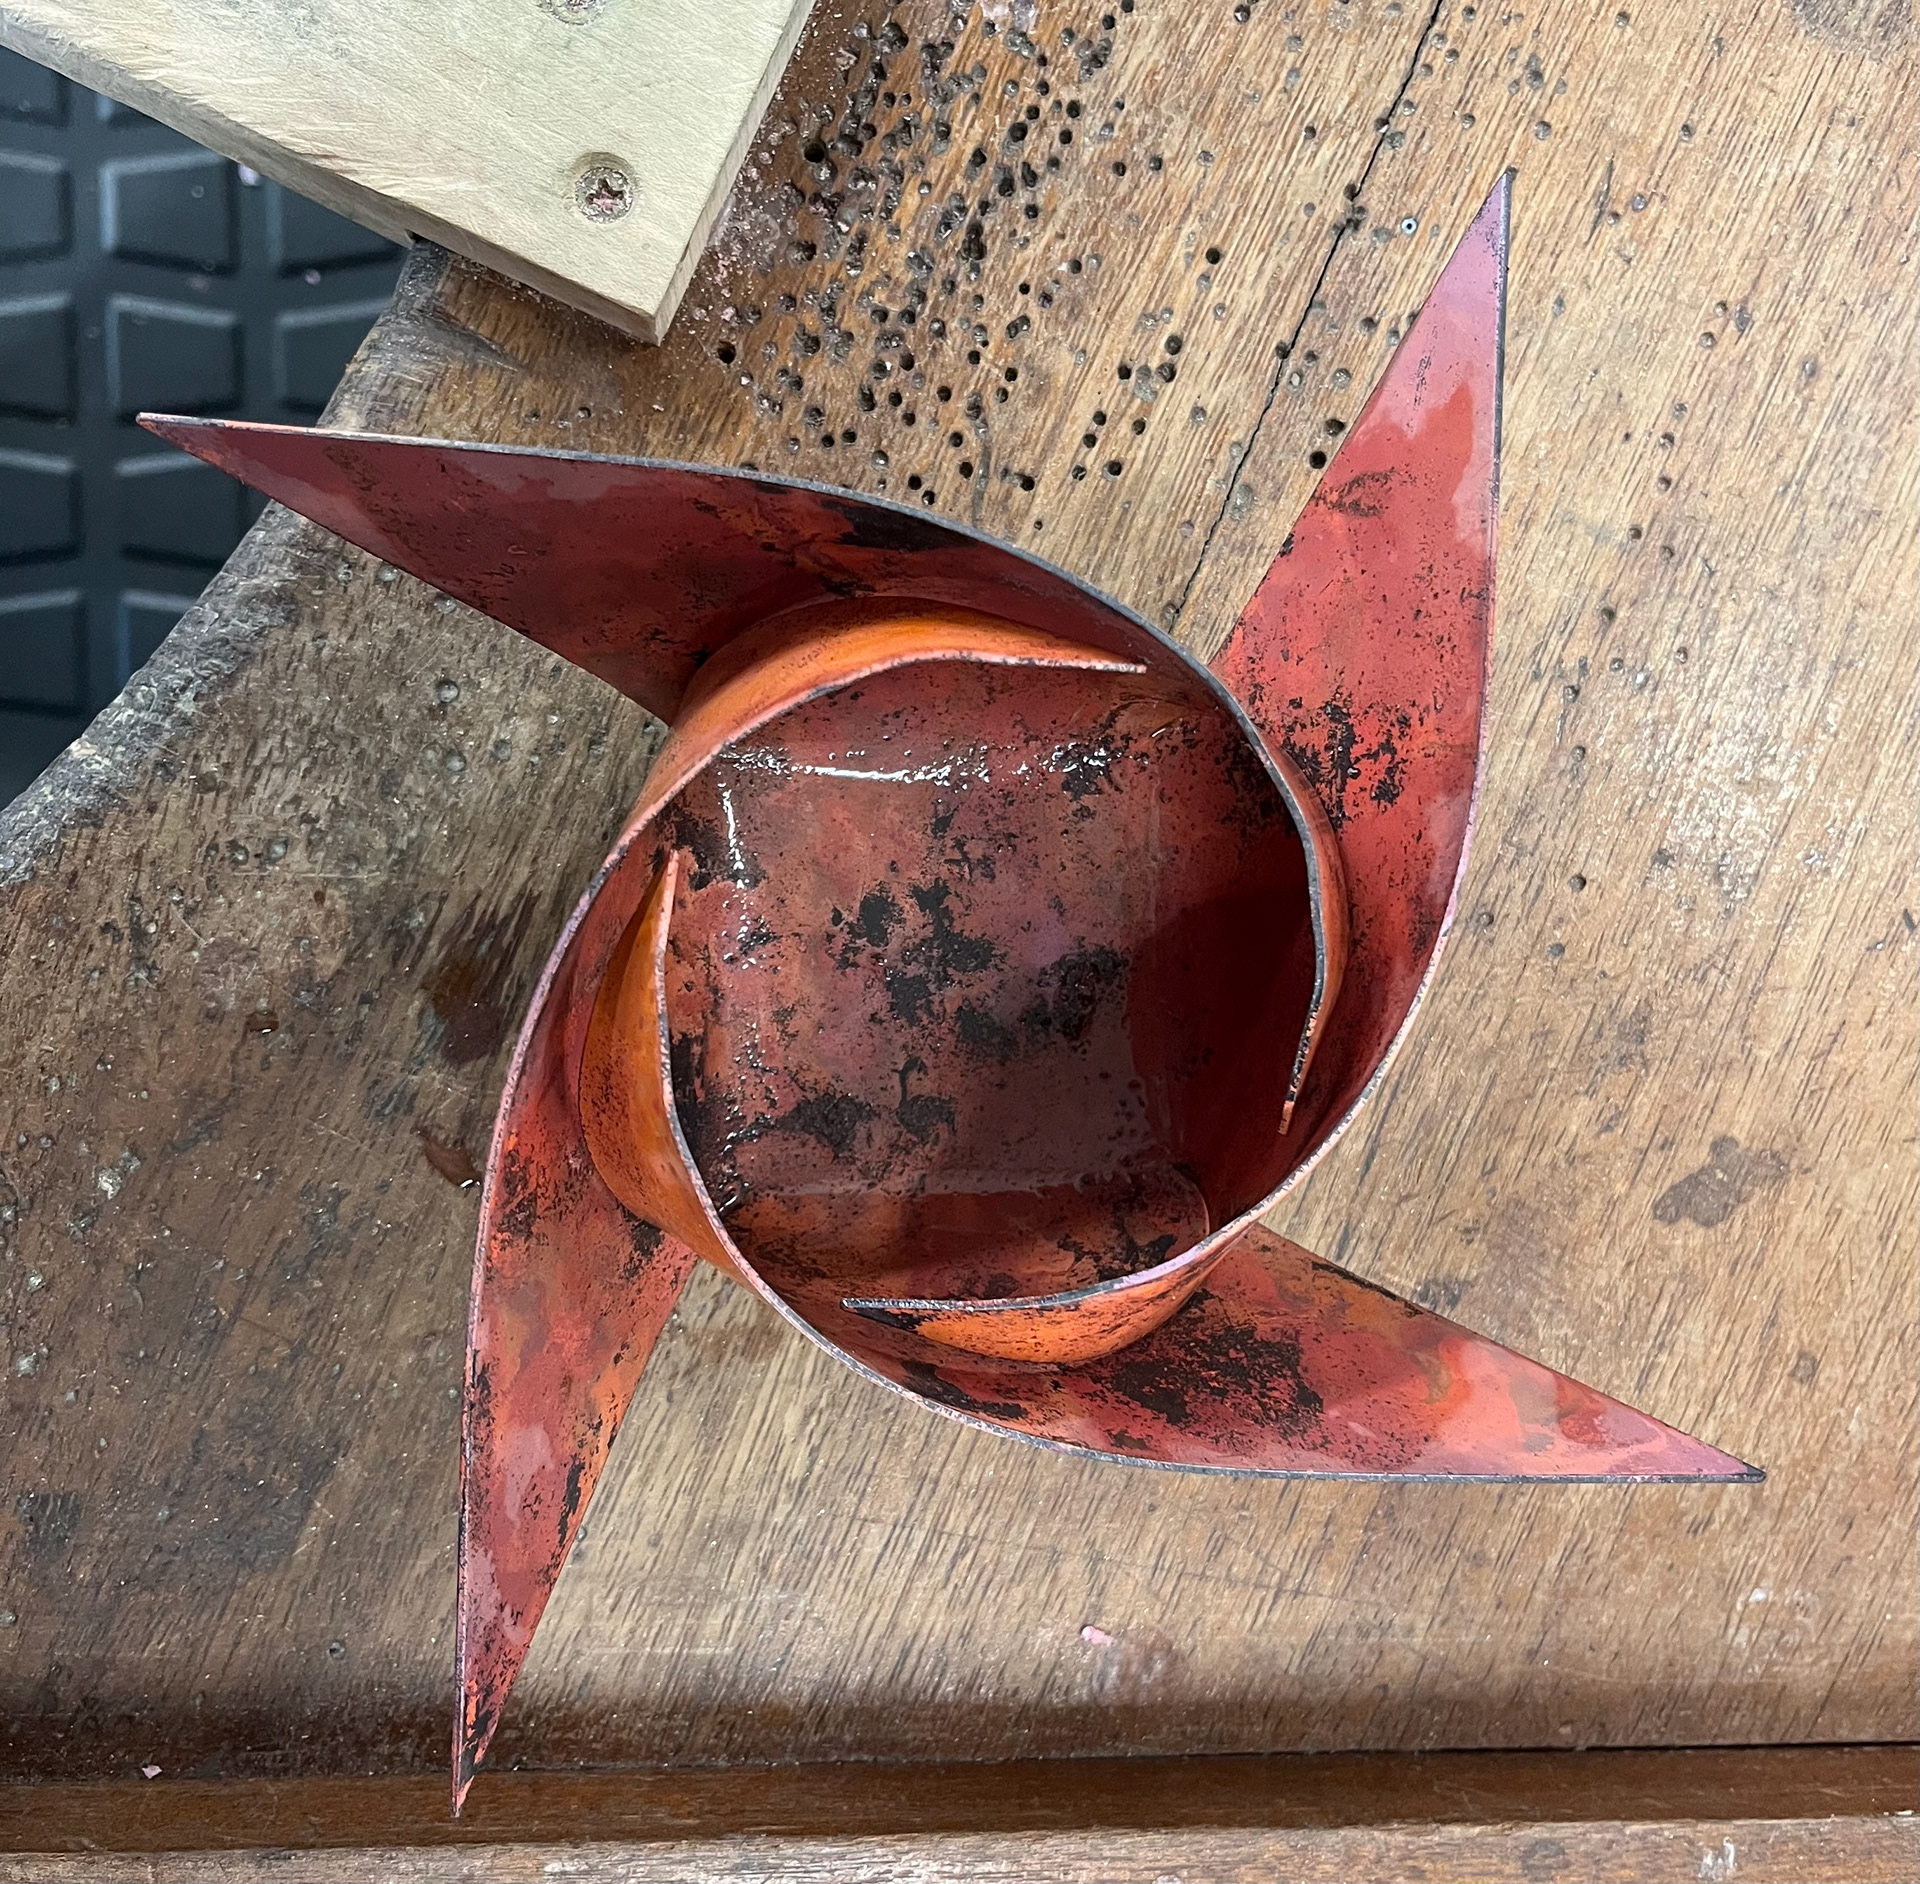
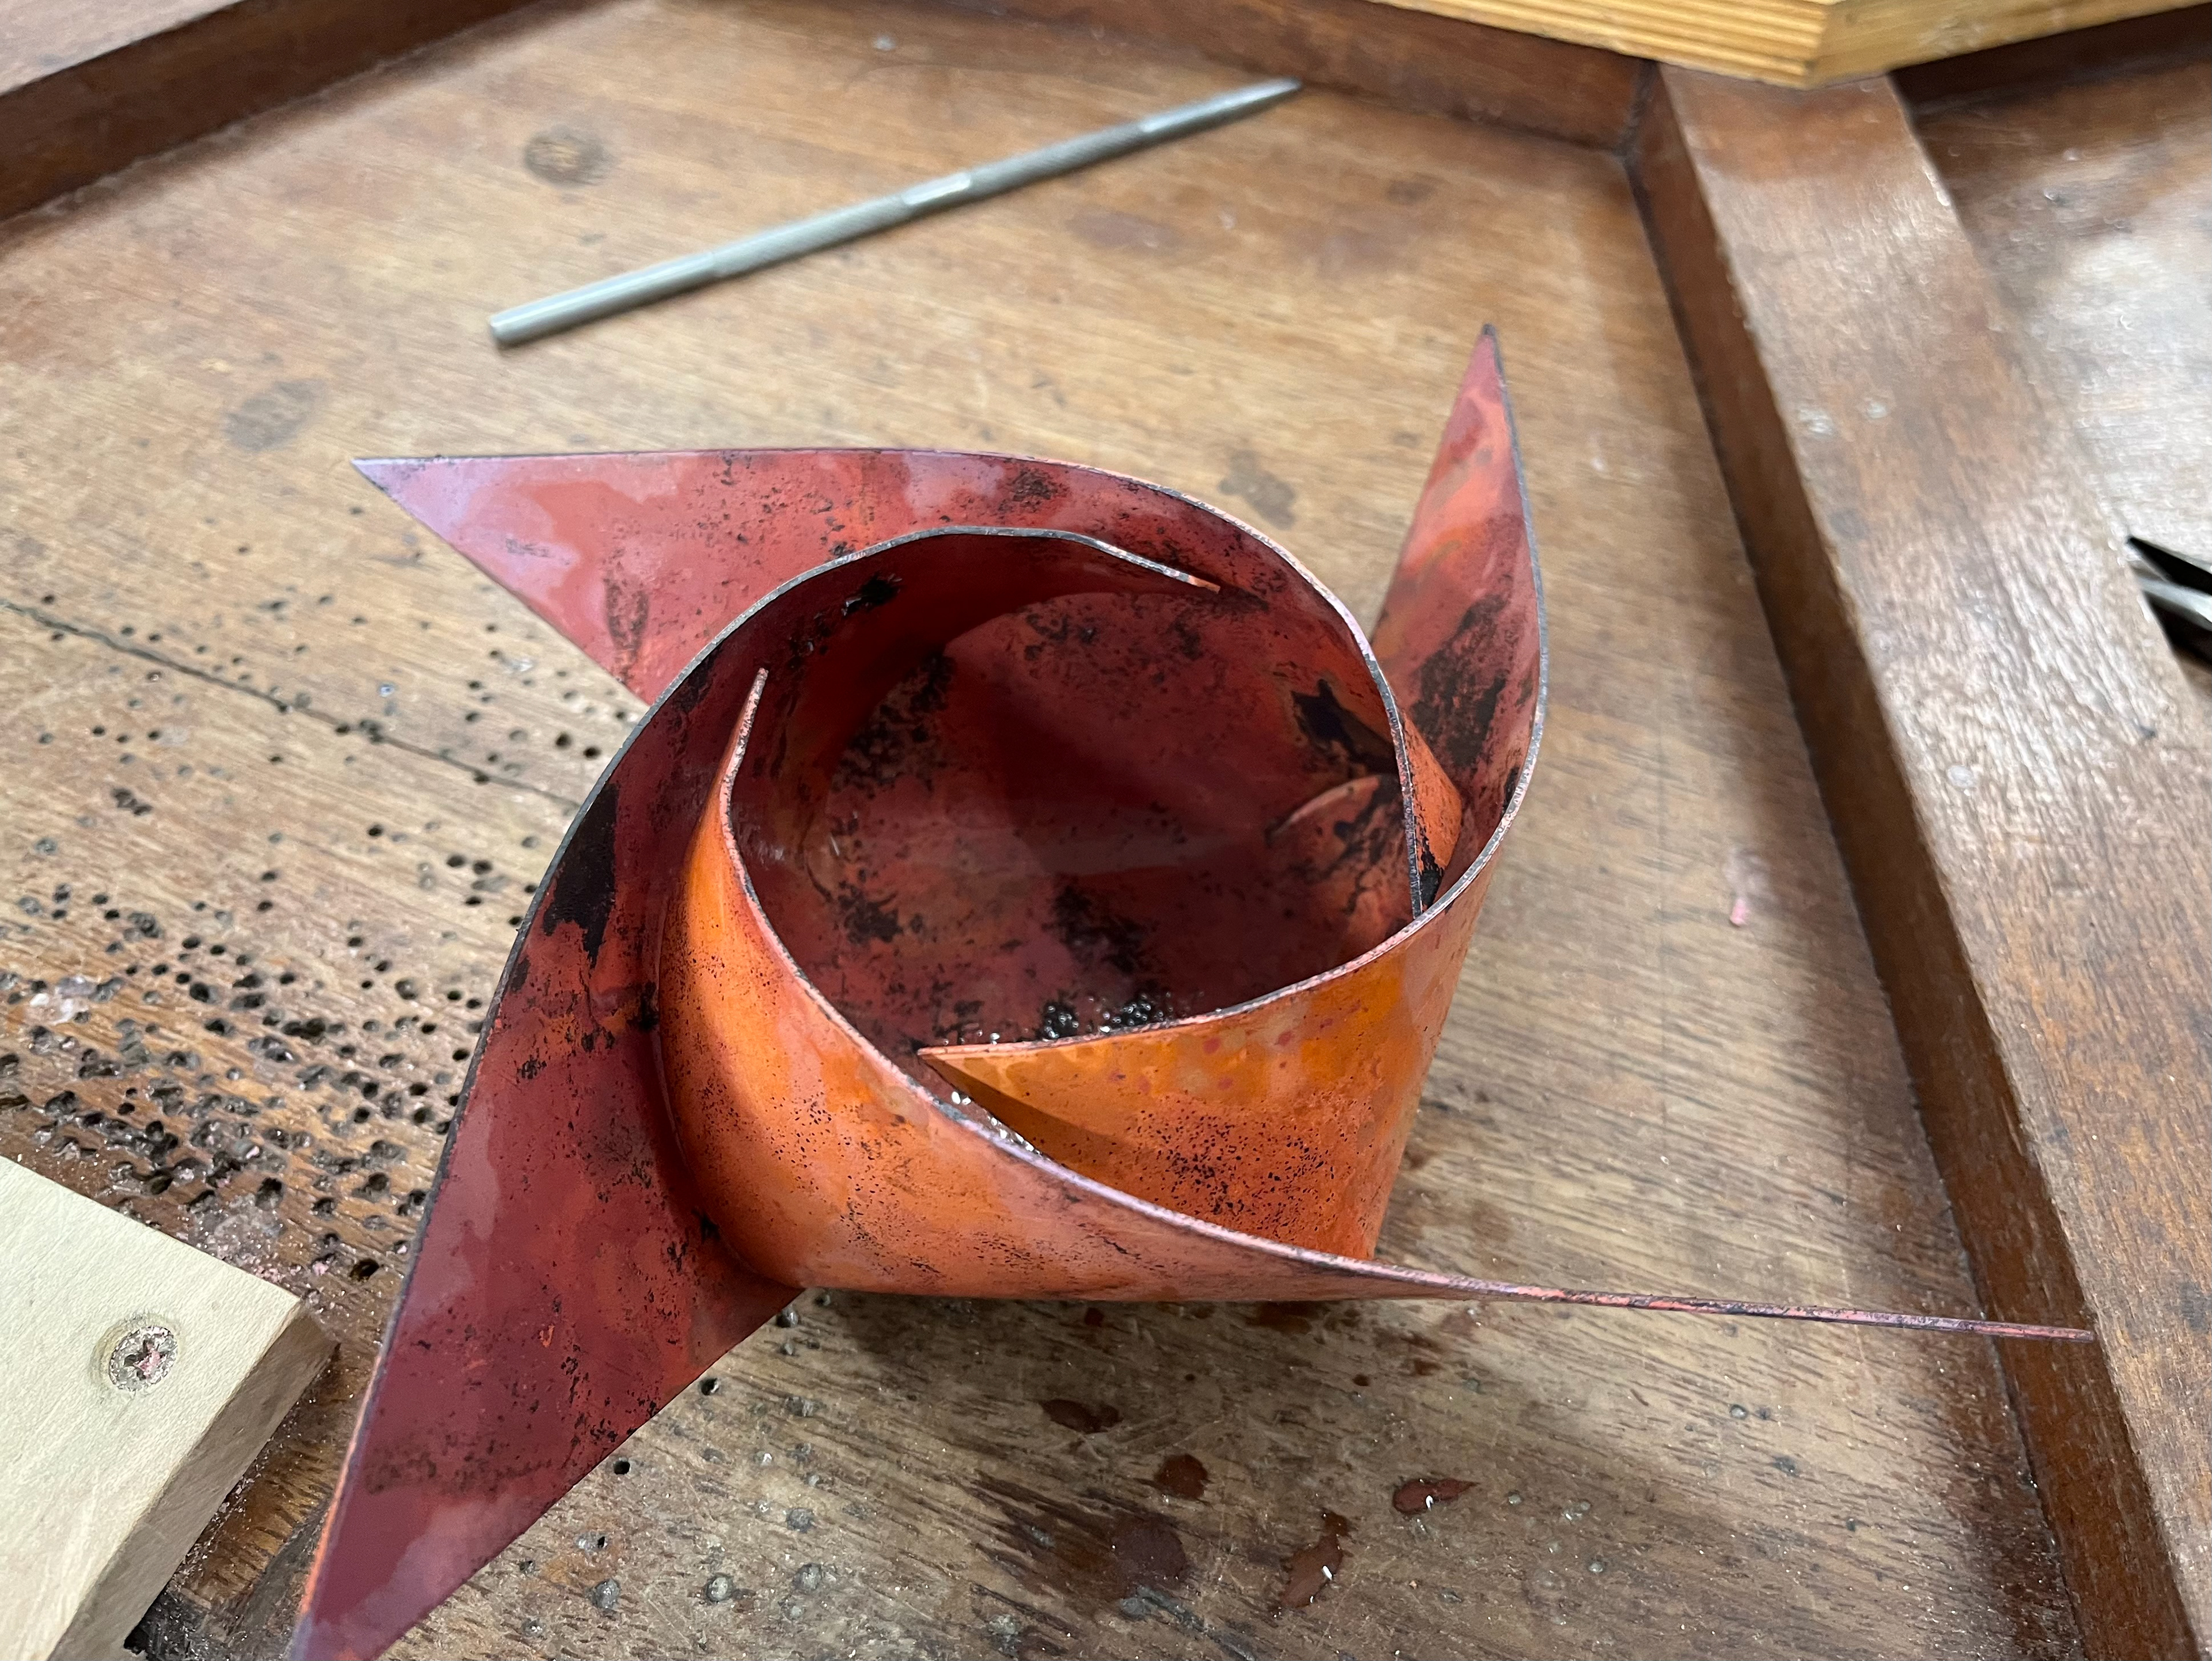
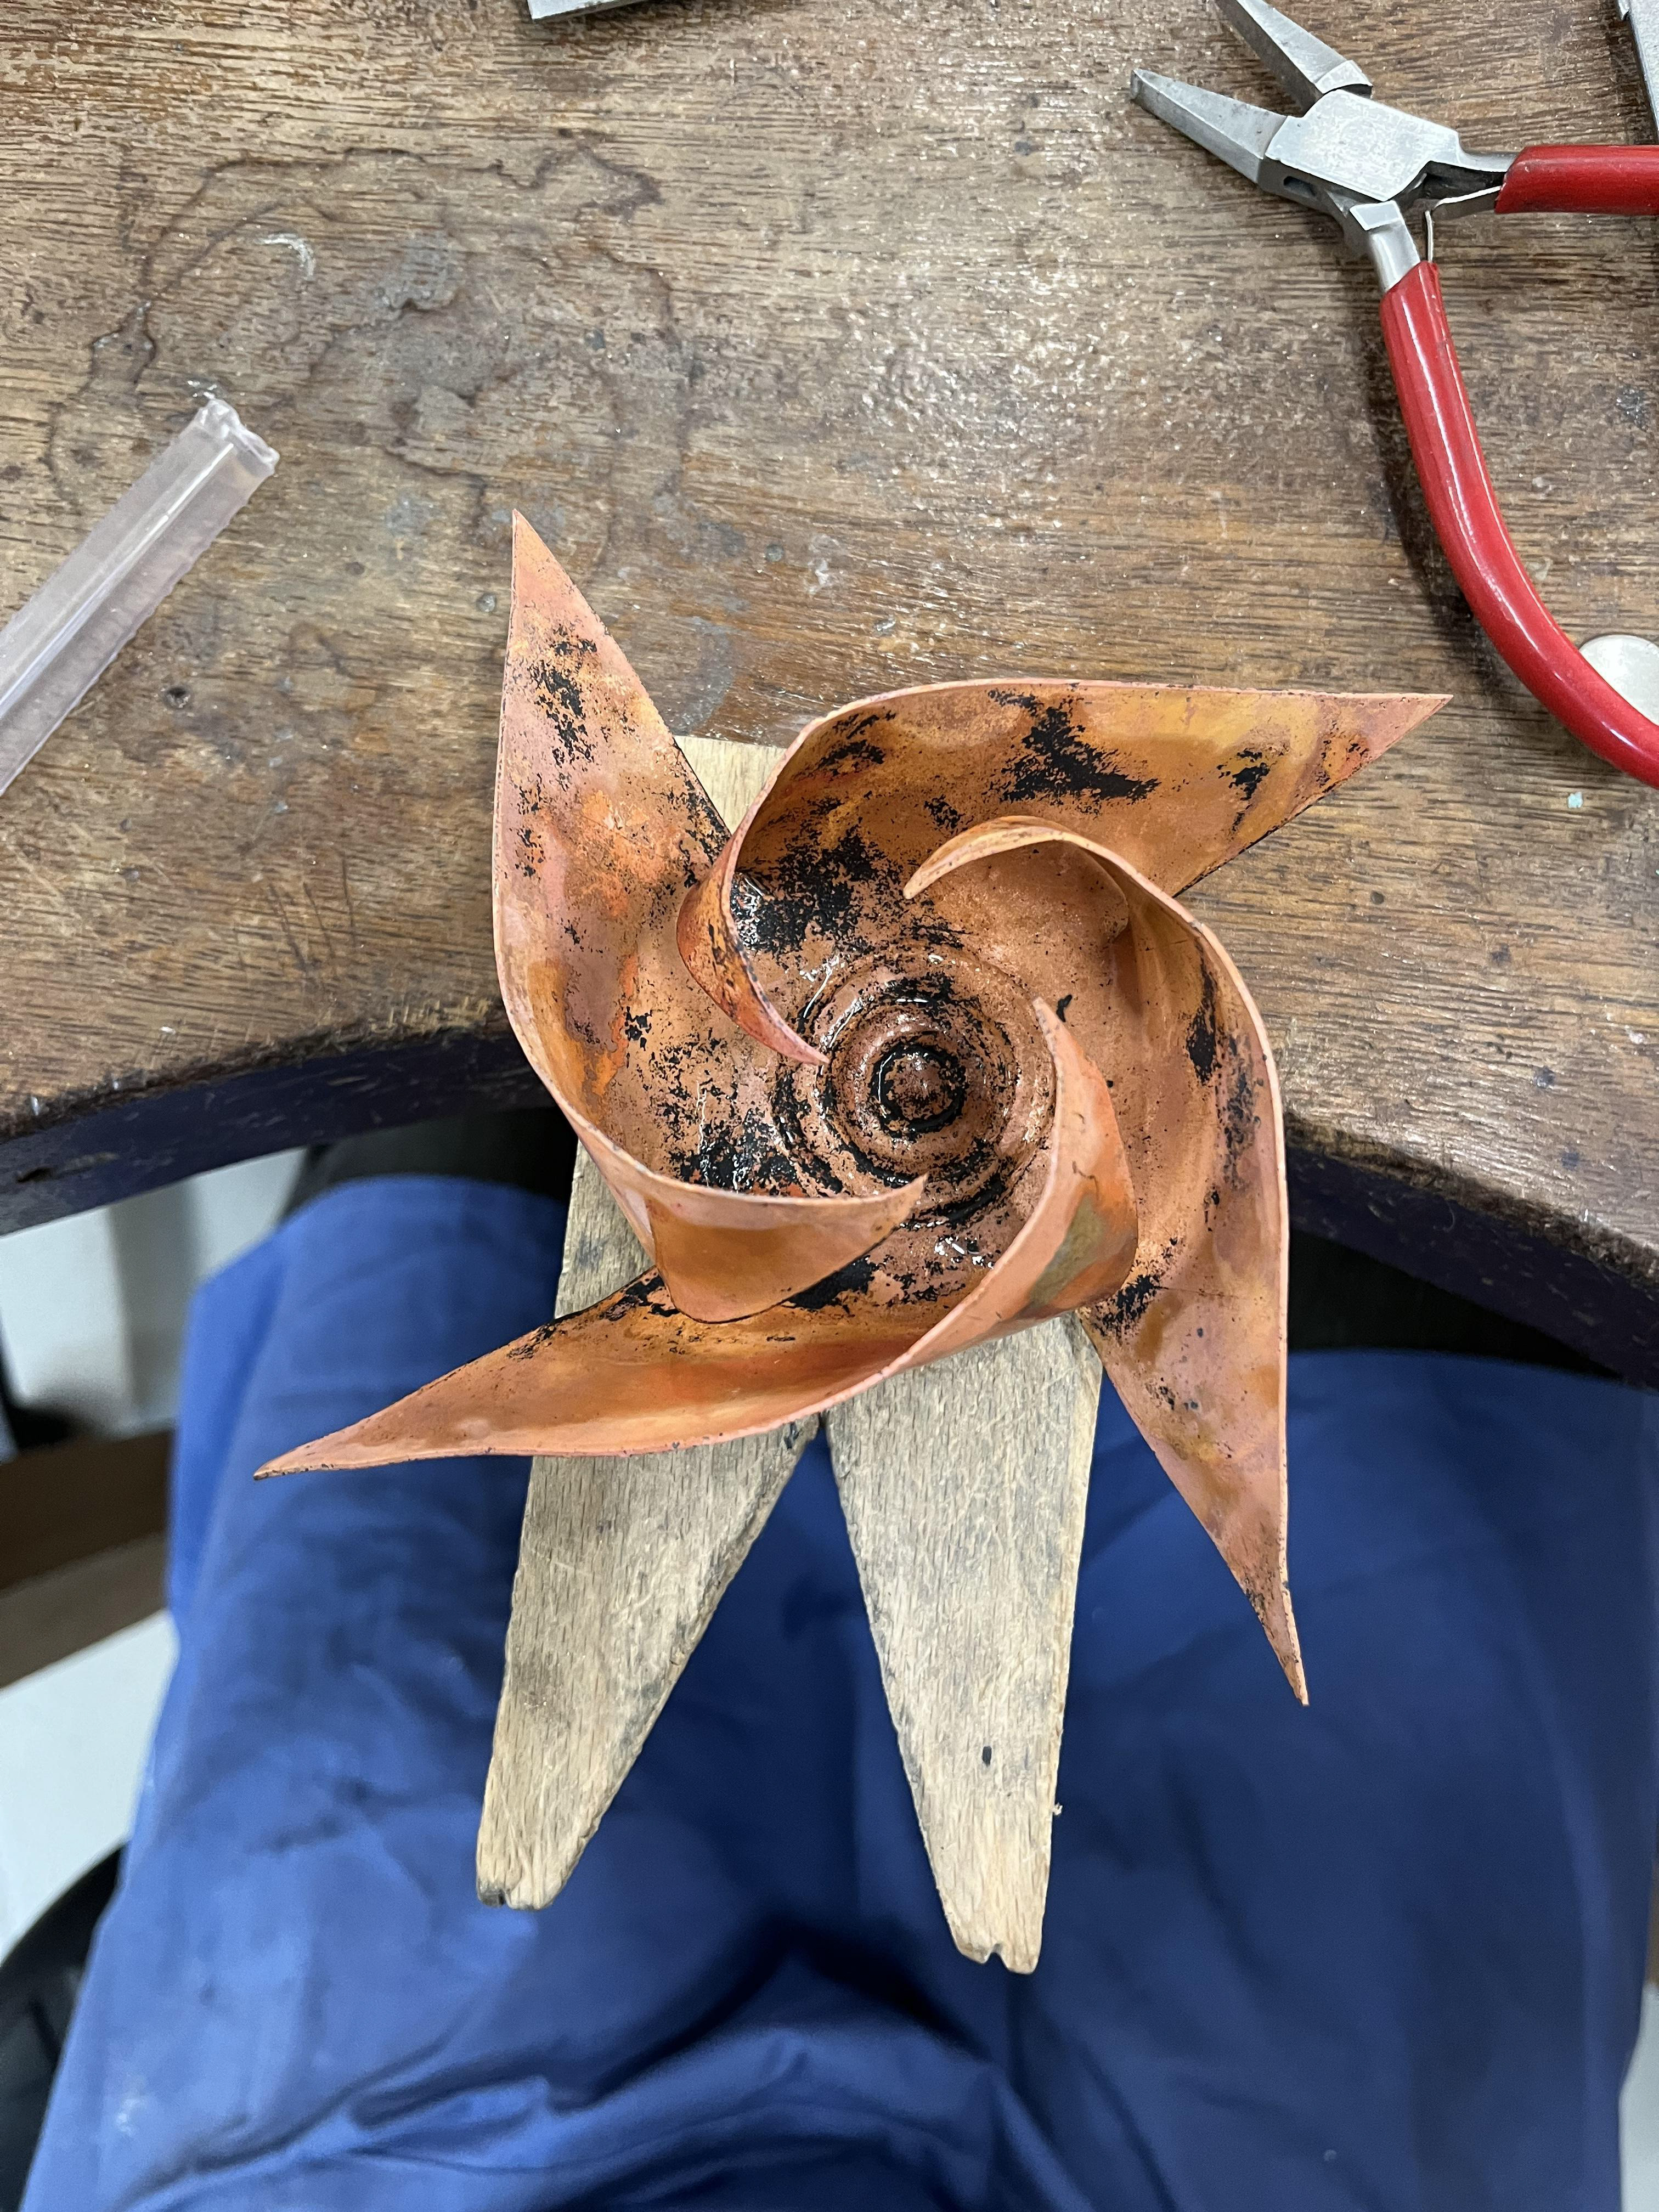
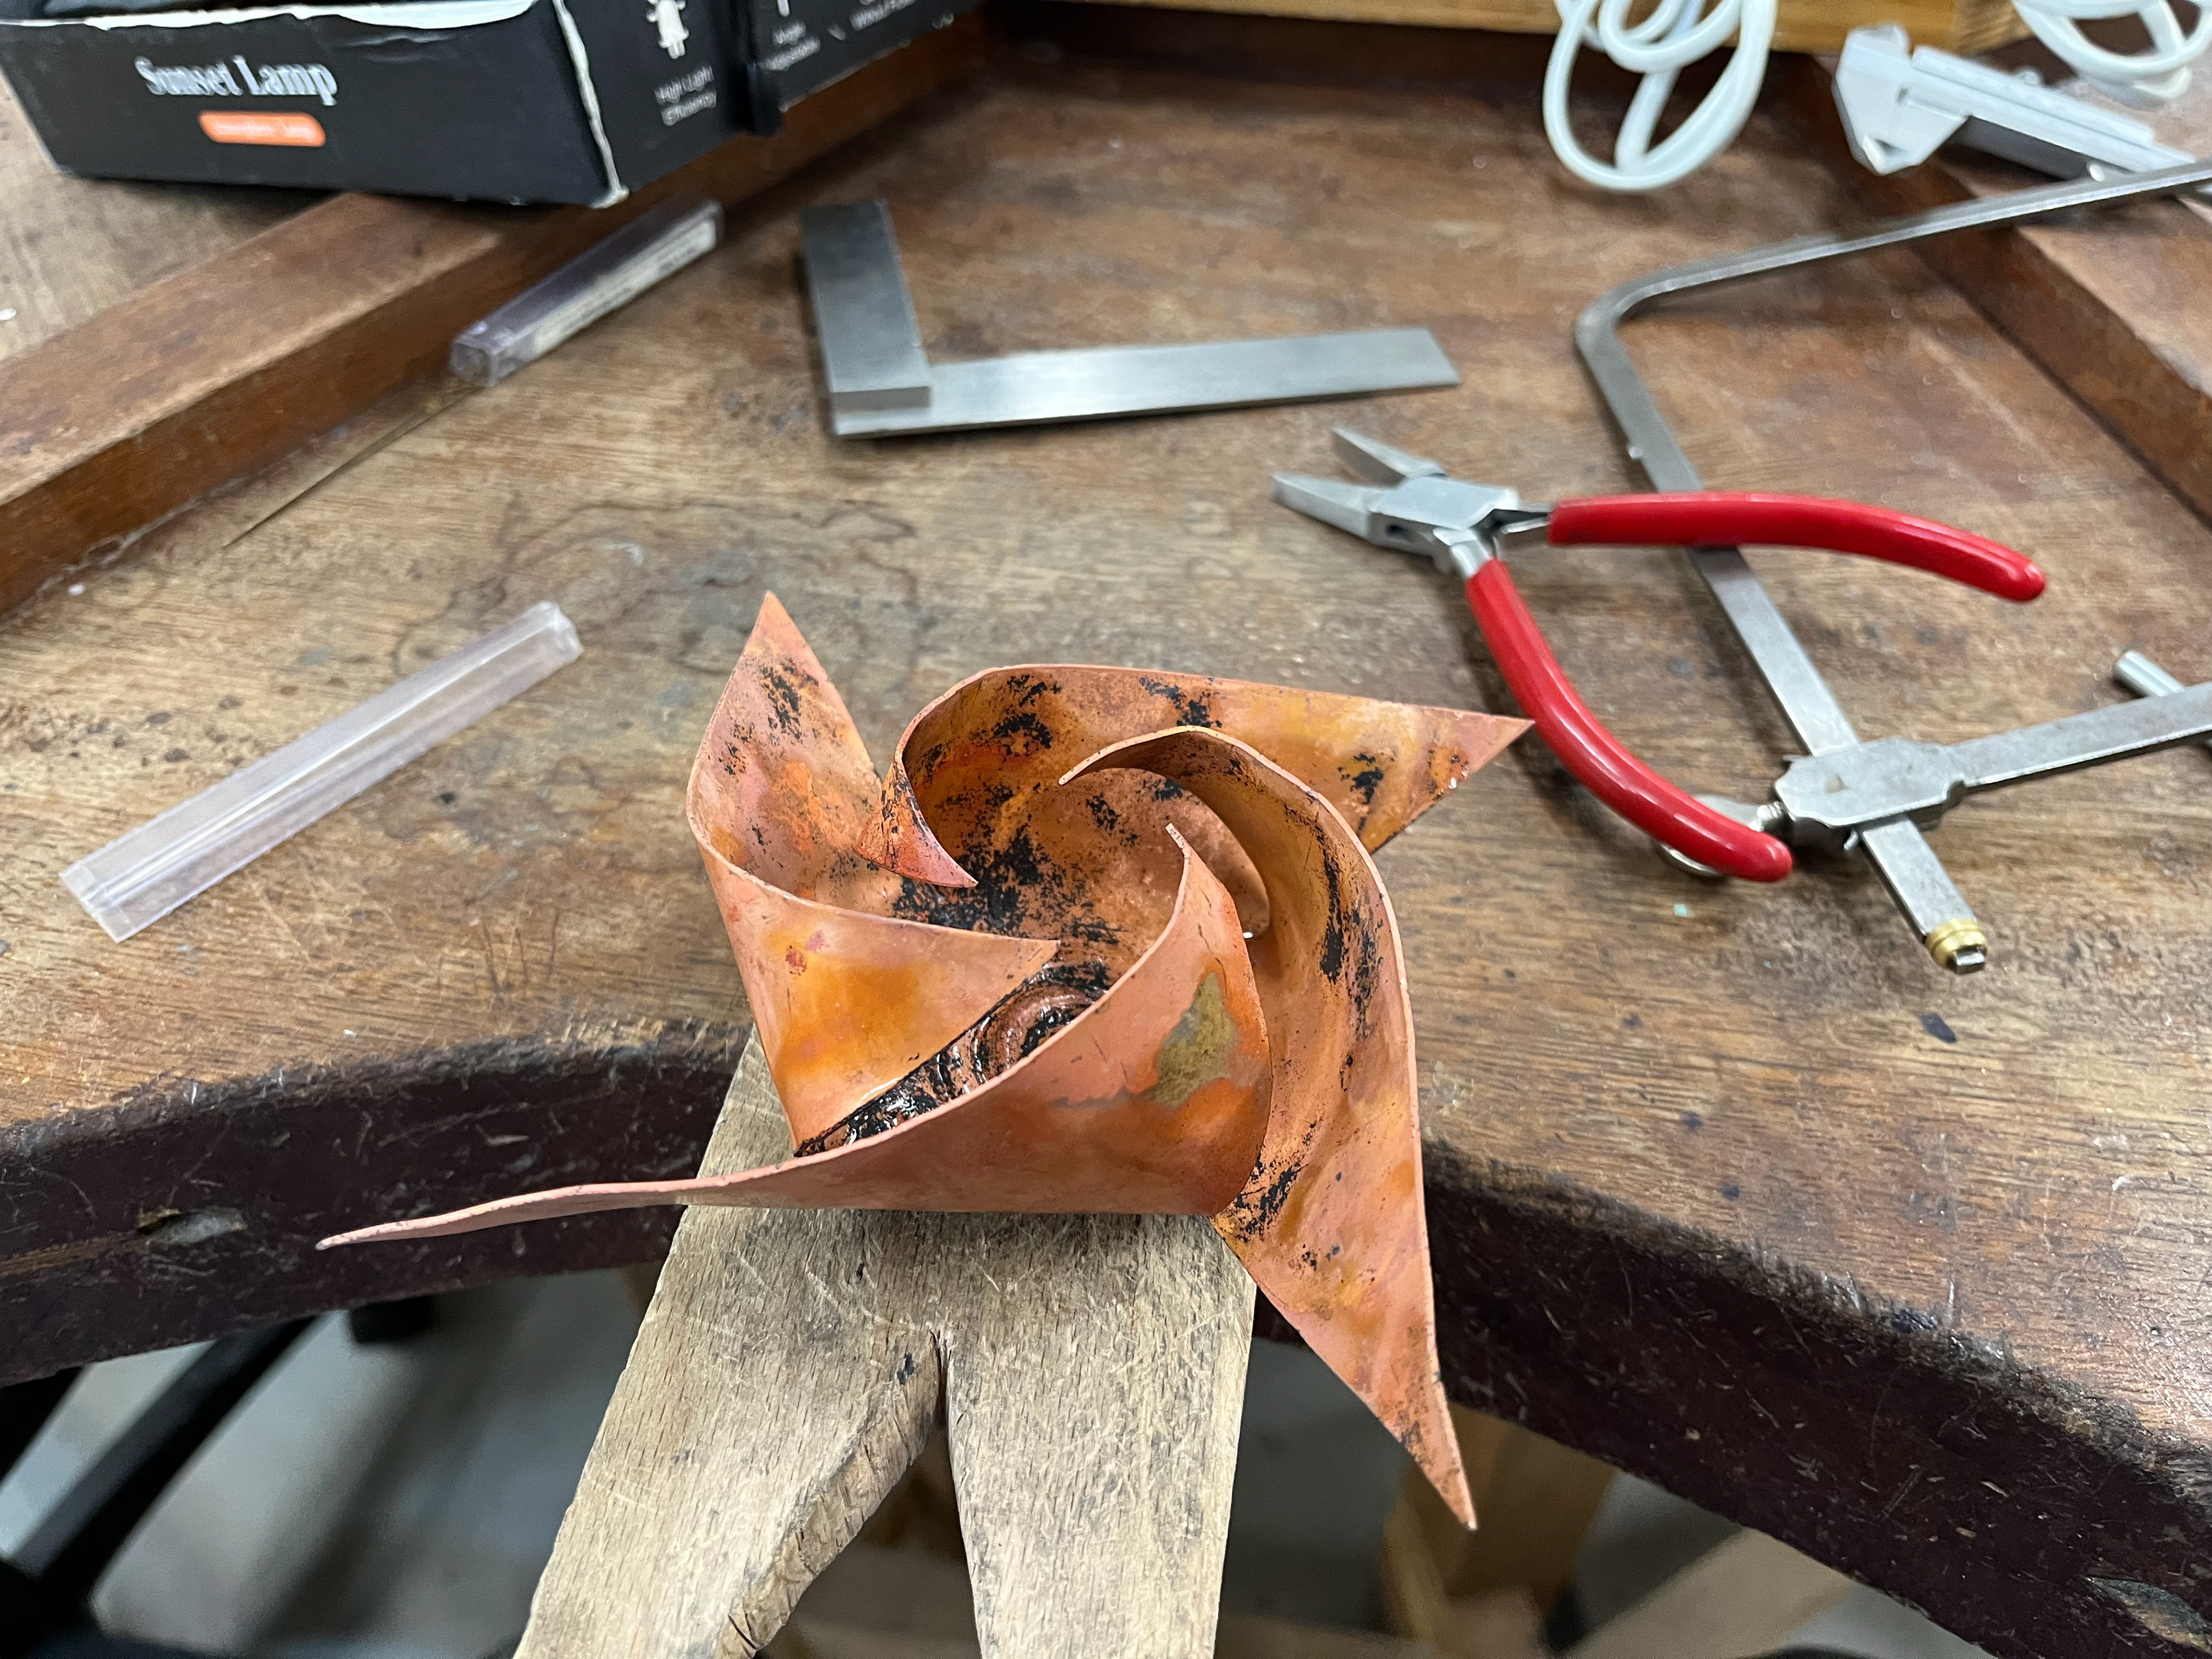
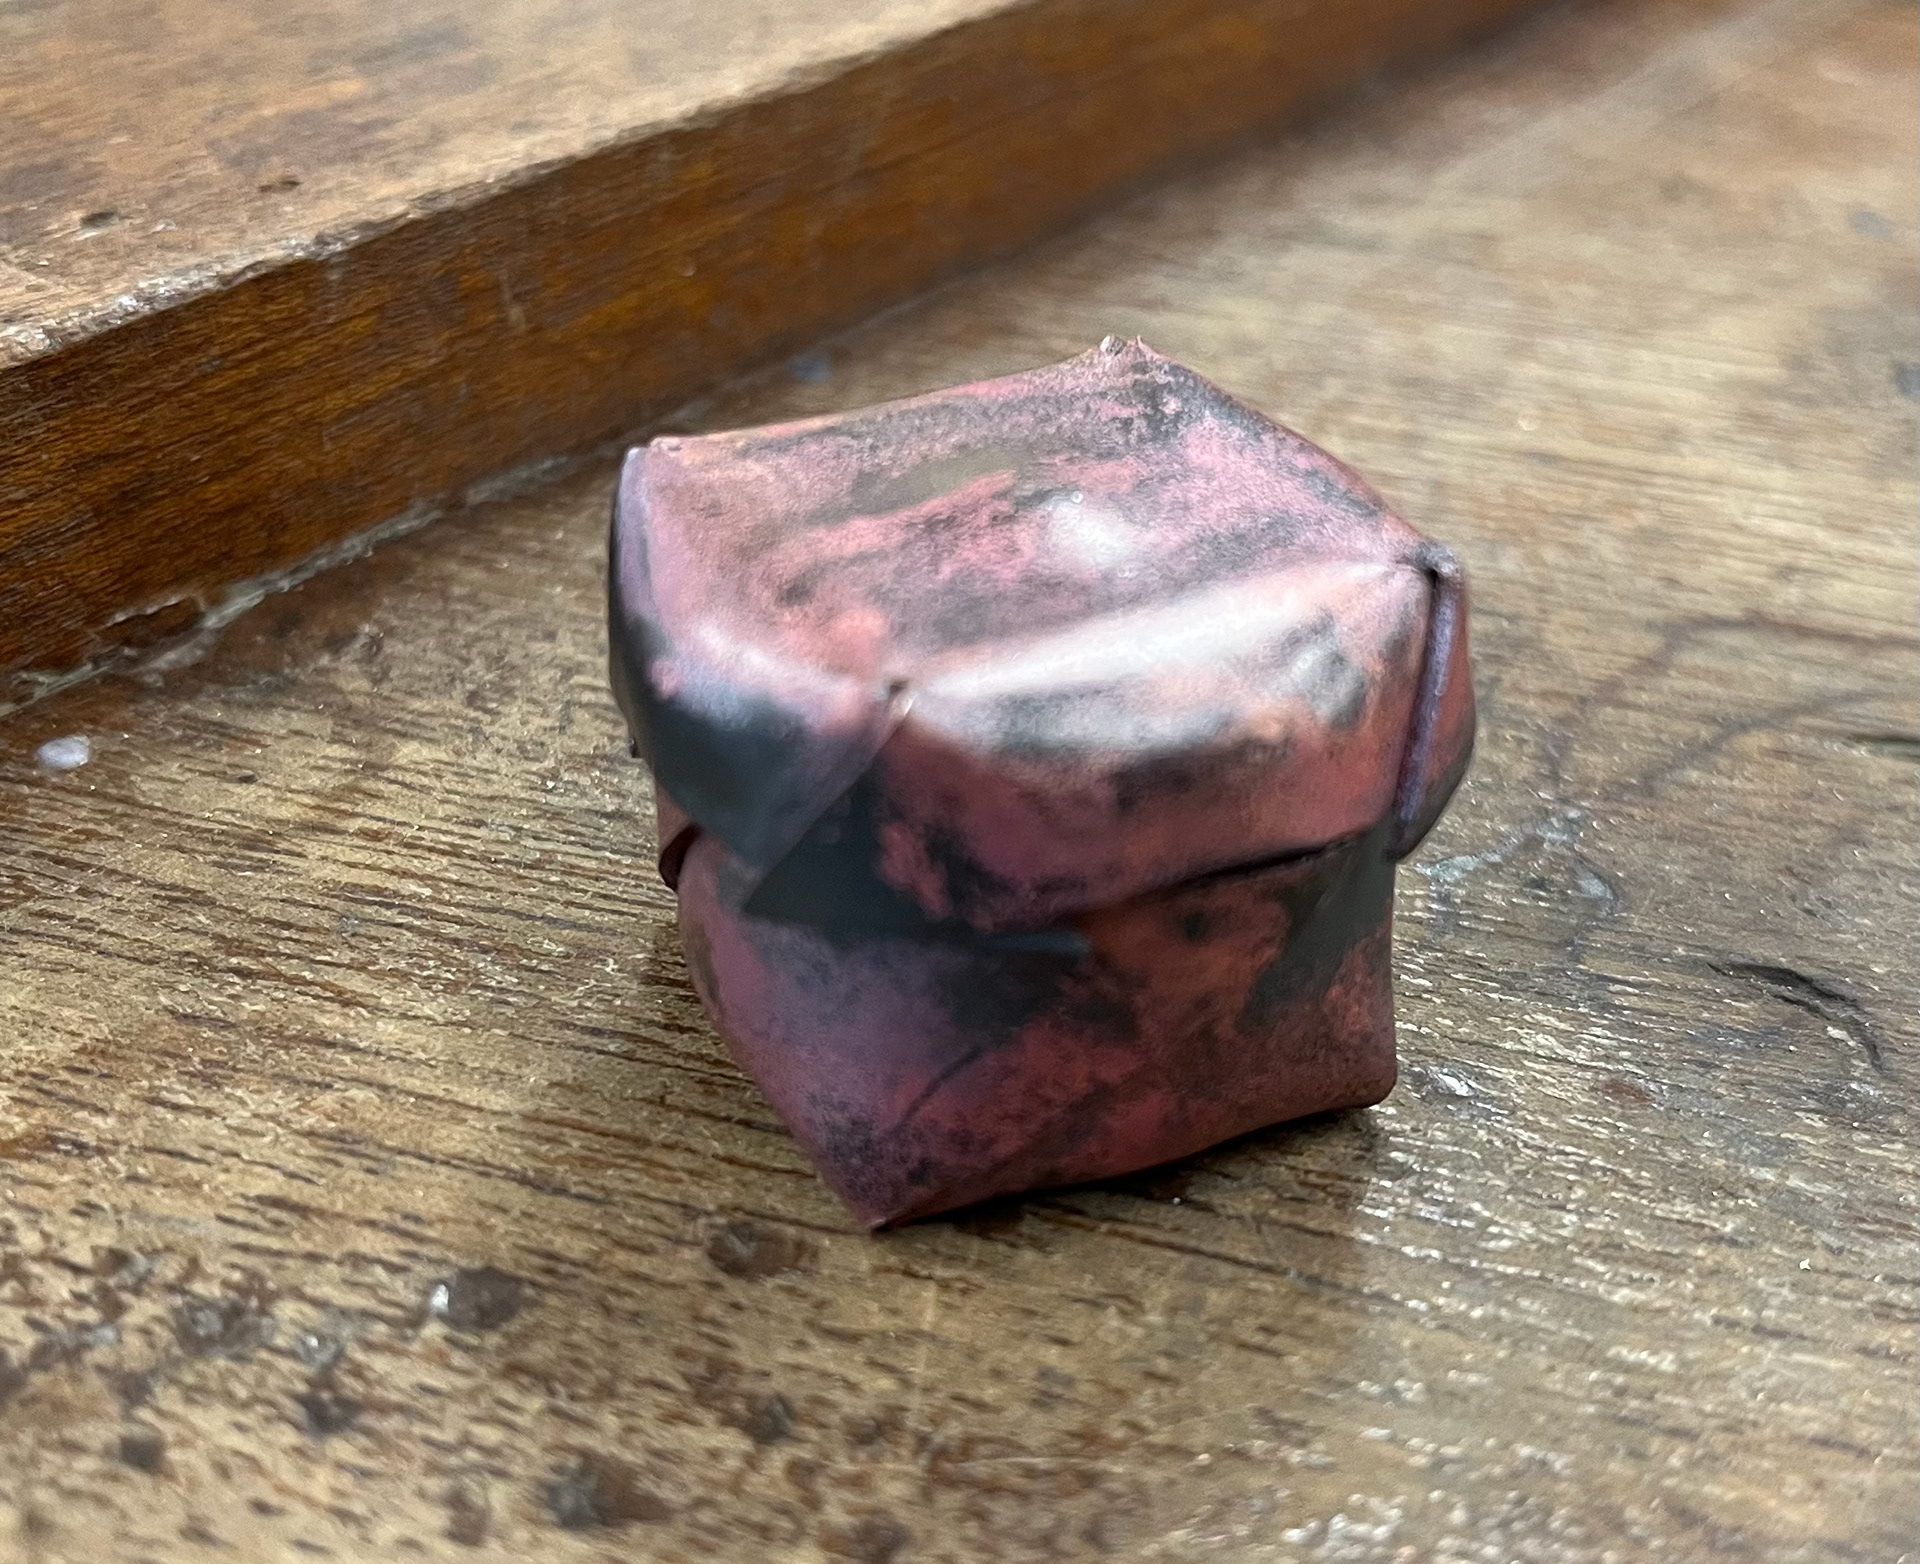
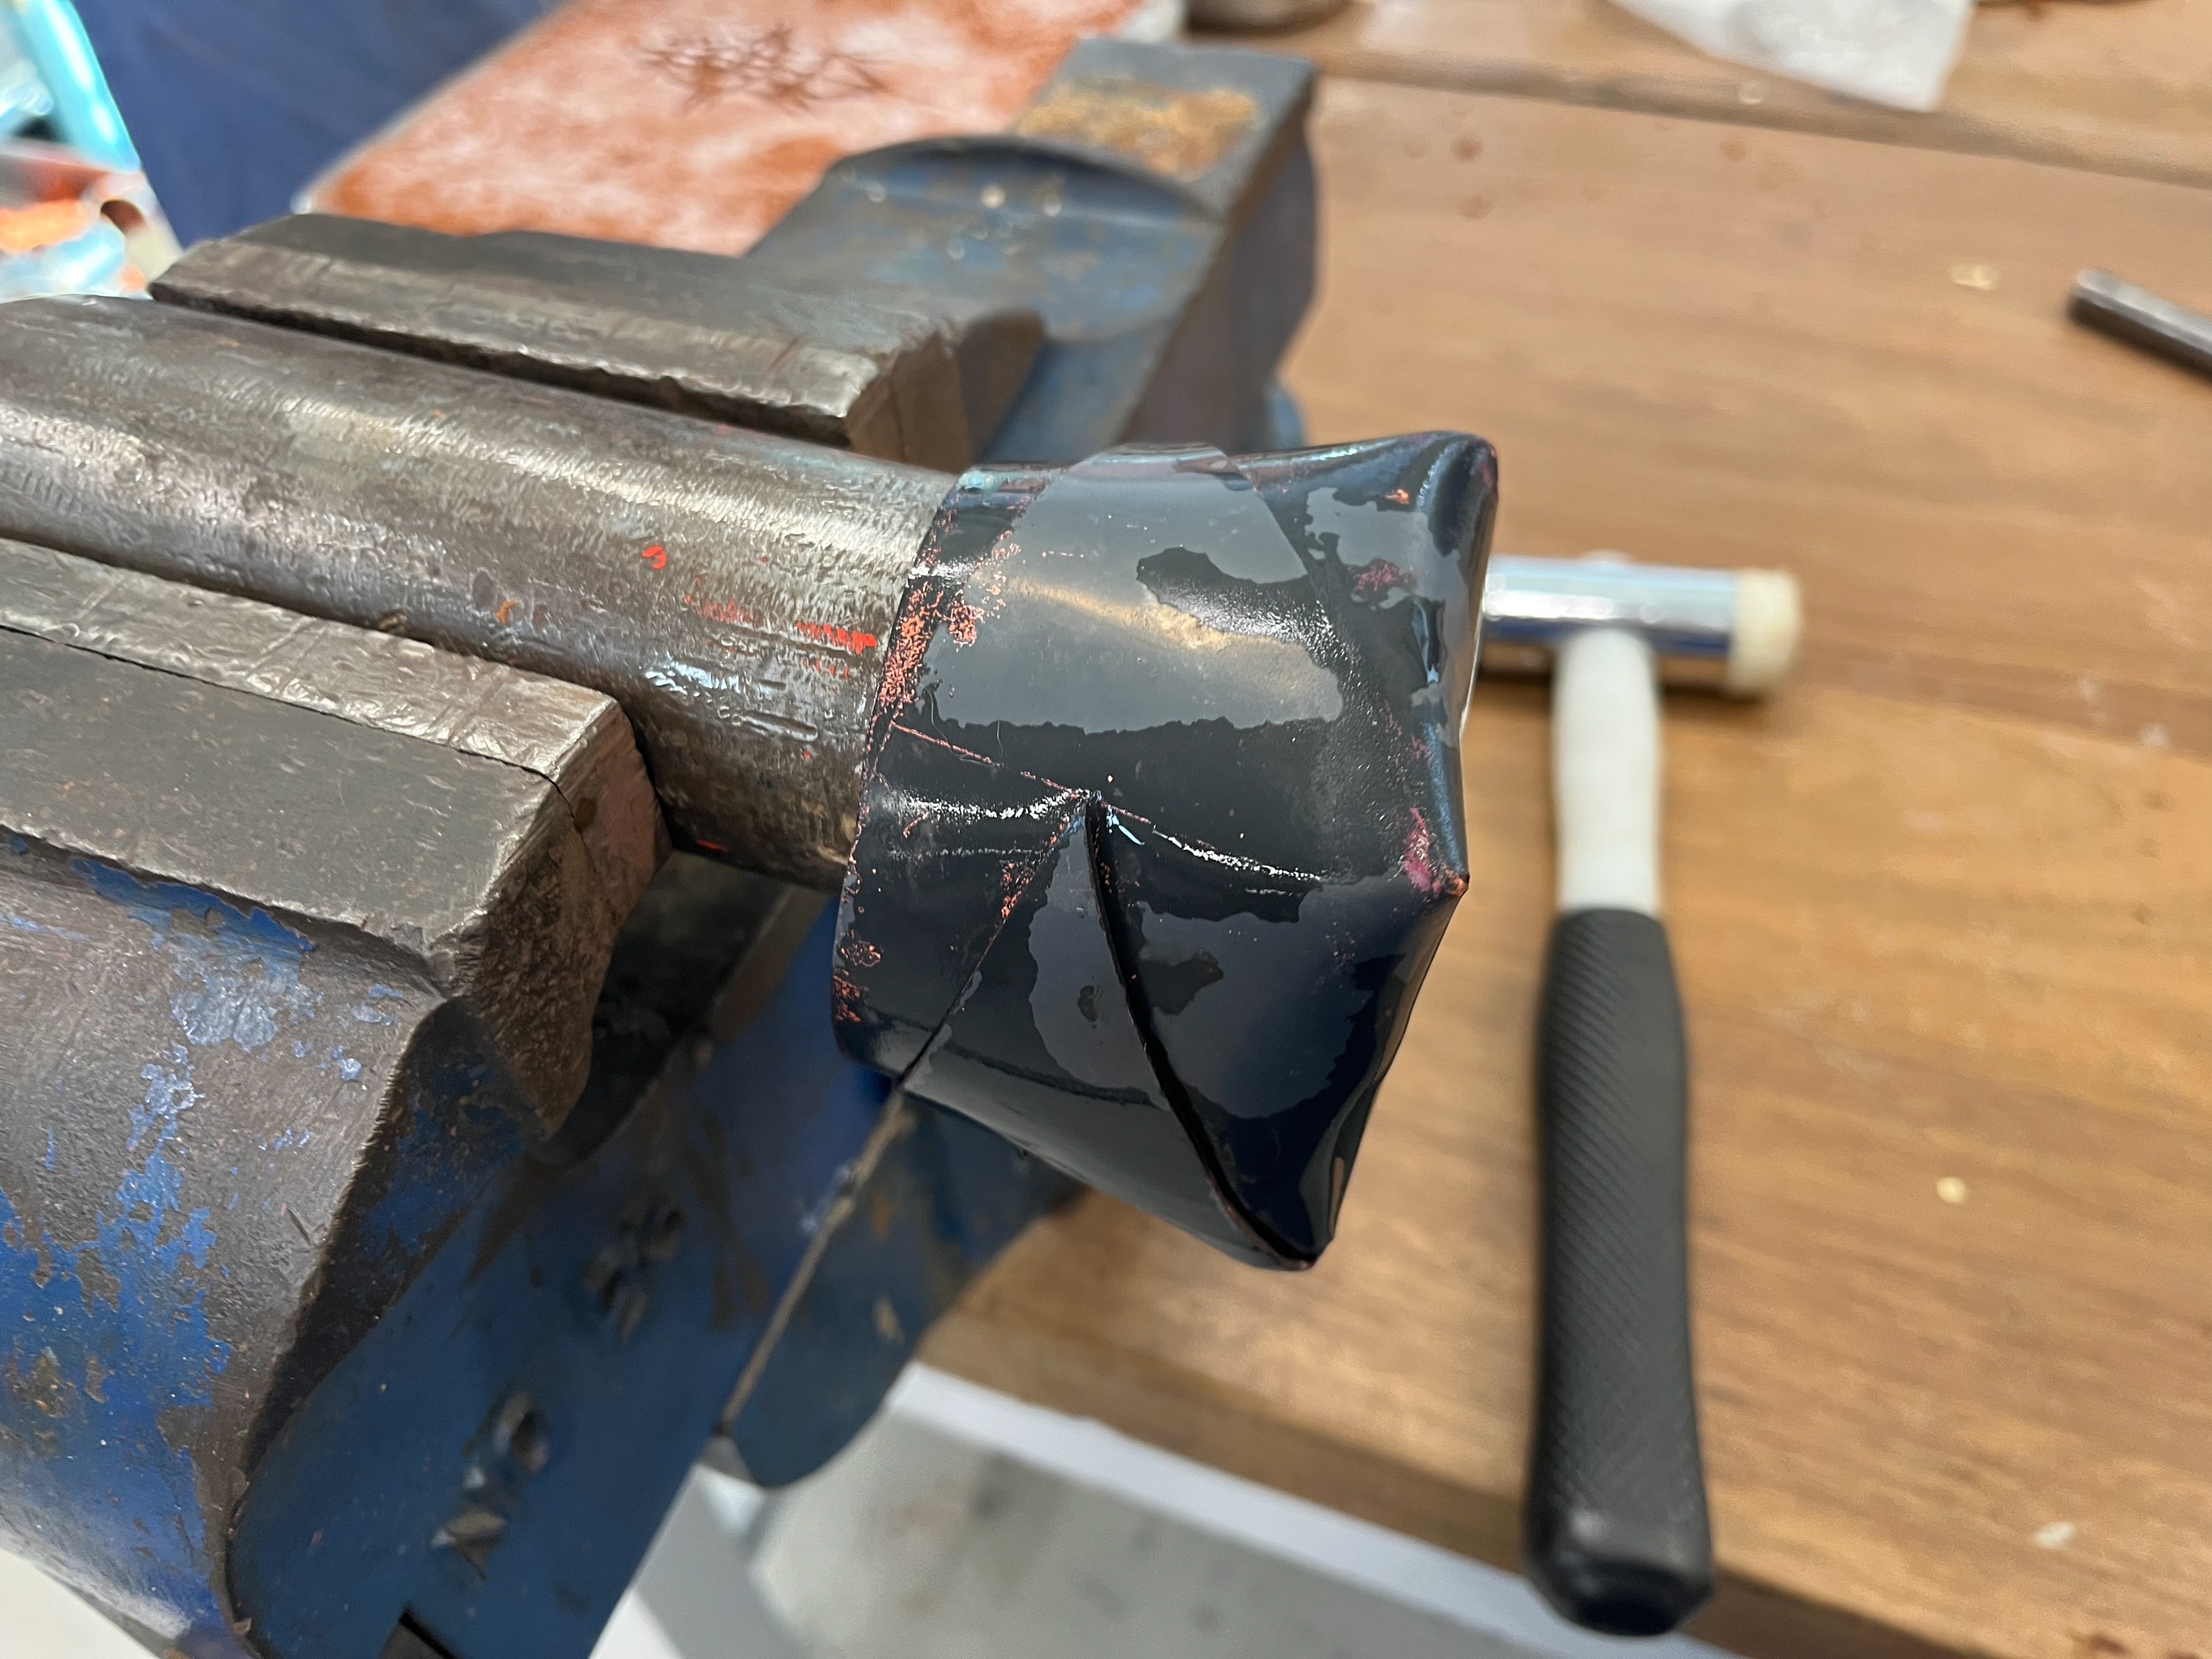
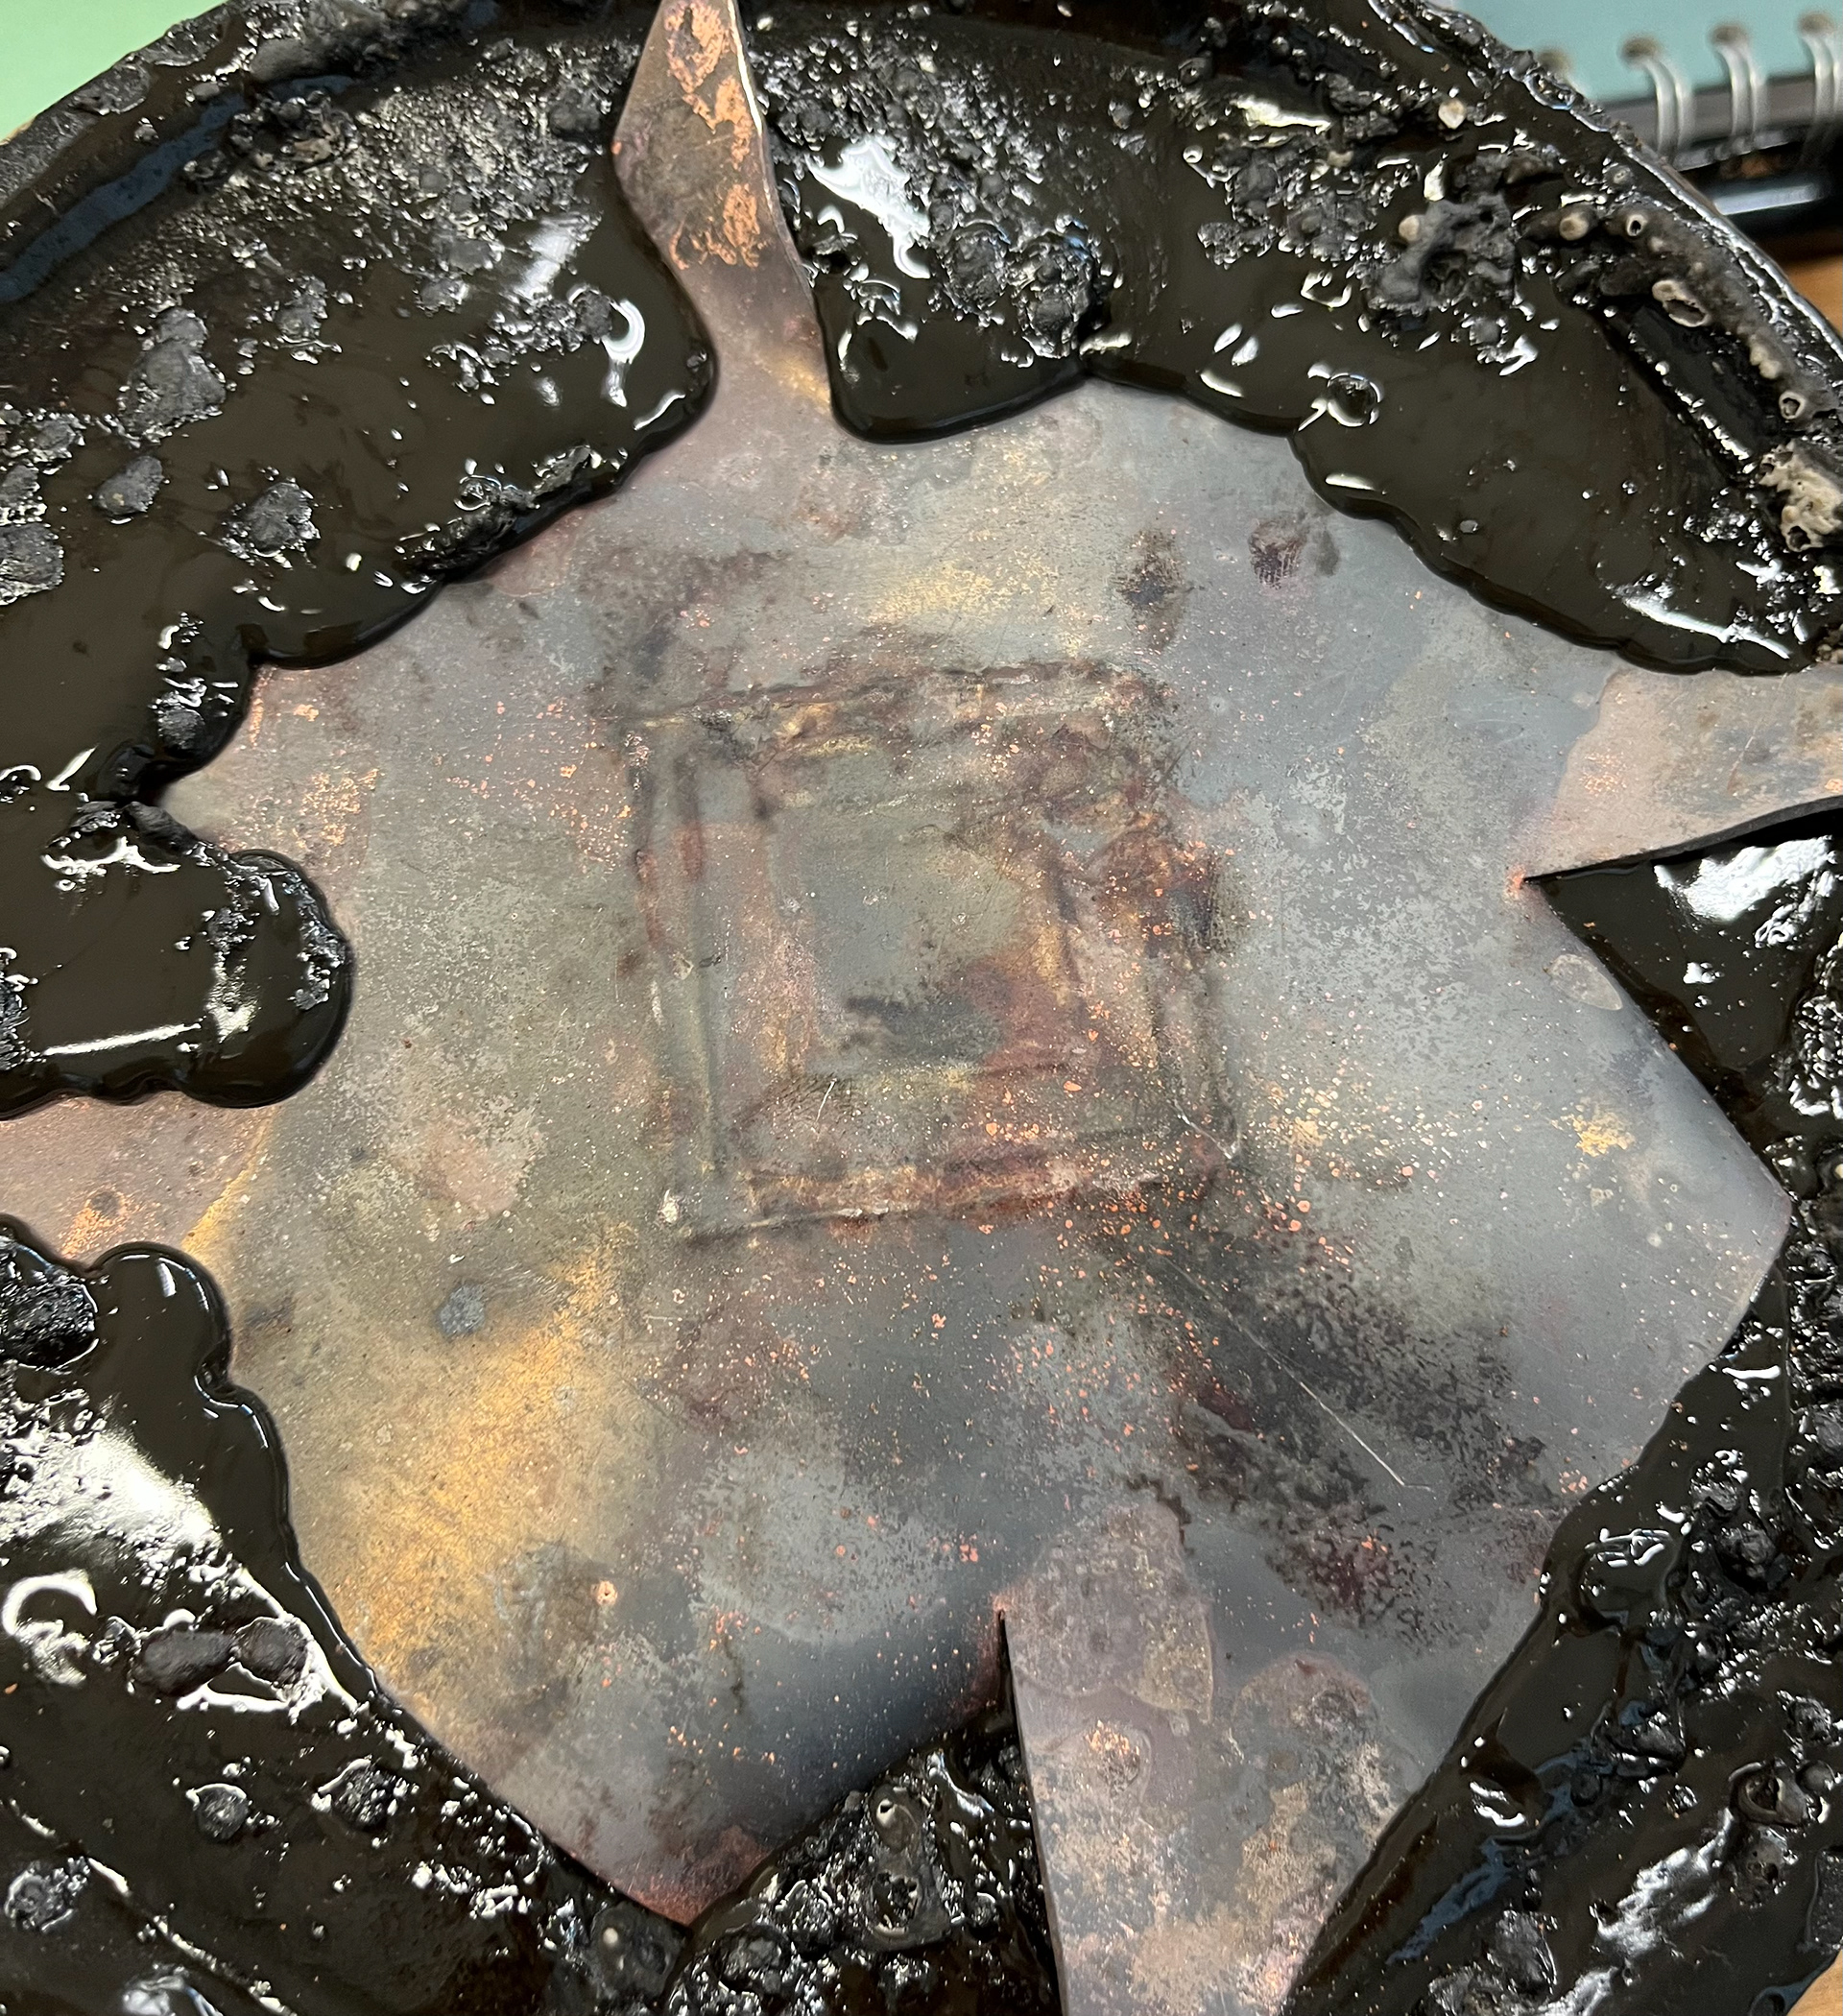
I was originally going to turn this piece into a box, with the repousse bottom but as I was folding it round into shape, I realised I actually preferred this form, reminding me of a ninja star… or maybe a flower? The piece turned in on itself and became something quite beautiful. I’m not sure where I will go with this but its a form I very much enjoy.
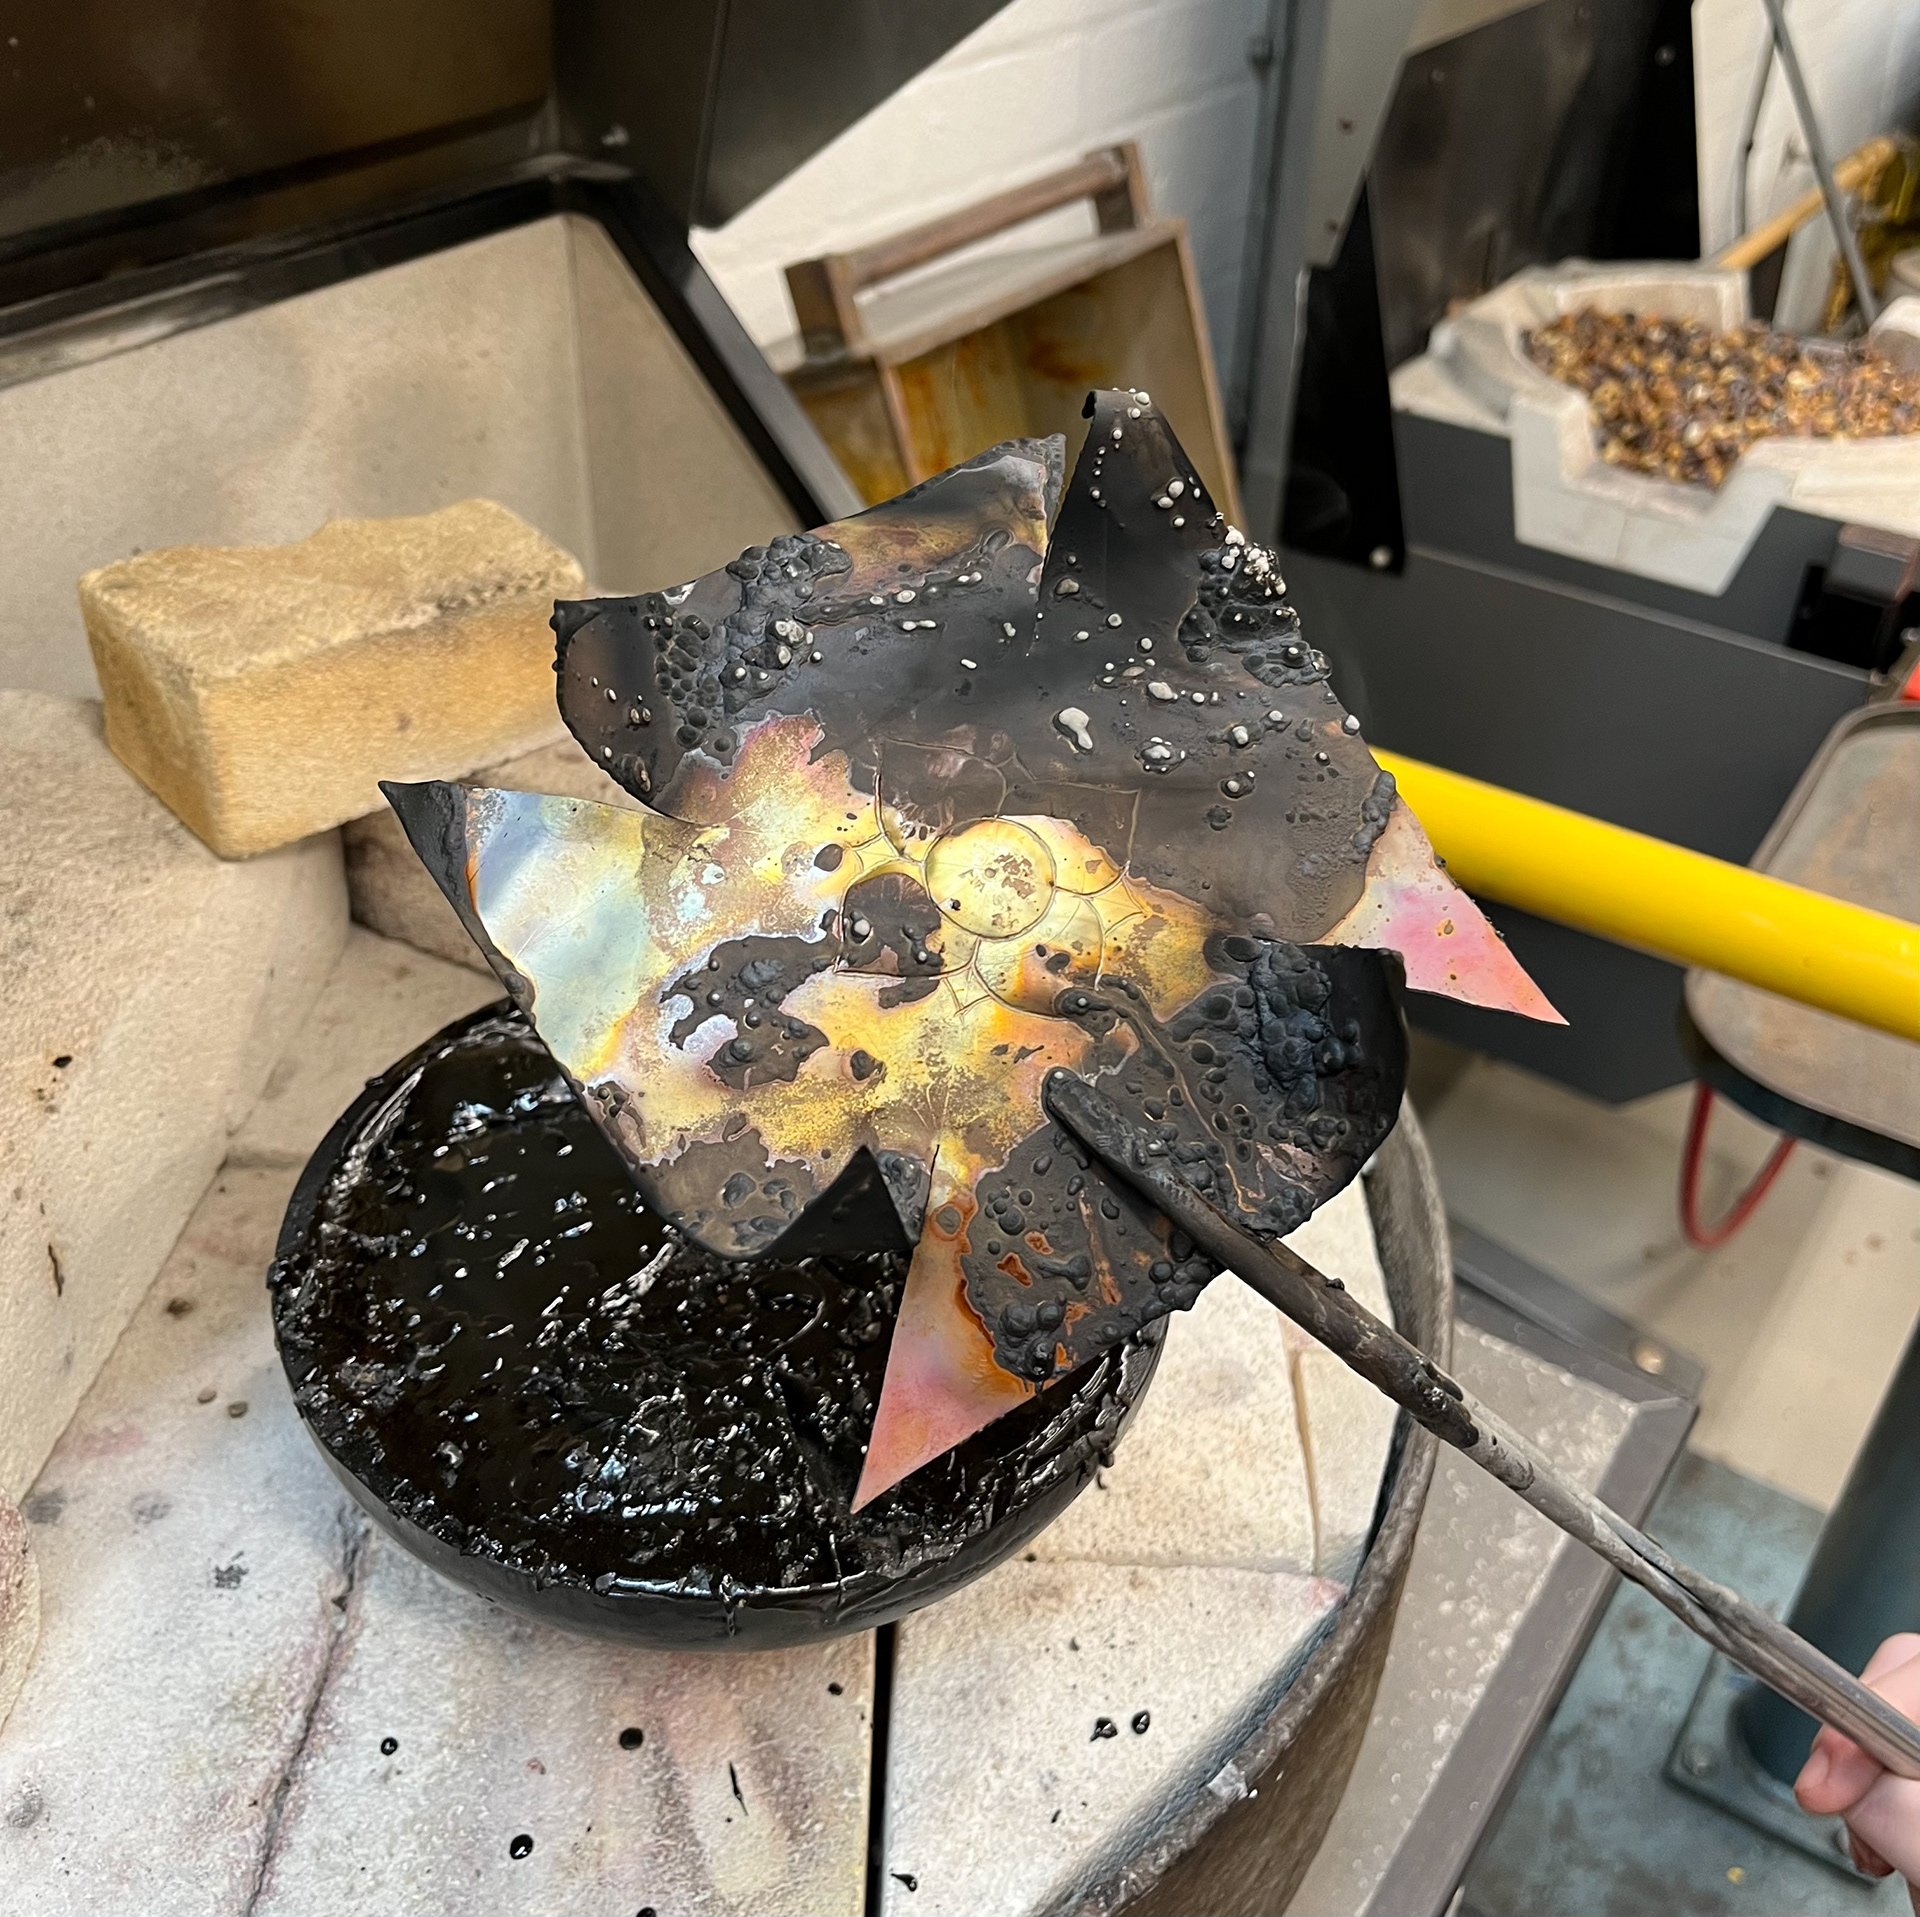
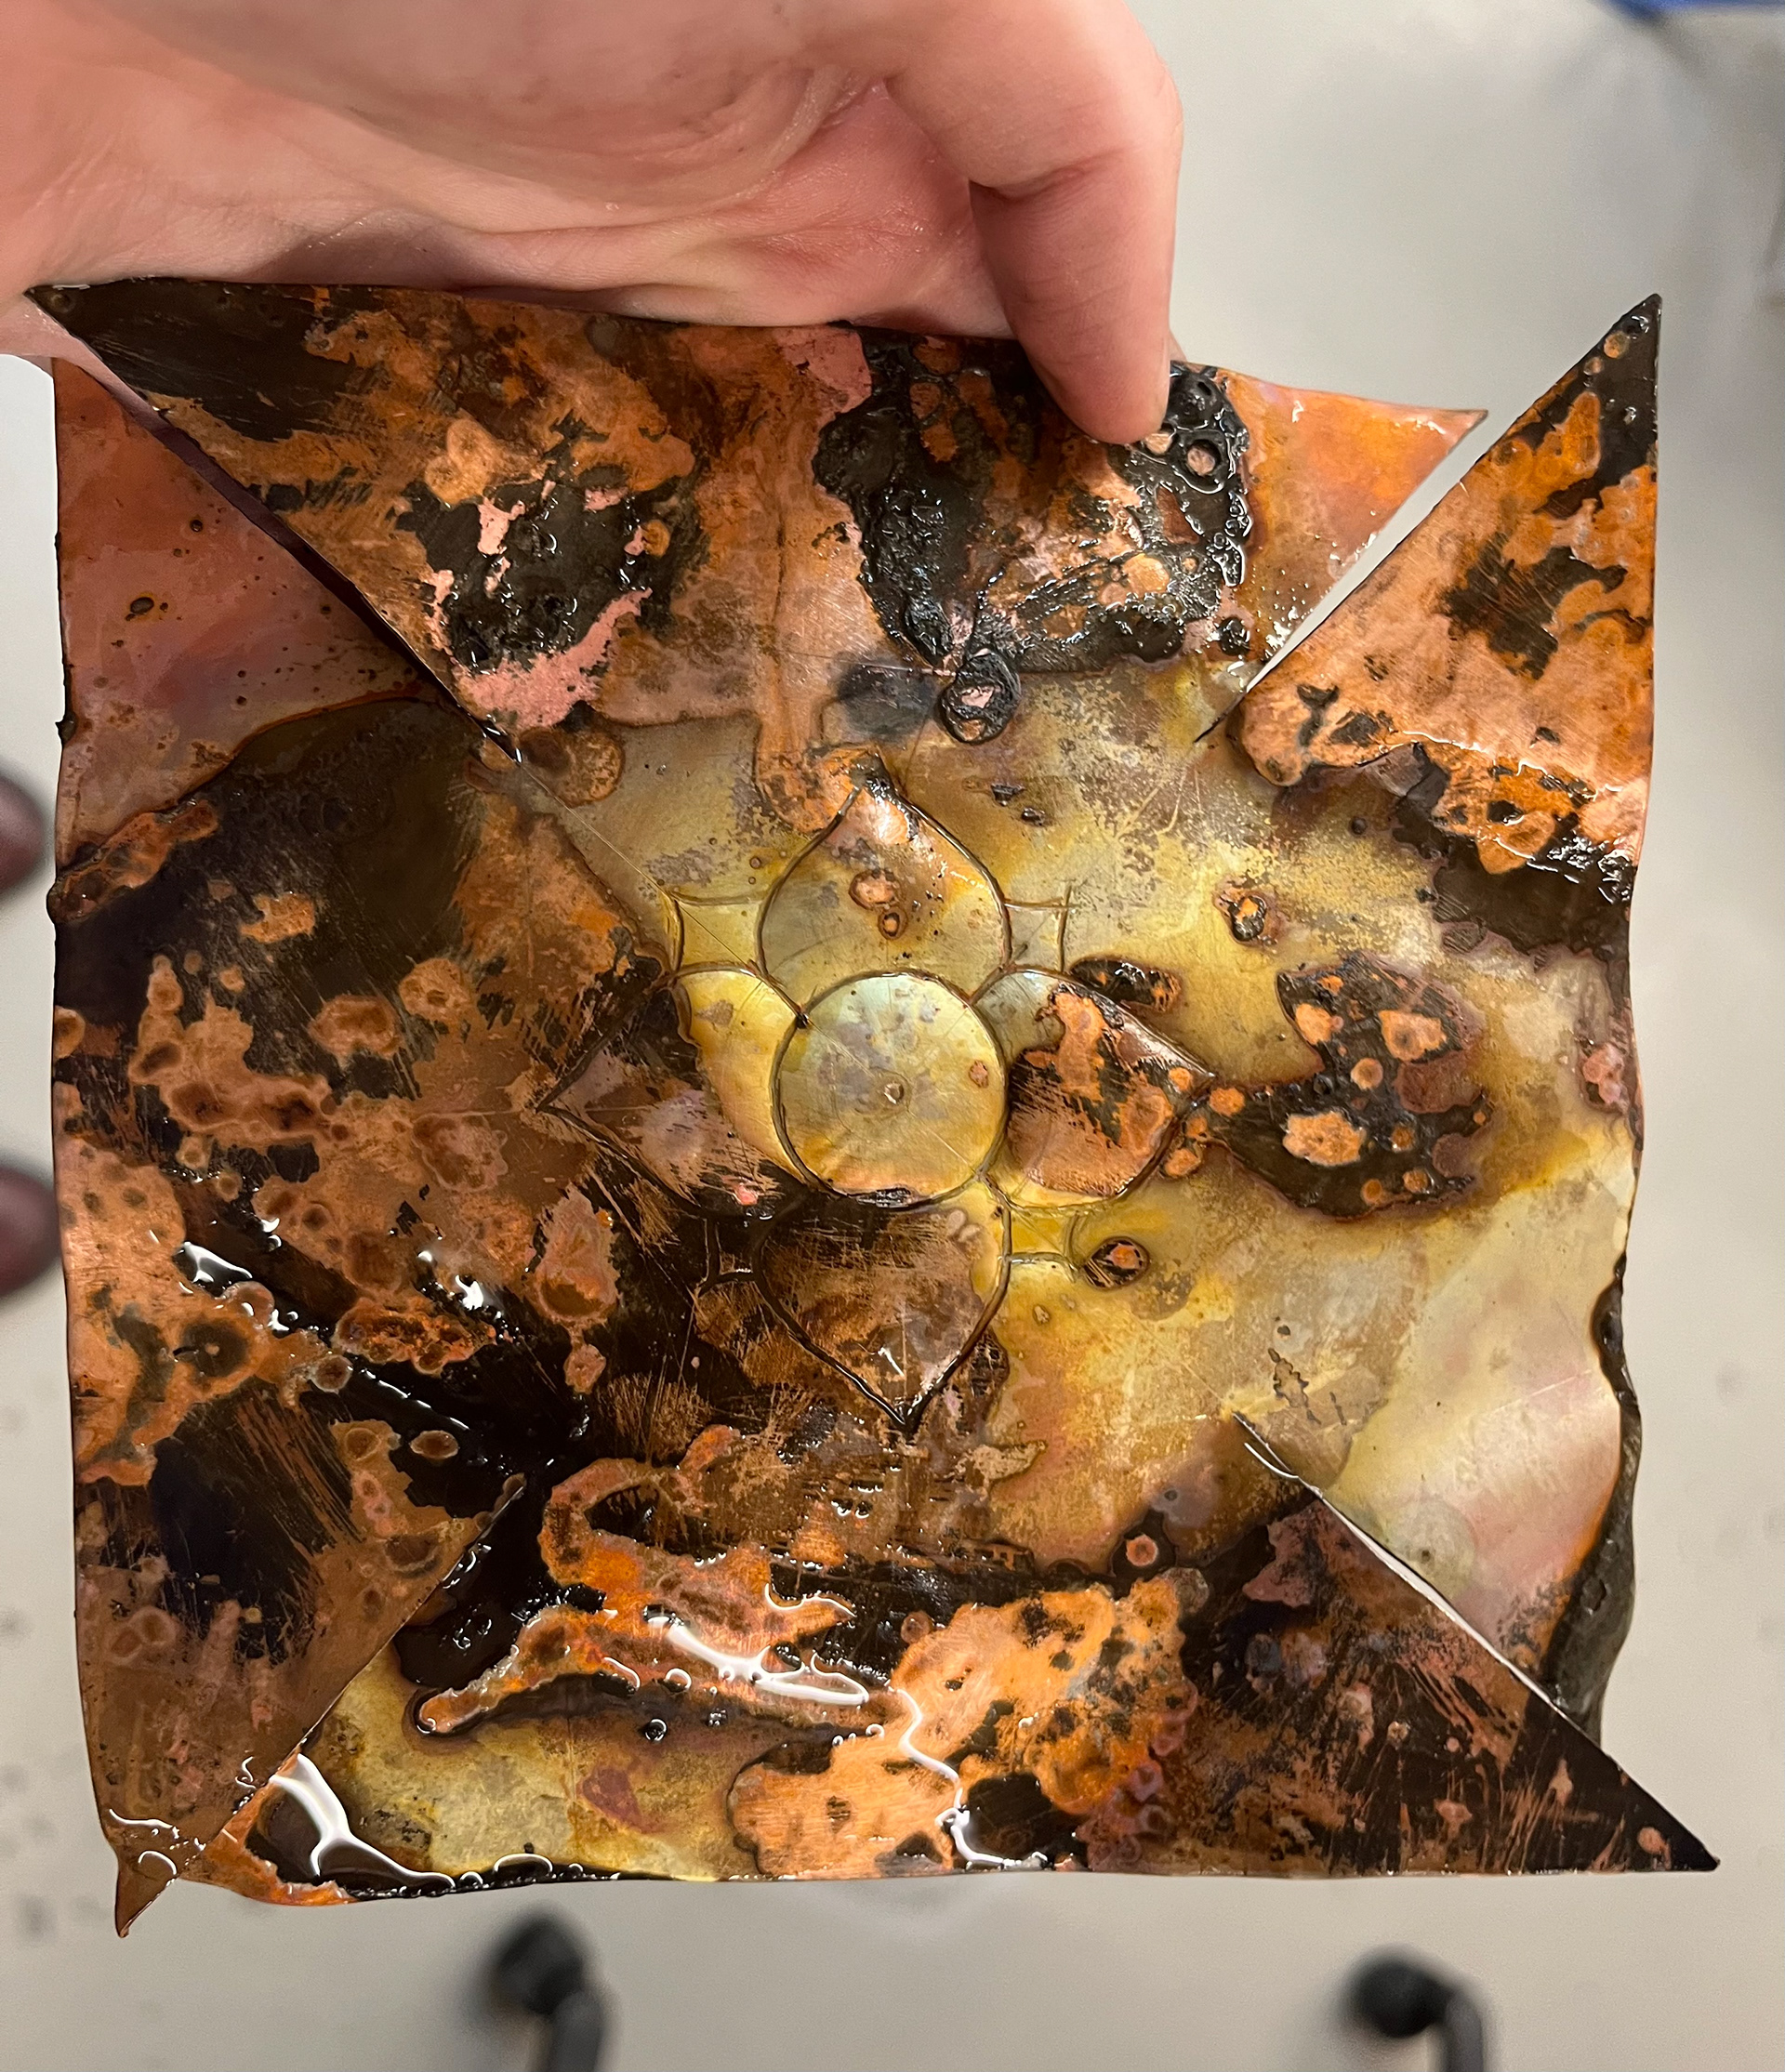
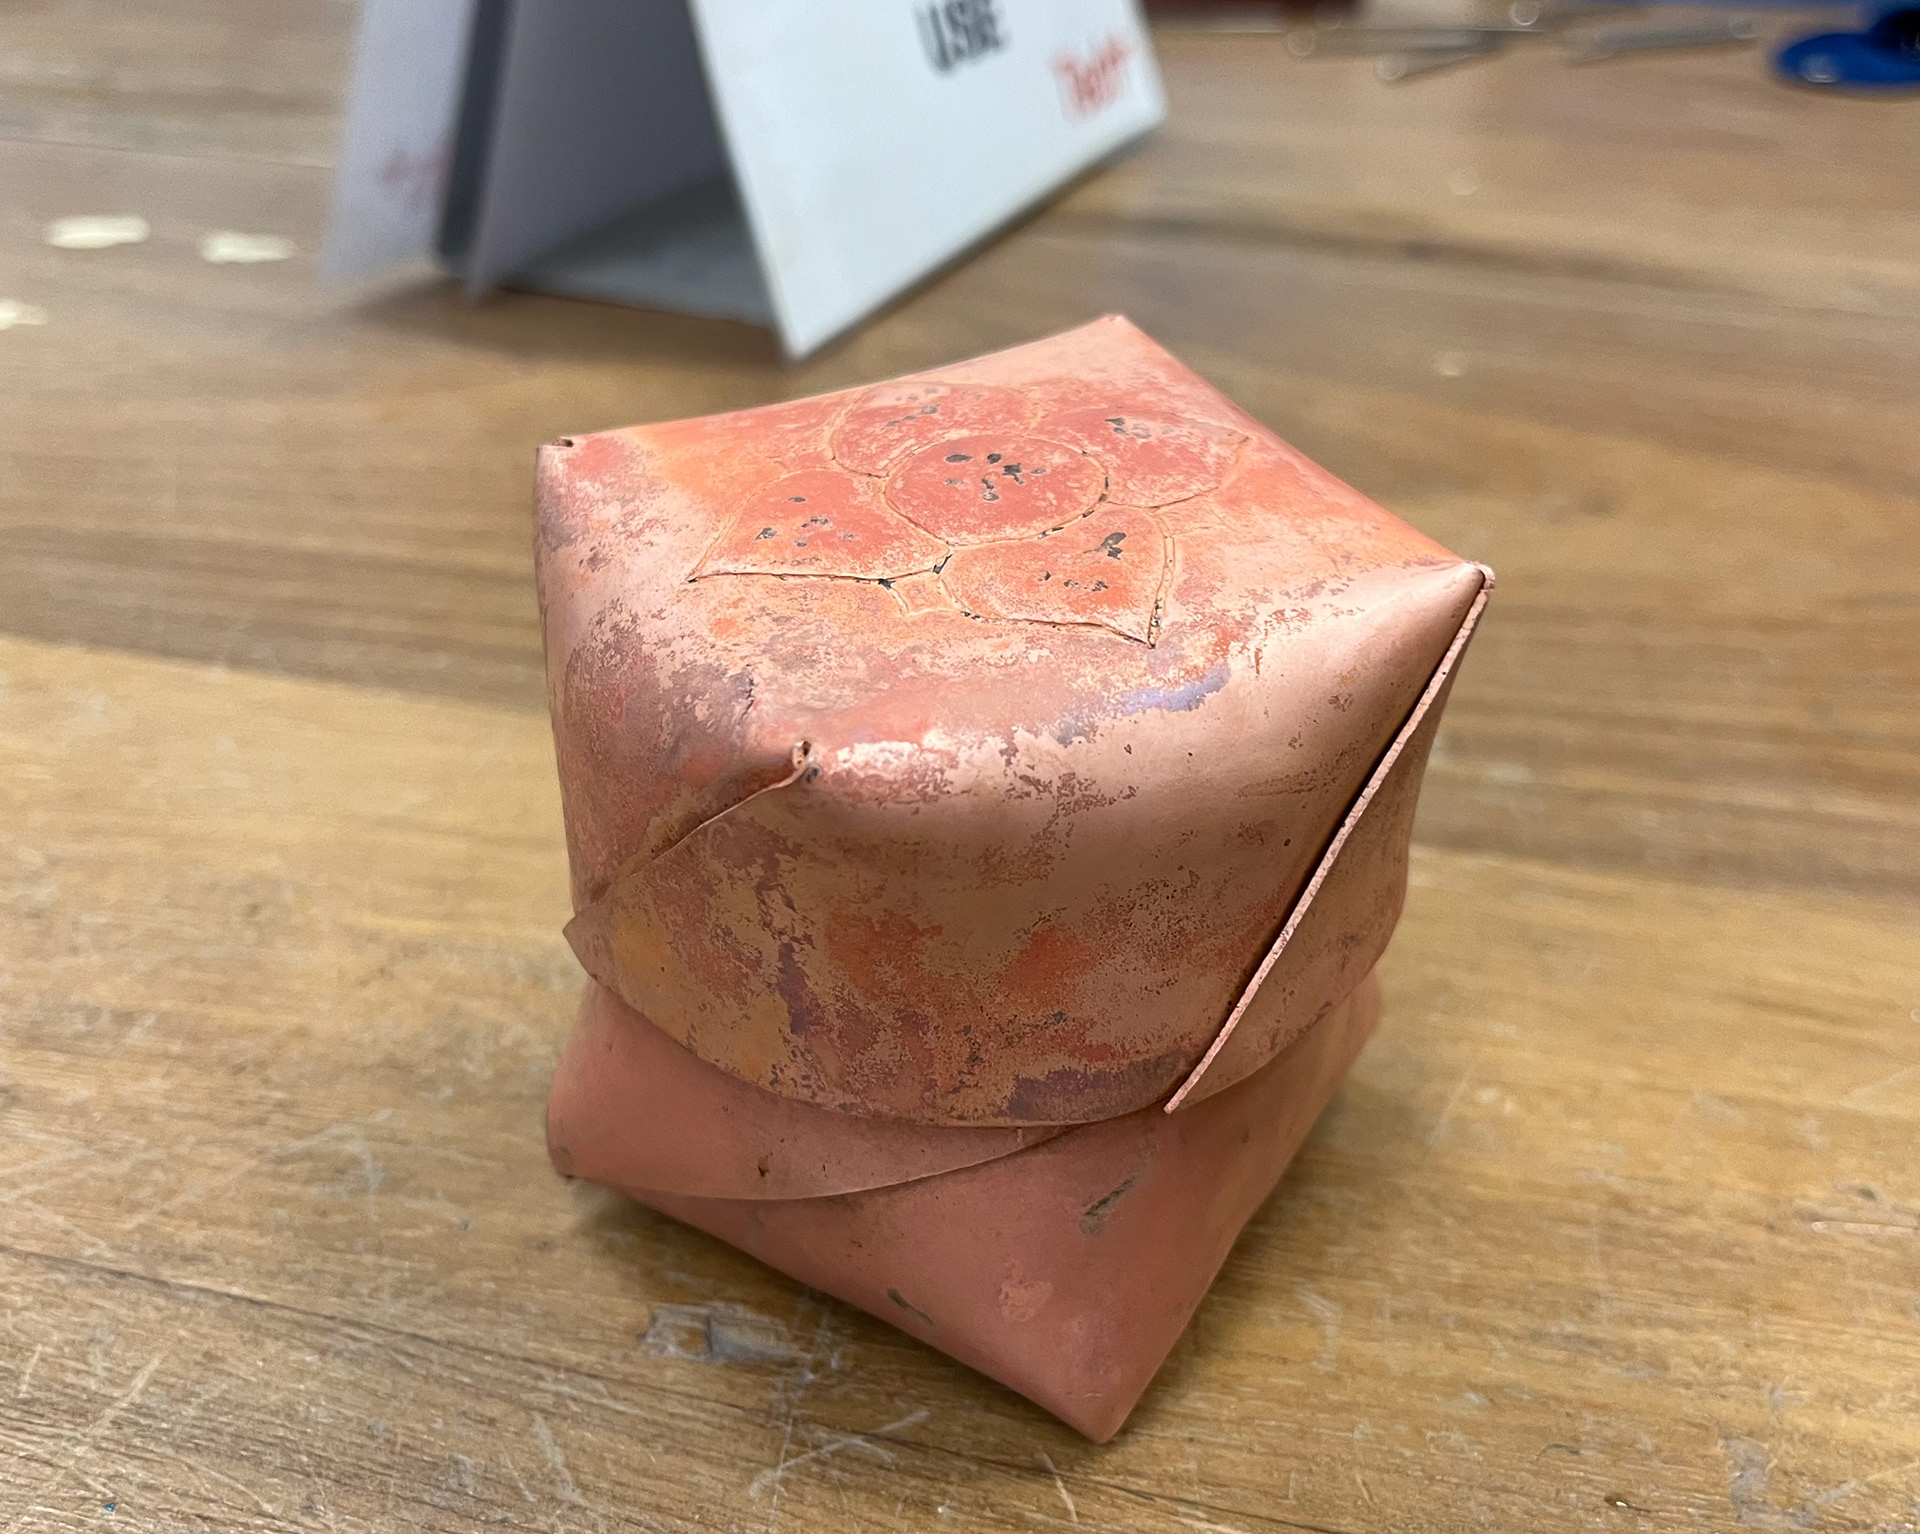
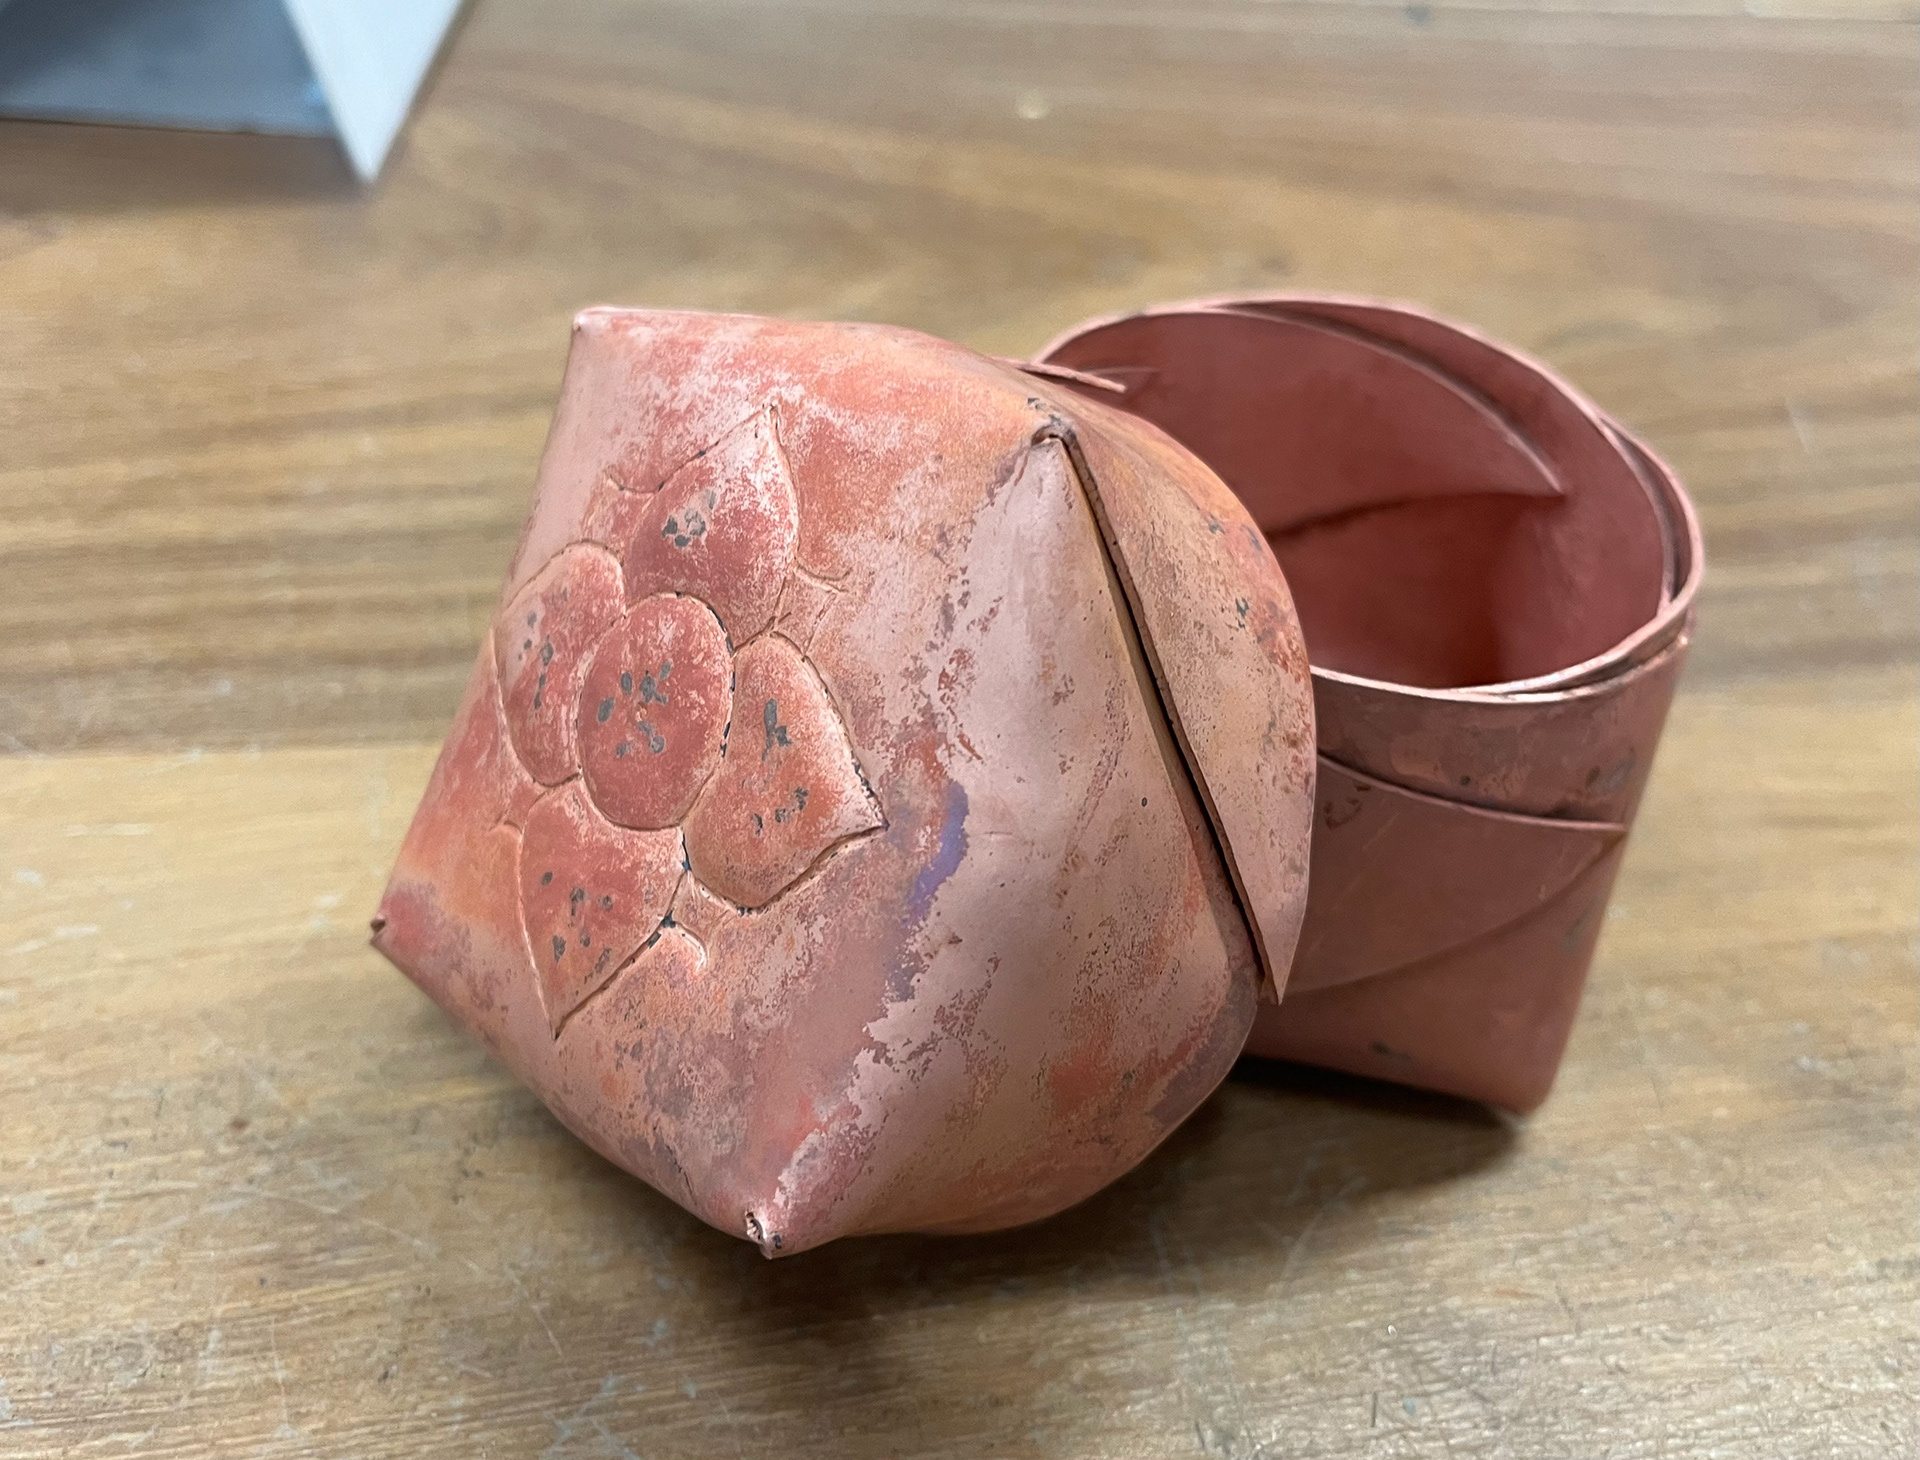
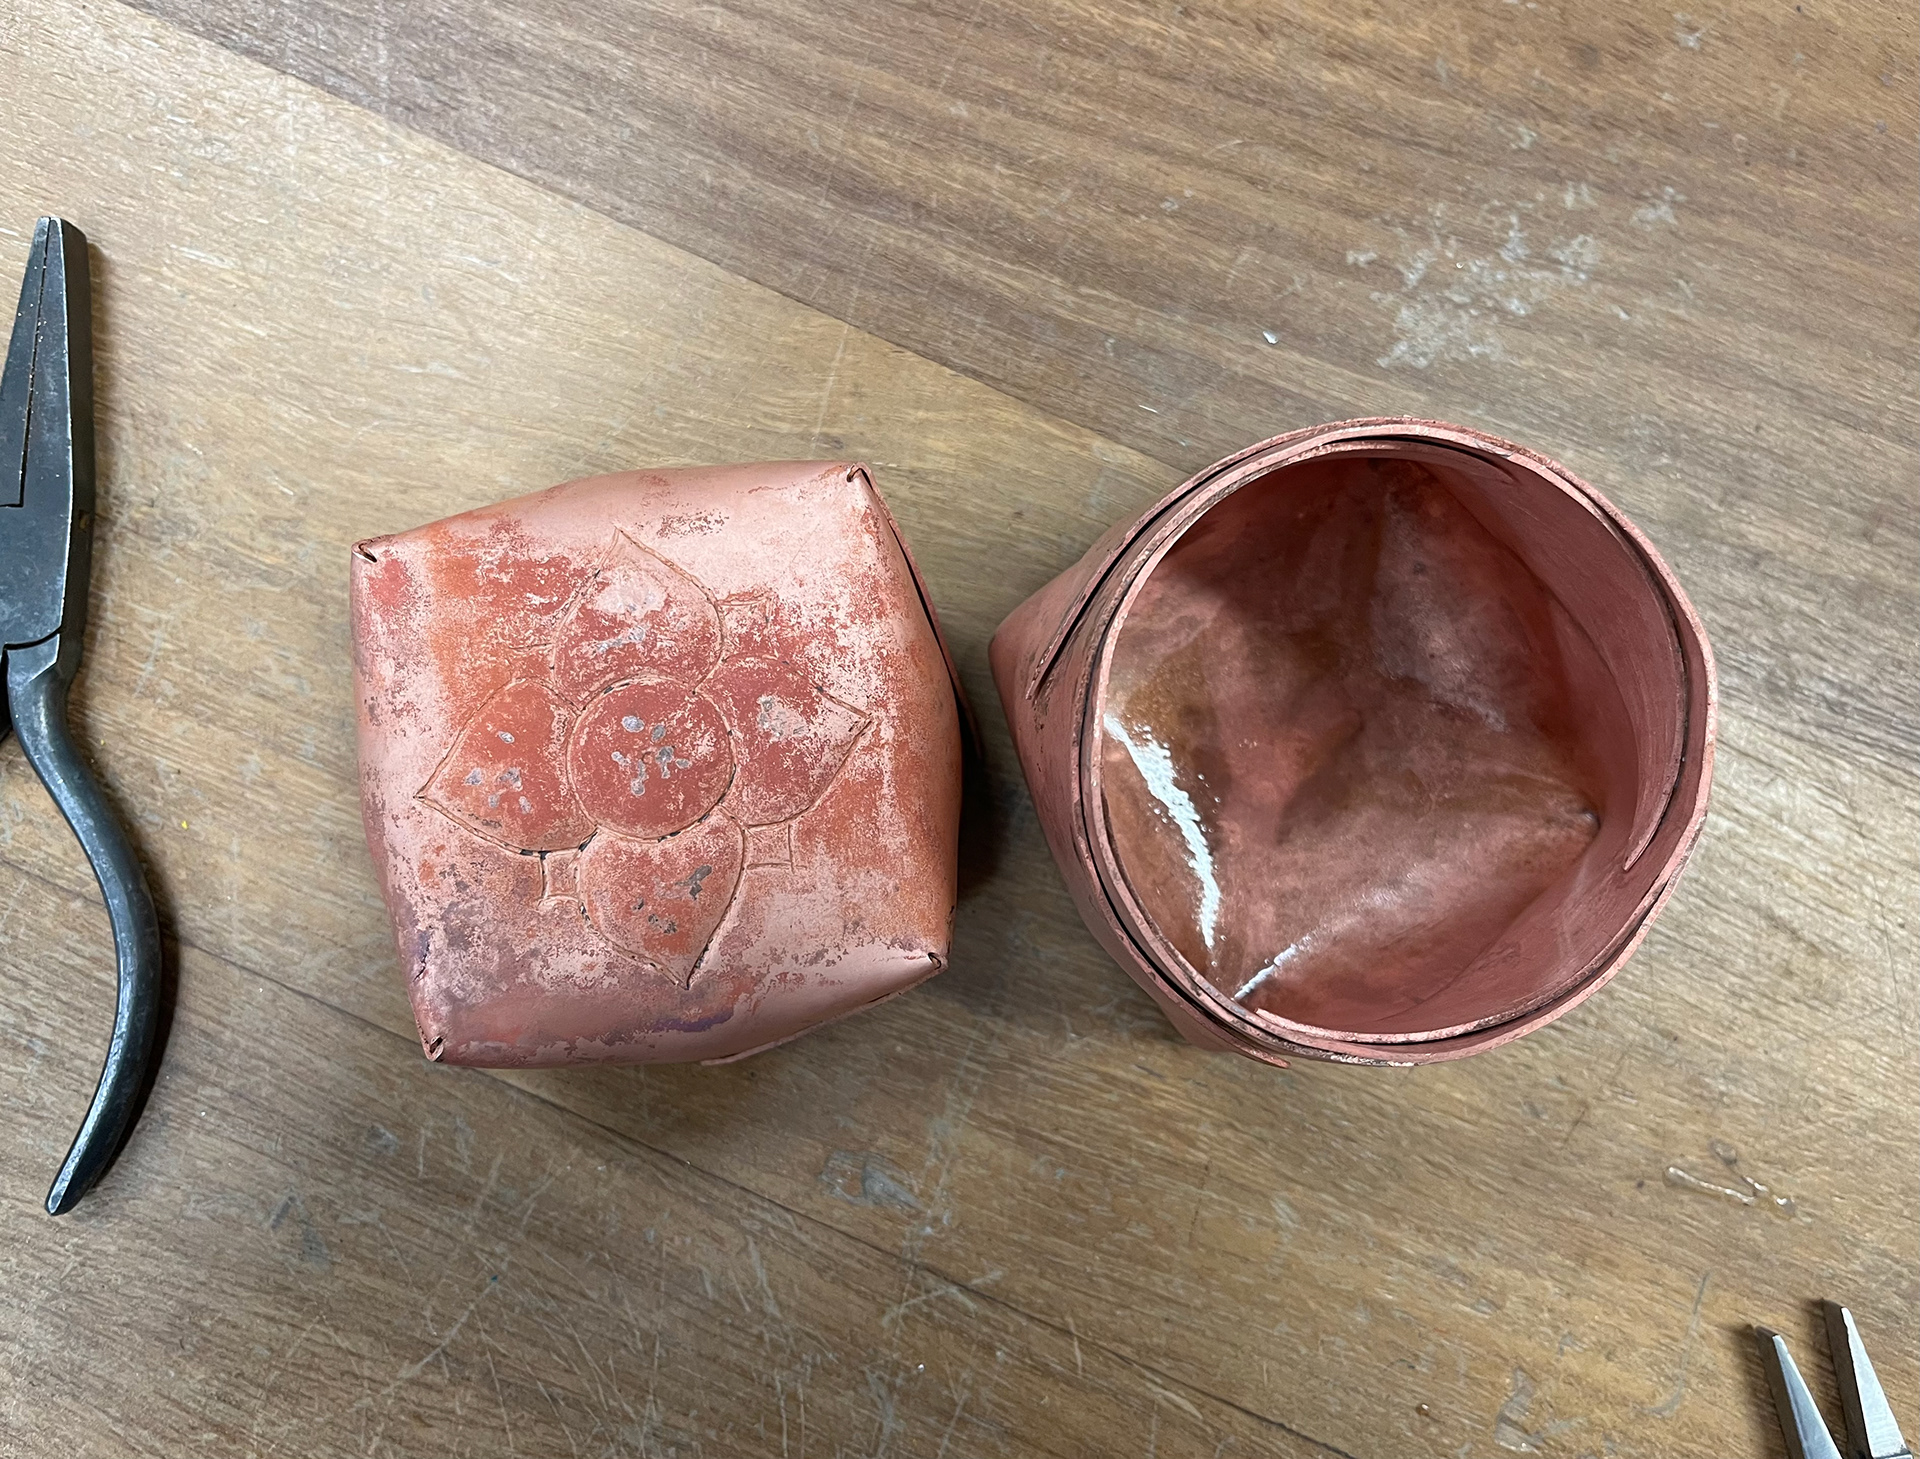
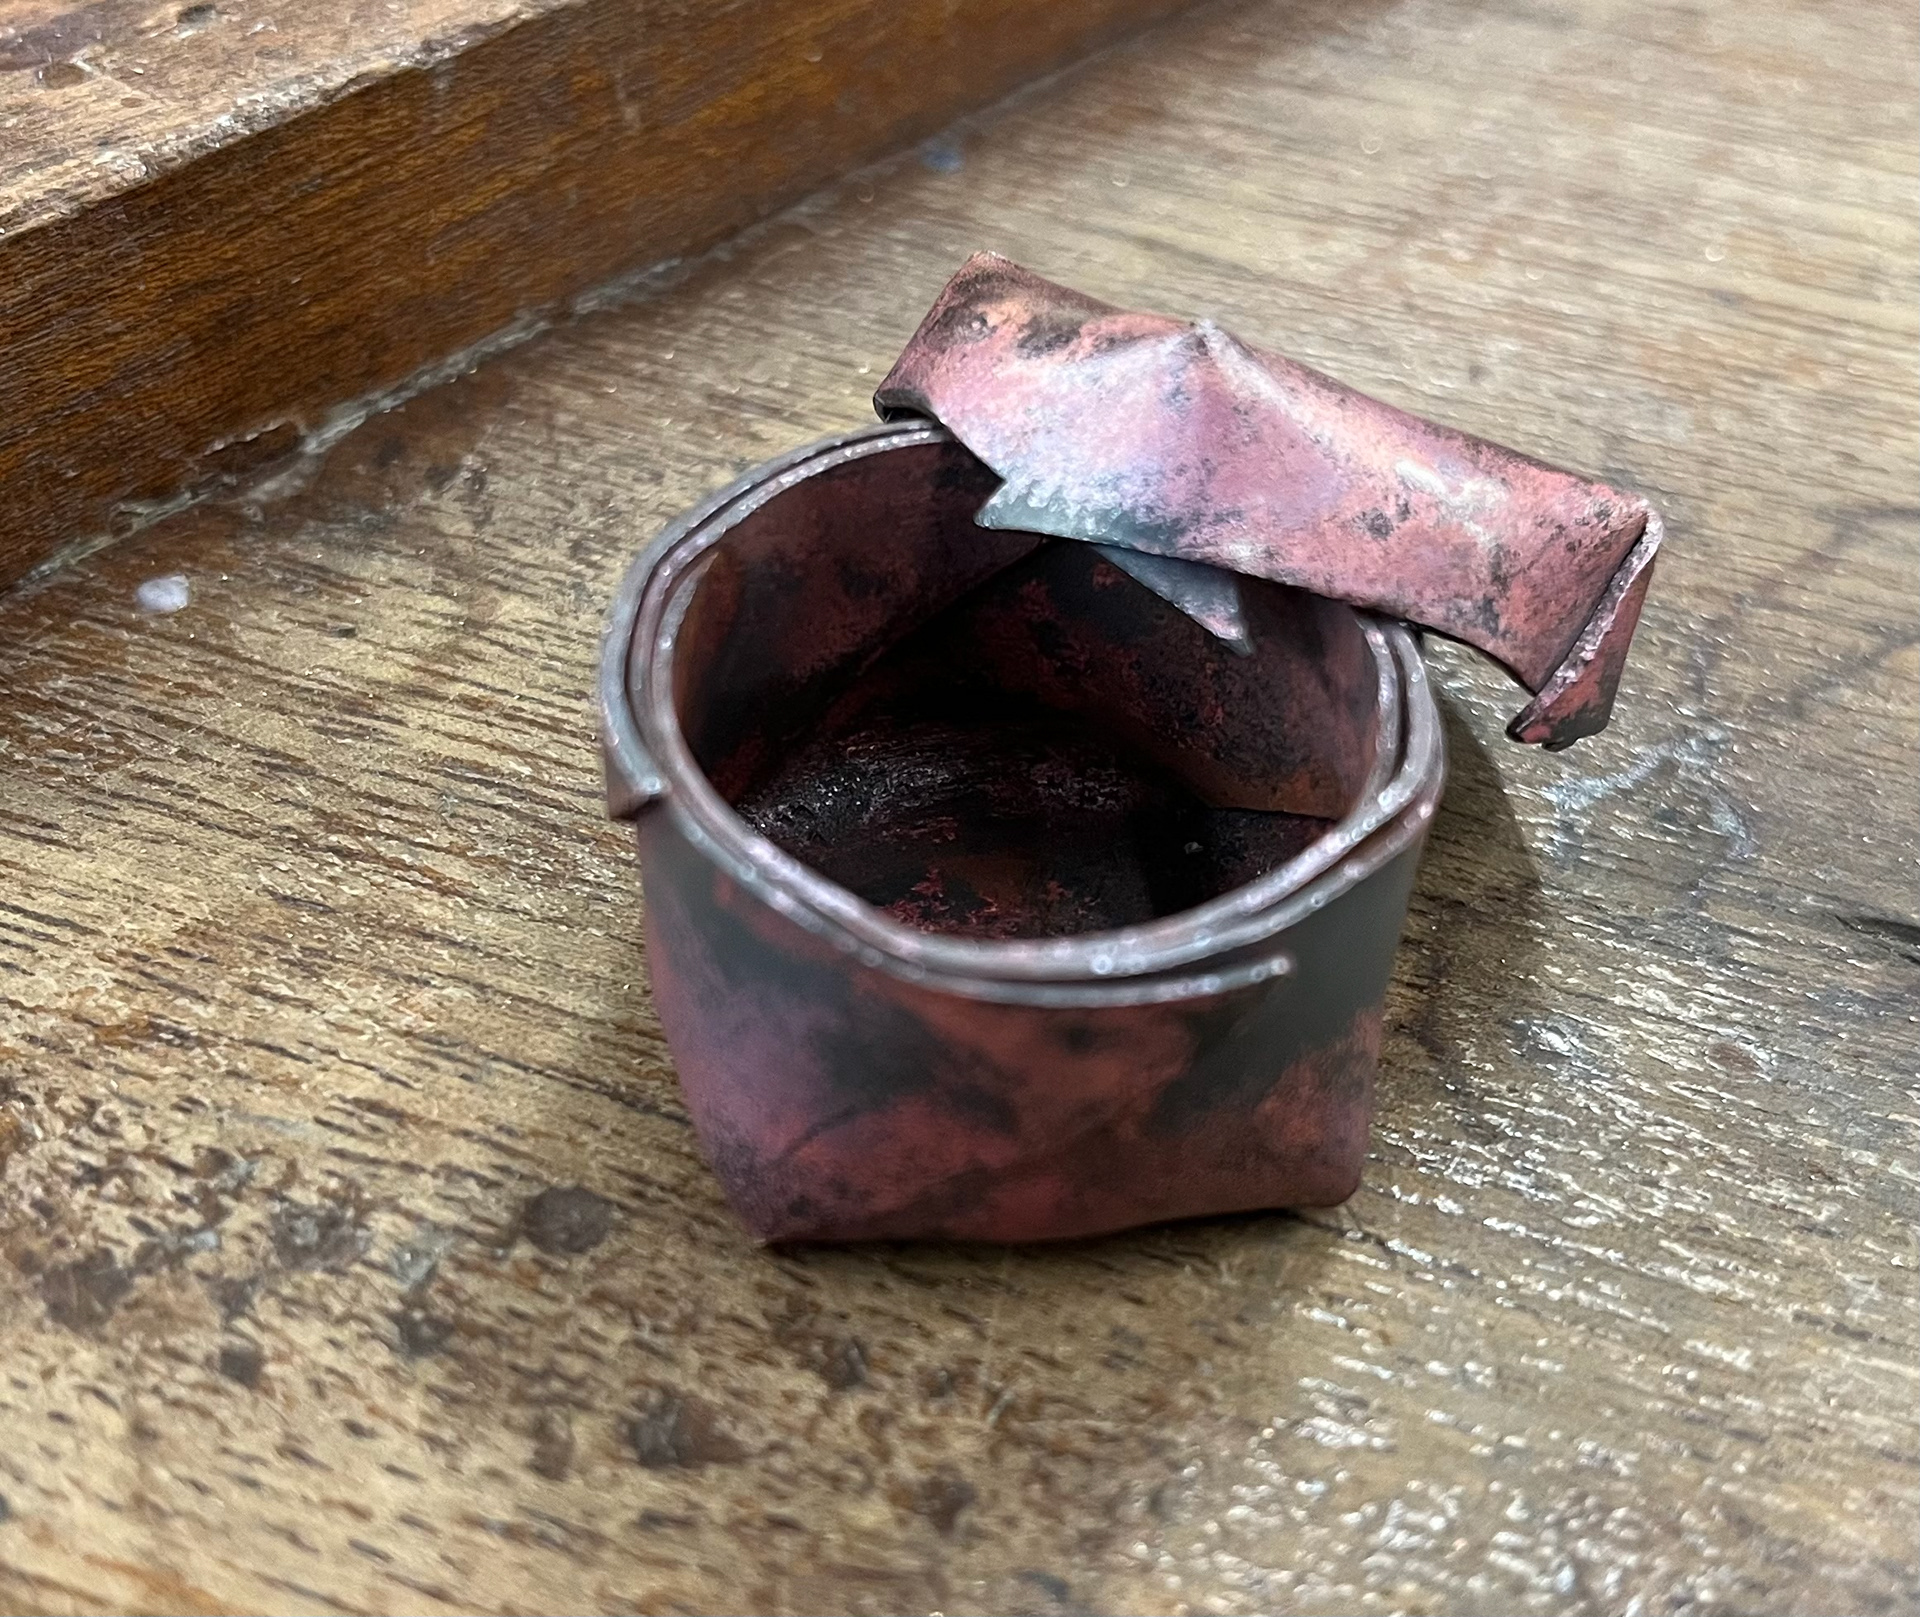
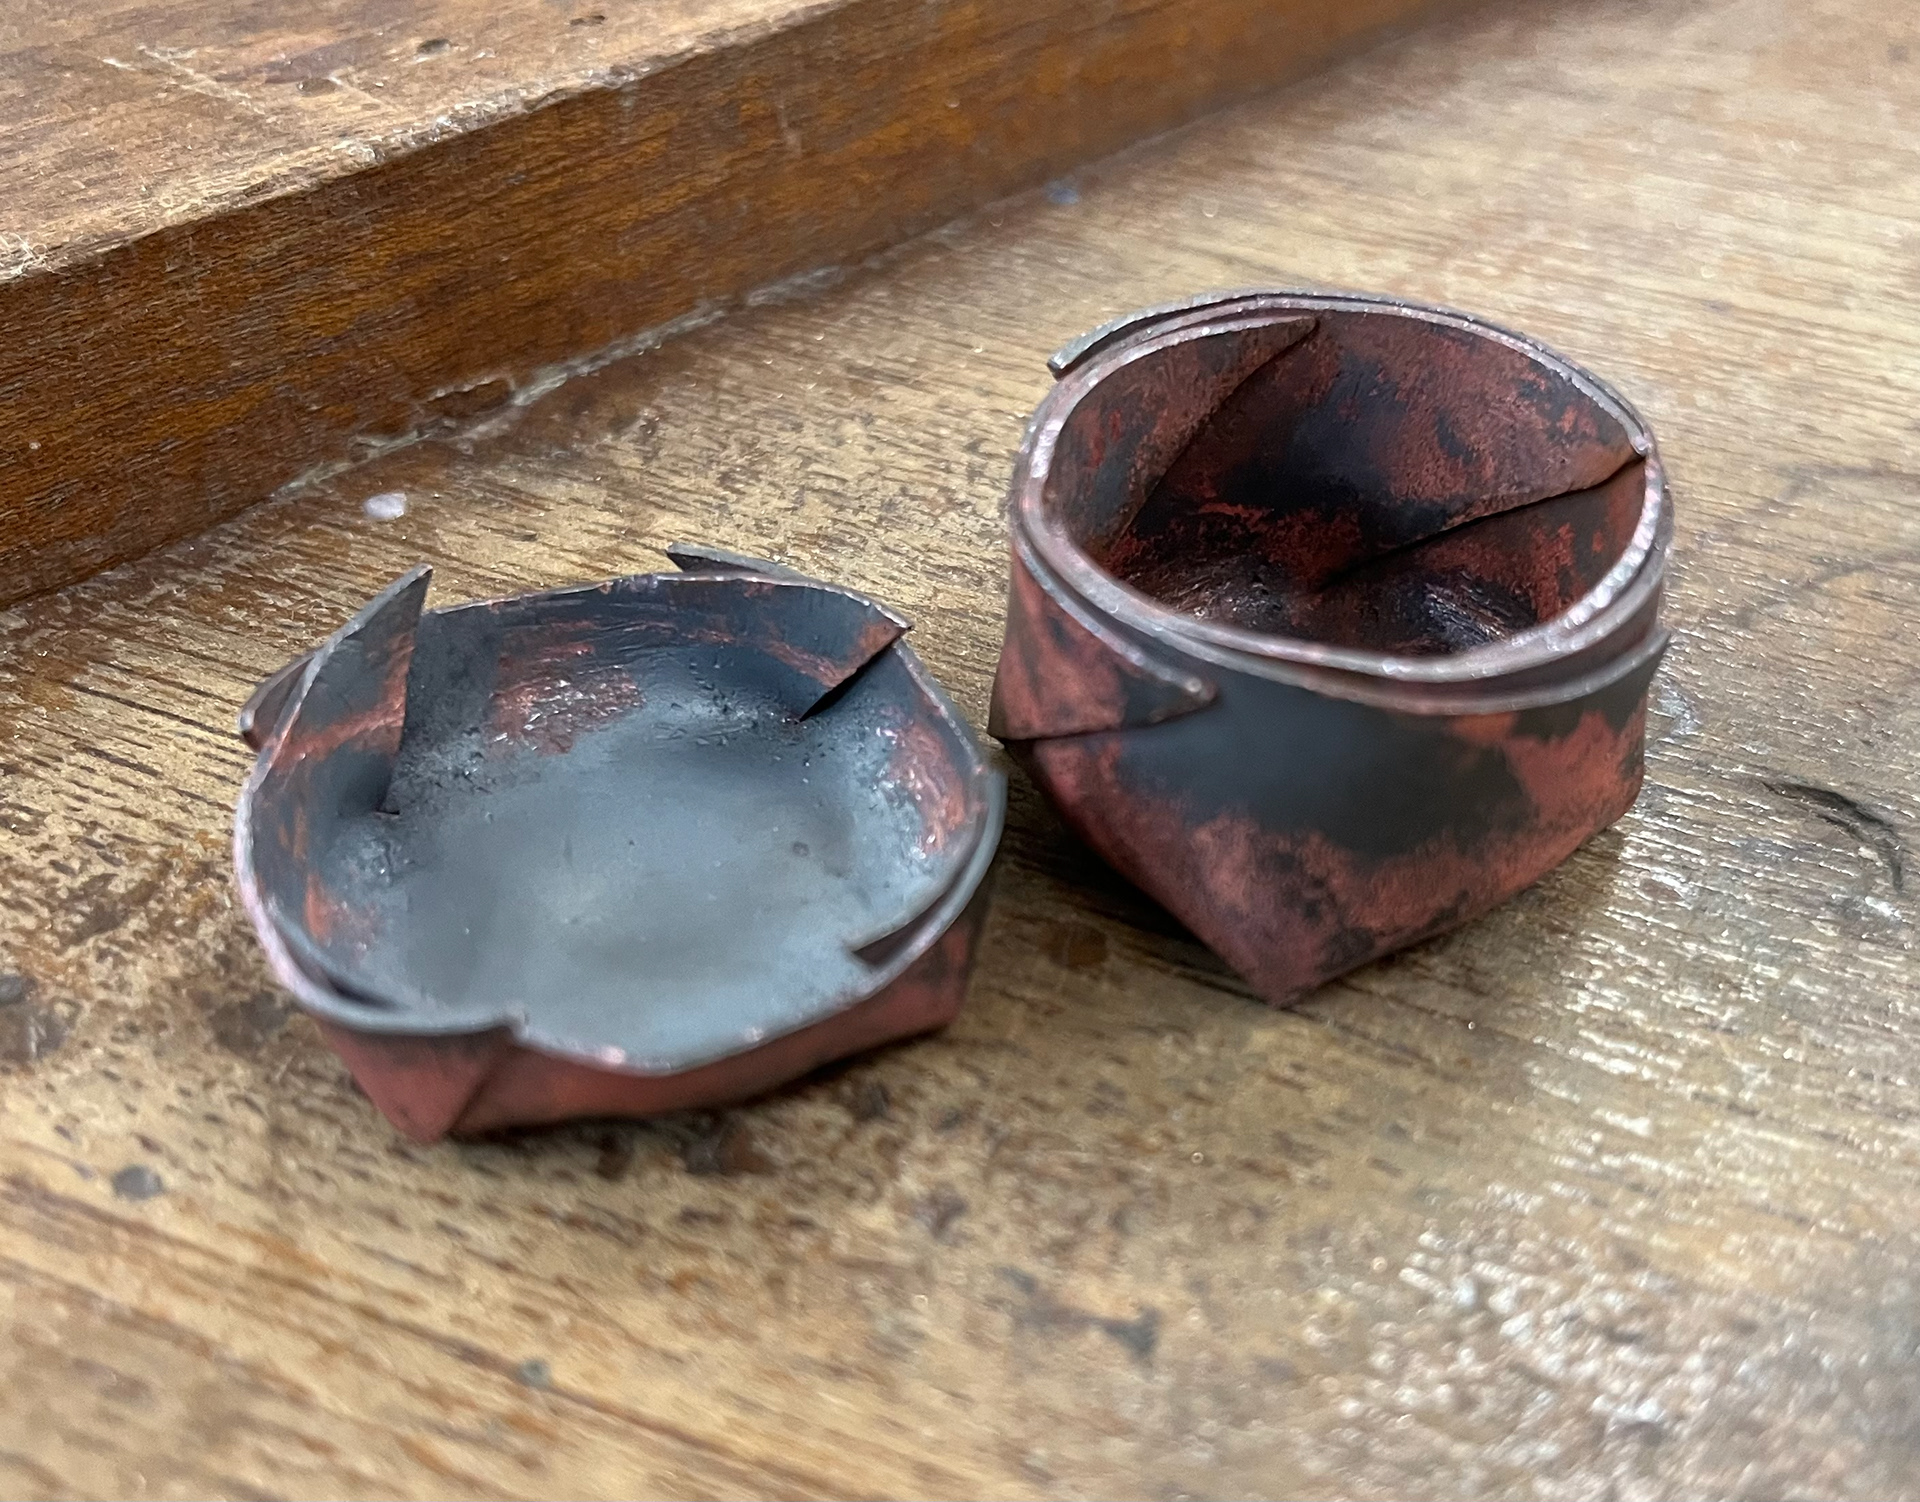
These images above show the process of taking my piece out of the pitch and turn it into a lid. My main concern with this was that I could damage or warp the repoussed piece but folding it over showed to be easier than expected and I think this could be an interesting technique to continue exploring for lid decorations. As a lid itself, it was a bit too big, I would have liked it to be less chunky on the top but I had made the wrong measurements so I will try to make it smaller next time.
I also really liked the marks and scars left by the pitch, the way the tar pustules and leaves warts. When you scrub off the pitch, the outline where the tar was still remains and reminded me of a patina. The Katrina Patina was formed from a horrific disaster and yet the marks left from the hurricane were quite beautiful. These marks reminded me of that. The disgusting tar that pustules, burns and bubbles, the irritating process of removing the tar like boiling sticky slime. And yet, The aftermath of these scars I find quite lovely, despite the process it took to get there.
The image above shows the different lid sizes made for my big box. The one on the left was 2cm tall and looked too small on the box. The one in the middle was 3cm tall, a good height but it was still slightly too narrow and was a bit too tight on the box. The one on the right was 4cm tall but looked clumpy on the box. The 3cm tall one was the best height but still too narrow so I will have to make these again to ensure a perfect fit. Also as part of my resolution I would like the folds to all line up and be flush with the box to create a continuous line.

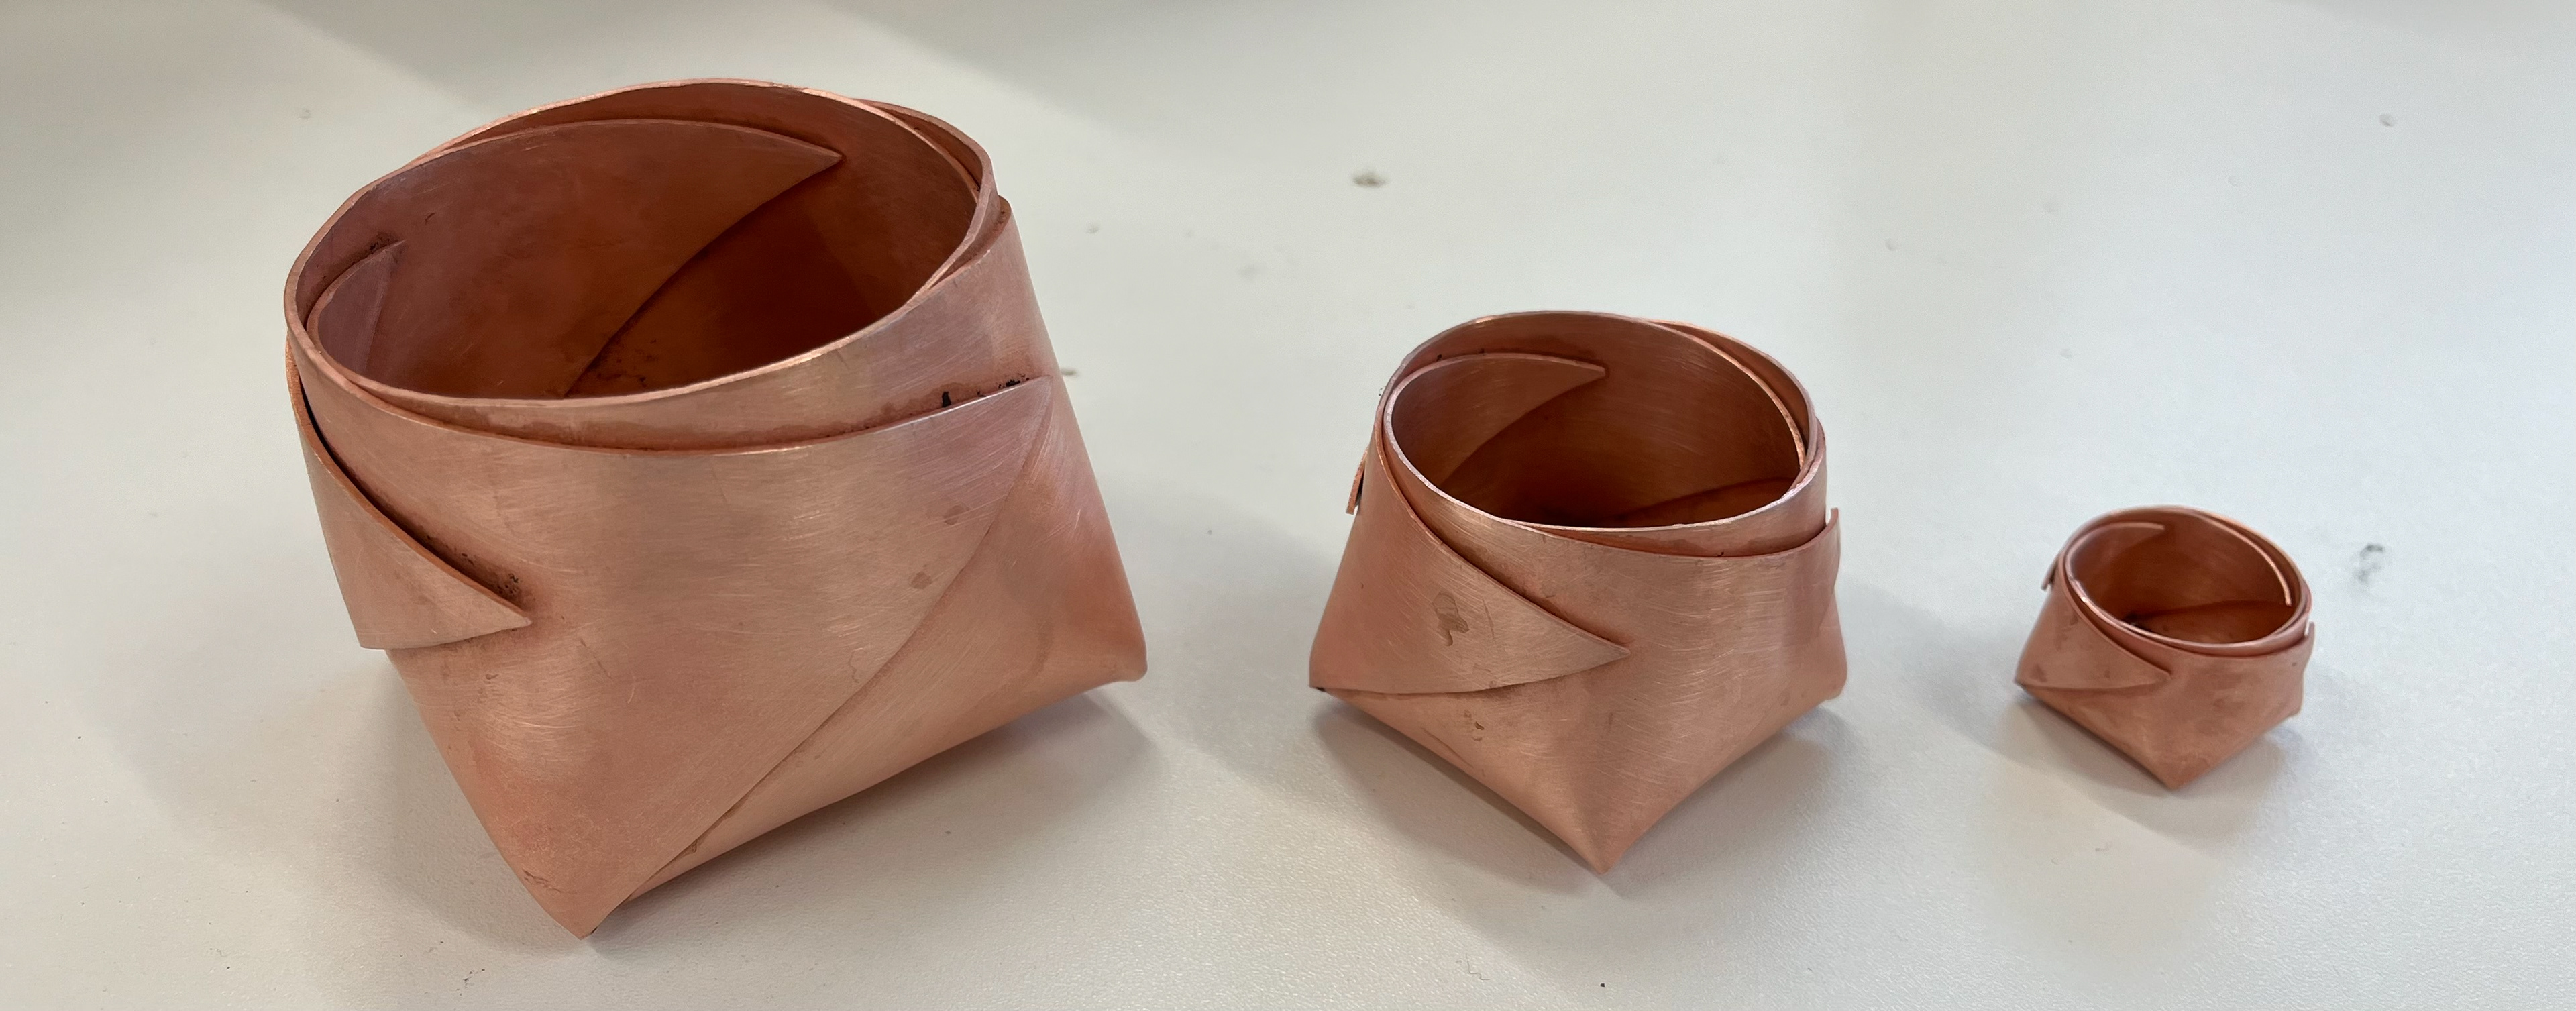
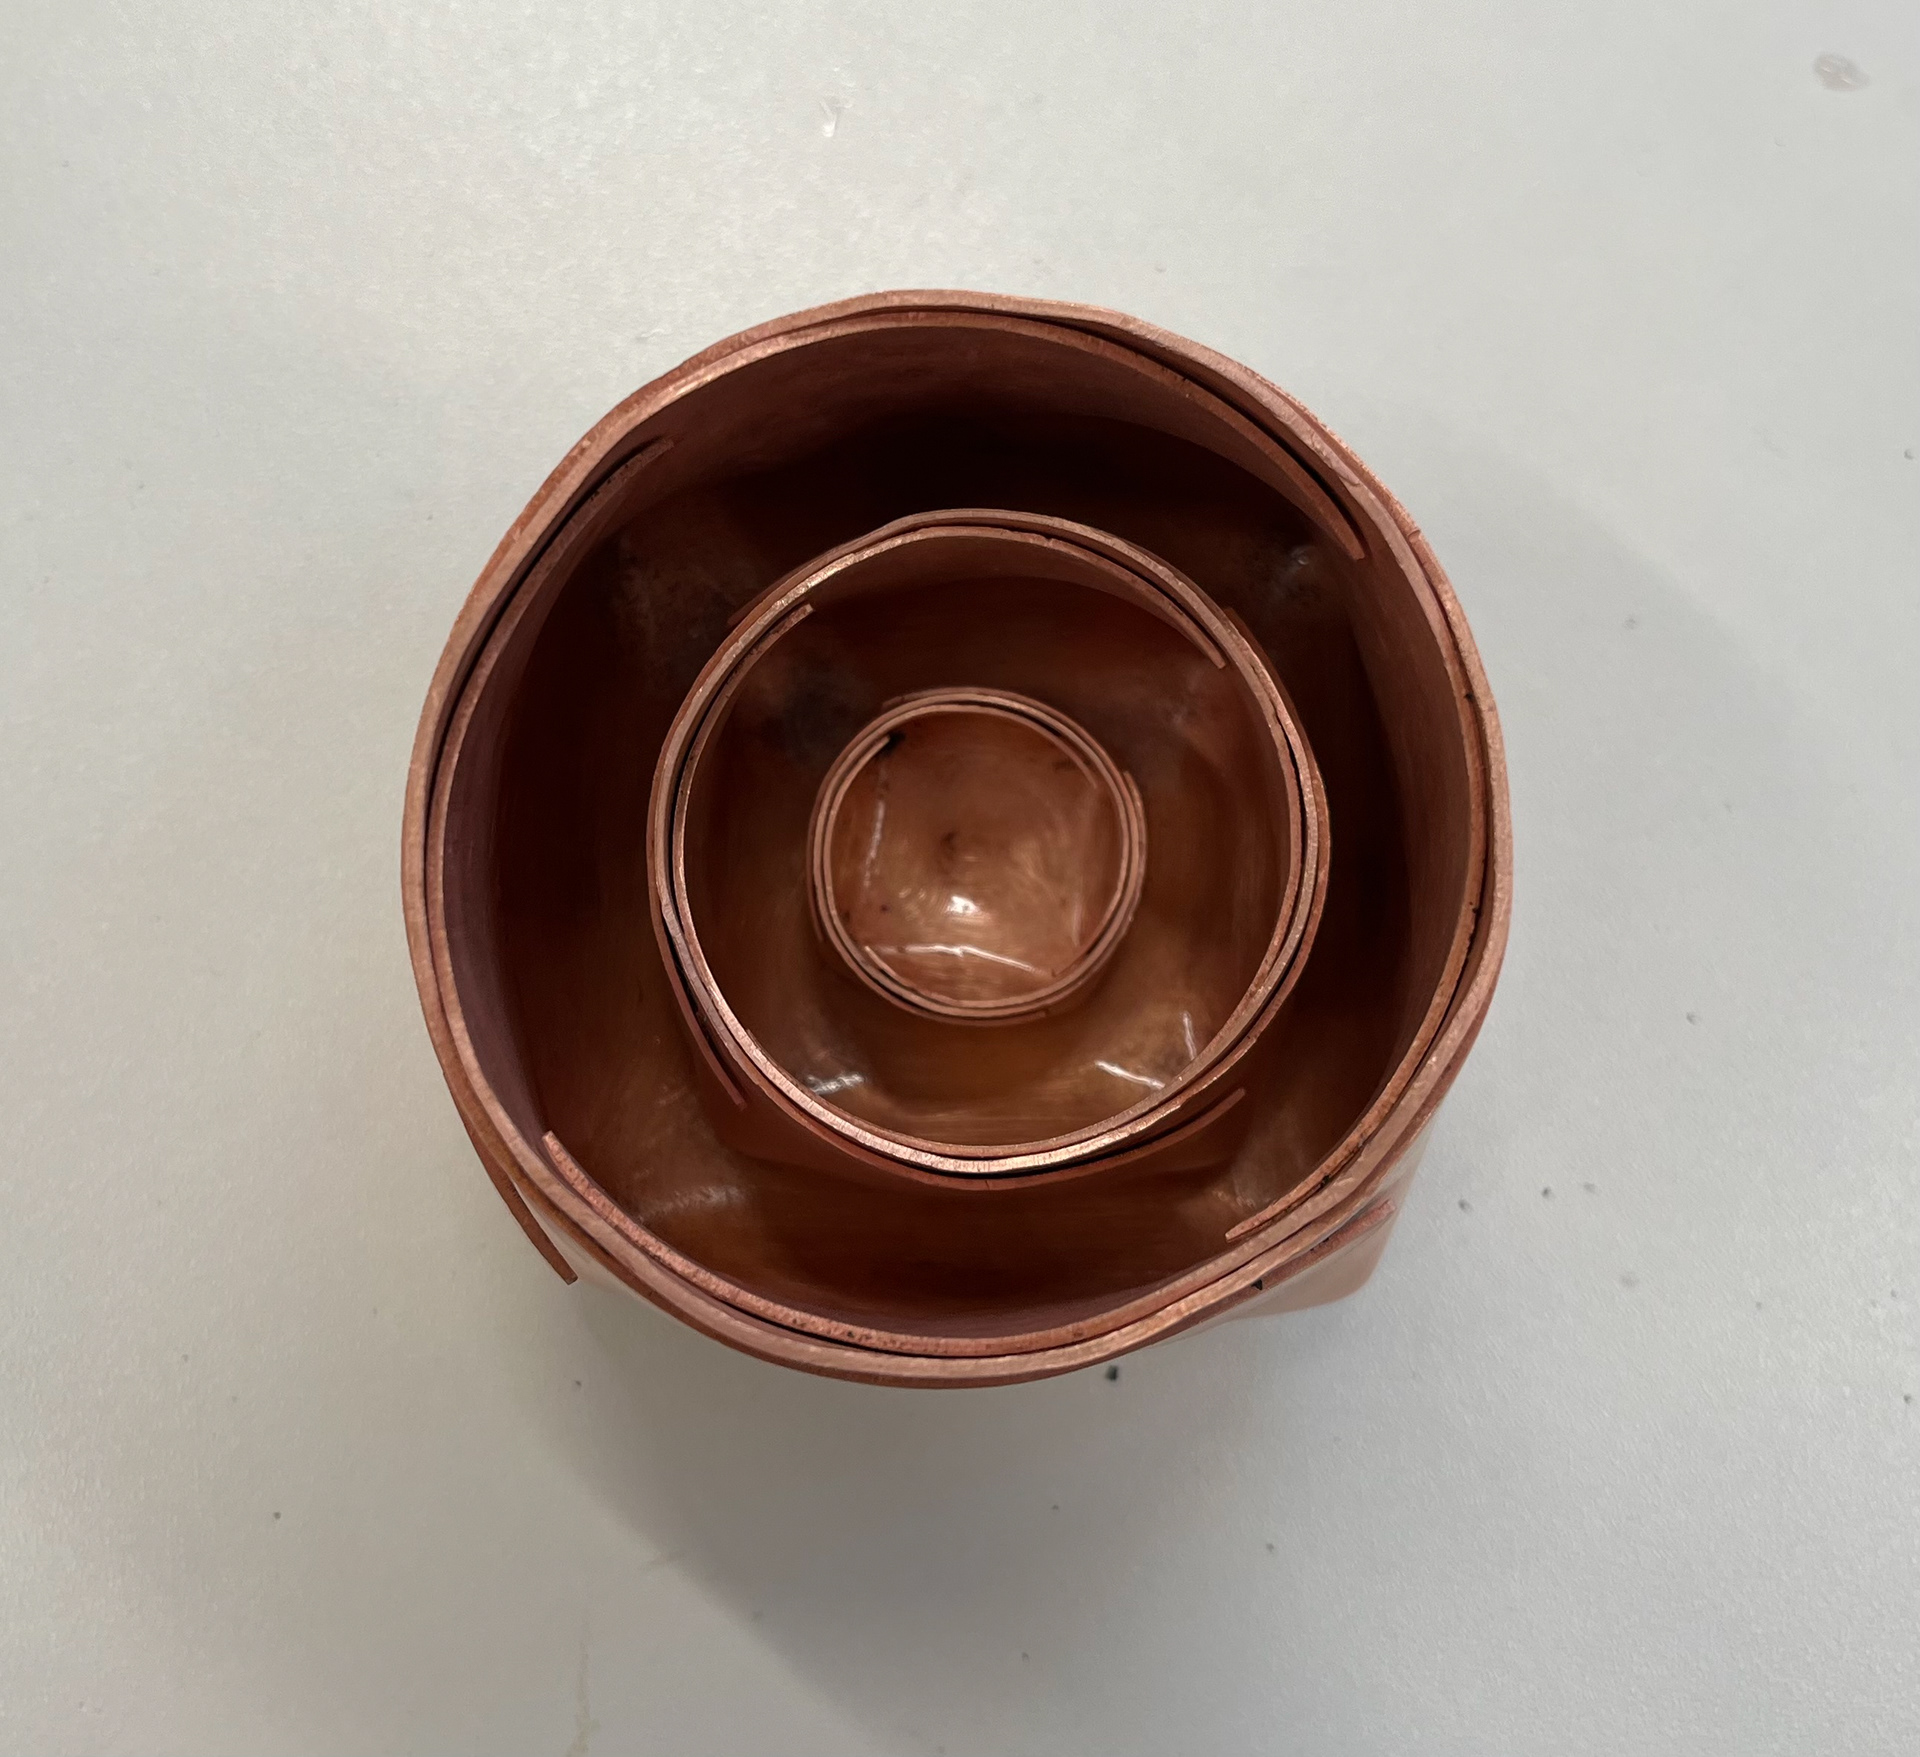
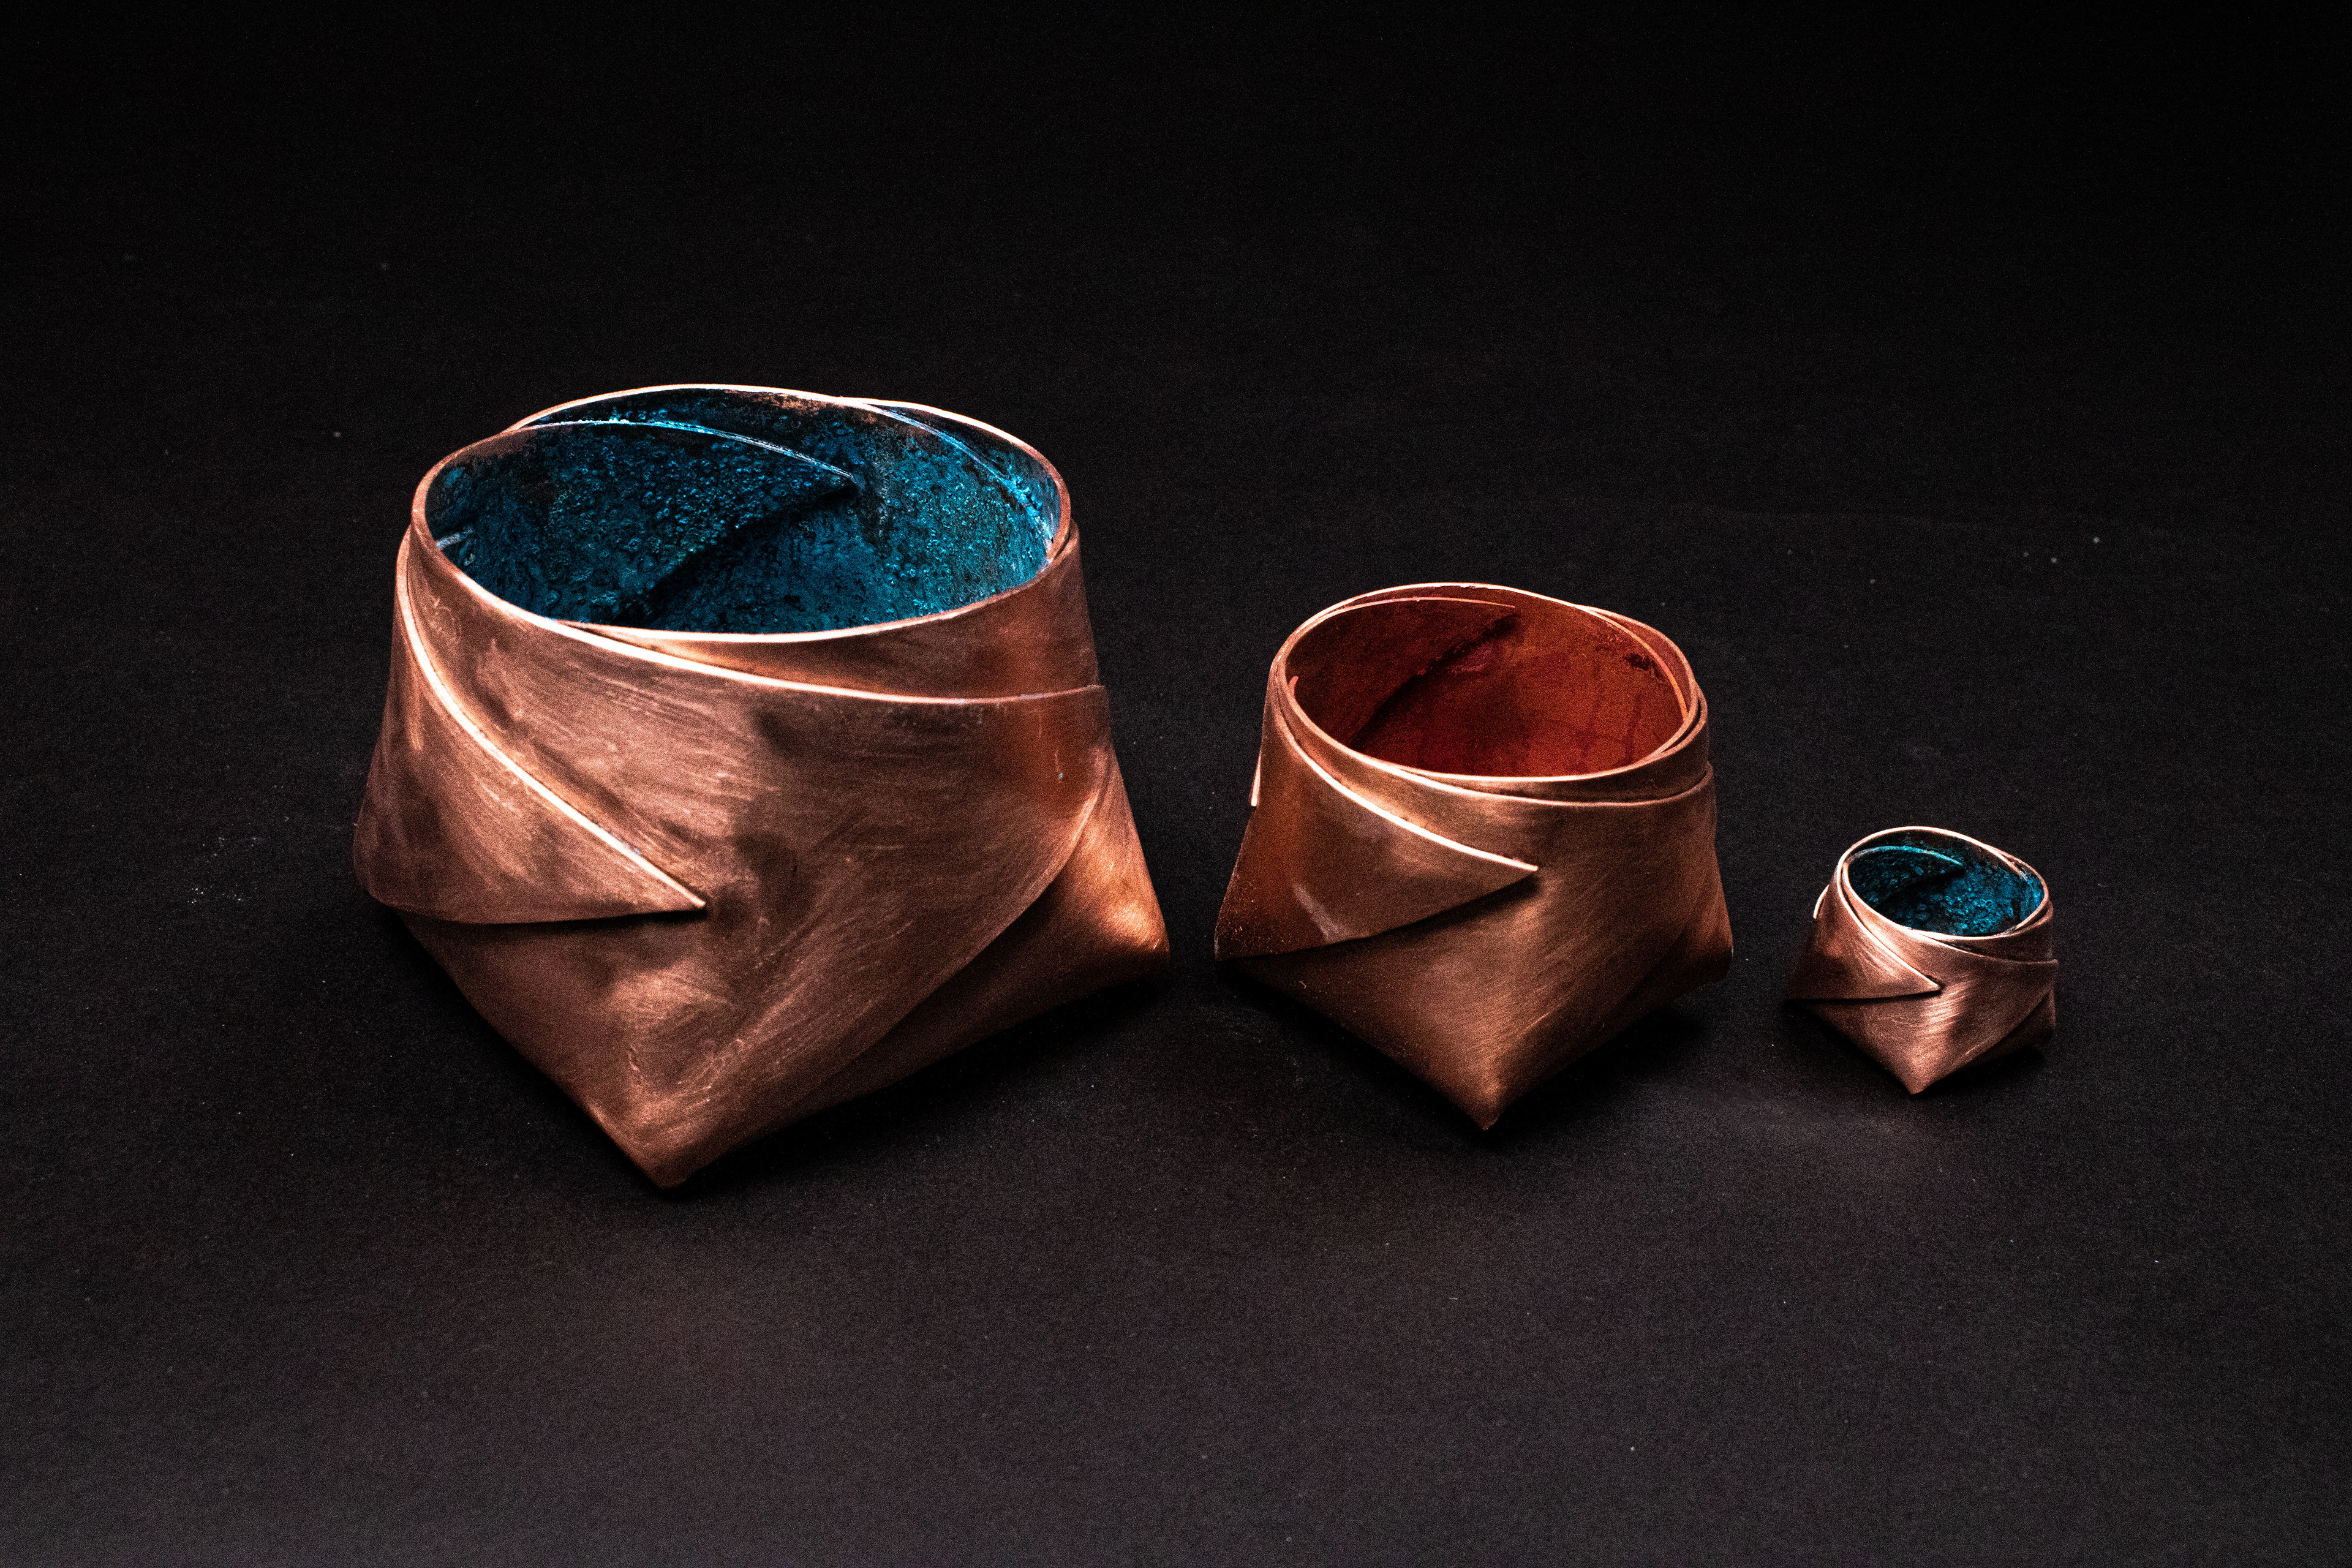
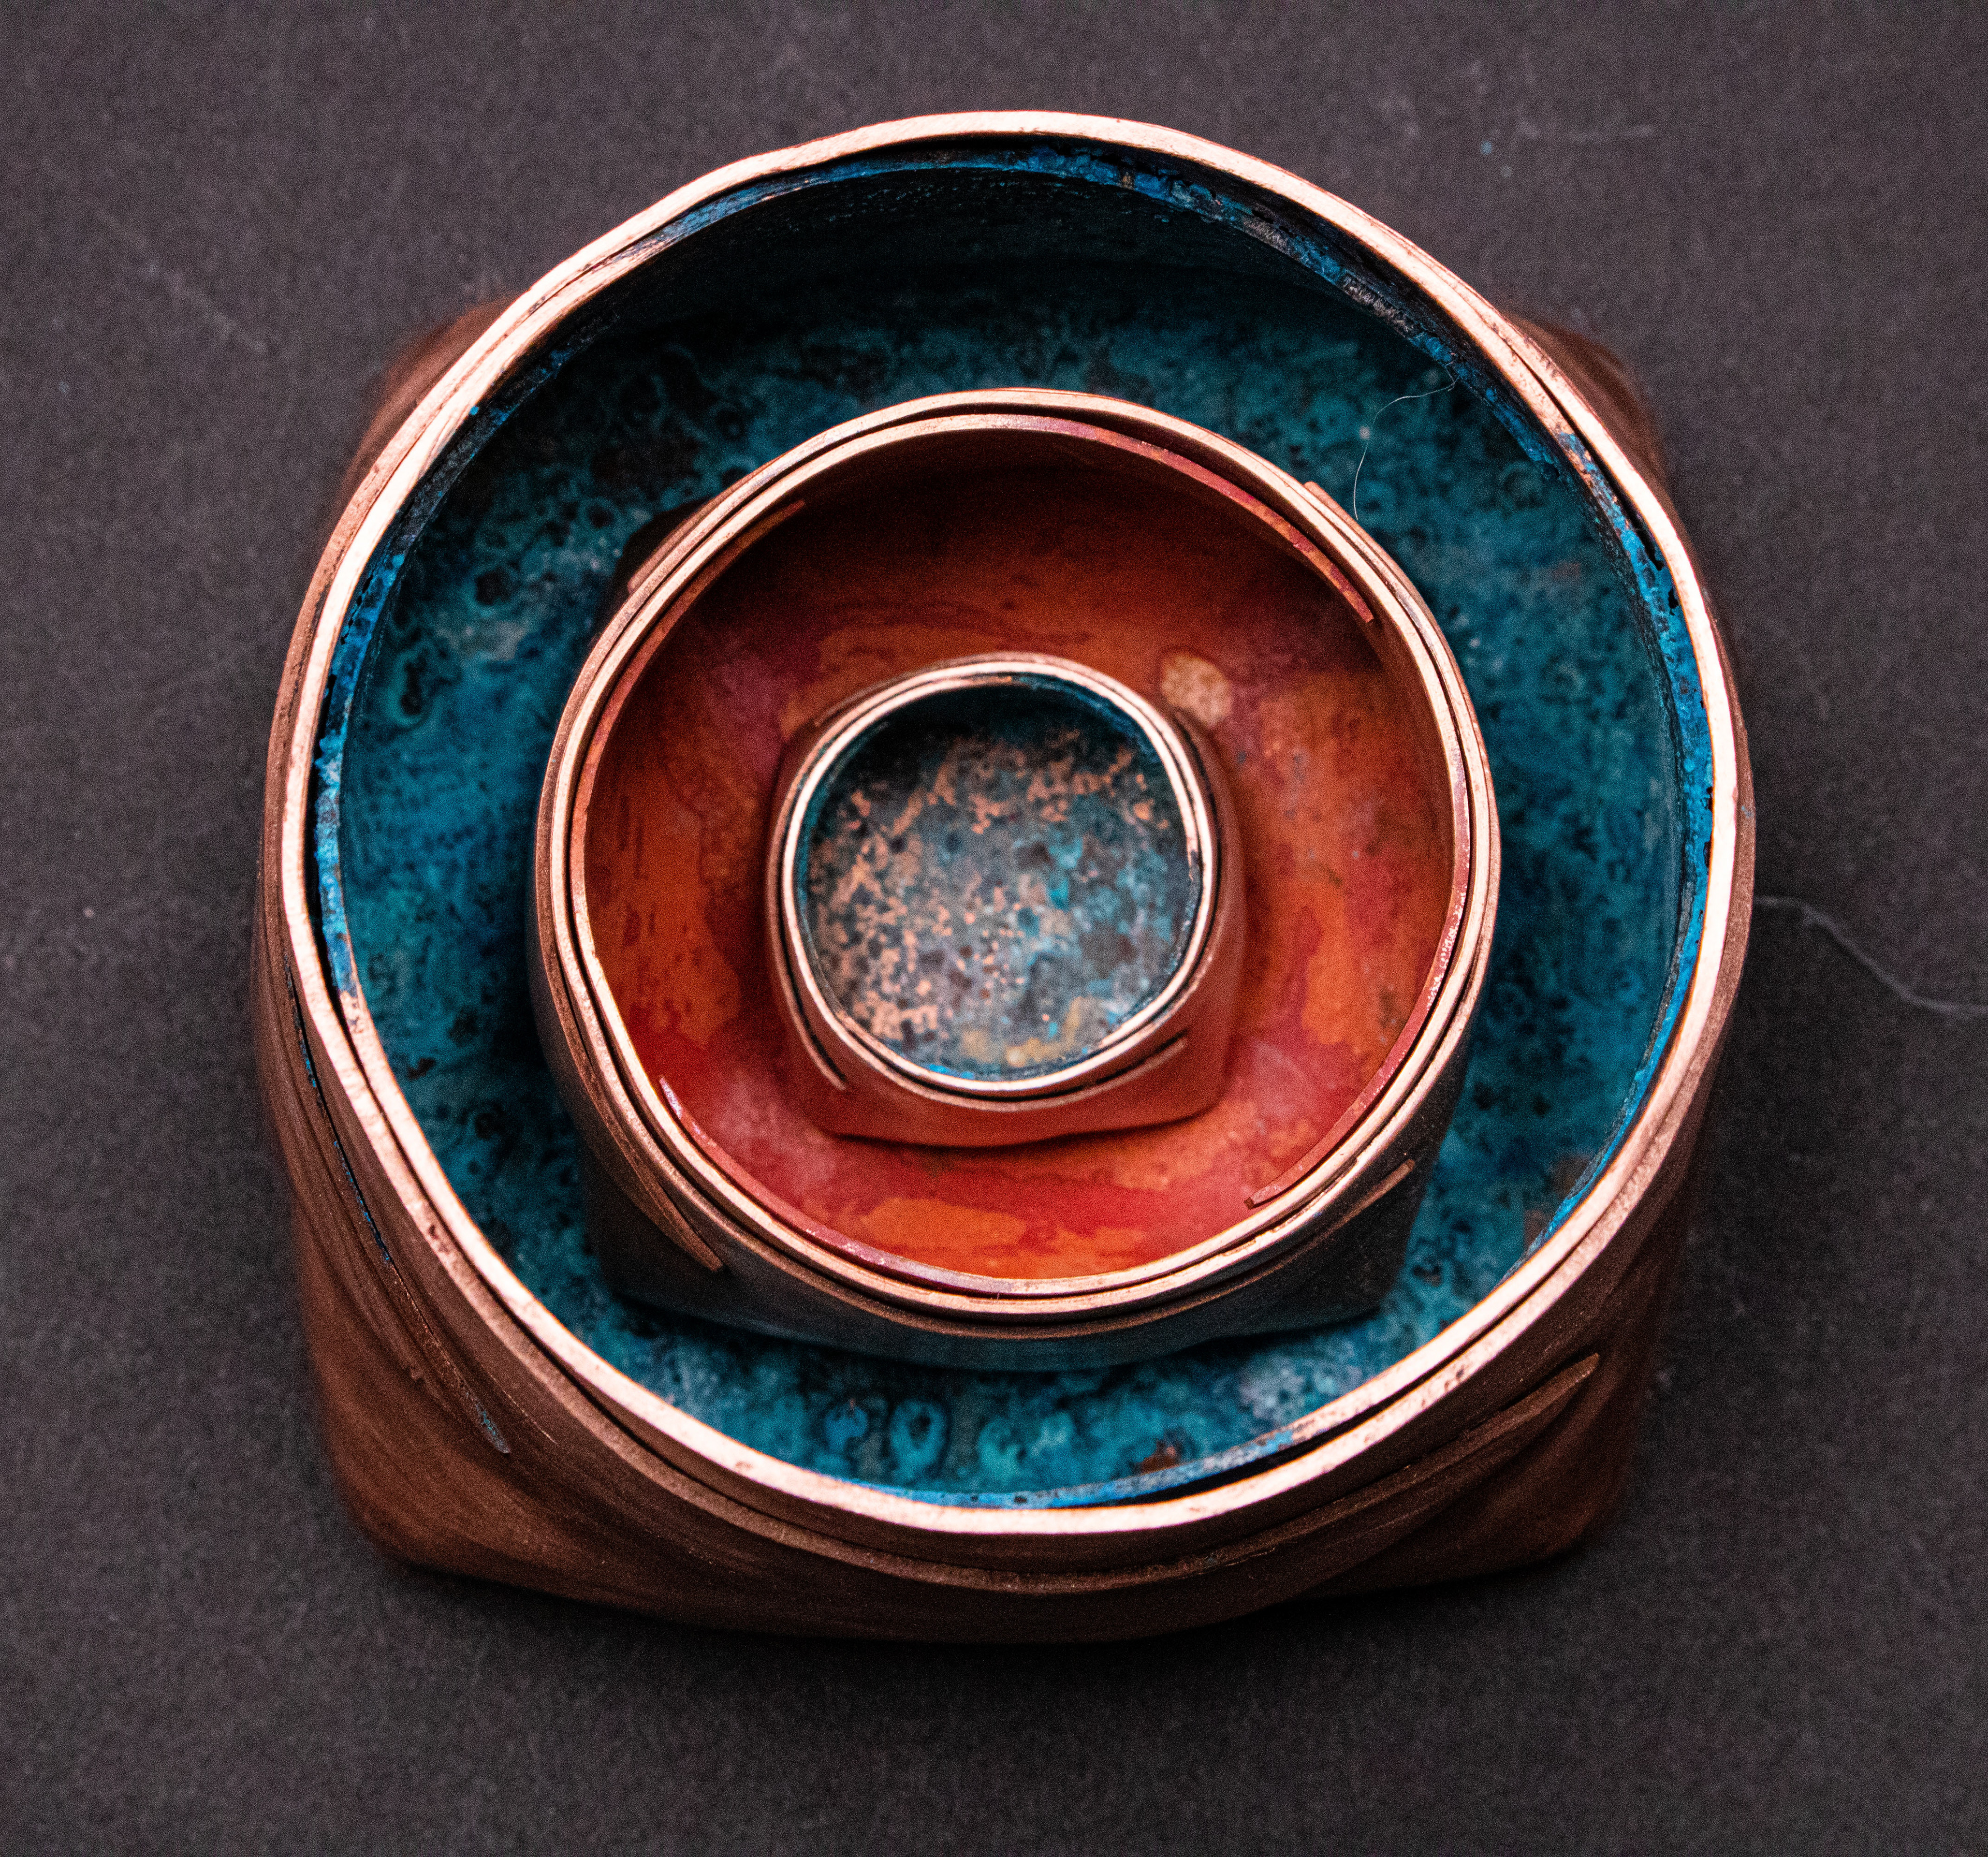
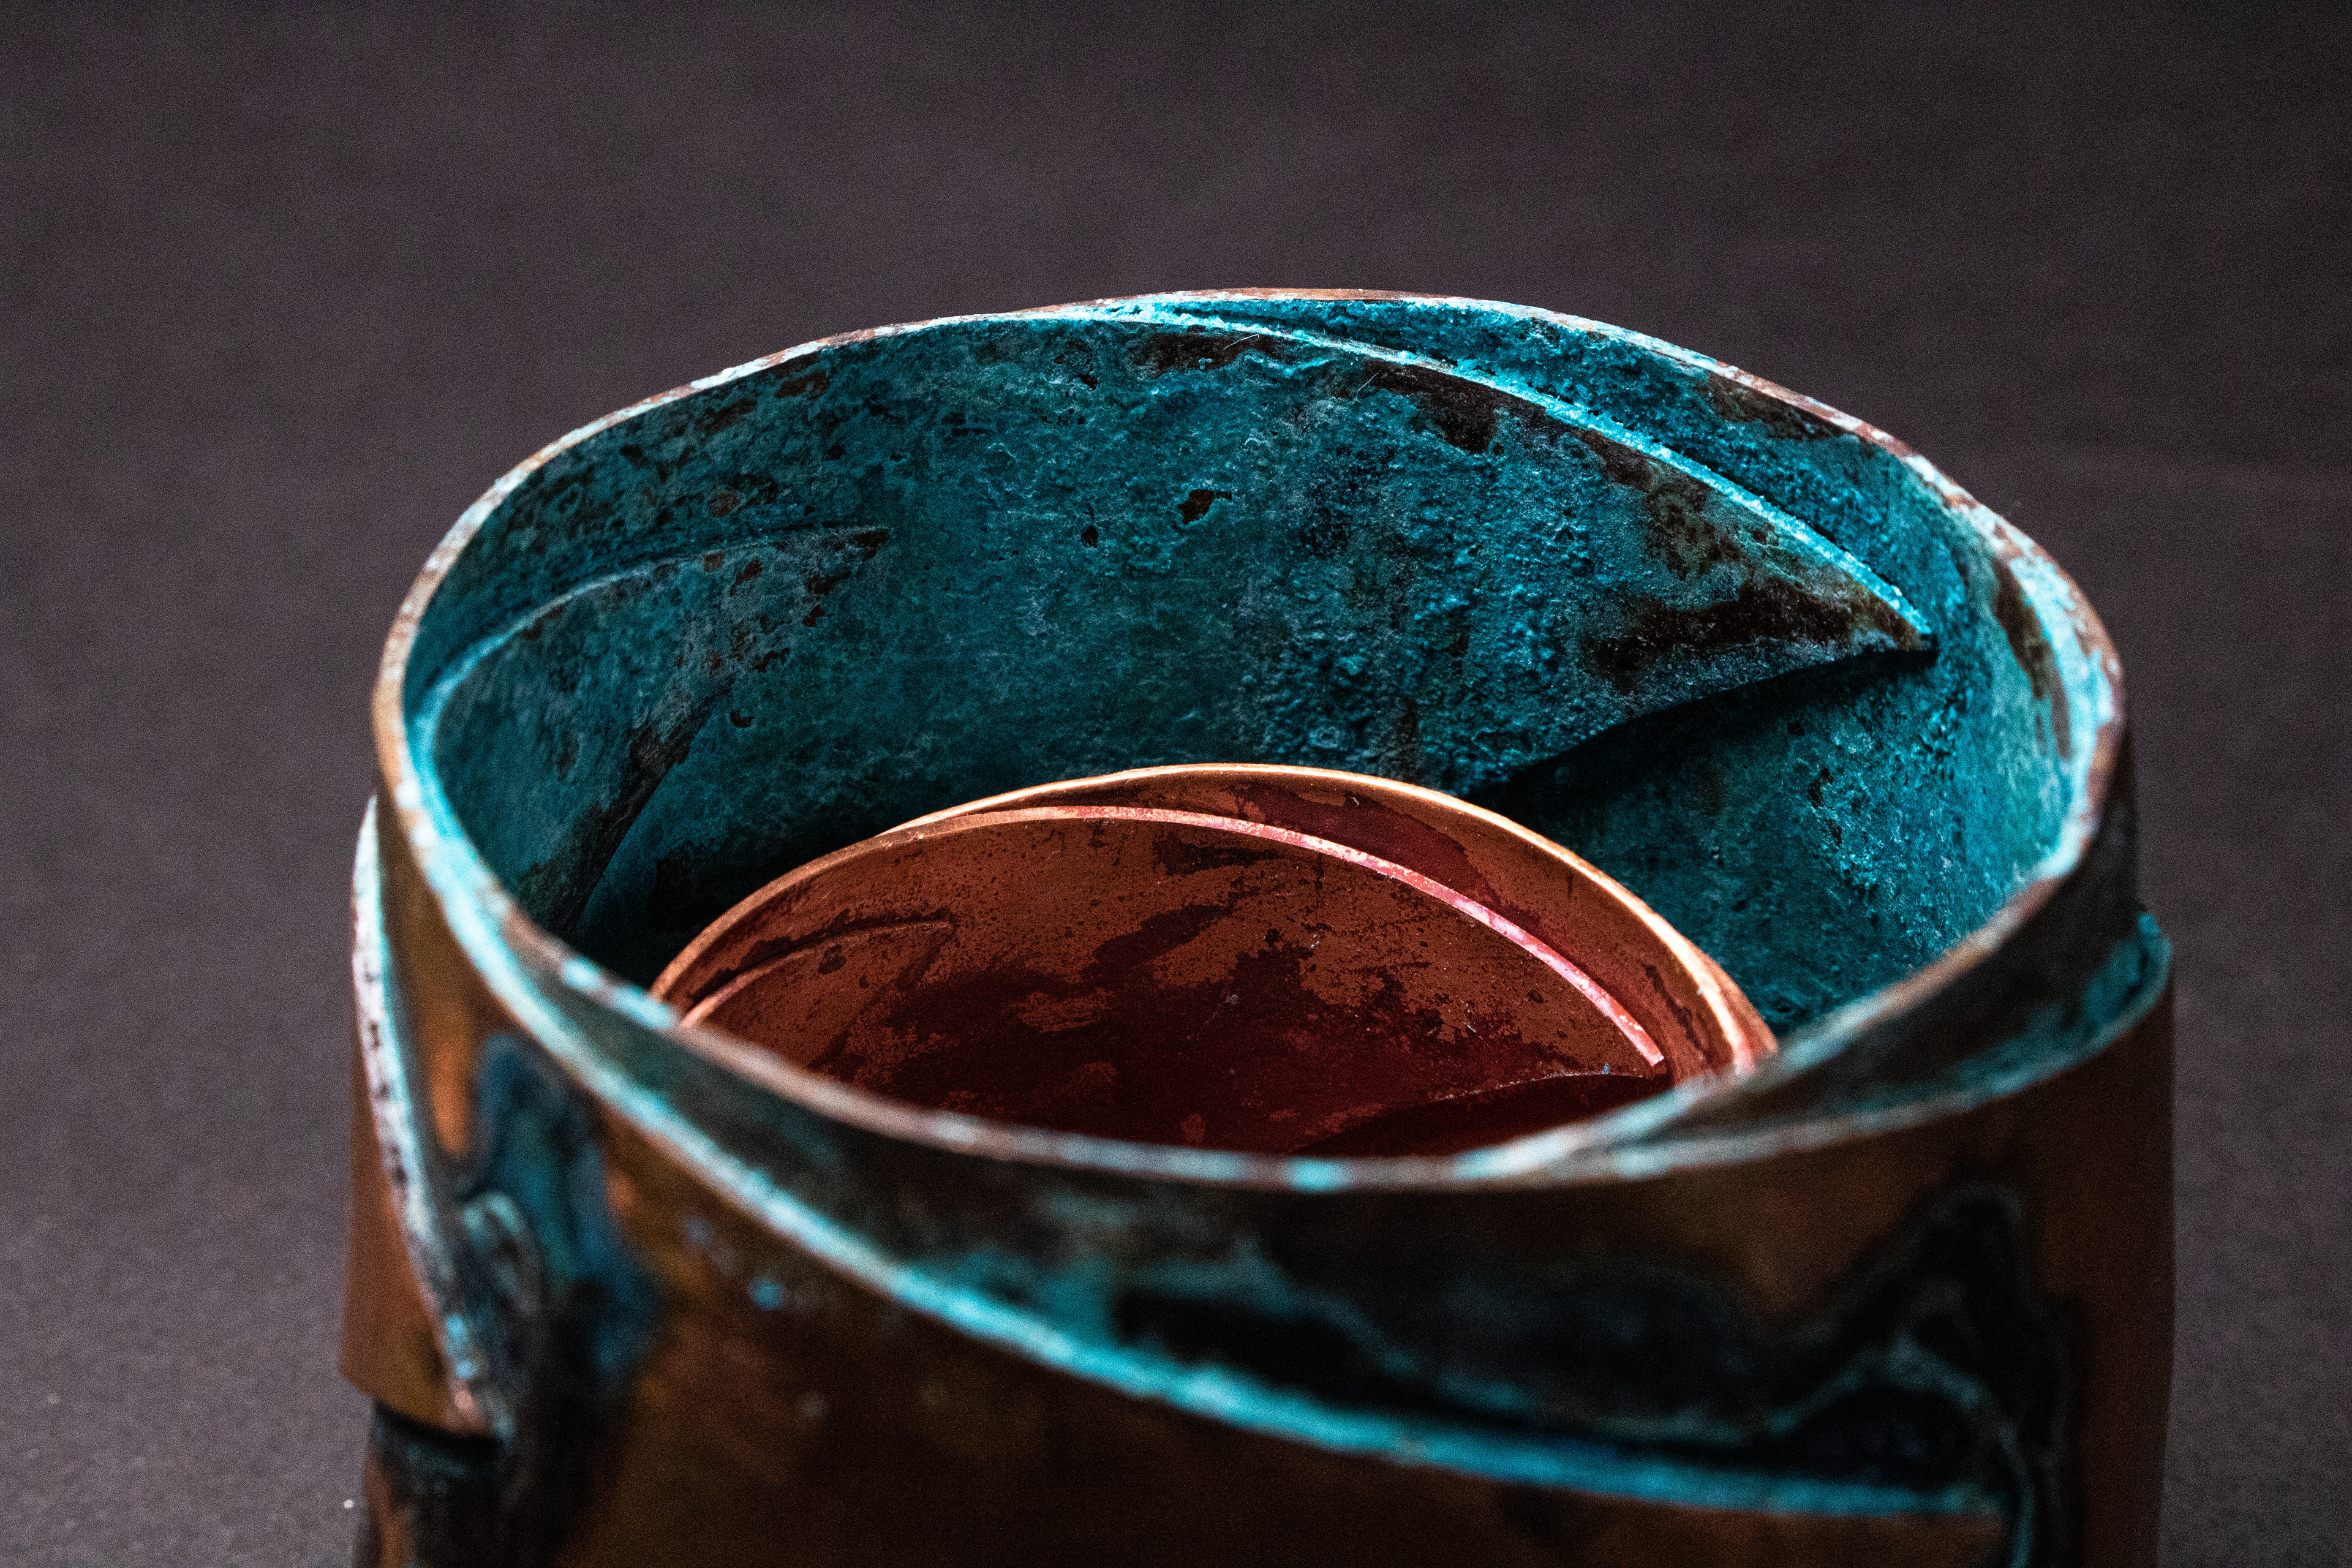
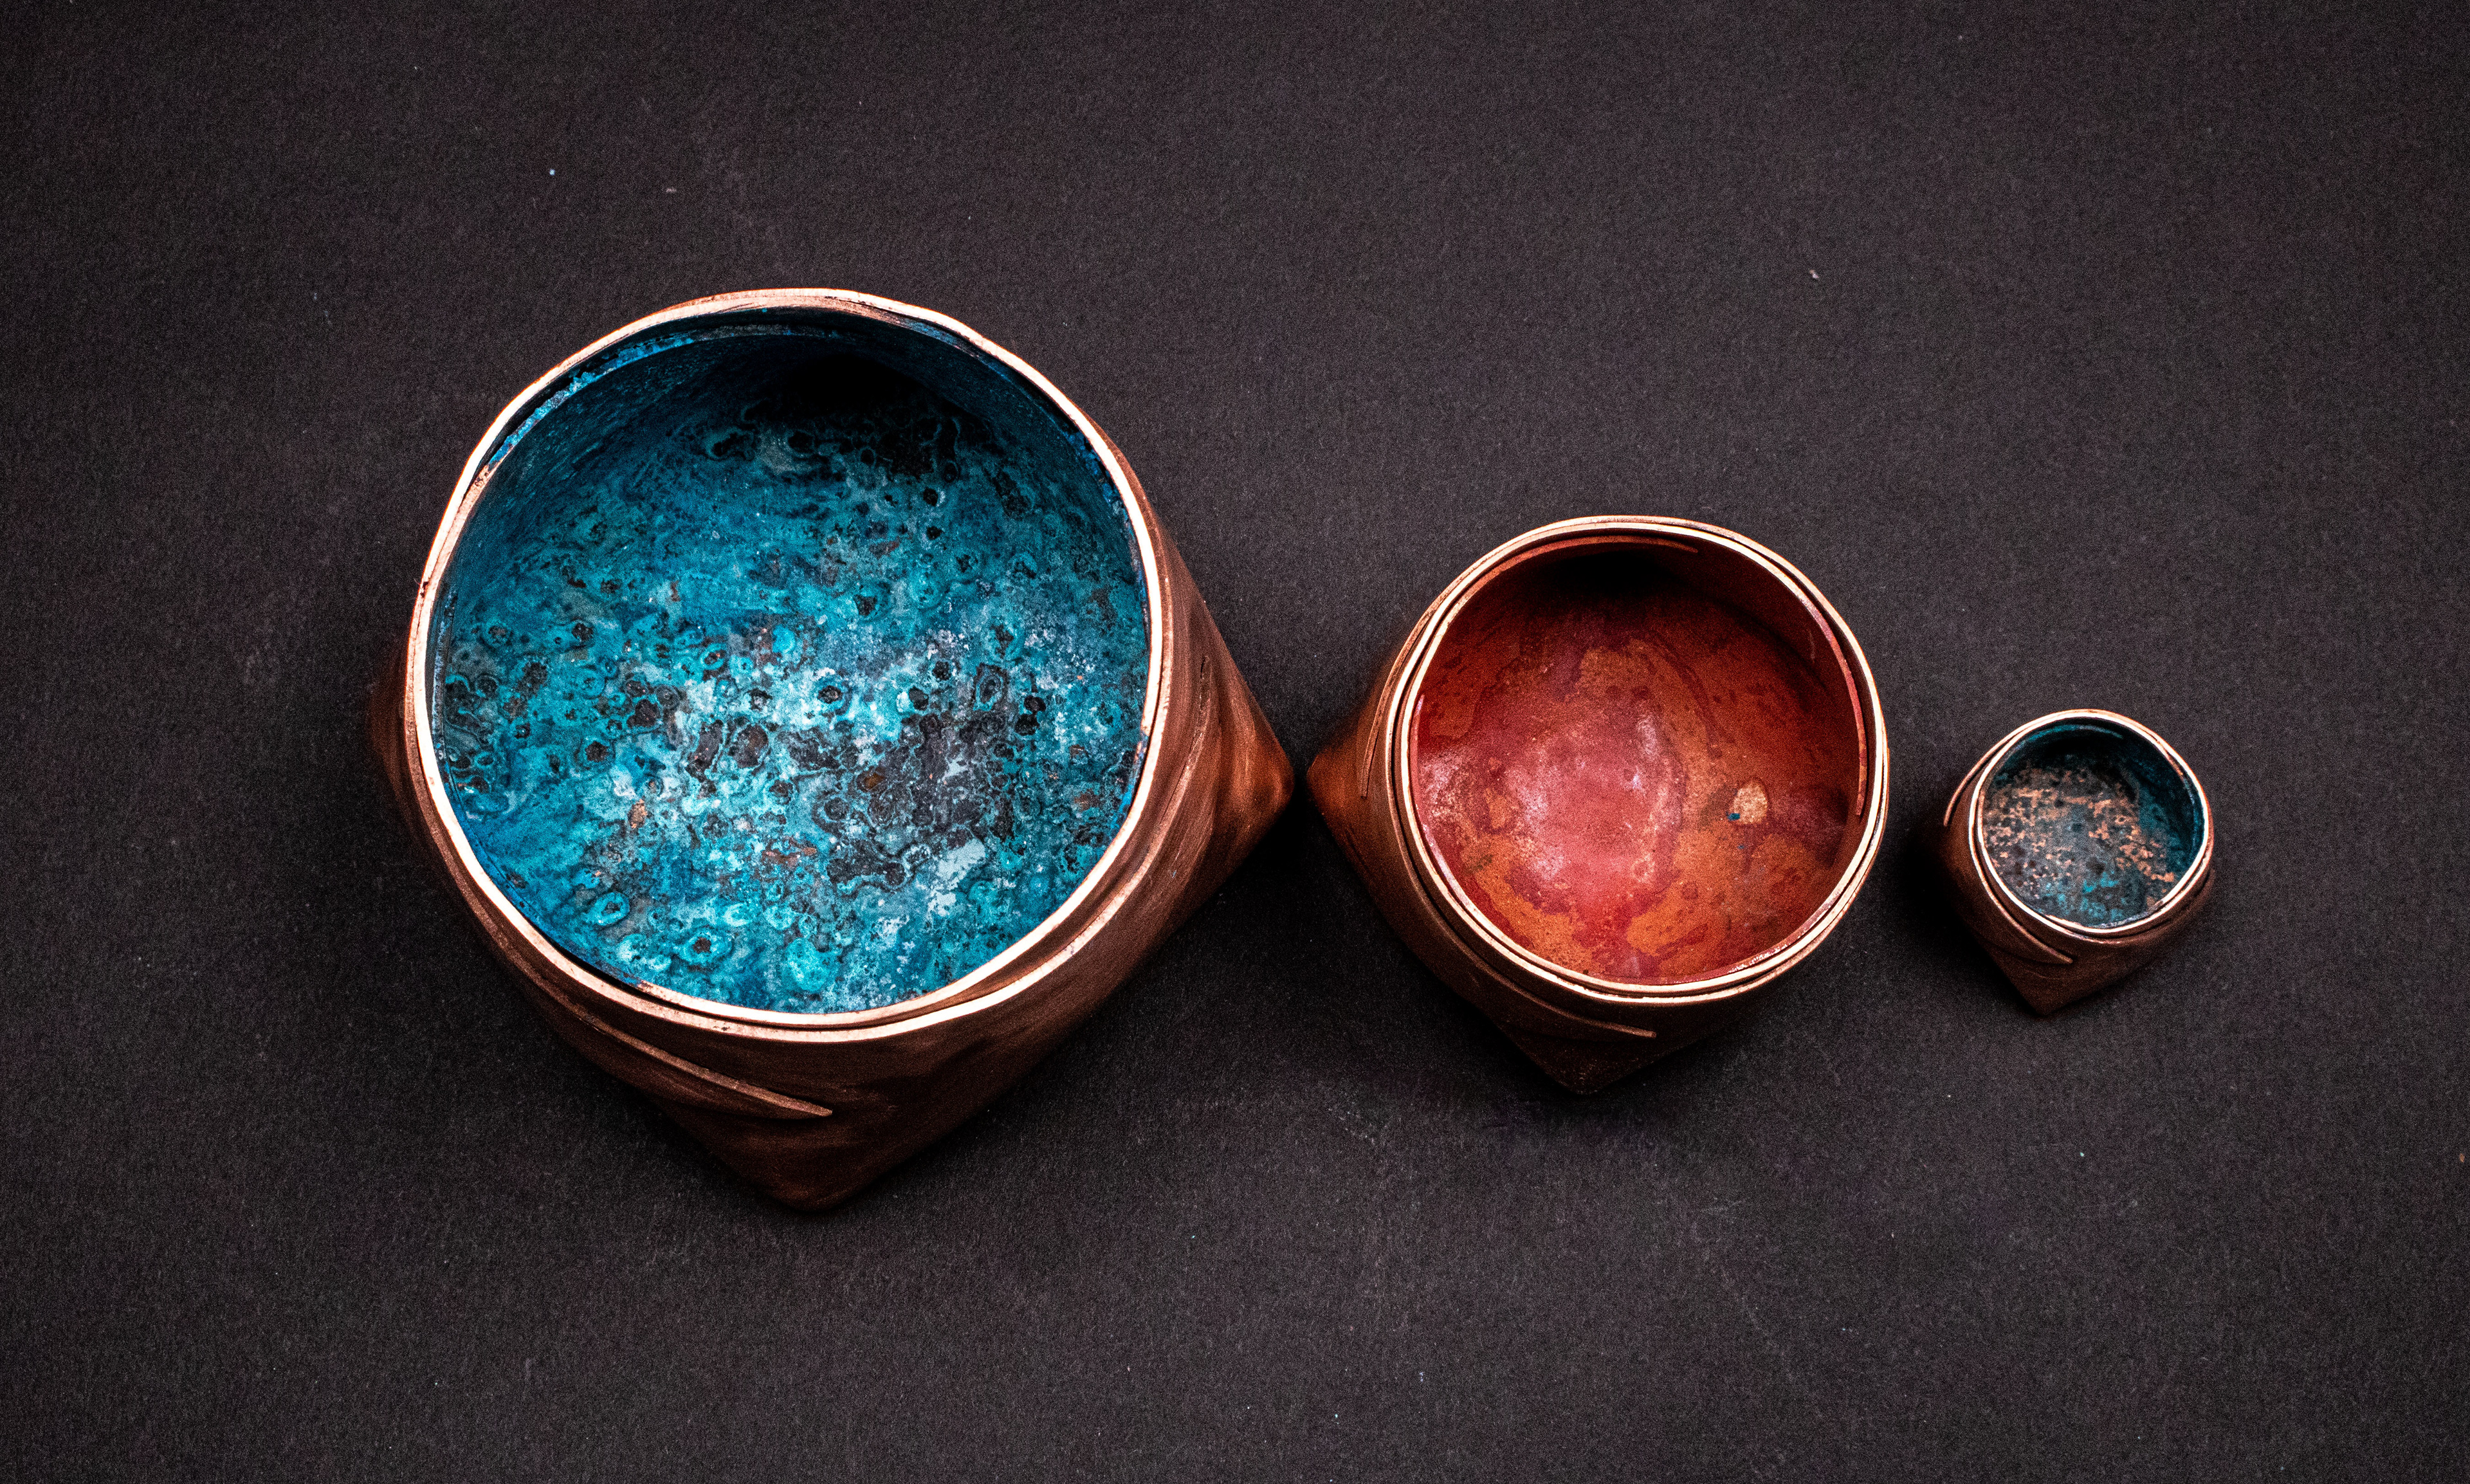
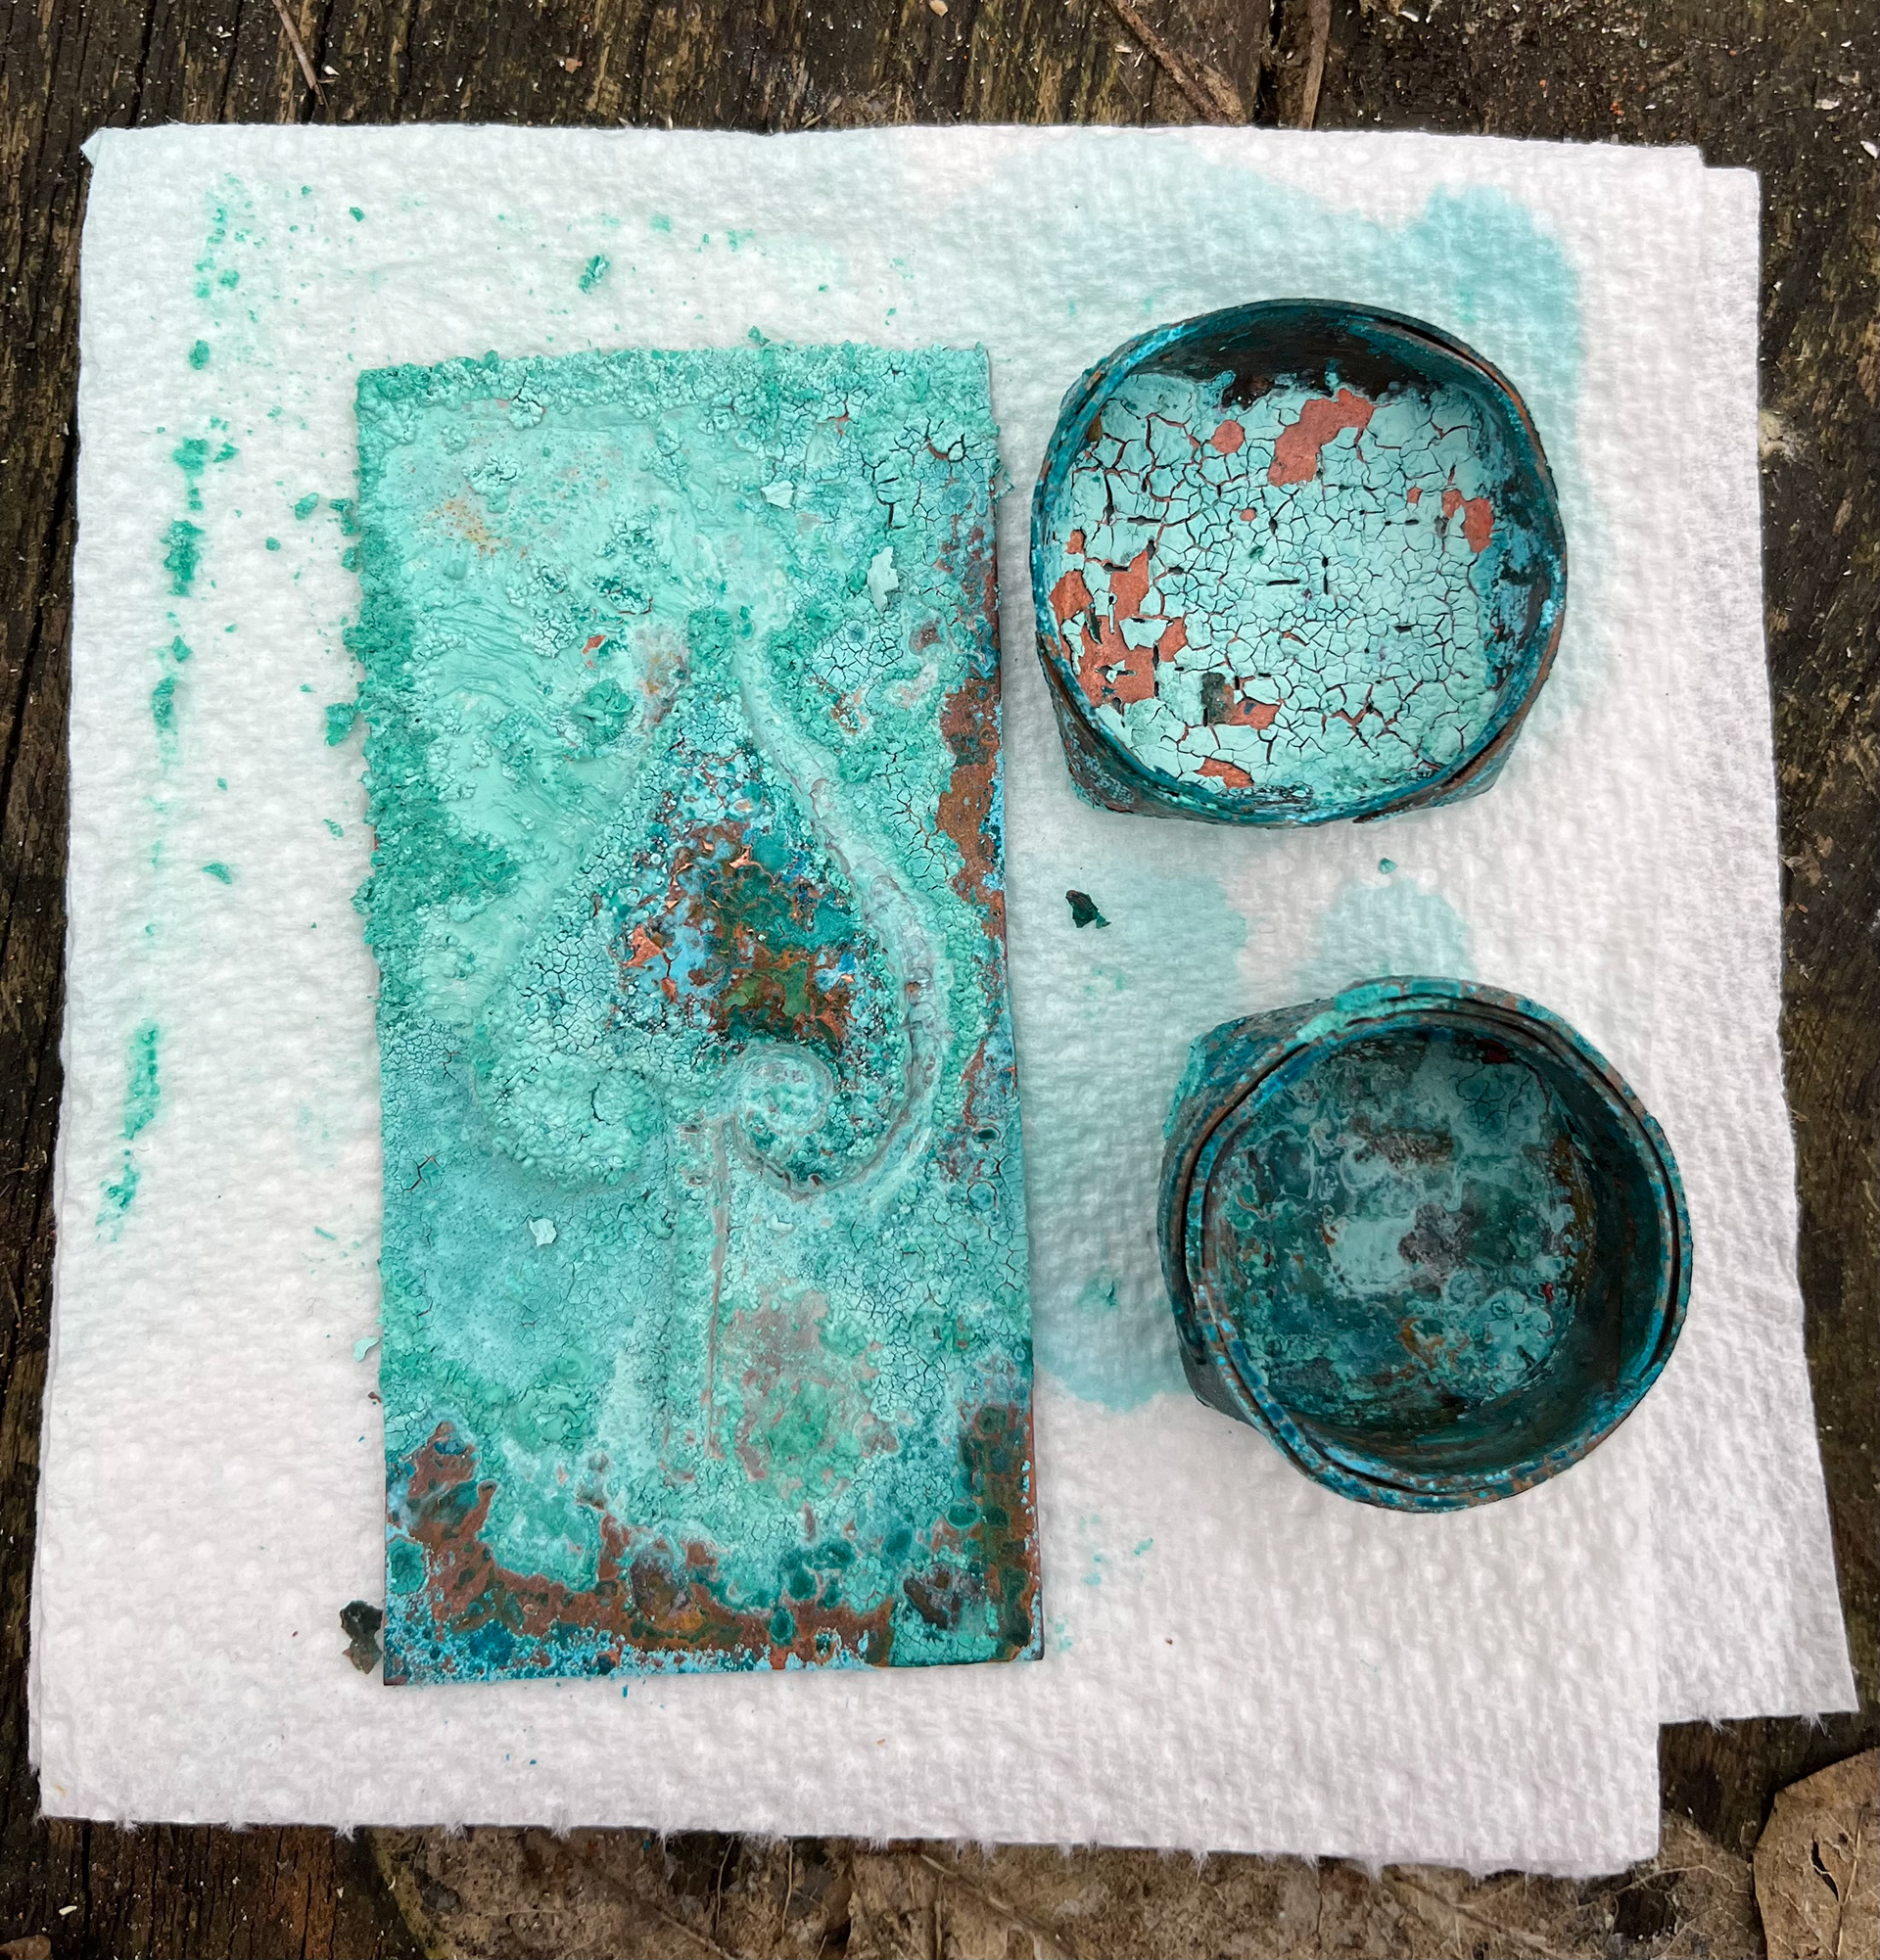
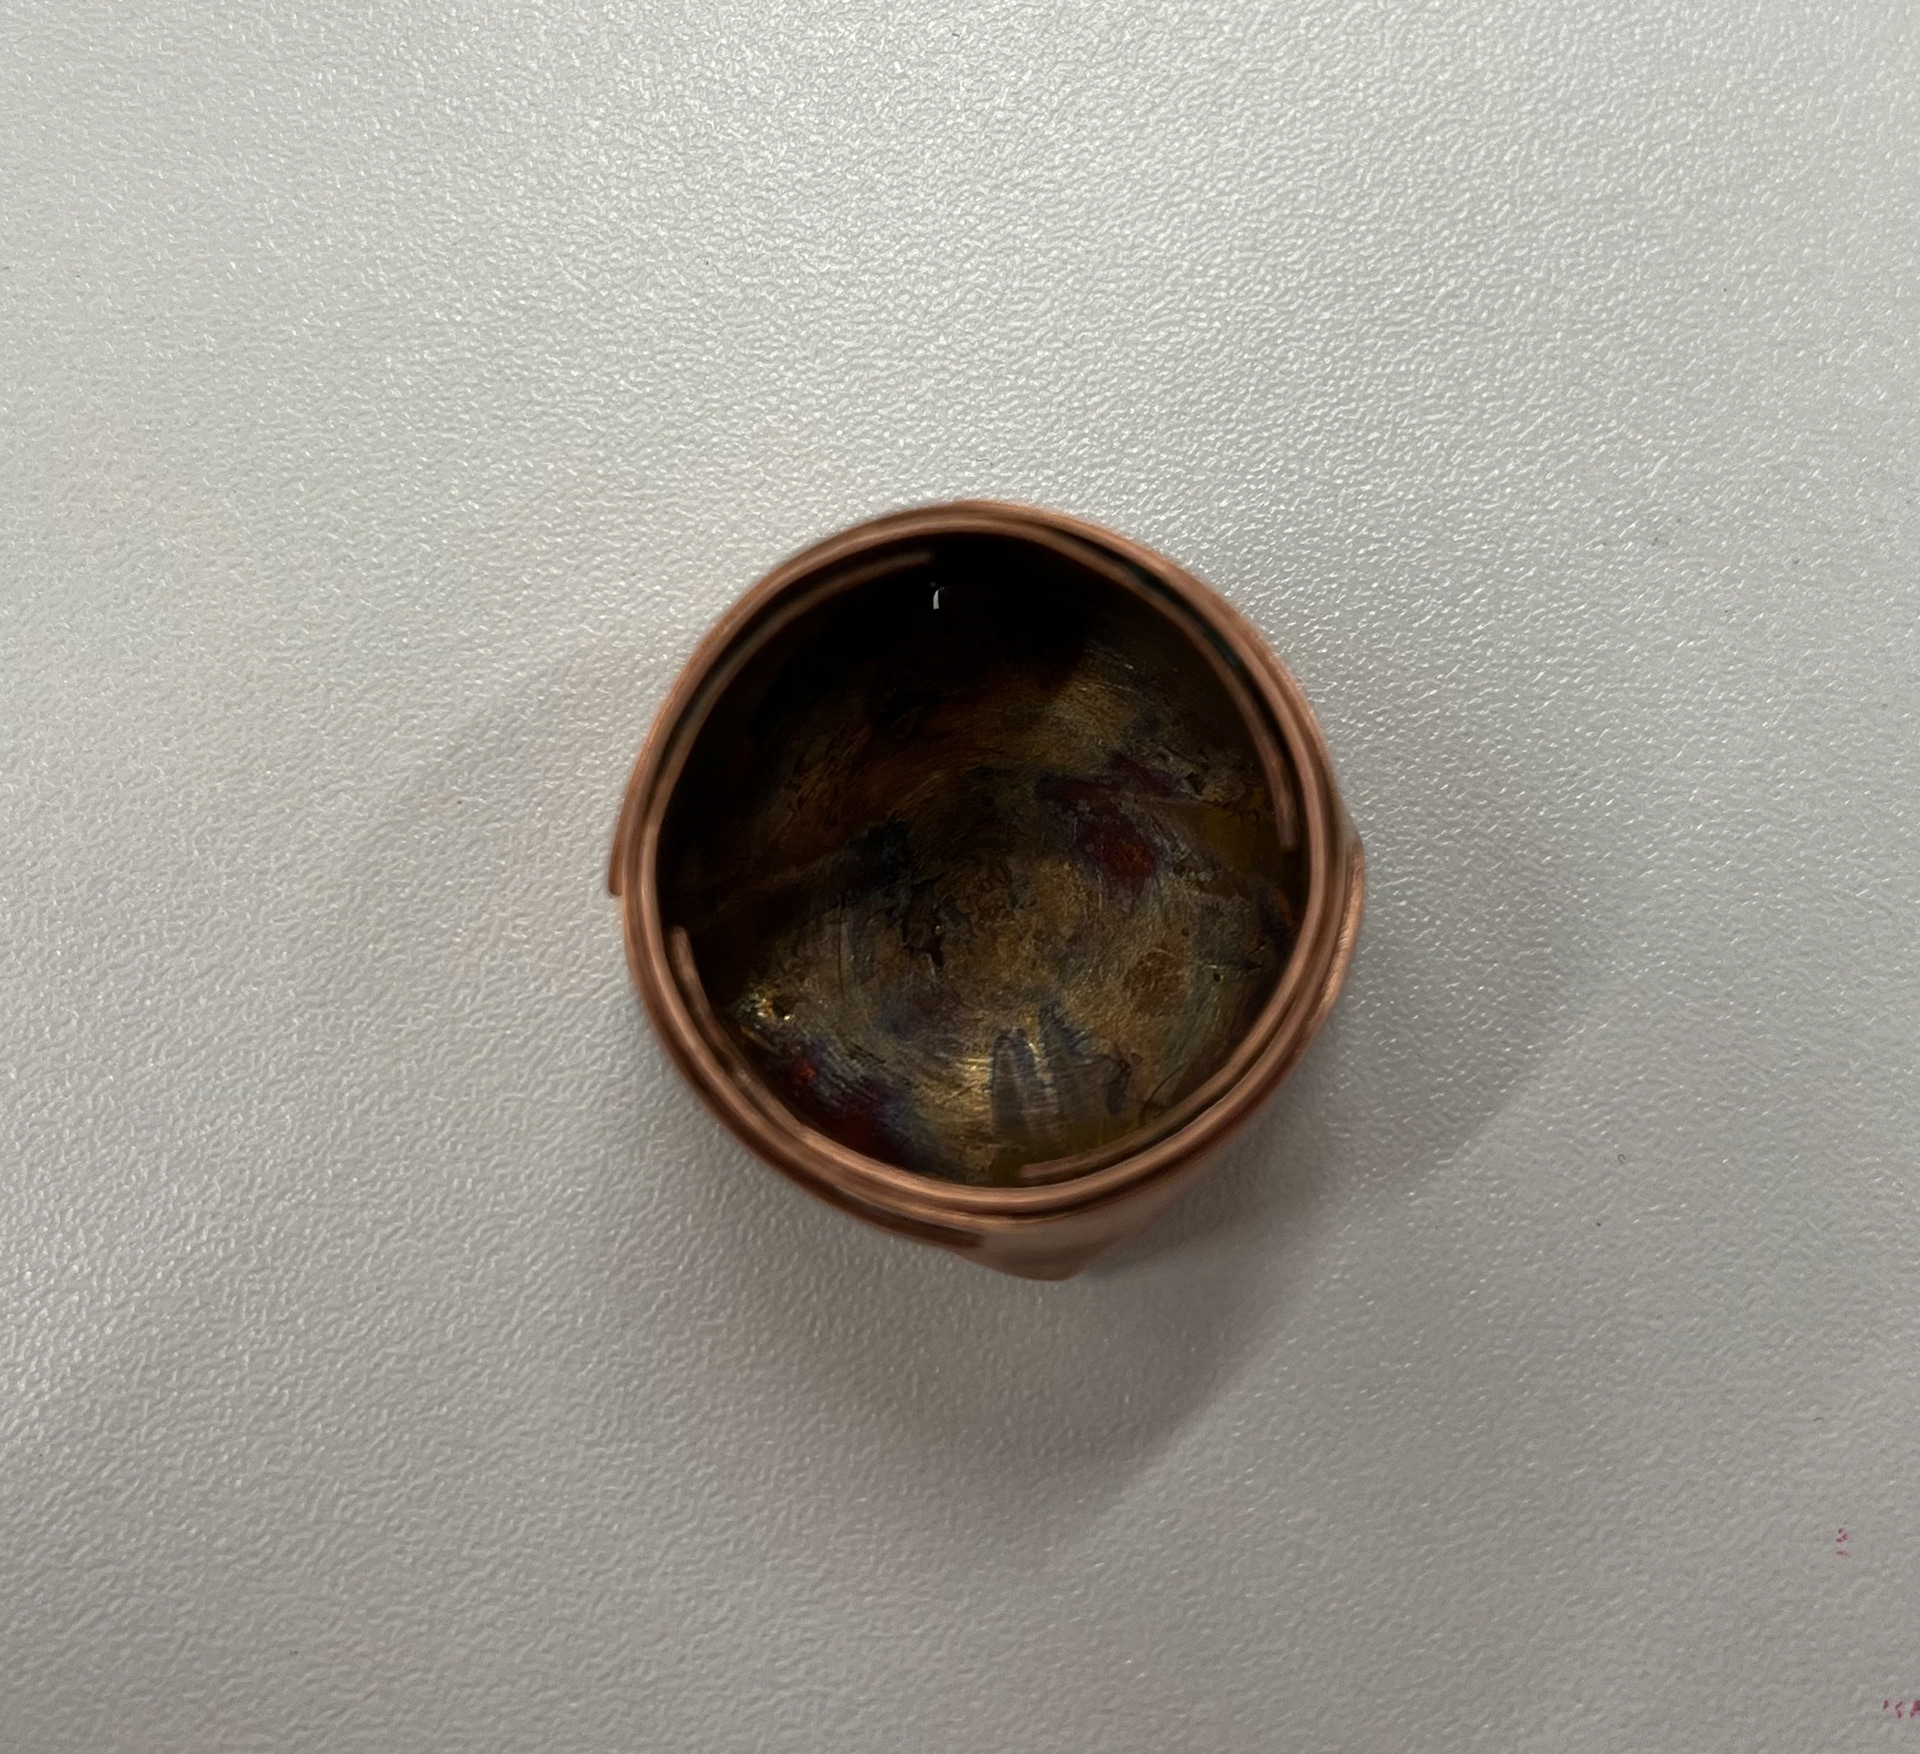
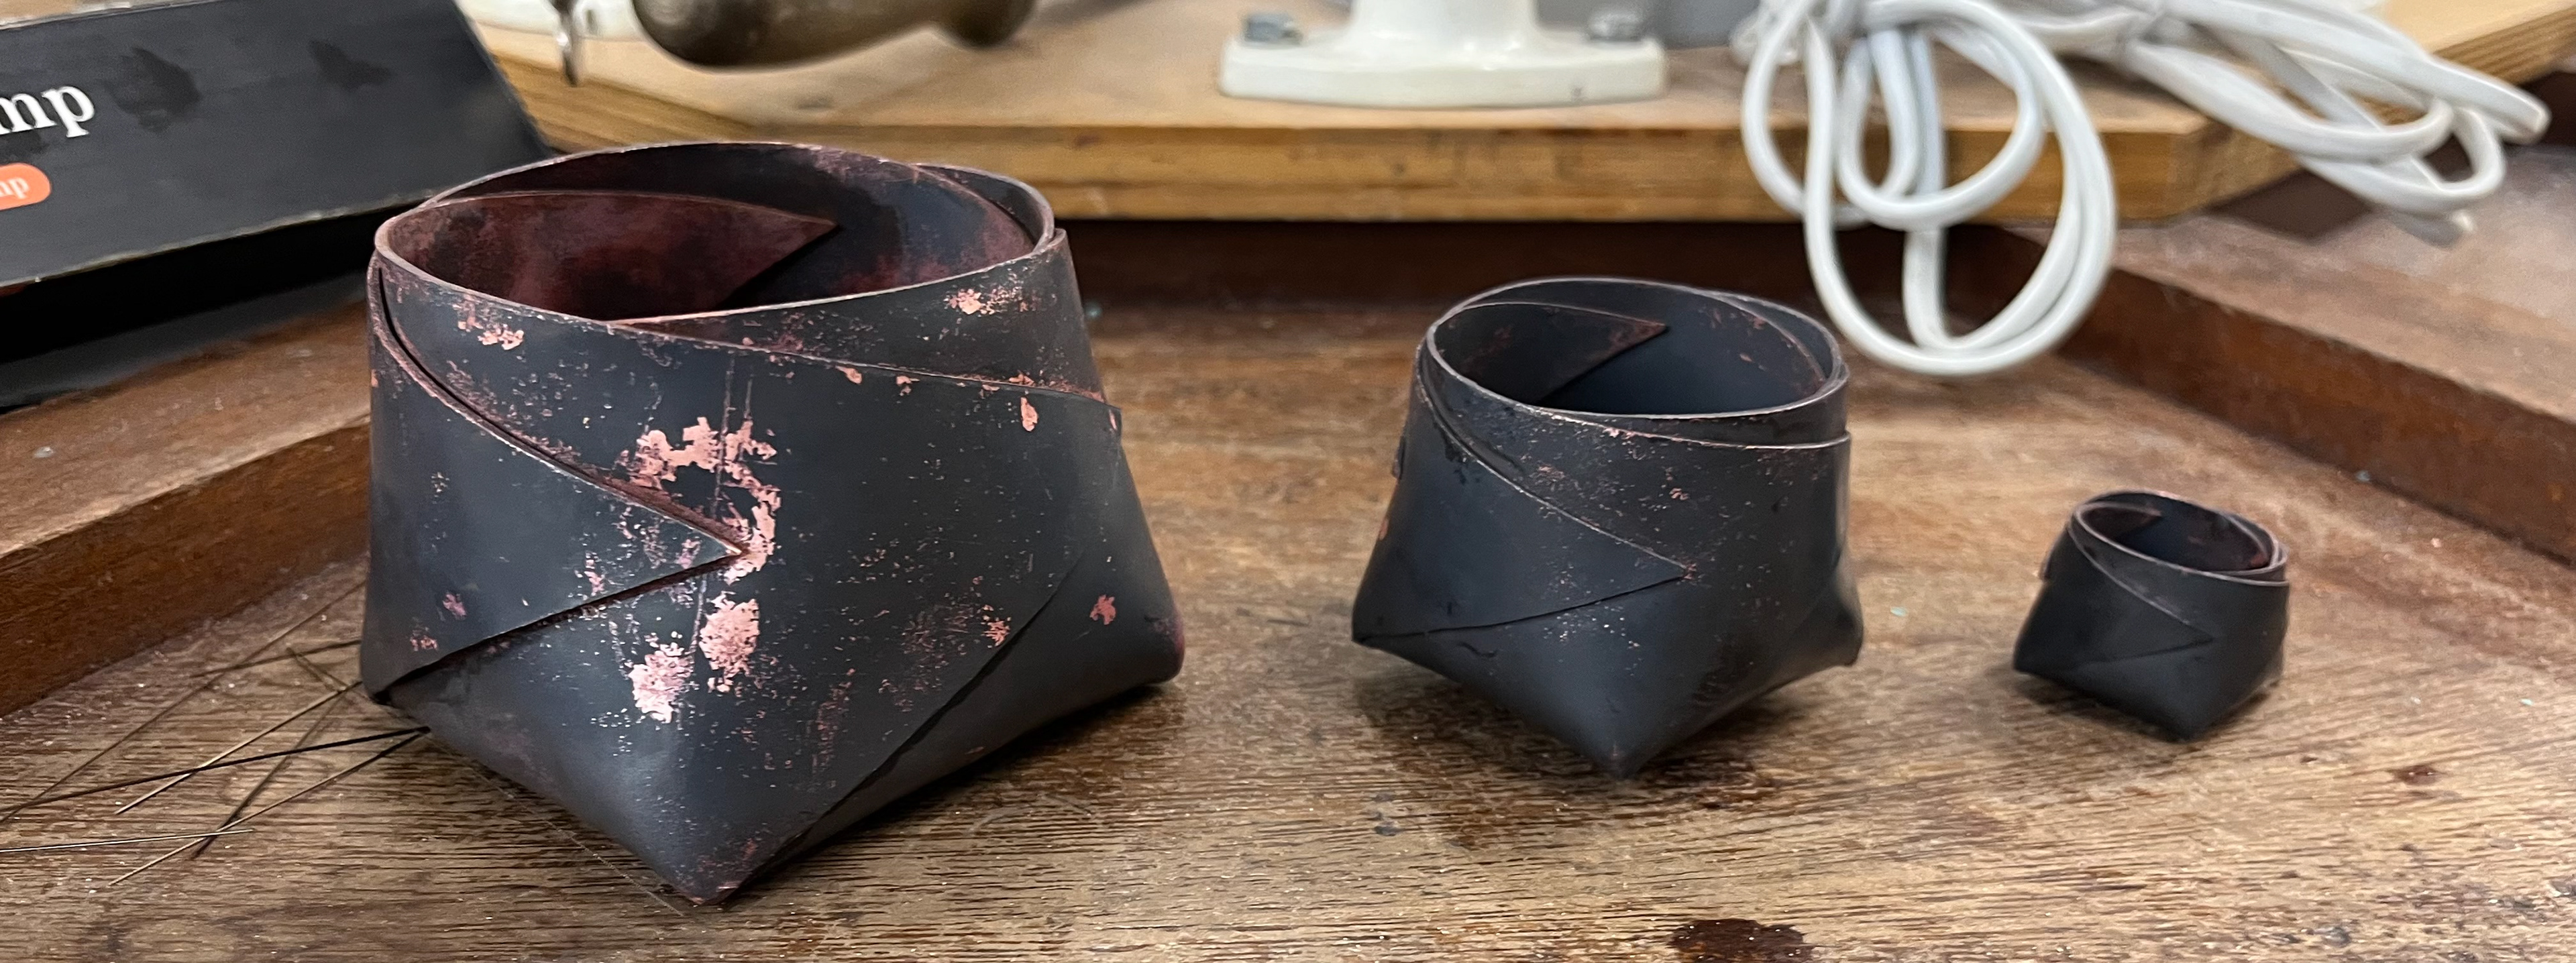
These images show how I would like my boxes to be resolved. A series of 3 cups with 3 different sizes that can nest and fit in each other. I really like how these forms turned out as they are quite elegant and fit really well. I especially like how the boxes narrow at the top.
Small box was patinad using liver of sulphur.

Medium box was patinad using liquid flux.

Large box was patinad using Ammonia and salt

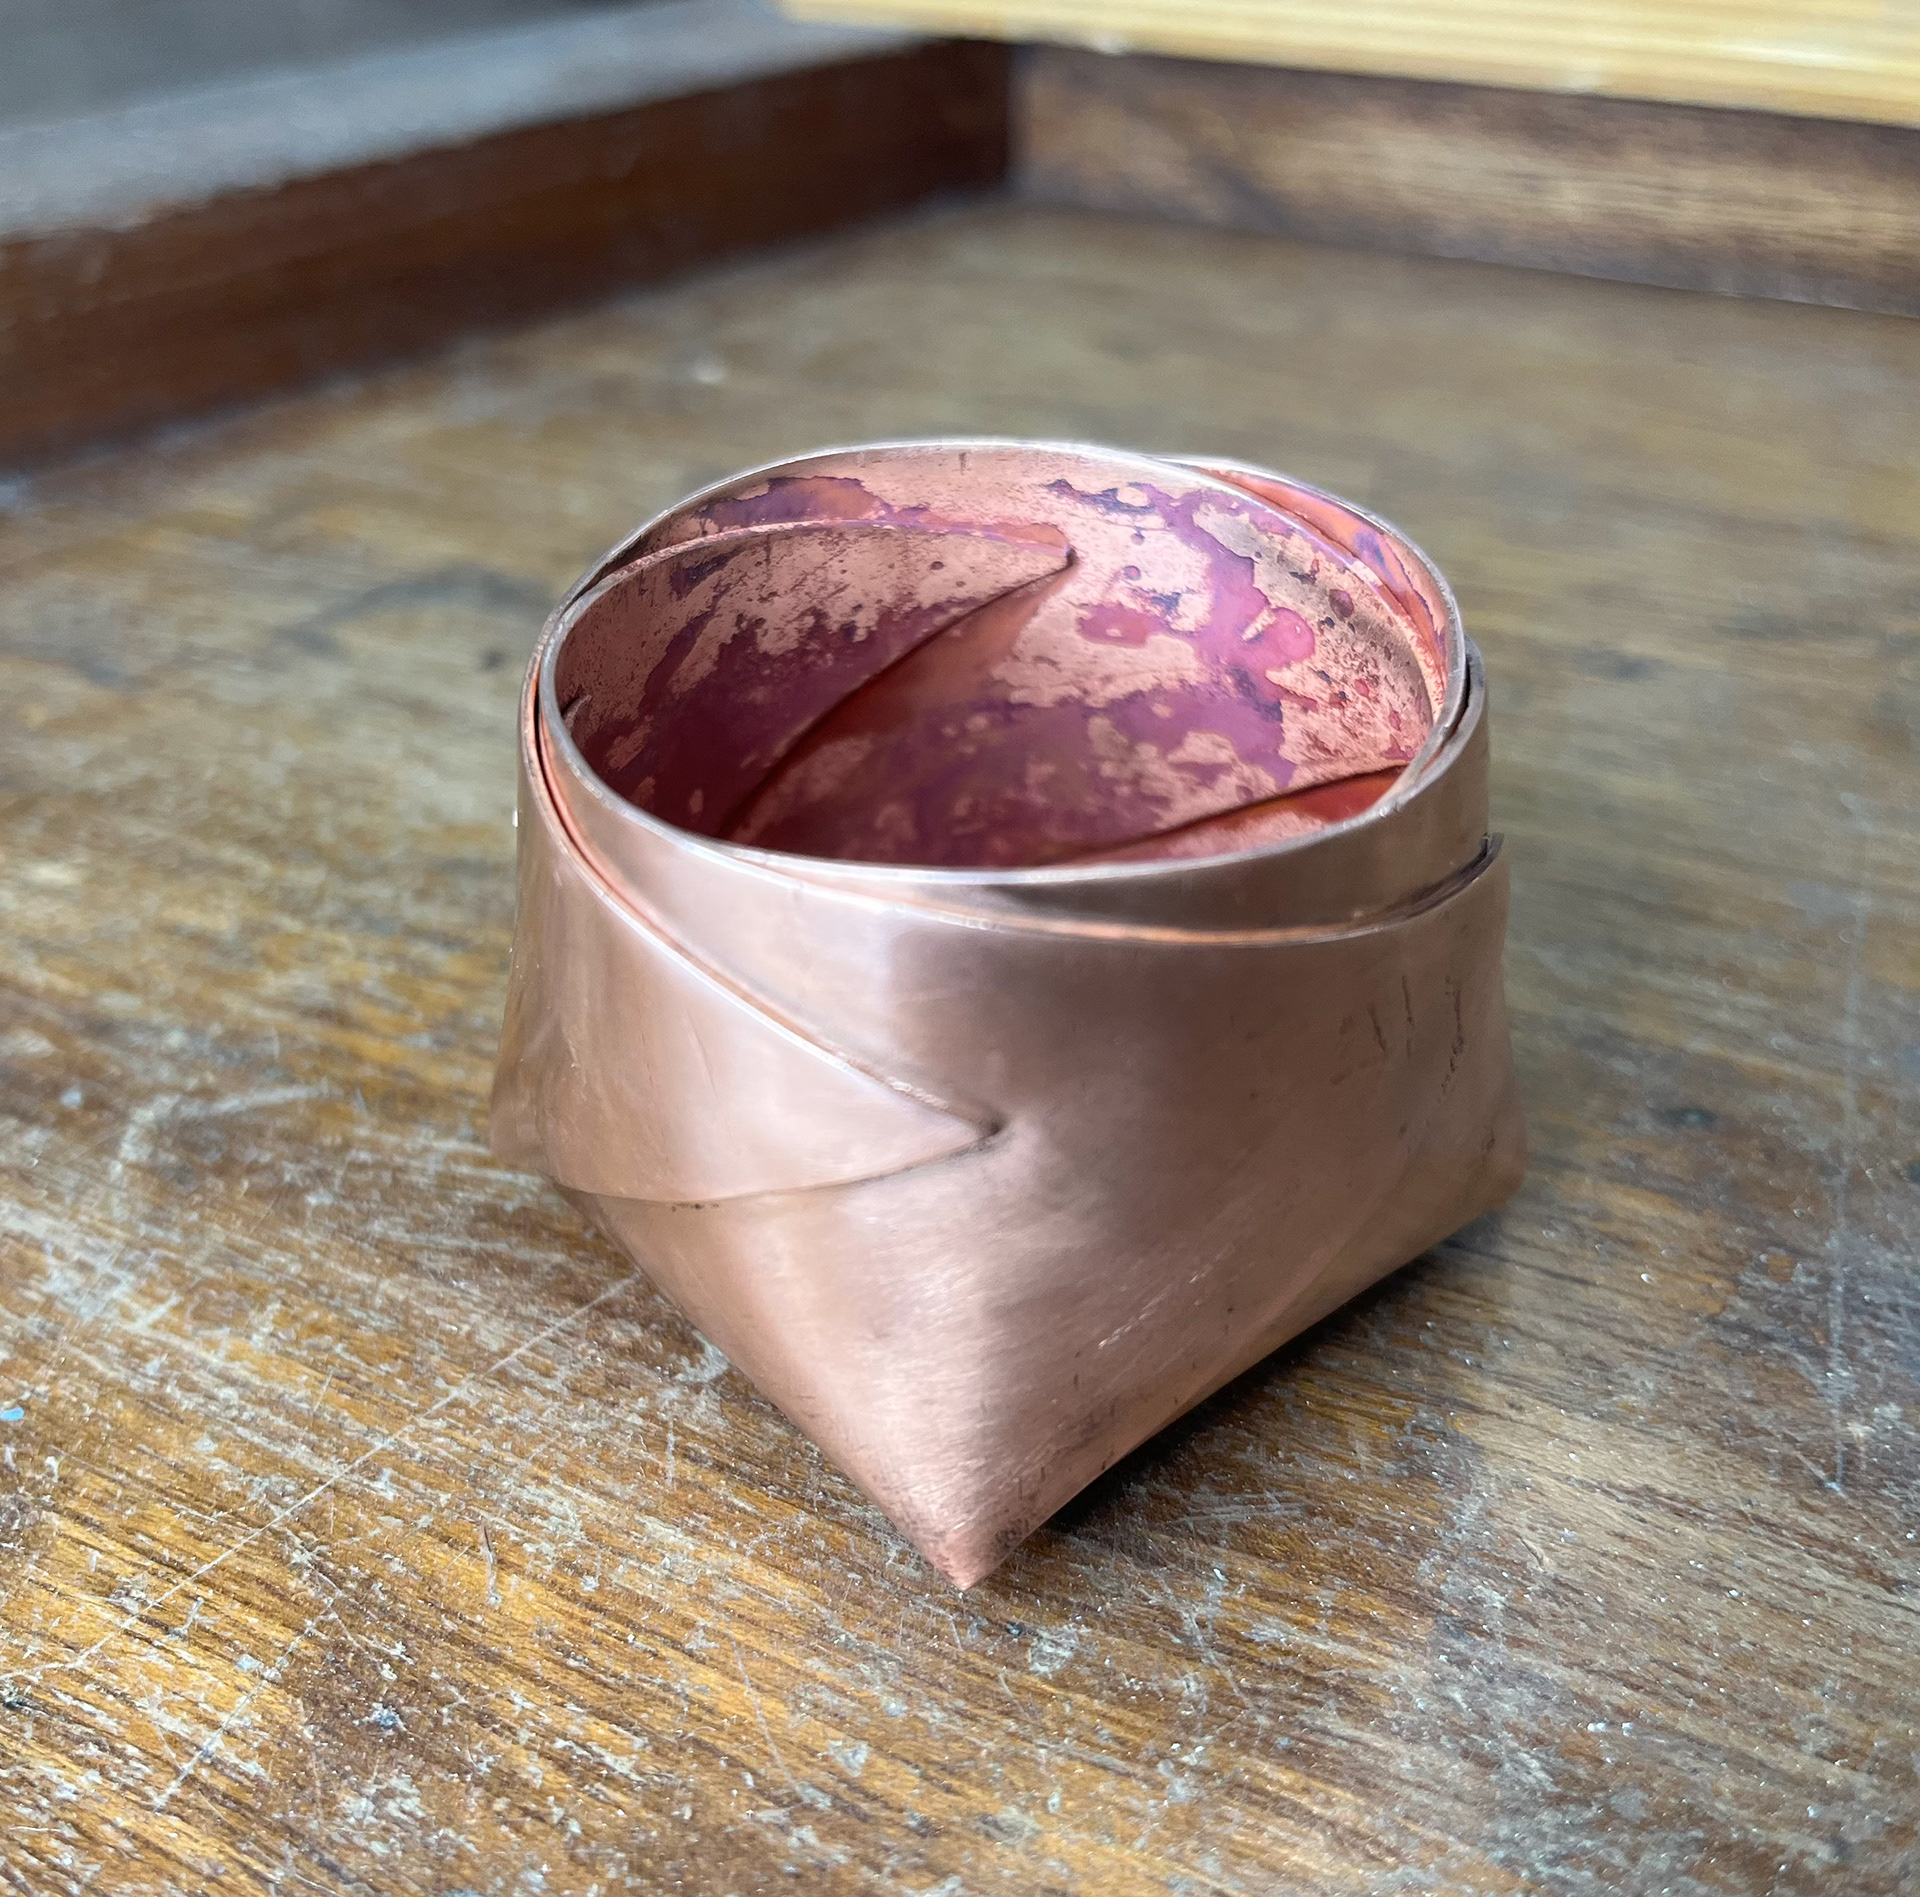
I am happy how these boxes turned out and the colours really pop when they are nesting. Furthermore, the images above of the large box with the ammonia, unintentionally patinad the outside with this swirly, fluid stains. This was caused by the vinyl as it it left pockets of air where the ammonia seeped through the cracks leaving this fluid patina. I really like this and want to continue developing this for my final piece. Letting the patina do its own thing, and control it less.
Bronze Piece
I wanted to try lost wax casting in Bronze as bronze is the traditional metal to patina historically and has a strong link to European traditions in metal crafts. My knowledge of patinas stems from research from copper/bronze pieces that have been buried for hundreds or thousands of years. Therefore, I wanted to make a bronze piece that is associated with place and chose Fallowfield so I could burry the piece in my garden and see what type of natural patina is revealed after several months.
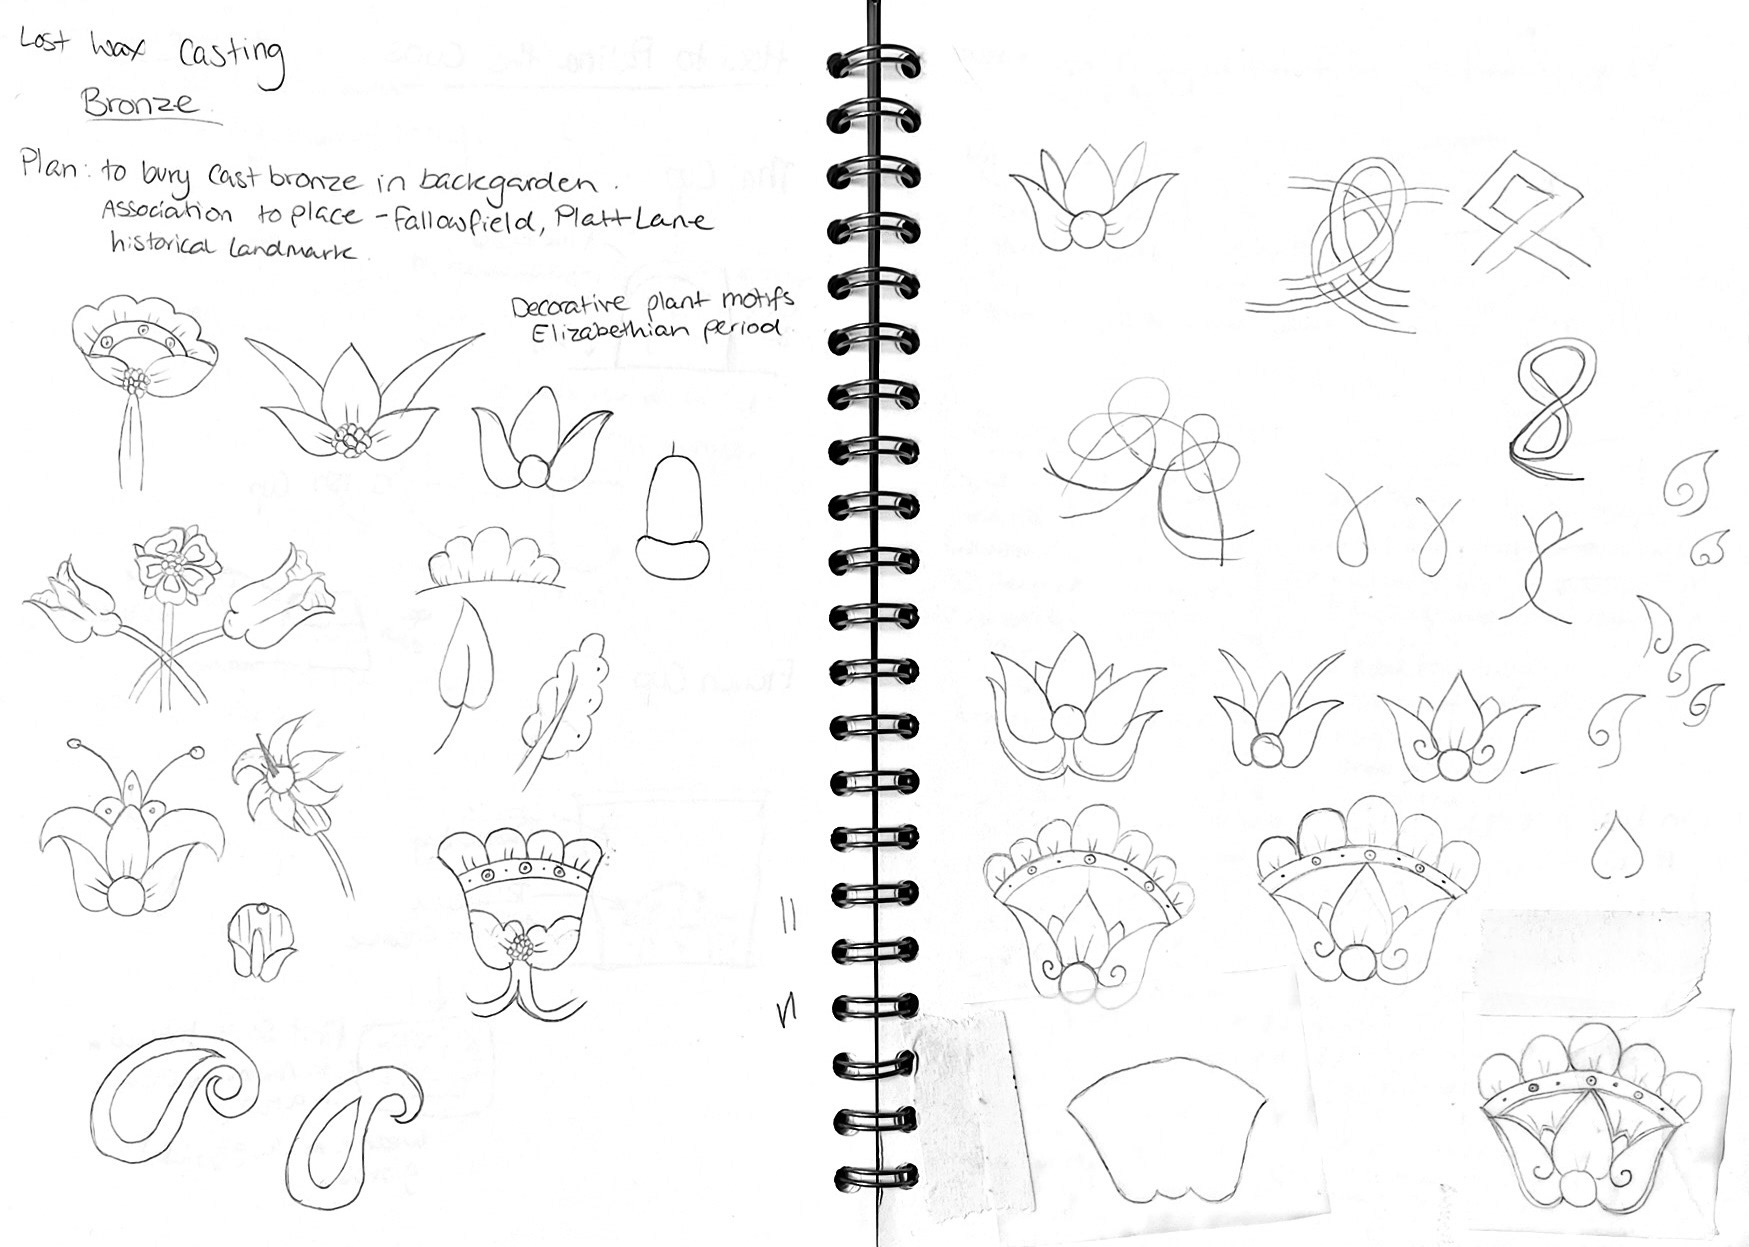
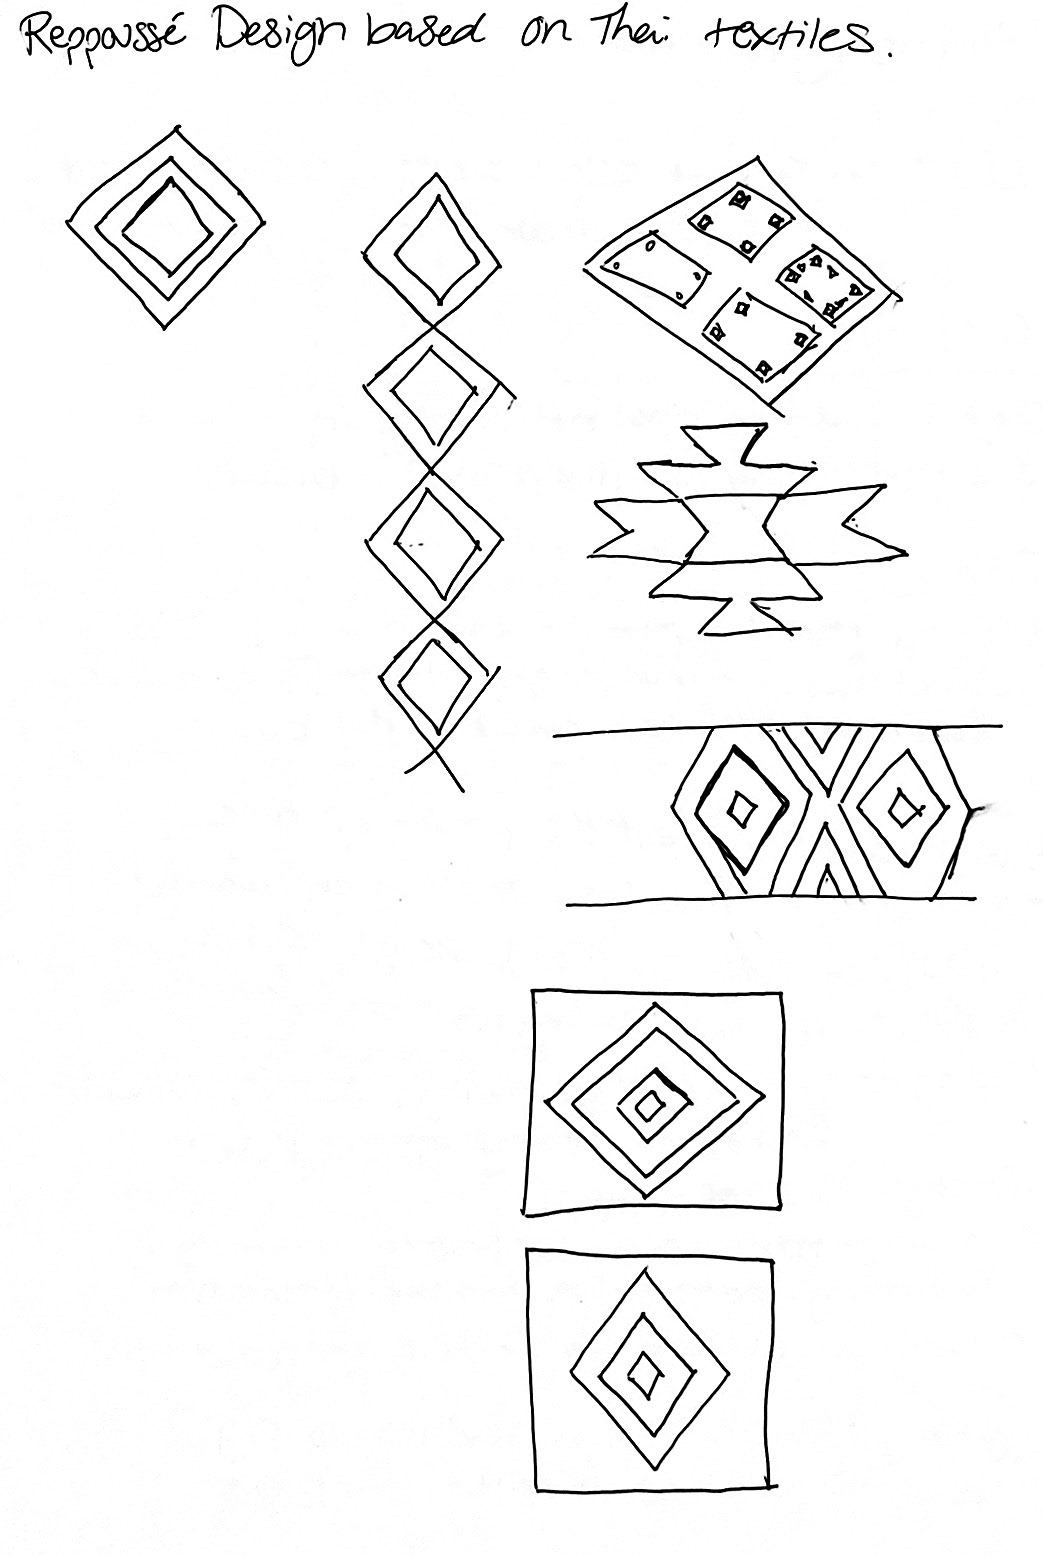
I took inspiration from Elizabethan plant motifs from Platt Manor and drew some designs based on this style of art.
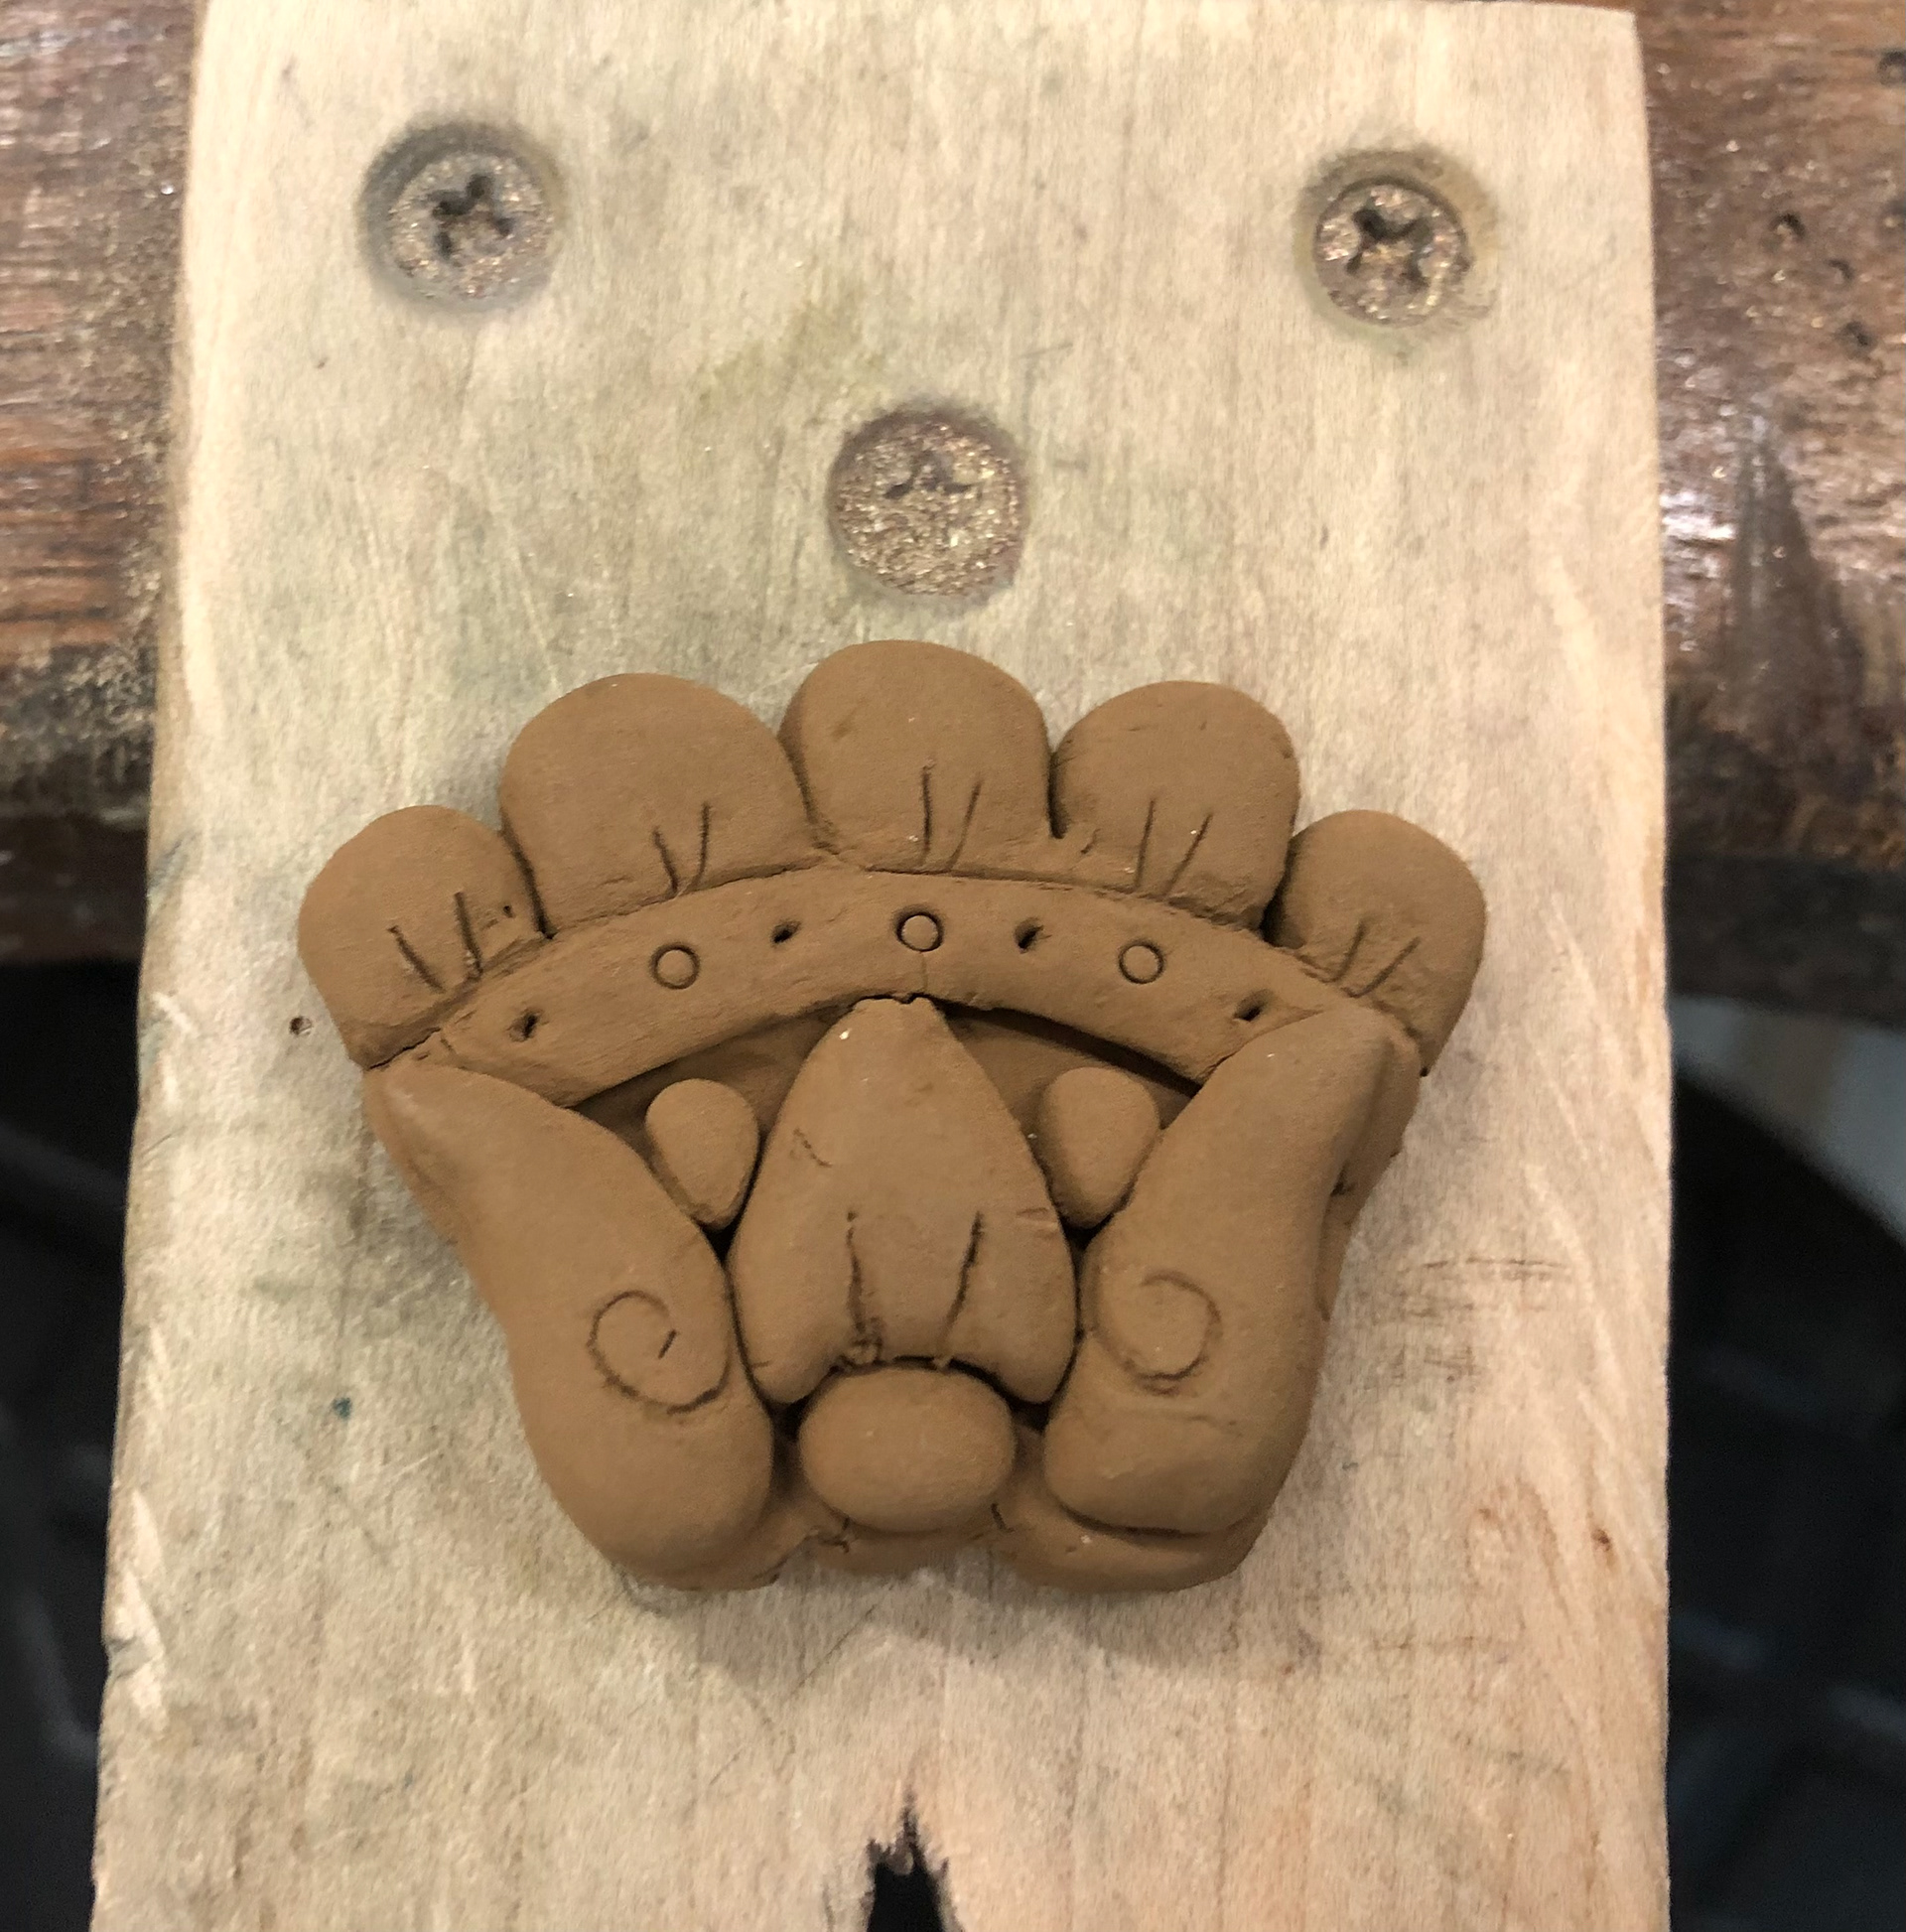
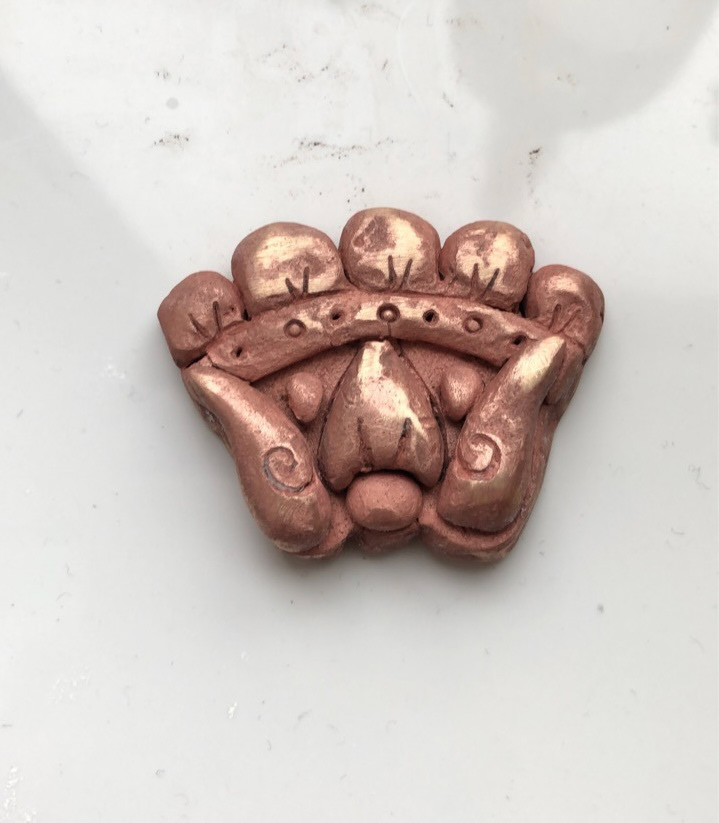
At the time, we had some issues with lost wax casting in the workshop so I decided to skip the casting process completely and got myself some bronze clay. I moulded it into my desired pattern and put it in the kiln at 800 degrees C for 30 minutes. This process evaporates all the moisture within the clay leaving a solid bronze piece. I should have anticipated the shrinkage of the clay but I was happy it stayed together and non of the elements fell off. The last step was to burry it in my garden where it will remain for the rest of the year. A natural patina takes over 100 years to form, but I am hoping there is at least some layer of patina after a couple months.
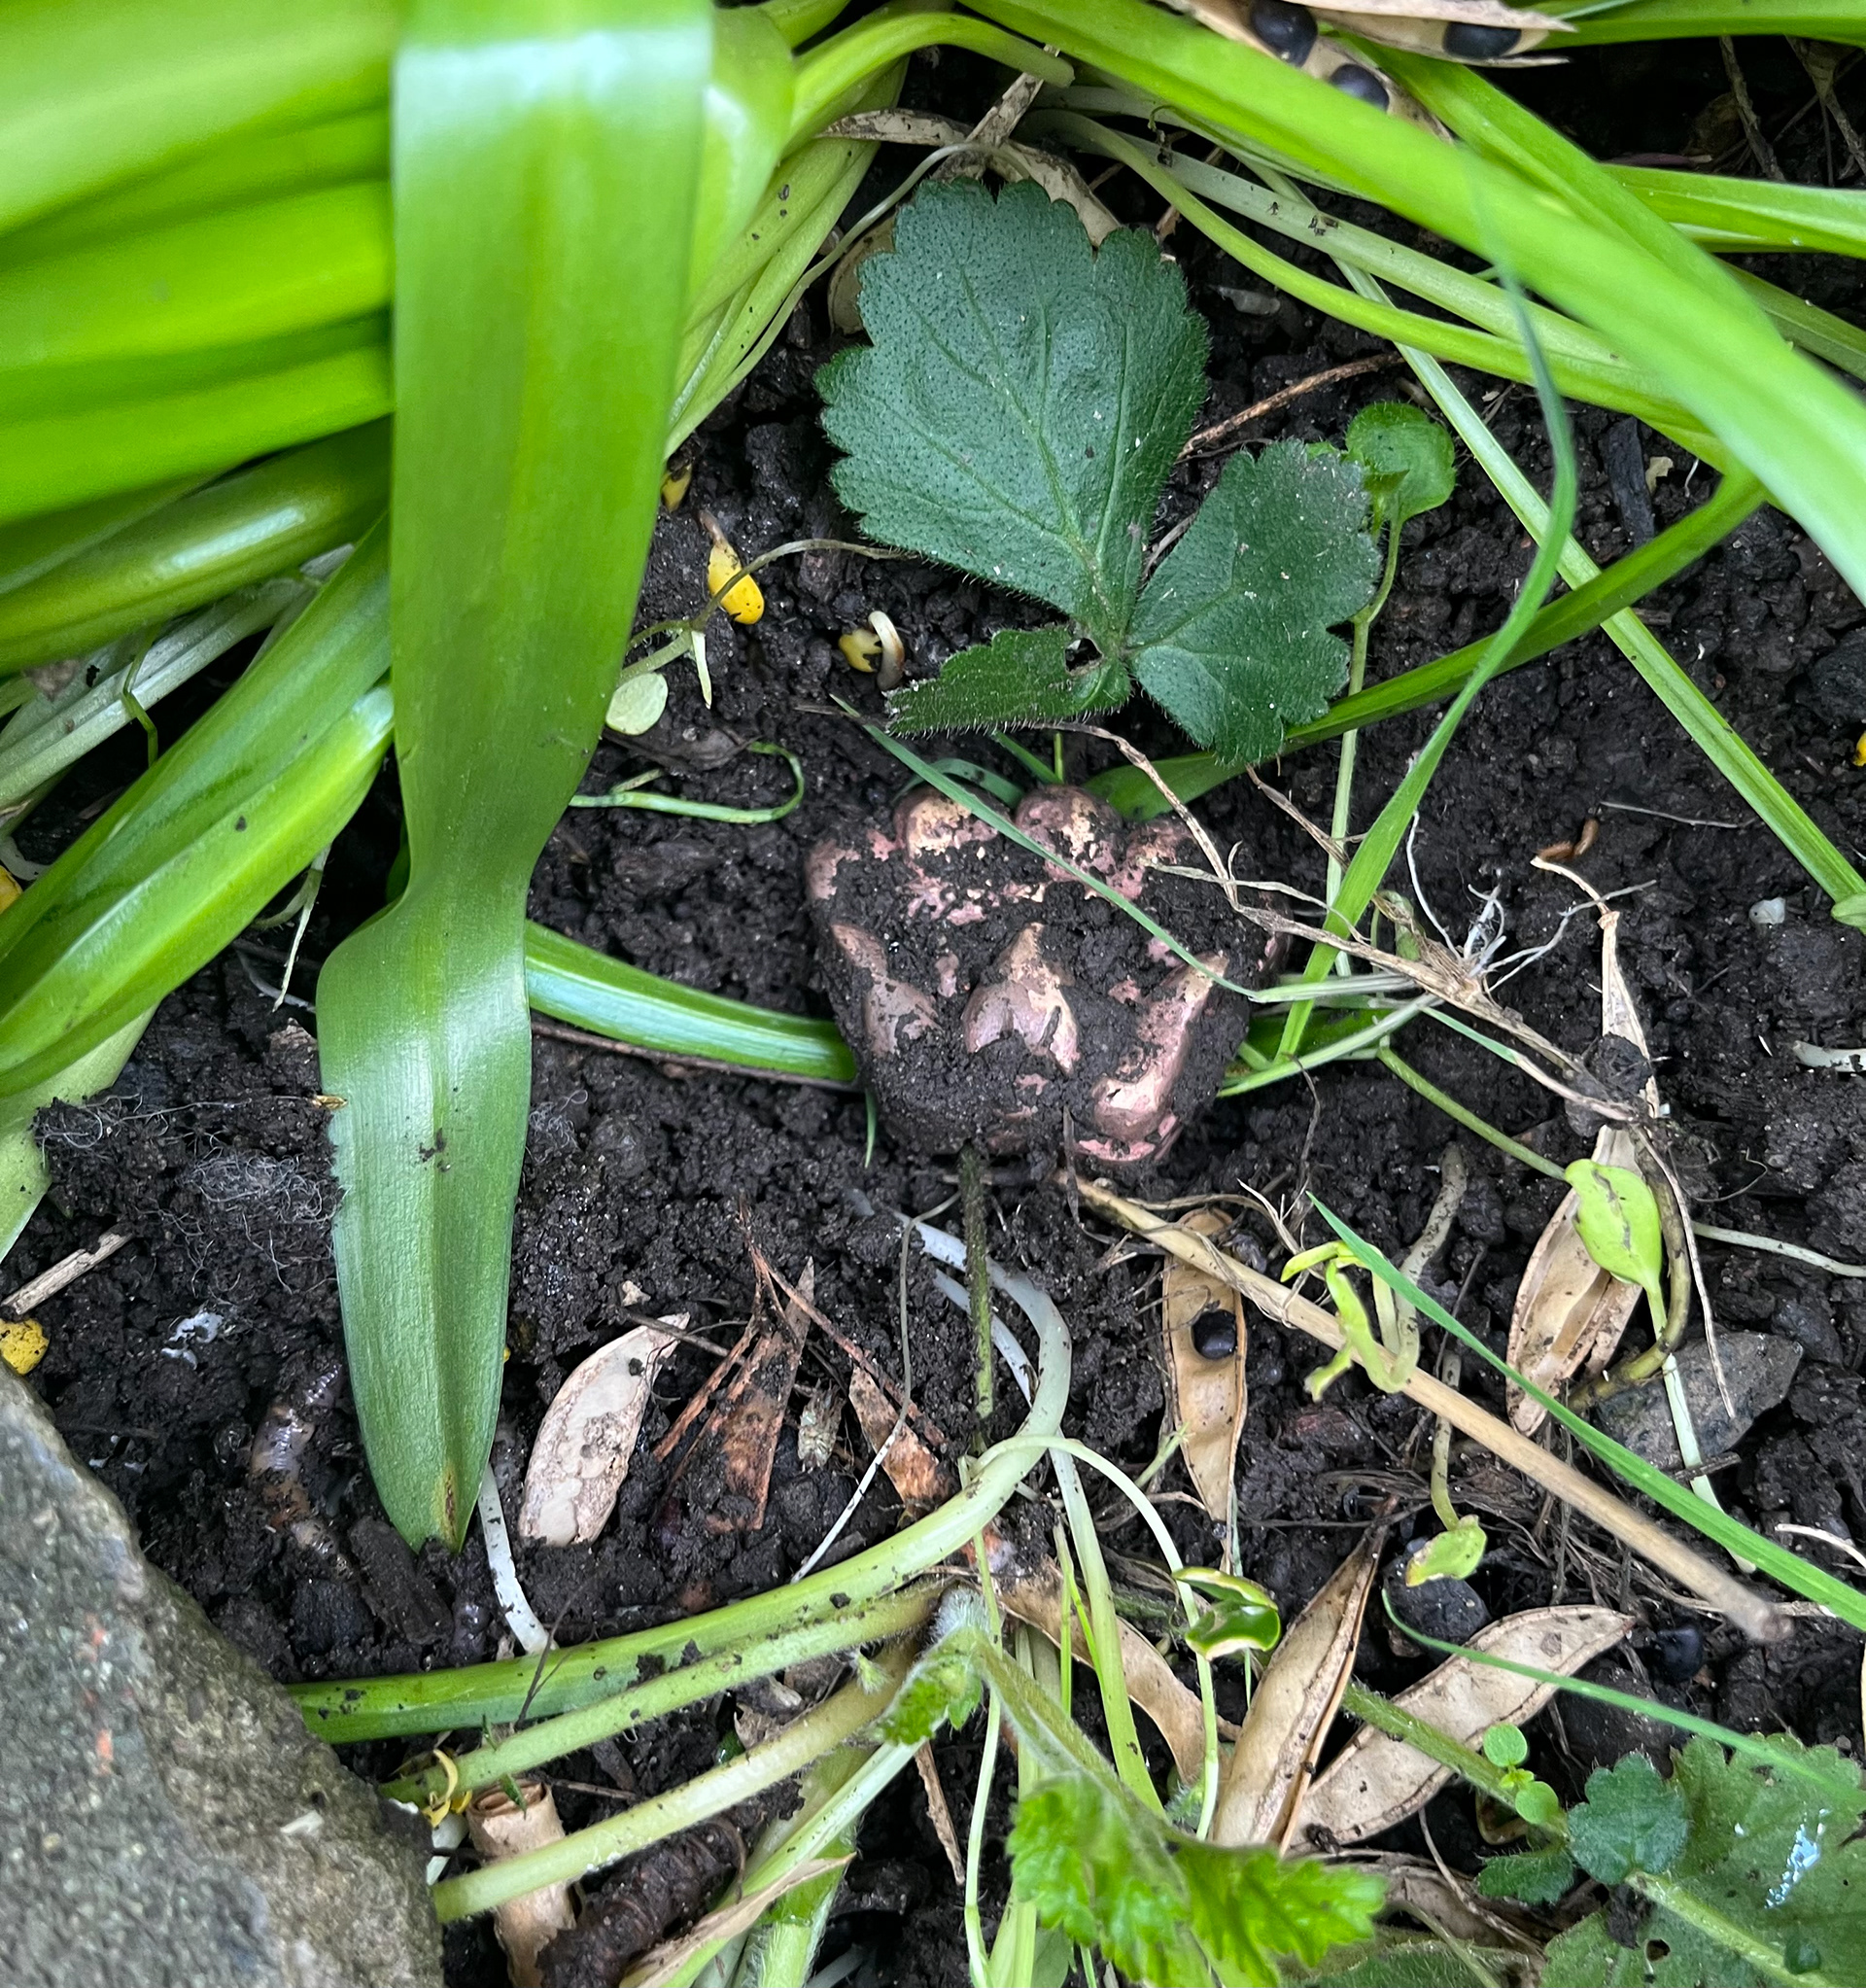
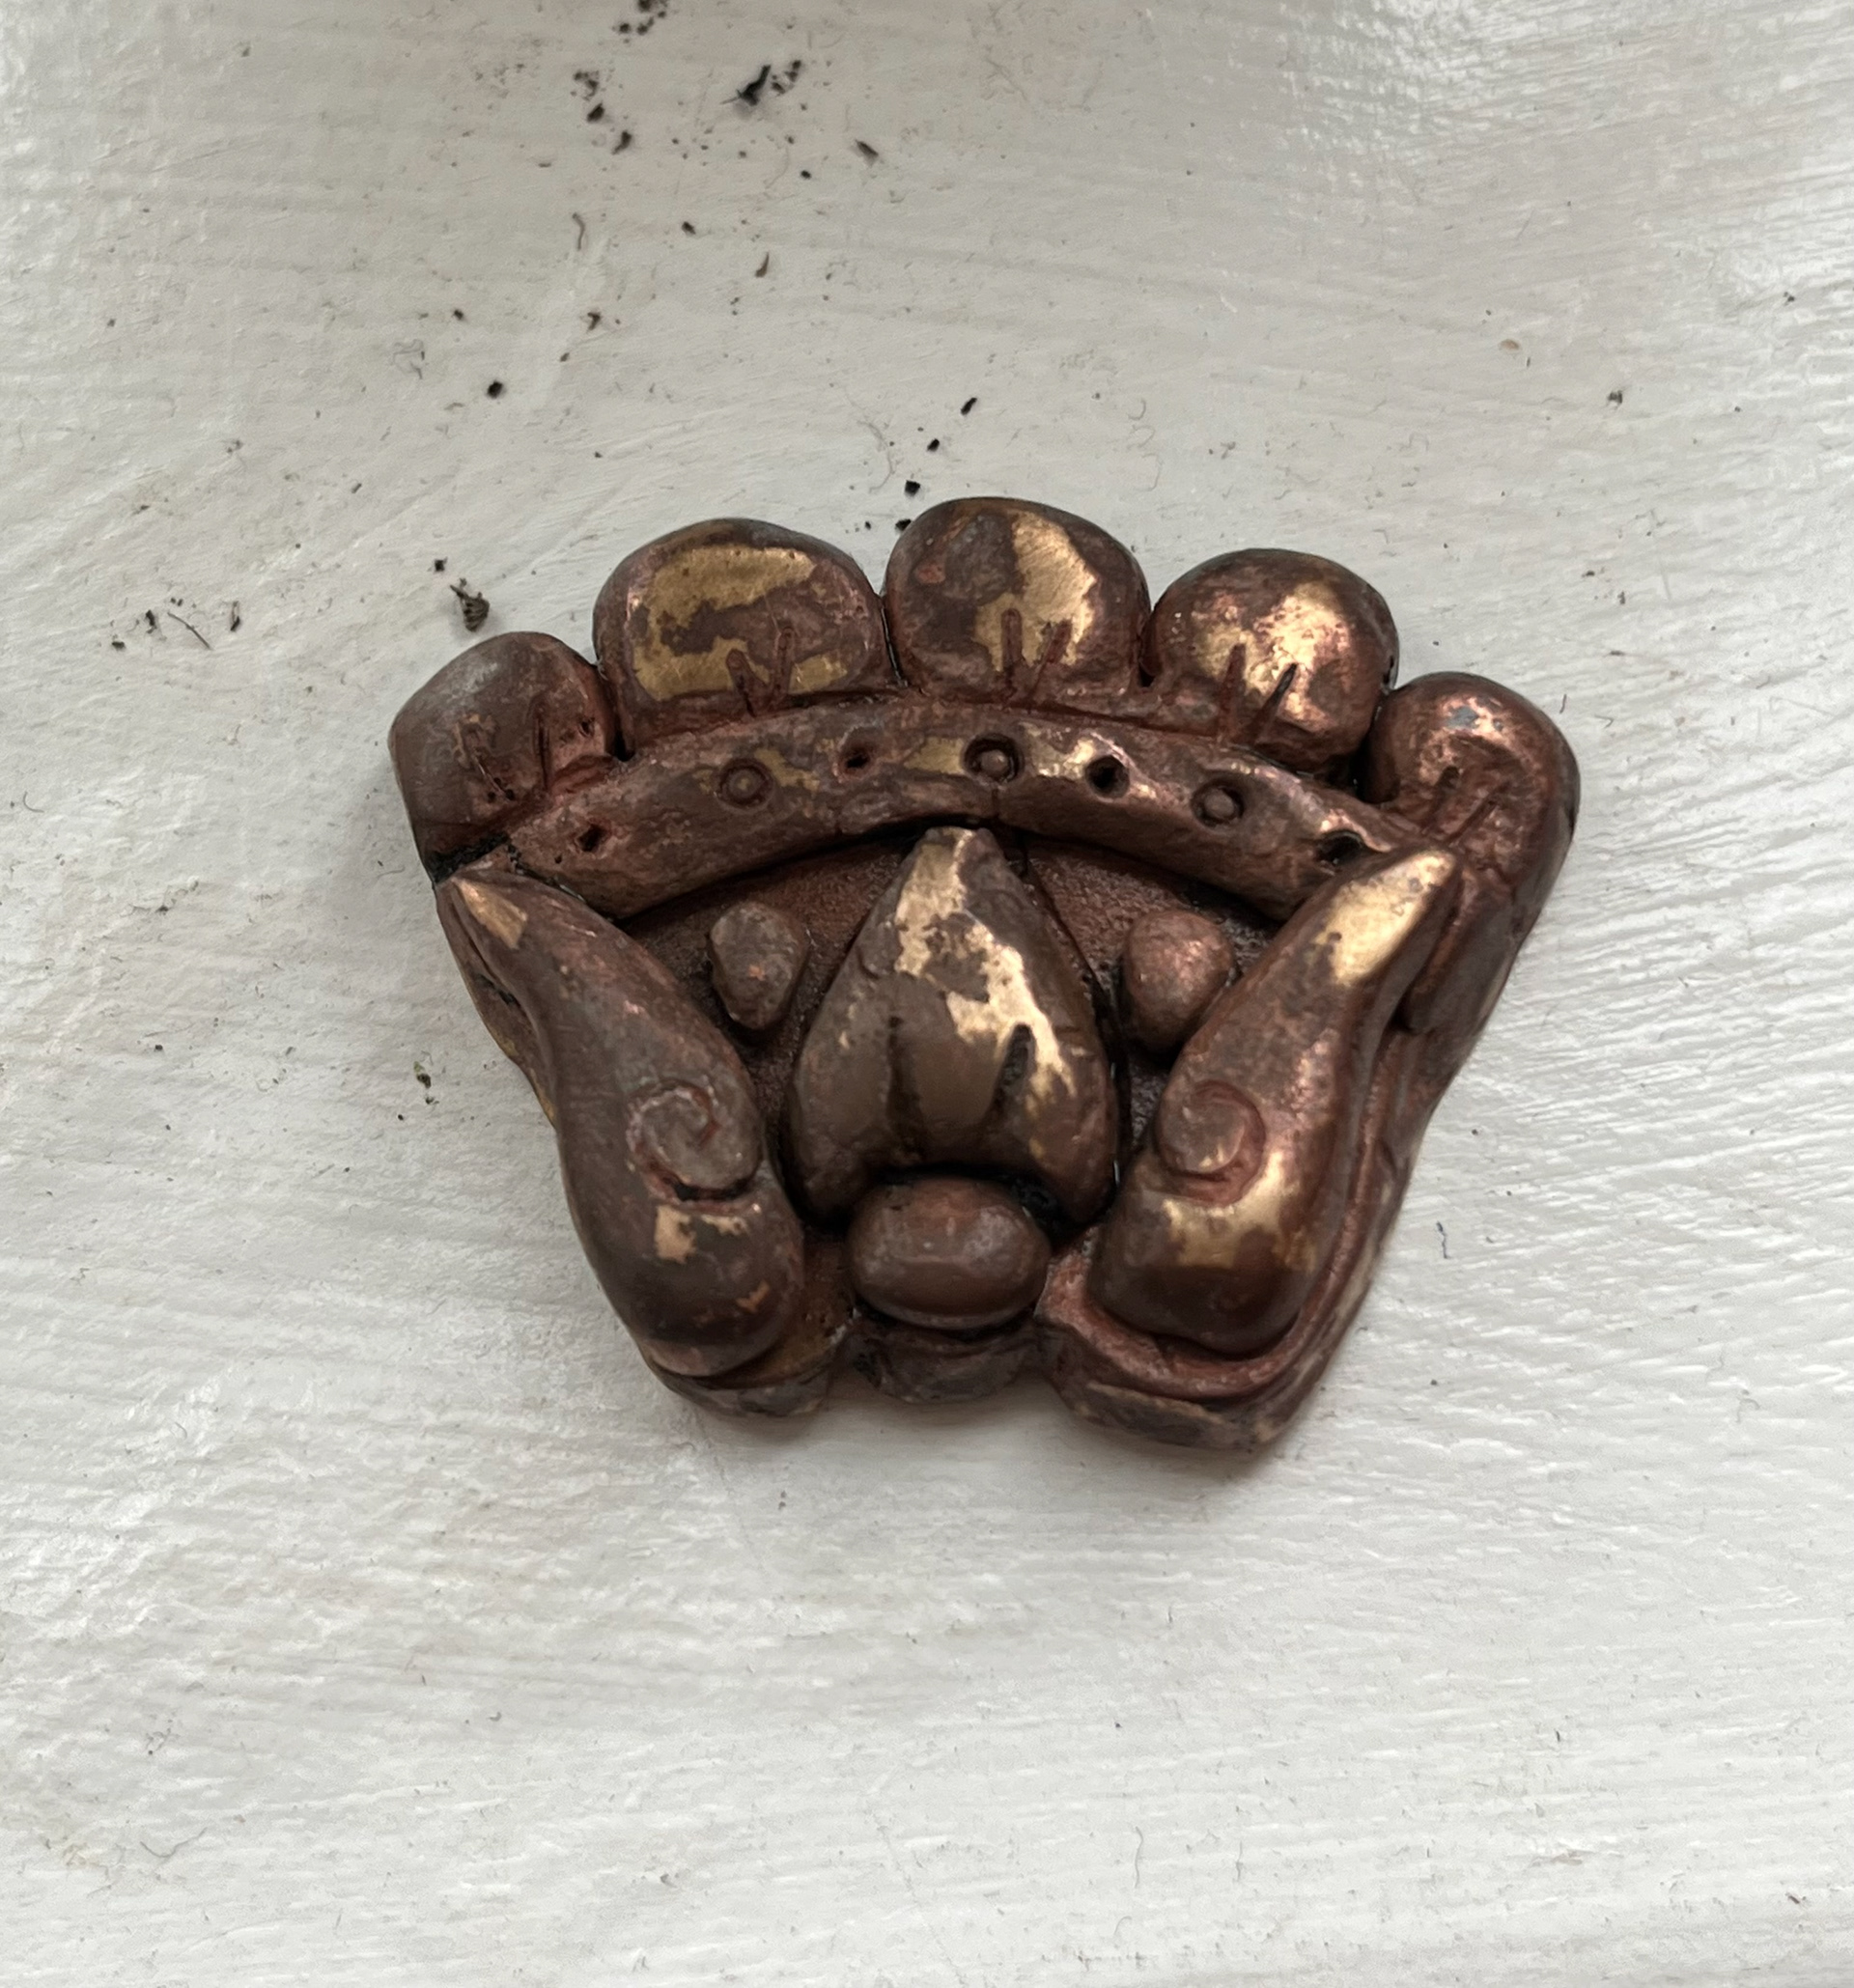
4 months down the line, I dug up my artefact that revealed a deep brown patina. I was only expecting the colour brown and its not as exciting as a 1000 year old arrow head from the Bronze Age but I was quite proud to have developed a natural patina over the span of a couple months. No chemicals or catalysts were added to speed the process. It was pure Fallowfield earth.
Pollution Patina
Through my research I have learnt how in recent decades, the increase of fossil fuels in the atmosphere has started to degrade and rust outdoor sculptures that have been standing proud for hundreds of years. The natural patina that once protected them from weathering can no longer fight against the acidity of the atmosphere in urban areas. With this knowledge in mind, I thought it would interesting to conduct a similar experiment to Smogware and collect some pollution dust of my own and and see what sort of effect it had on copper.
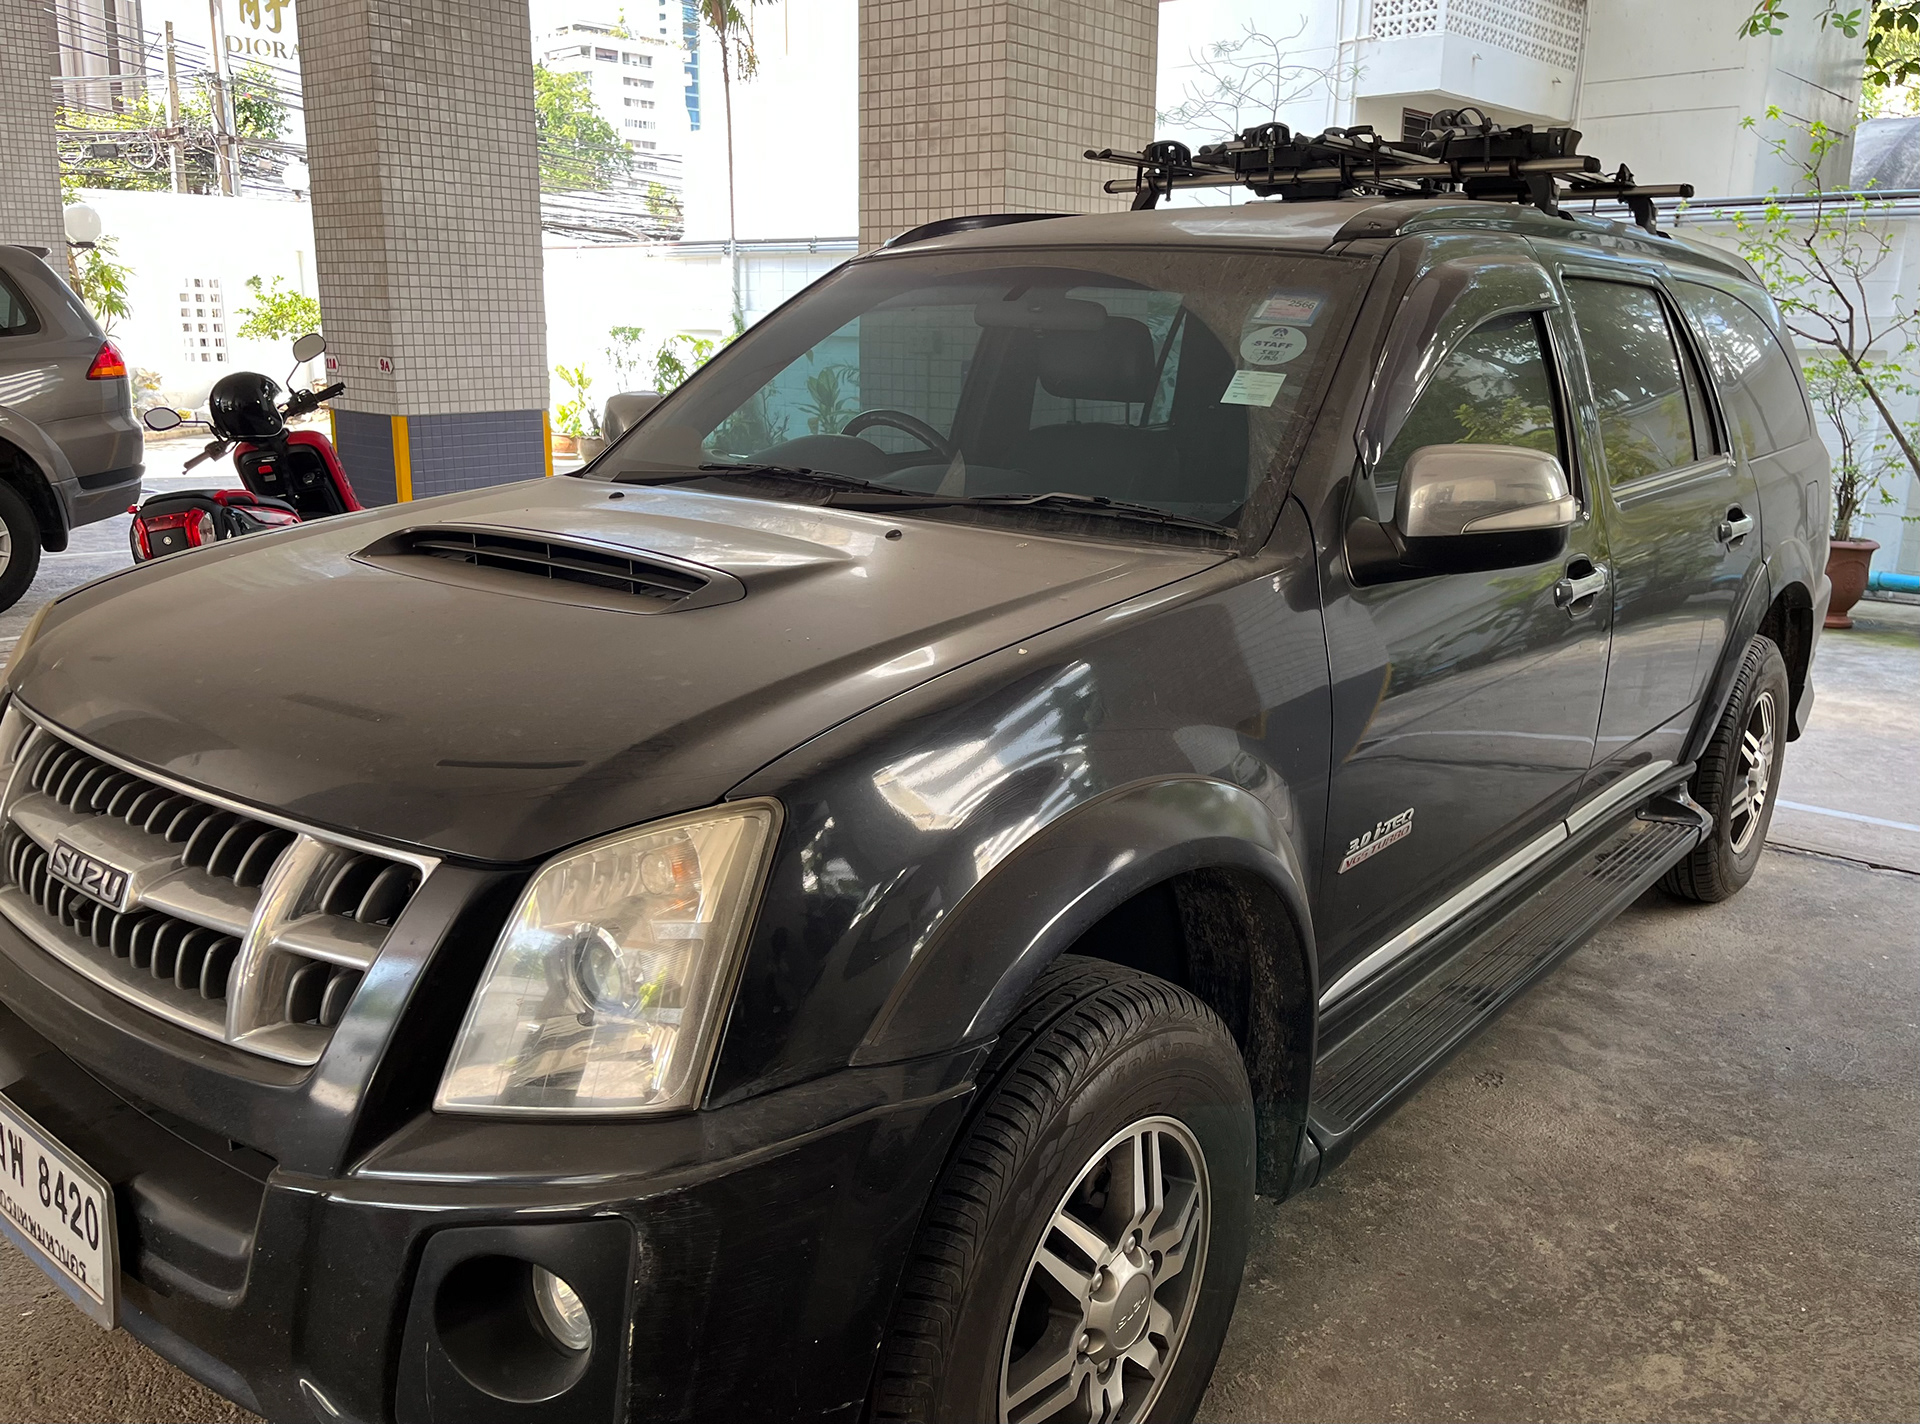
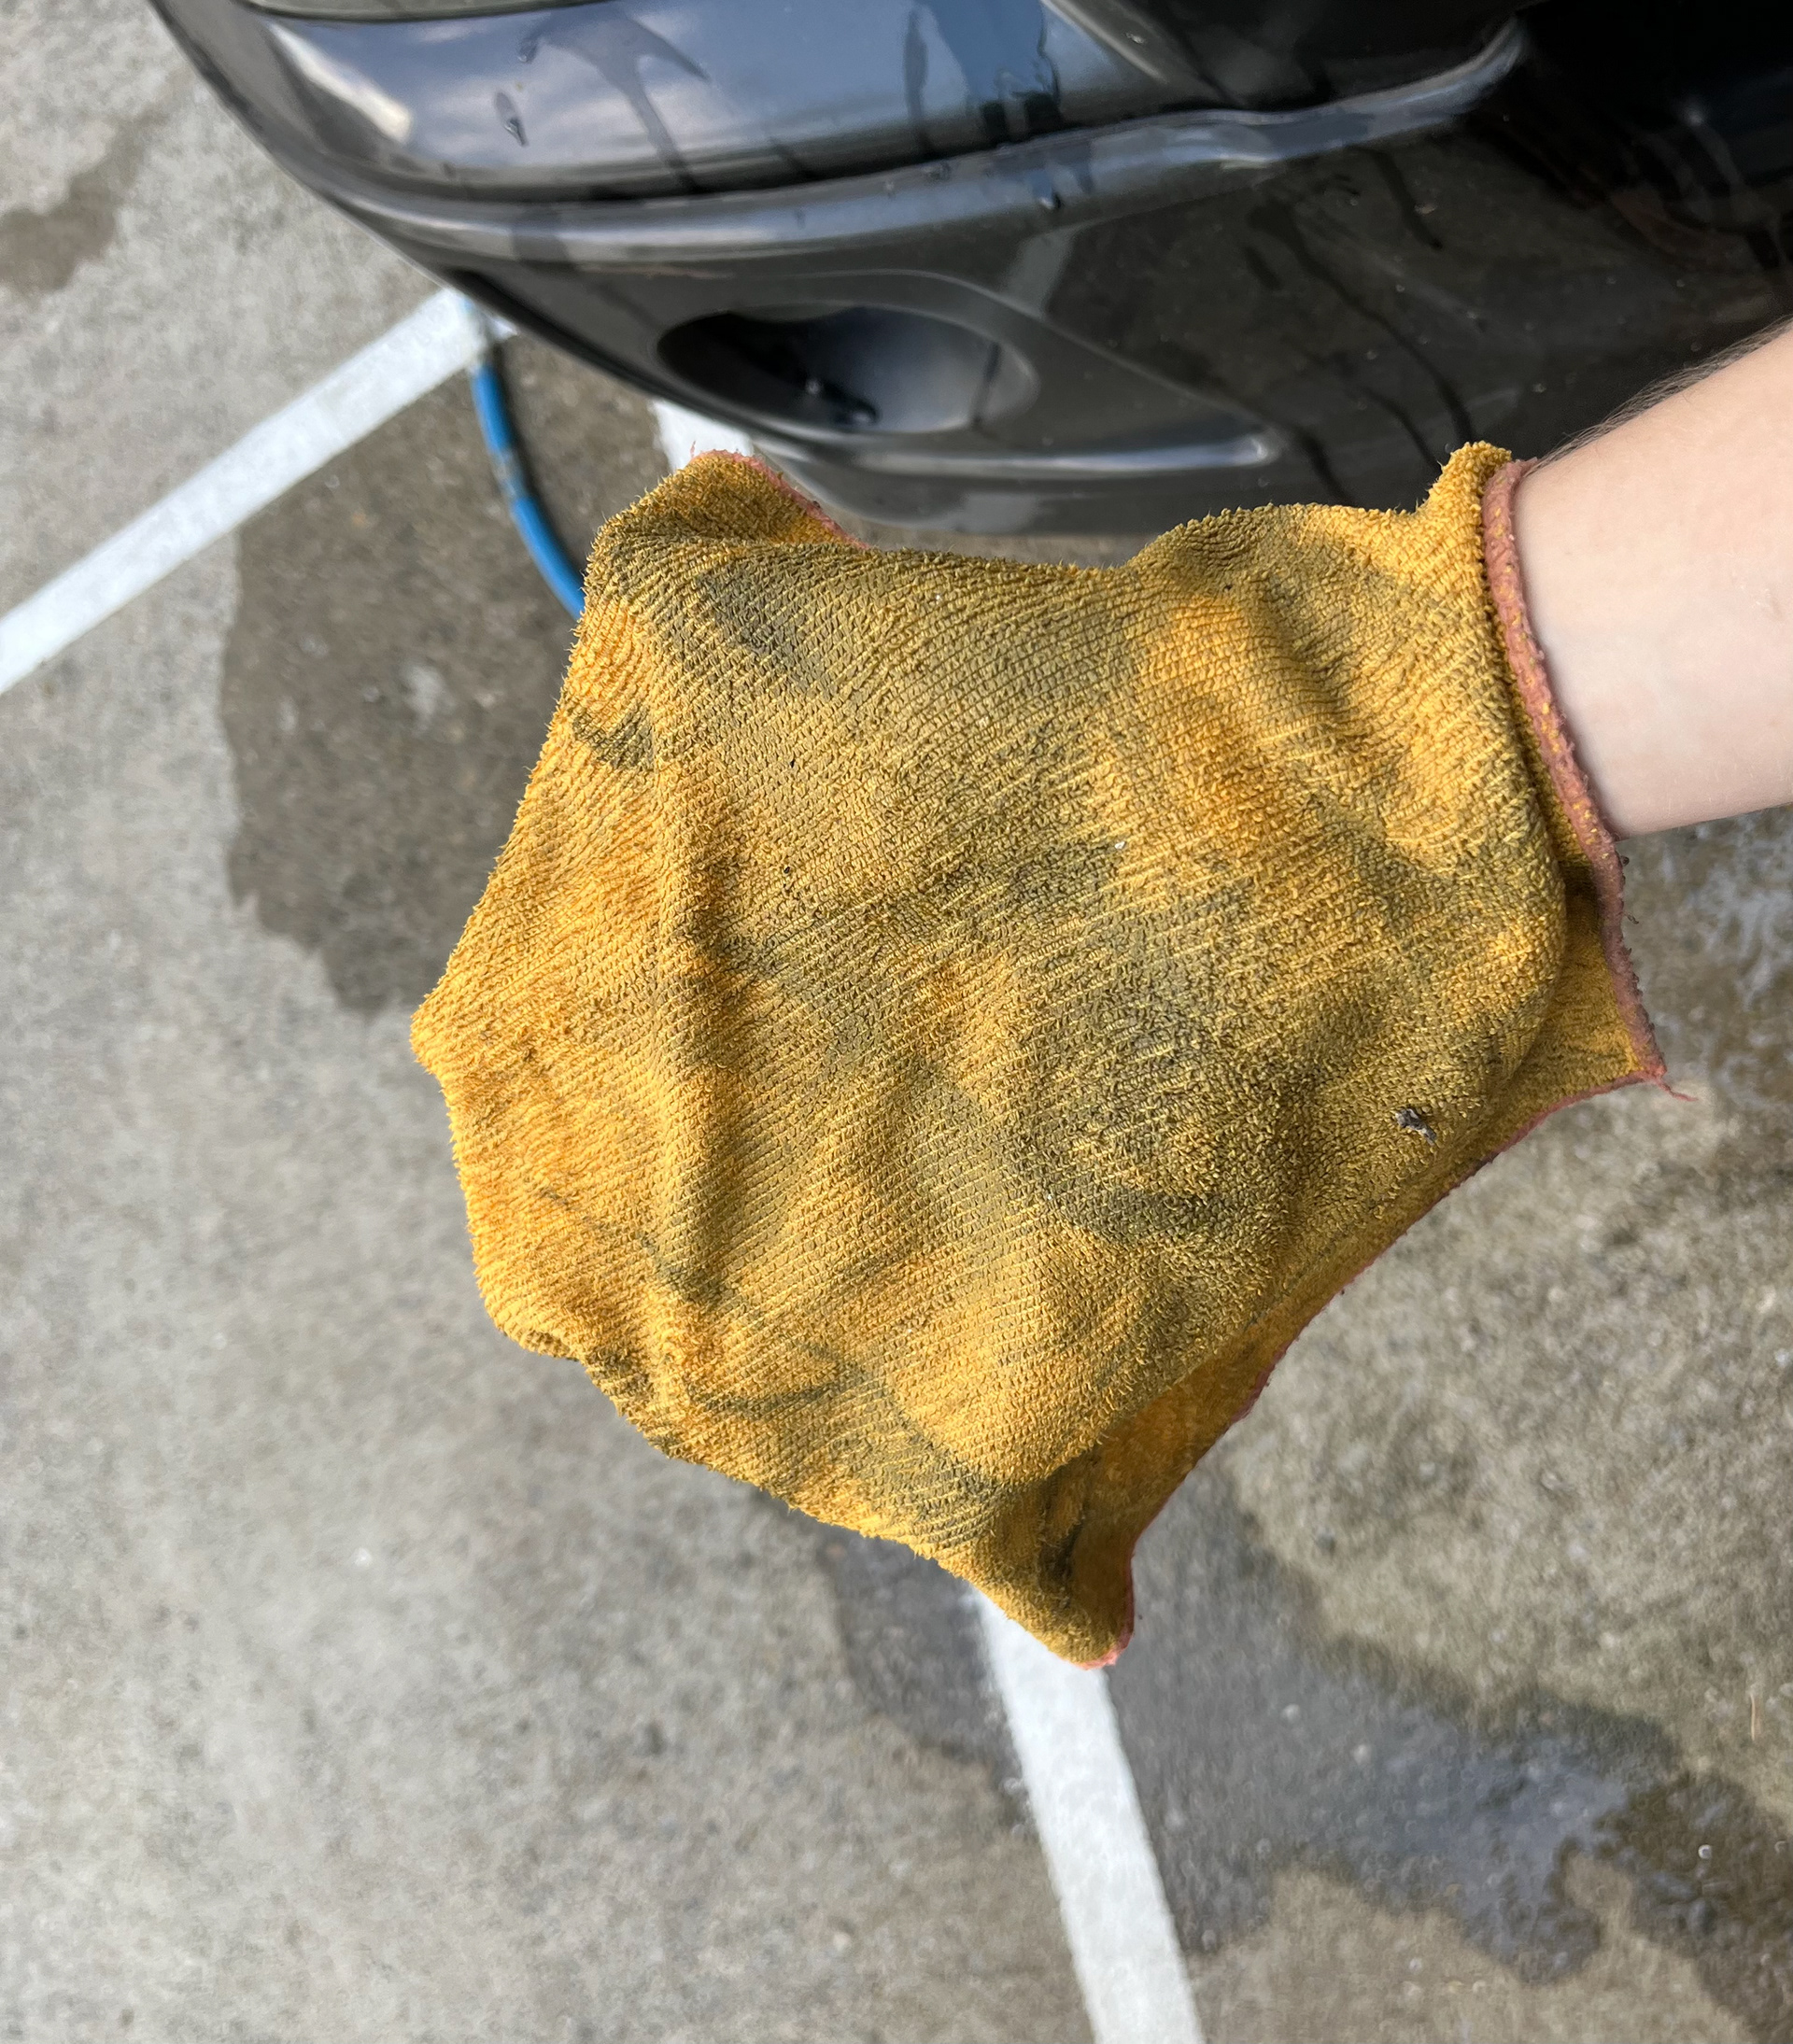
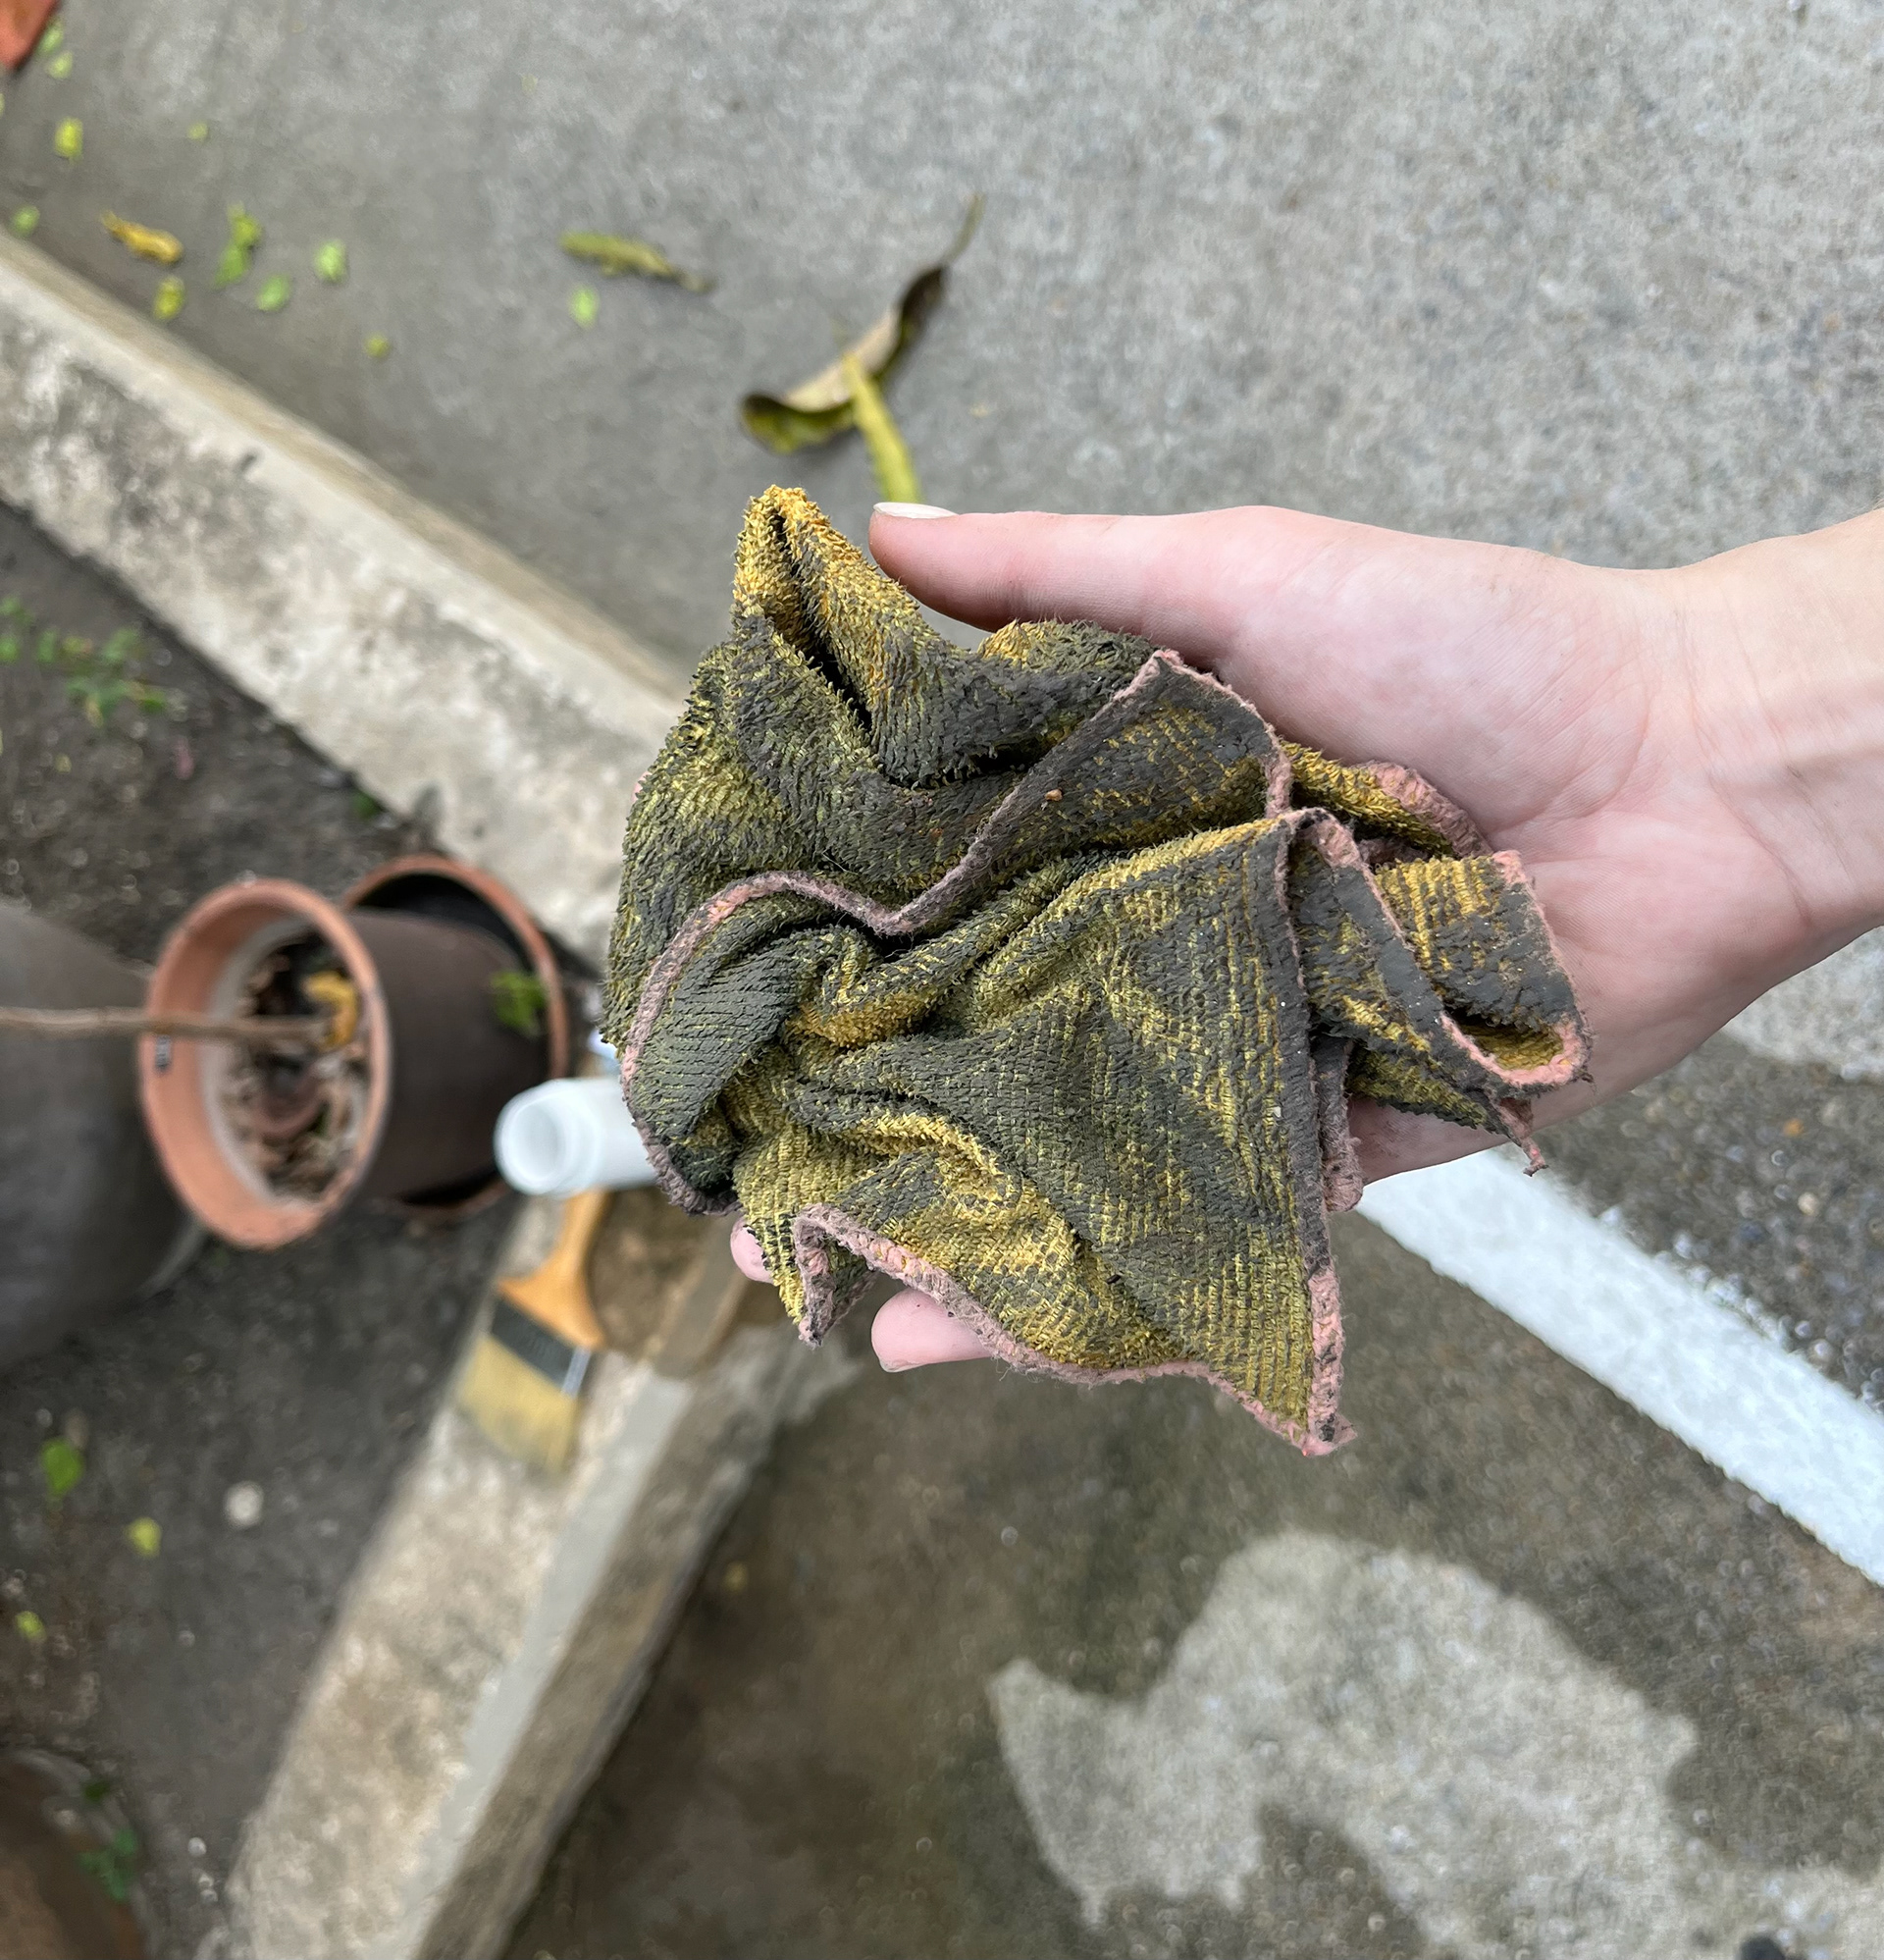
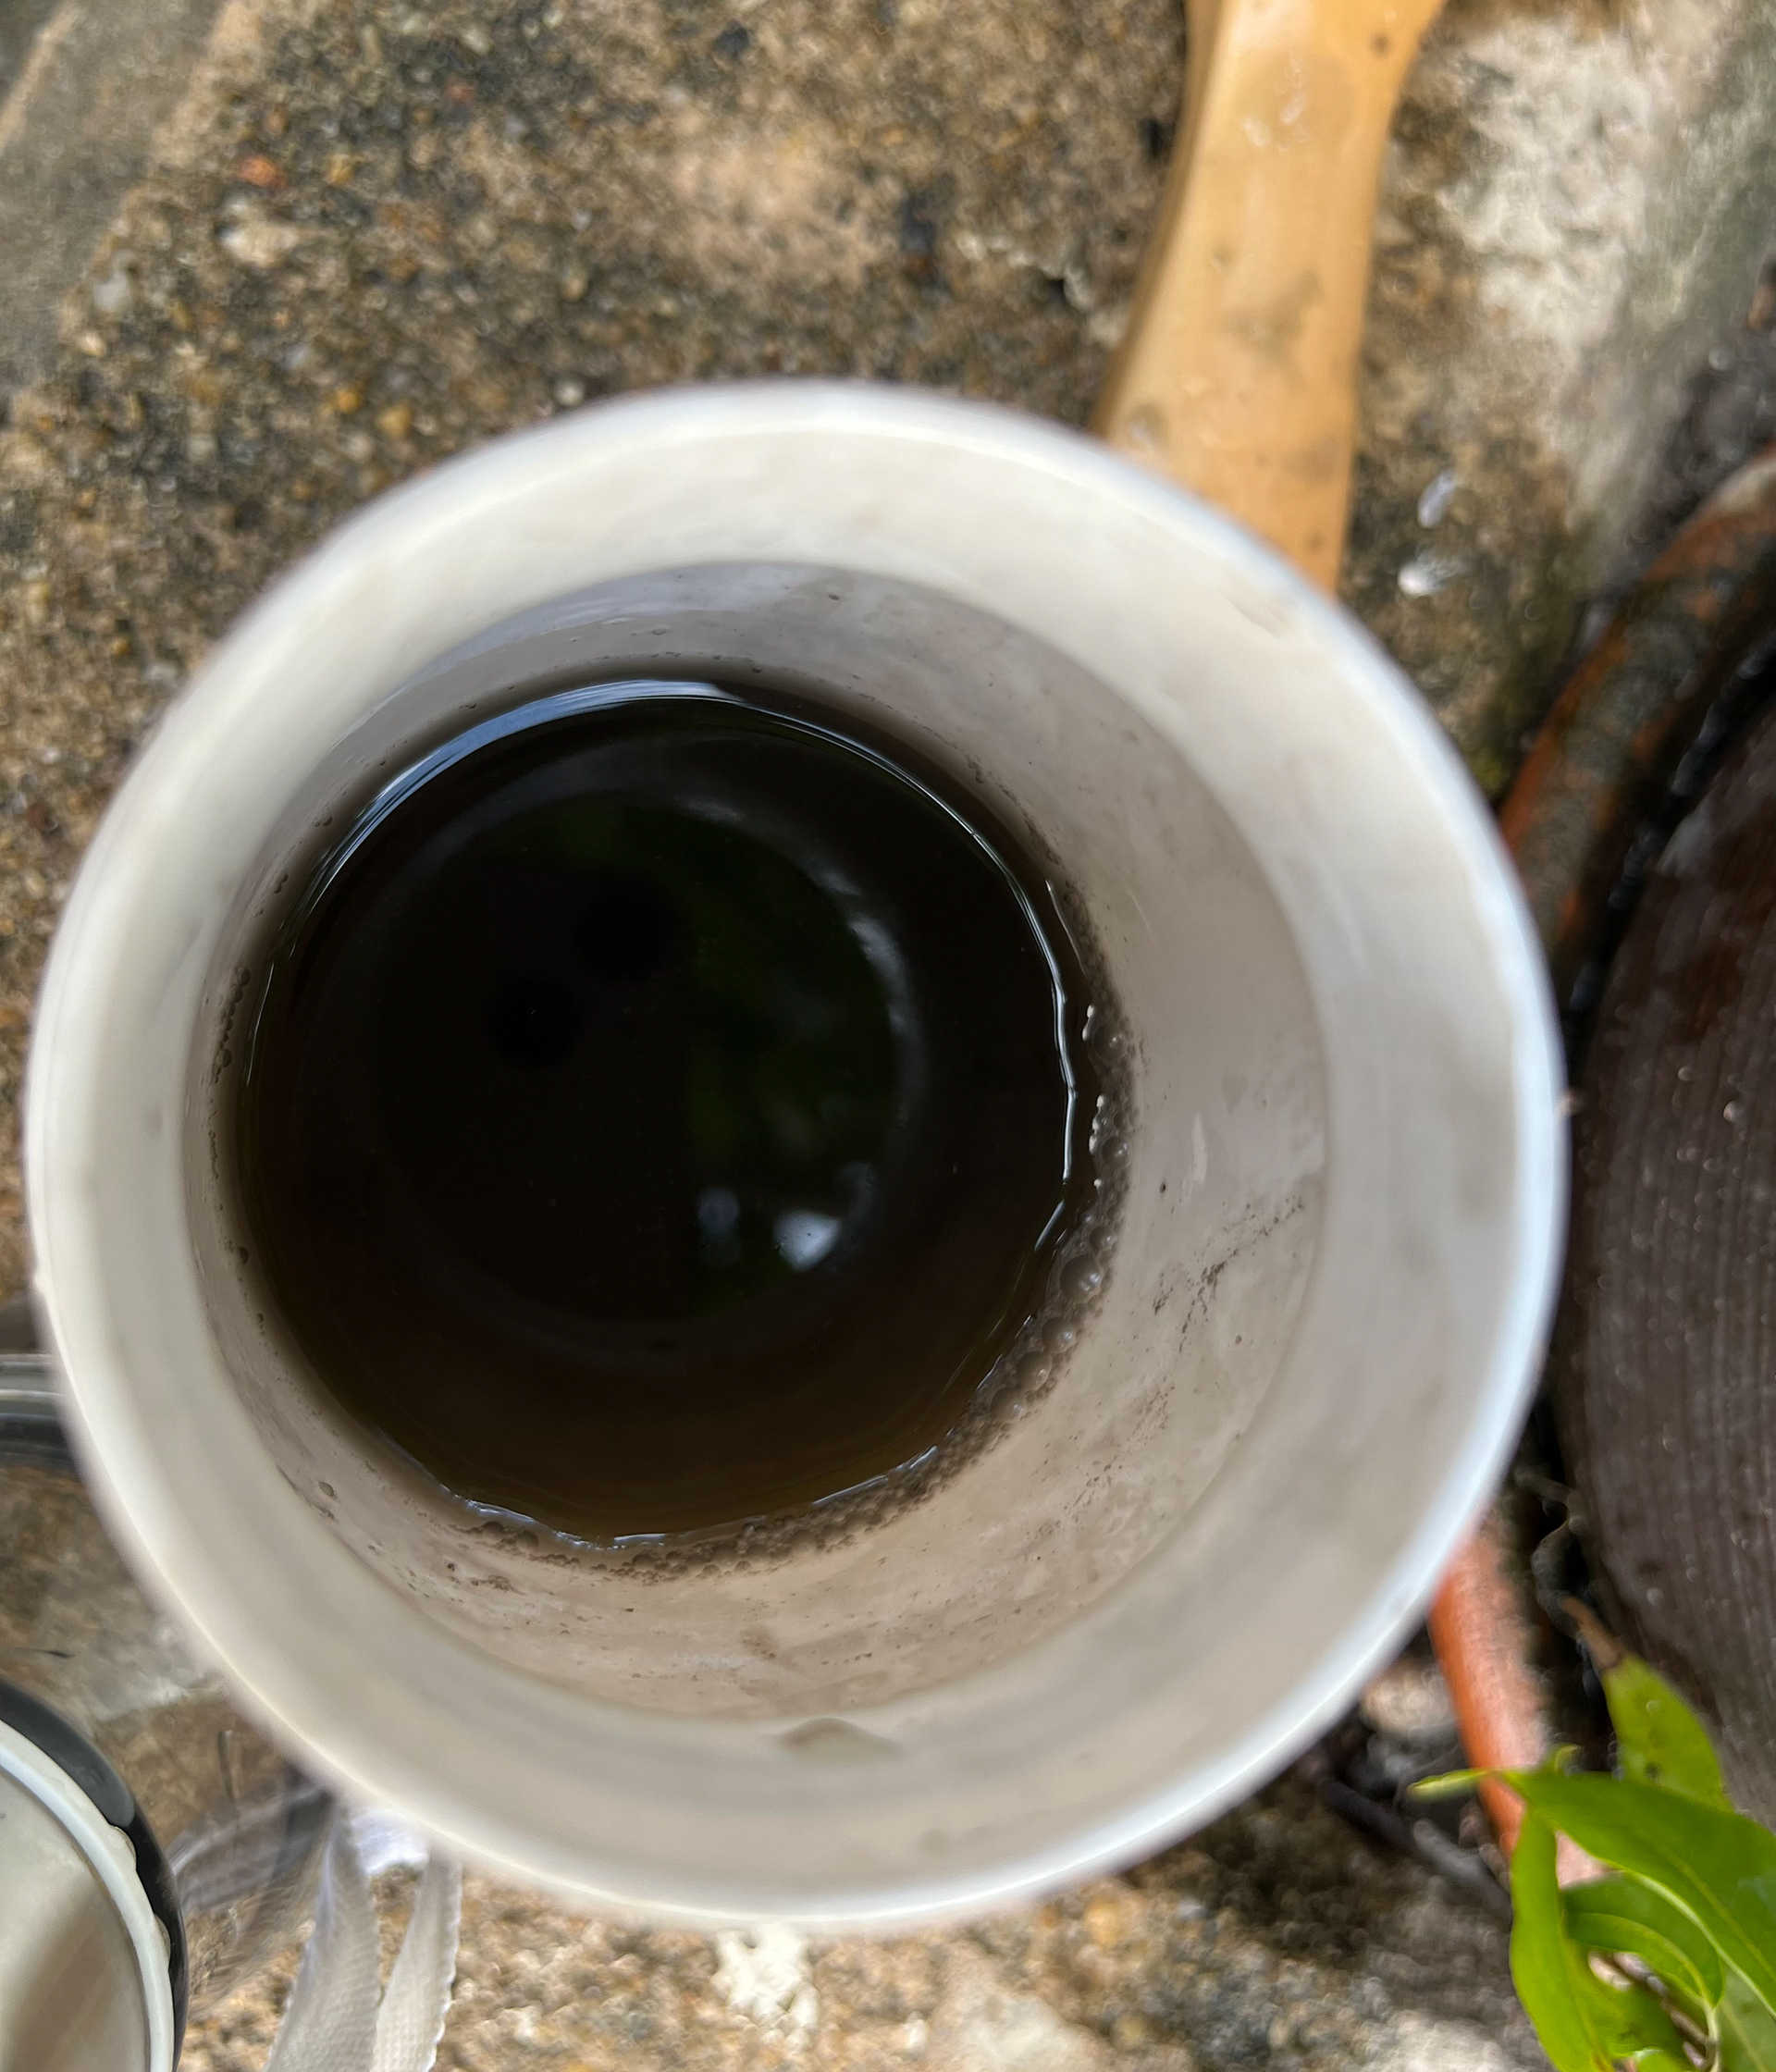
As Bangkok is one of the most polluted cities in the world, I thought I would take the opportunity while I was there to collect some pollution dust using the same technique Smogware used. After trying to figure out where would be the best place to collect the pollution, I took one look at my parents grotty car and thought it would be the perfect candidate to collect my pollution (while also getting an overdue wash). Using some water and a cloth, I started wiping away at the layer of dust on the car and rinsed the filthy rag into a bottle. I focused mainly on the exhaust pipe and the hood of the car where the most pollution had accumulated. After filling the bottle with a murky black solution, I sealed the bottle tightly for its flight back to the UK.
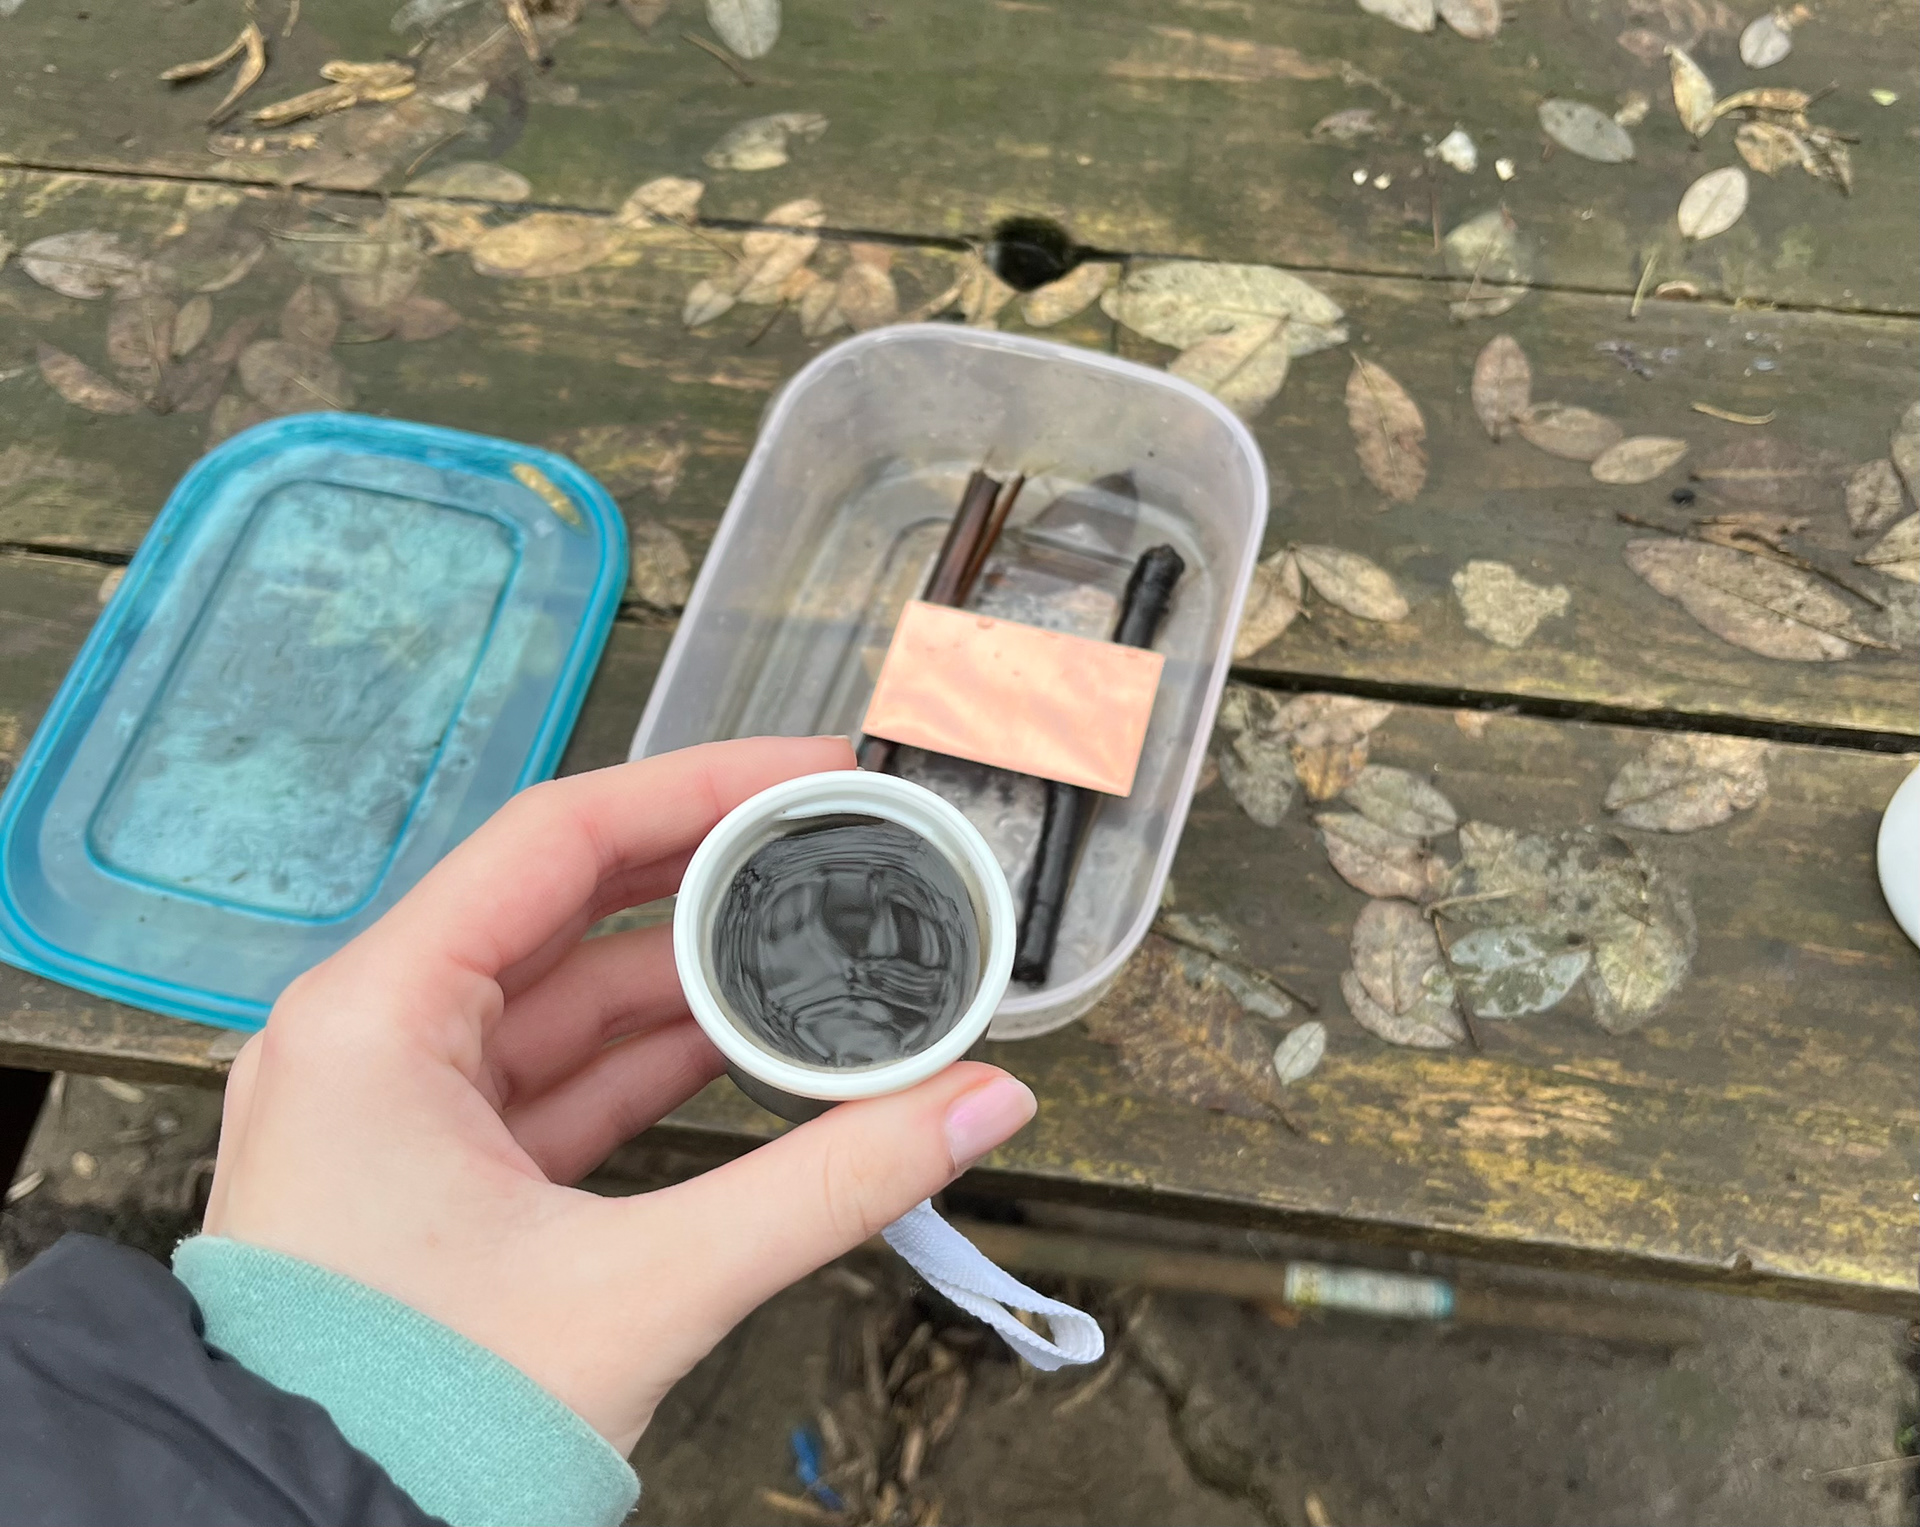
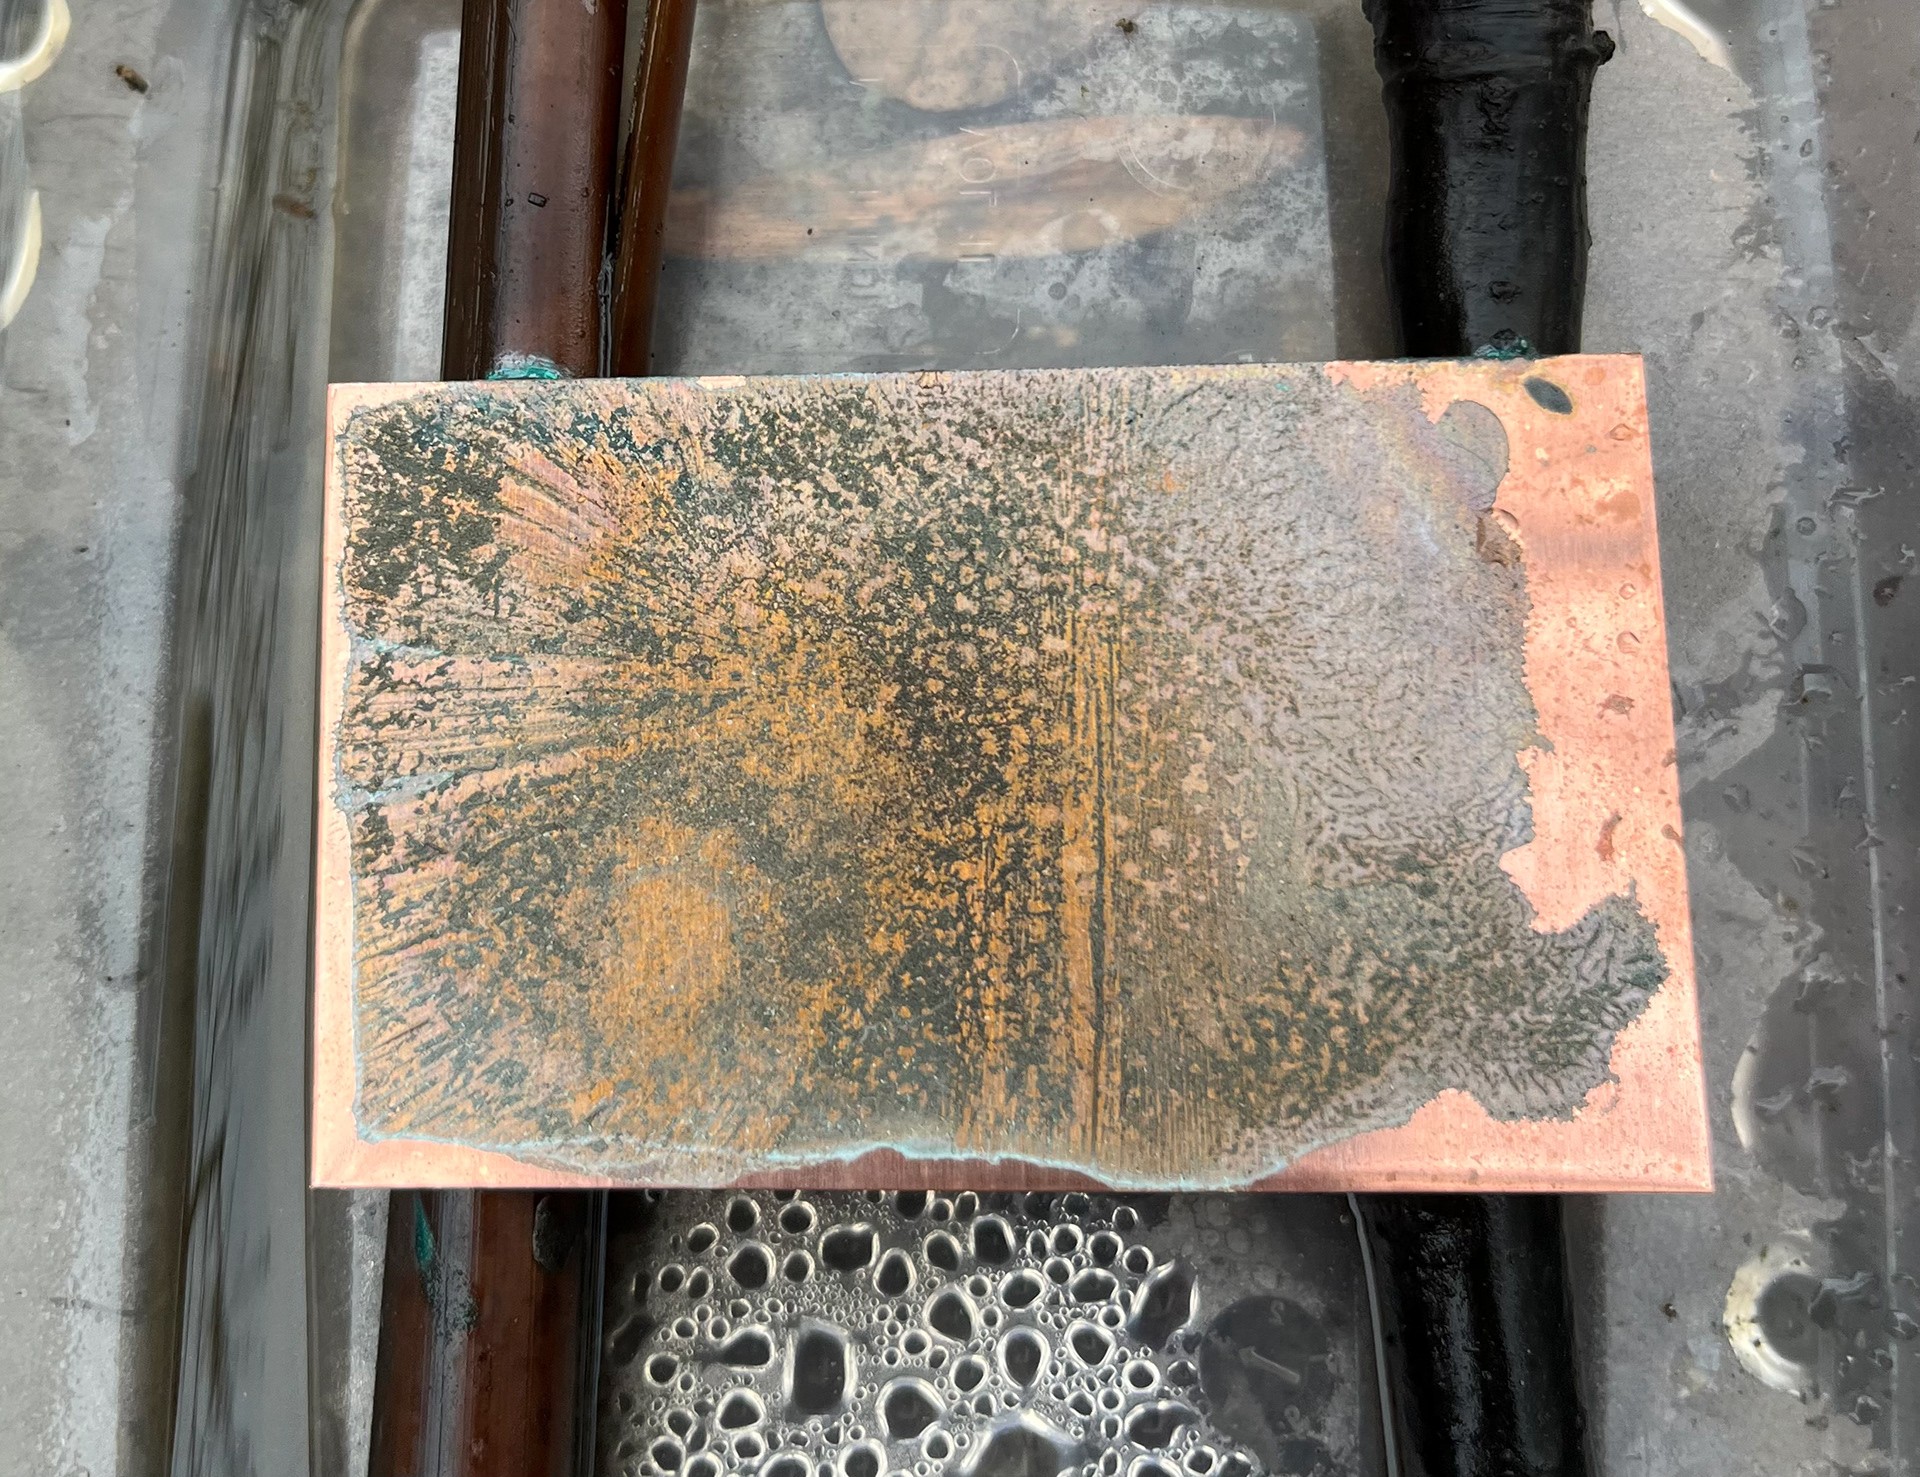
When I arrived back in Manchester, I took a lid full of the pollution water and pored it over a sheet of metal which I covered and left to sit for just over a week. I was pleasantly surprised by the results as it created an interesting surface layer of patina? Rust? I am hoping if I leave it on for long enough it may start to erode and eat at the metals surface.
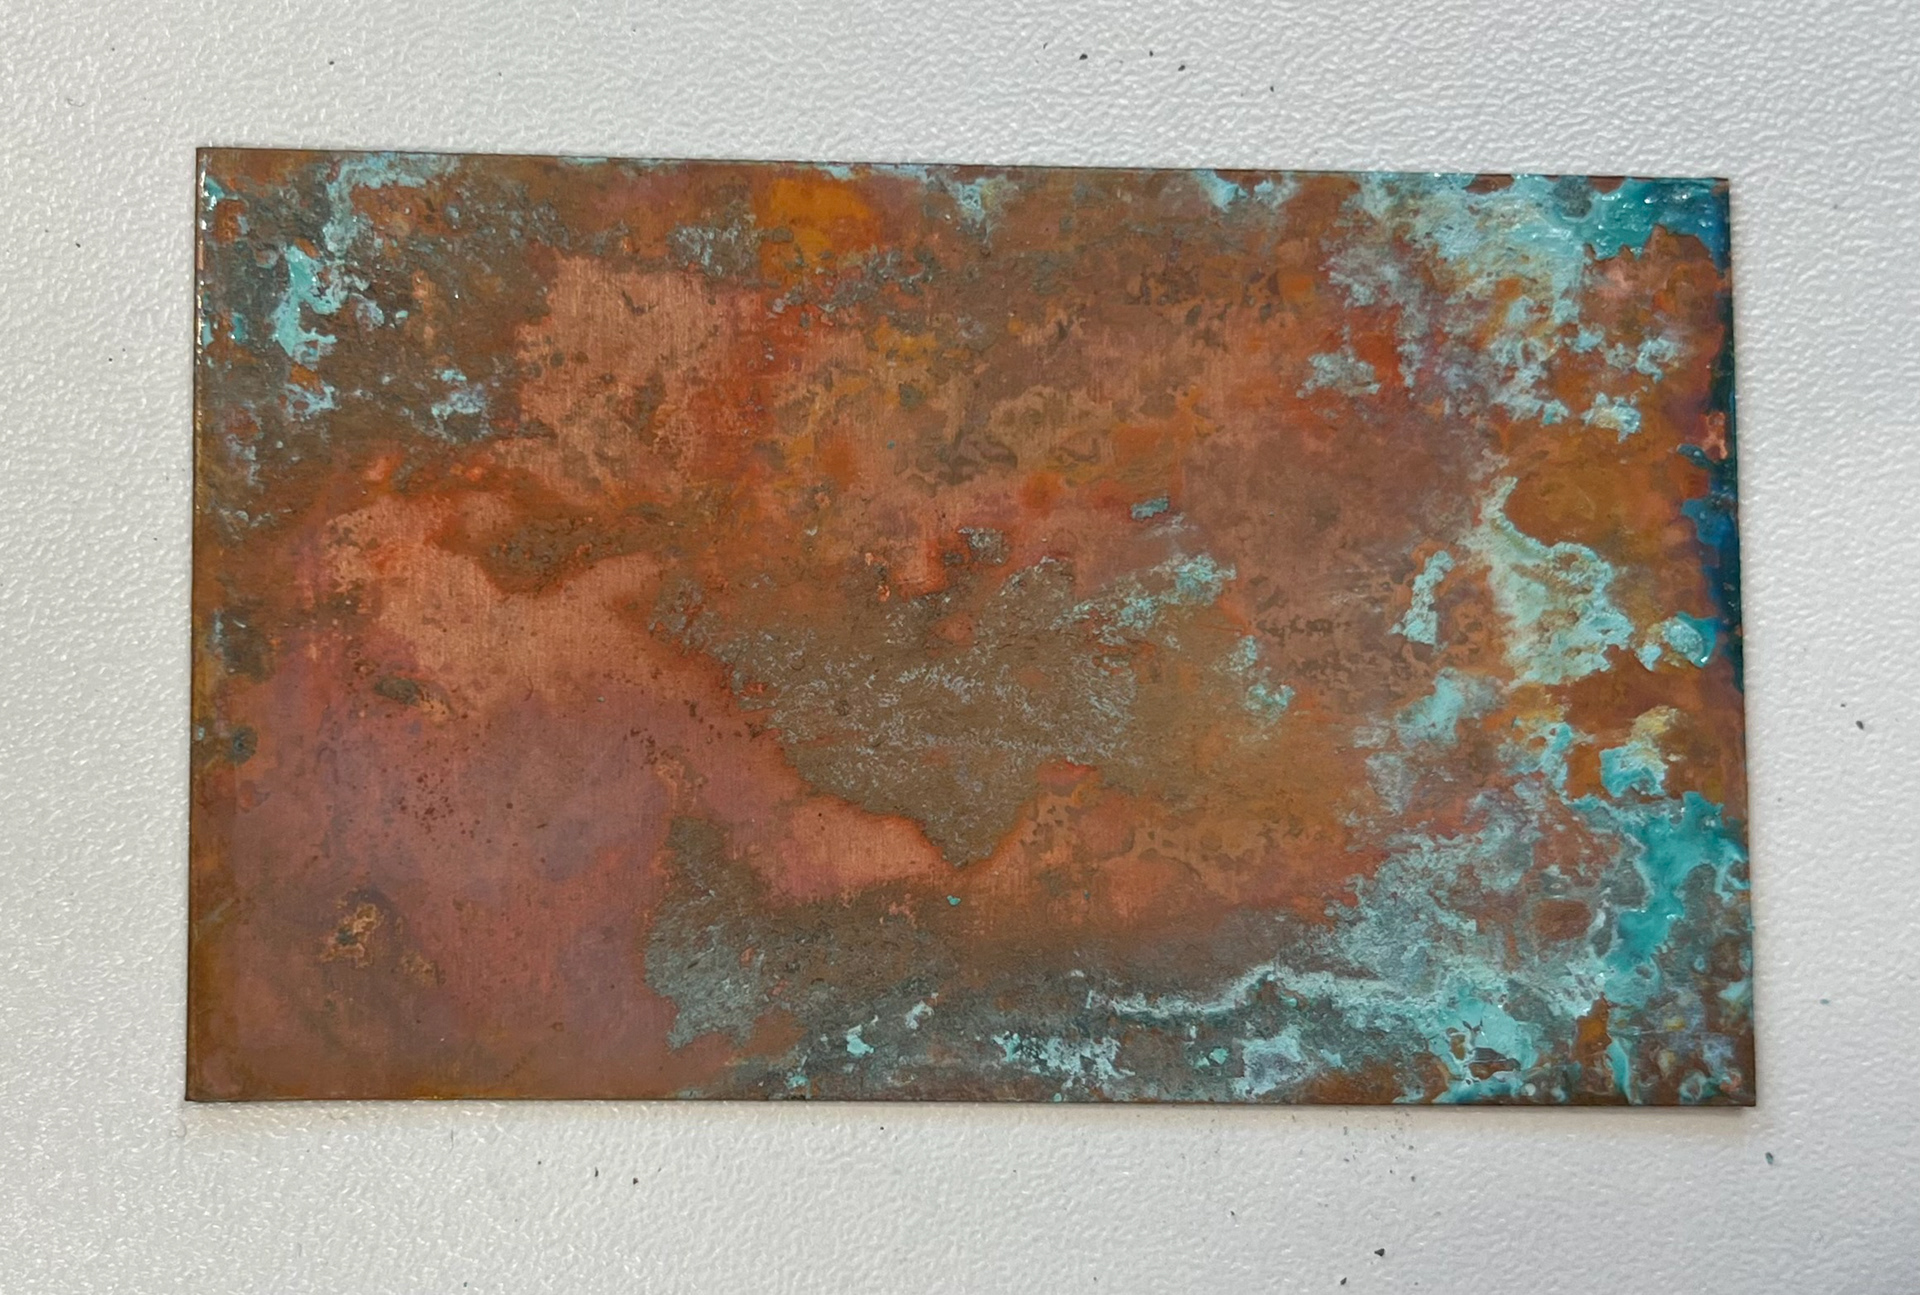
The image on the left shows what the pollution patina looks like after nearly 4 weeks of marinating. To accelerate the process, I added some vinegar and salt to the surface to see if it would aid with its corrosion. Although the piece didn’t rust like I thought it would, it produced a lovey red and blue rust/patina. This process however takes too long for me to use for my project so I will be abandoning this idea for now but hopefully pick it back up in the future.
Final Box Creation
When I first started this project I wanted to look at place oriented design and how patinas can relate to different countries round the world depending on the elements present in the soil. Every country has their own patina. To make it more personal to me, I chose the countries I feel most connected to: France, Scotland and Thailand.
However through the course of this project, and through the extensive tests, experiments and processes I have conducted, I found that I really enjoy each and every process that goes into making my boxes. I found that the story of how these objects were made was actually more interesting than the final piece. The story of a piece is exactly what patina is. It’s the marks and scars accumulated through time that gives each object and even each person their own unique patina that cannot be replicated. So for the finale of this project, I would like to display the markings of time and process through patination on my boxes. Surface texture, which has been a key aspect of this project, will demonstrate how these objects were made in an artistic and (hopefully) elegant way.
Furthermore, I am using cultural influences from Thailand to pay homage to the box shapes that resemble Thai basketry. Thai design has been a big part of my projects since the beginning of my time here at Uni and has become very important to my practice.
Firstly, I cut the copper sheets exactly to size using the digital guillotine. The measurements are as follows:
small box is 6x6cm (2-2-2), 0.7mm thick.
Medium box is 12x12cm (4-4-4), 0.9mm thick.
Big box is 18x18cm (6-6-6), 1.1mm thick
As you can see, the sizes vary incrementally and all scale the same. Once the squares have been measured exactly, and the cut lines have been drawn, I very carefully, with a piecing saw, cut along the diagonal lines. I considered cutting these lines with snipes or a smaller guillotine but I didn’t trust their accuracy and the blades could easily slip off course. The piercing saw is slow and steady and if I concentrate enough I can get a very straight line.
After the squares get cut, I anneal them well with the torch and I start folding my boxes. Originally I was folding them round using pliers, but I found that they leave uneven and inorganic folds with the box. I realised that it was actually better to mould the boxes at first with my hands. The metal is soft enough and not too thick that I can manipulate the copper like clay, giving it more organic and less ridged forms. This video demonstrates that as well as the beautiful forms found between.
Colour is very important. It serves not just as an aesthetic value but also a practice one. In metal, the colour of the piece when torching determines the temperature, and the temperature tells you what you can do with it whether its, annealing, soldering, brazing and more.

Once I can no longer fold the box round with my hands or pliers, I place it on a stake that is just smaller than the top of the box and using a mallet, I start hammering it into shape. I hit the corners of the box to get them sharp and flush to the rest of the box and work my way up to the ends. This process is quite fun but I have to be careful how hard or where I hit as it could really damage the box form.
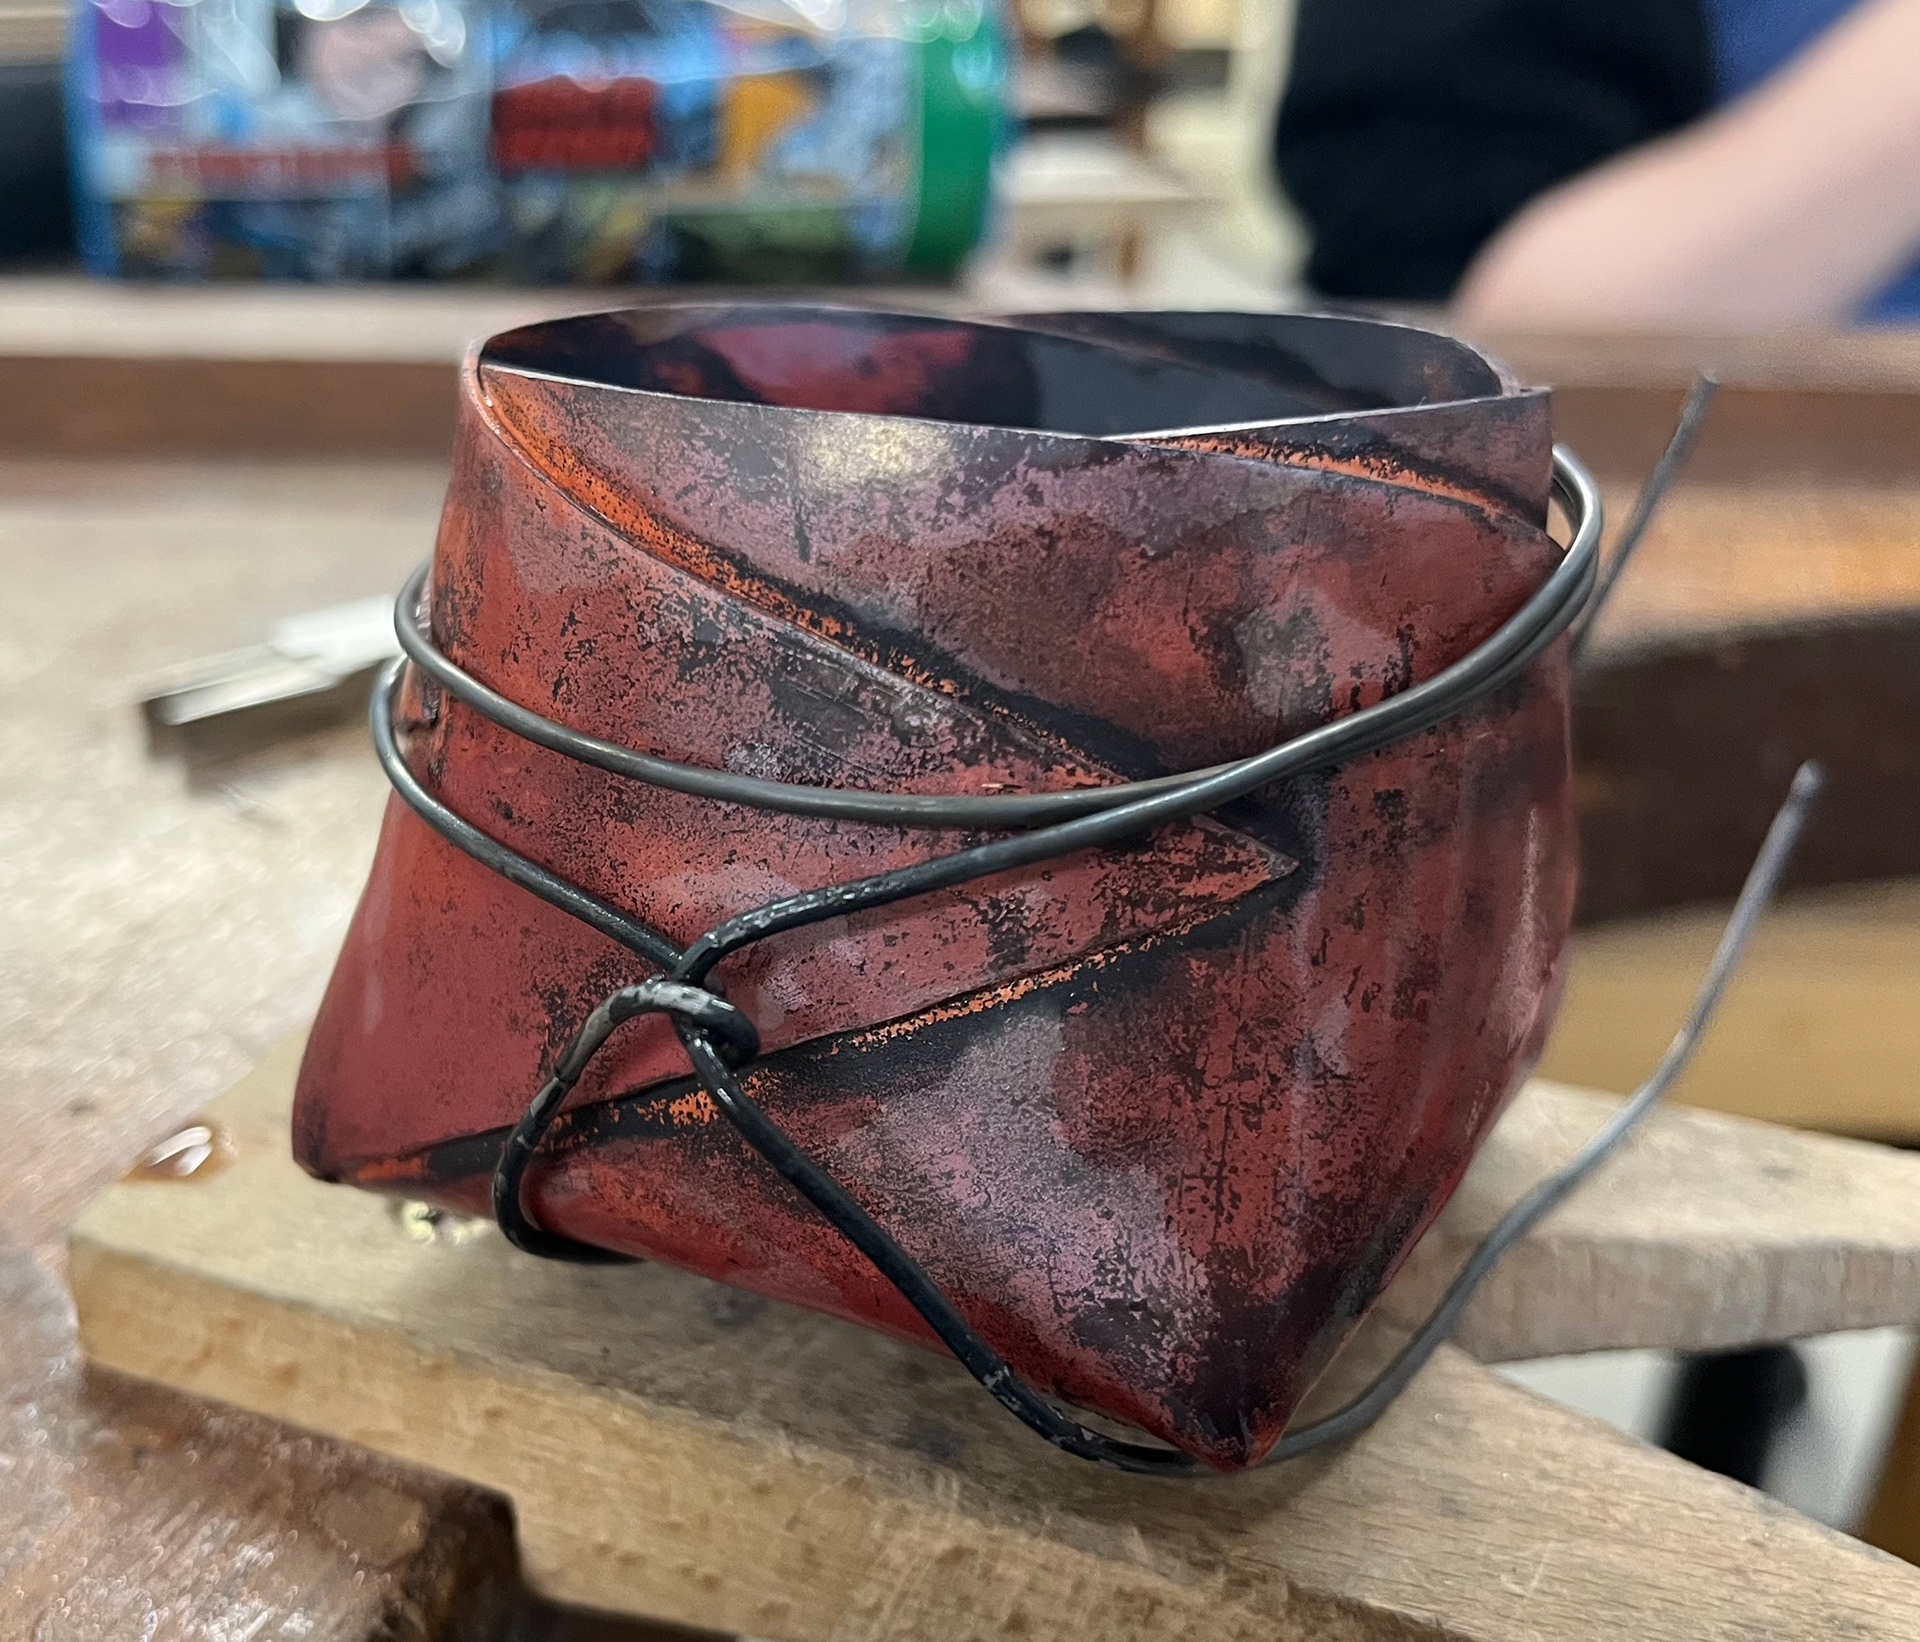
This is what I mean by damaging the form of the box. While hammering down my largest box, I couldn’t quite get the fold points to be completely flush with the rest of the box. So in my impatience, I continued hammering away and actually started denting the box at the fold corners (the images don’t display this well sorry). This meant I had to start hammering from the inside of the box to try to buff it out. This didn’t fix my springy folds however, so I tried using binding wire to squeeze the box tight so that all the folds where pressed against the box and annealed it. Shocking it by dunking it in water, froze the fold ends pressed to the box and remained that way. Problem solved.
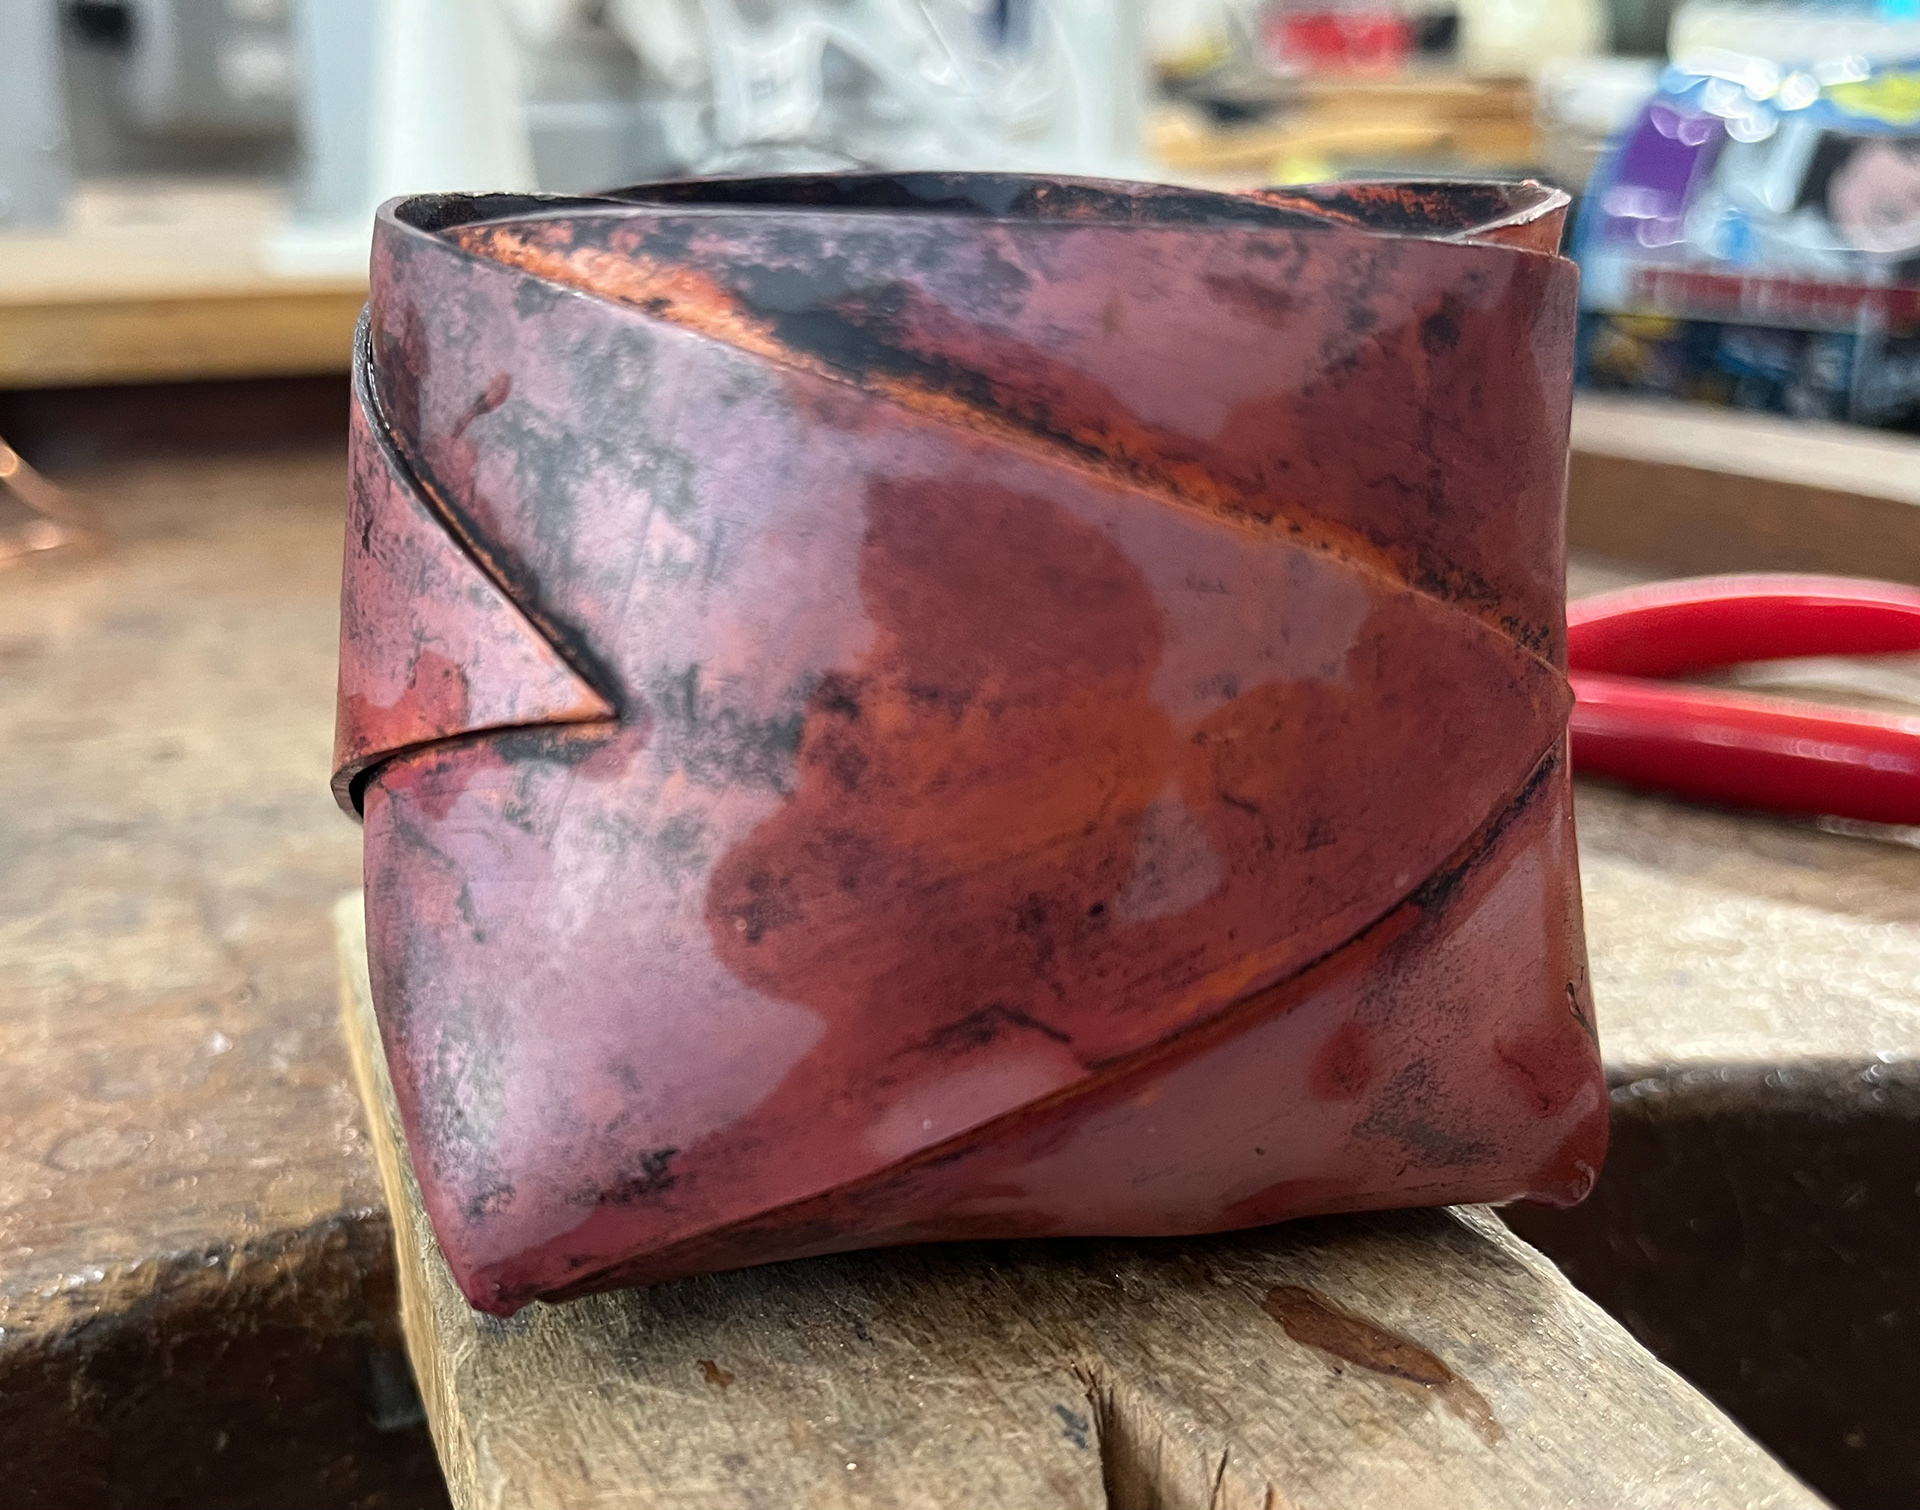
These are the final 3 boxes.
This video demonstrates how I did my repousse for the lid of my big box. For this I need repousse punches and a hammer. The copper sits in a bowl of pitch which keeps the piece together and prevents it from moving. I was originally going to punch a pattern in the base of the boxes but I decided to put them on the lids instead. This is because I liked the simplicity of the boxes as they are and thought that having a repoussed bottom would ruin that a bit. Also I liked how the boxes had a spin created by the domed bottoms and thought that if I repoussed them I would lose that spin or make them unbalanced where they stood.
These images show the process of doing the pattern. I start on the back side and hammered straight harsh lines that are the outline of the pattern. Once I flip the piece over those lines show through but are far less severe and more domed and soft. On this side I start the chasing where I give the front side more relief and definition. The image on the top right shows the piece after. This is a process I am still learning so I was not very happy with many of my lines as they were not very smooth. You can still see the marks the punches left but I suppose it gives it a bit more character.
Once I finished the repousse for the lids, I thought it would look cool if I vinyled the inverse of the pattern so that they stand out. After this was done I put it in a sealed container with ammonia and salt and let it marinate for a few days along side the big and small box base.
Then I used a buffing tip on a Dremel to sand down the patina that seeped through the vinyl and to give the copper a brushed finish. I didn't want the boxes to have a high polish so I decided to simply lightly sand it down leaving a semi matte/semi polish finish which I think is a lot more natural looking for copper.
Final Pieces
All in all, I am very happy with how my boxes turned out. I absolutely love the forms and the colours pop spectacularly. I am very happy with my skills in applying the patinas as they look natural with this bubbling and antique look. I could not be more happy with the forms and I am so glad I found this way of displaying copper’s materiality in a very bespoke and elegant way. Of course there are many things that could be improved upon. The finish of the brushed surface could have been done better and given it a more even surface. The edges of the lip could have been sanded down to a more rounded and smooth finish. And the pierced fold line could have been cut straighter. Despite this, my efforts in this project have really shown off the beauty of patinas and has made me more driven to develop this further in the future.