A continuation and development from my last project, I will be exploring the refinement and diversity of my vessels in a professional context.
Initial Ideas
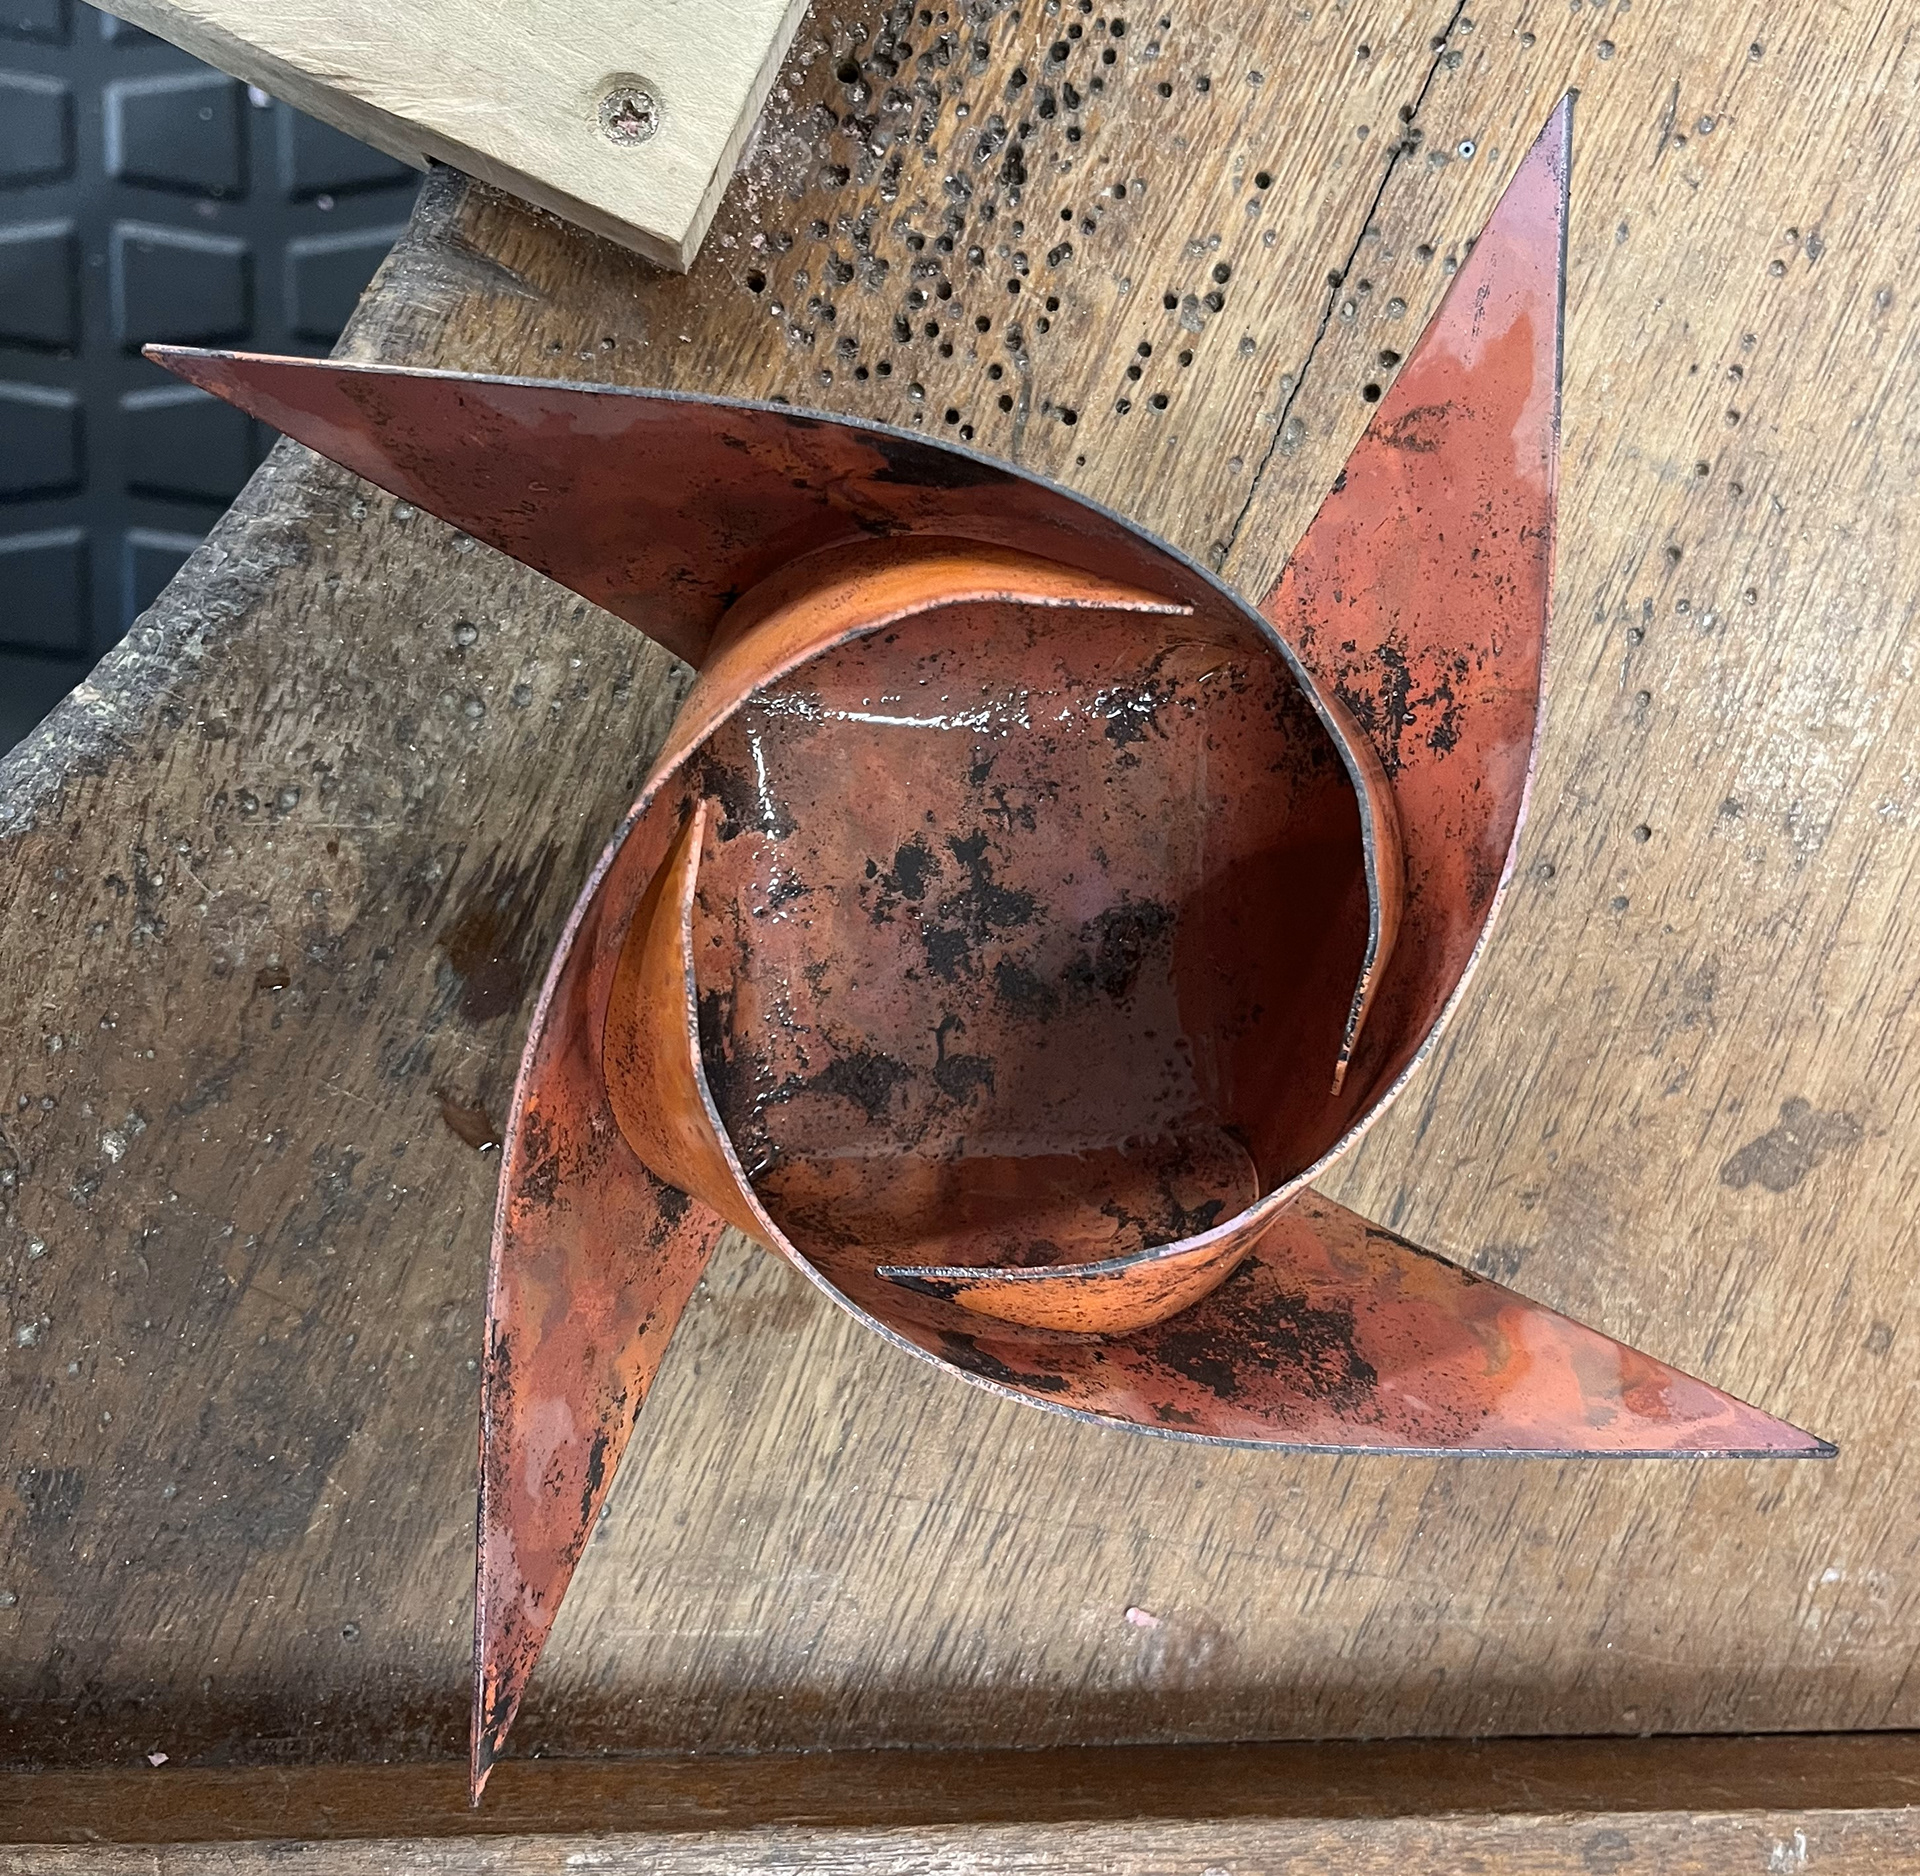
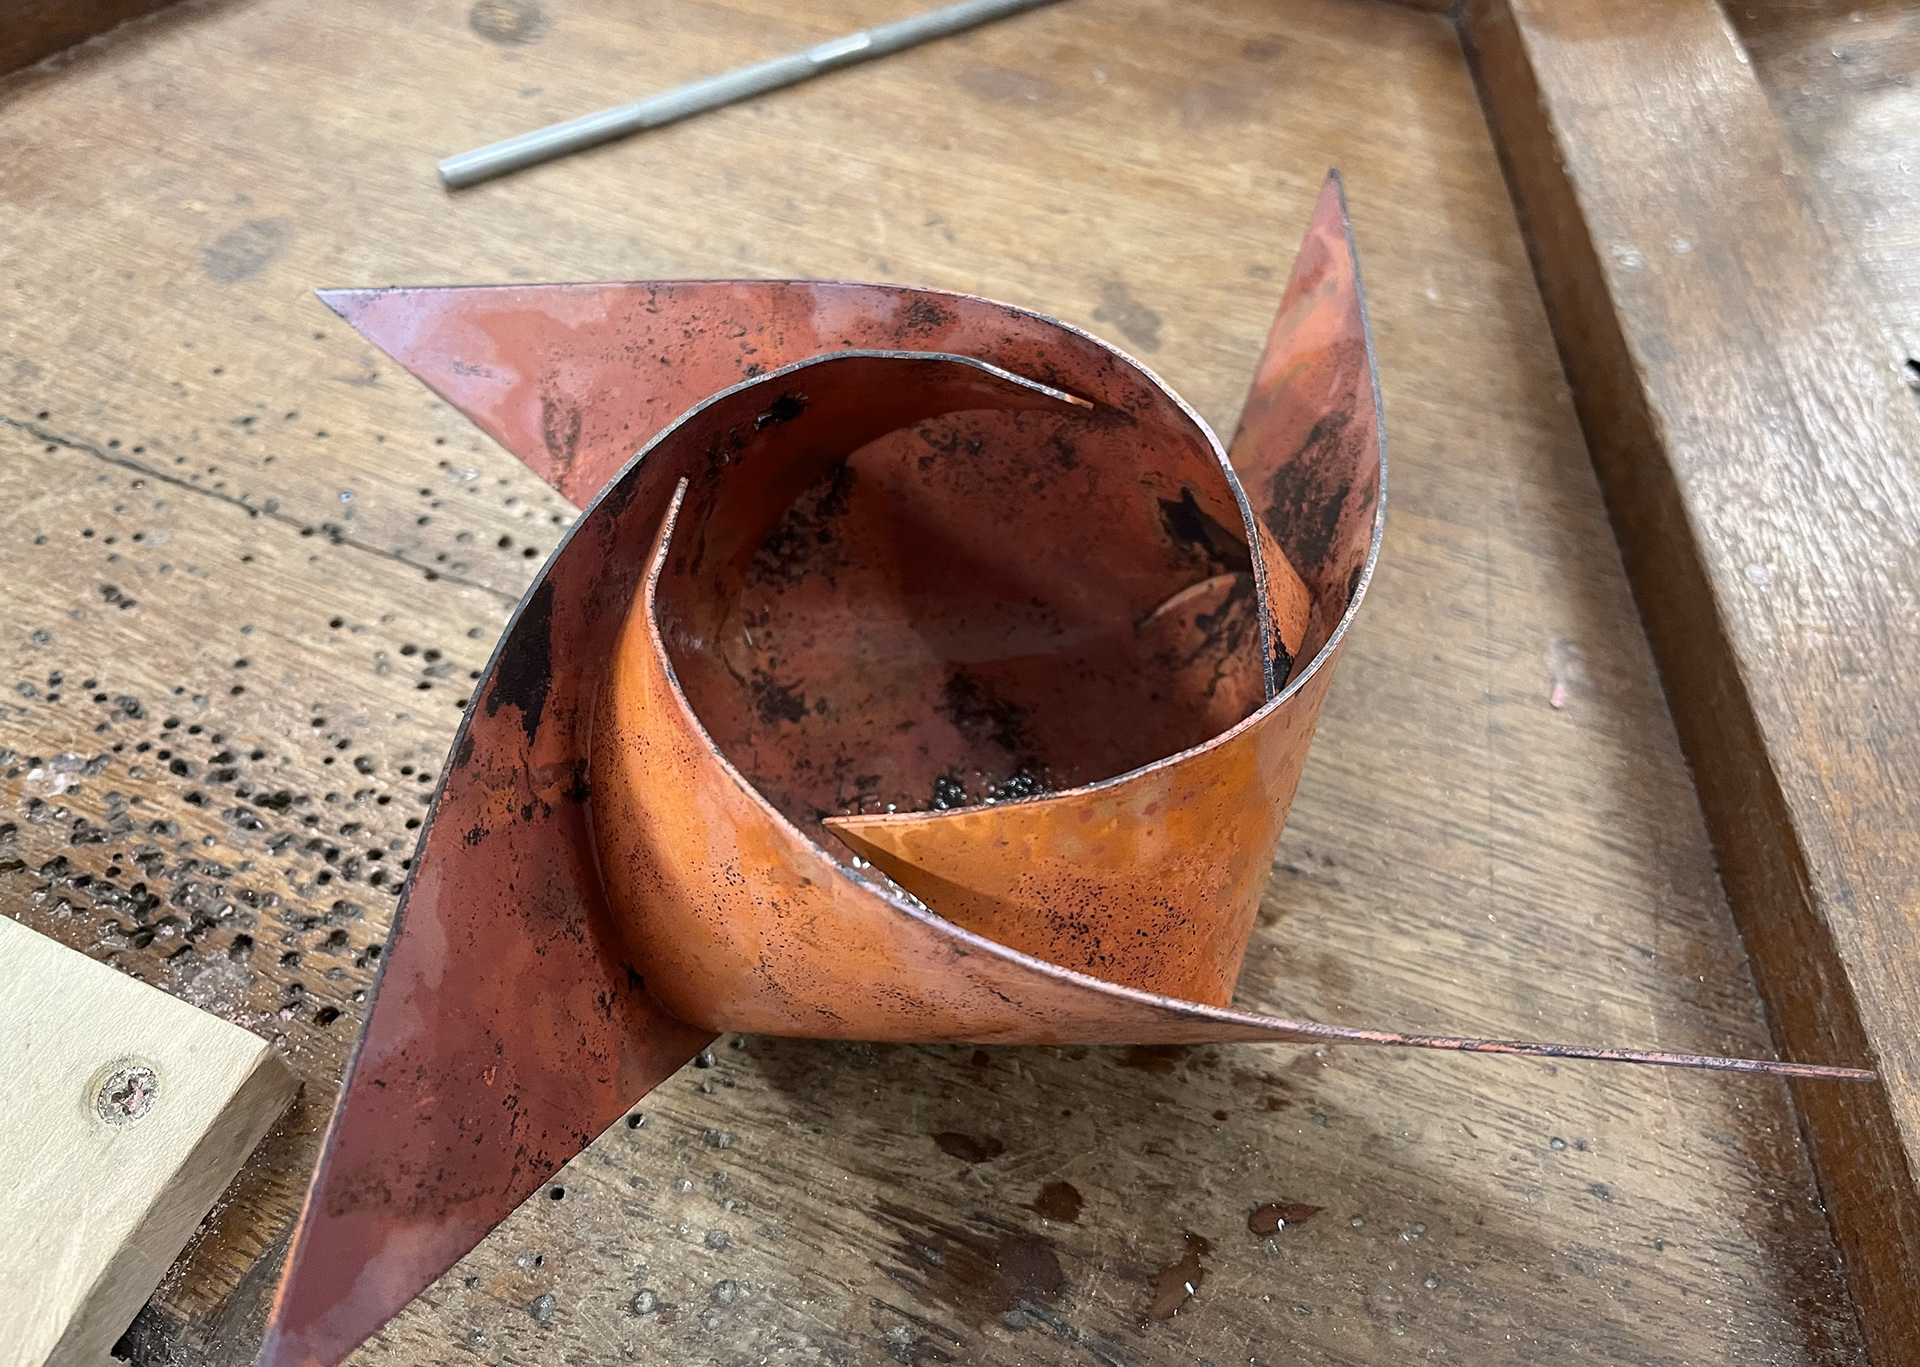
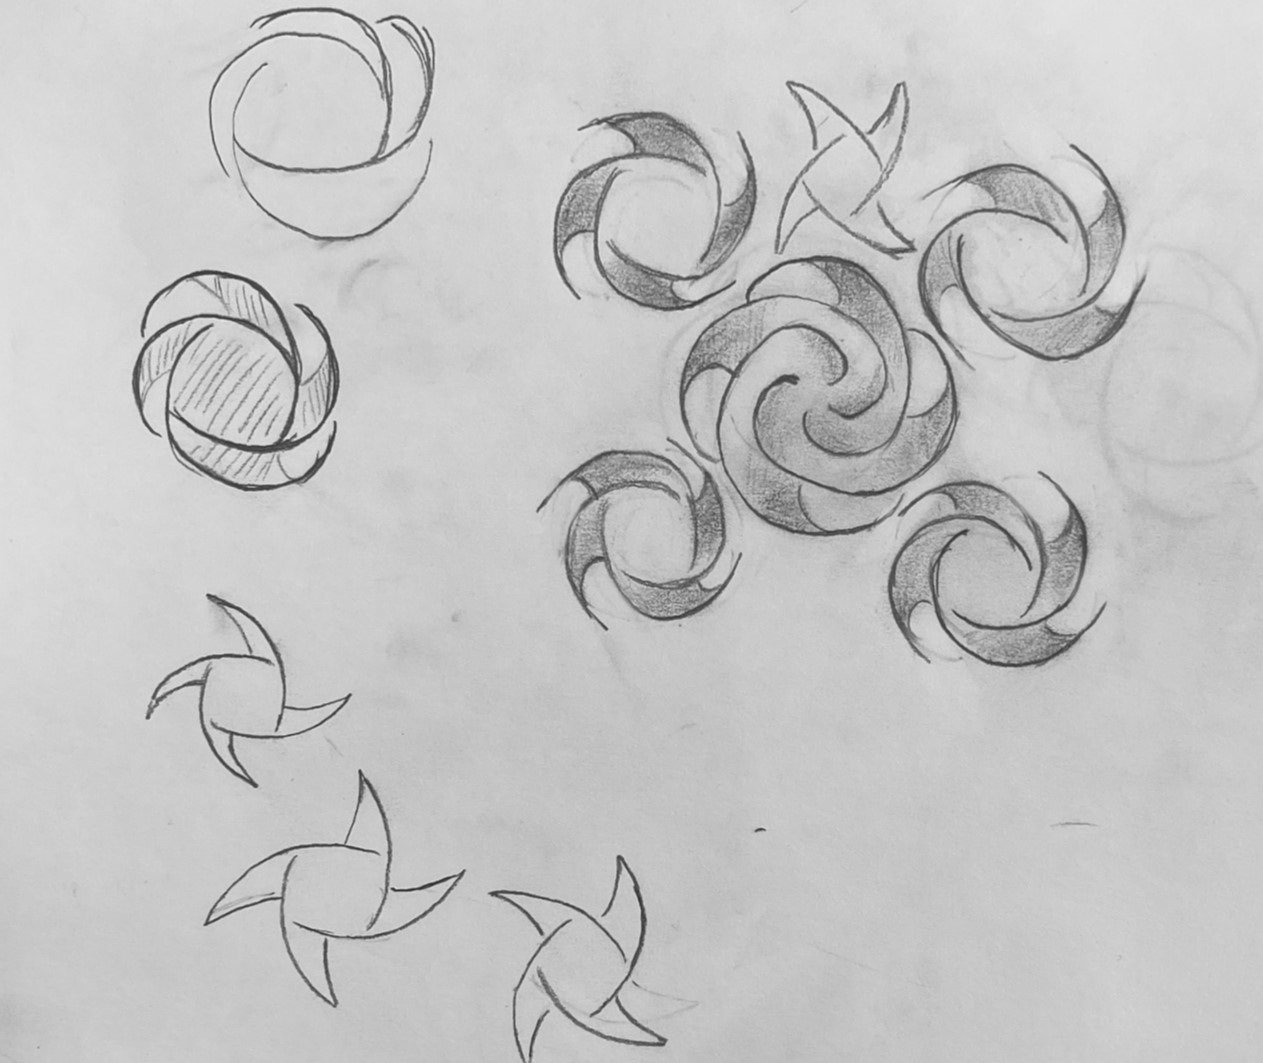
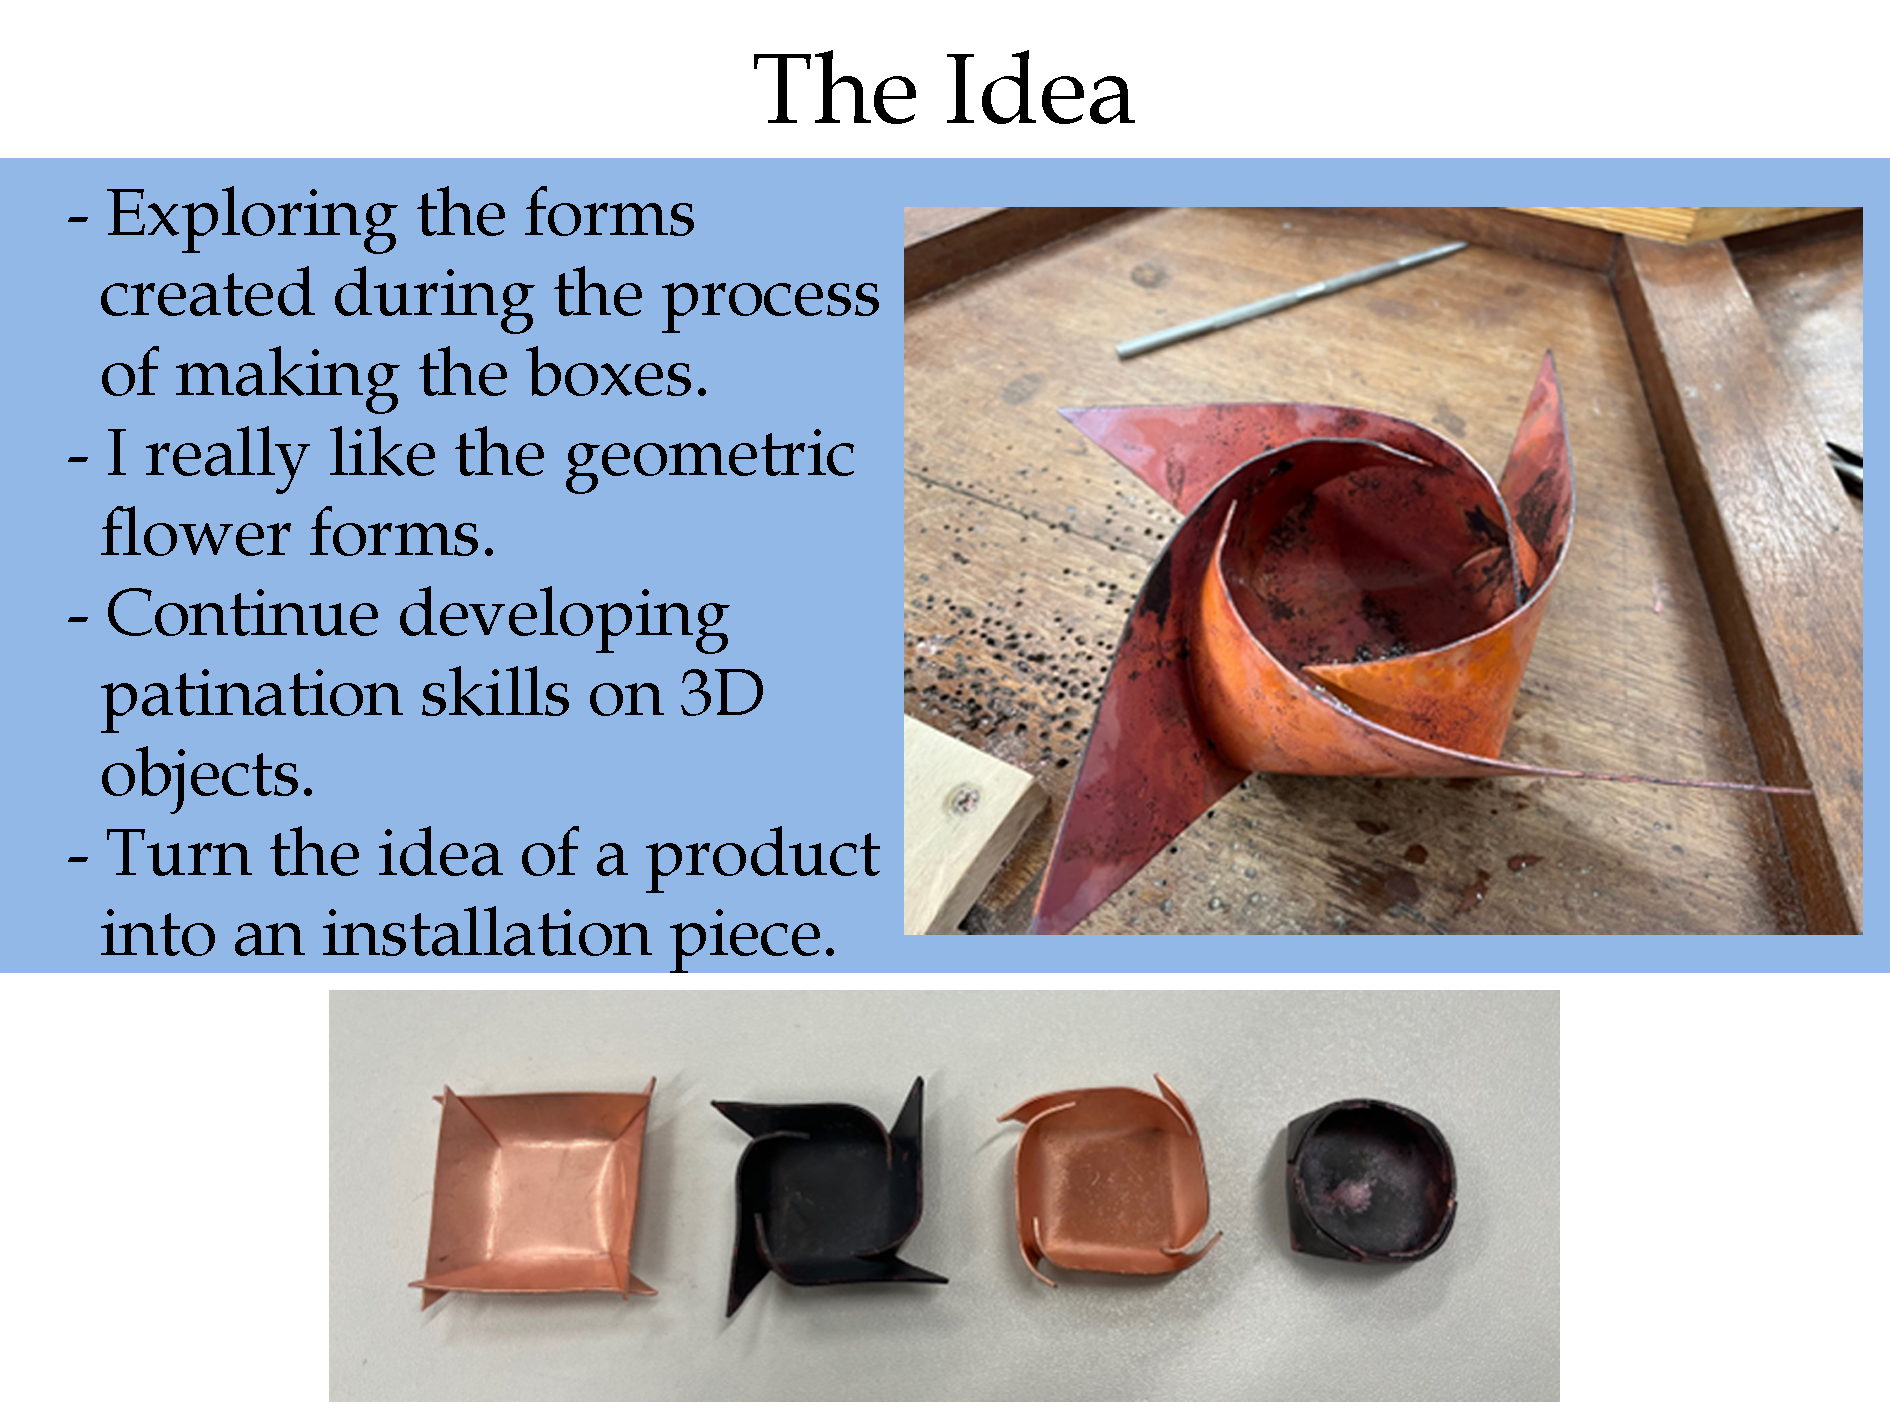
When I first thought about what I wanted to do for Unit X, I thought it would be interesting if I could do an installation piece. It is something I have always wanted to do and I thought it would be a great achievement to build a sculpture for my final unit at Uni. I was inspired by these geometric flower forms that were created as a result of forming my vessels round and I thought that these forms could look really lovely in a collage as a wall hanging piece.

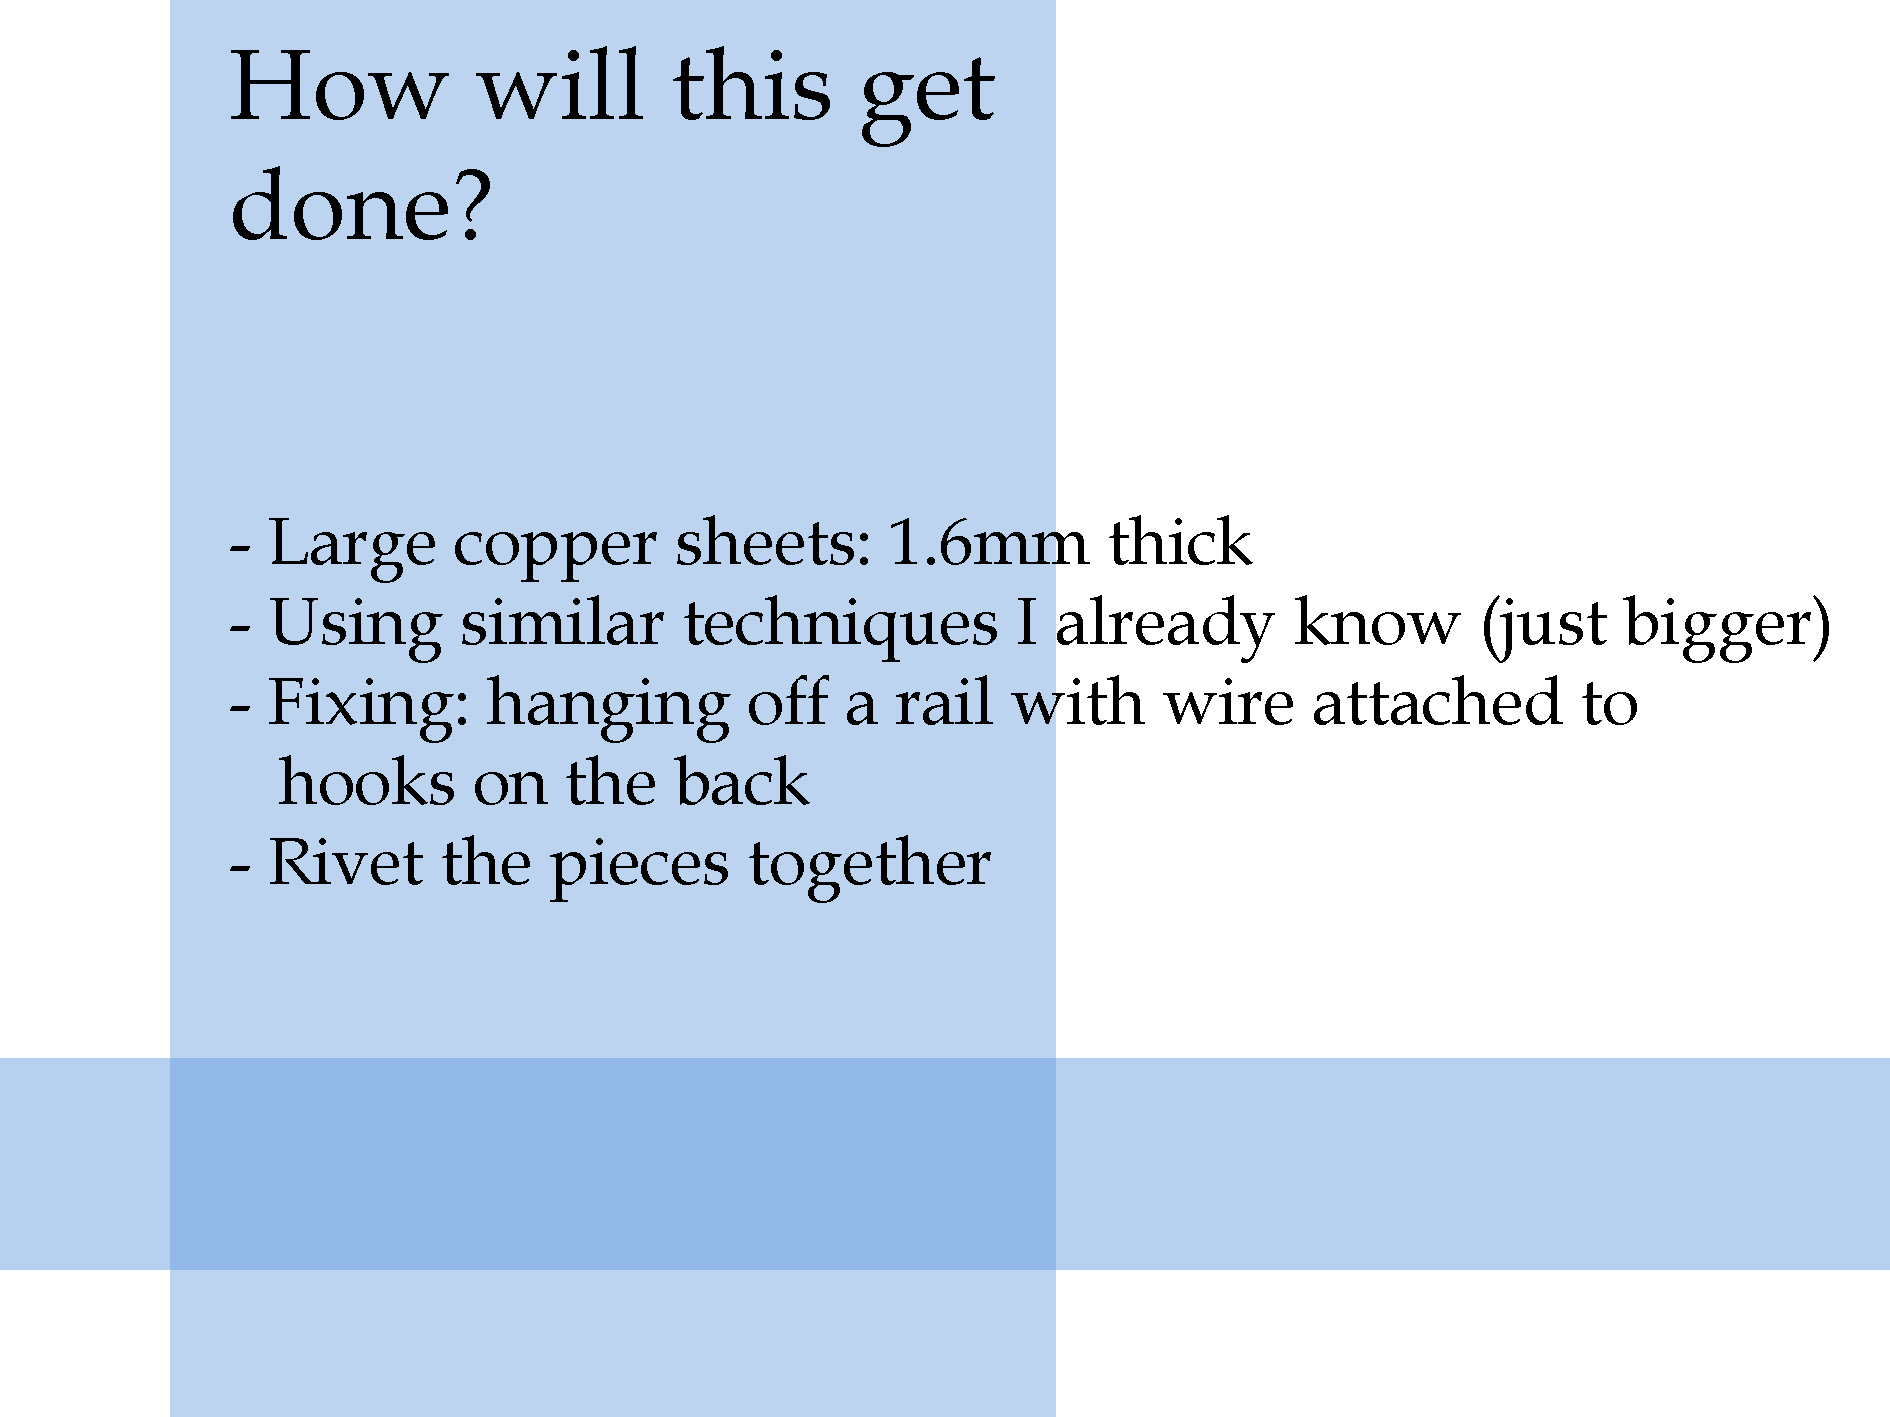
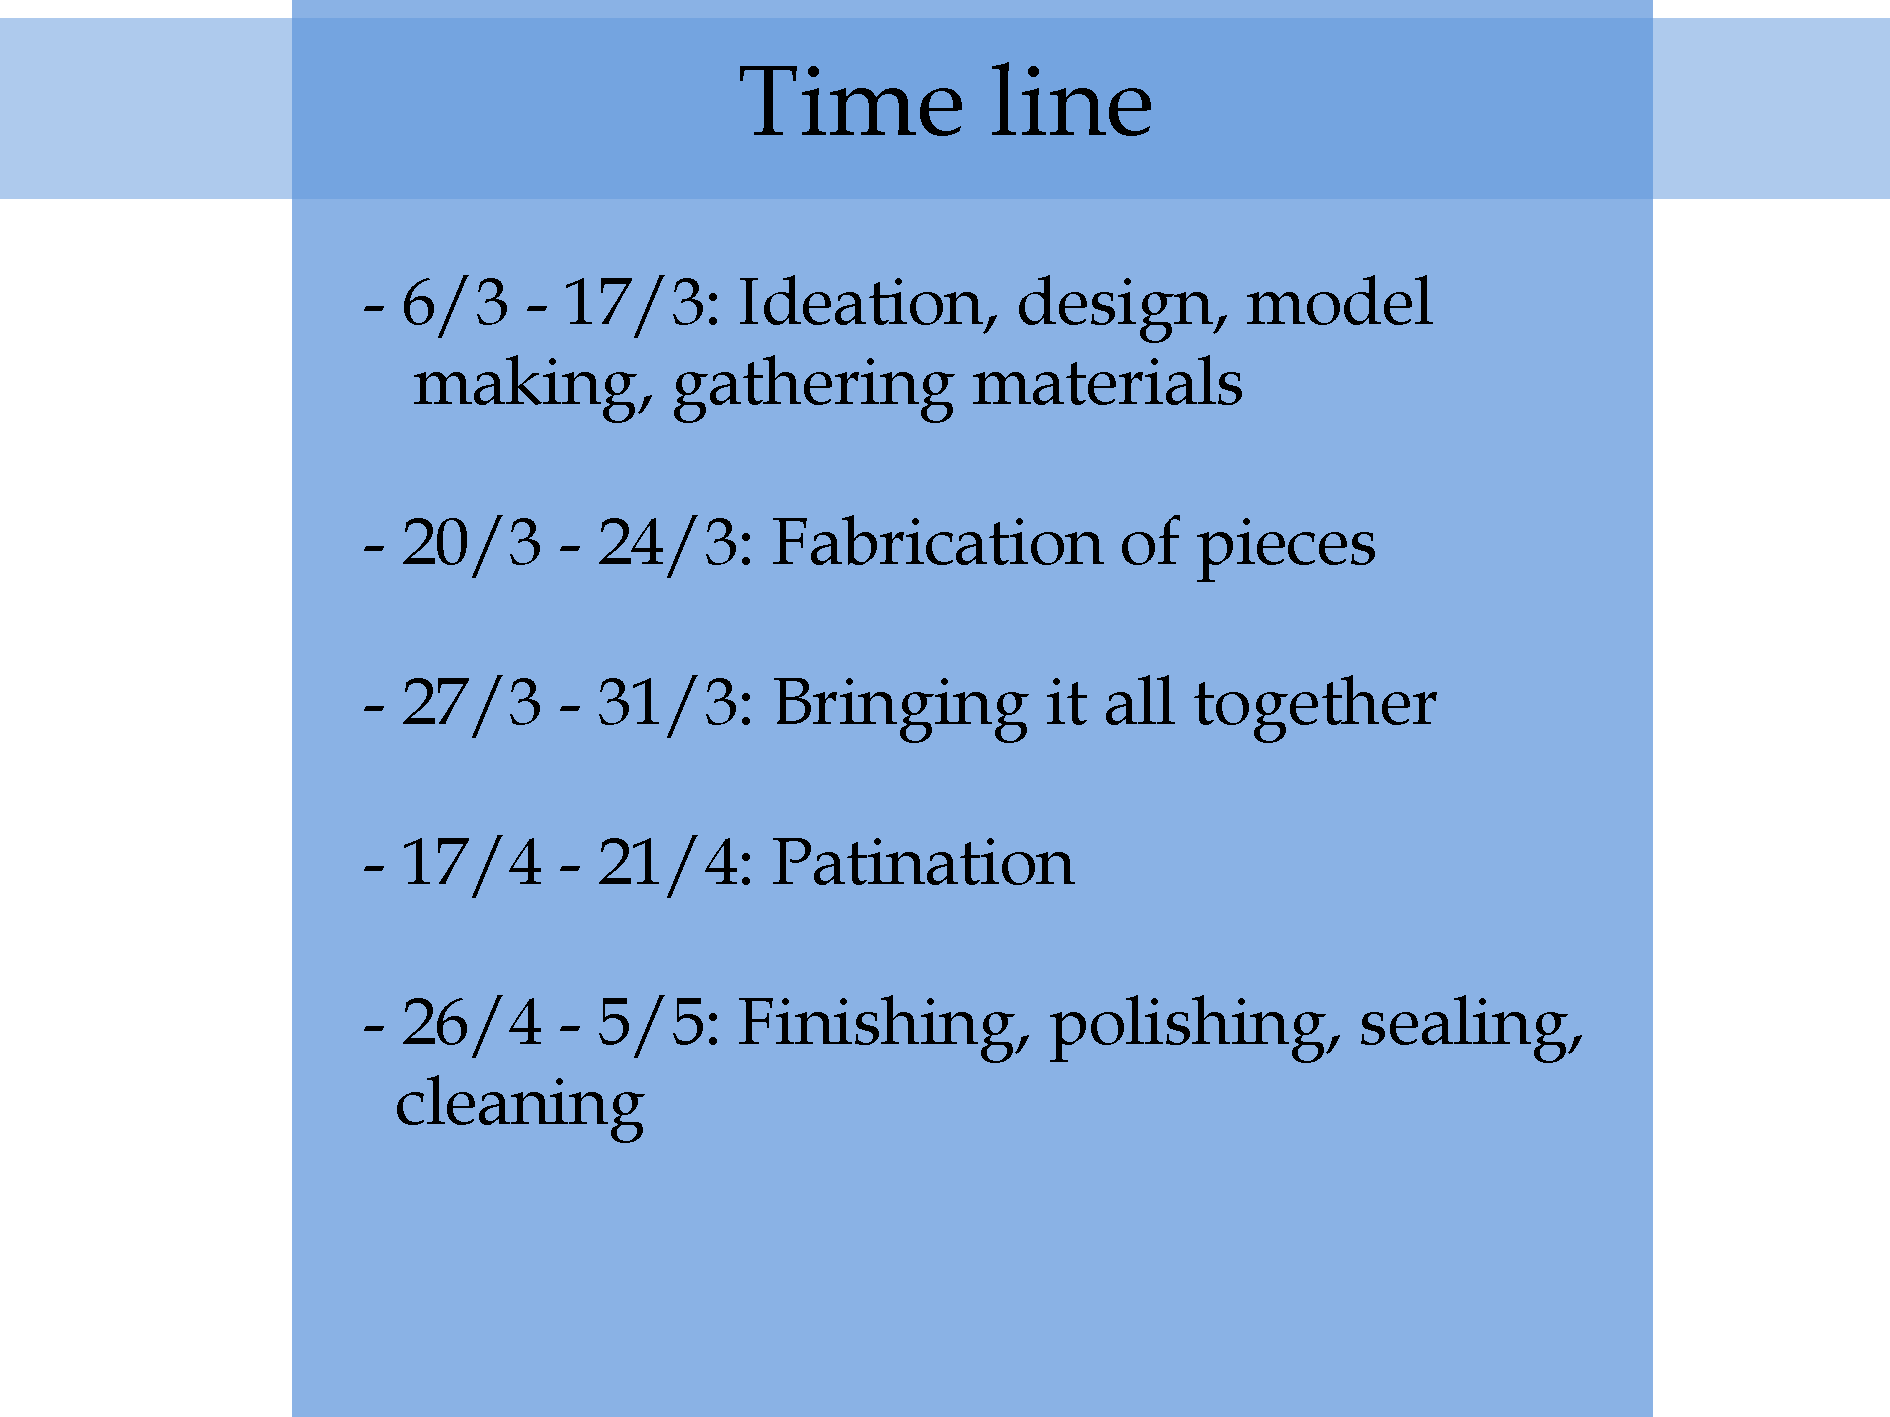
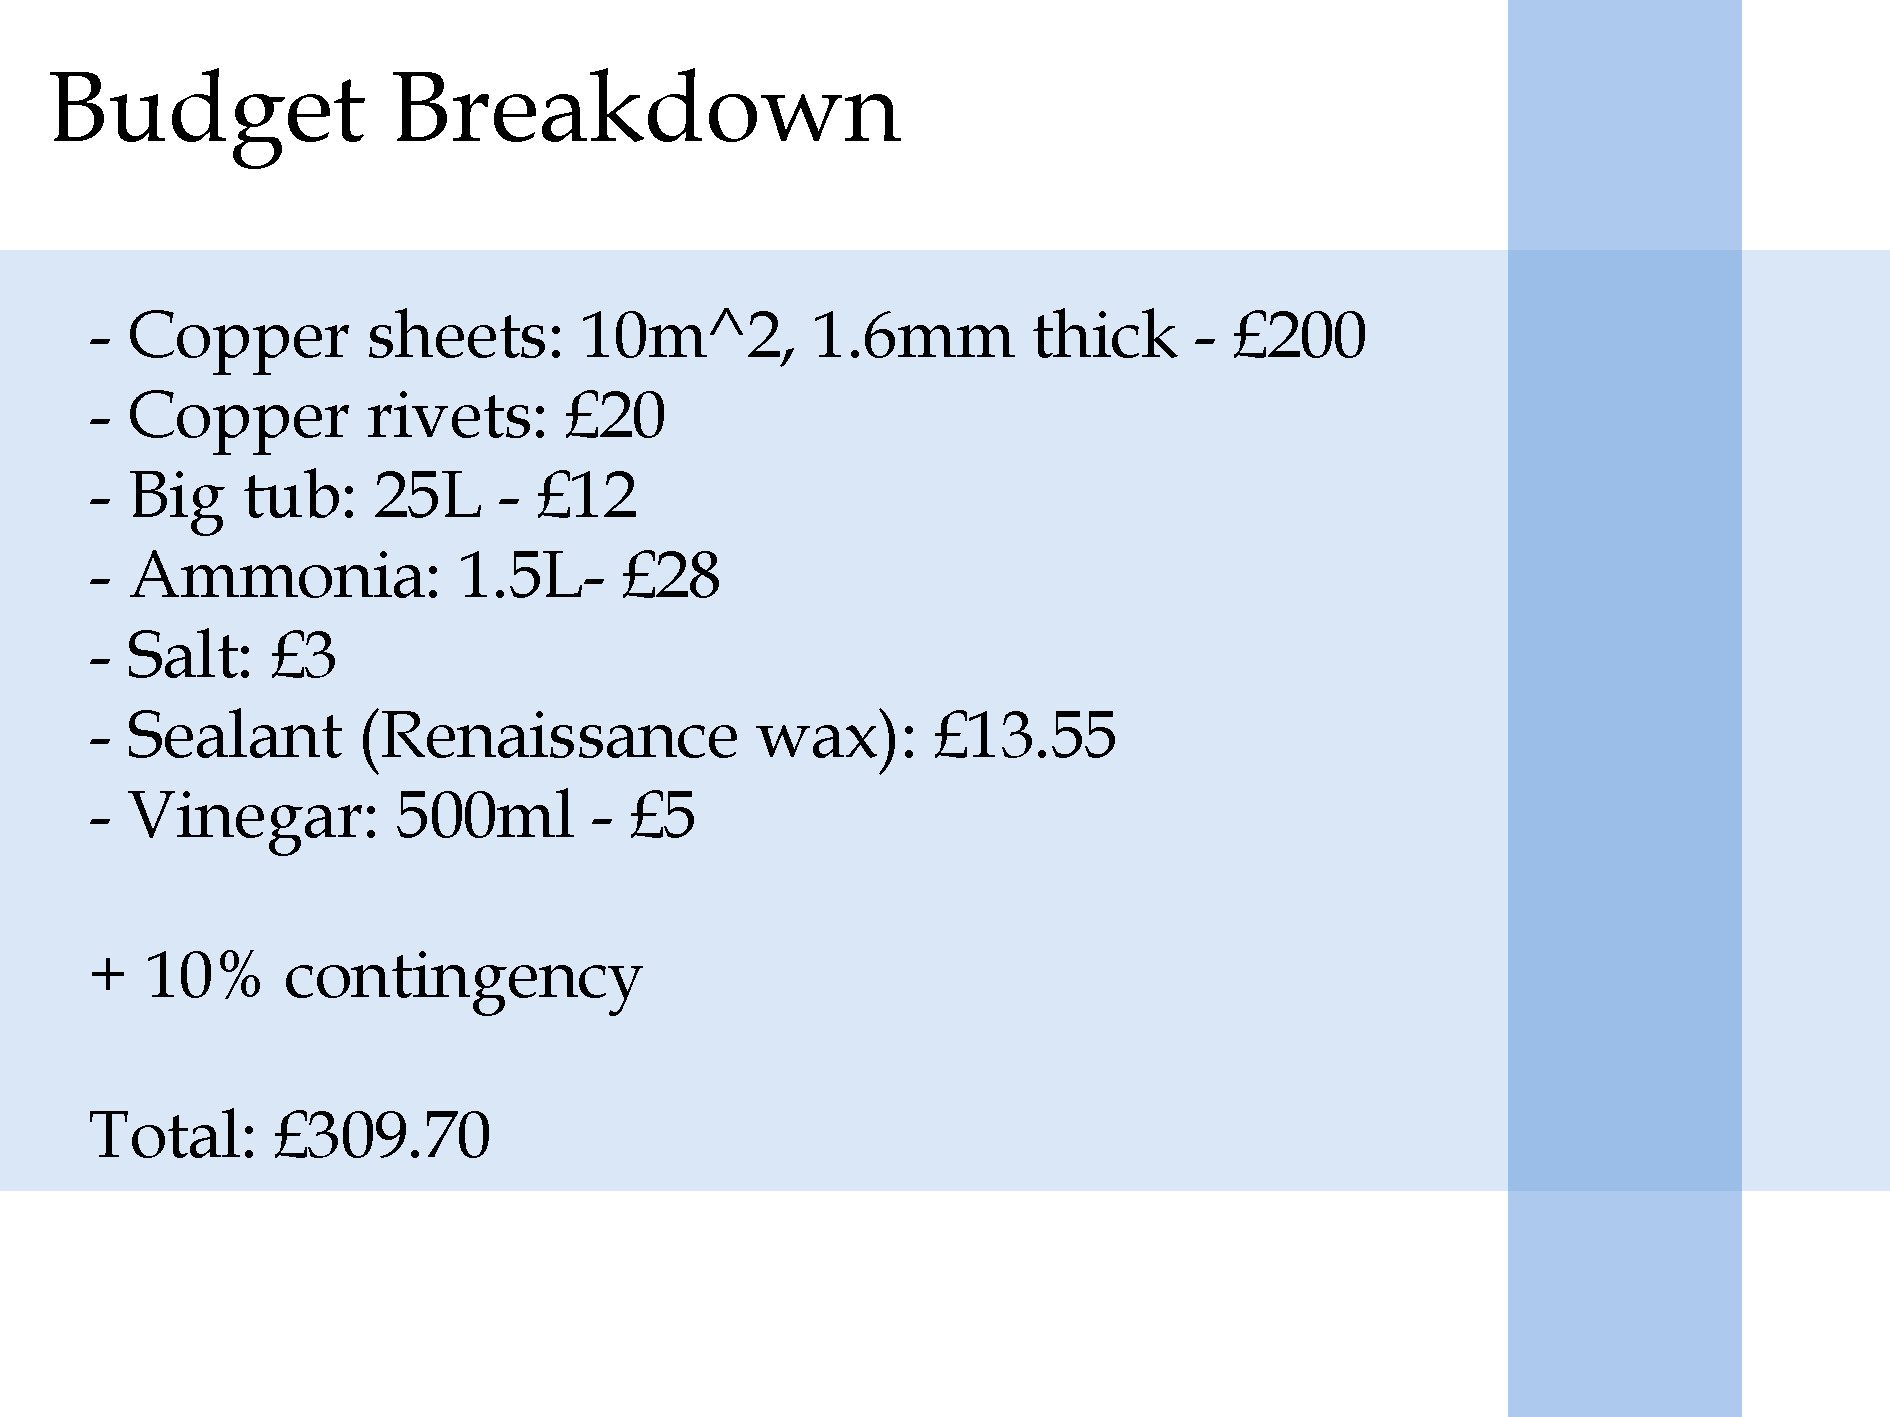
I expressed this interest to the Vertical Gallery commission committee and pitched my idea to them on the second round of the application process. I hoped that if I was accepted, I could use the money they gave me to realize my vision and create something big and bold. Below are the slides I presented to the VG committee.
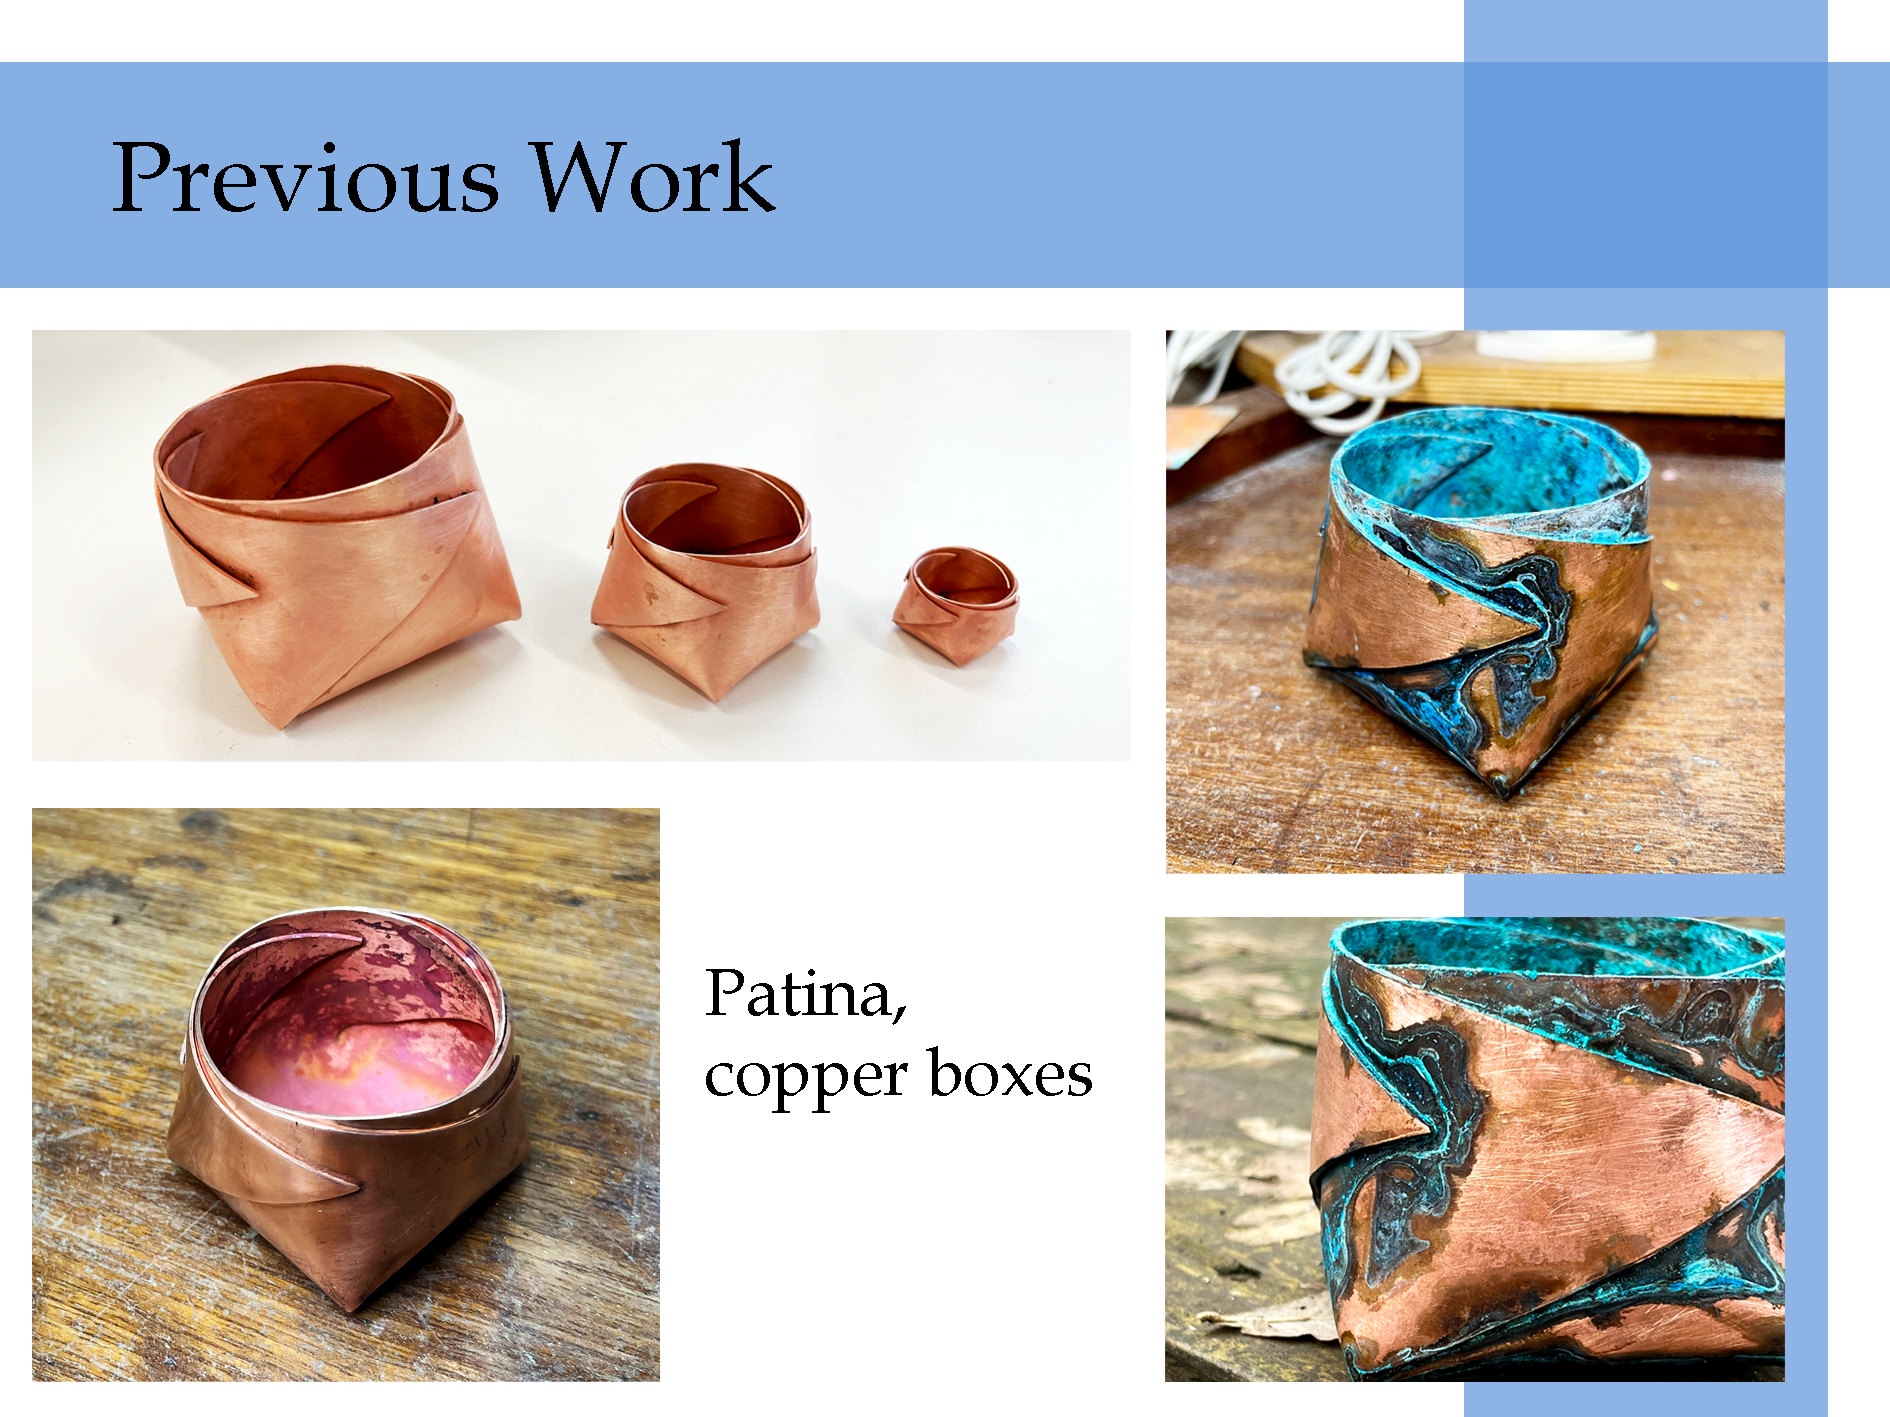

Unfortunately, I was not accepted for the commission but it made me realize that this was a big task and was perhaps unrealistic given the timeframe. I also understood that there were still many improvements and developments to be made to my vessels. They were not perfect. Yet. And I want to make them gallery ready.
The Mission
I had 3 main goals to complete by the end of this project:
- Explore the diversity of vessels that can be produced from different nets
- Diversify in patina colours and their recipes
- Refinement of form to make it gallery ready
- Explore the diversity of vessels that can be produced from different nets
- Diversify in patina colours and their recipes
- Refinement of form to make it gallery ready
Diversifying the vessel
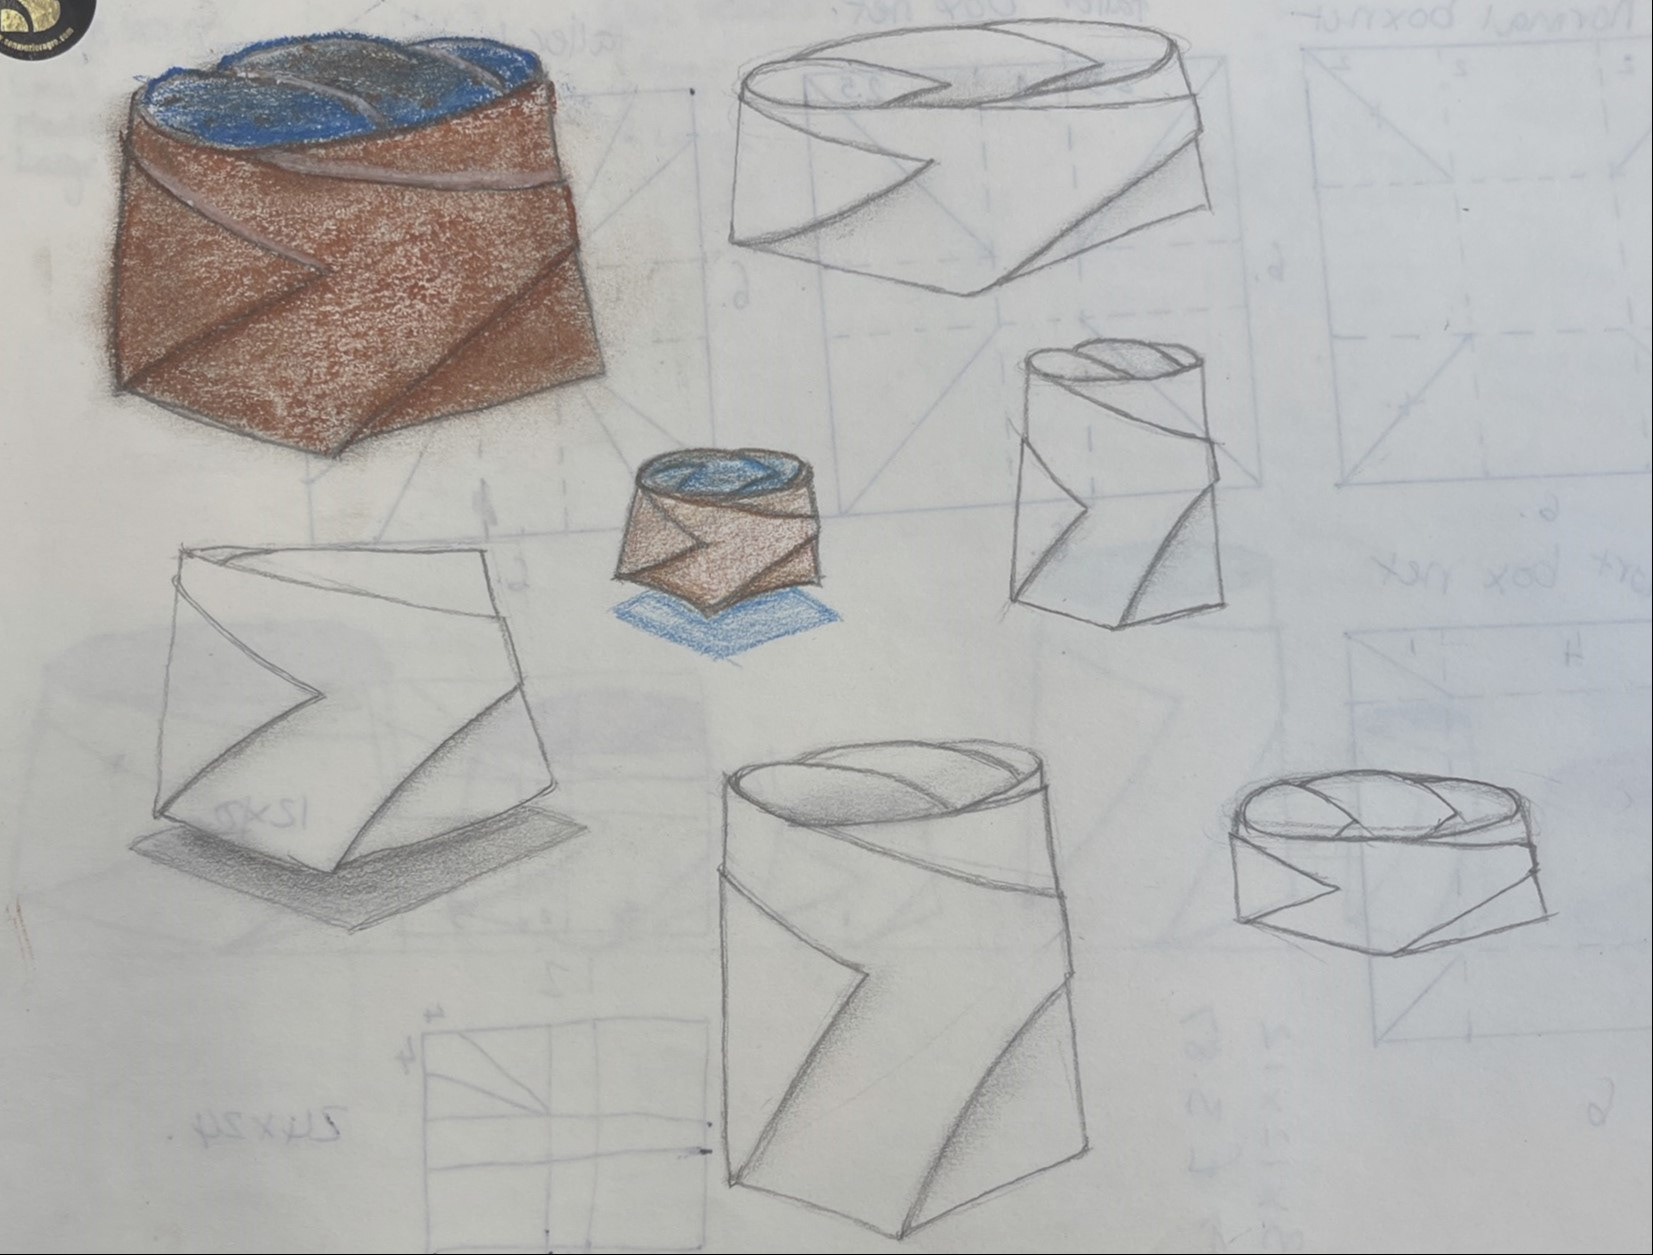
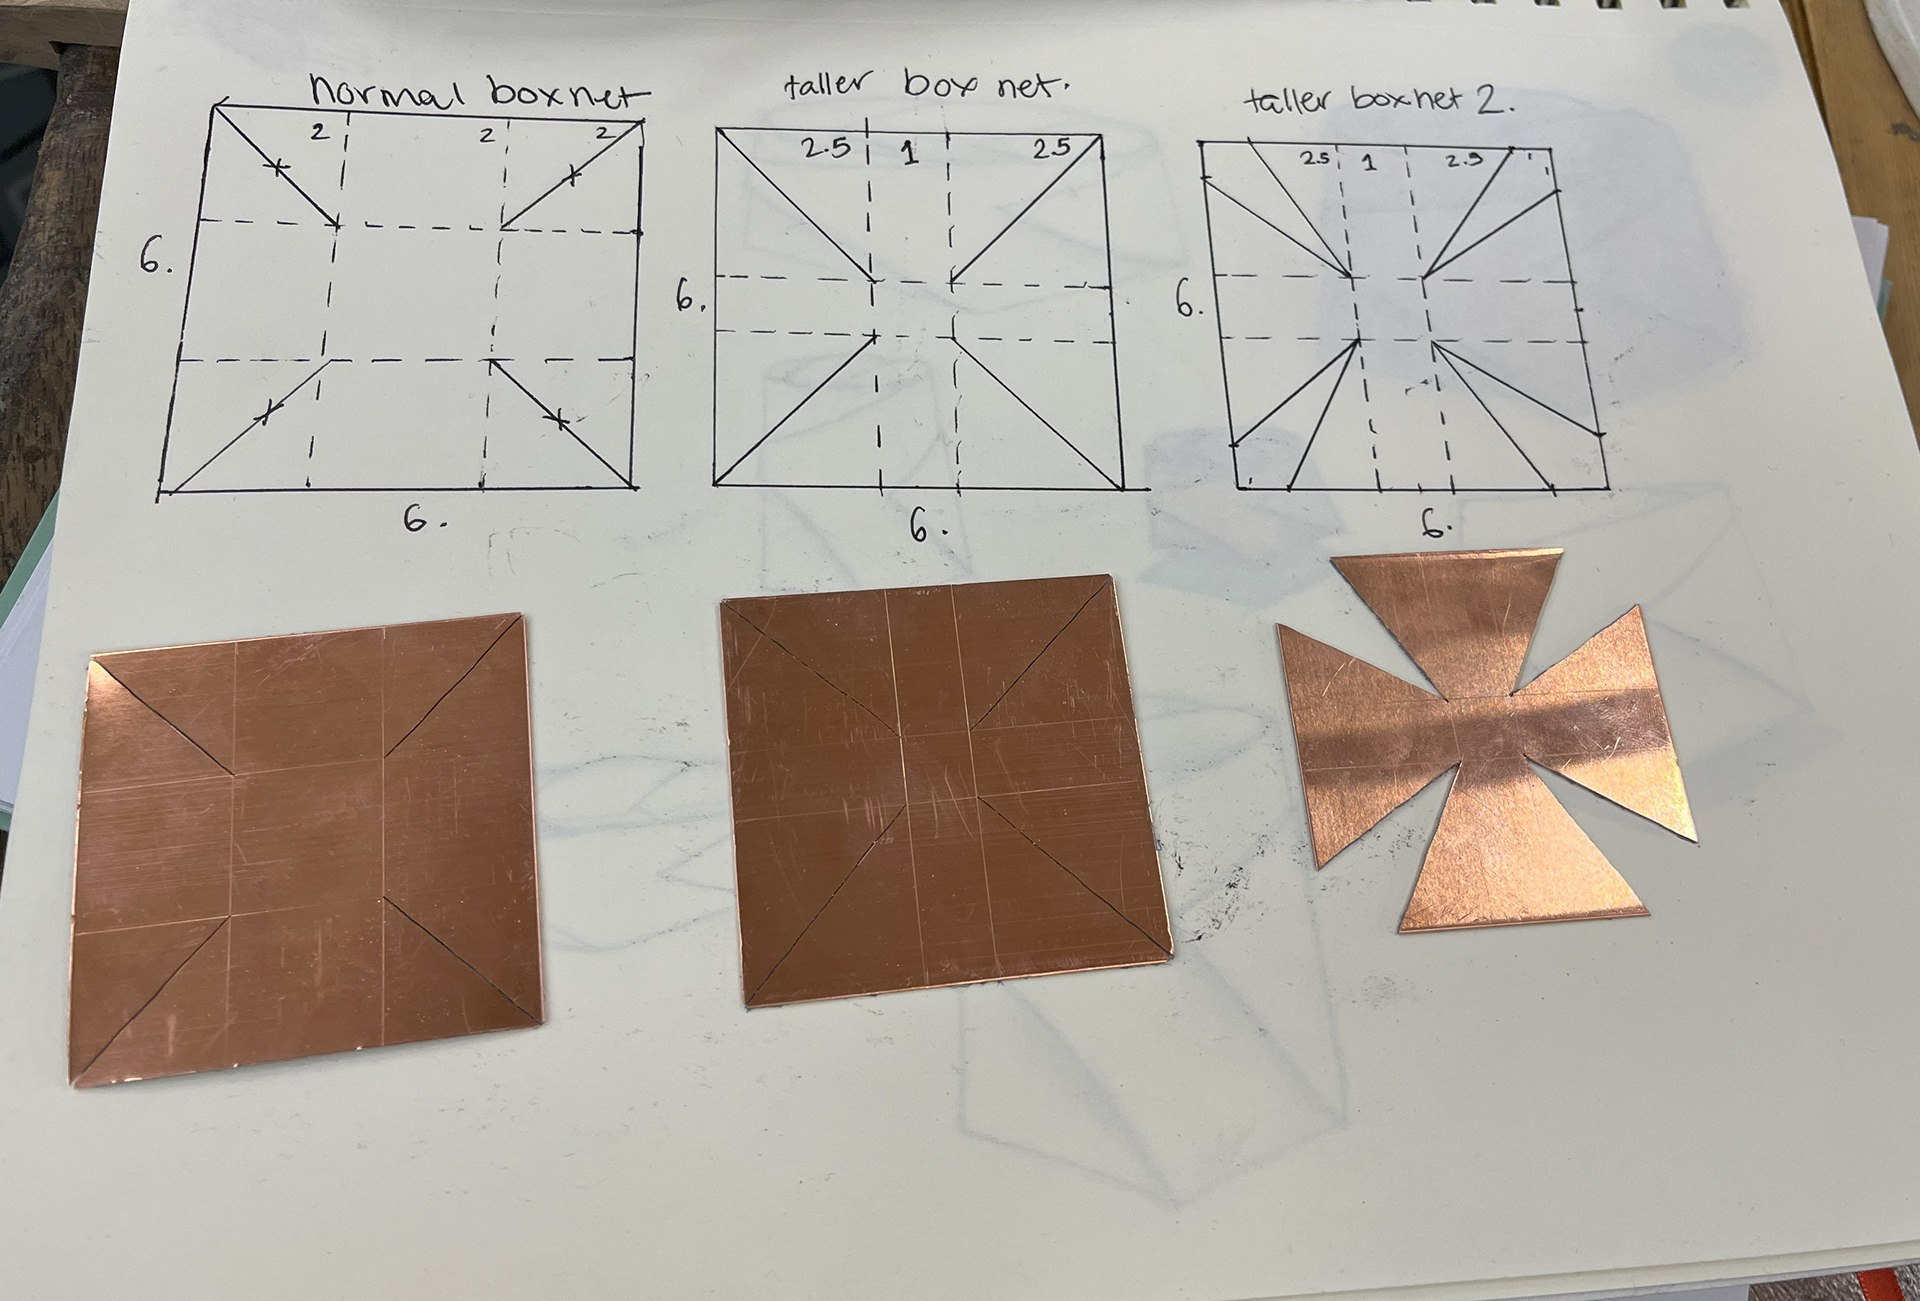
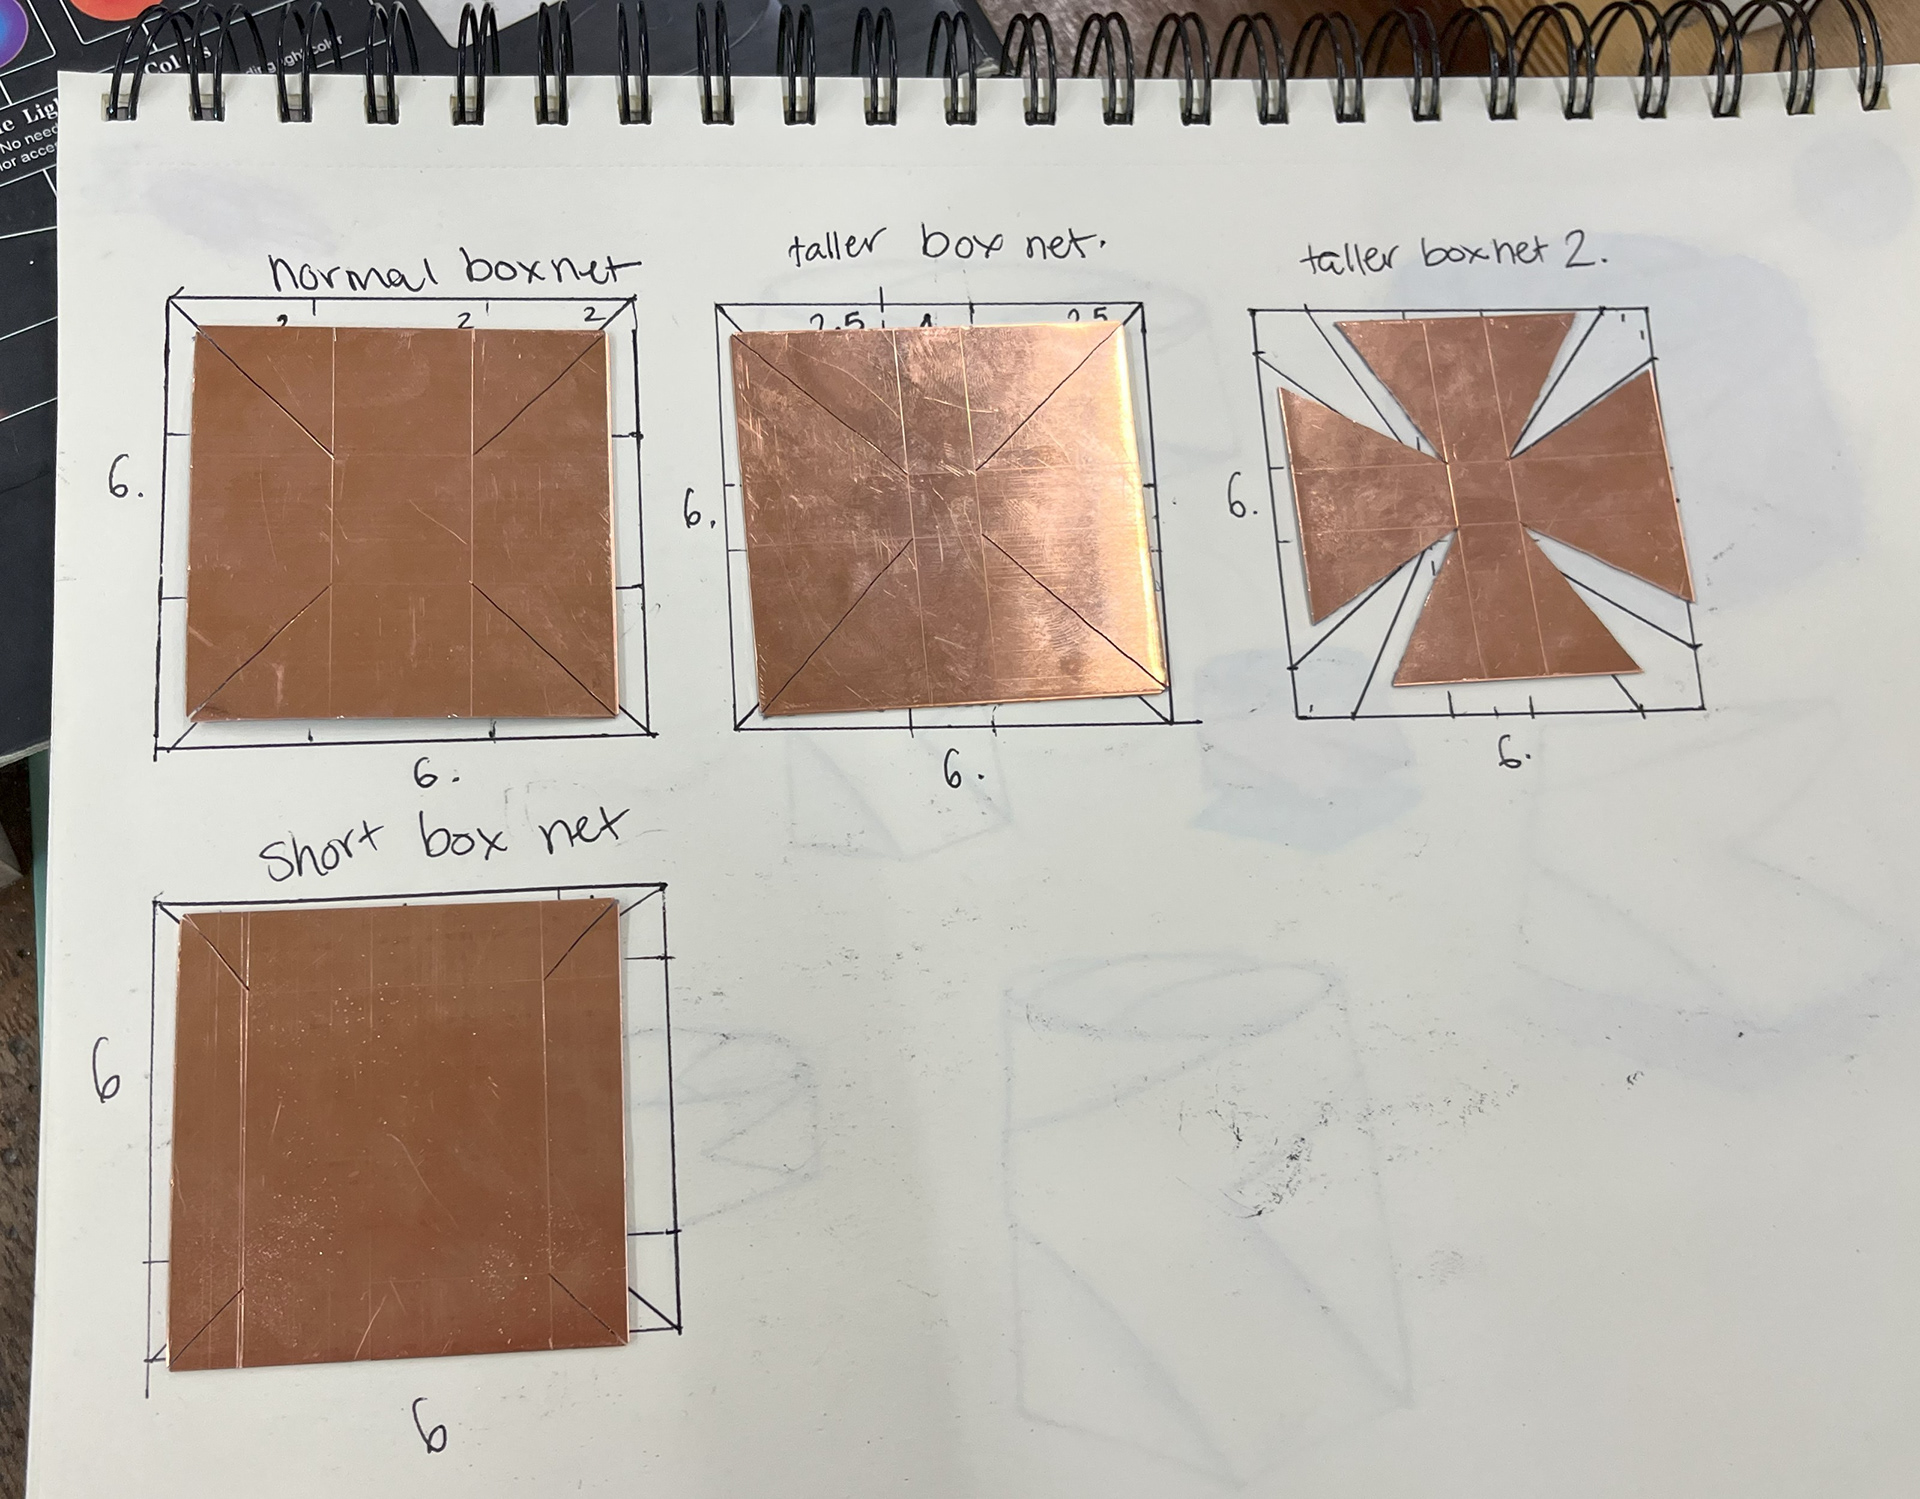
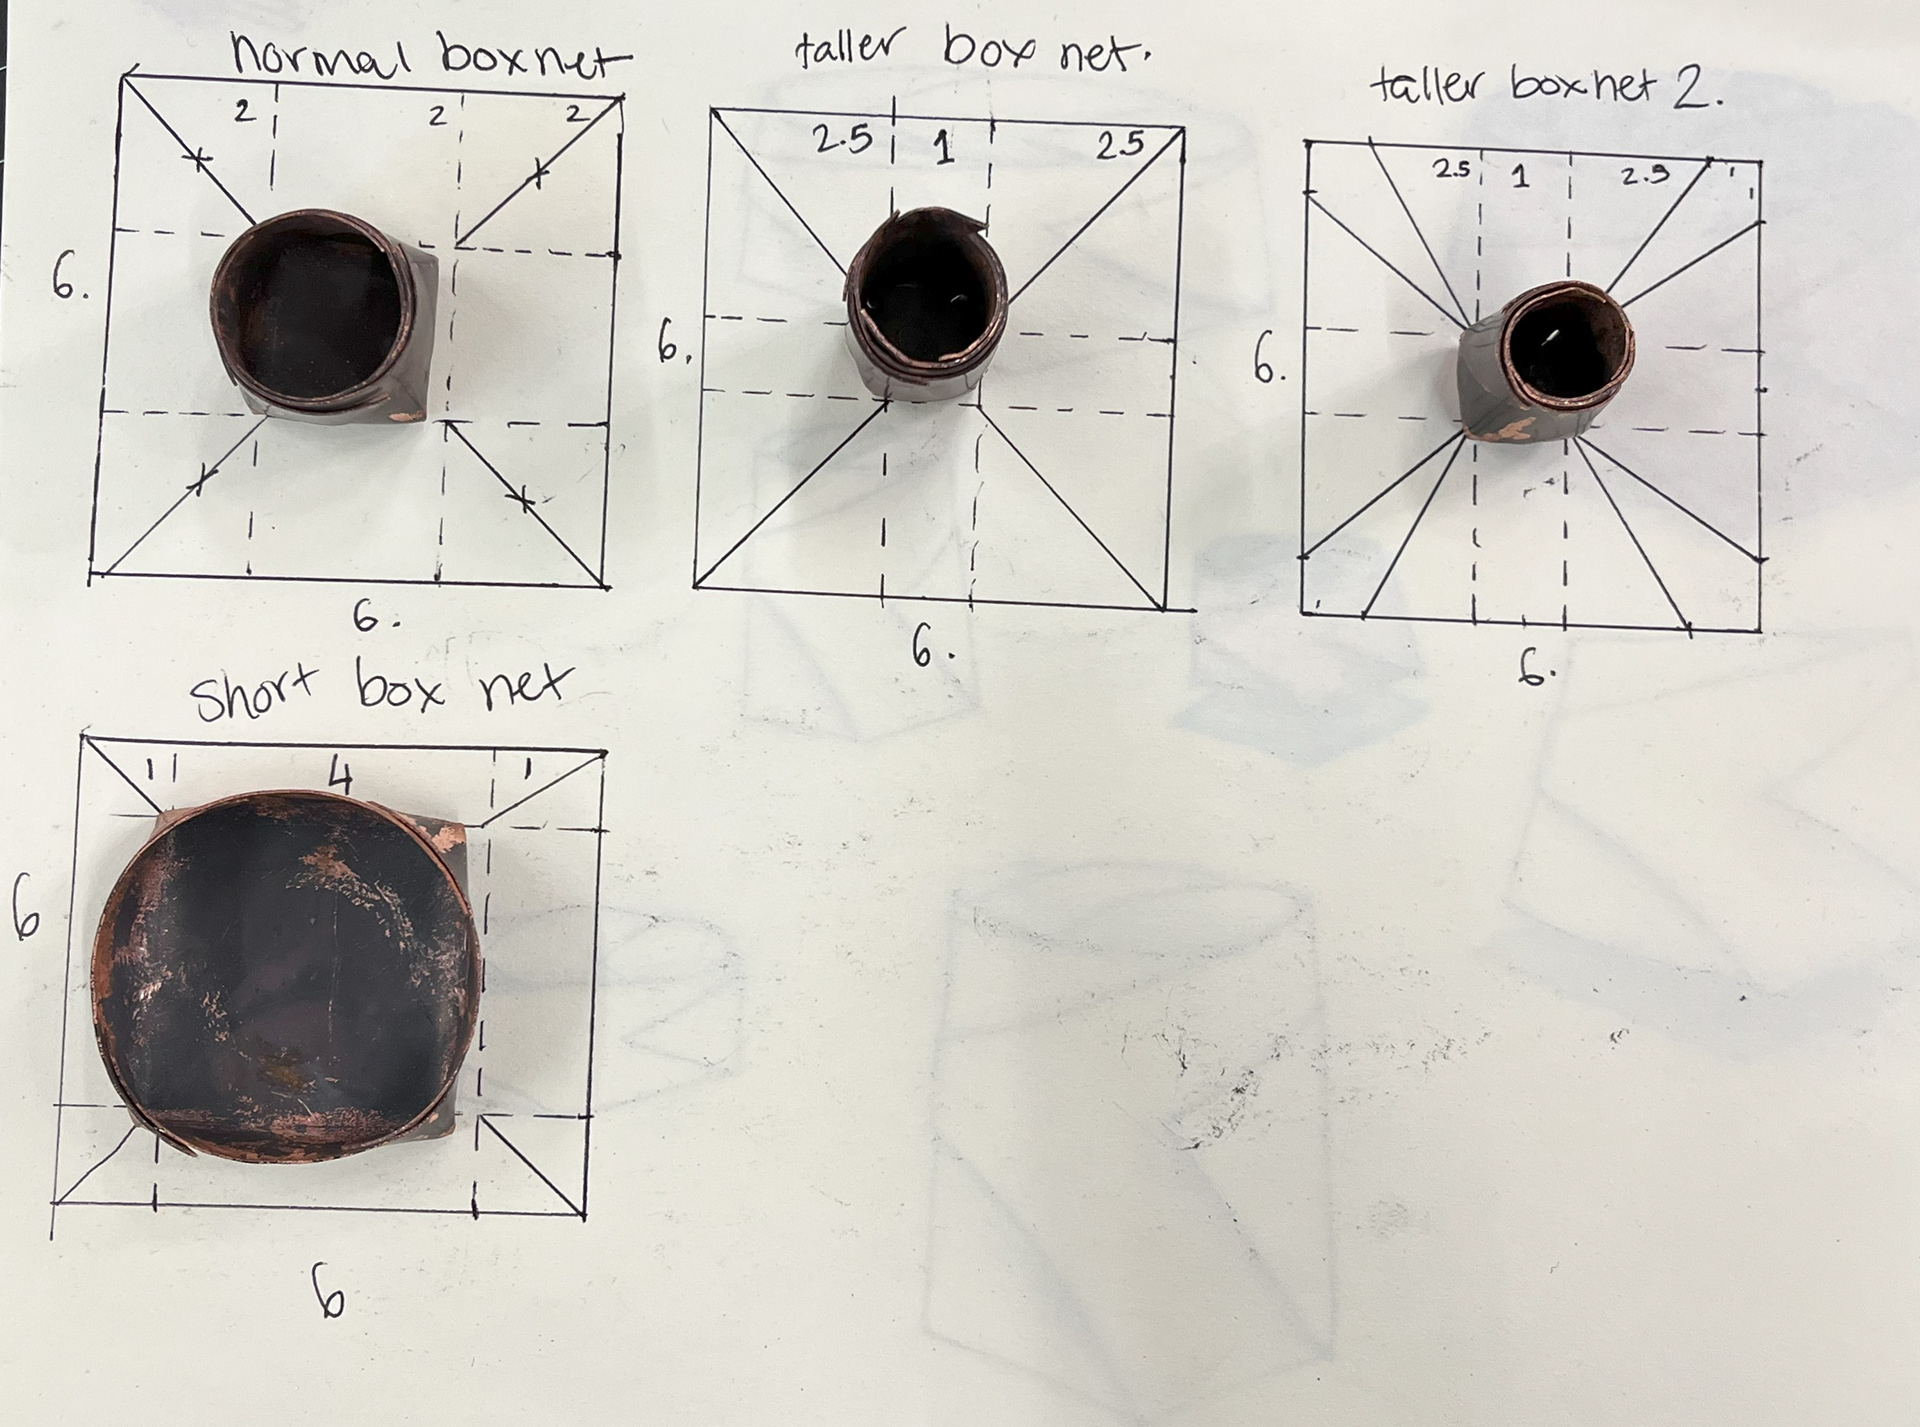
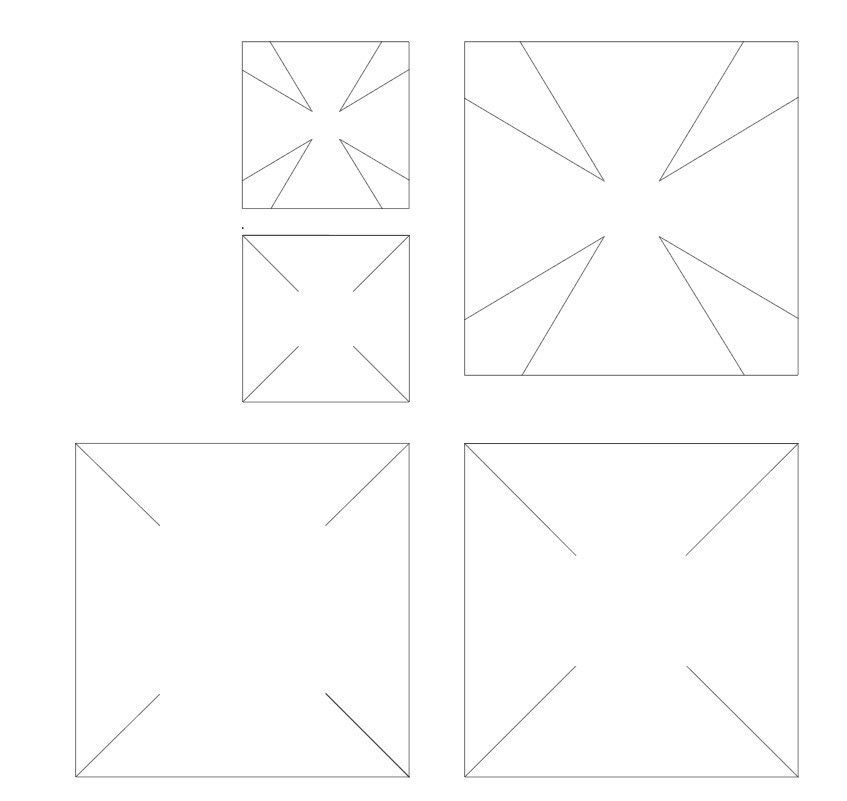
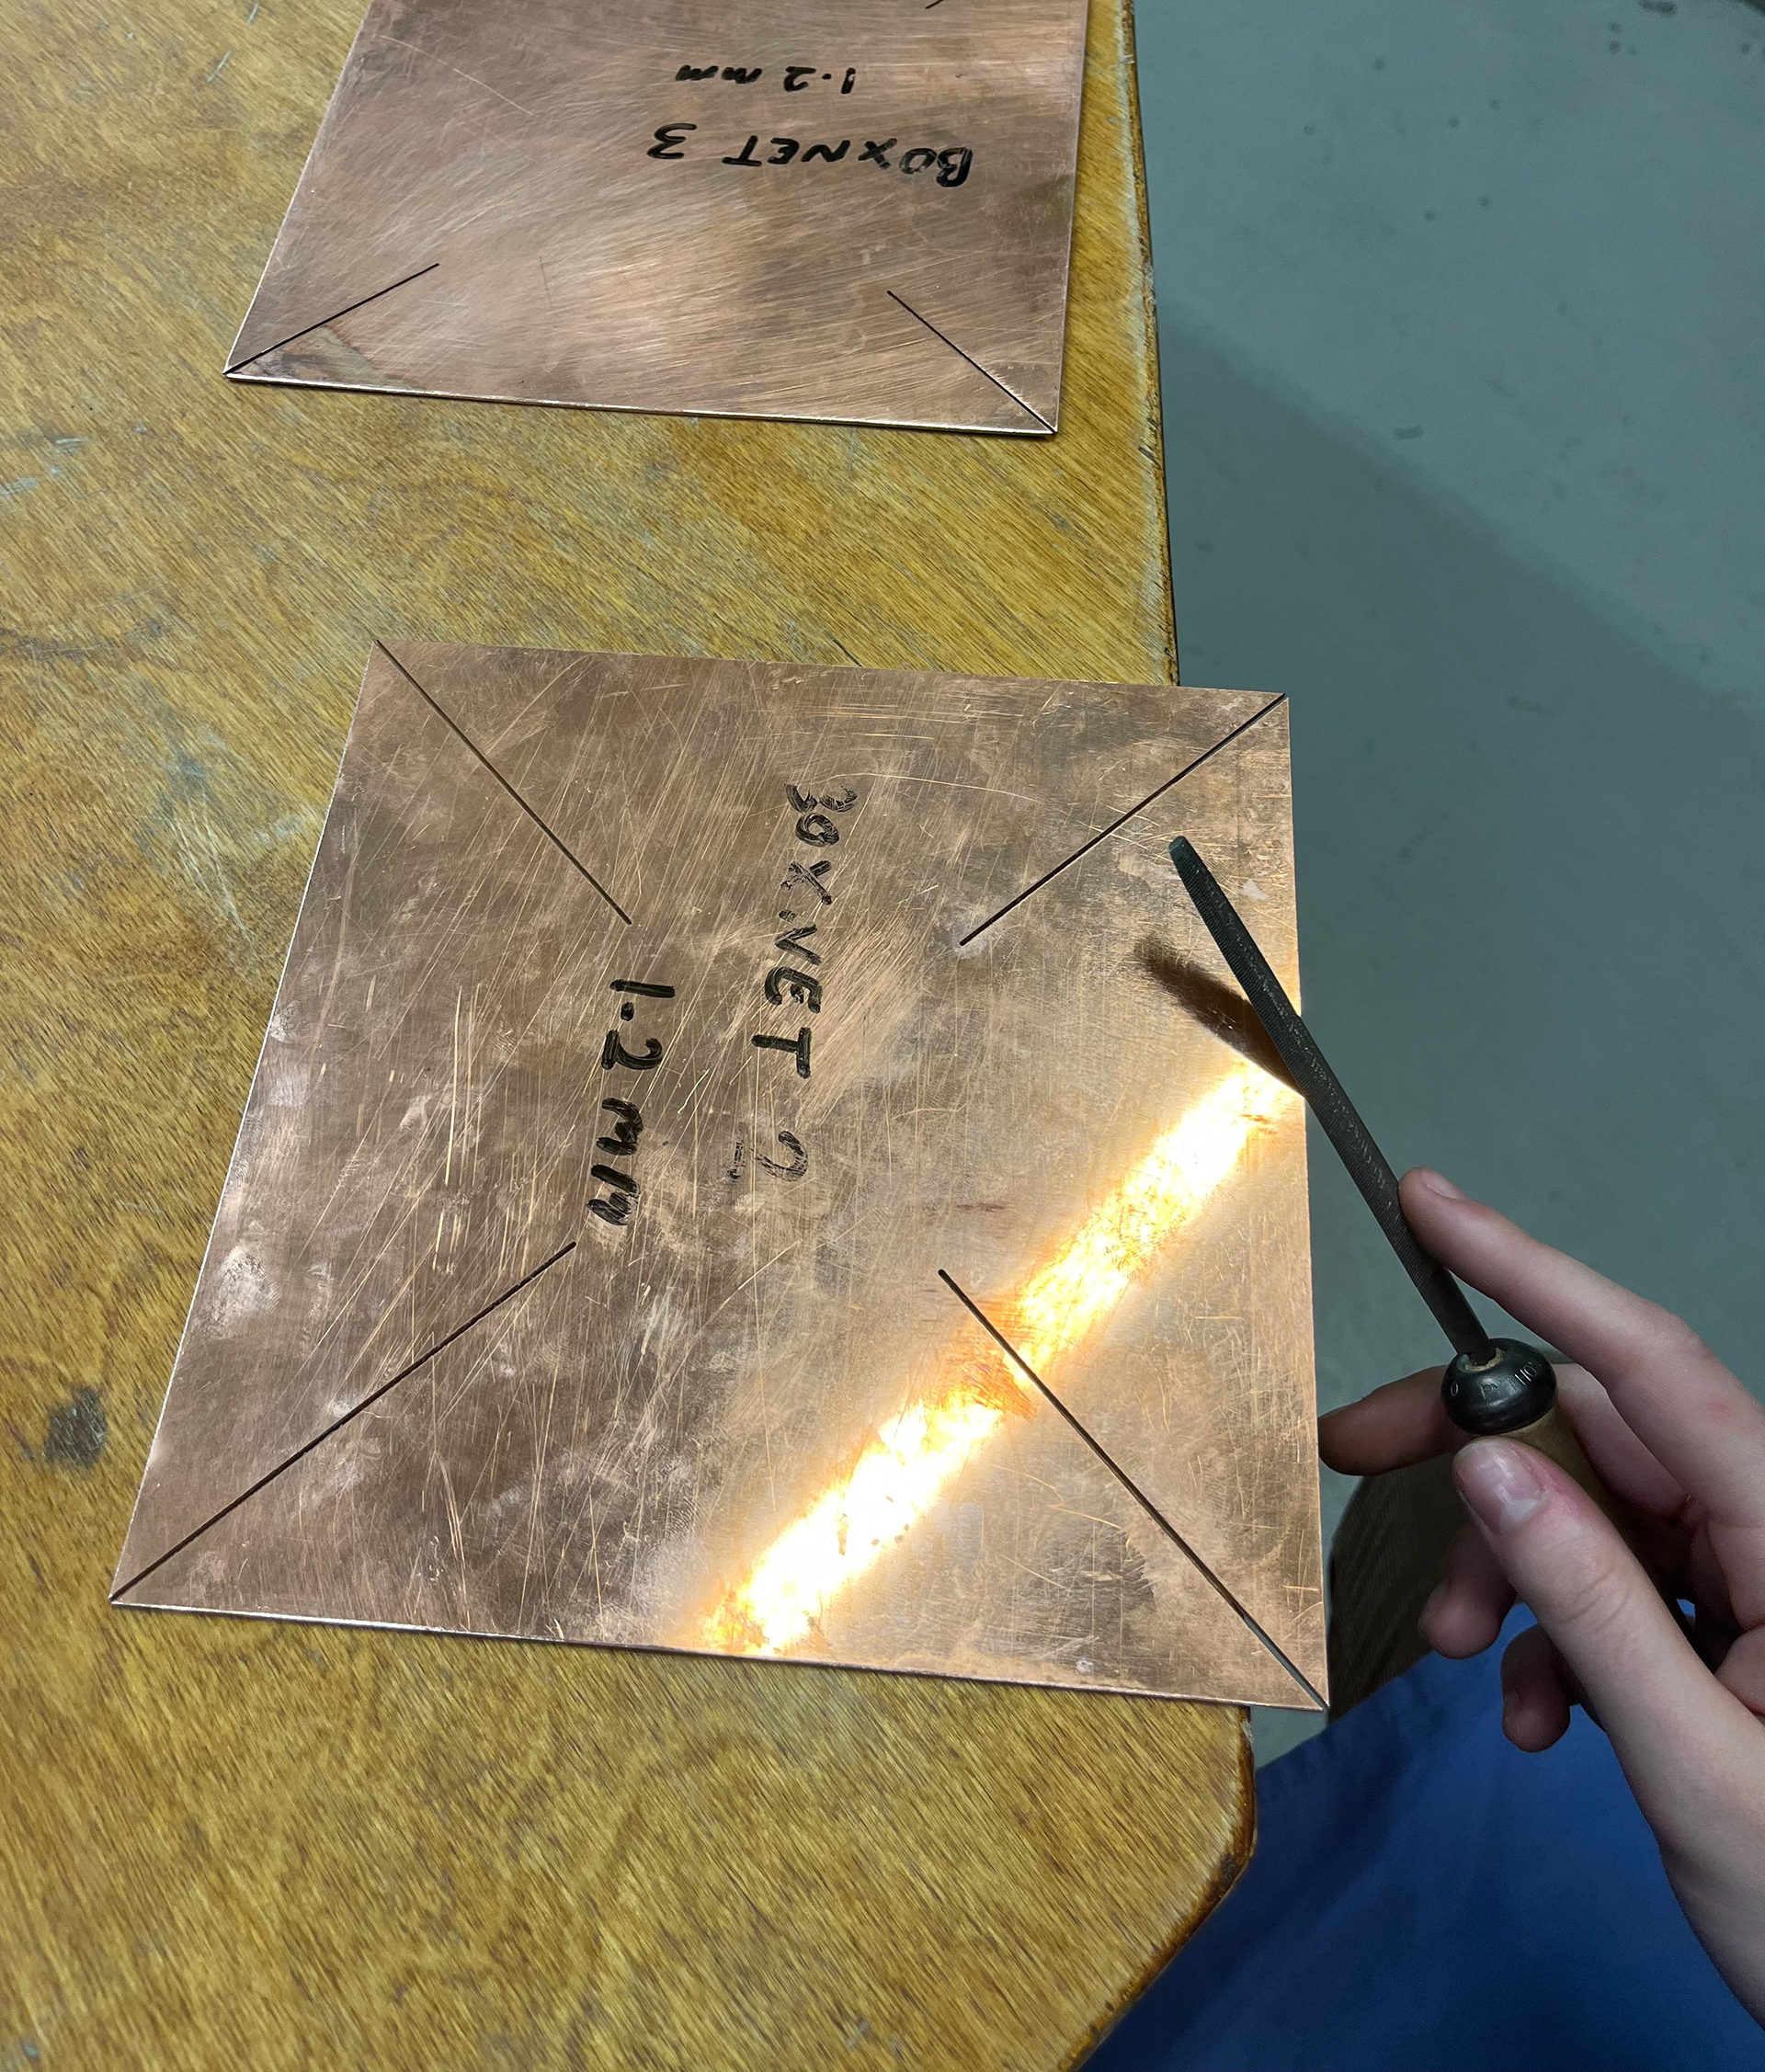
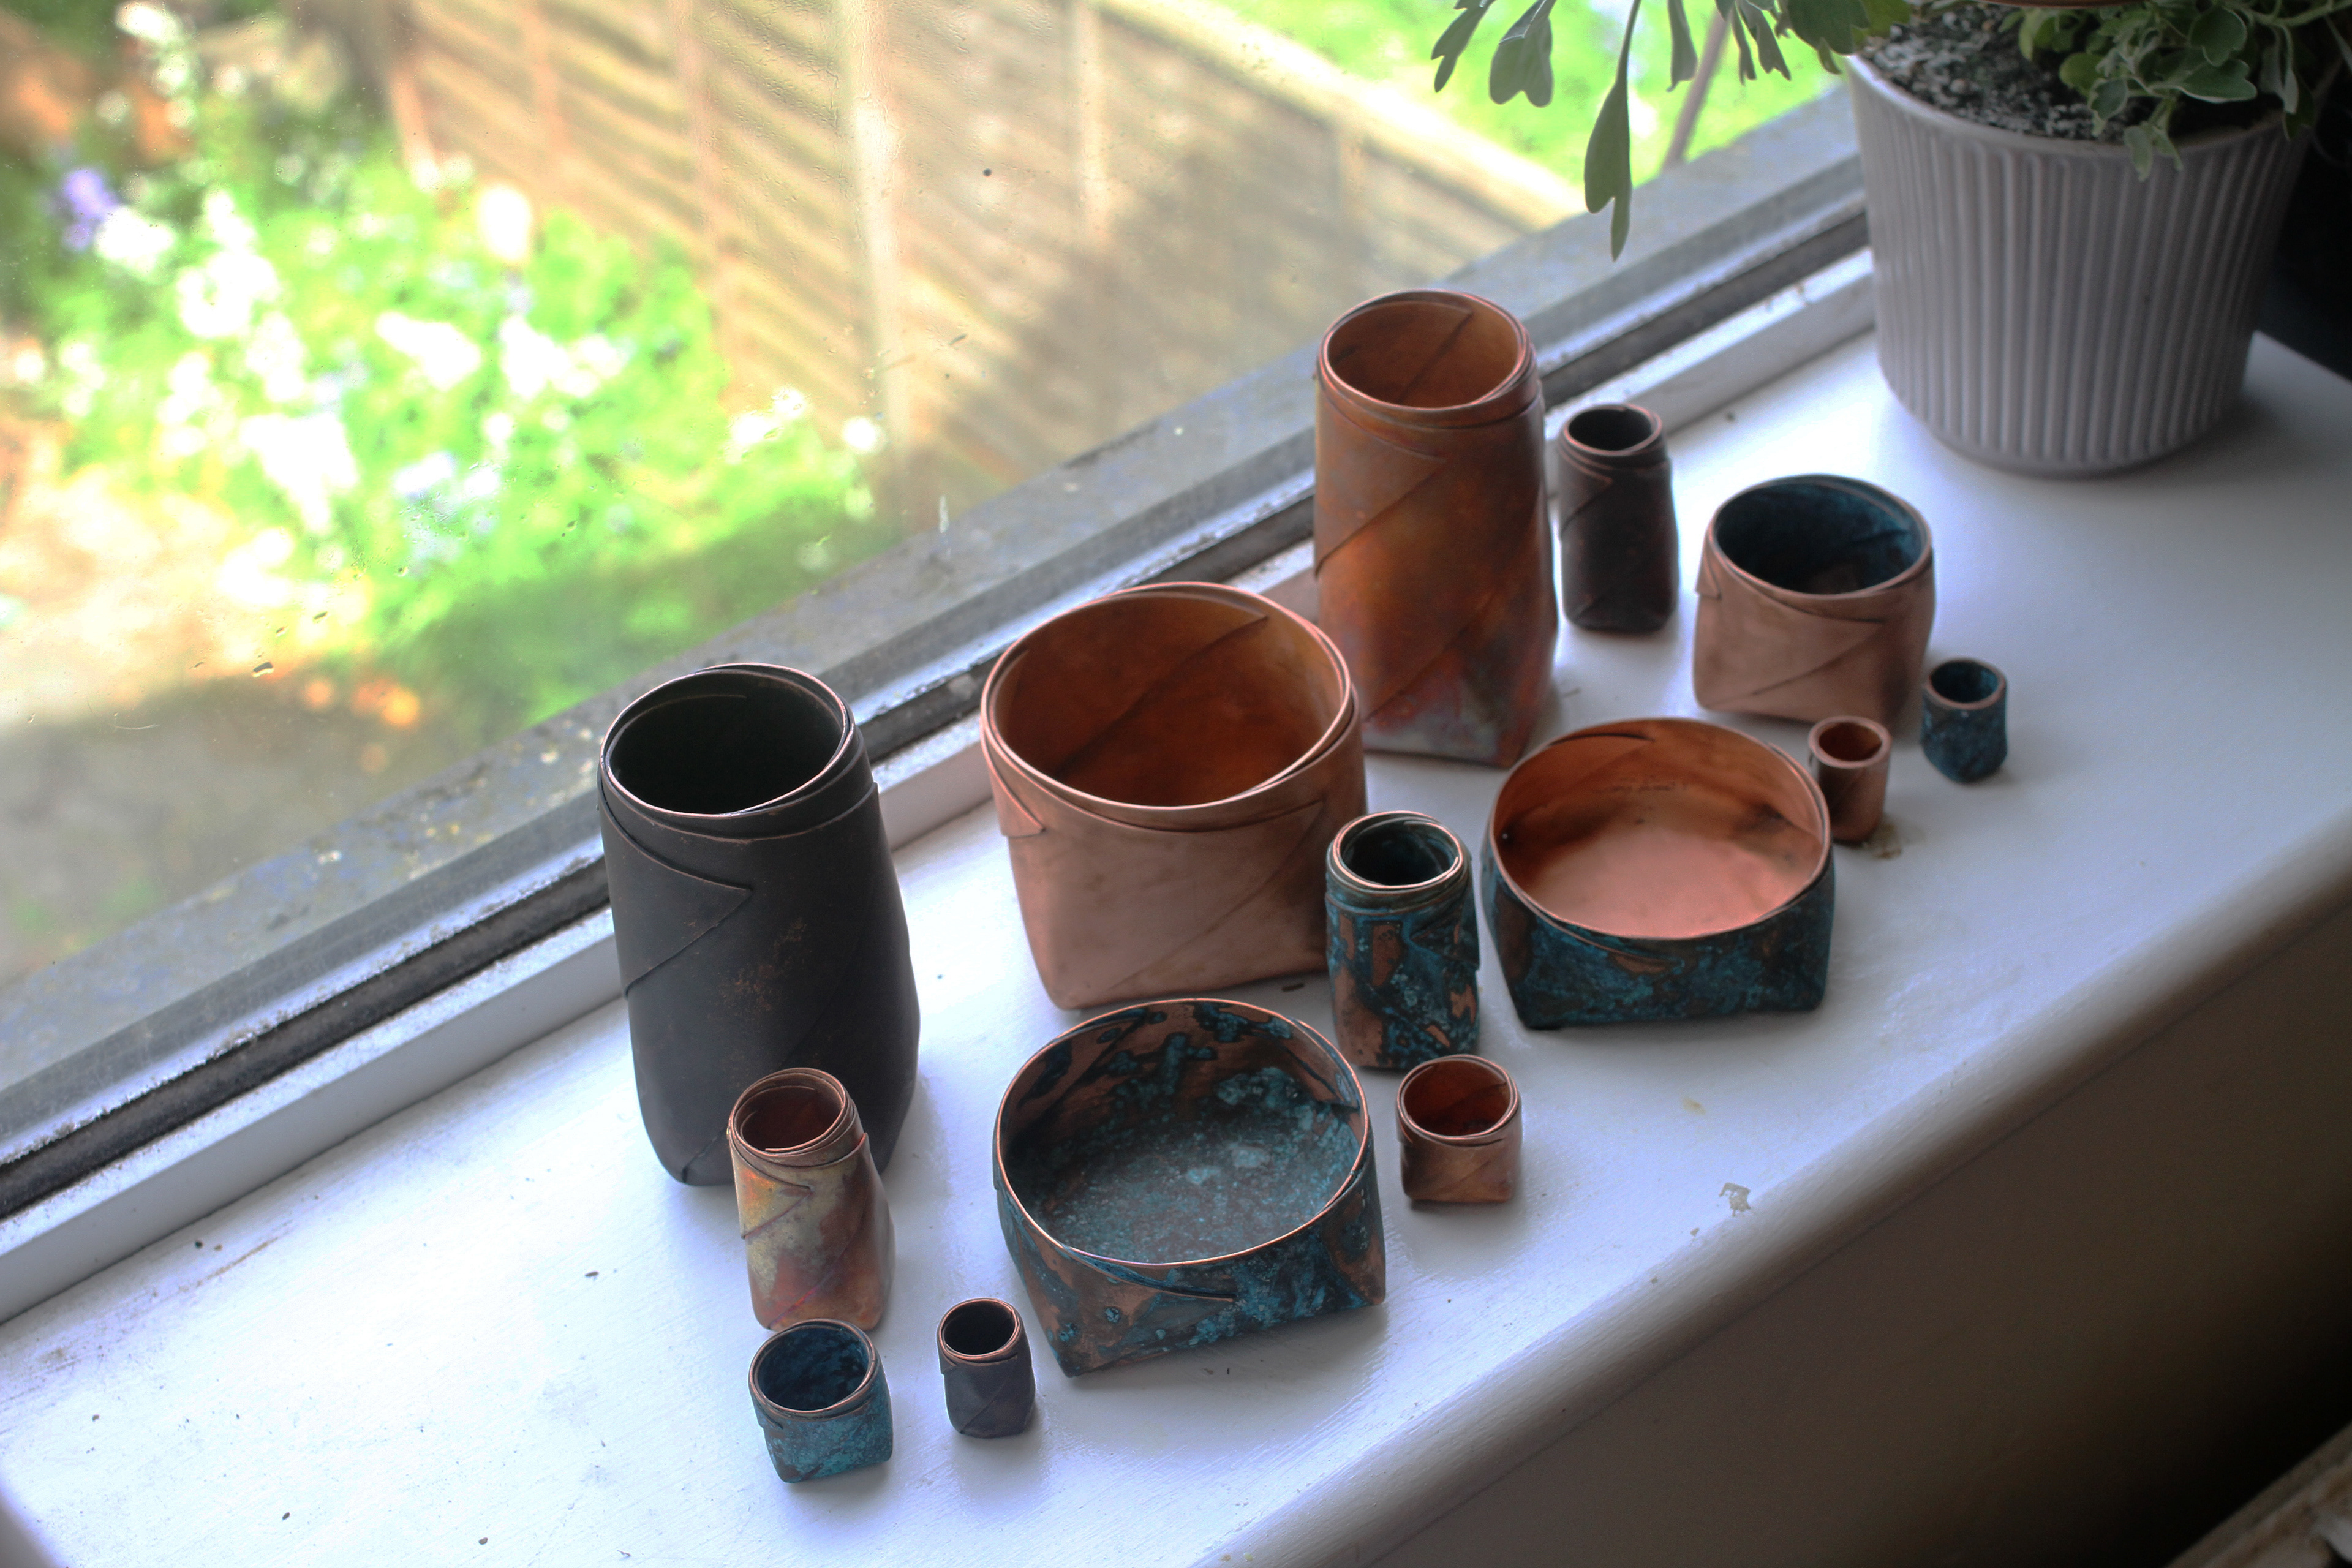
I first wanted to explore what different shapes I could create with a 60x60mm and 0.7mm thickness copper sheet. I drew out in my sketch book the original box net, 2 taller box nets and a short box net. I was delighted to see the interesting vessel forms come from the same sized sheet.
Because I couldn't fold the edges of the first tall box completely, I decided to cut wedges out of the second one and tried folding it round and the results were a lot better. I shall follow this net shape for future tall vessels and I think they could look really elegant with taller vessels.
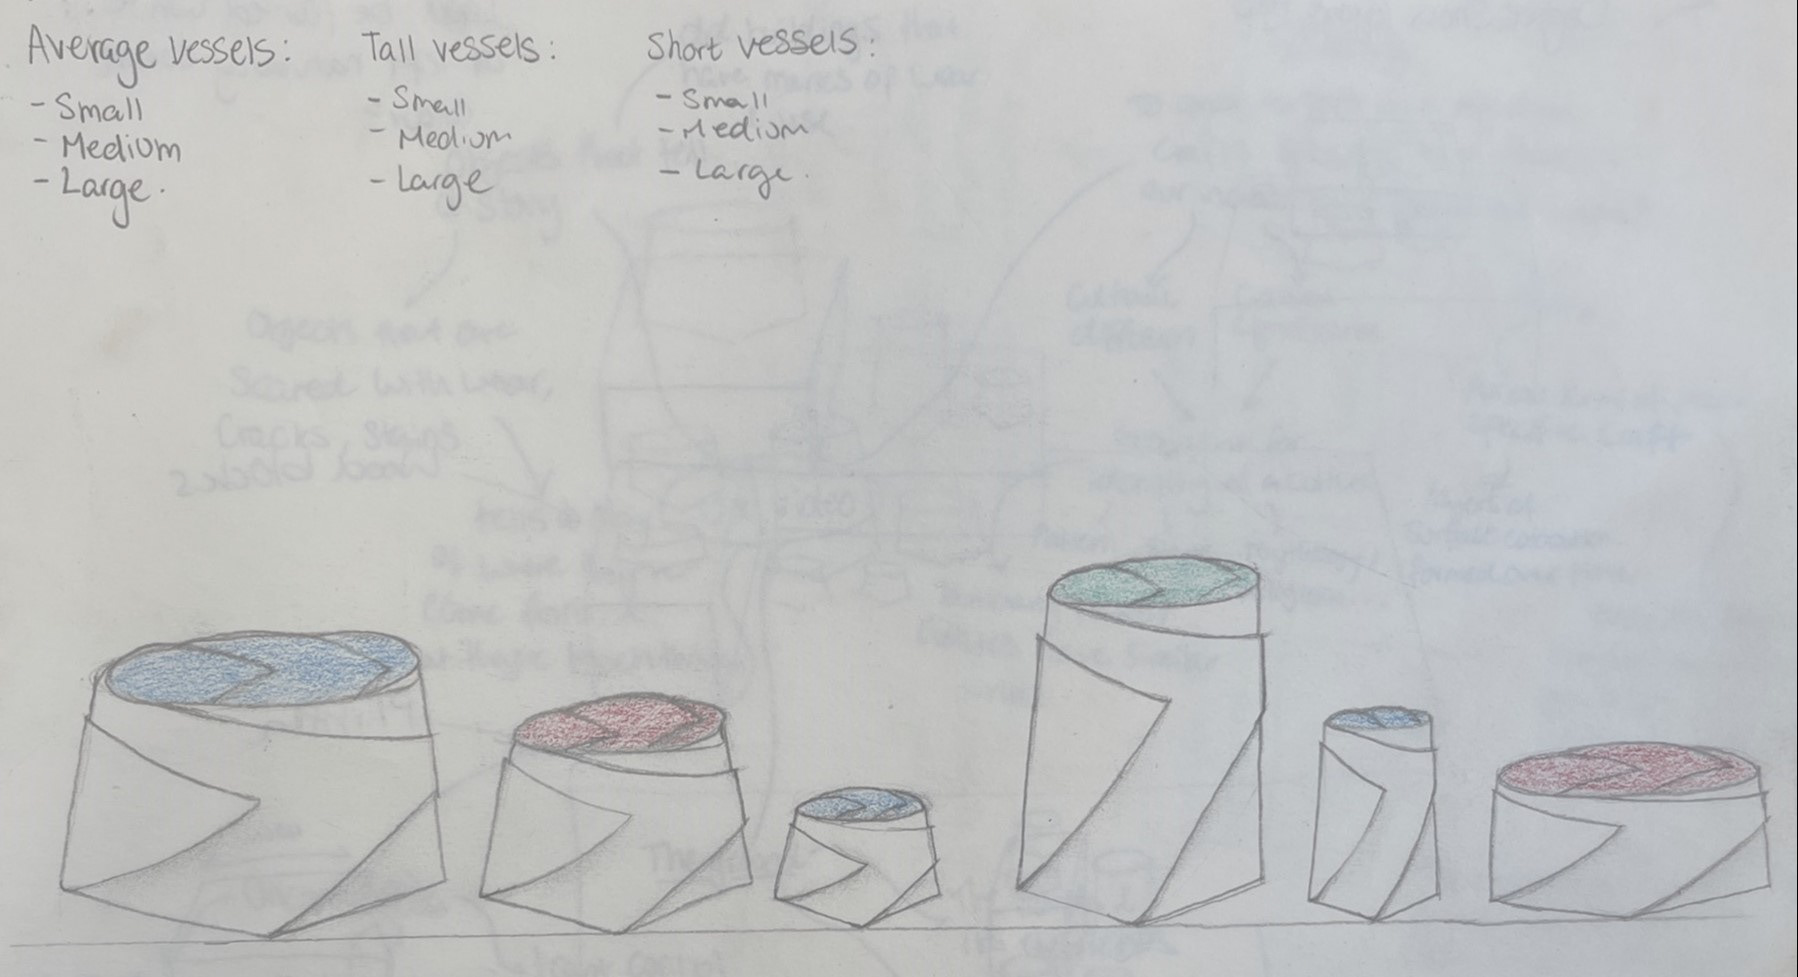
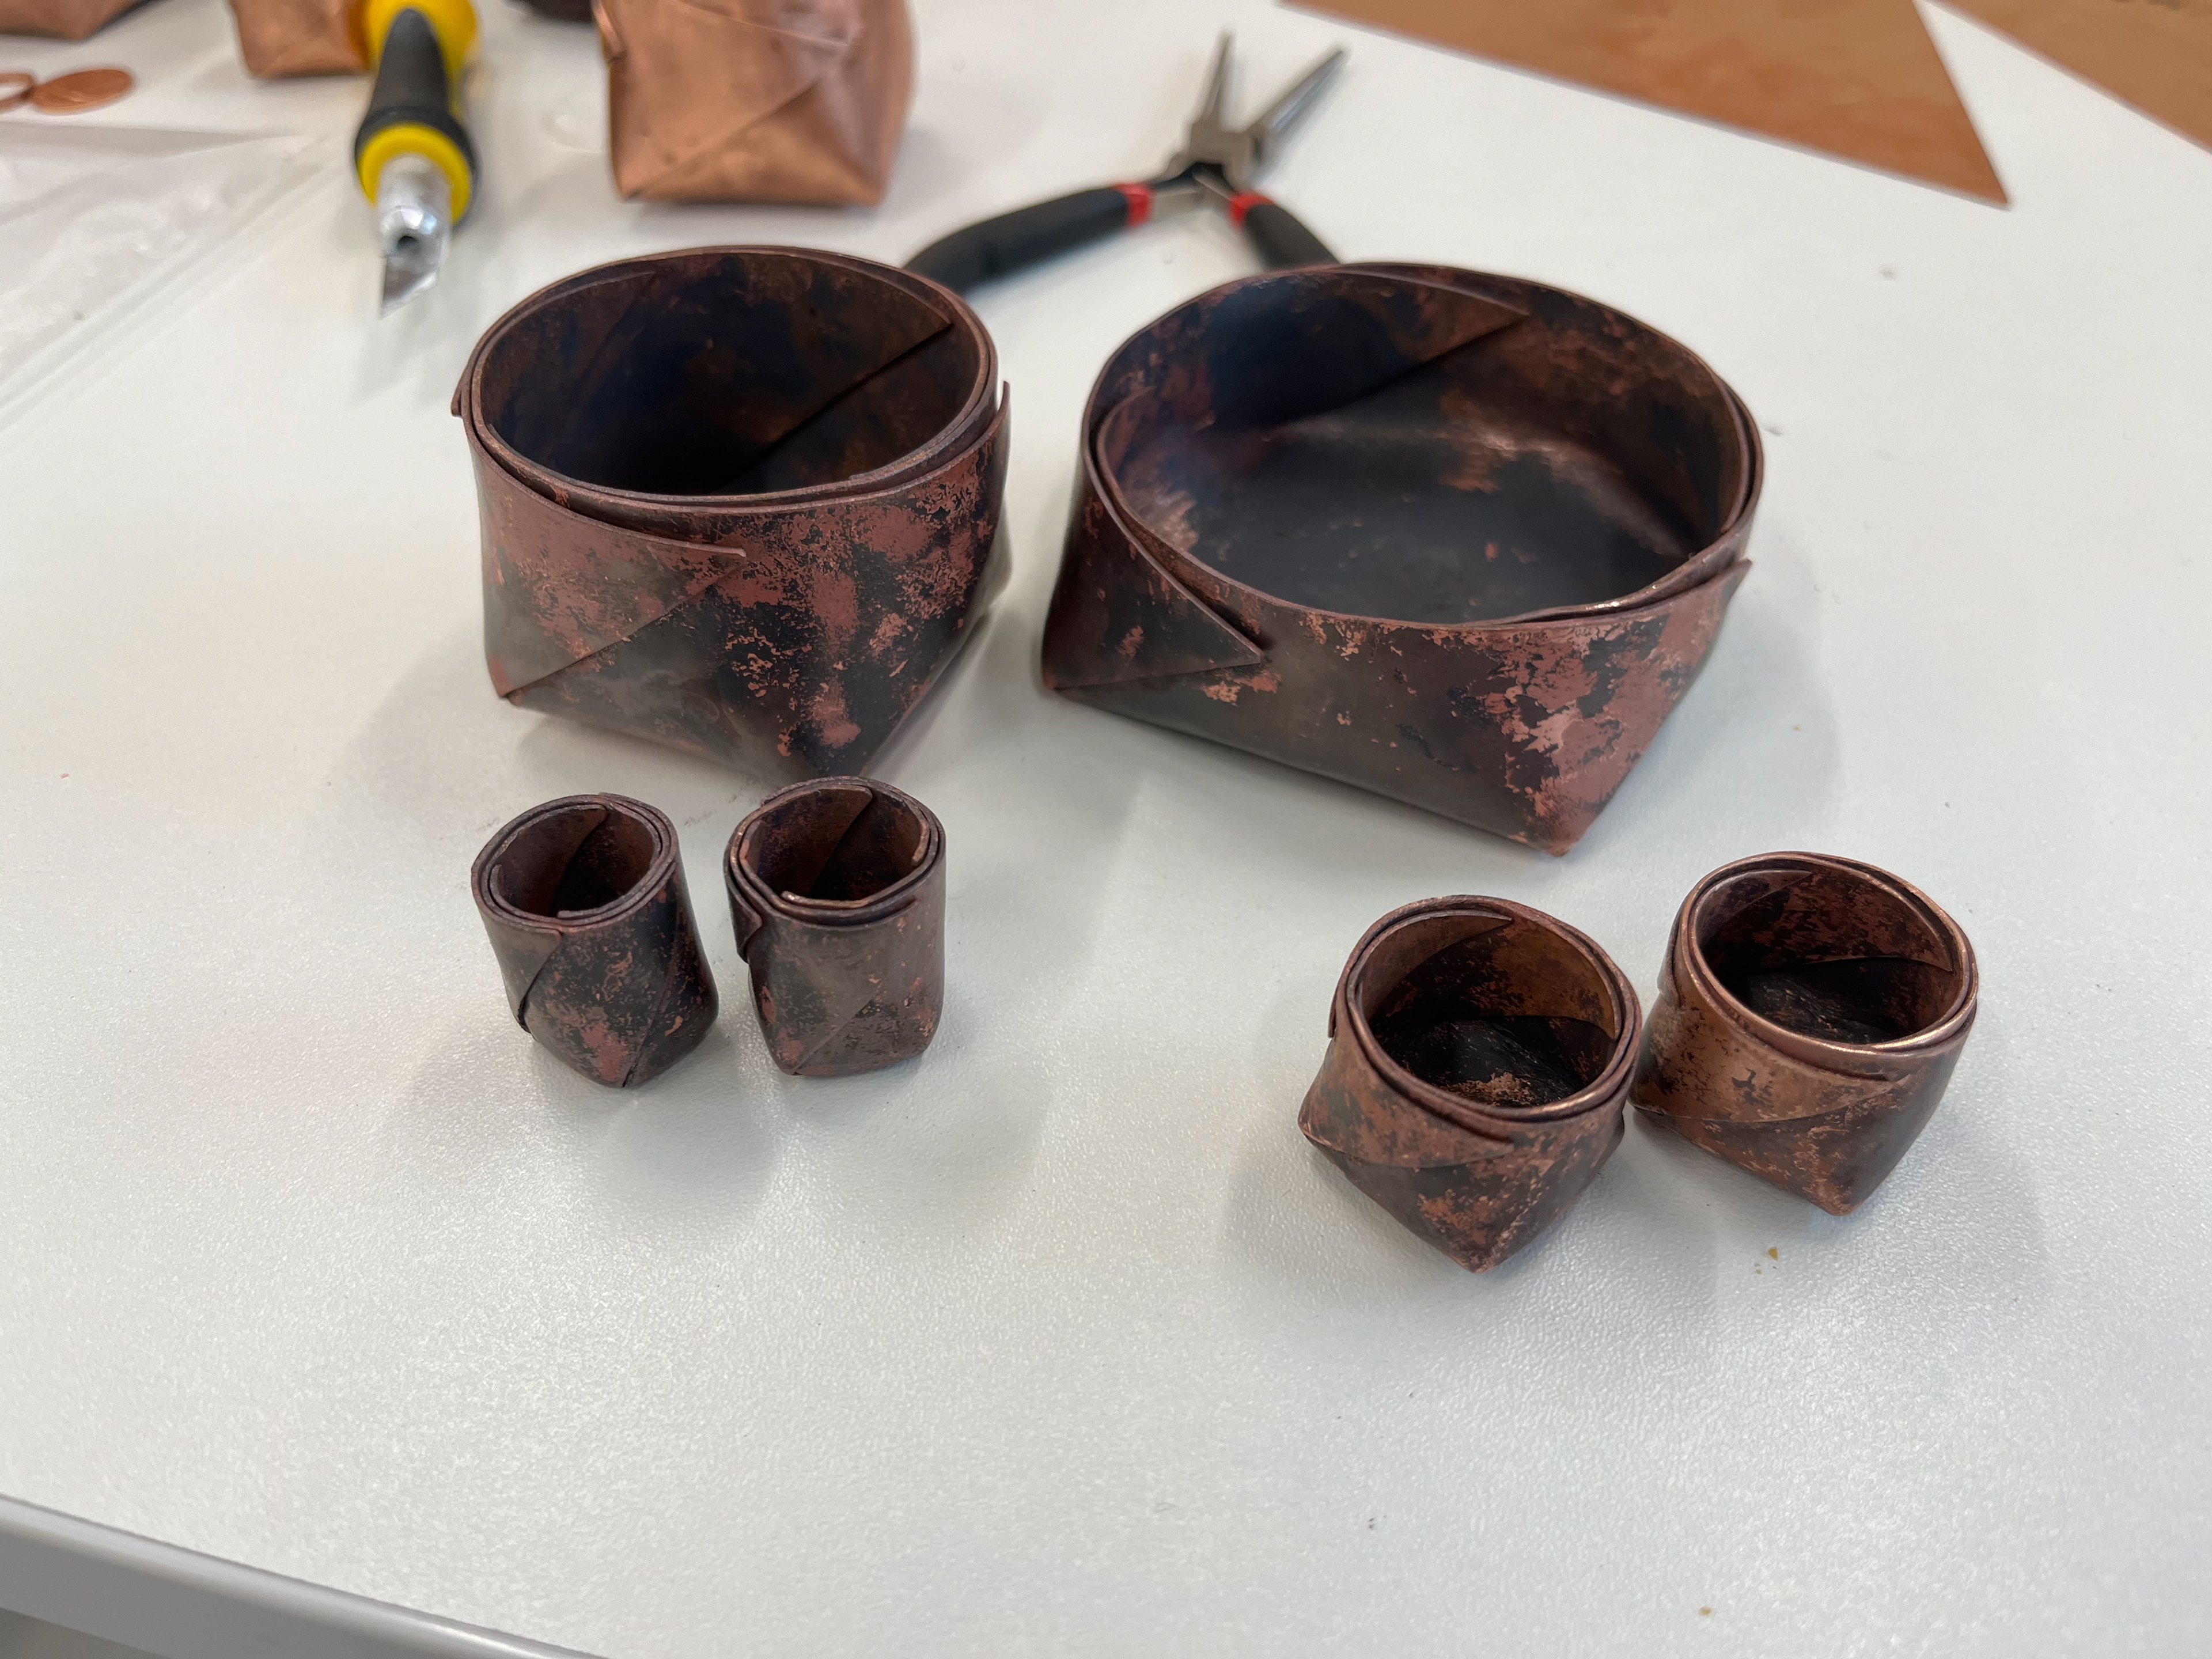
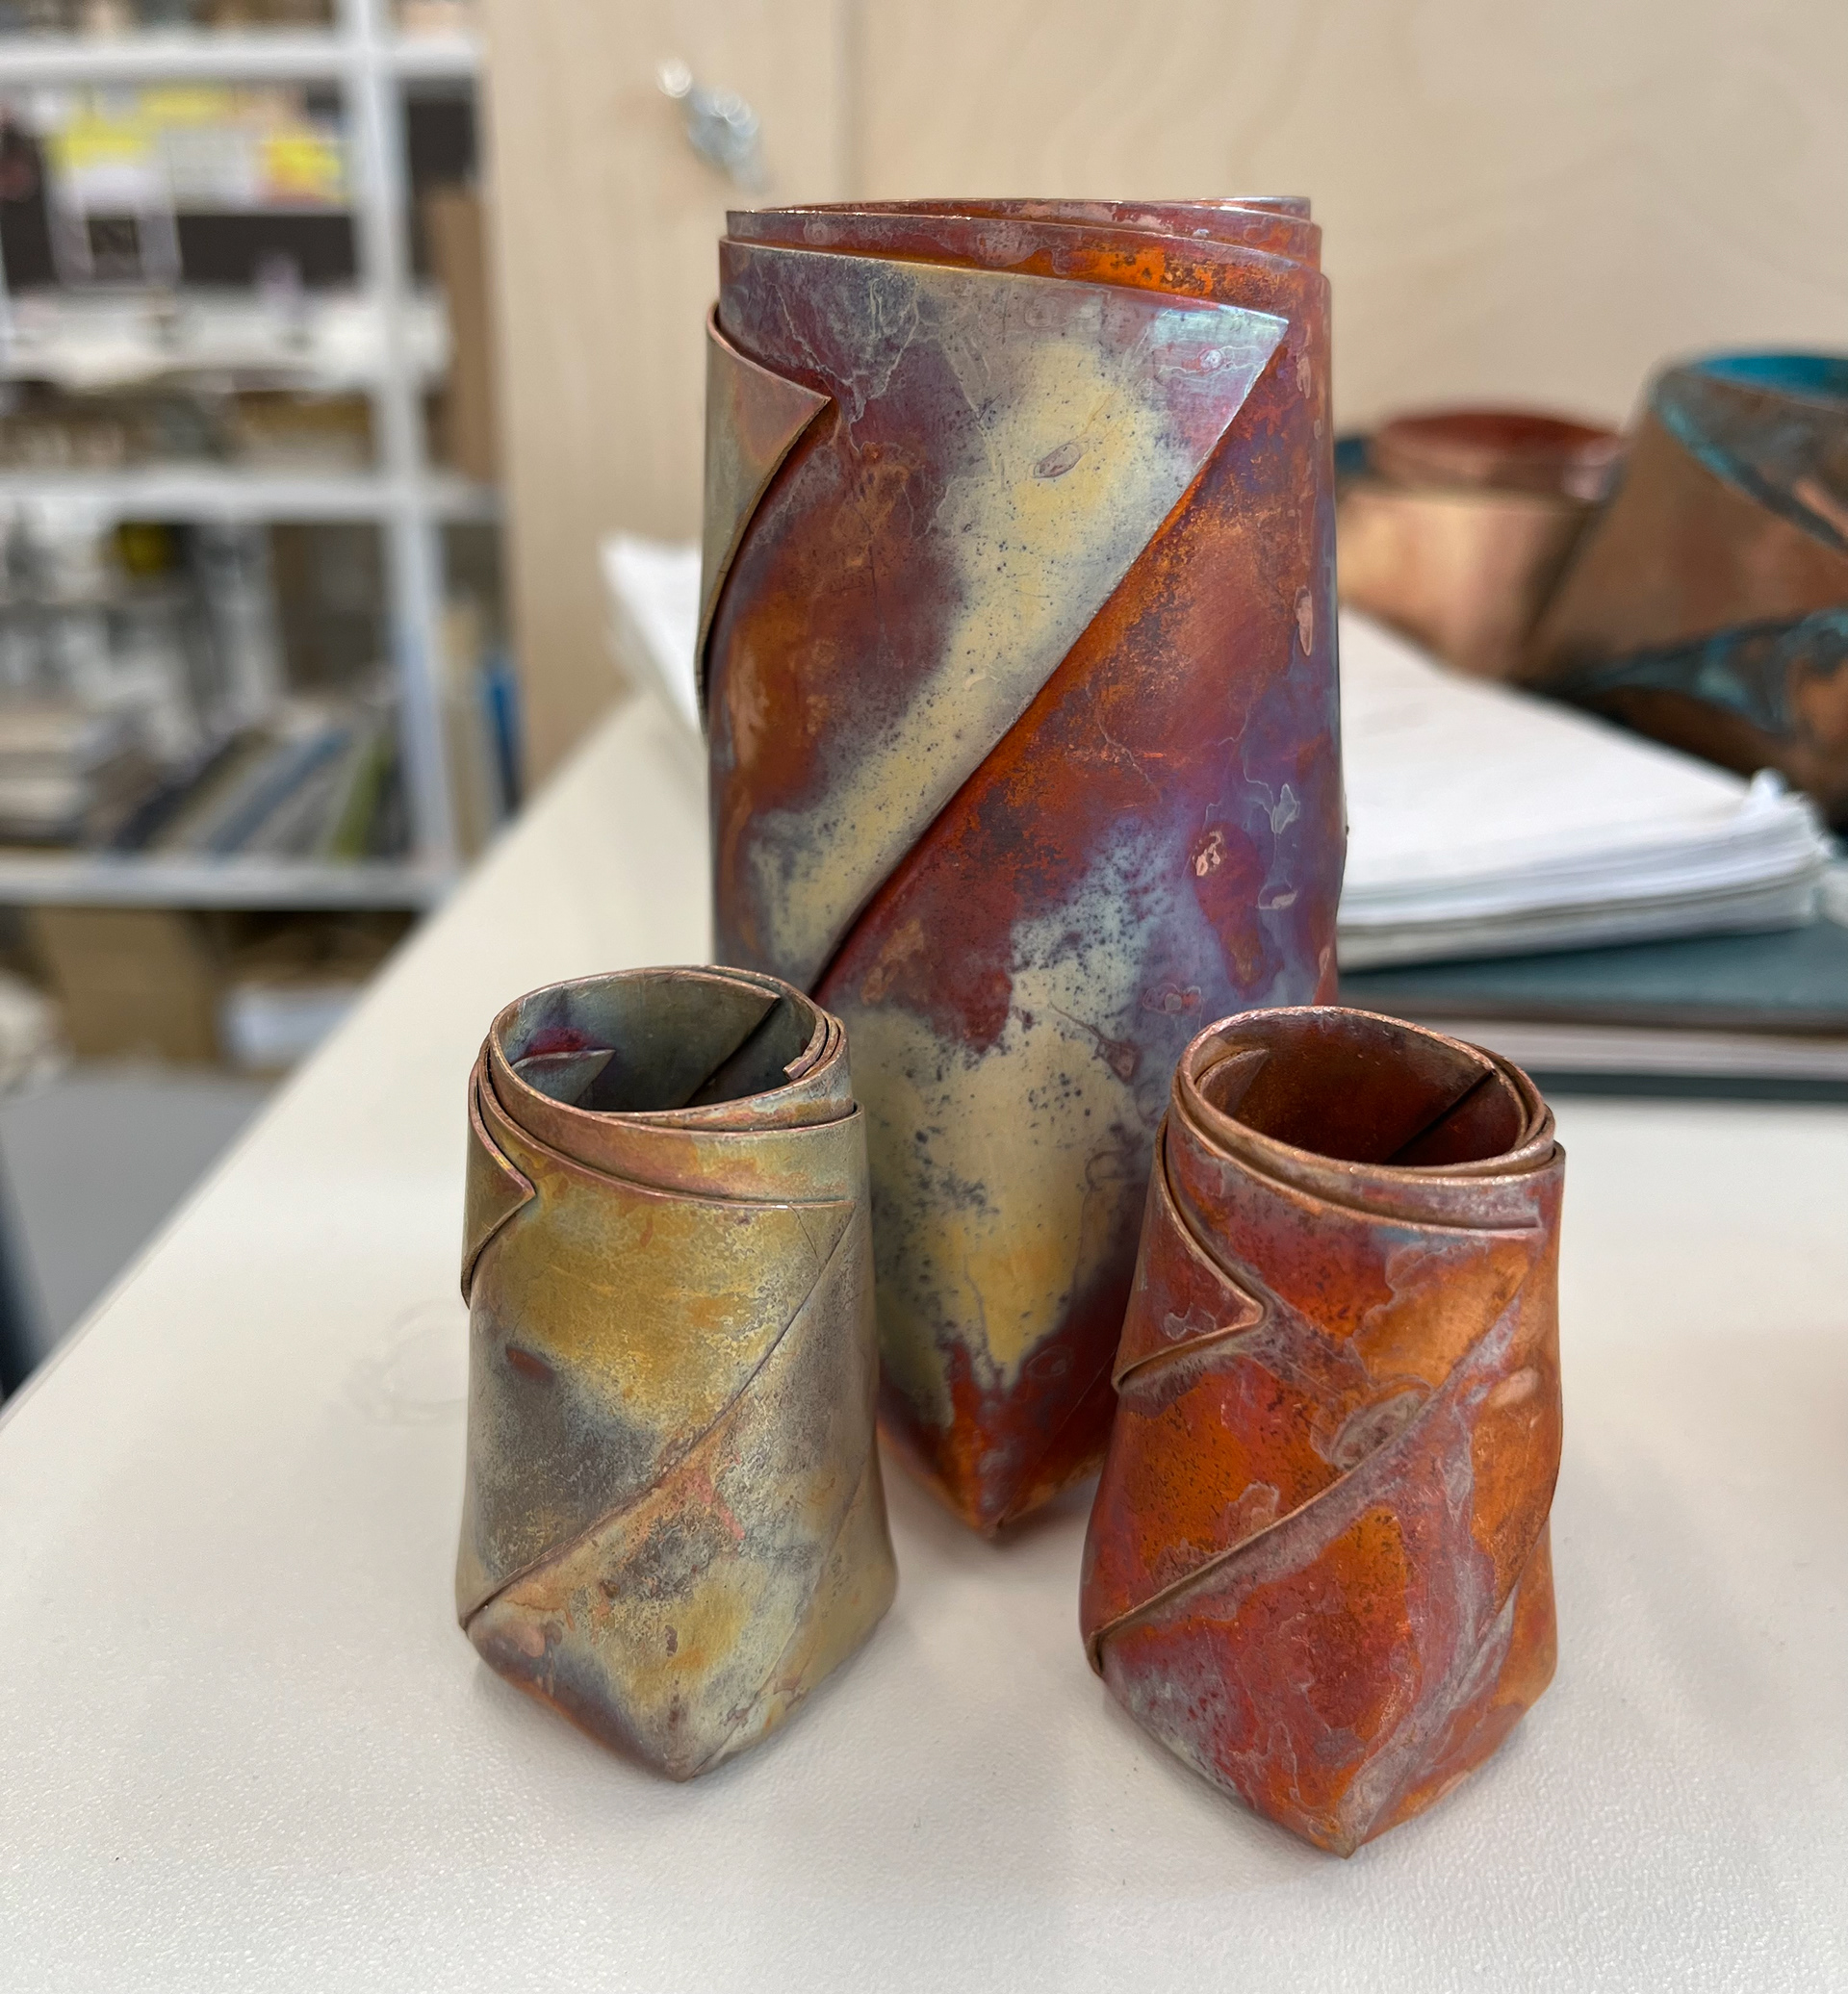
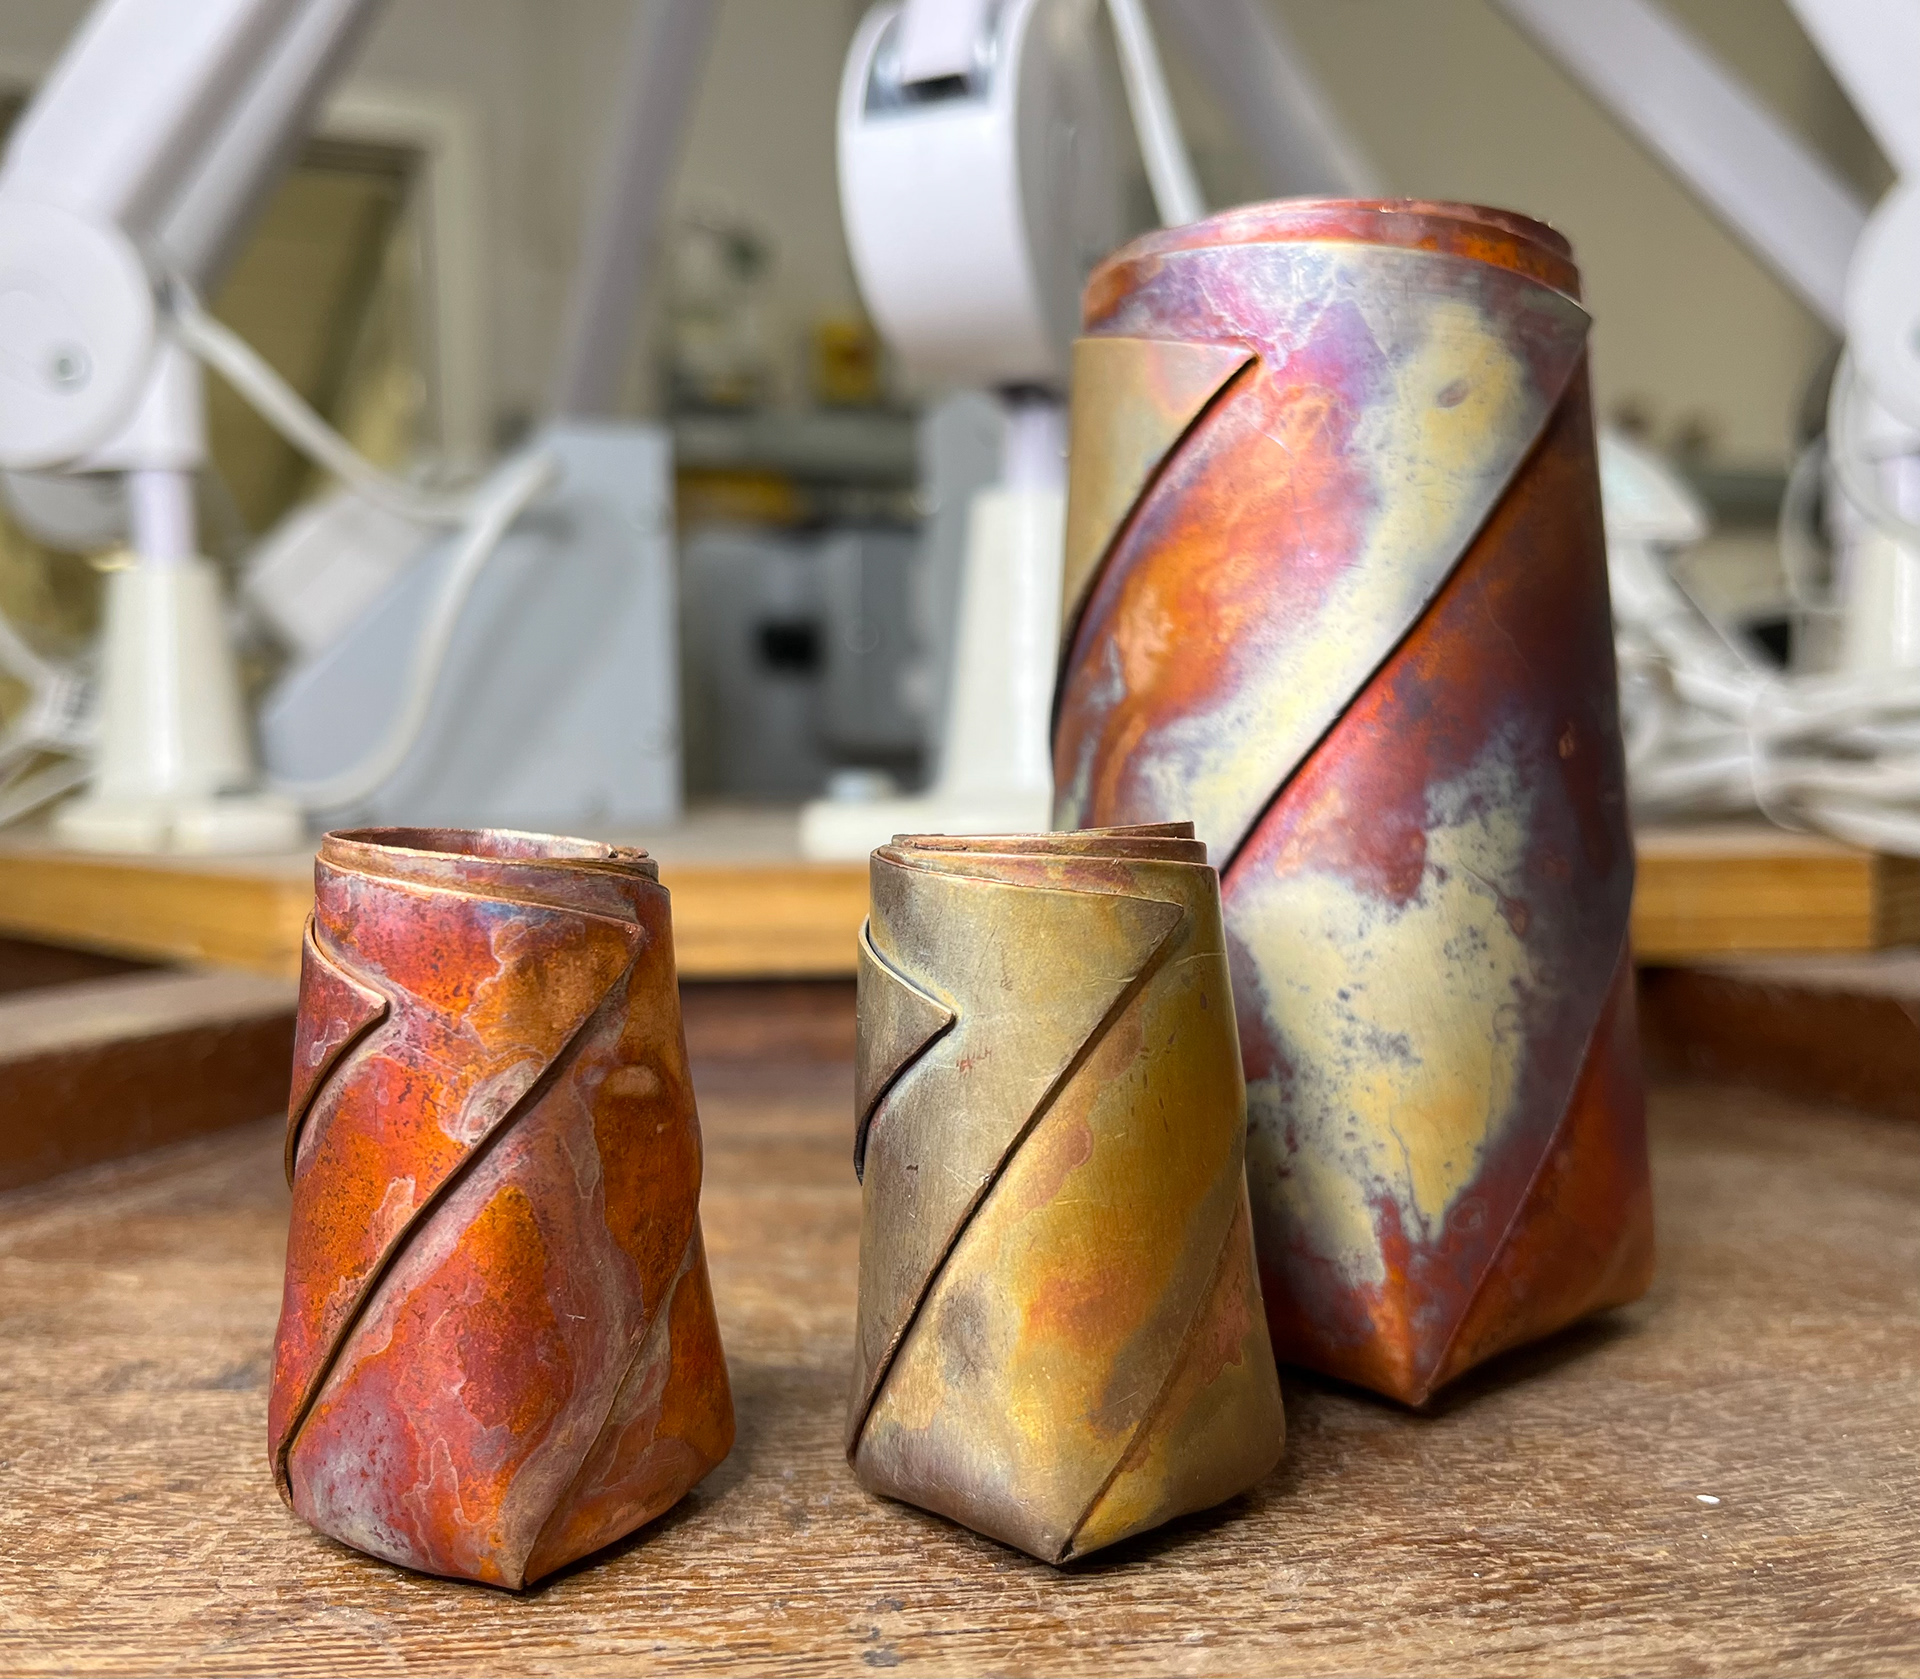
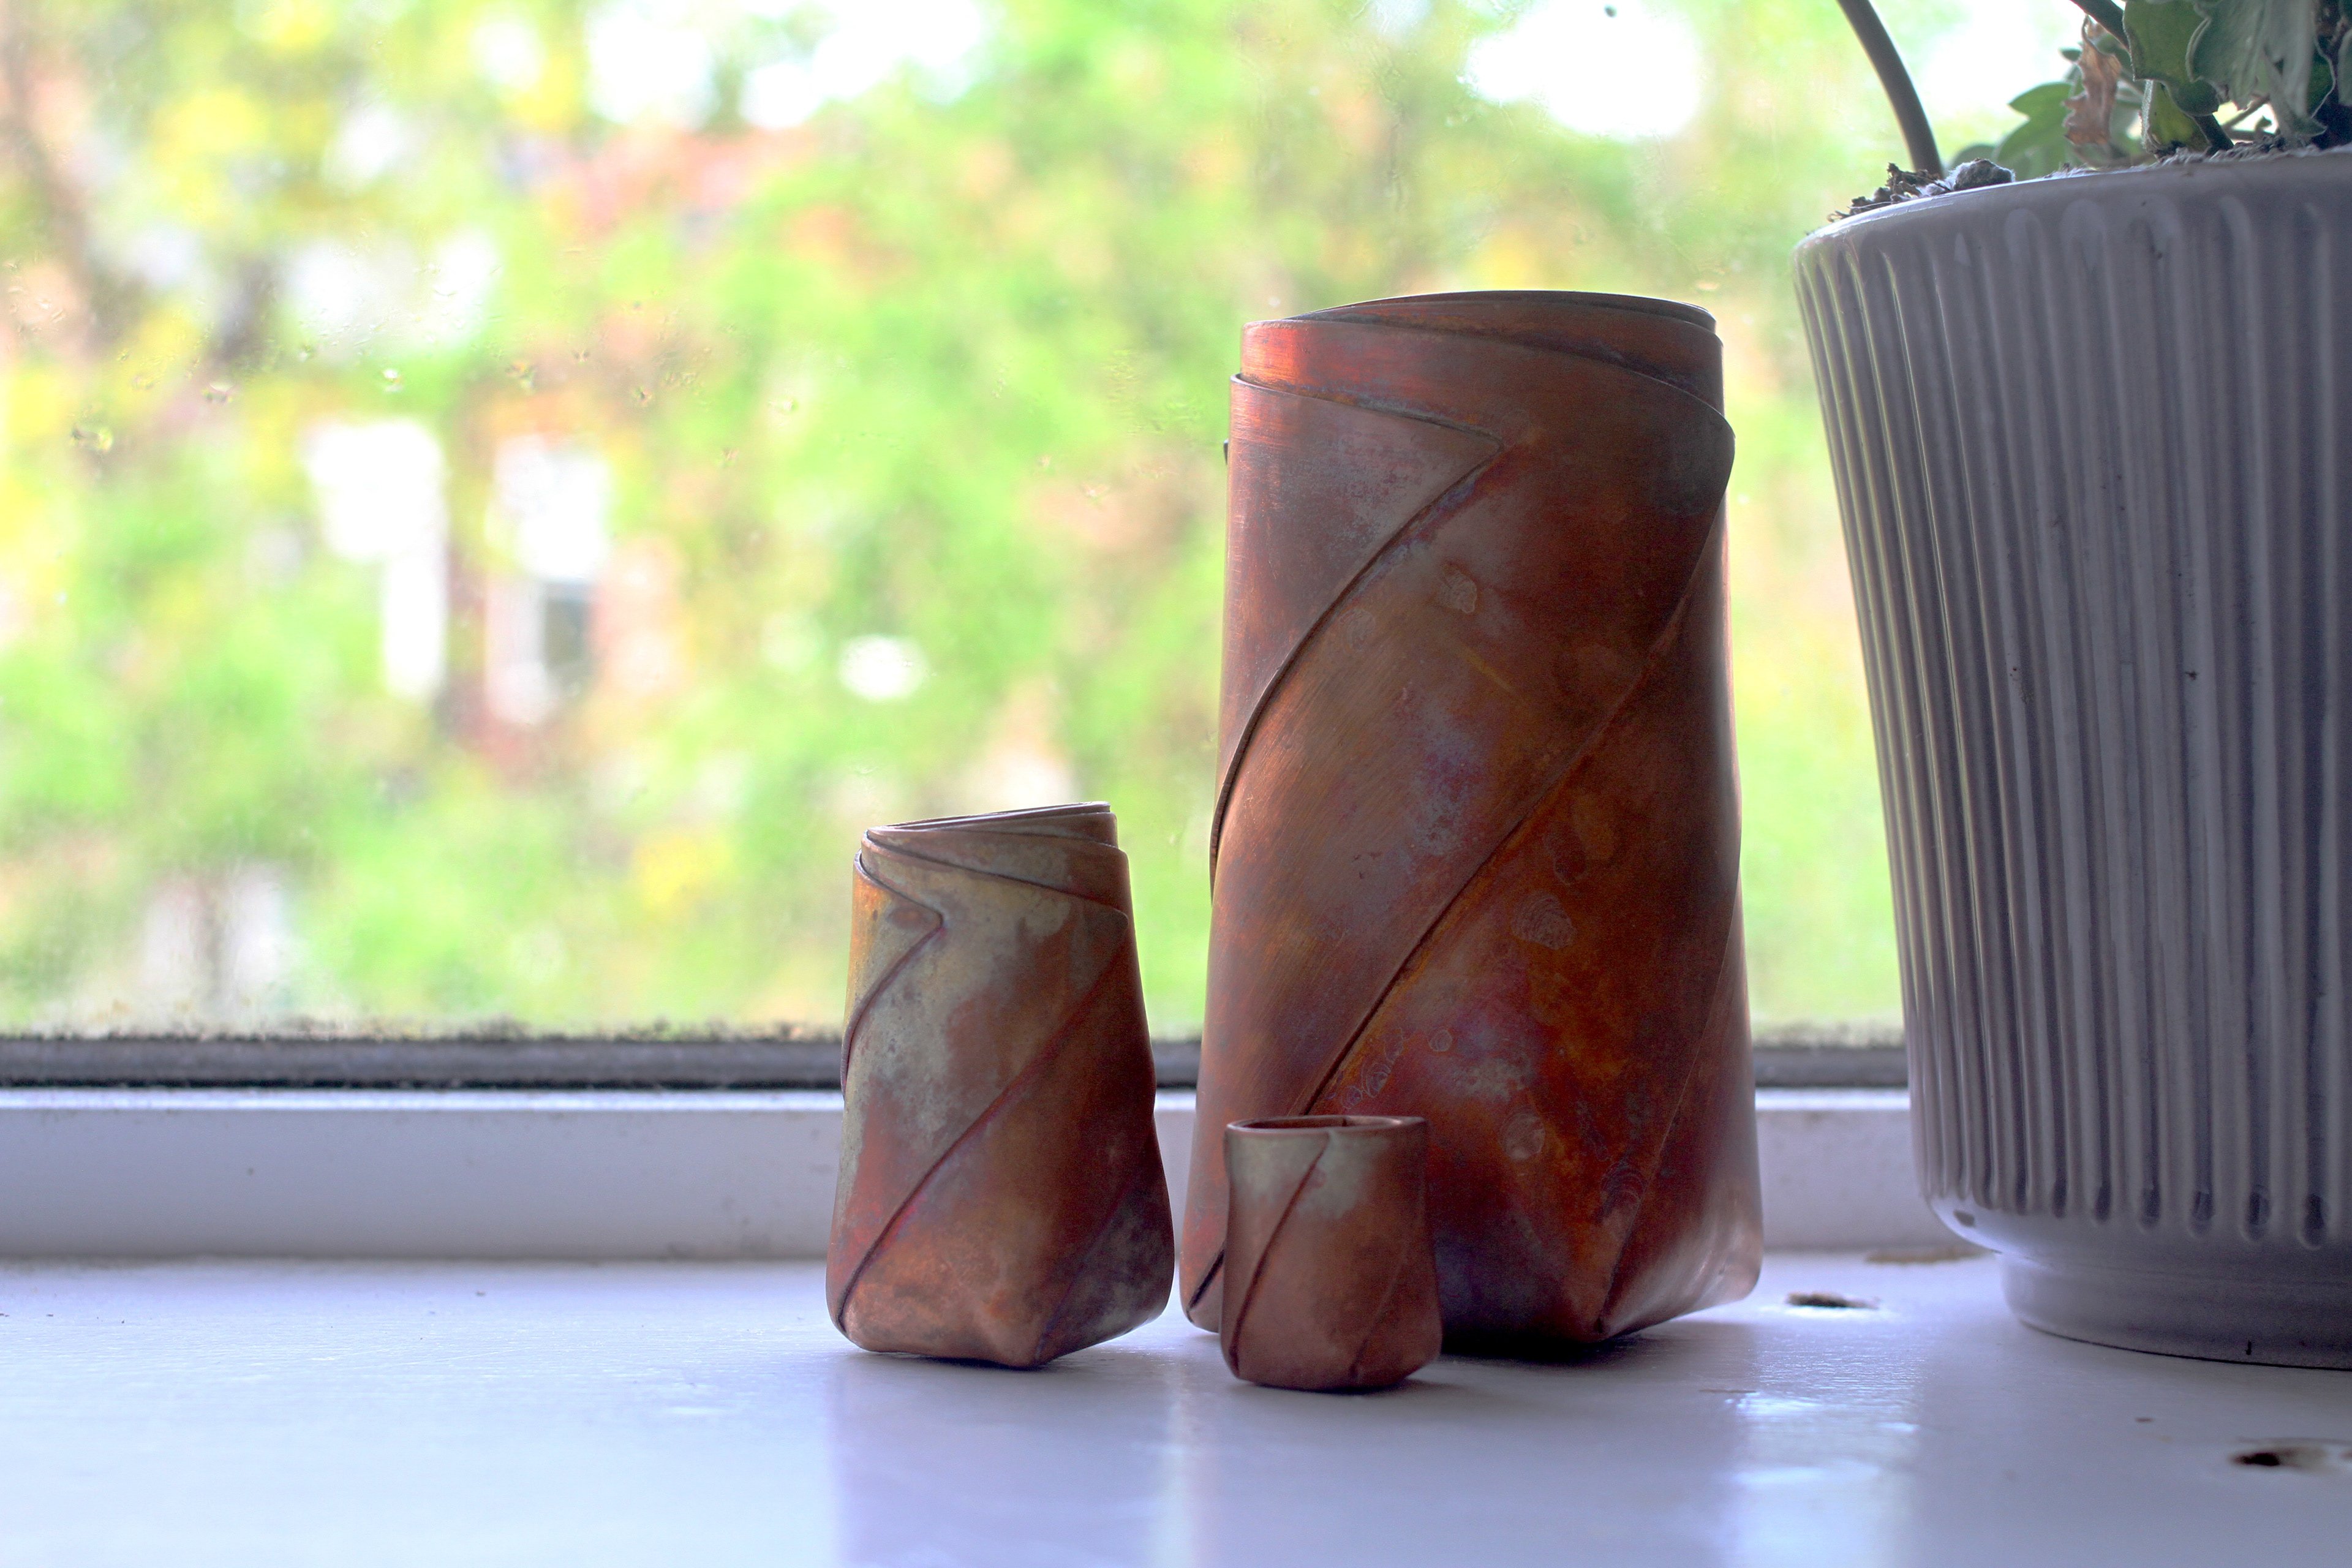
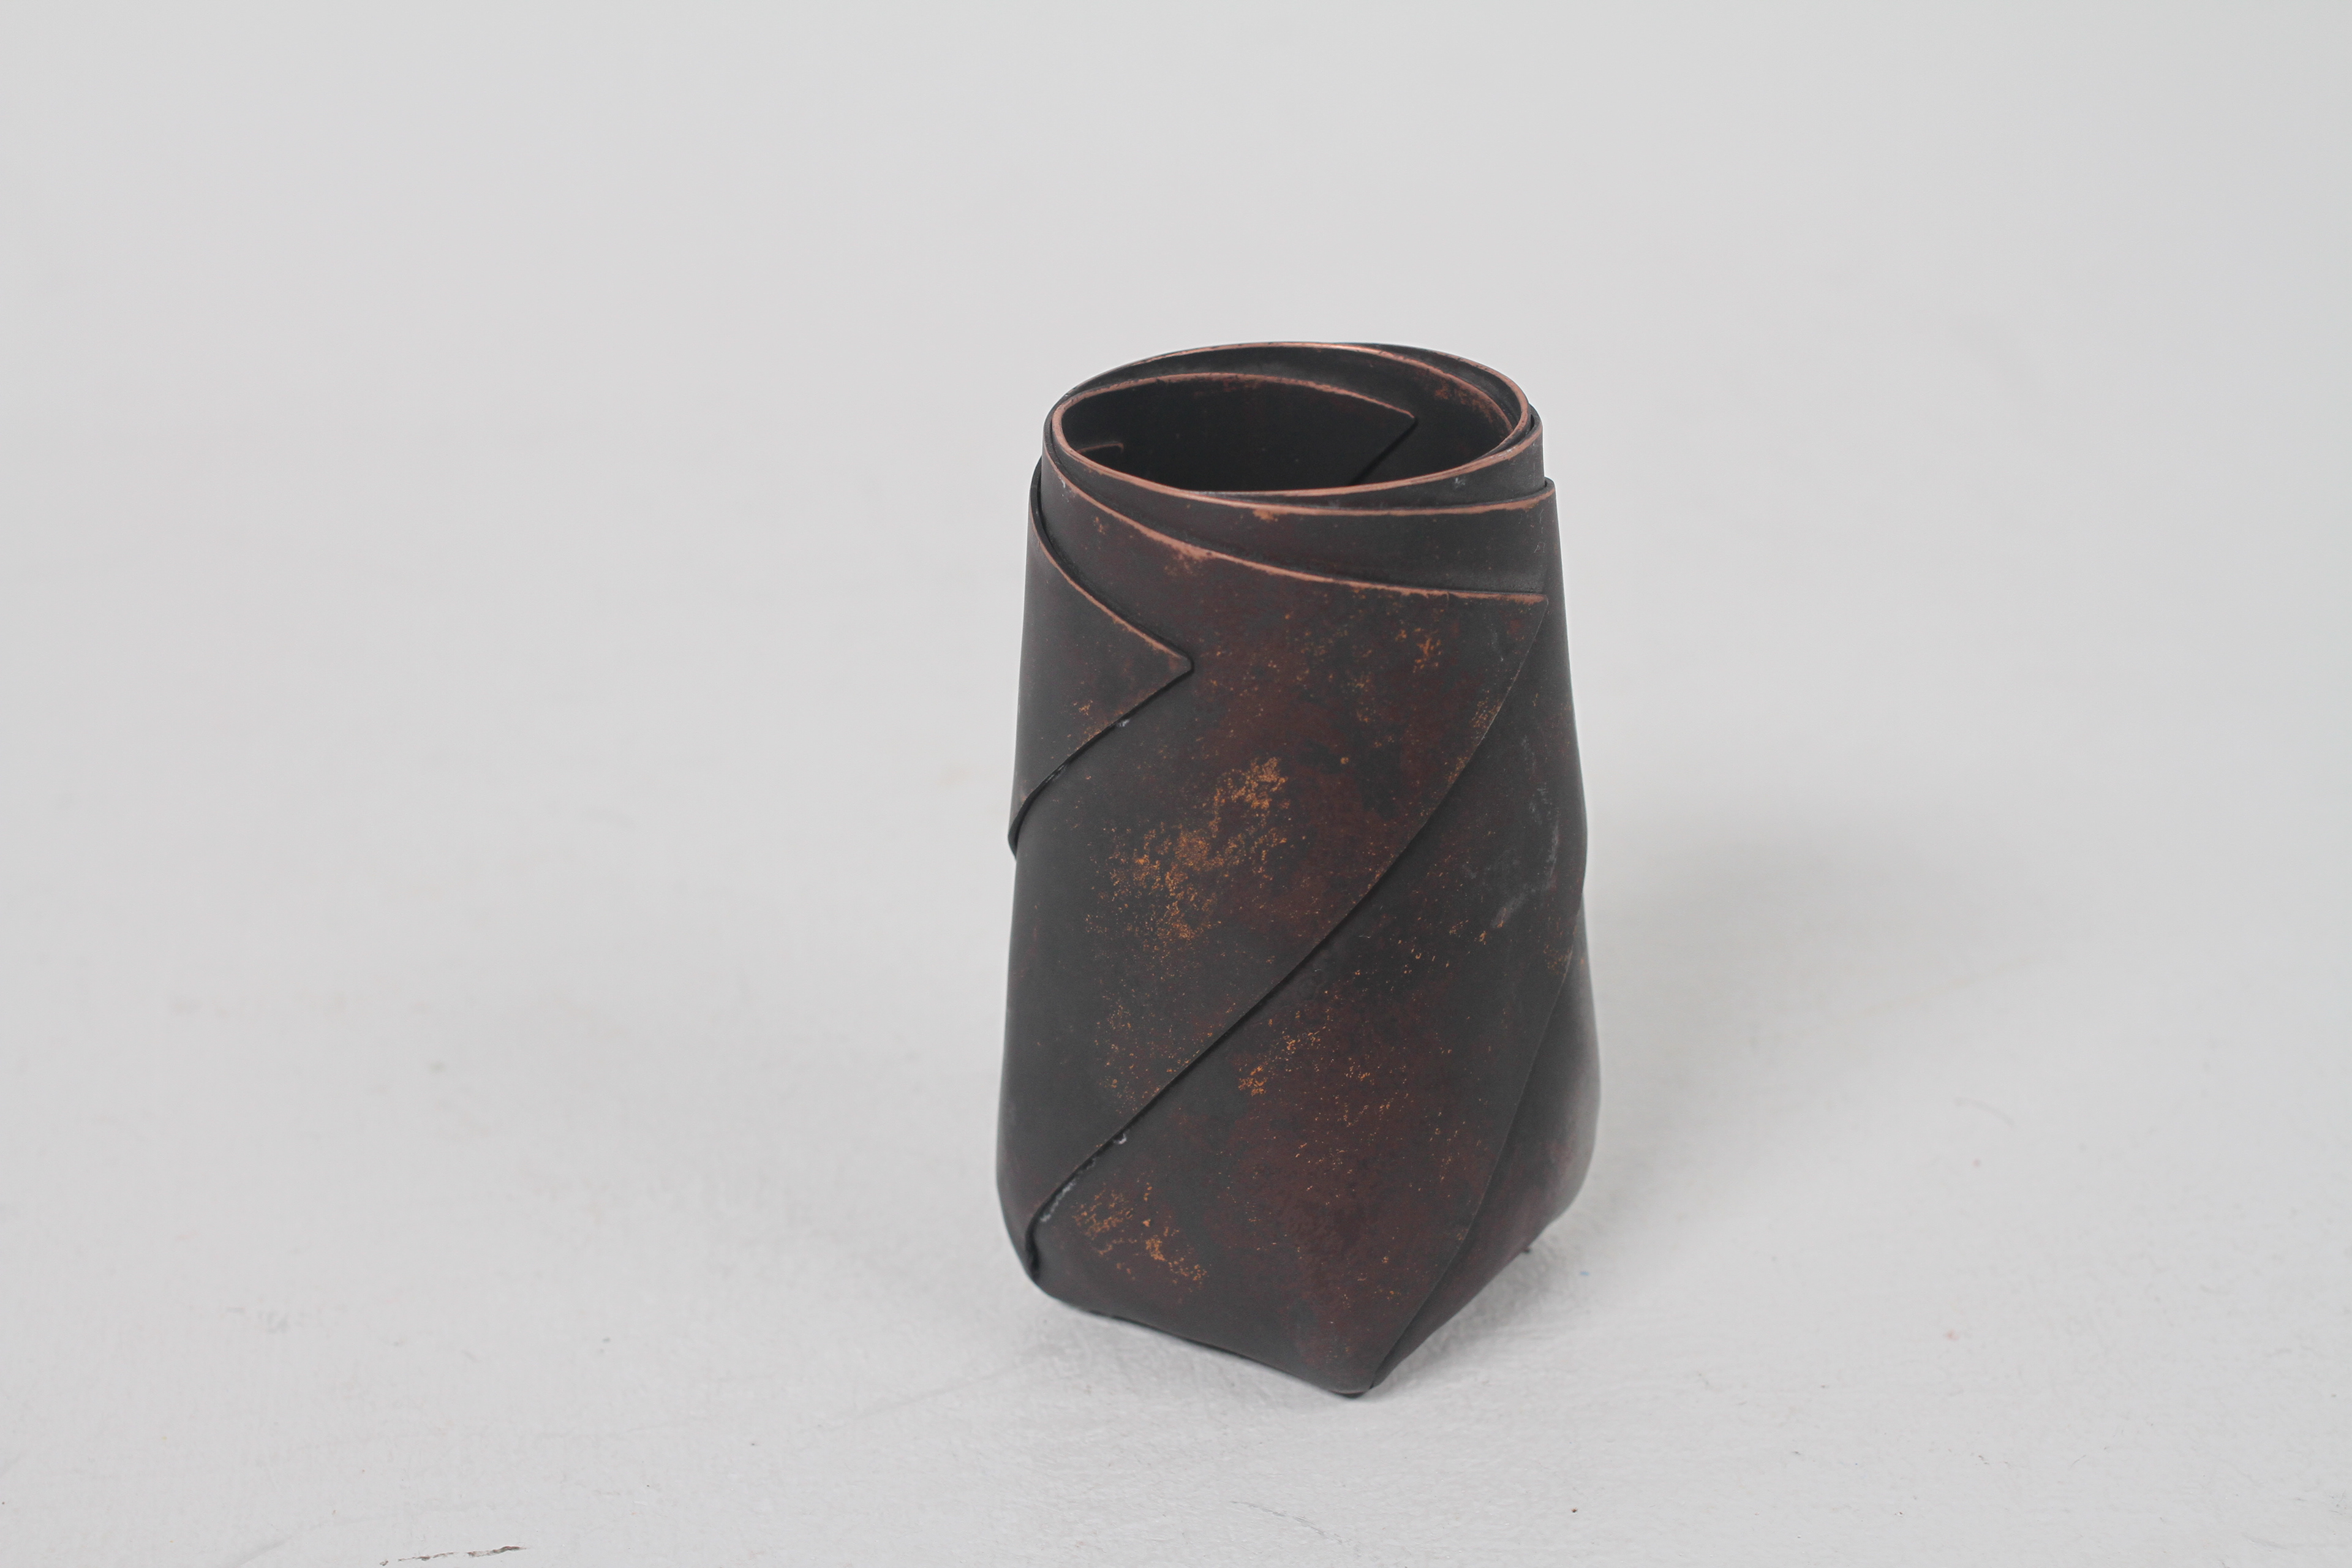
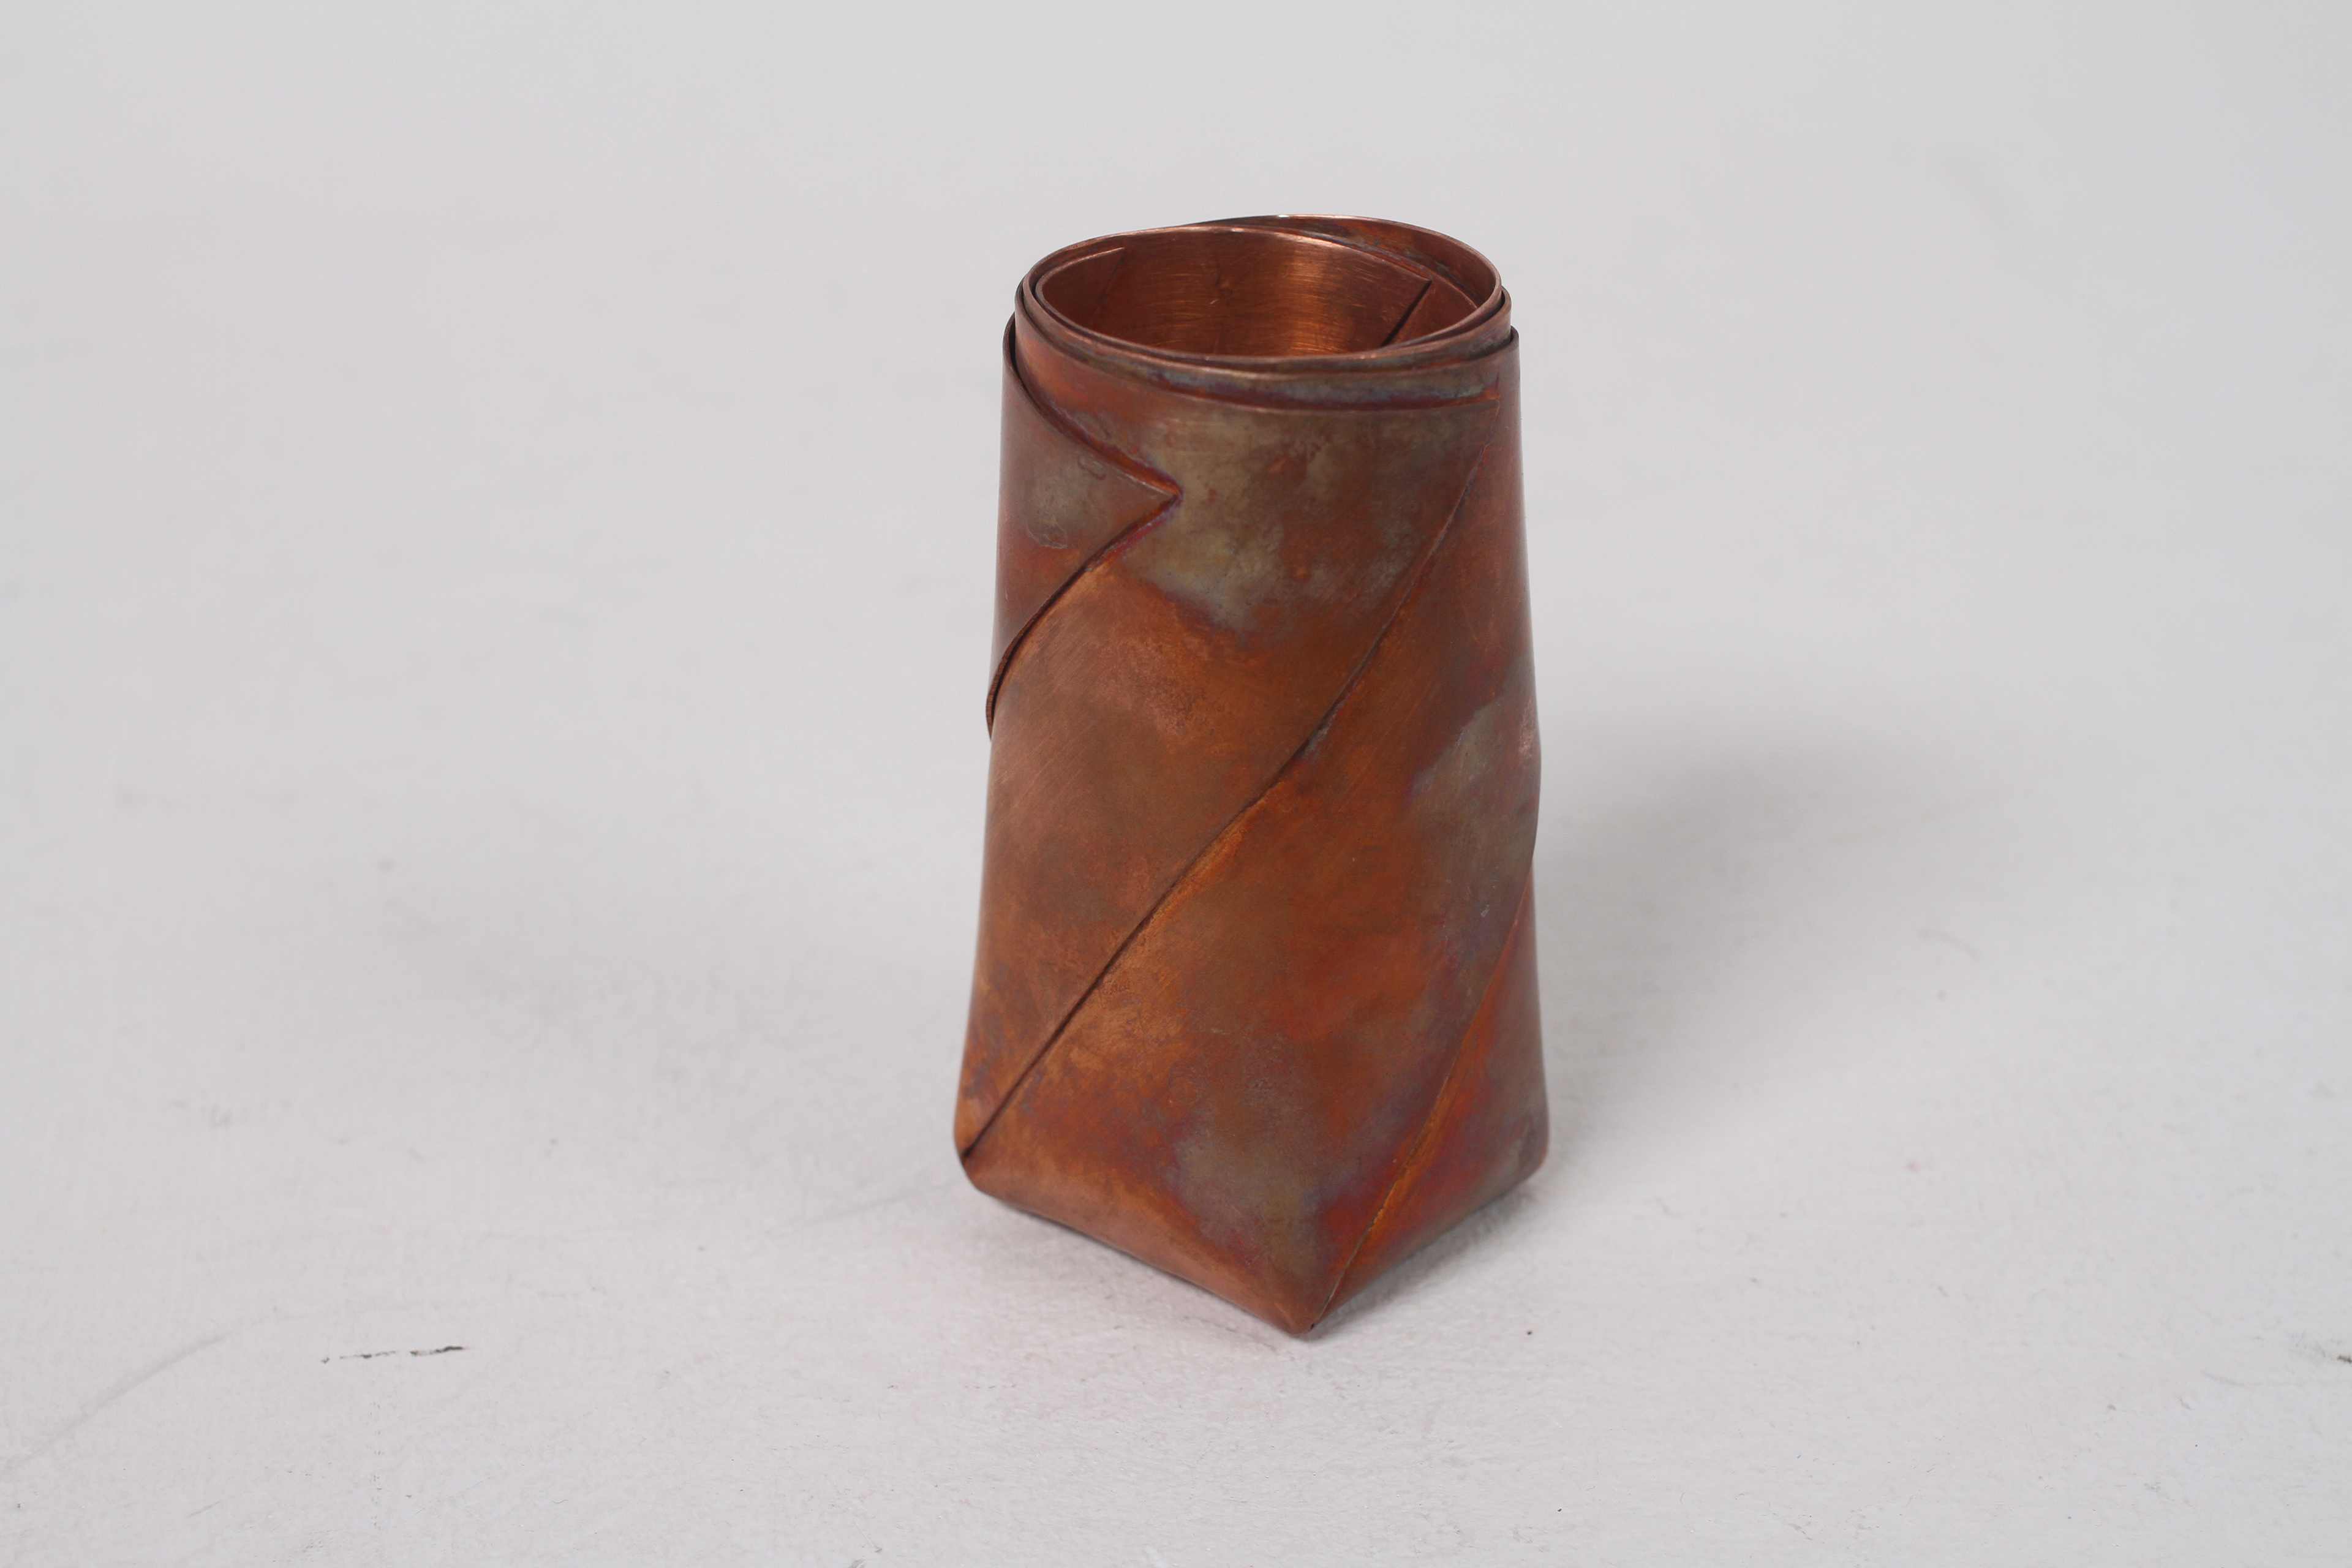
I then made some bigger versions of the tall vessels which took a bit longer to perfect but after making a couple practice pieces, I managed to get some very nice looking vessels.
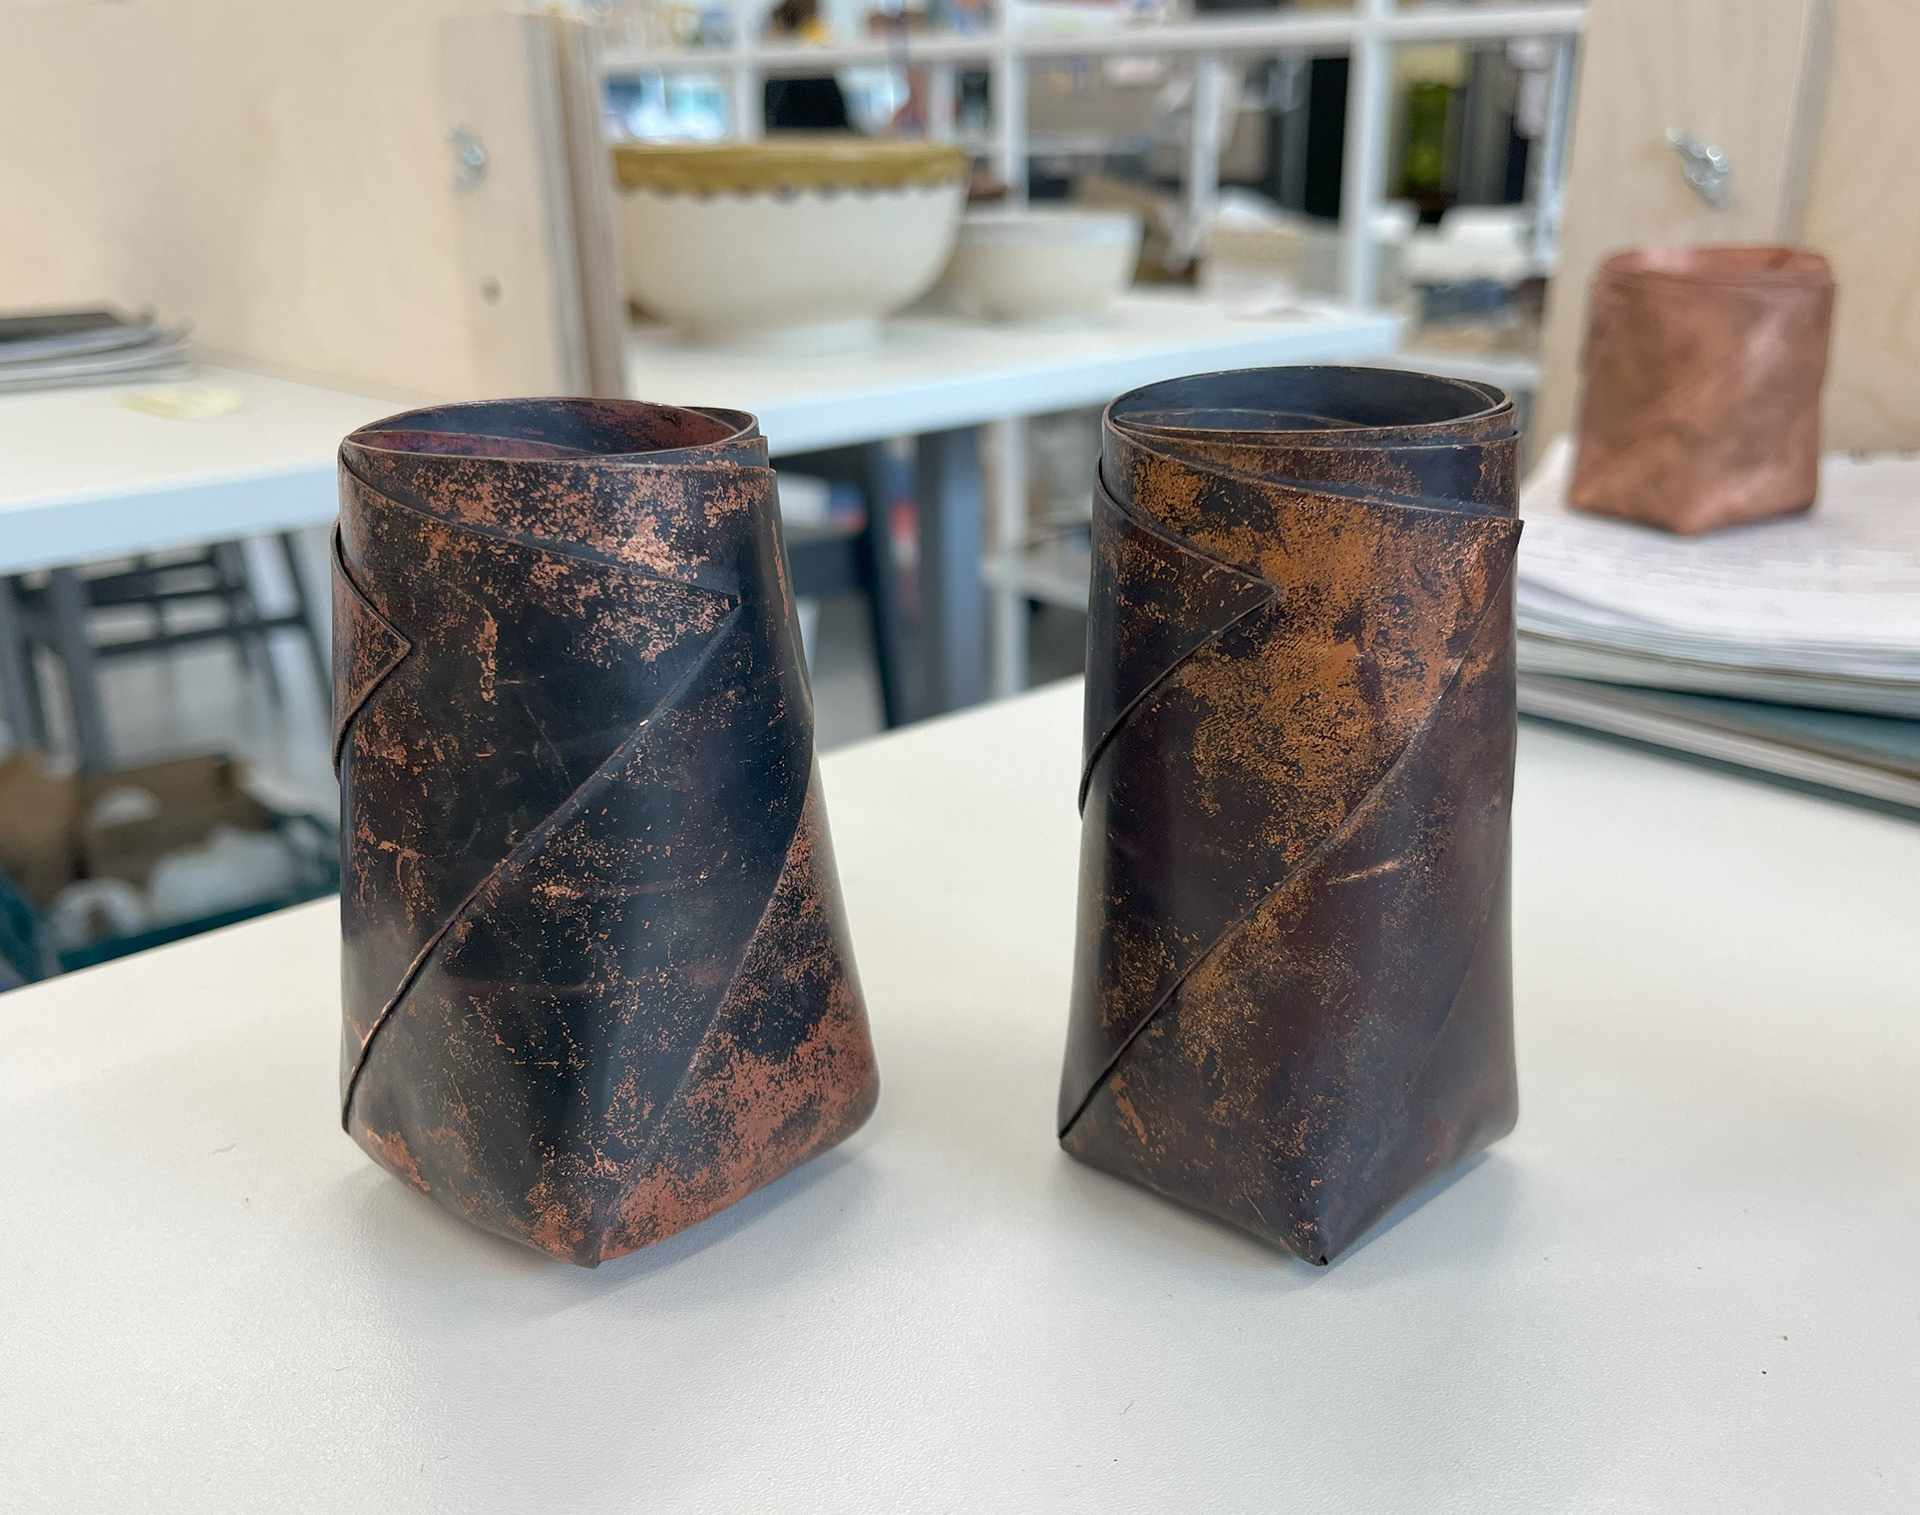
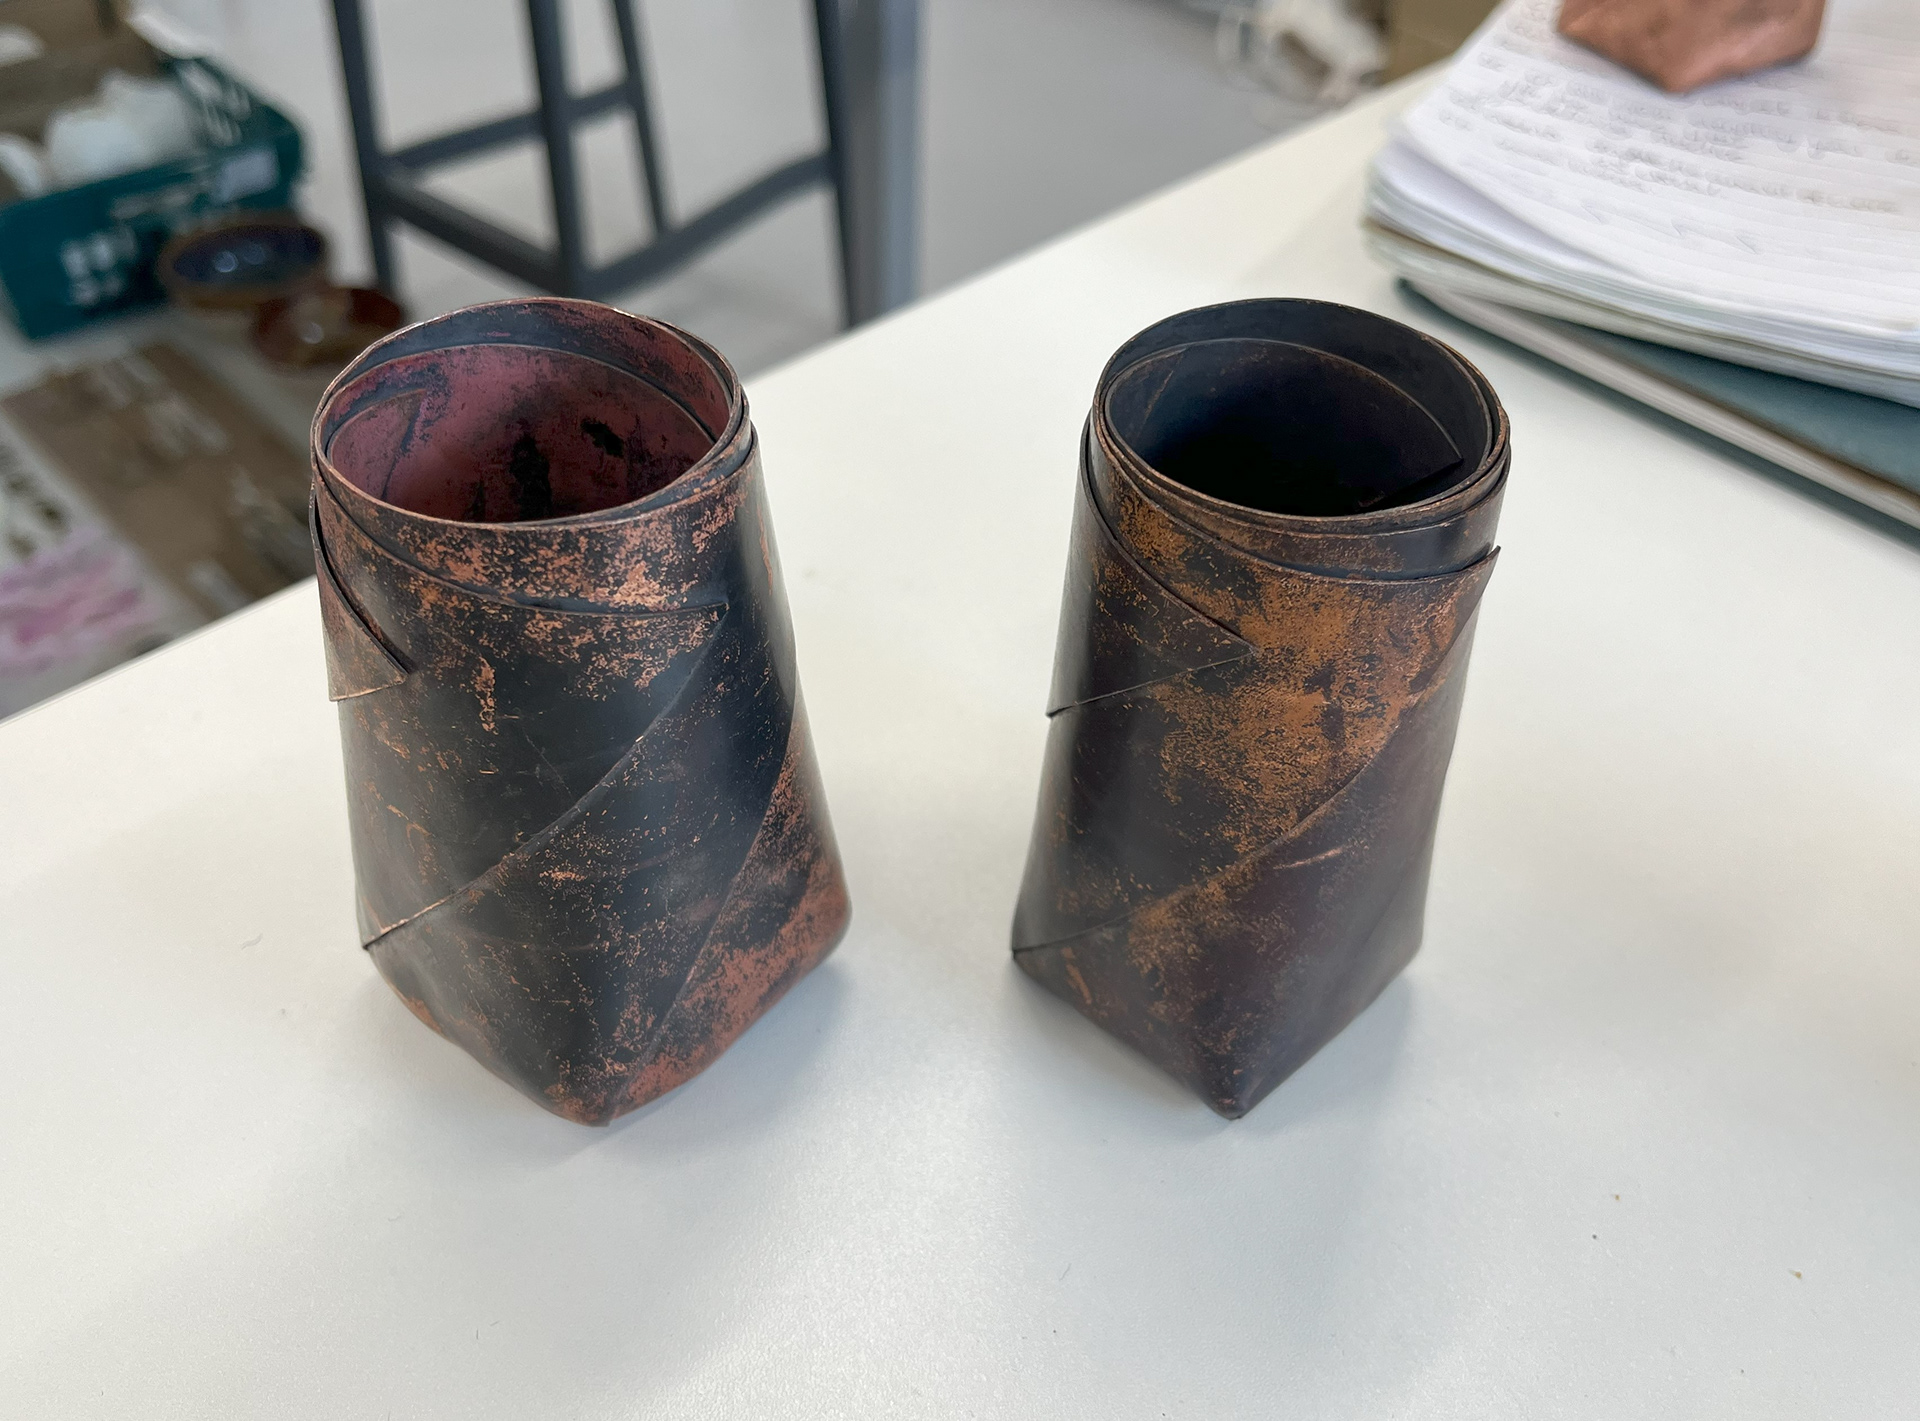
The vessel on the left is the first one I made, and was quite wobbly with bulges round the base where I made mistakes hammering it. The one on the right is a lot more precise and sharper. If I can keep this standard up for the tall vessels then I will be happy.
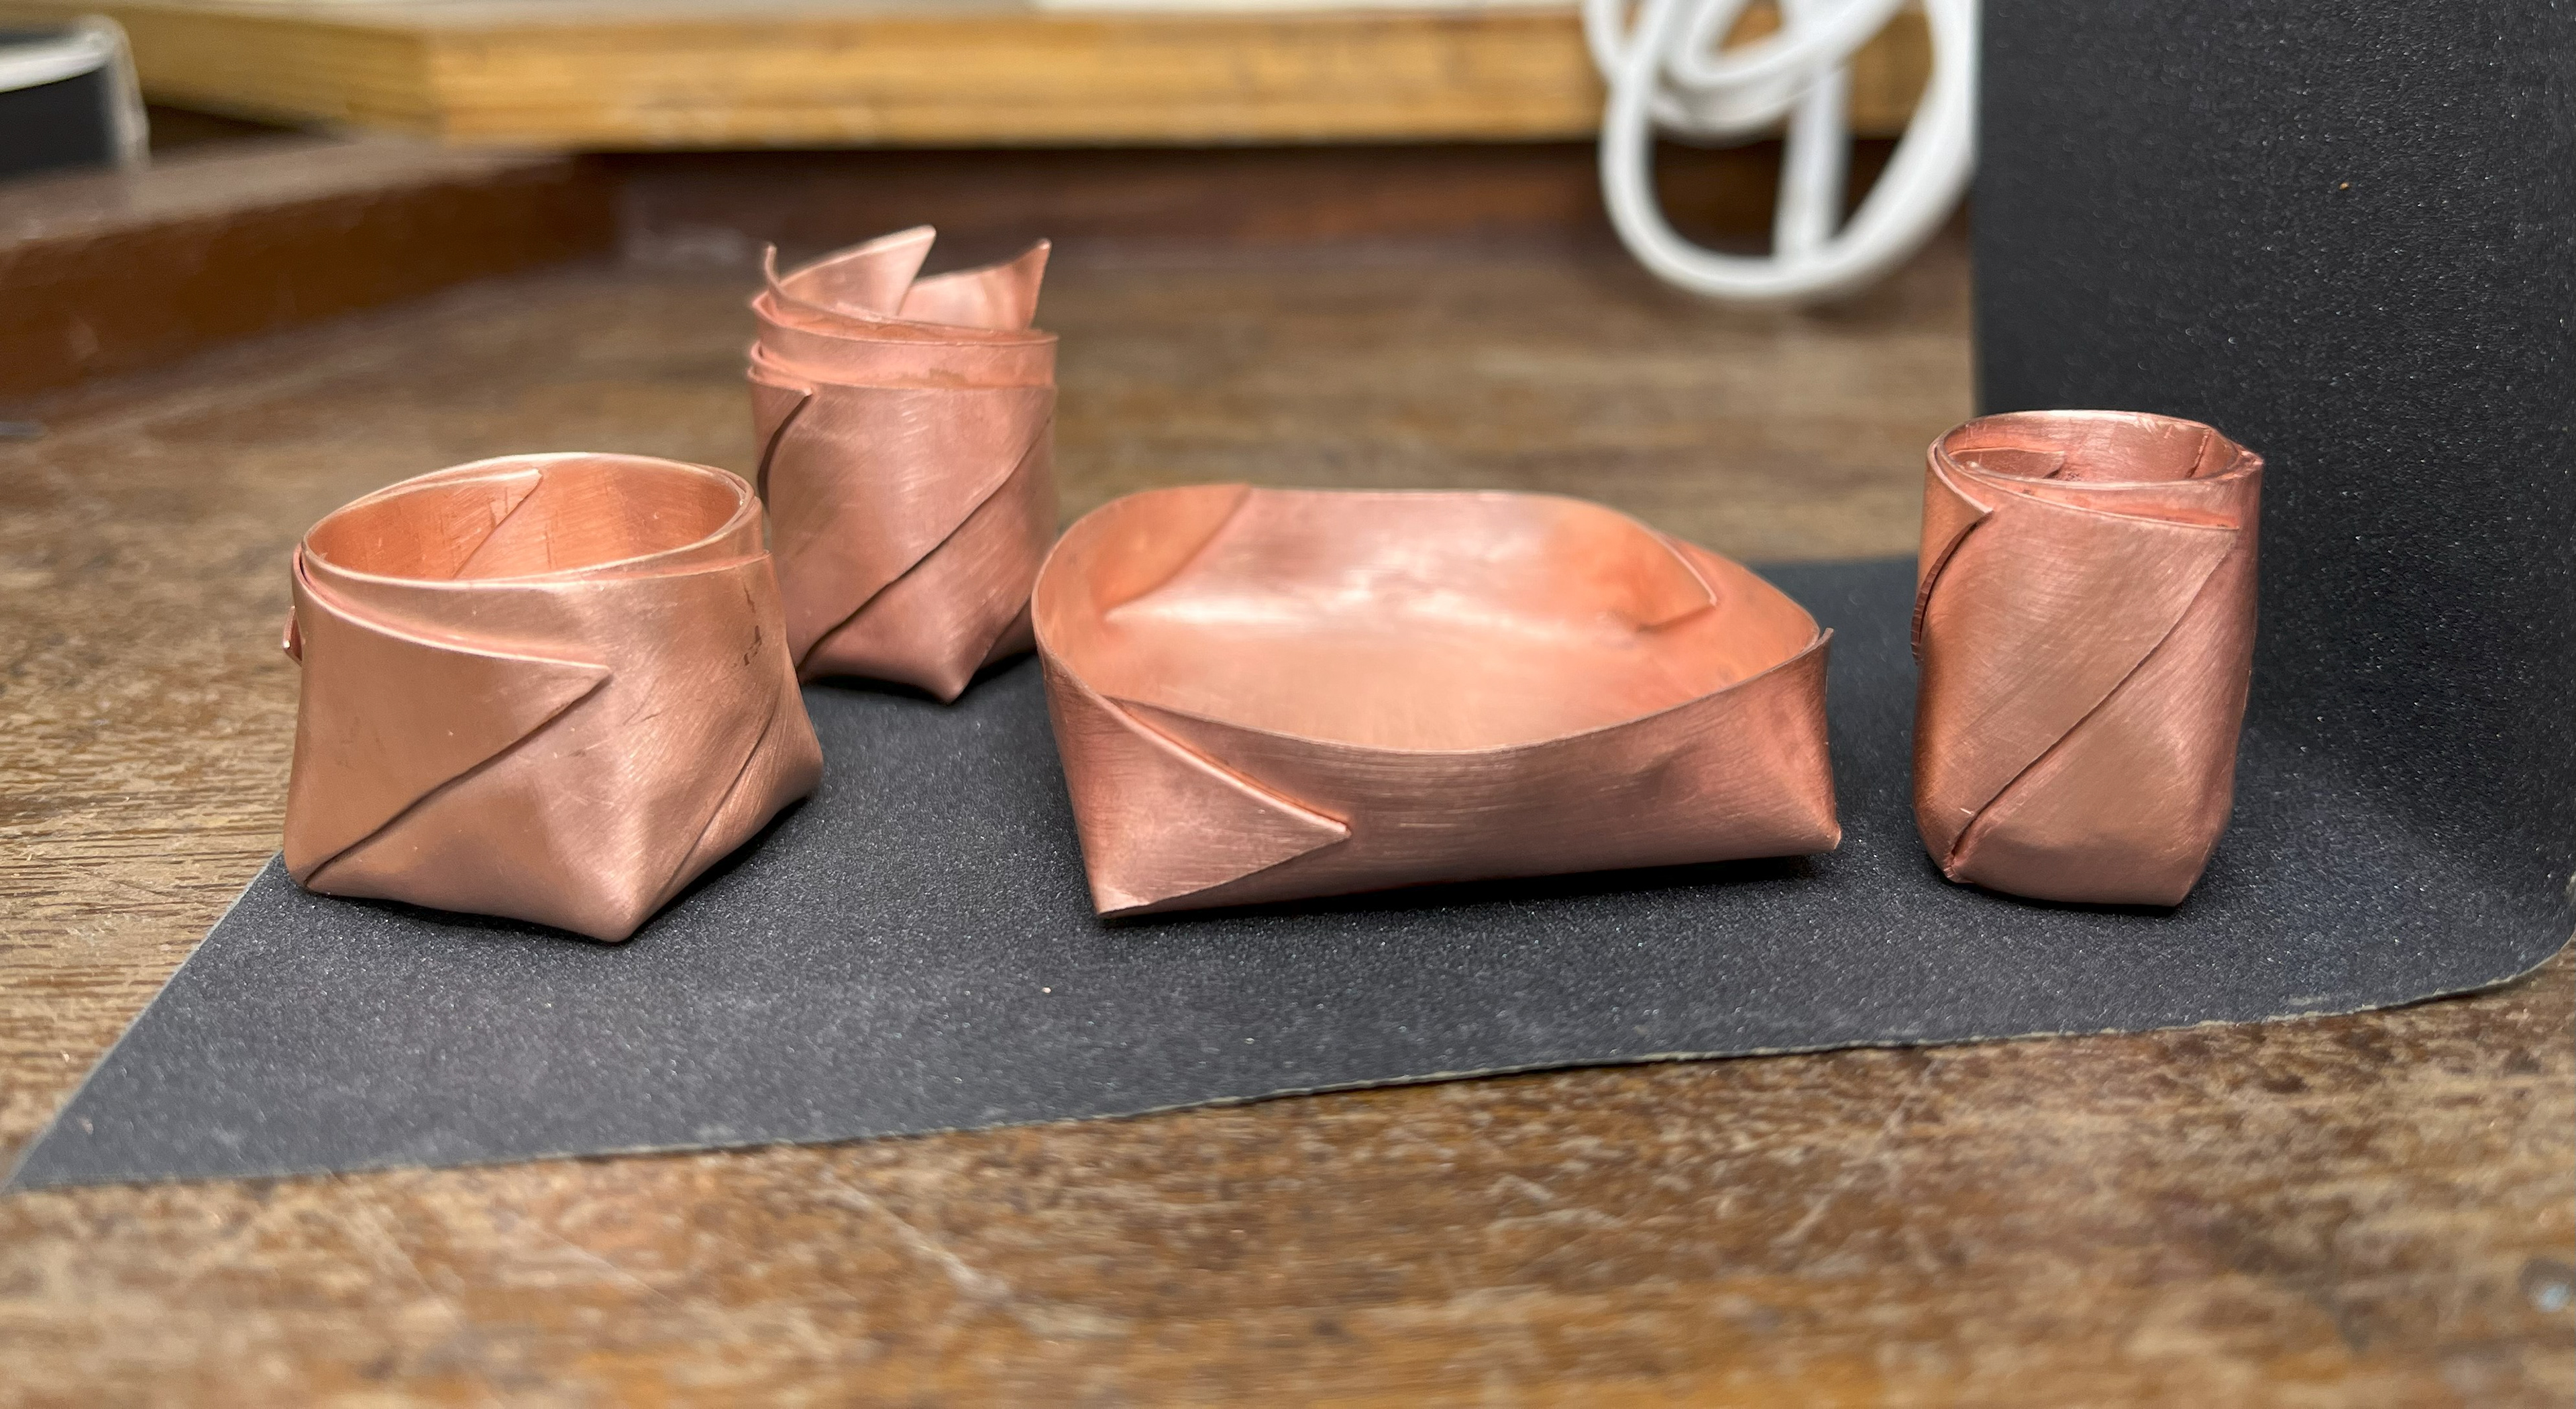
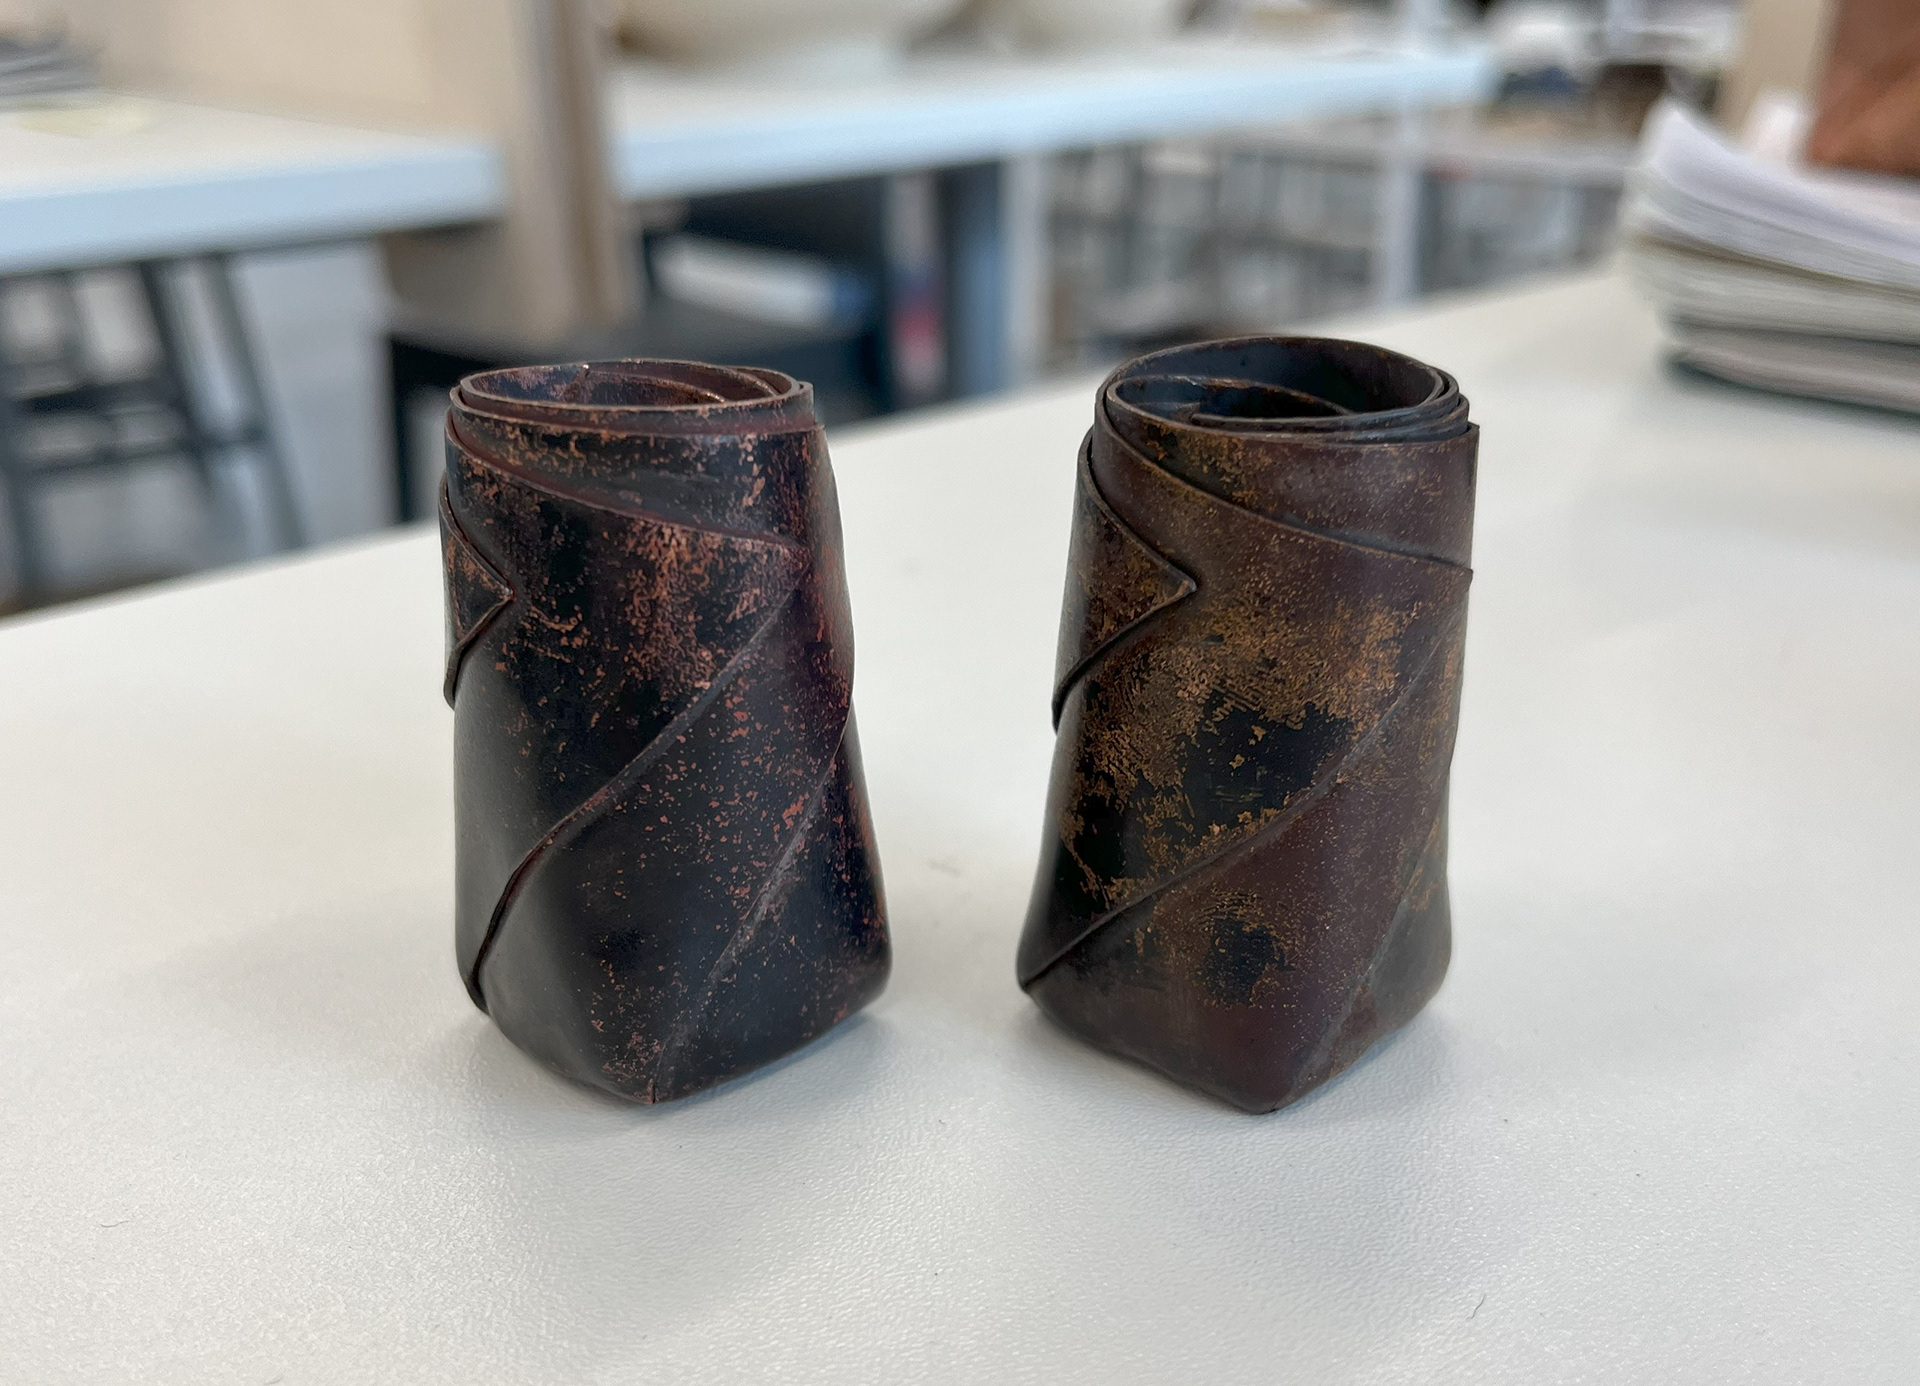
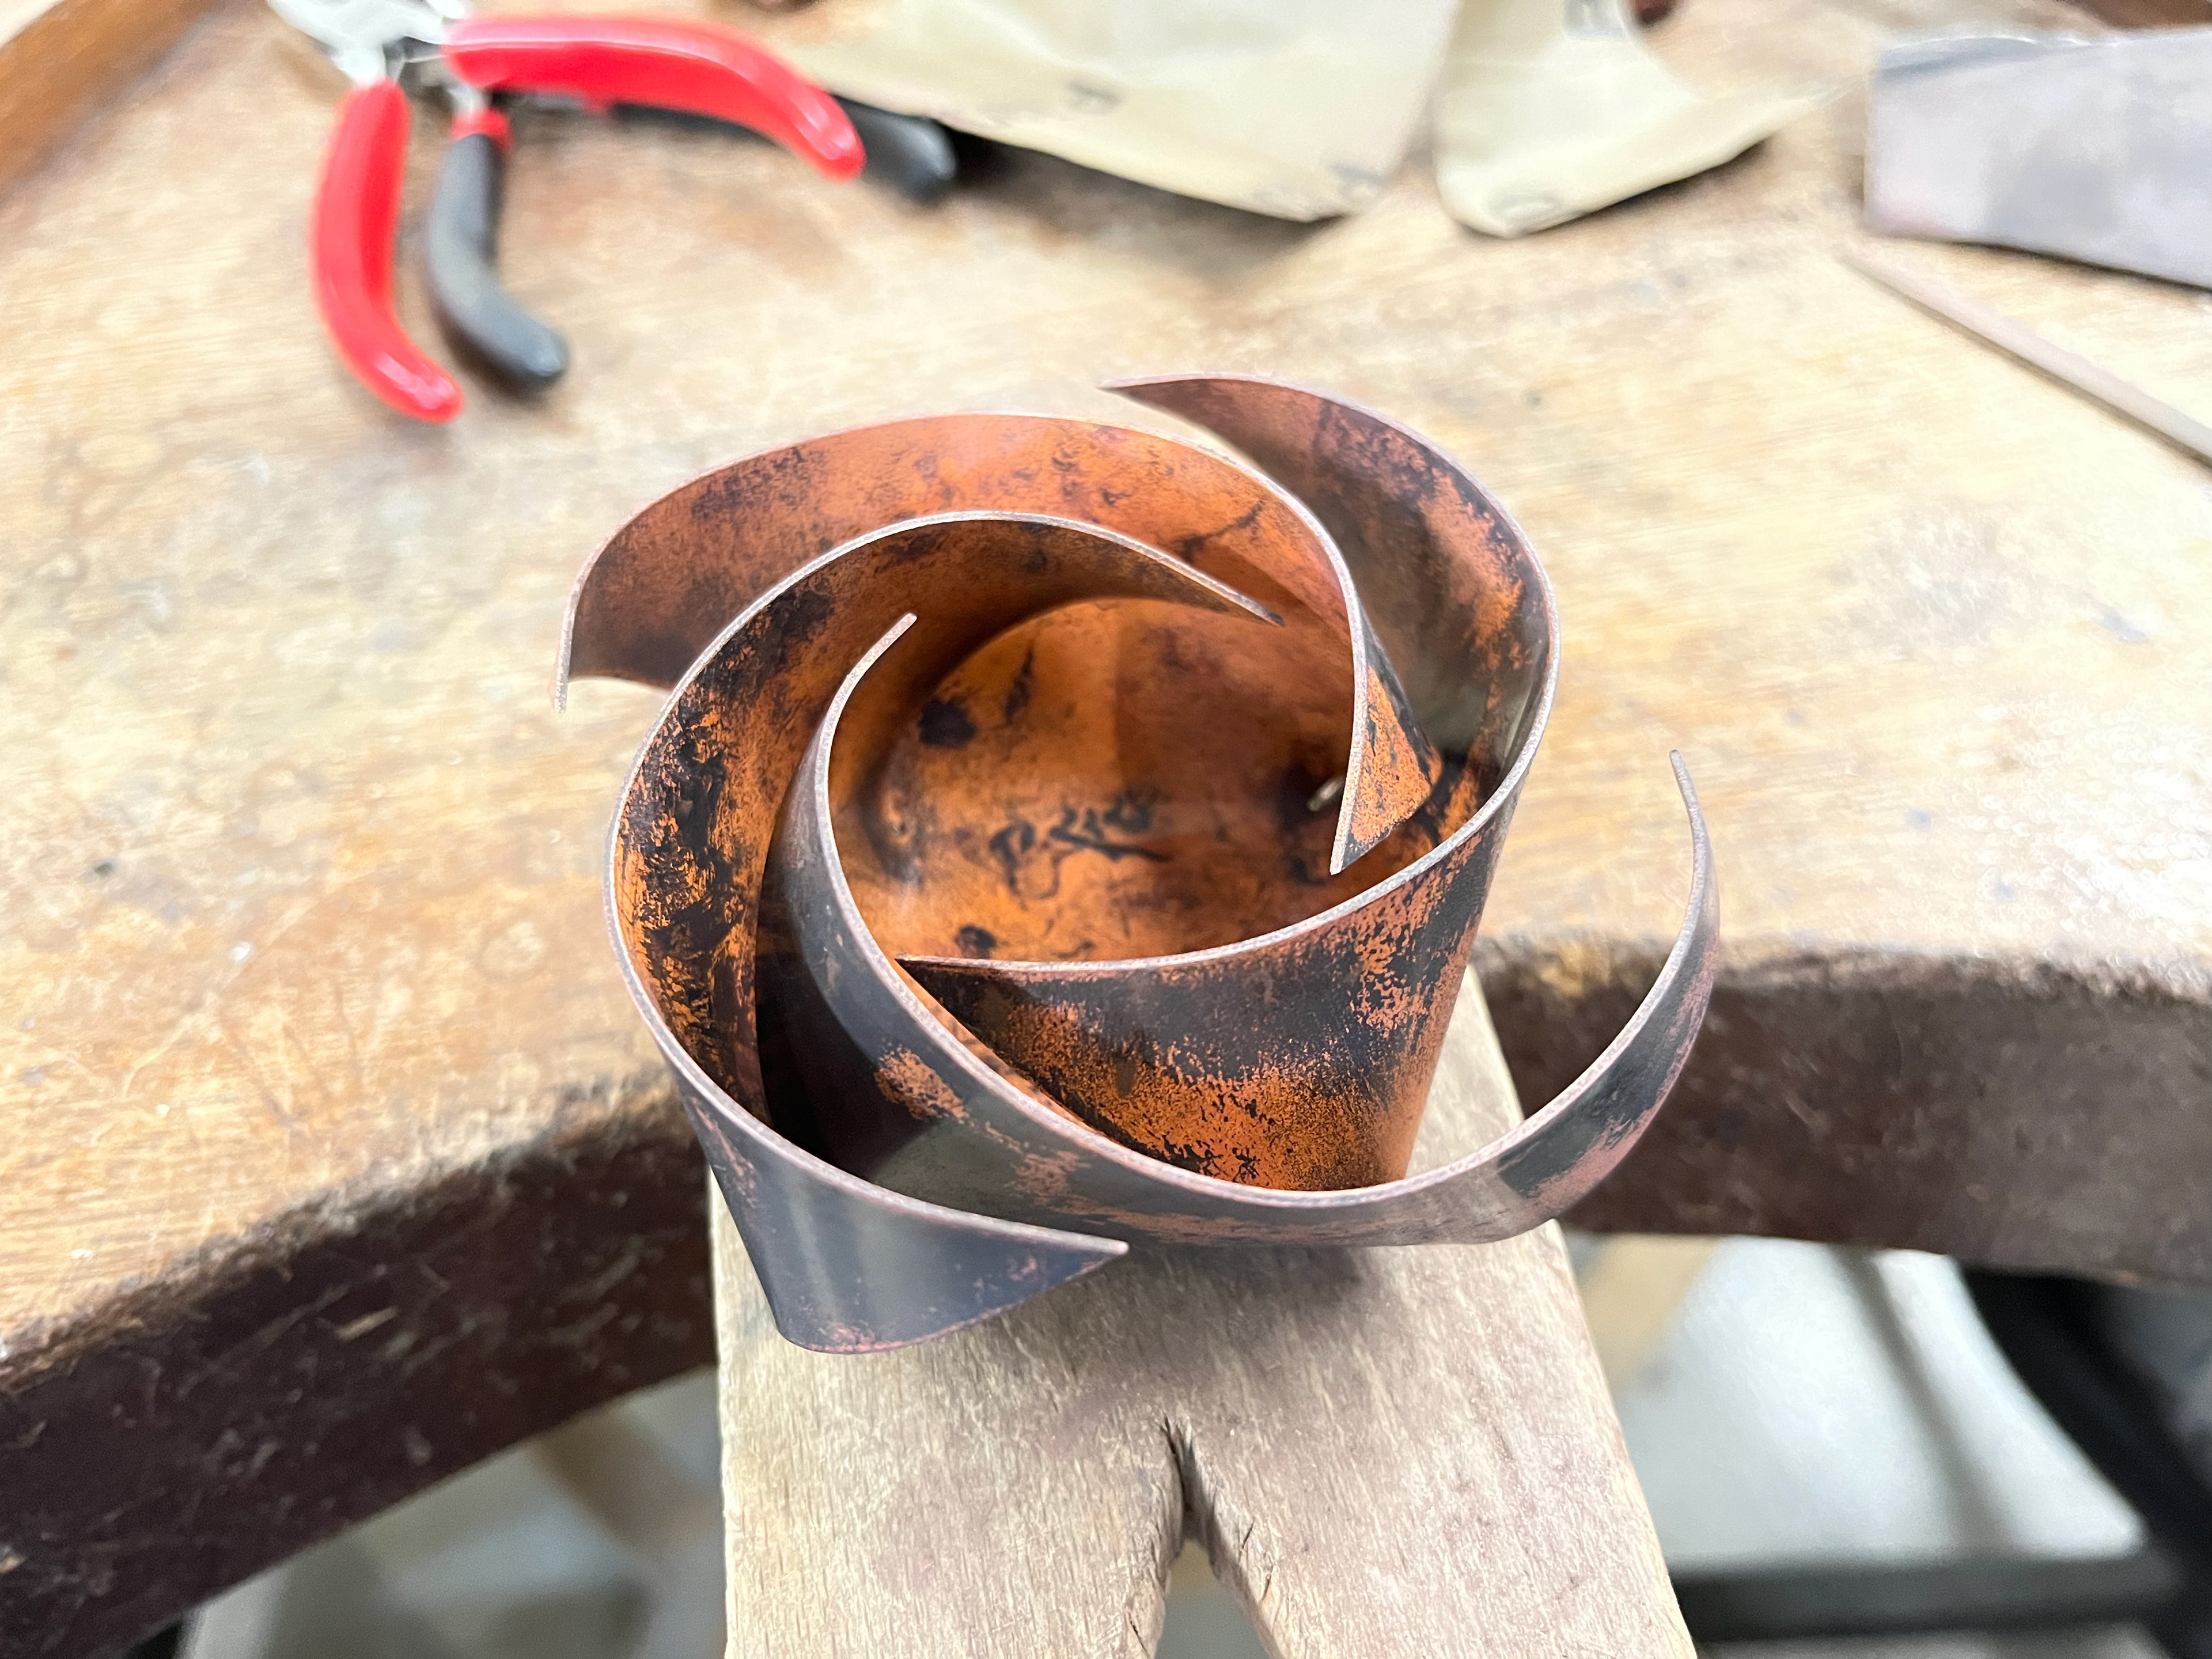
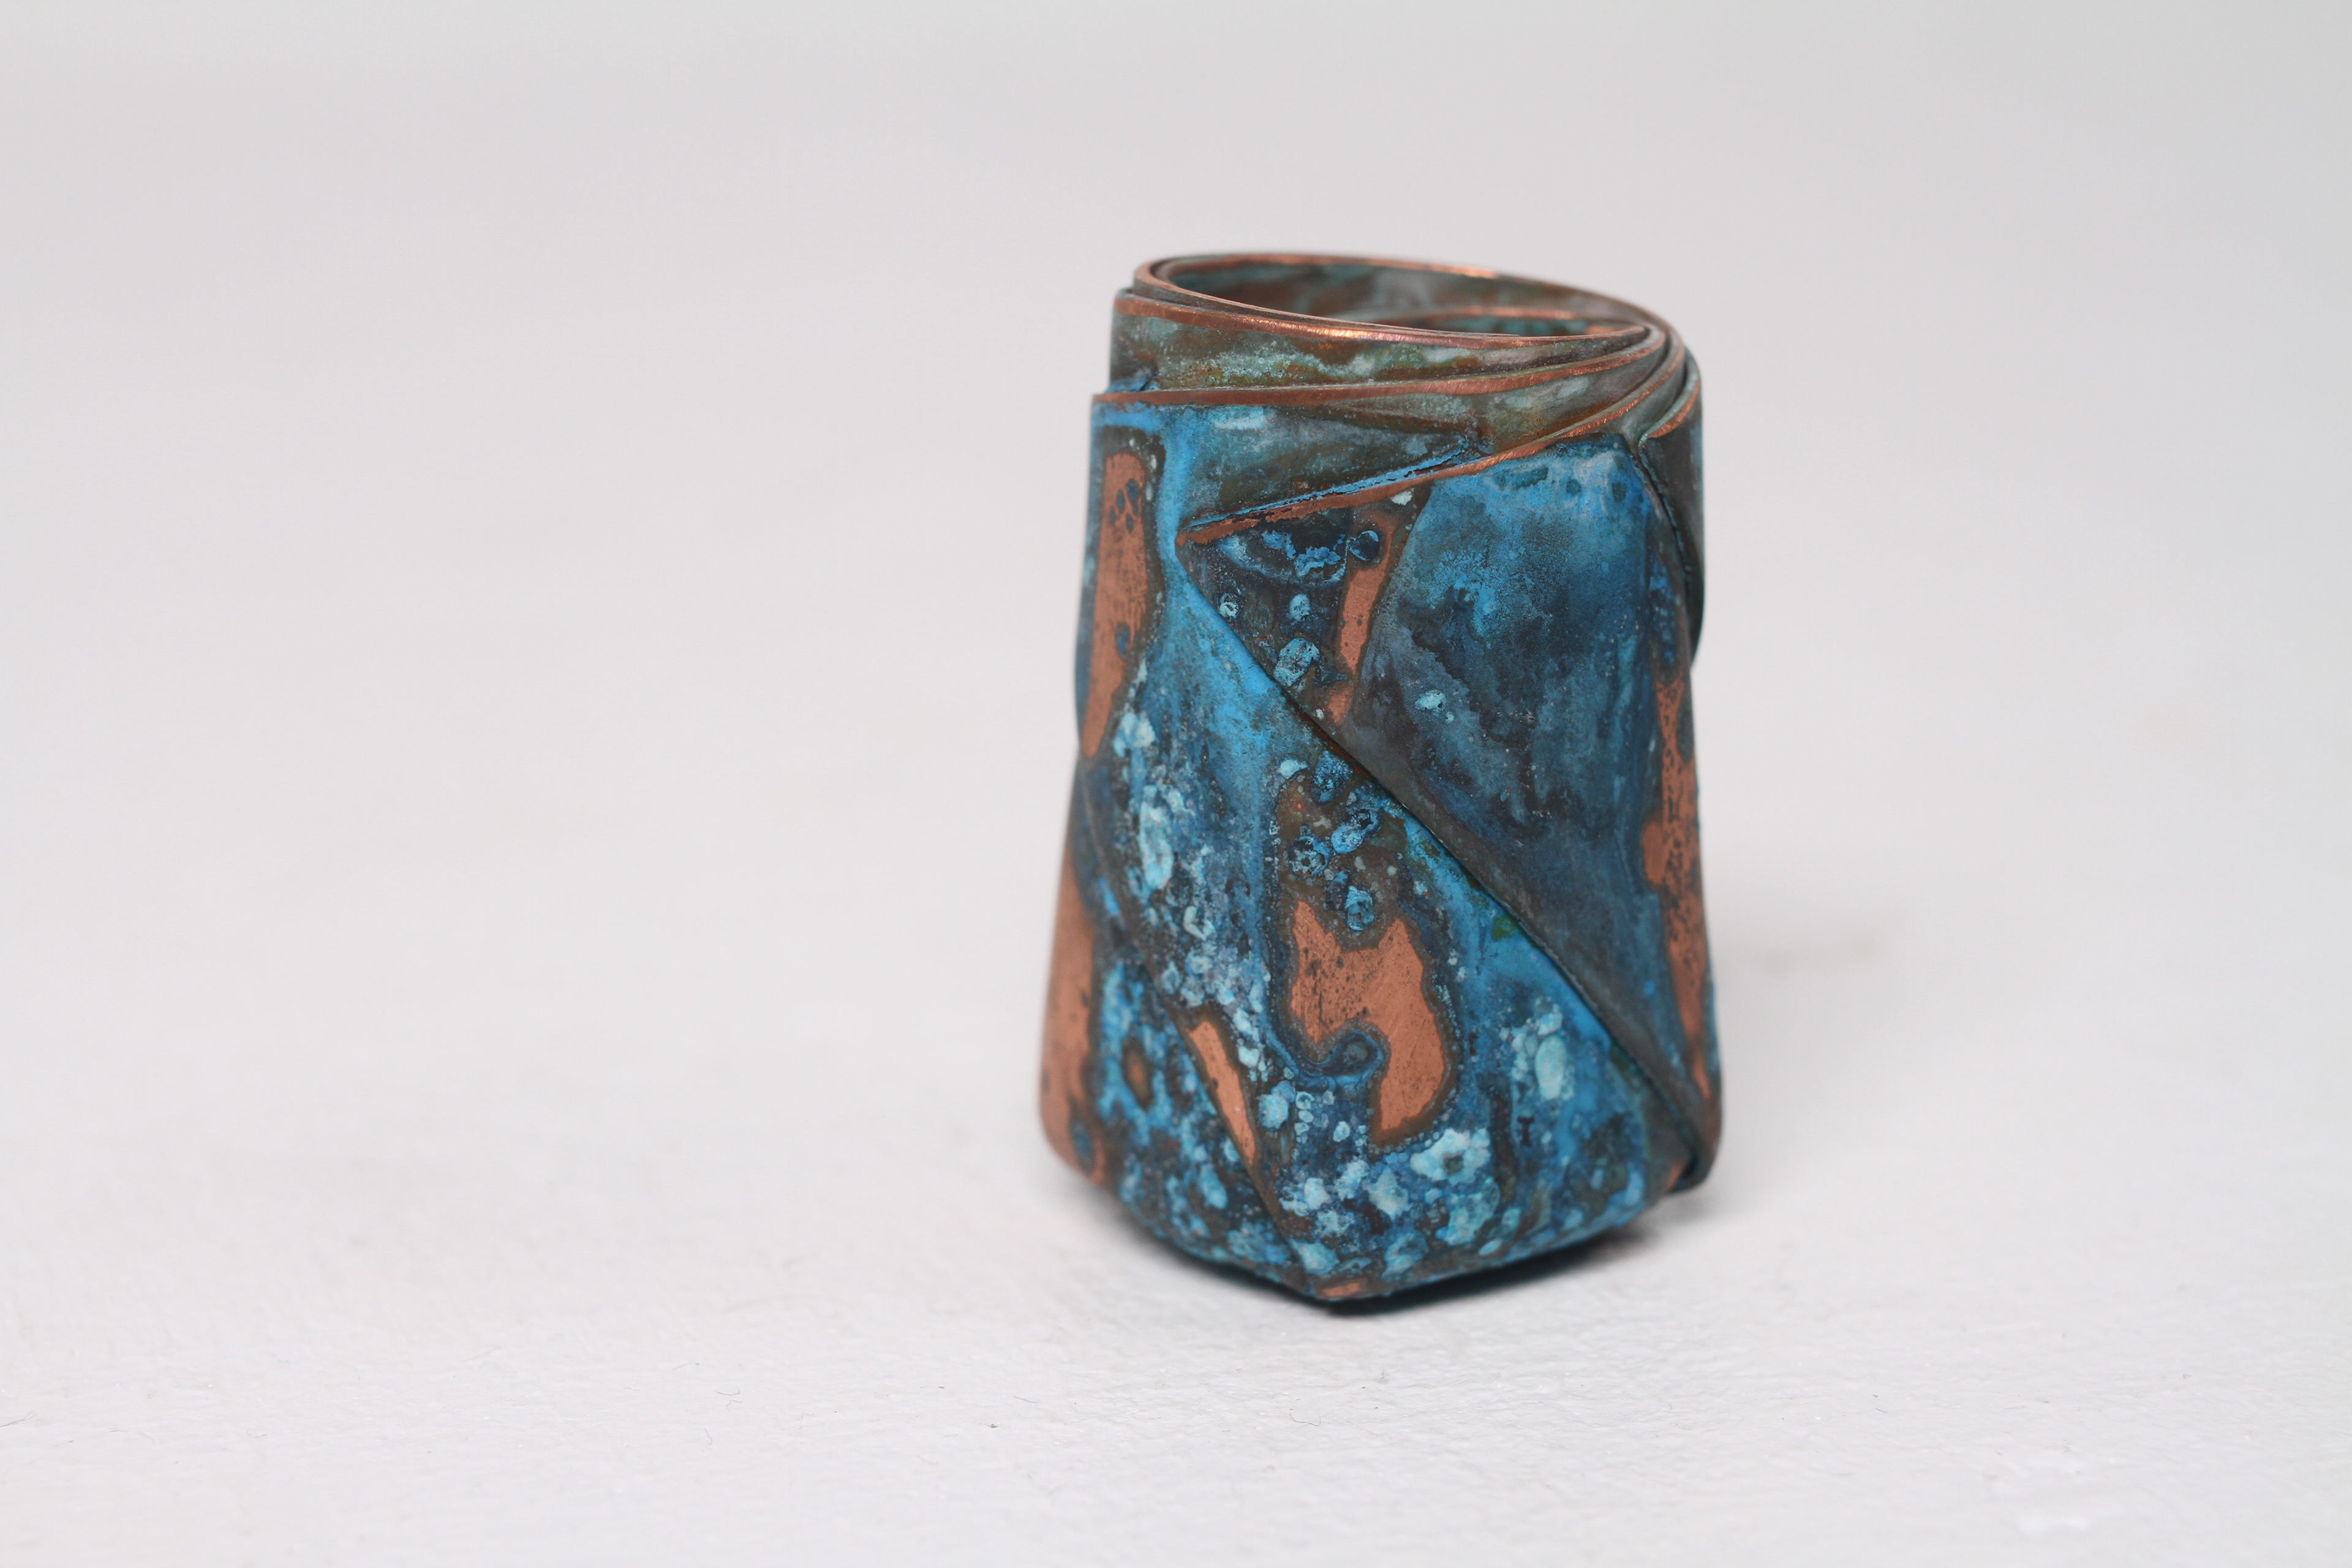
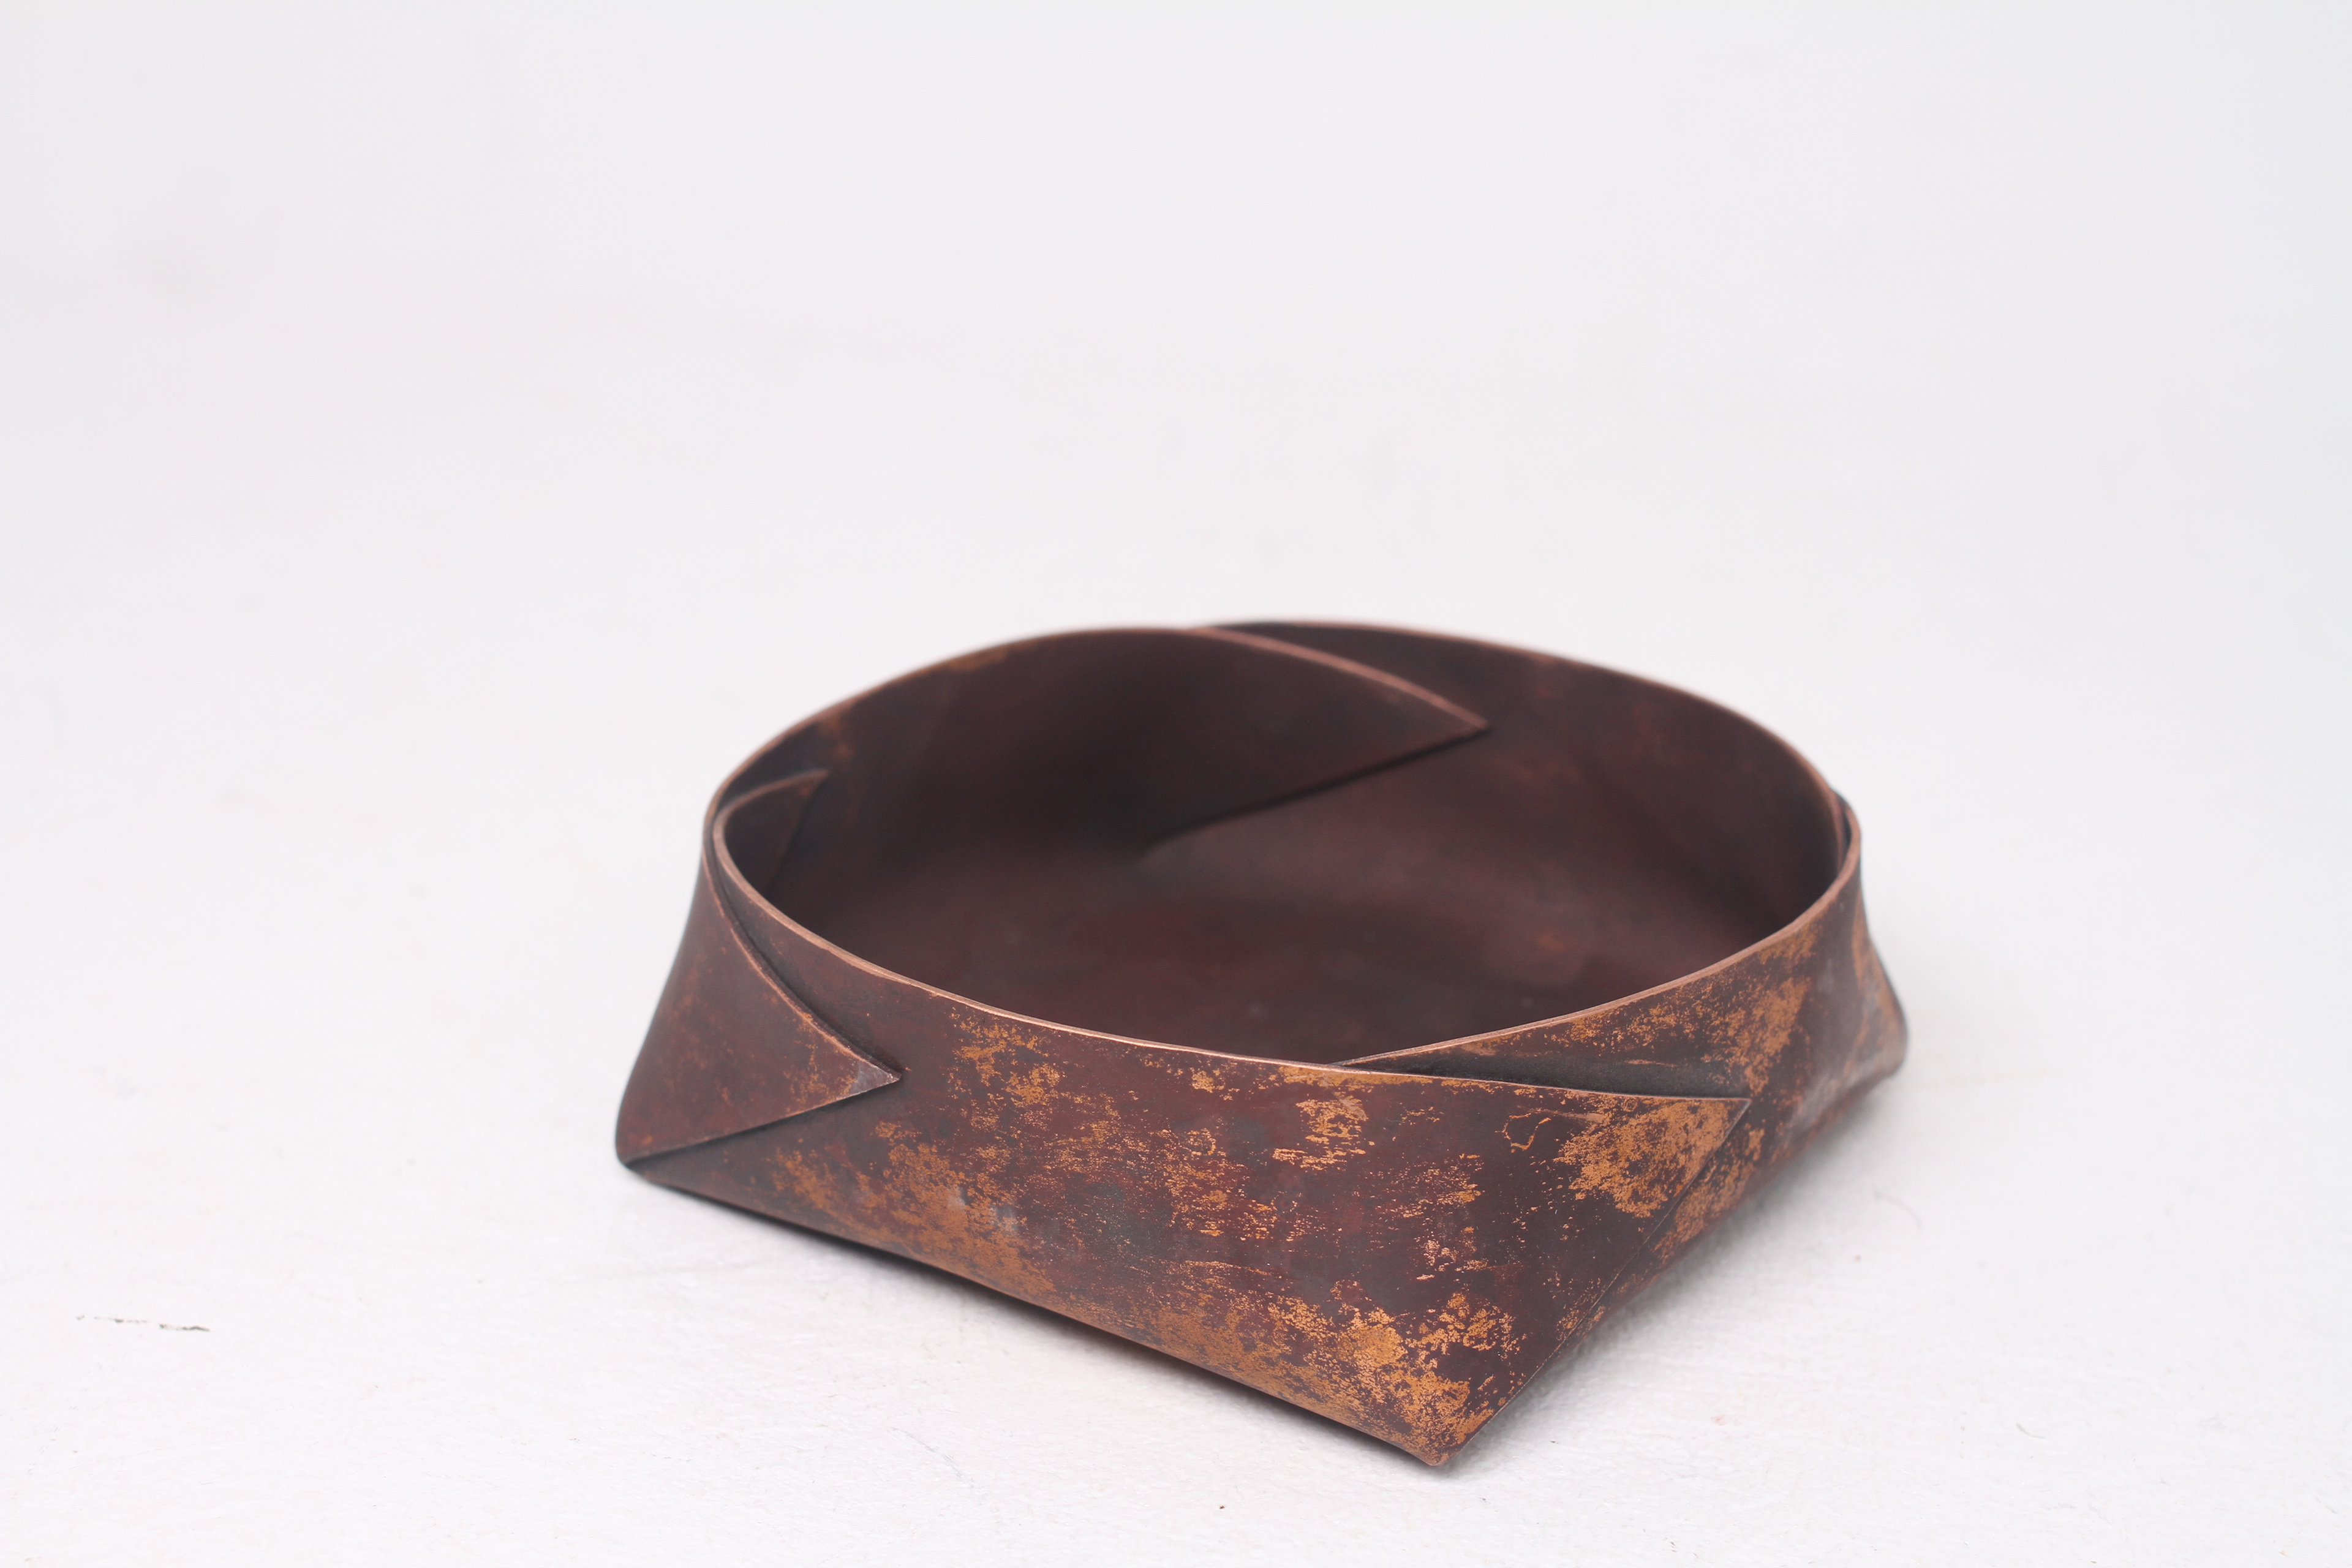
The vessels below didn't have much variation but I just made the one on the right tighter and the lip more circular rather than oval. I quite like how the spiral looks like it has a beginning and an end; the folds narrow at a particular point and it happened on both vessels which is interesting. I like how they look more organic and less uniform around the lip.
Water Jet Cutting
In order to make my vessels as accurate as possible, I decided to contact the engineering department to use their waterjet cutter. I drew out the nets in illustrator and sent them to the the technicians in engineering to cut them out for me on different thicknesses of copper.


Refinement of the vessel
As part of my refinement, I wanted to make my vessels as smooth and as and tight as possible. I sanded down all the edges to make lip and folds rounded, free of any sharpness. I also took extra care into making the vessel as sealed as possible and actually managed to make it carry water with no leaks. This is the standard I want all my vessels to have for this project.
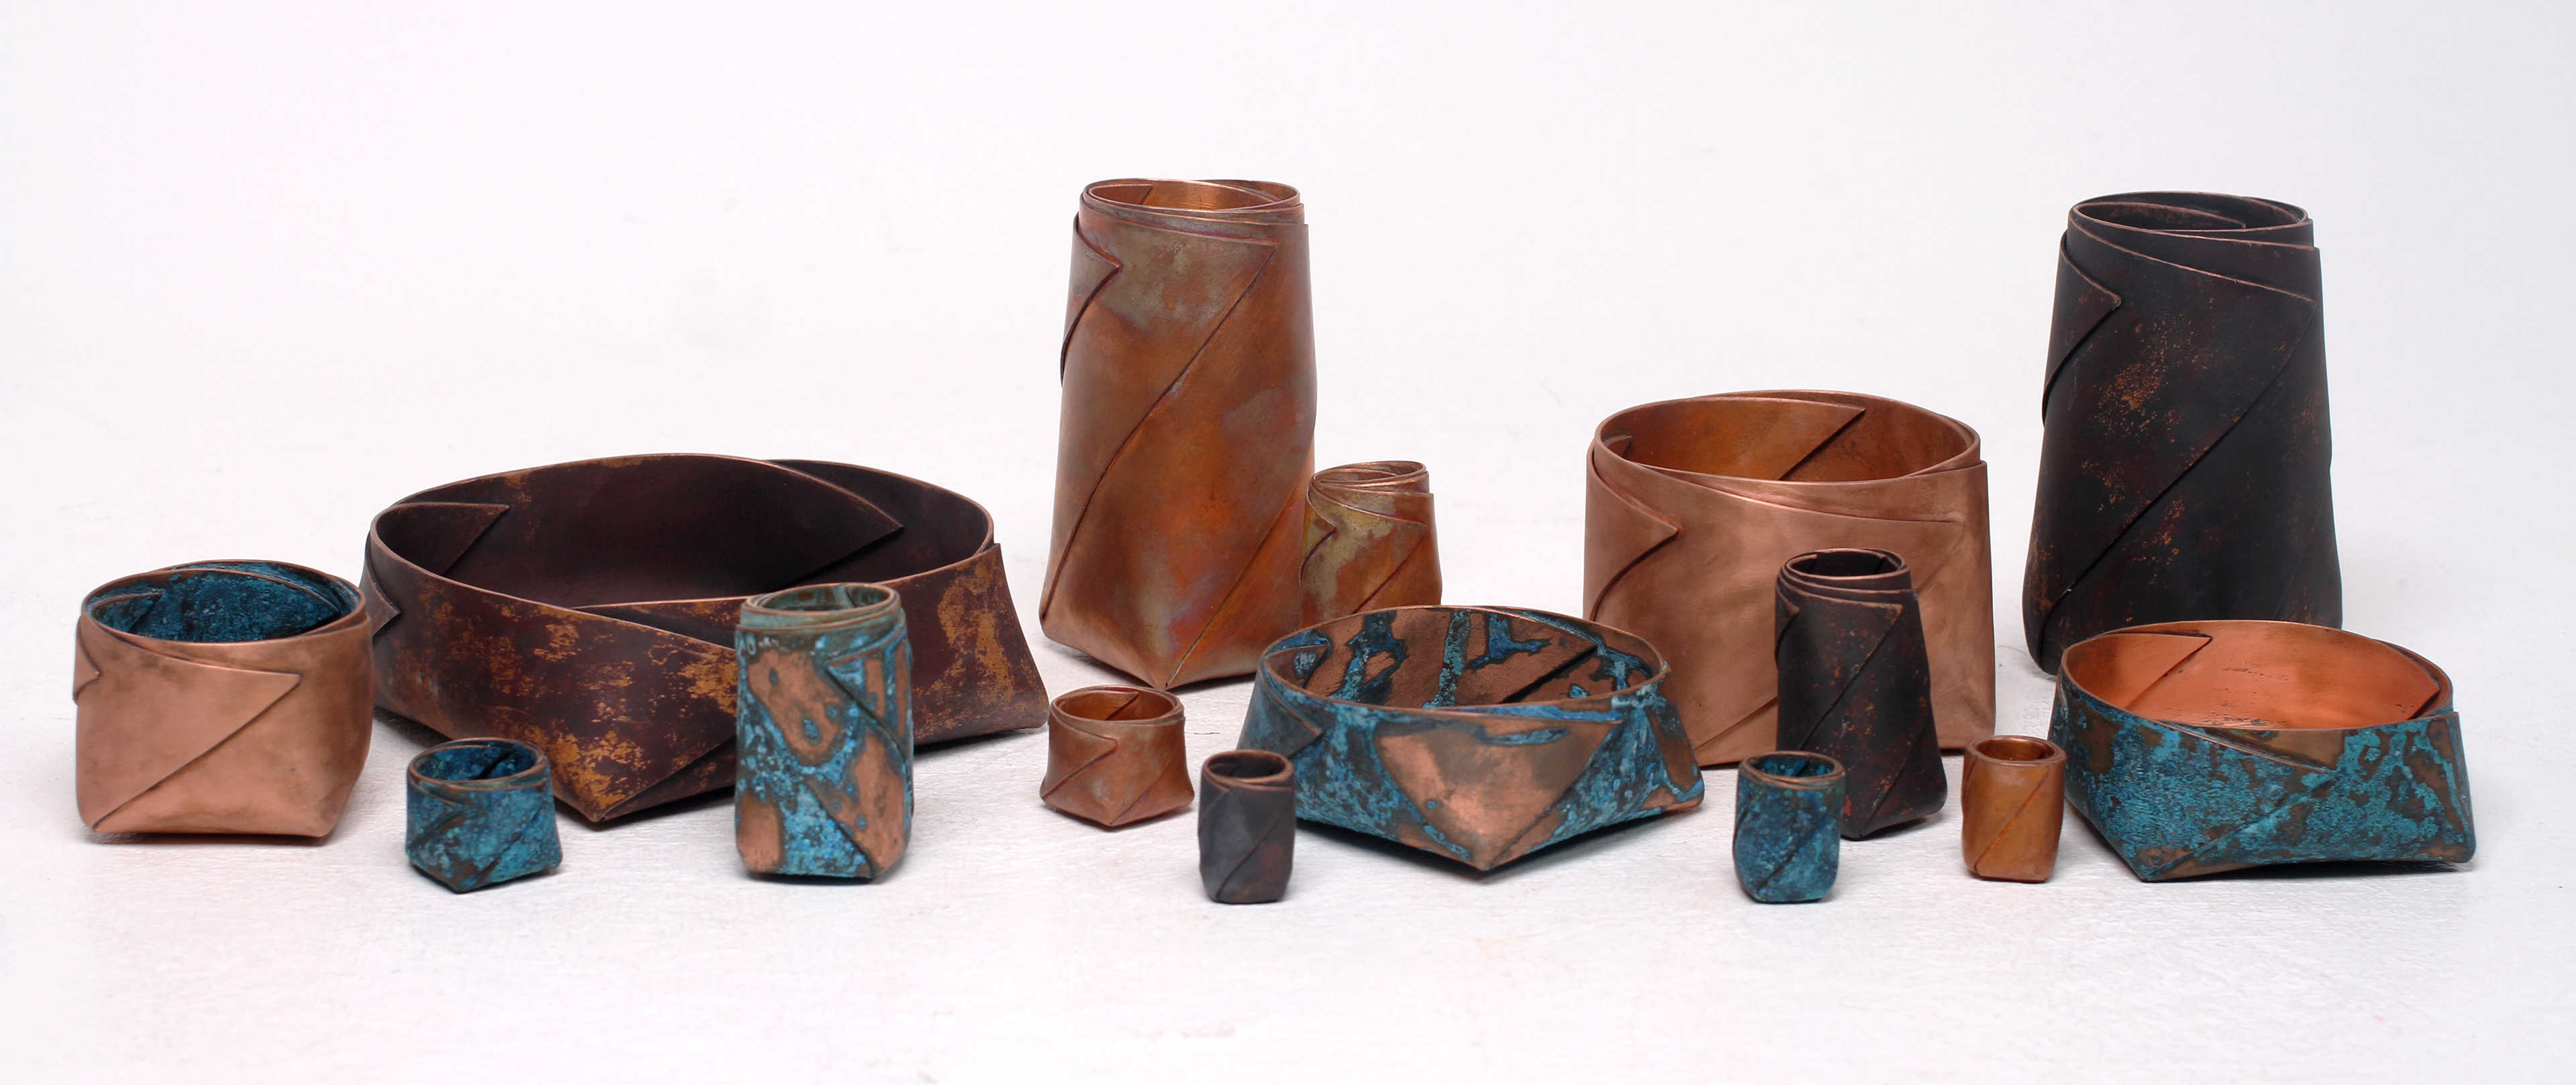
The making of the collection
Once I had all my water jet nets cut out, I could start the the making of my final collection. I started with the smaller ones and worked my way up. Giving each step extra detail all the way from filing down the edges and corners, to annealing at a good temperature and folding the vessels round as neatly as I could. Below shows my making process:

The binding wire allows the pieces to become tight. I figured this technique out during my synthesis and resolution project and have decided to repeat this process for all my vessels to ensure they all retain that same tightness. An issue that was recurring was getting the edge of the vessel a complete circle. With the last pieces, there was sometimes a bit of a wobble round the edge and I wanted to correct that for Unit X. However, I found that because I didn’t have steaks that fit the vessels circumference perfectly, I was struggling to get the edge to be completely circular. This meant I had to be very carefully when hammering in certain areas and take my time to get that nice circle.
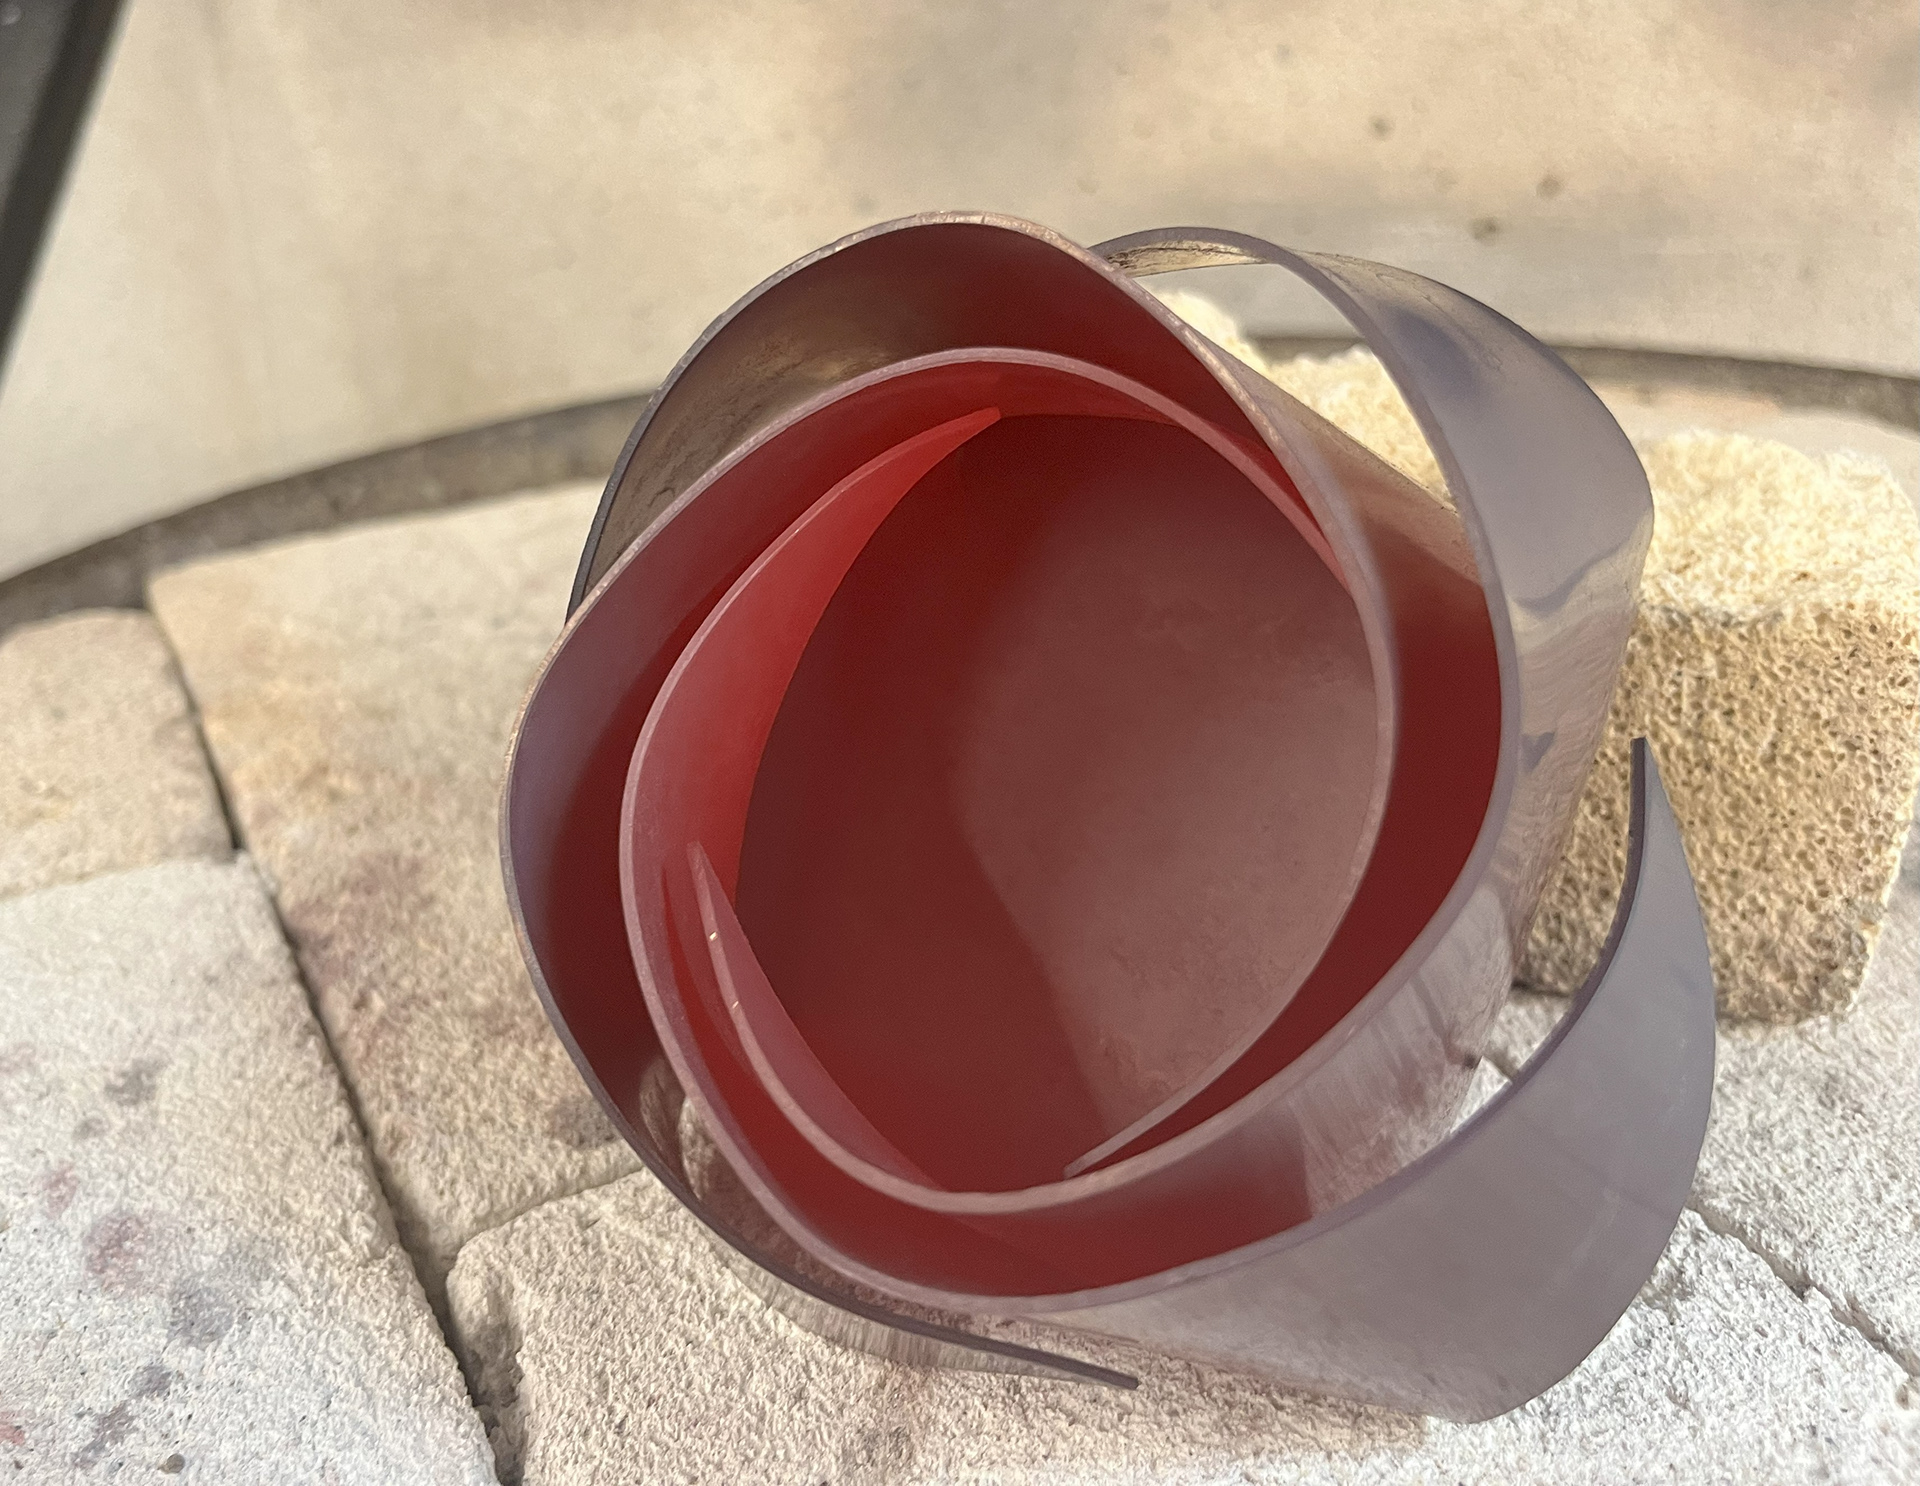
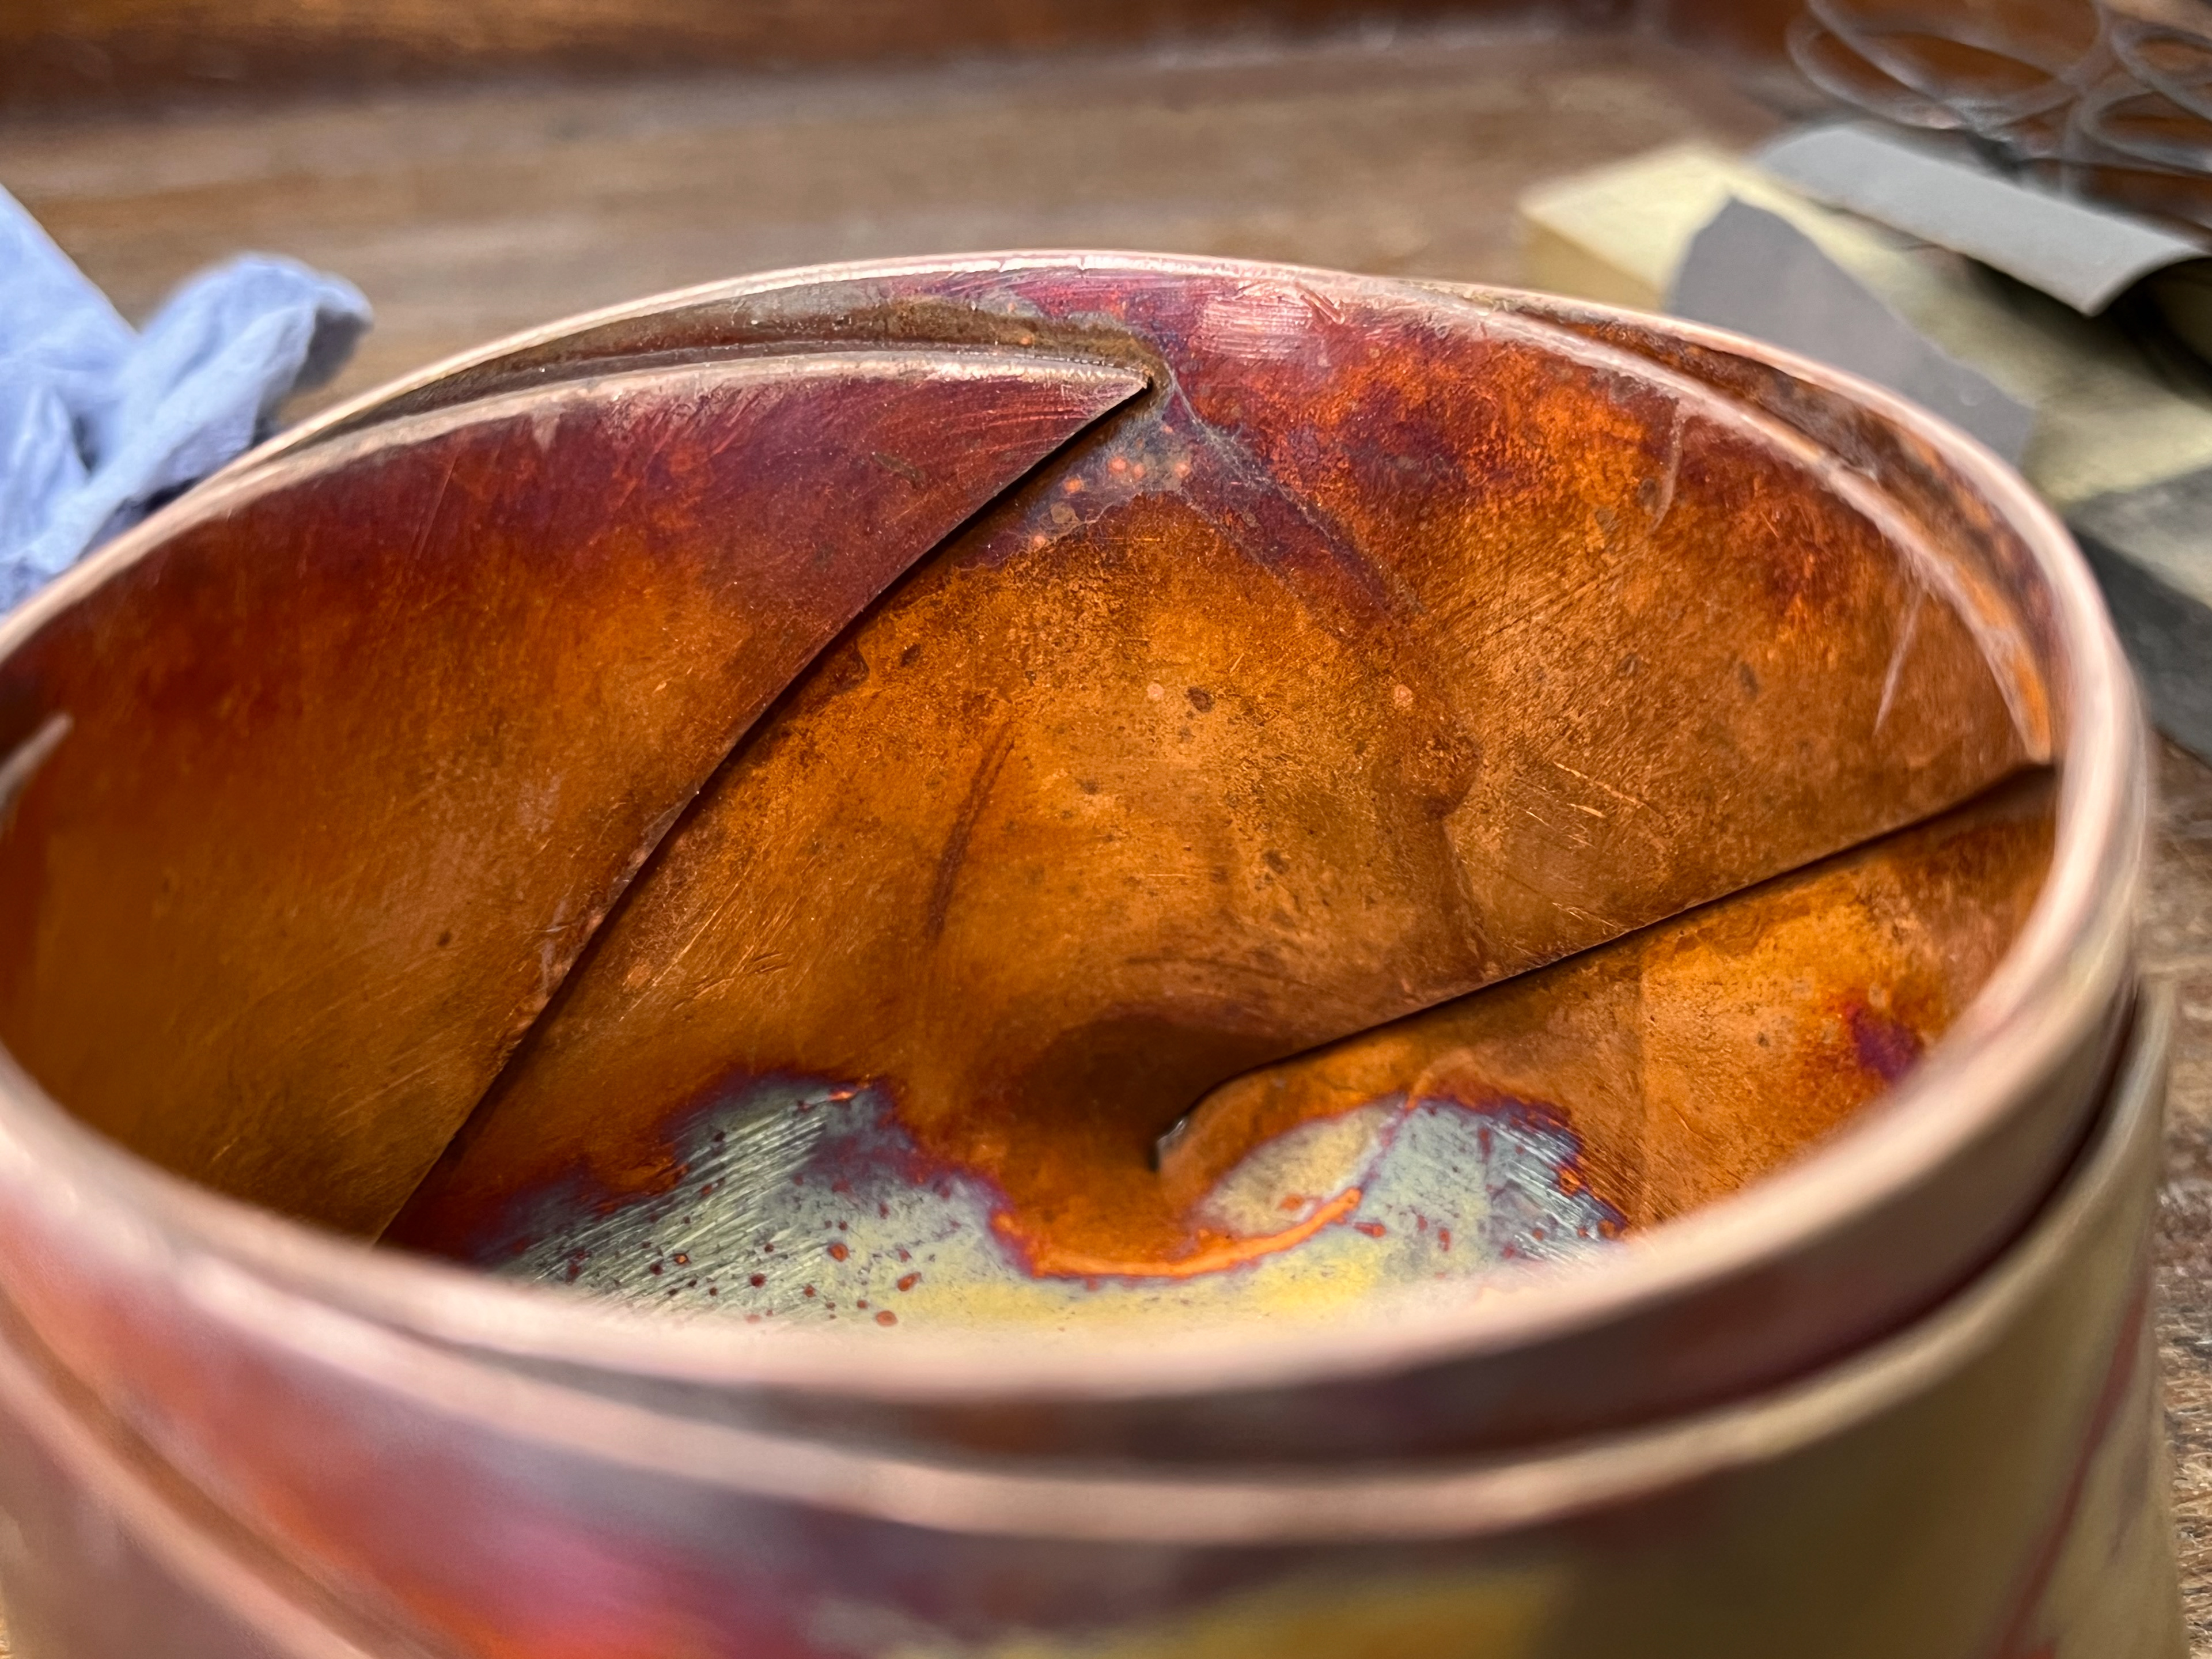
The Colour Red
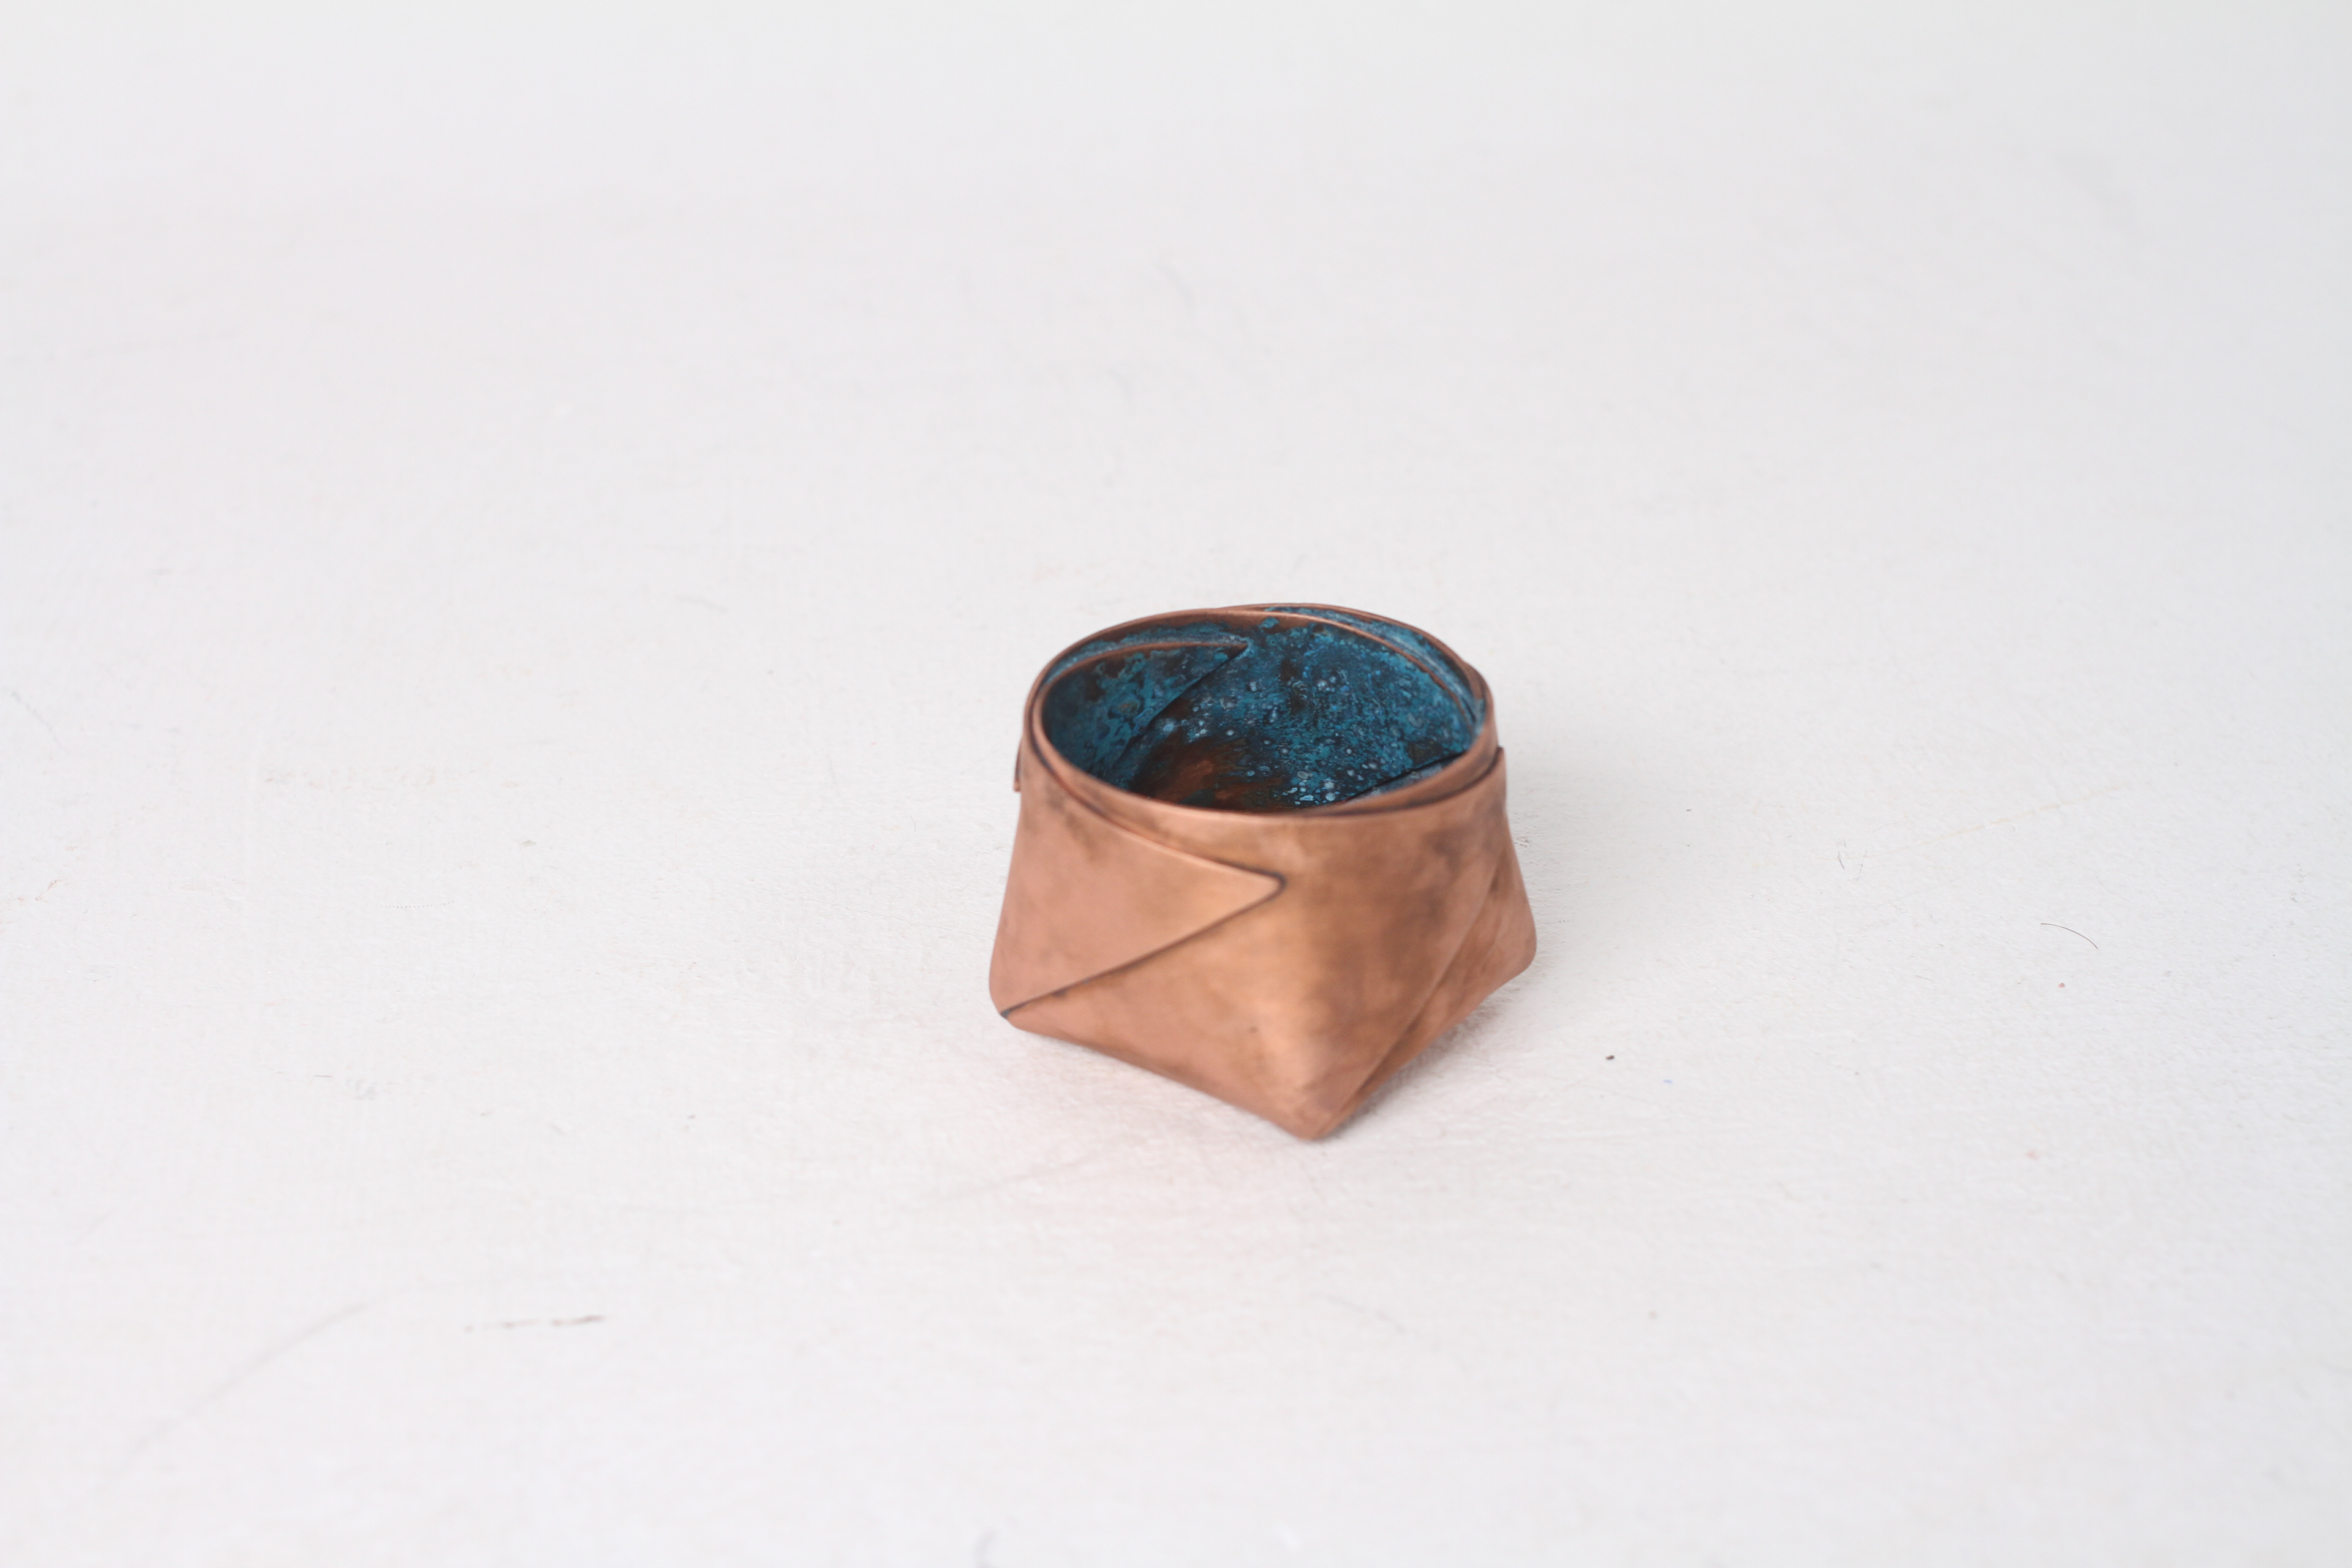
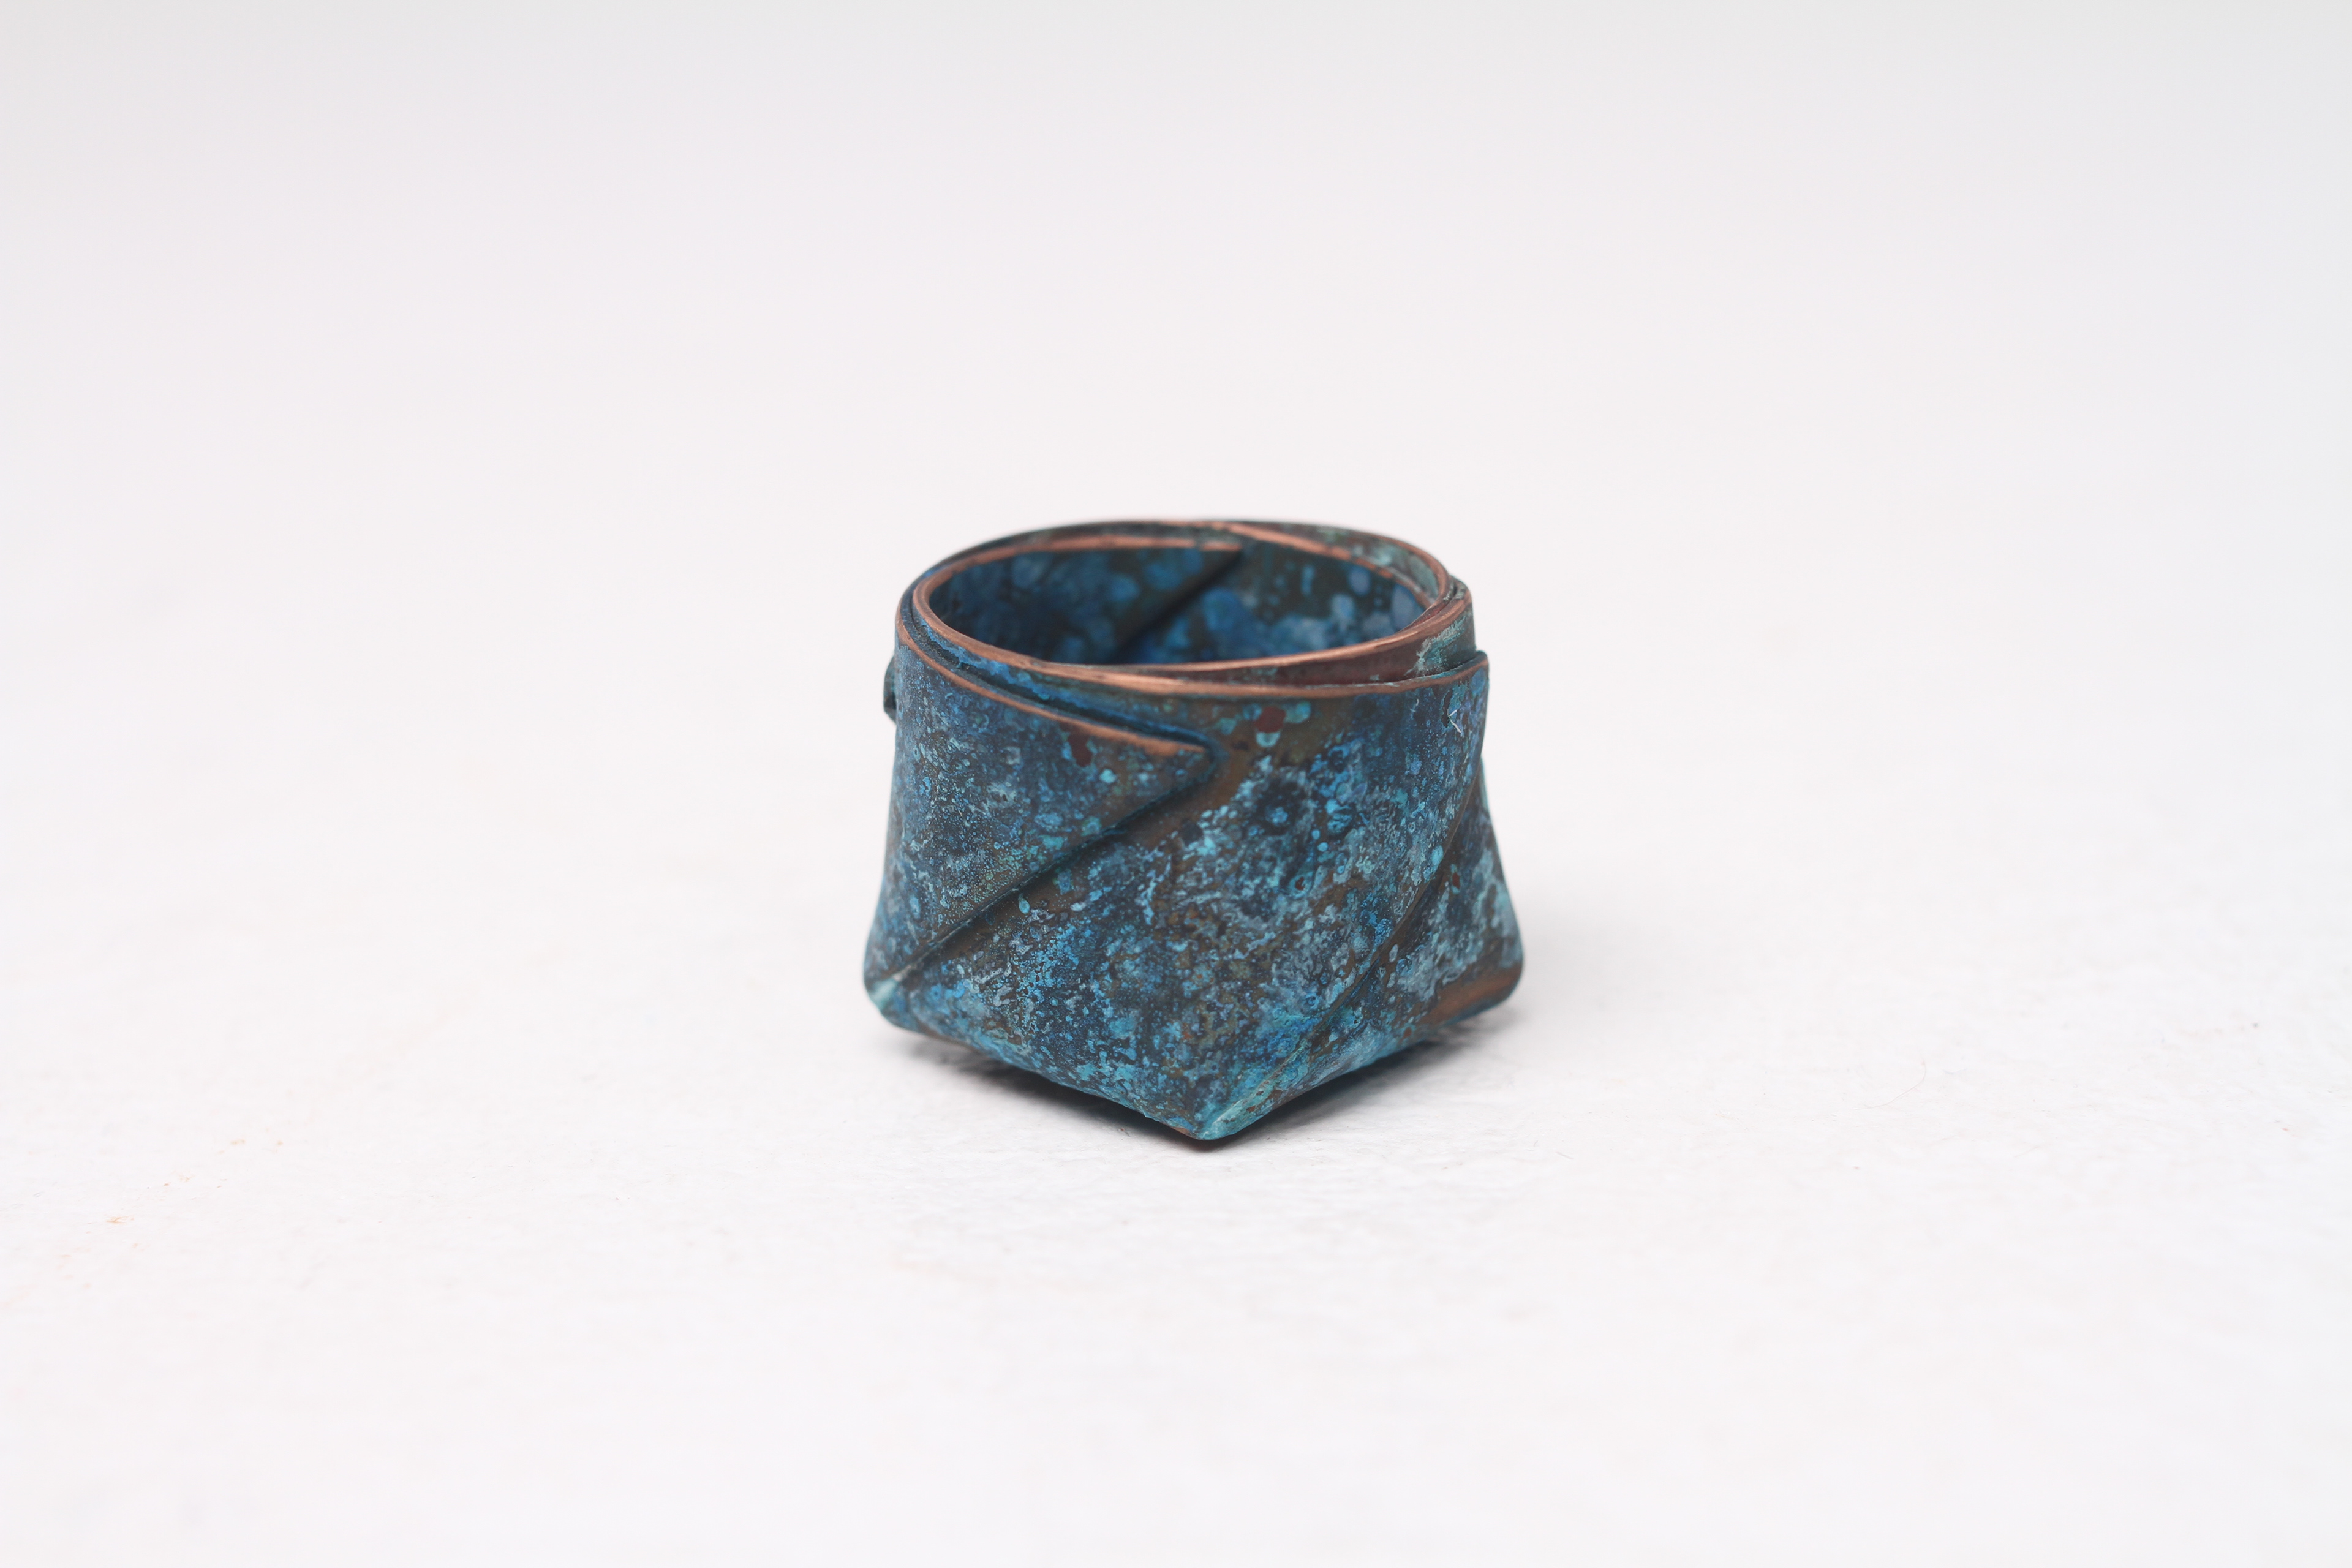
Another one of my aims for this project is to diversify in colours and types of patinas that can be achieved on my copper vessels. In my research archive I discuss my findings of an old Japanese patina recipe called Rokusho and Niage, that produces the colour red. The more I learnt about this the more I wanted to try it as it is a very secretive and ritualised crafting technique that is rarely discussed outside of Japan. Not only does it create a rich red colour that I have been trying to produce on my own pieces, it also represented generations of knowledge being passed down from one Japanese craftsmen to the next and the process is very traditional and true to the old ways. I thought that there wasn’t a process that could sum up my research through my CP better than this. I just wish I had found out about this sooner.
With less than 2 weeks remaining on the project it is unlikely I will get it done in time as the Rokusho takes a week to prepare and then several hours longer for the Niage. The chemistry department has been very helpful but due to health and safety reasons, it has taken a long time to get the green light for this and it won’t be ready for the deadline. So I had to find another way.
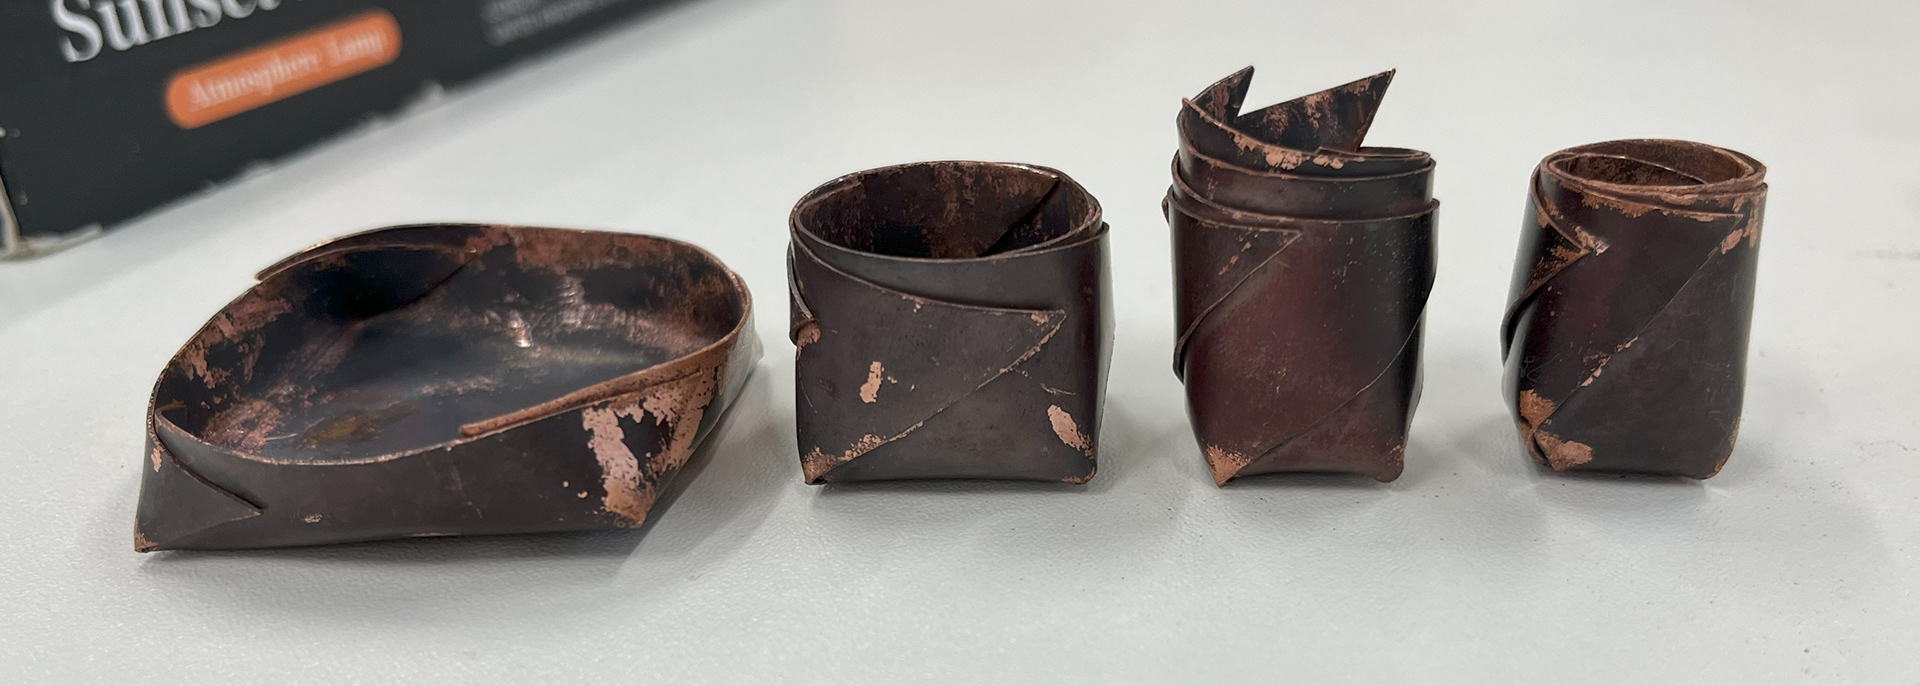
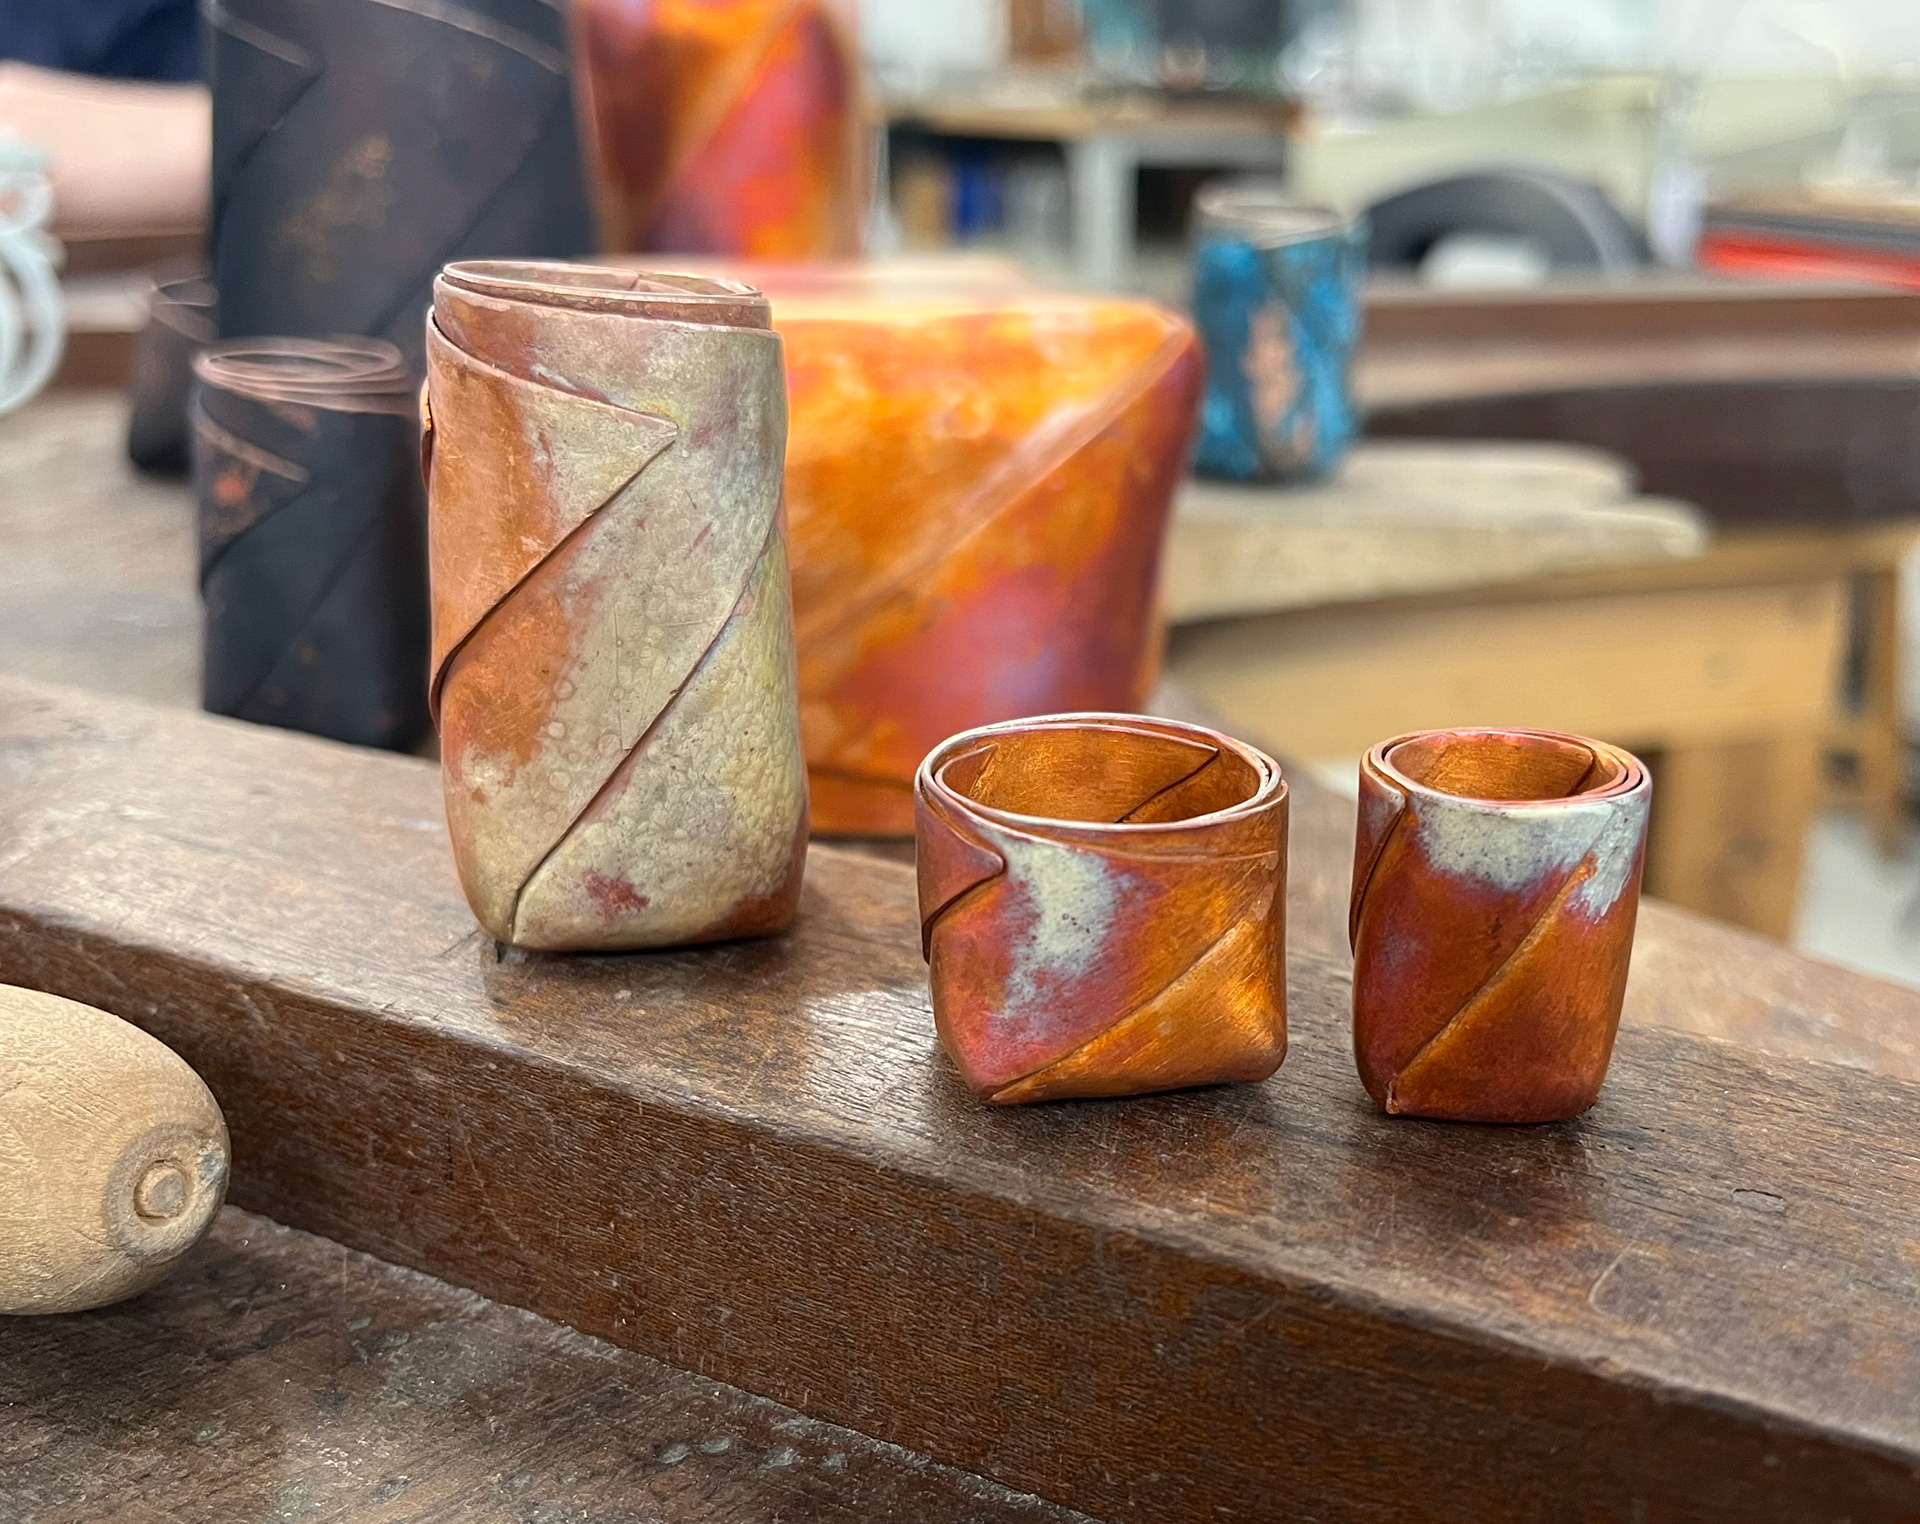
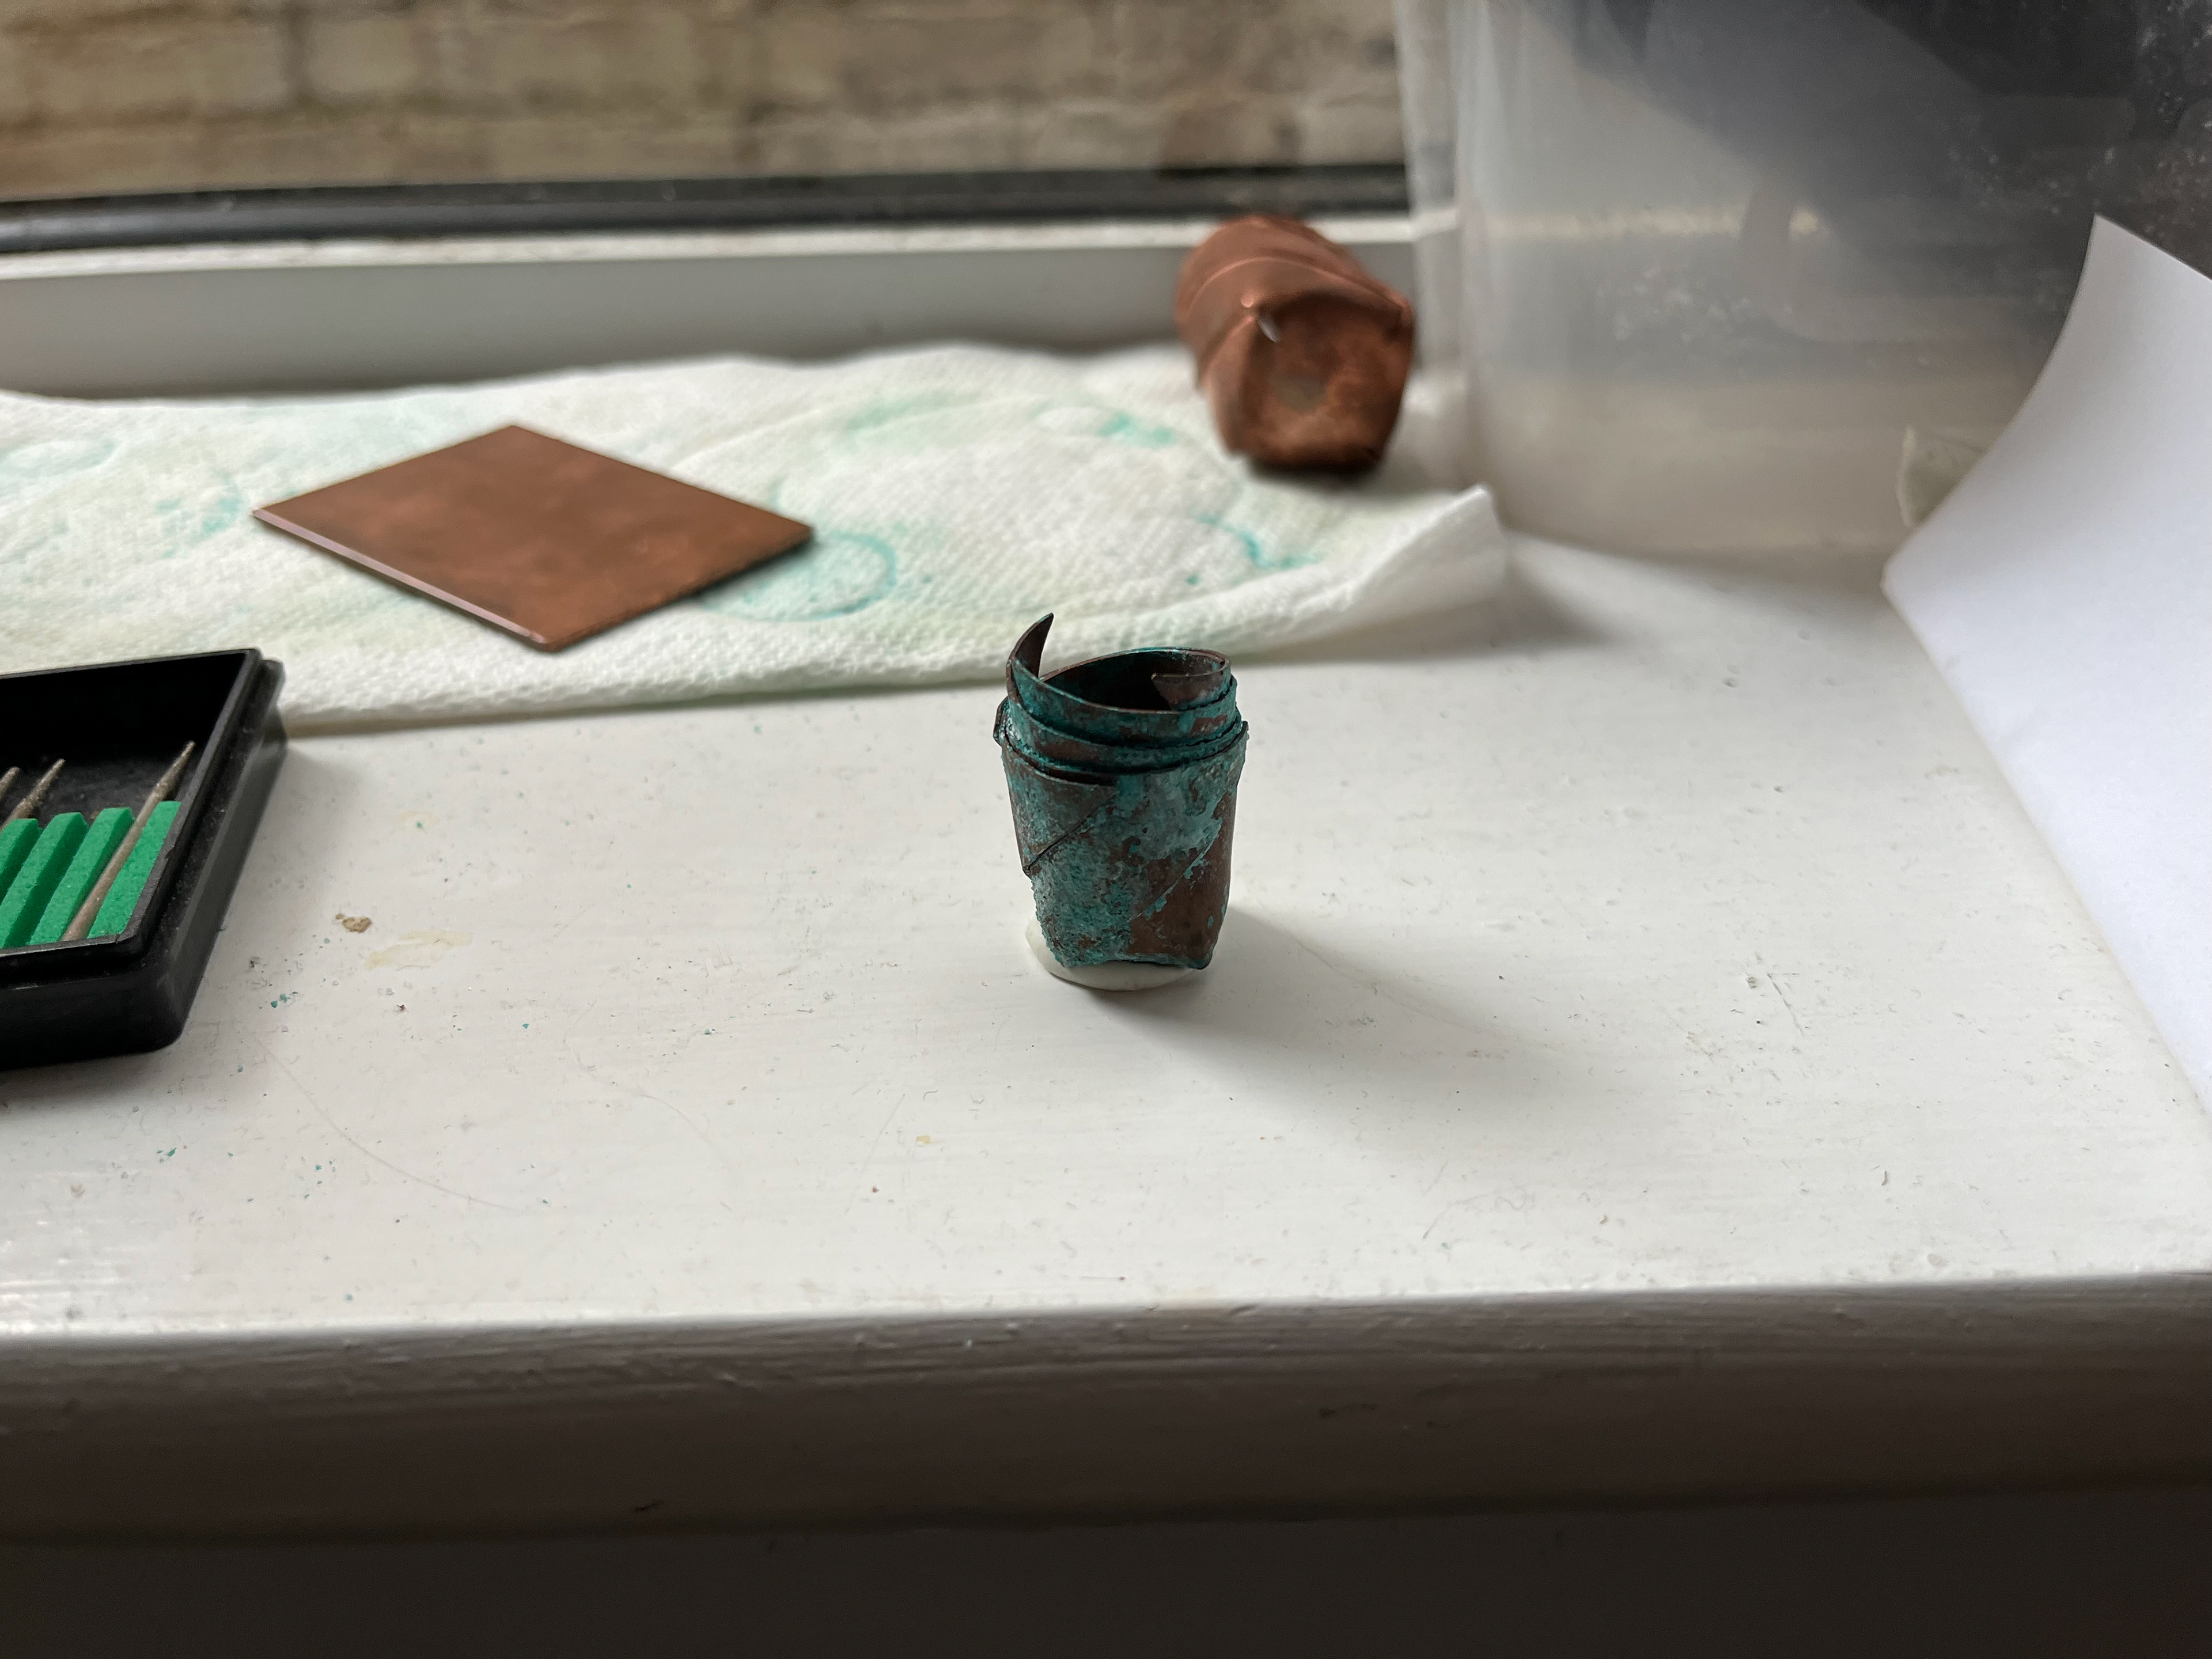
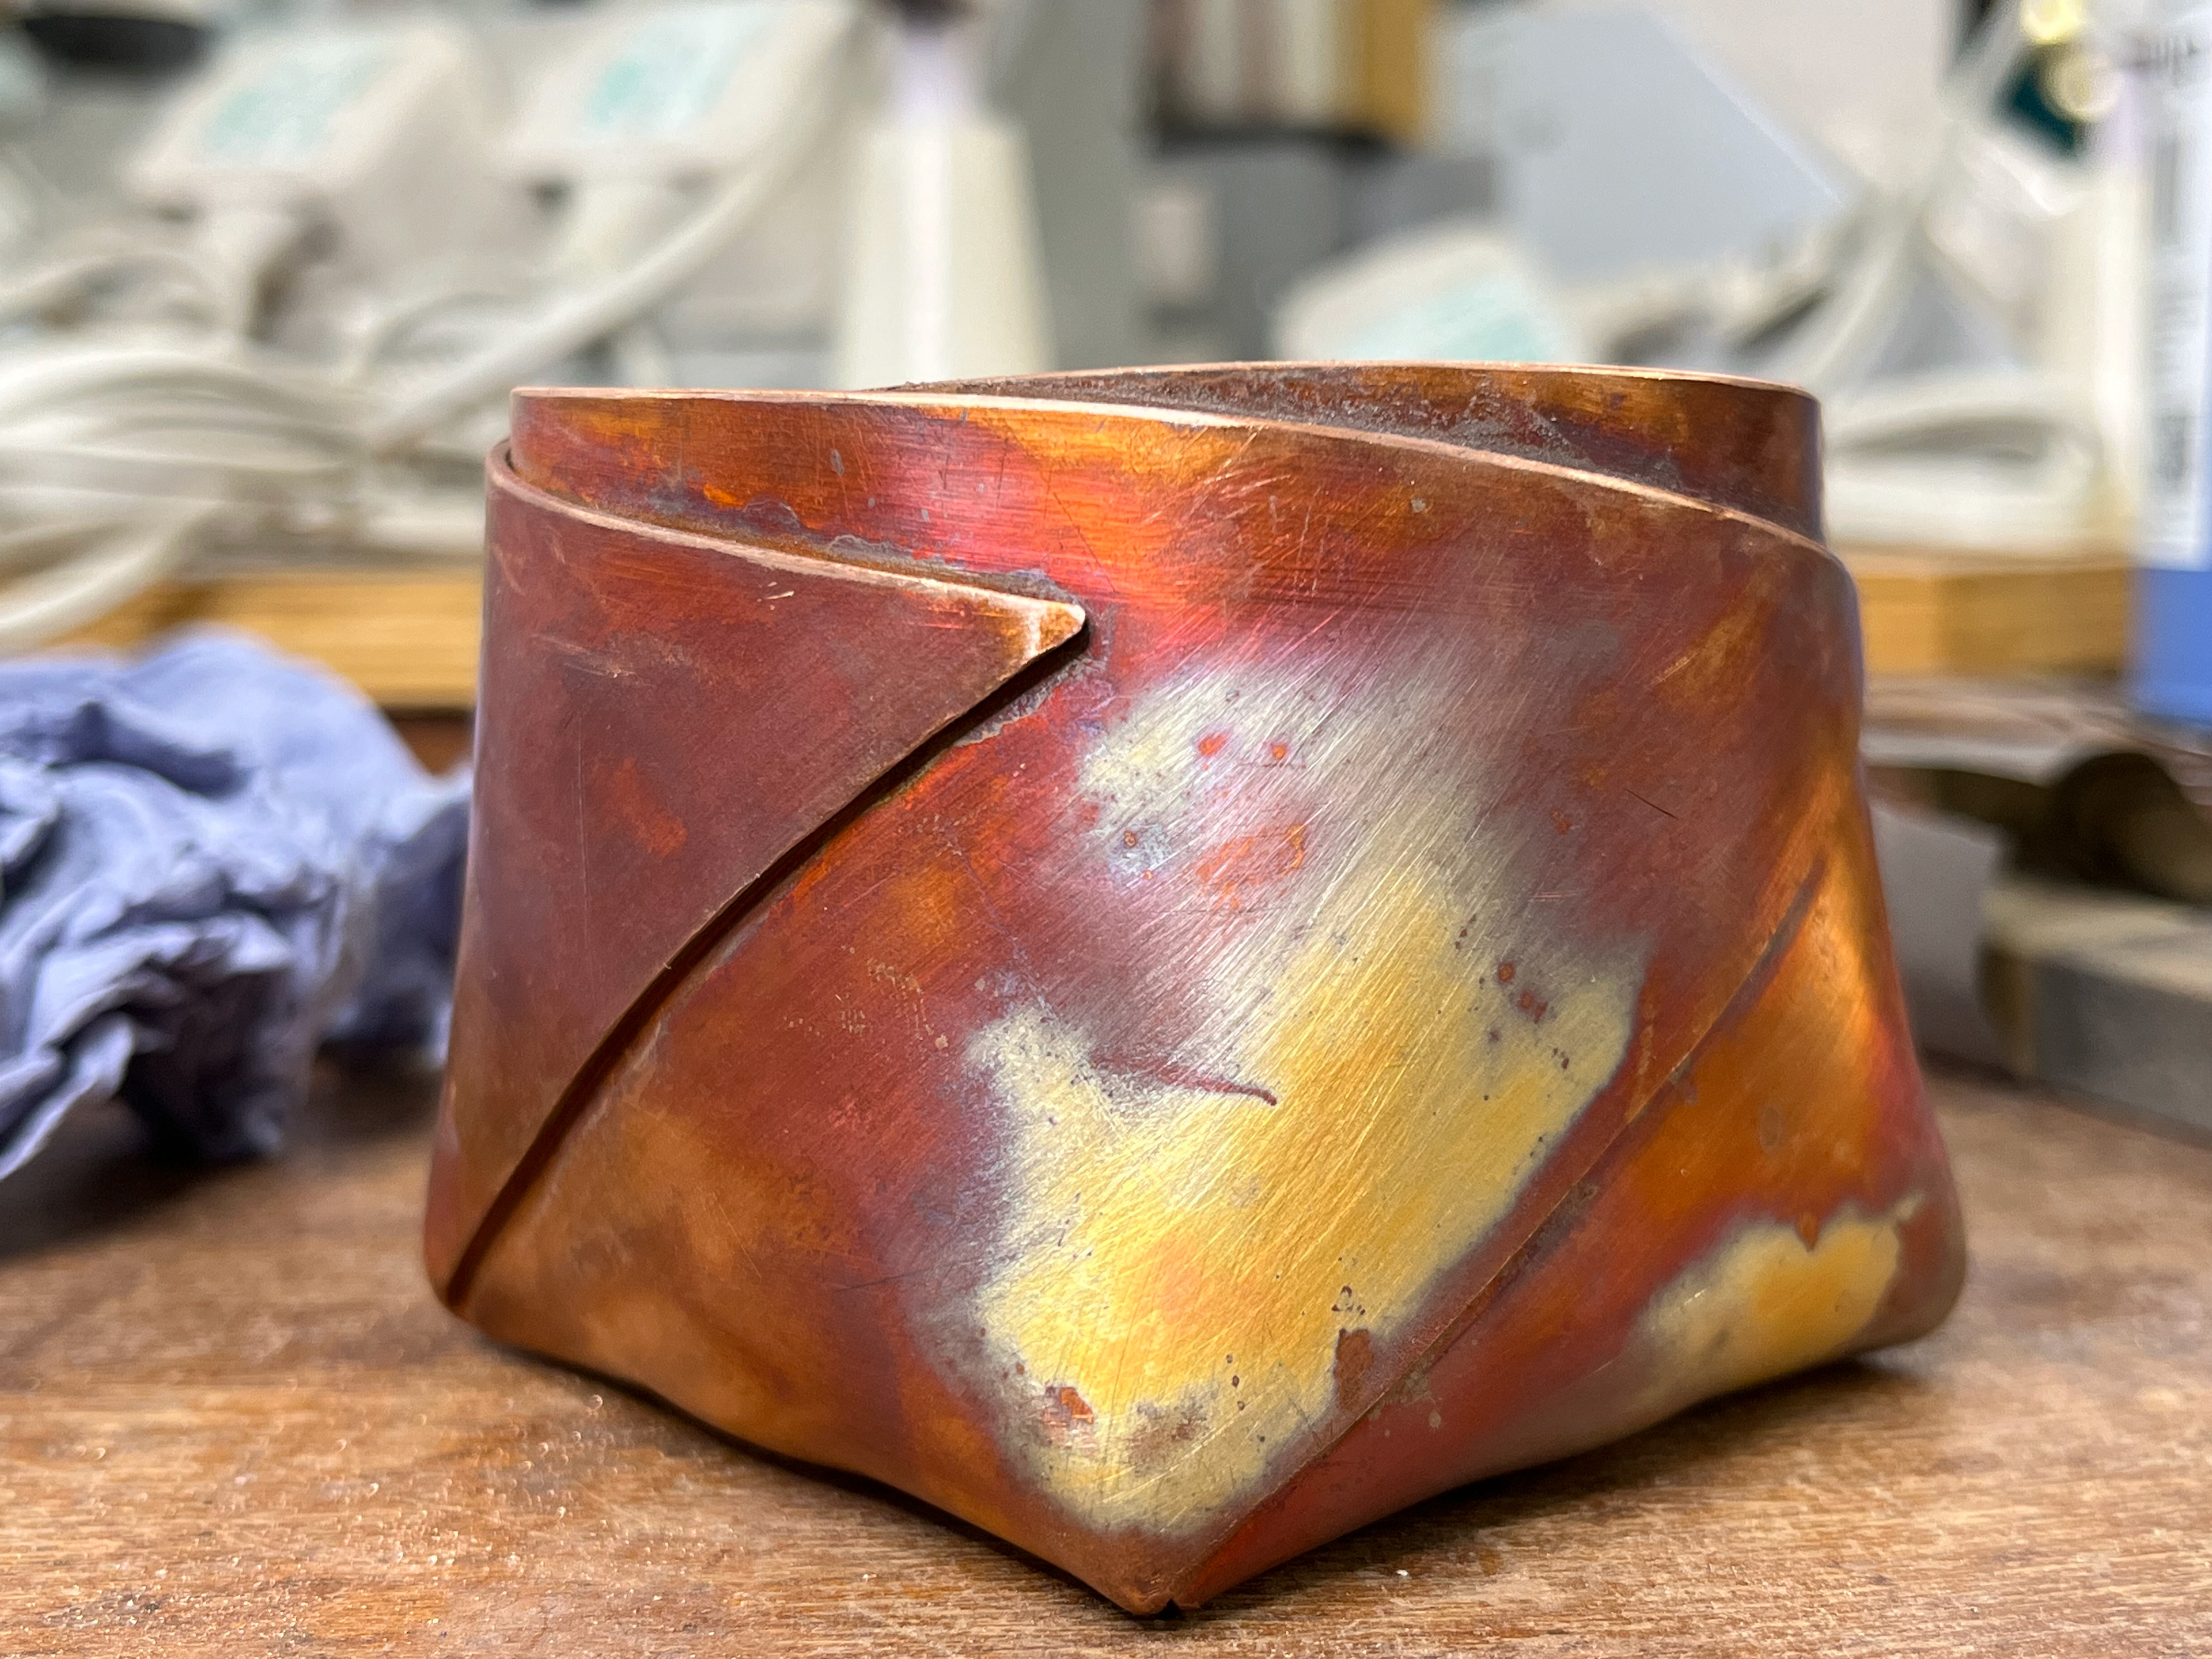
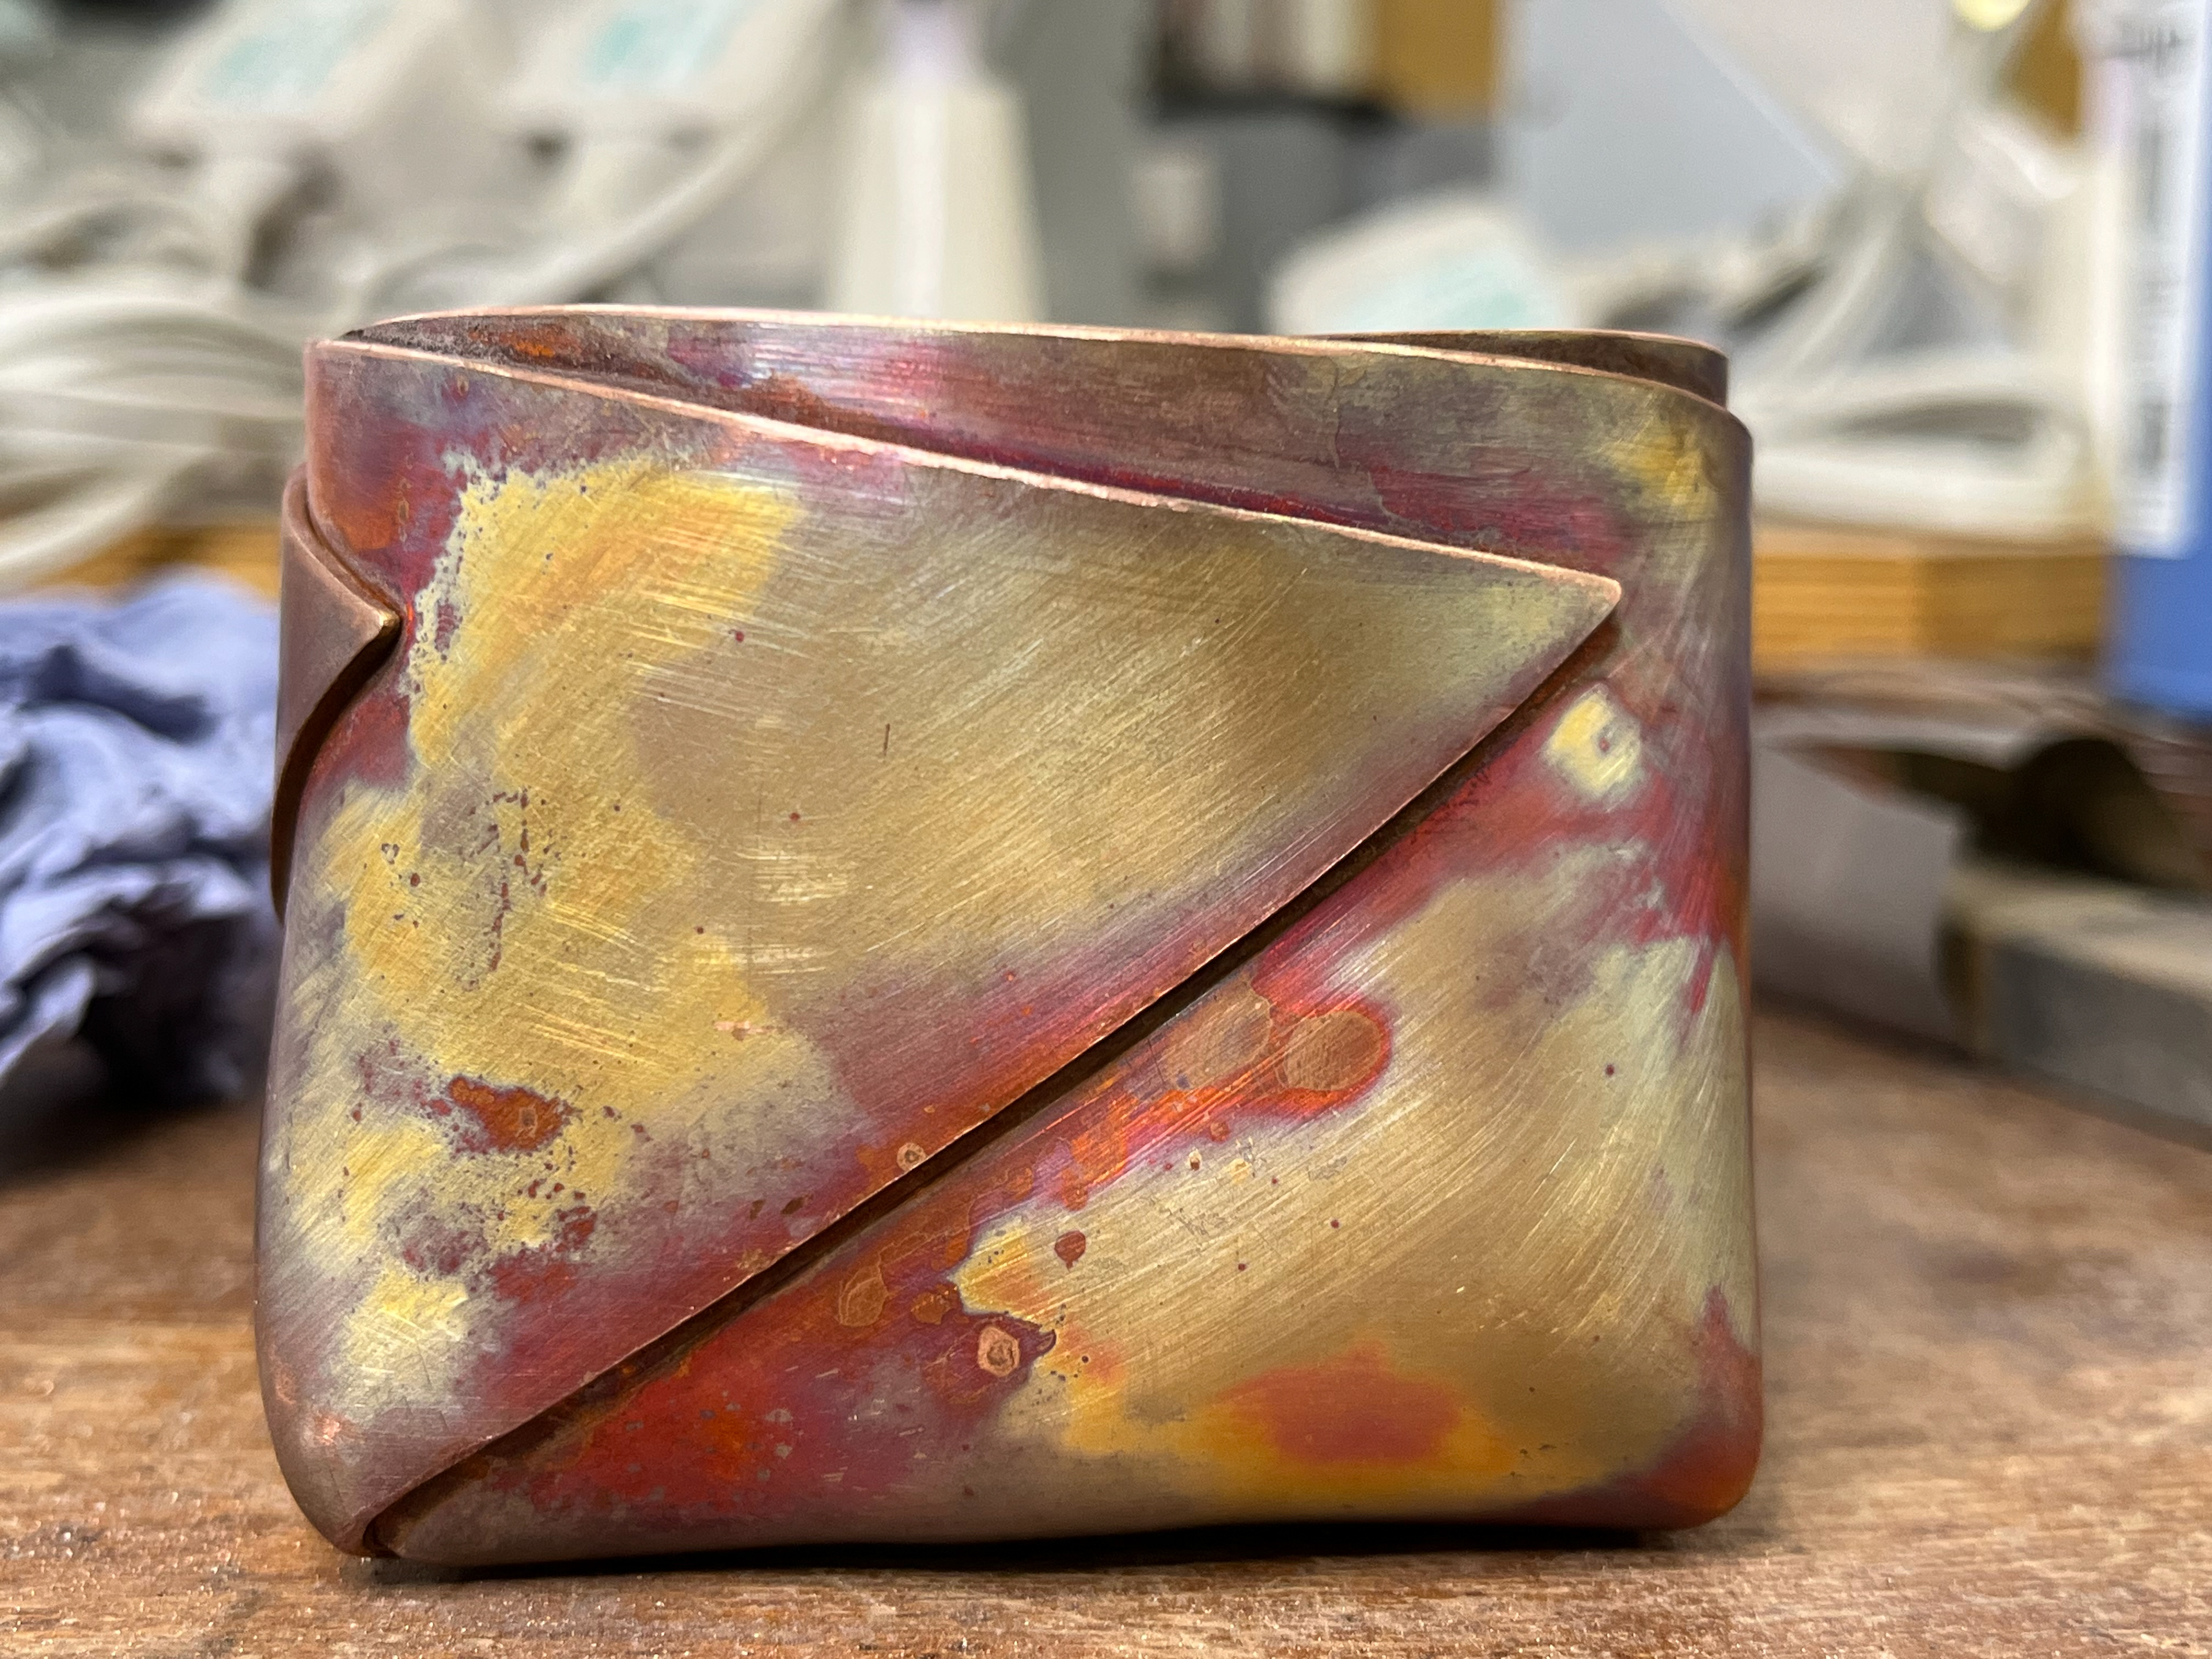
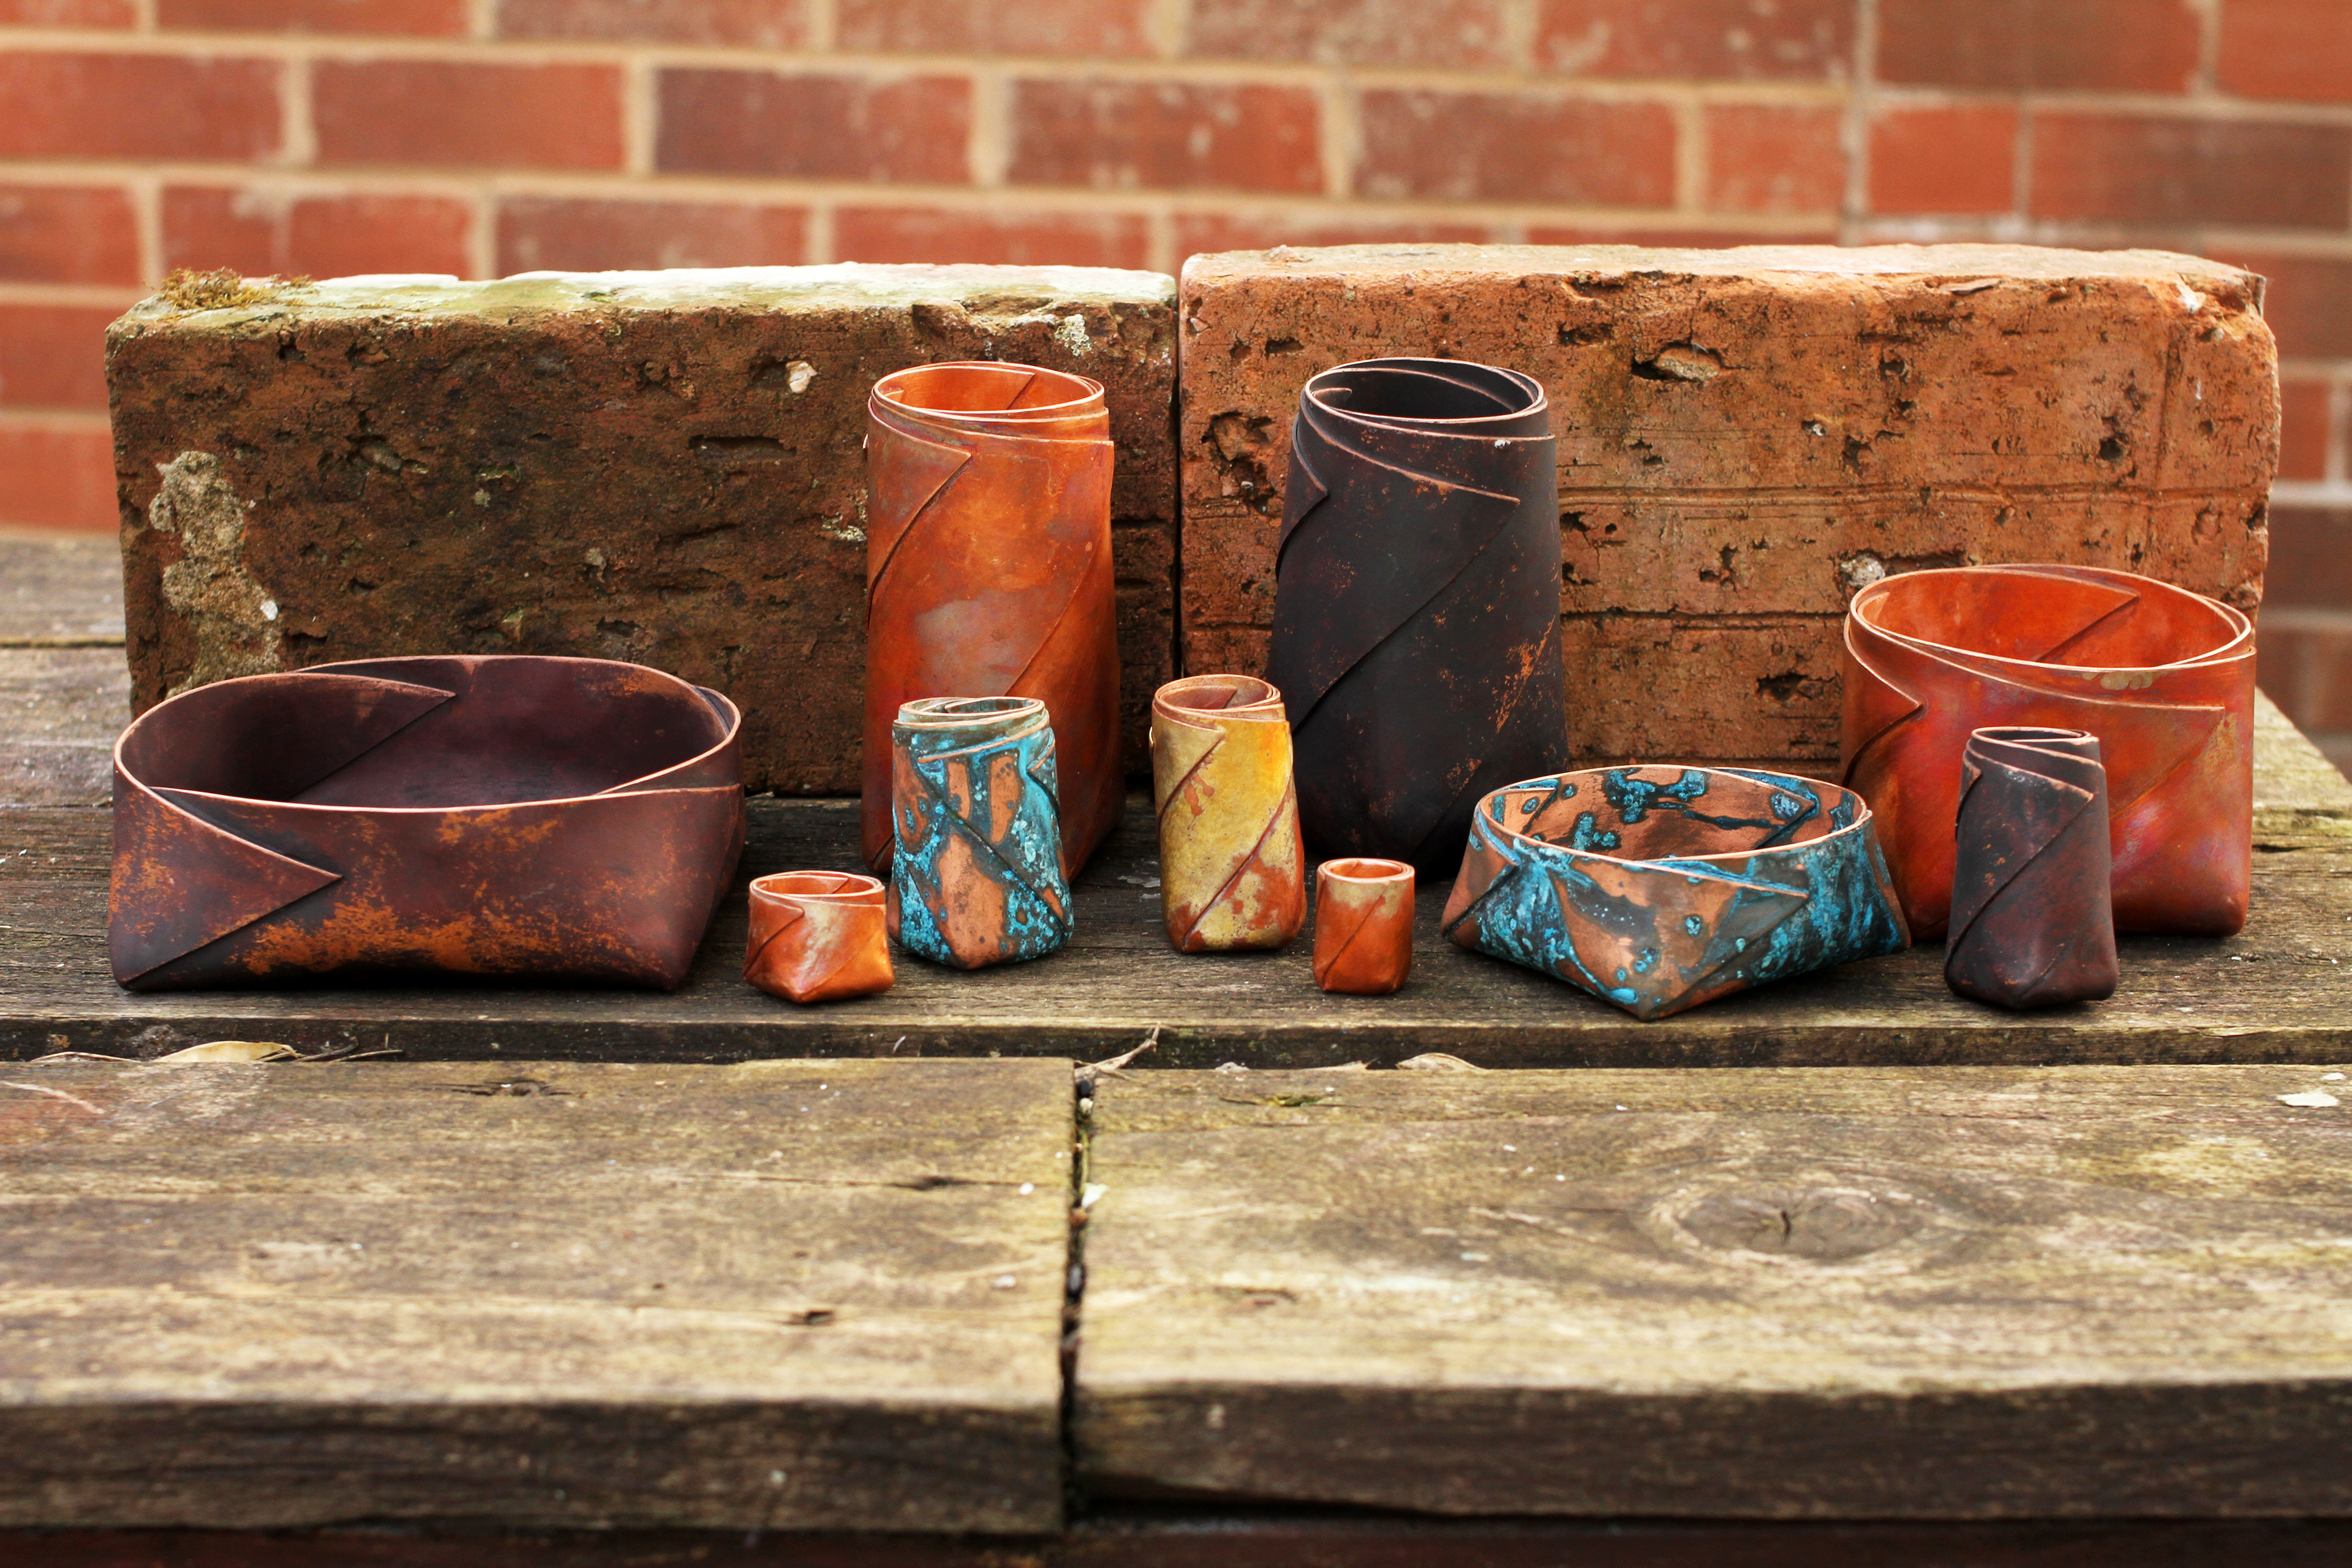
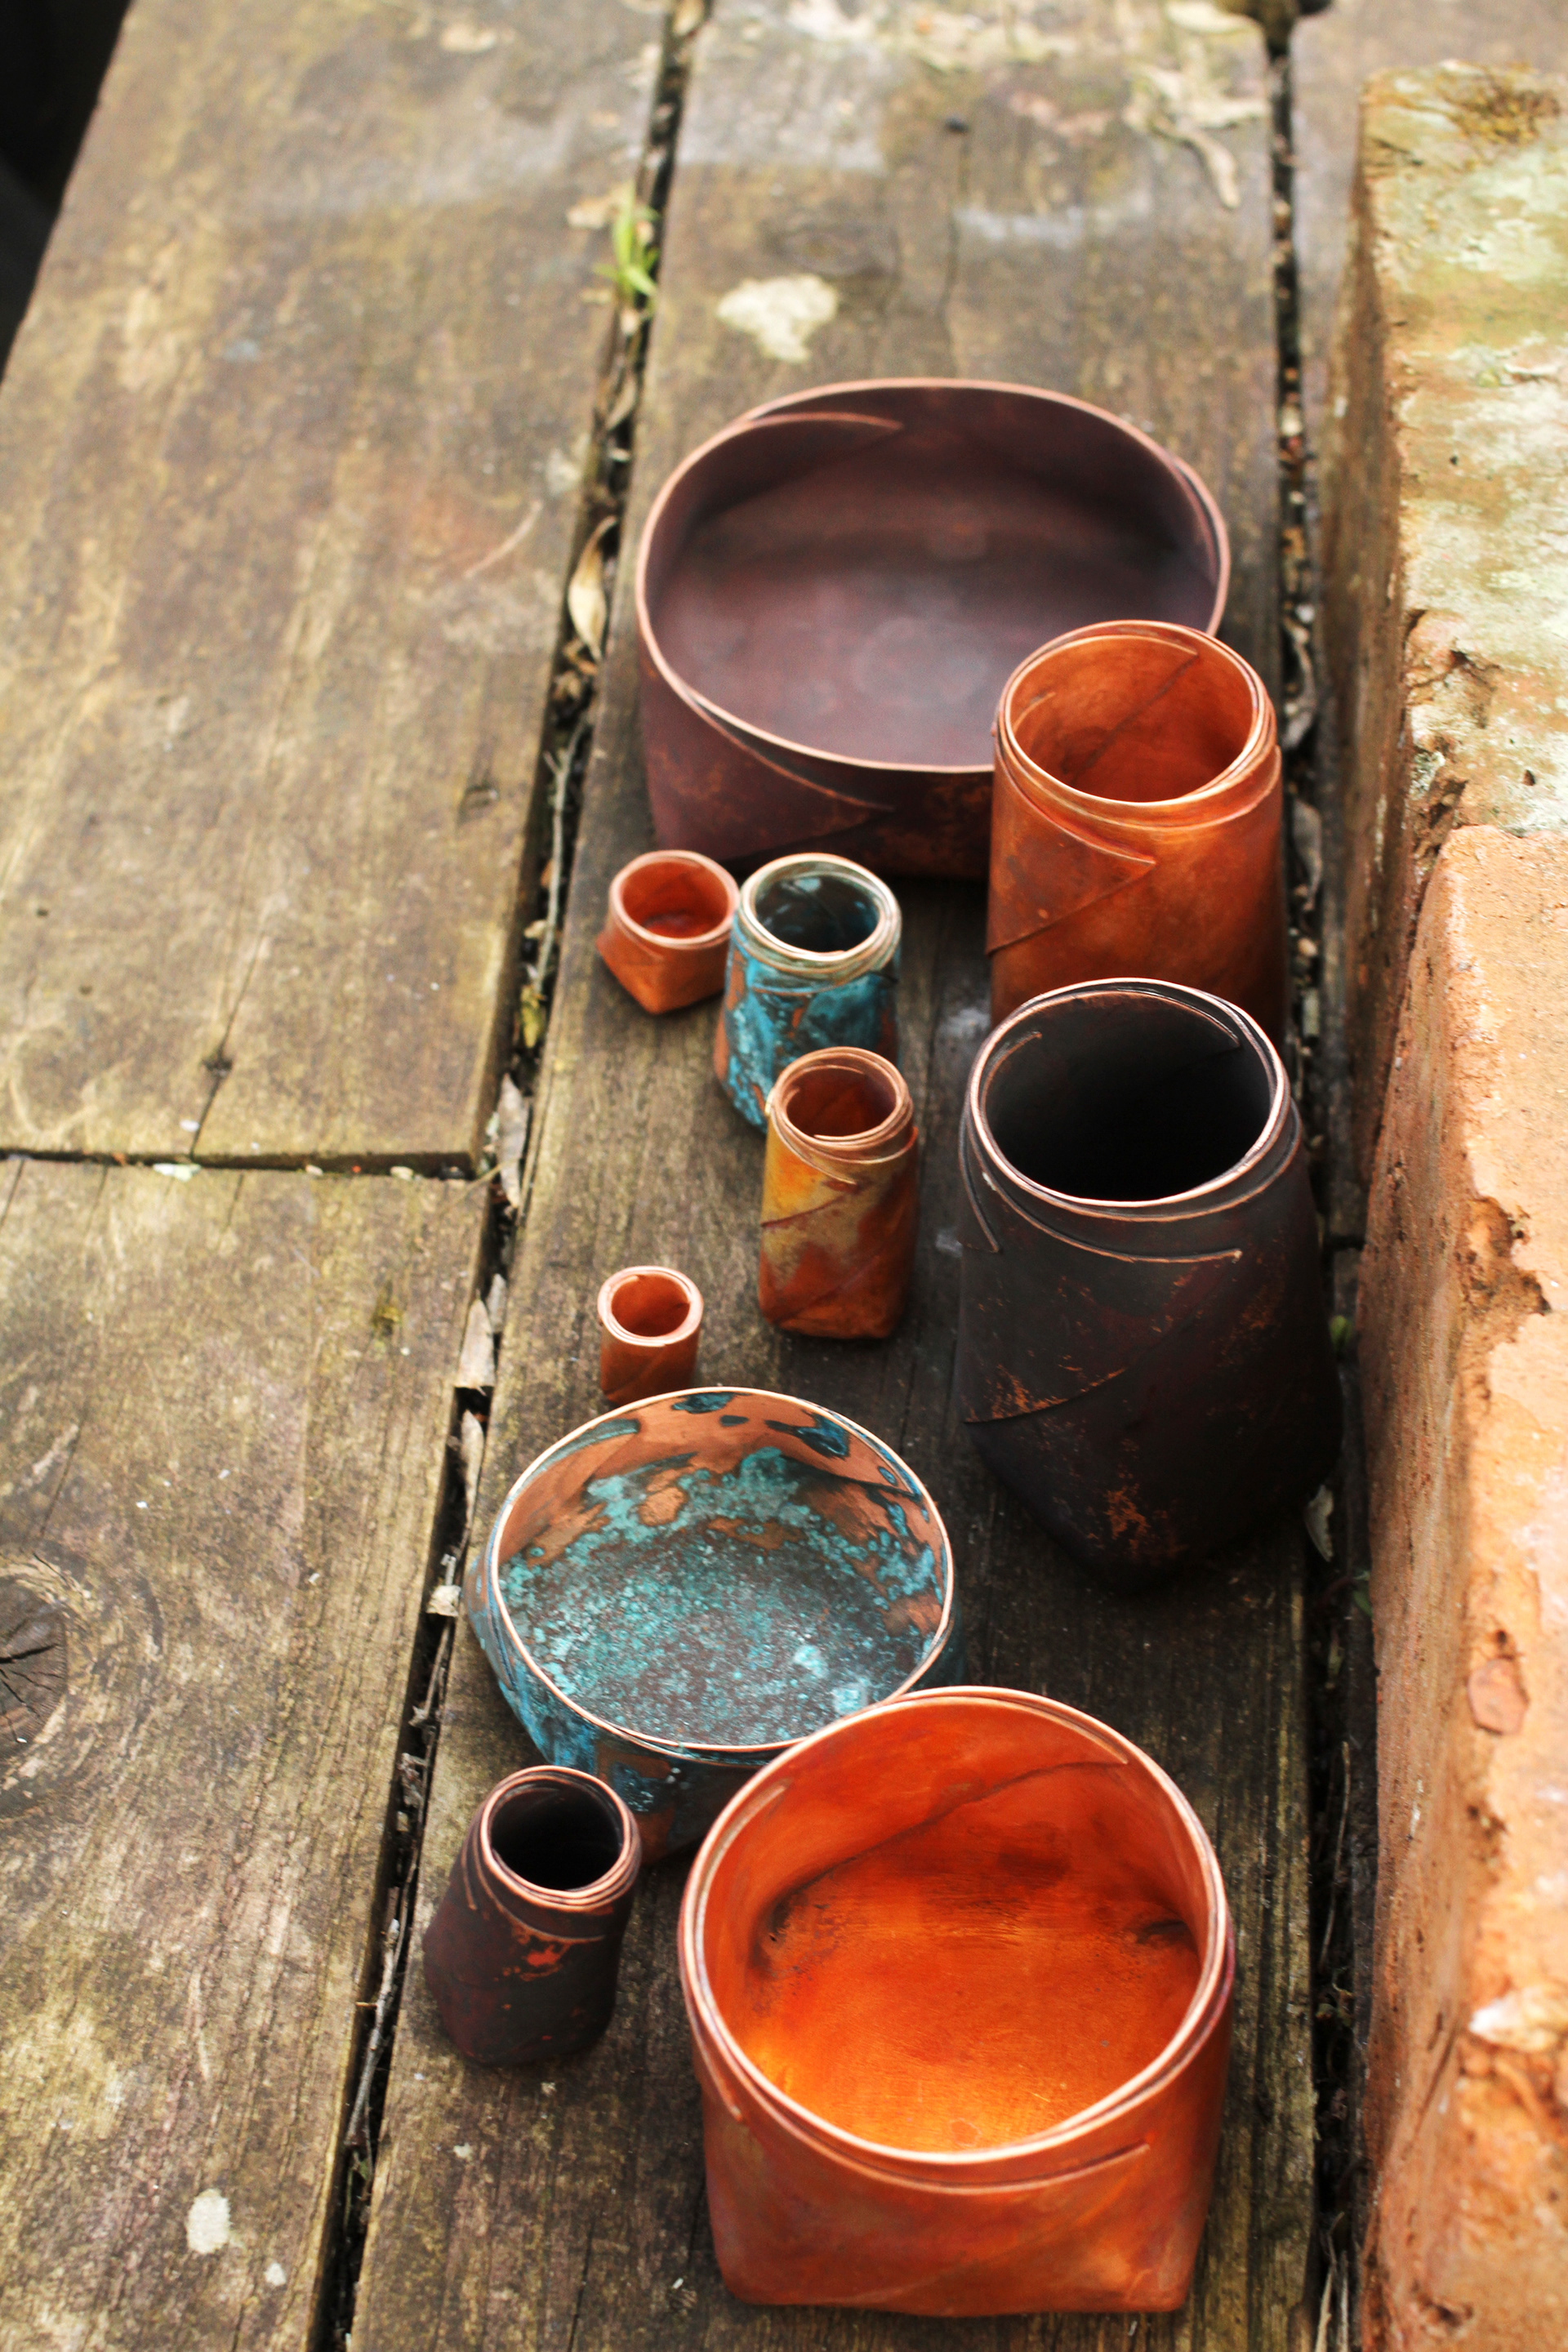
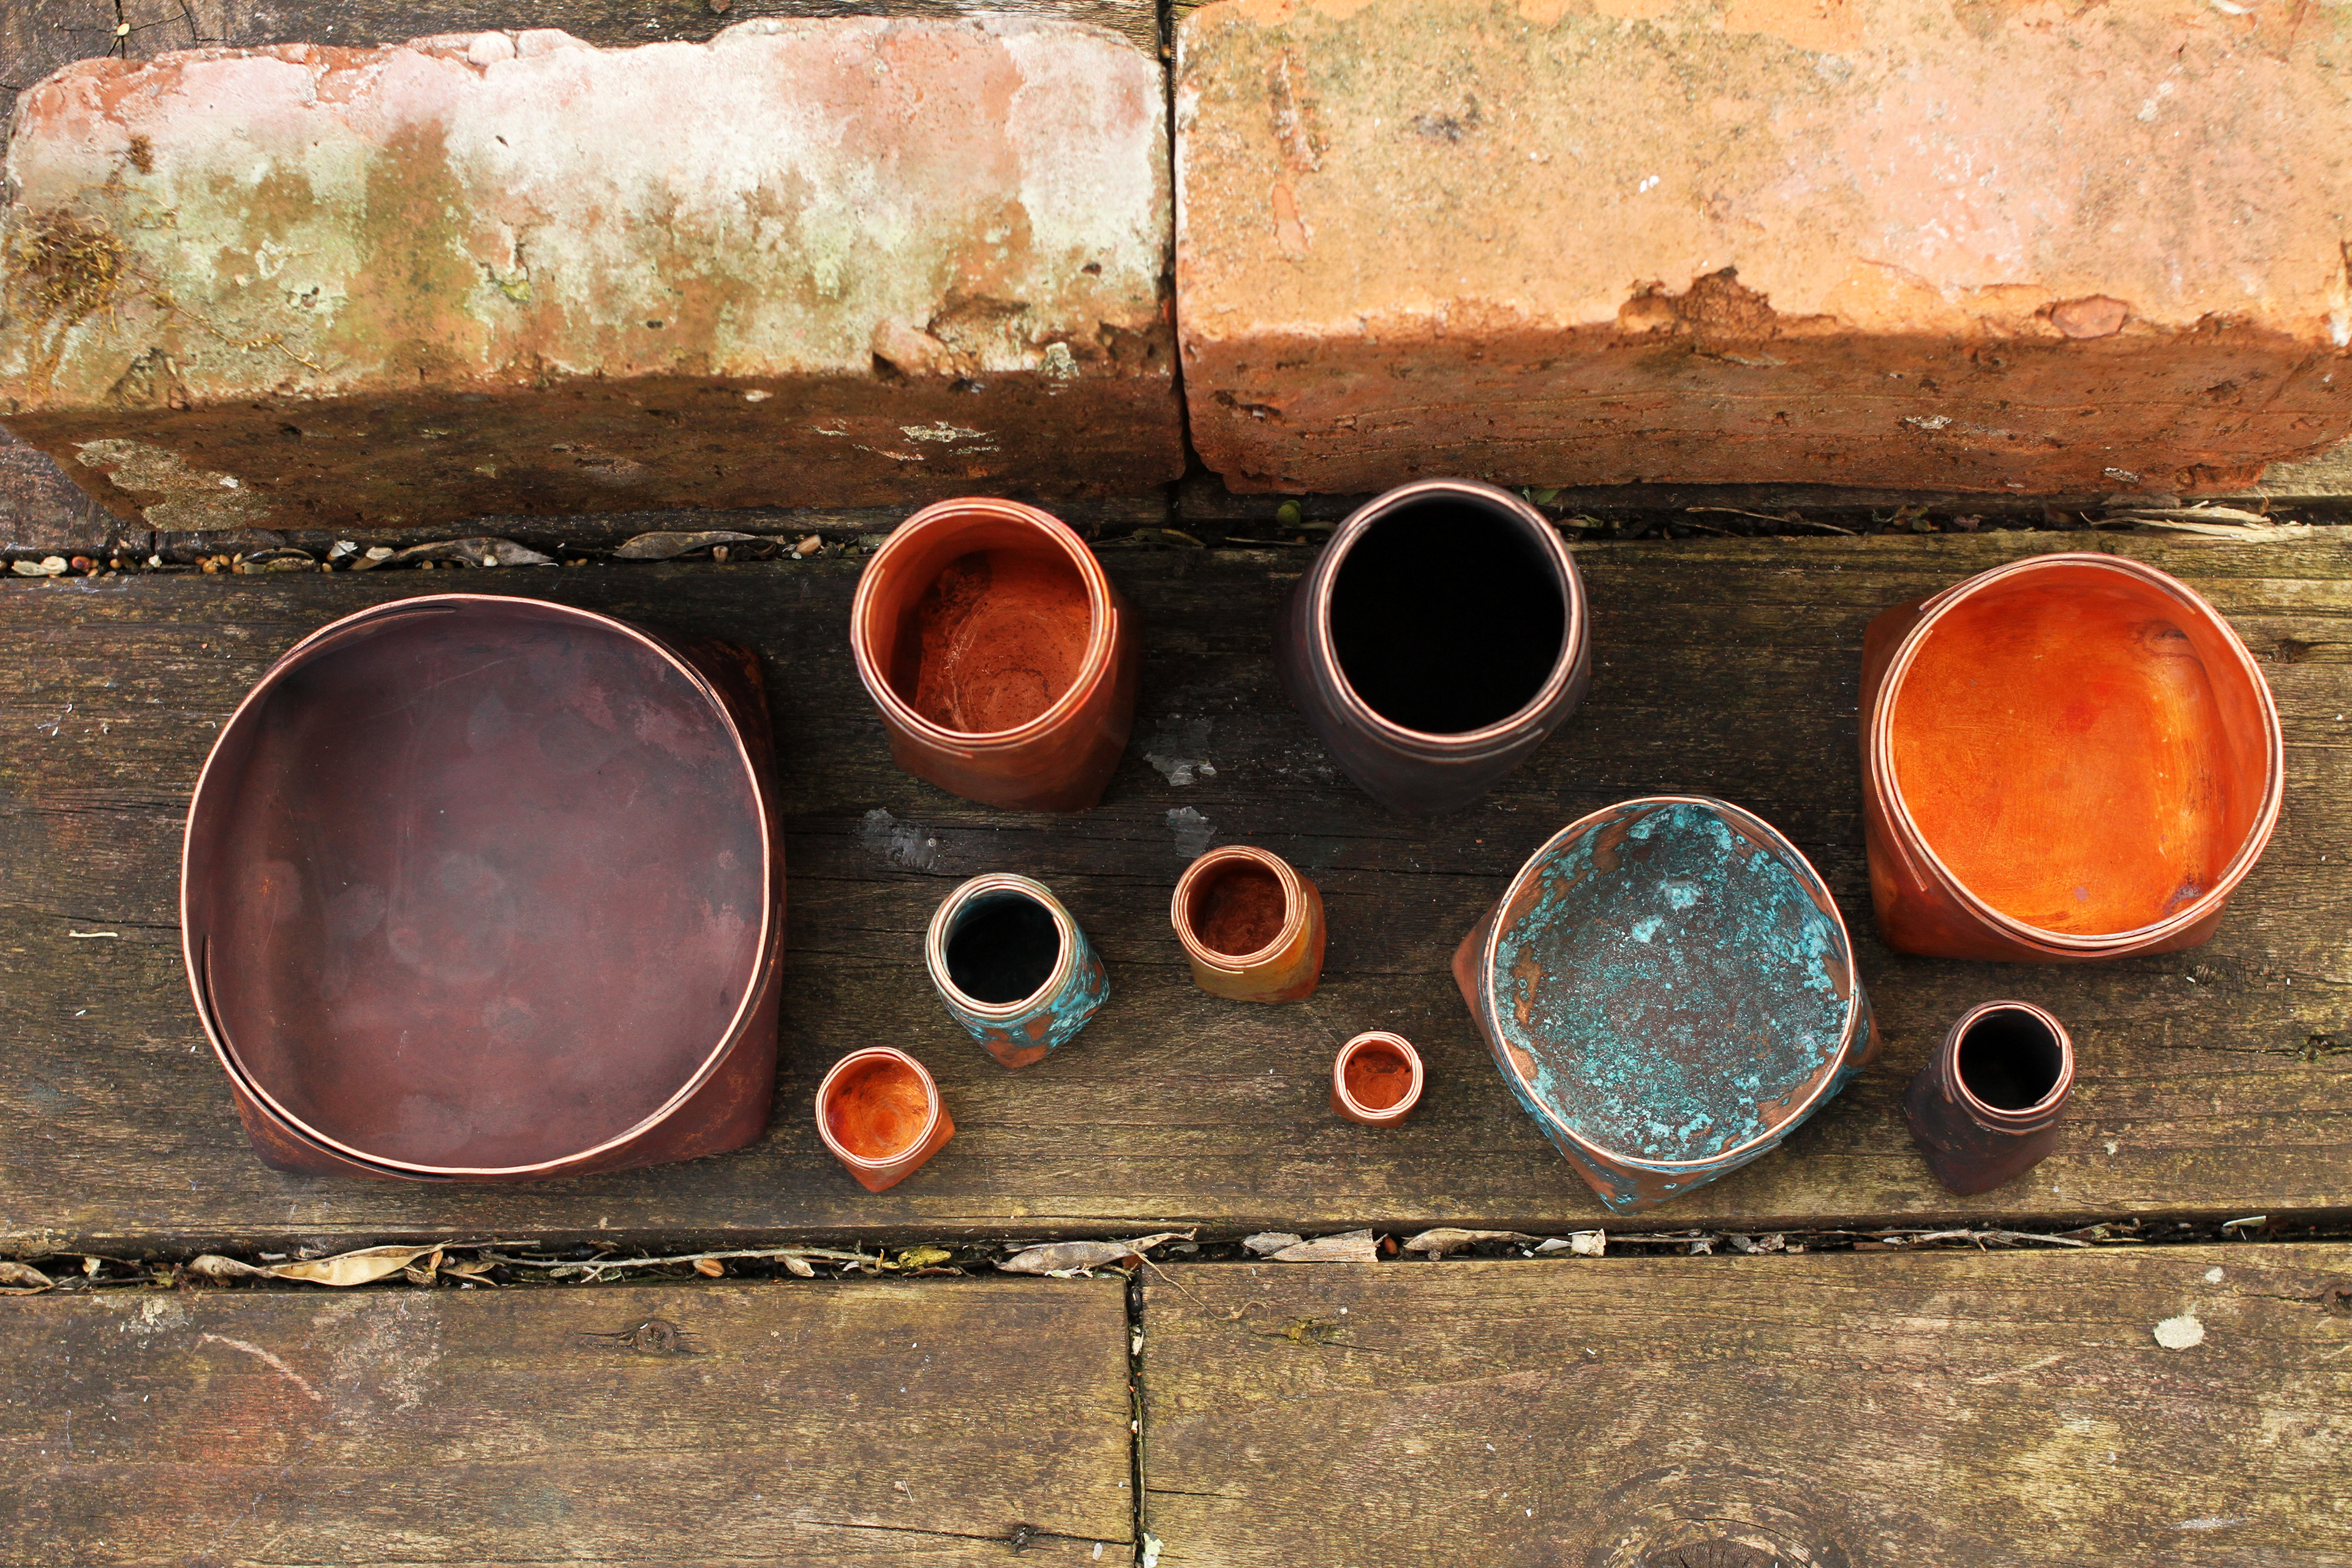
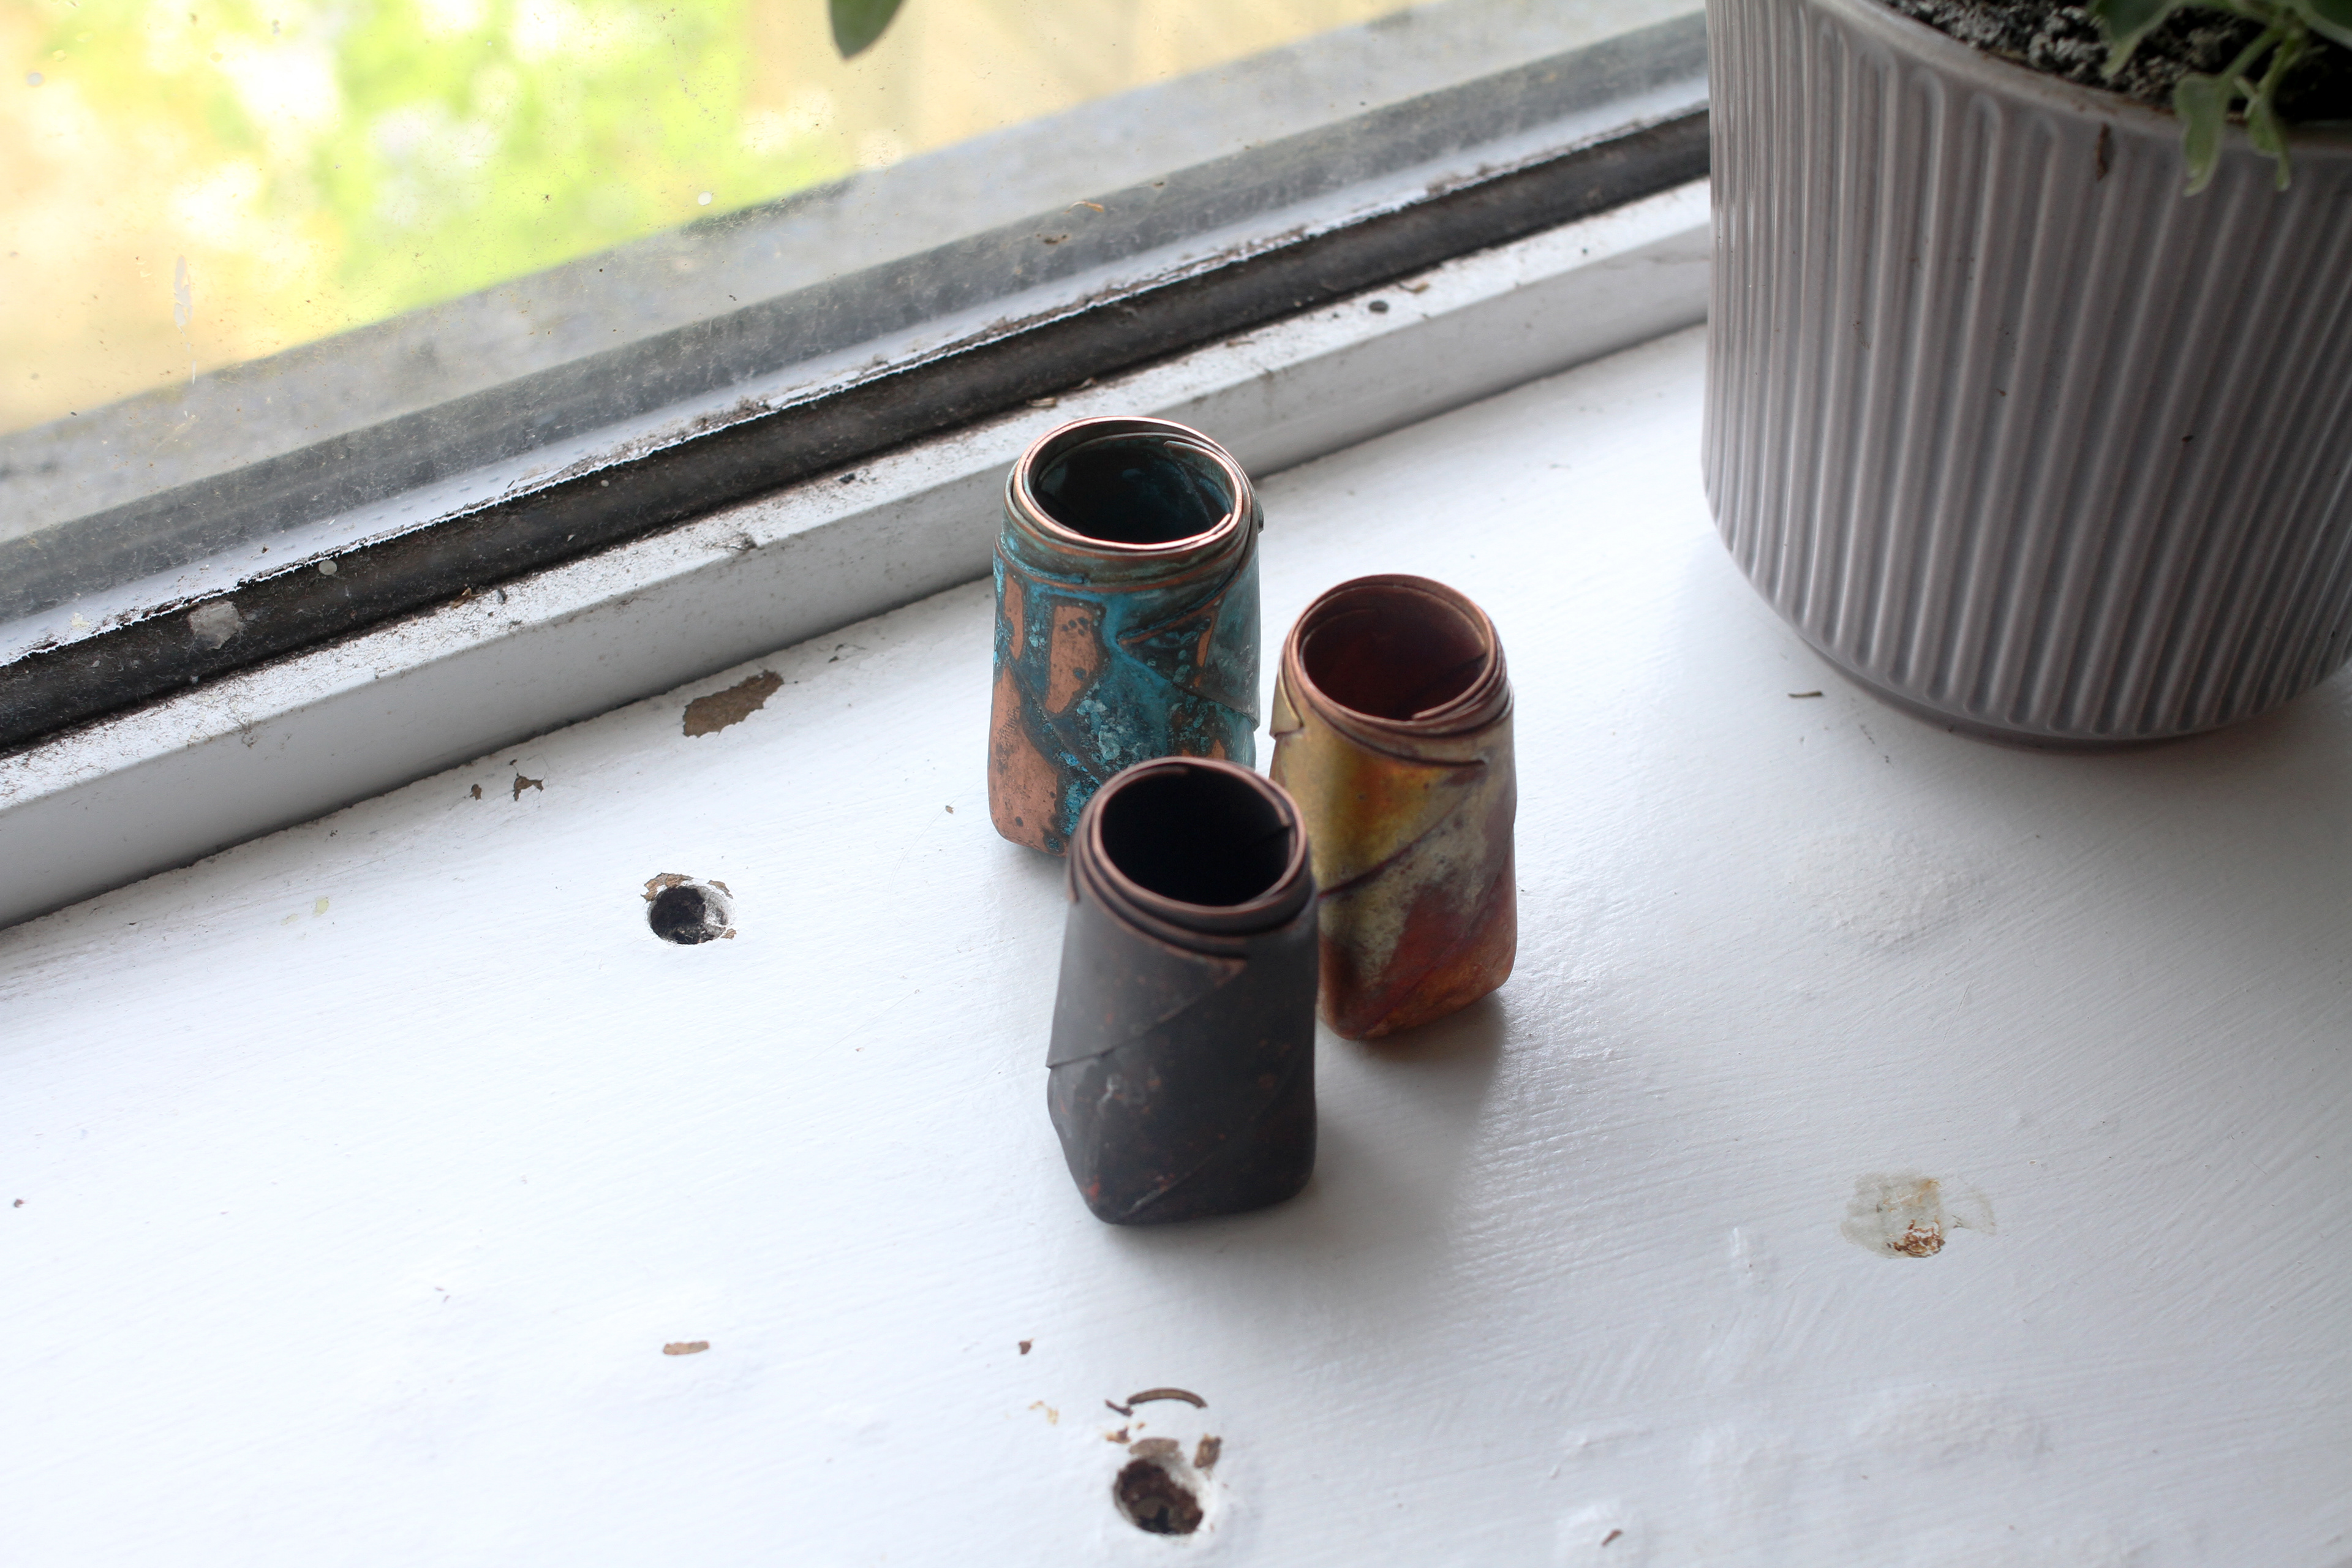
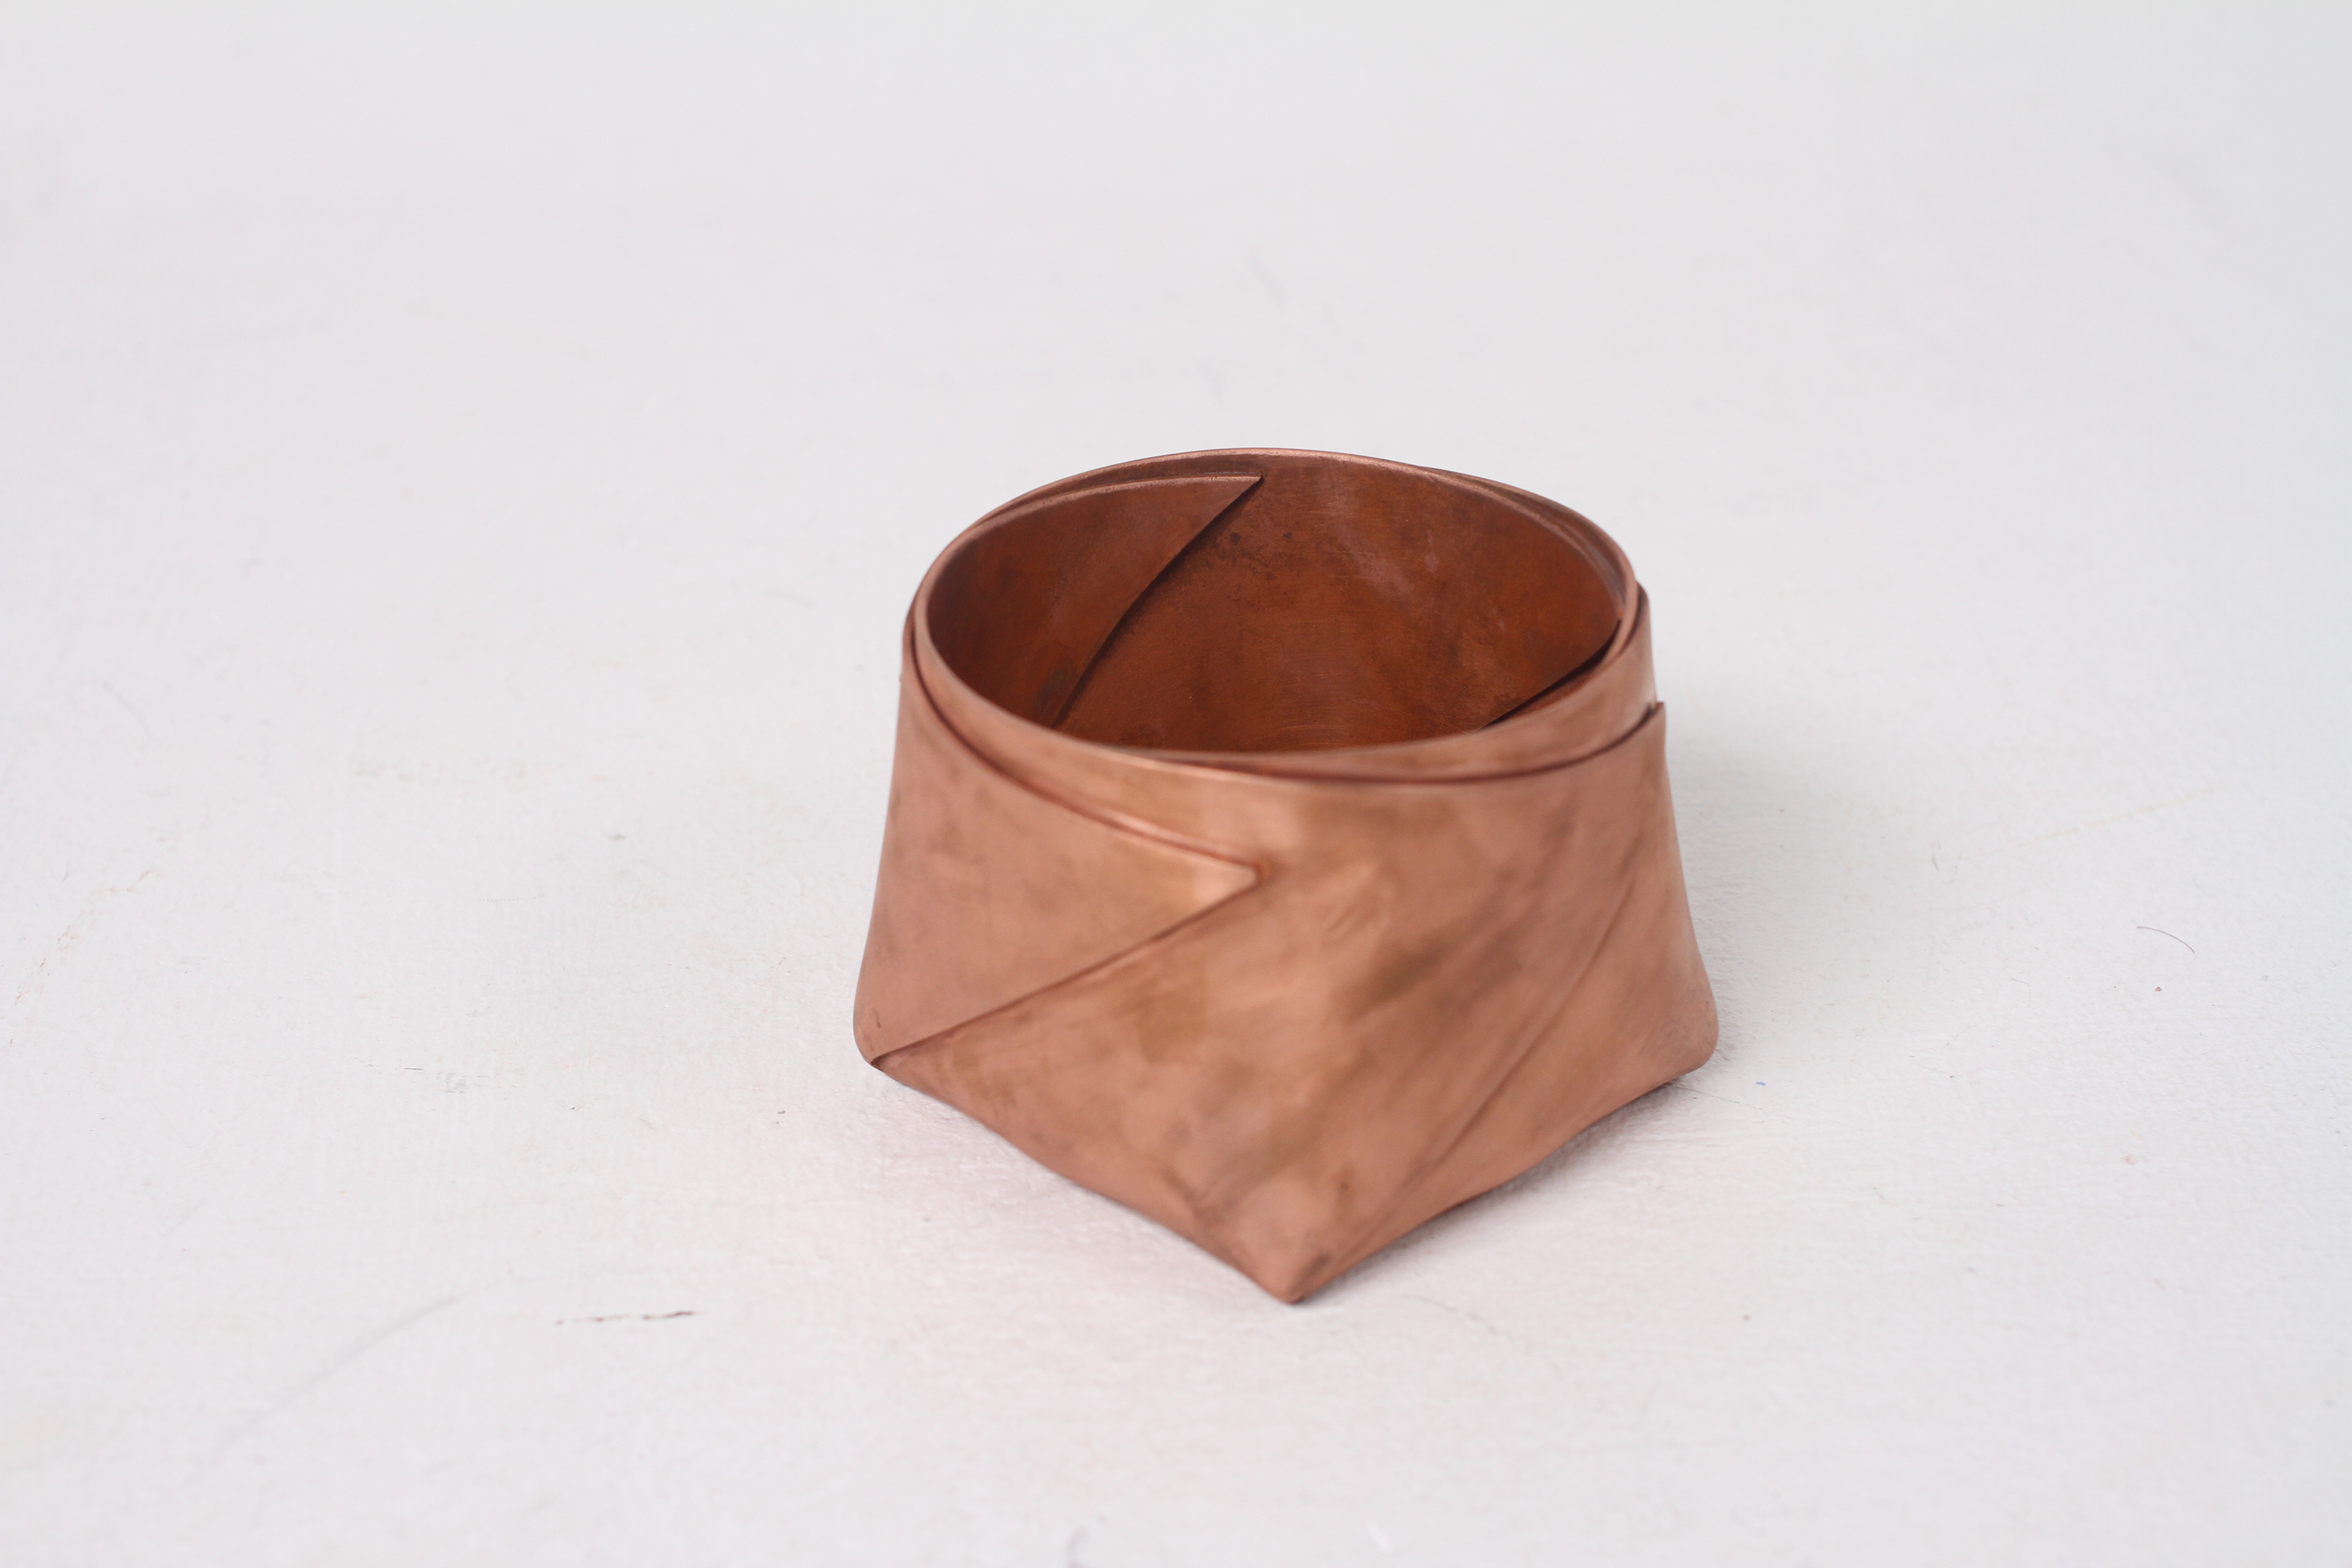
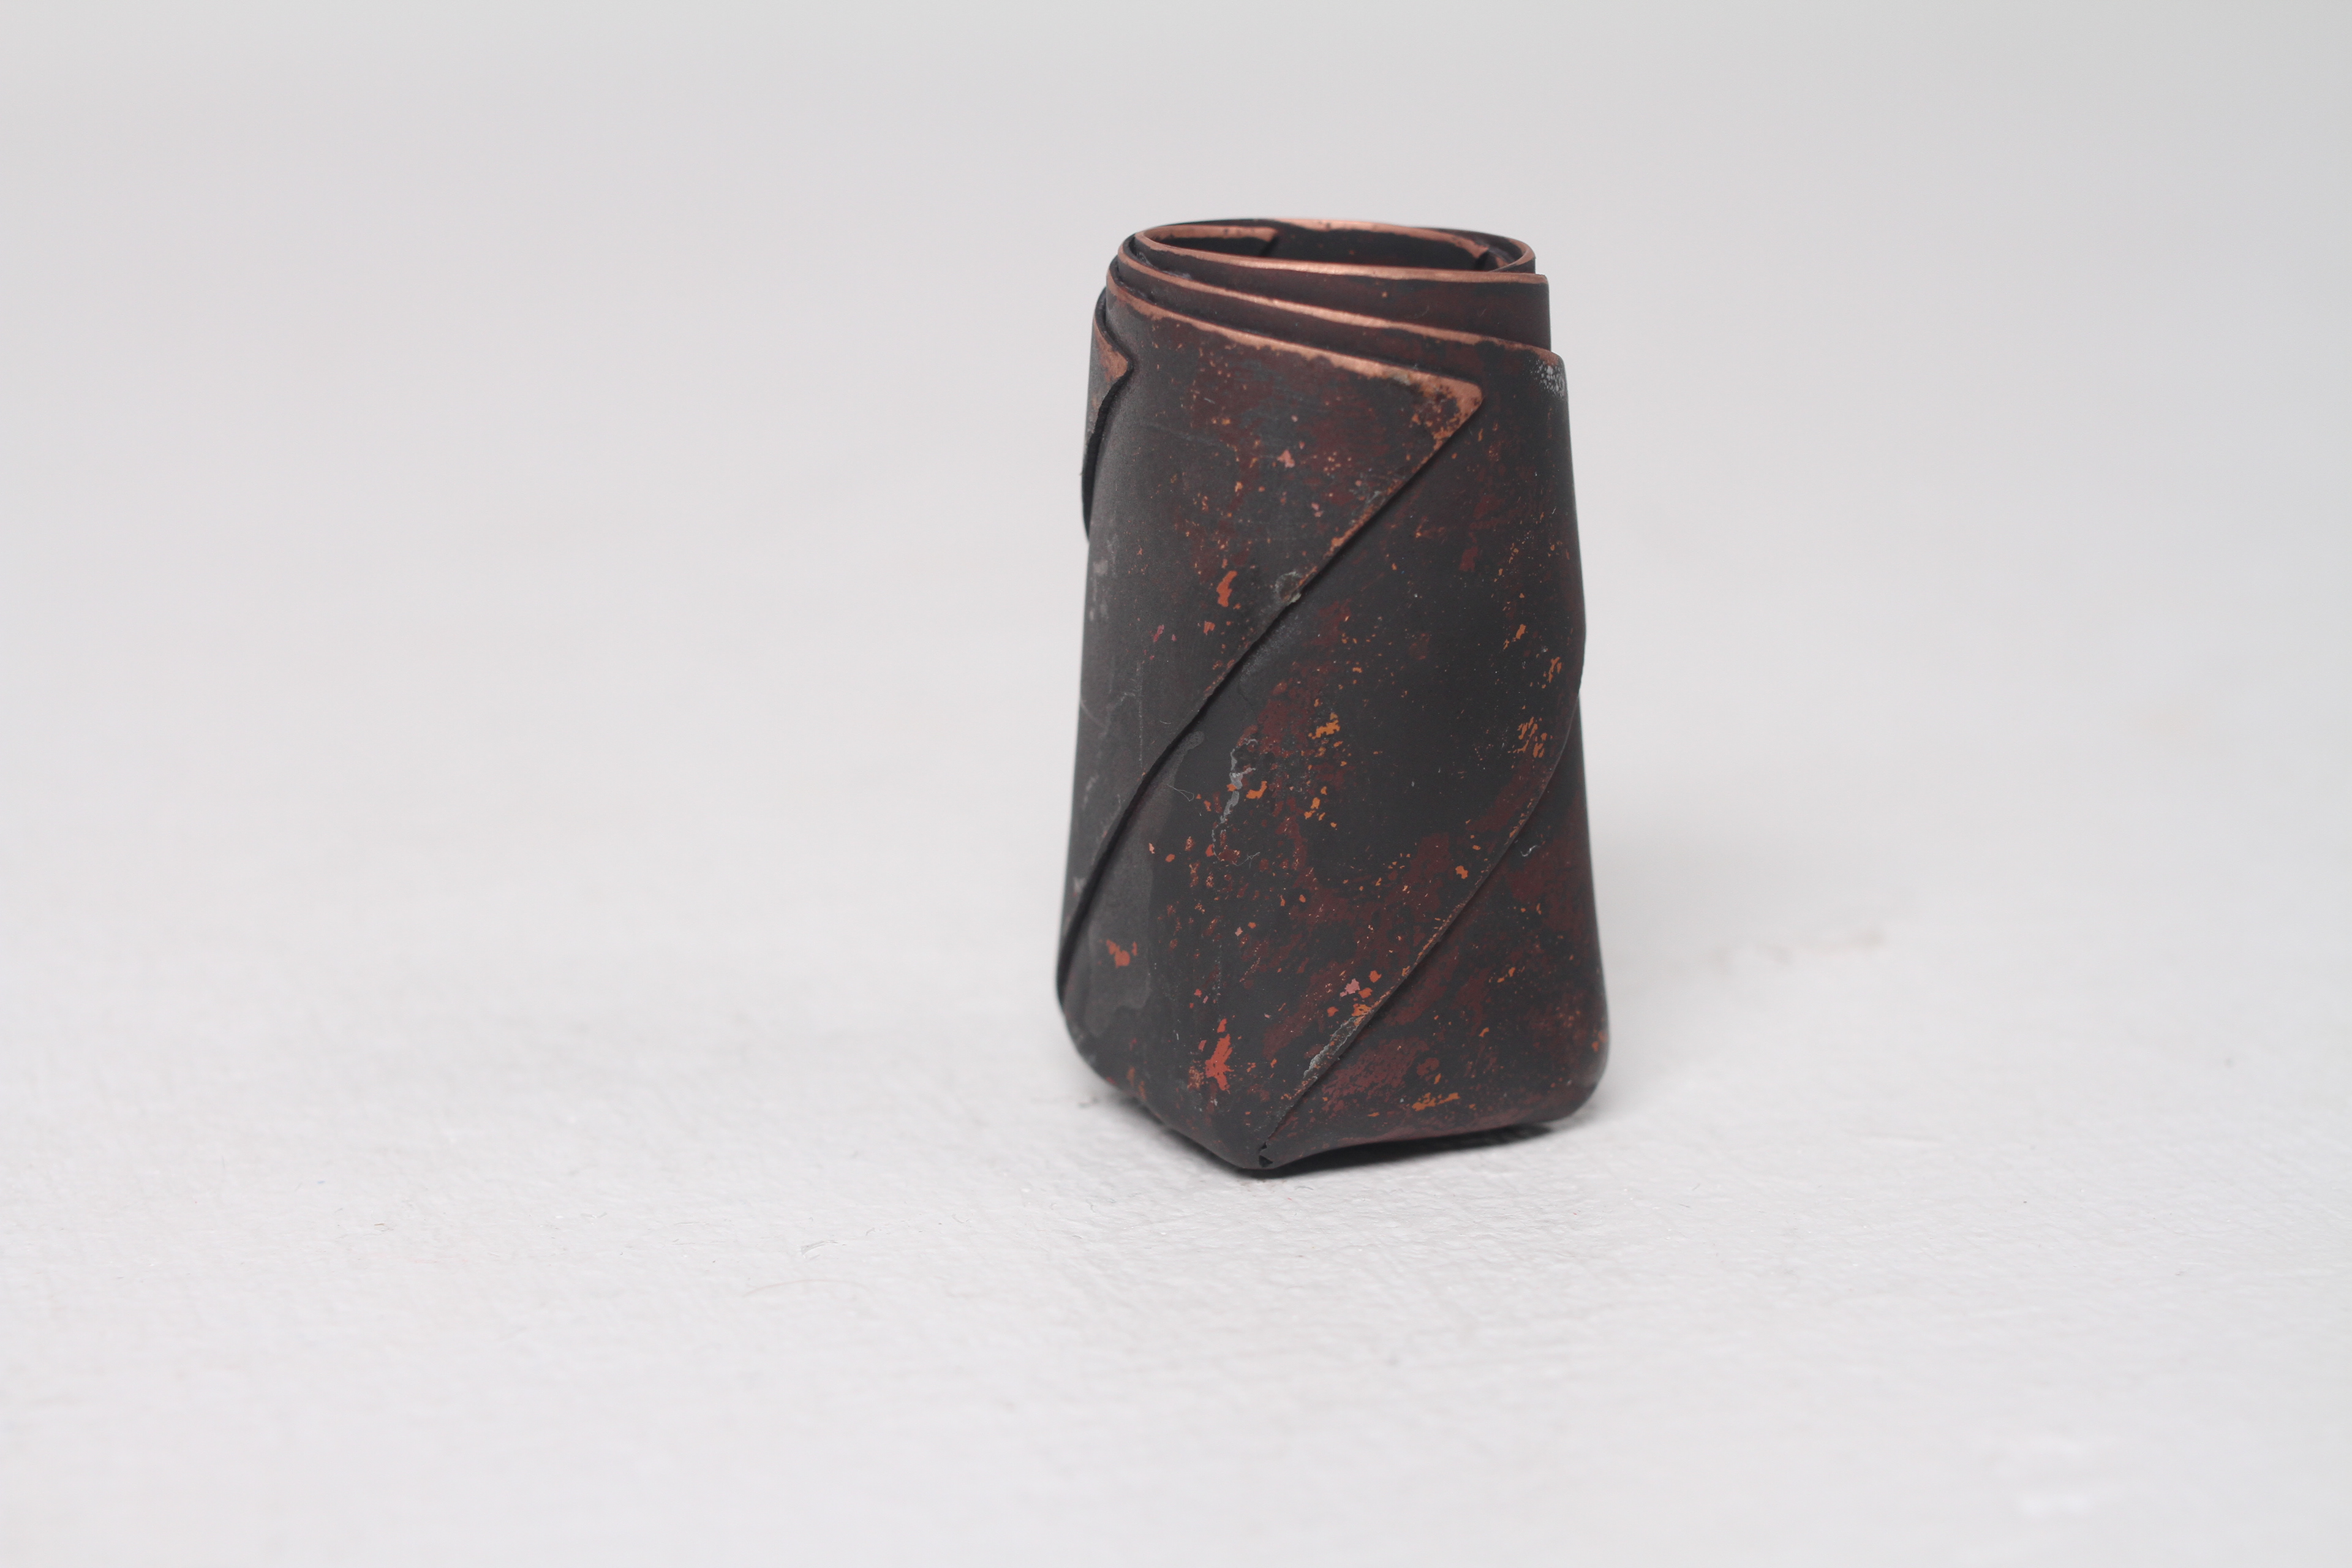
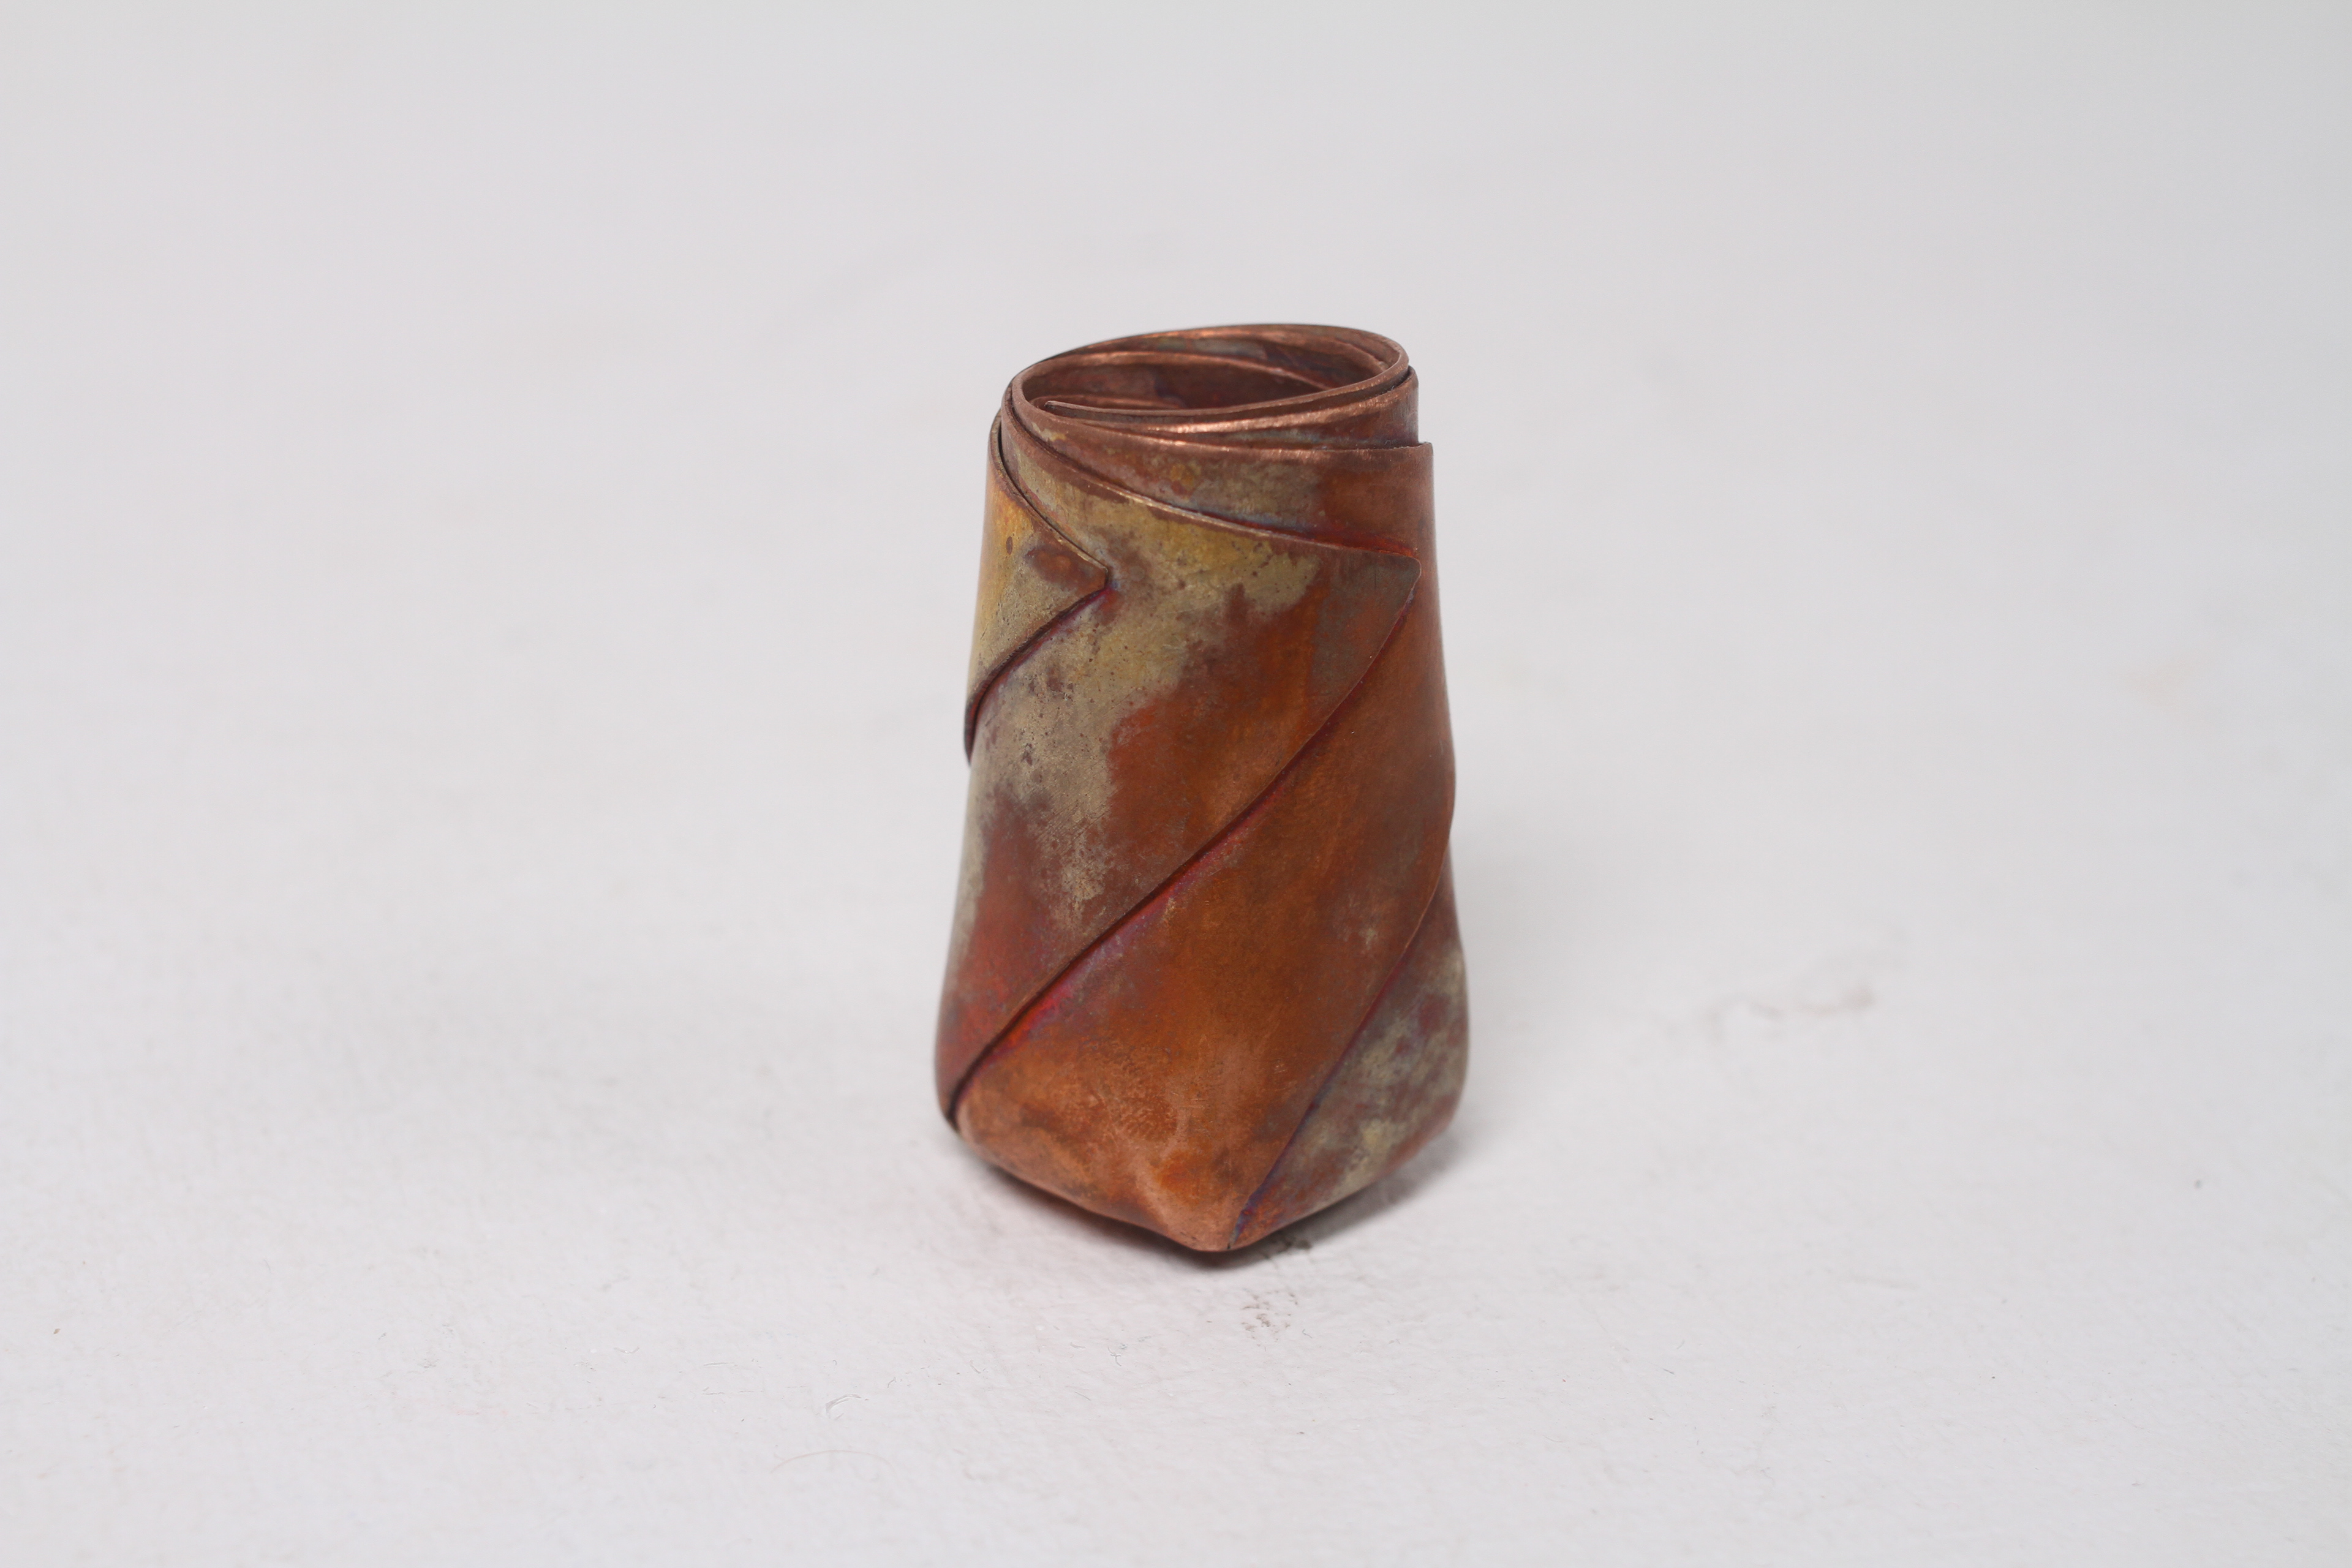
It was another day in the workshop and I was annealing one if my pieces when I saw the surface colour of the copper change from red to silver to black. This usually doesn’t surprise me as it is the typical colour change when heating copper but then I realised… heat treating!
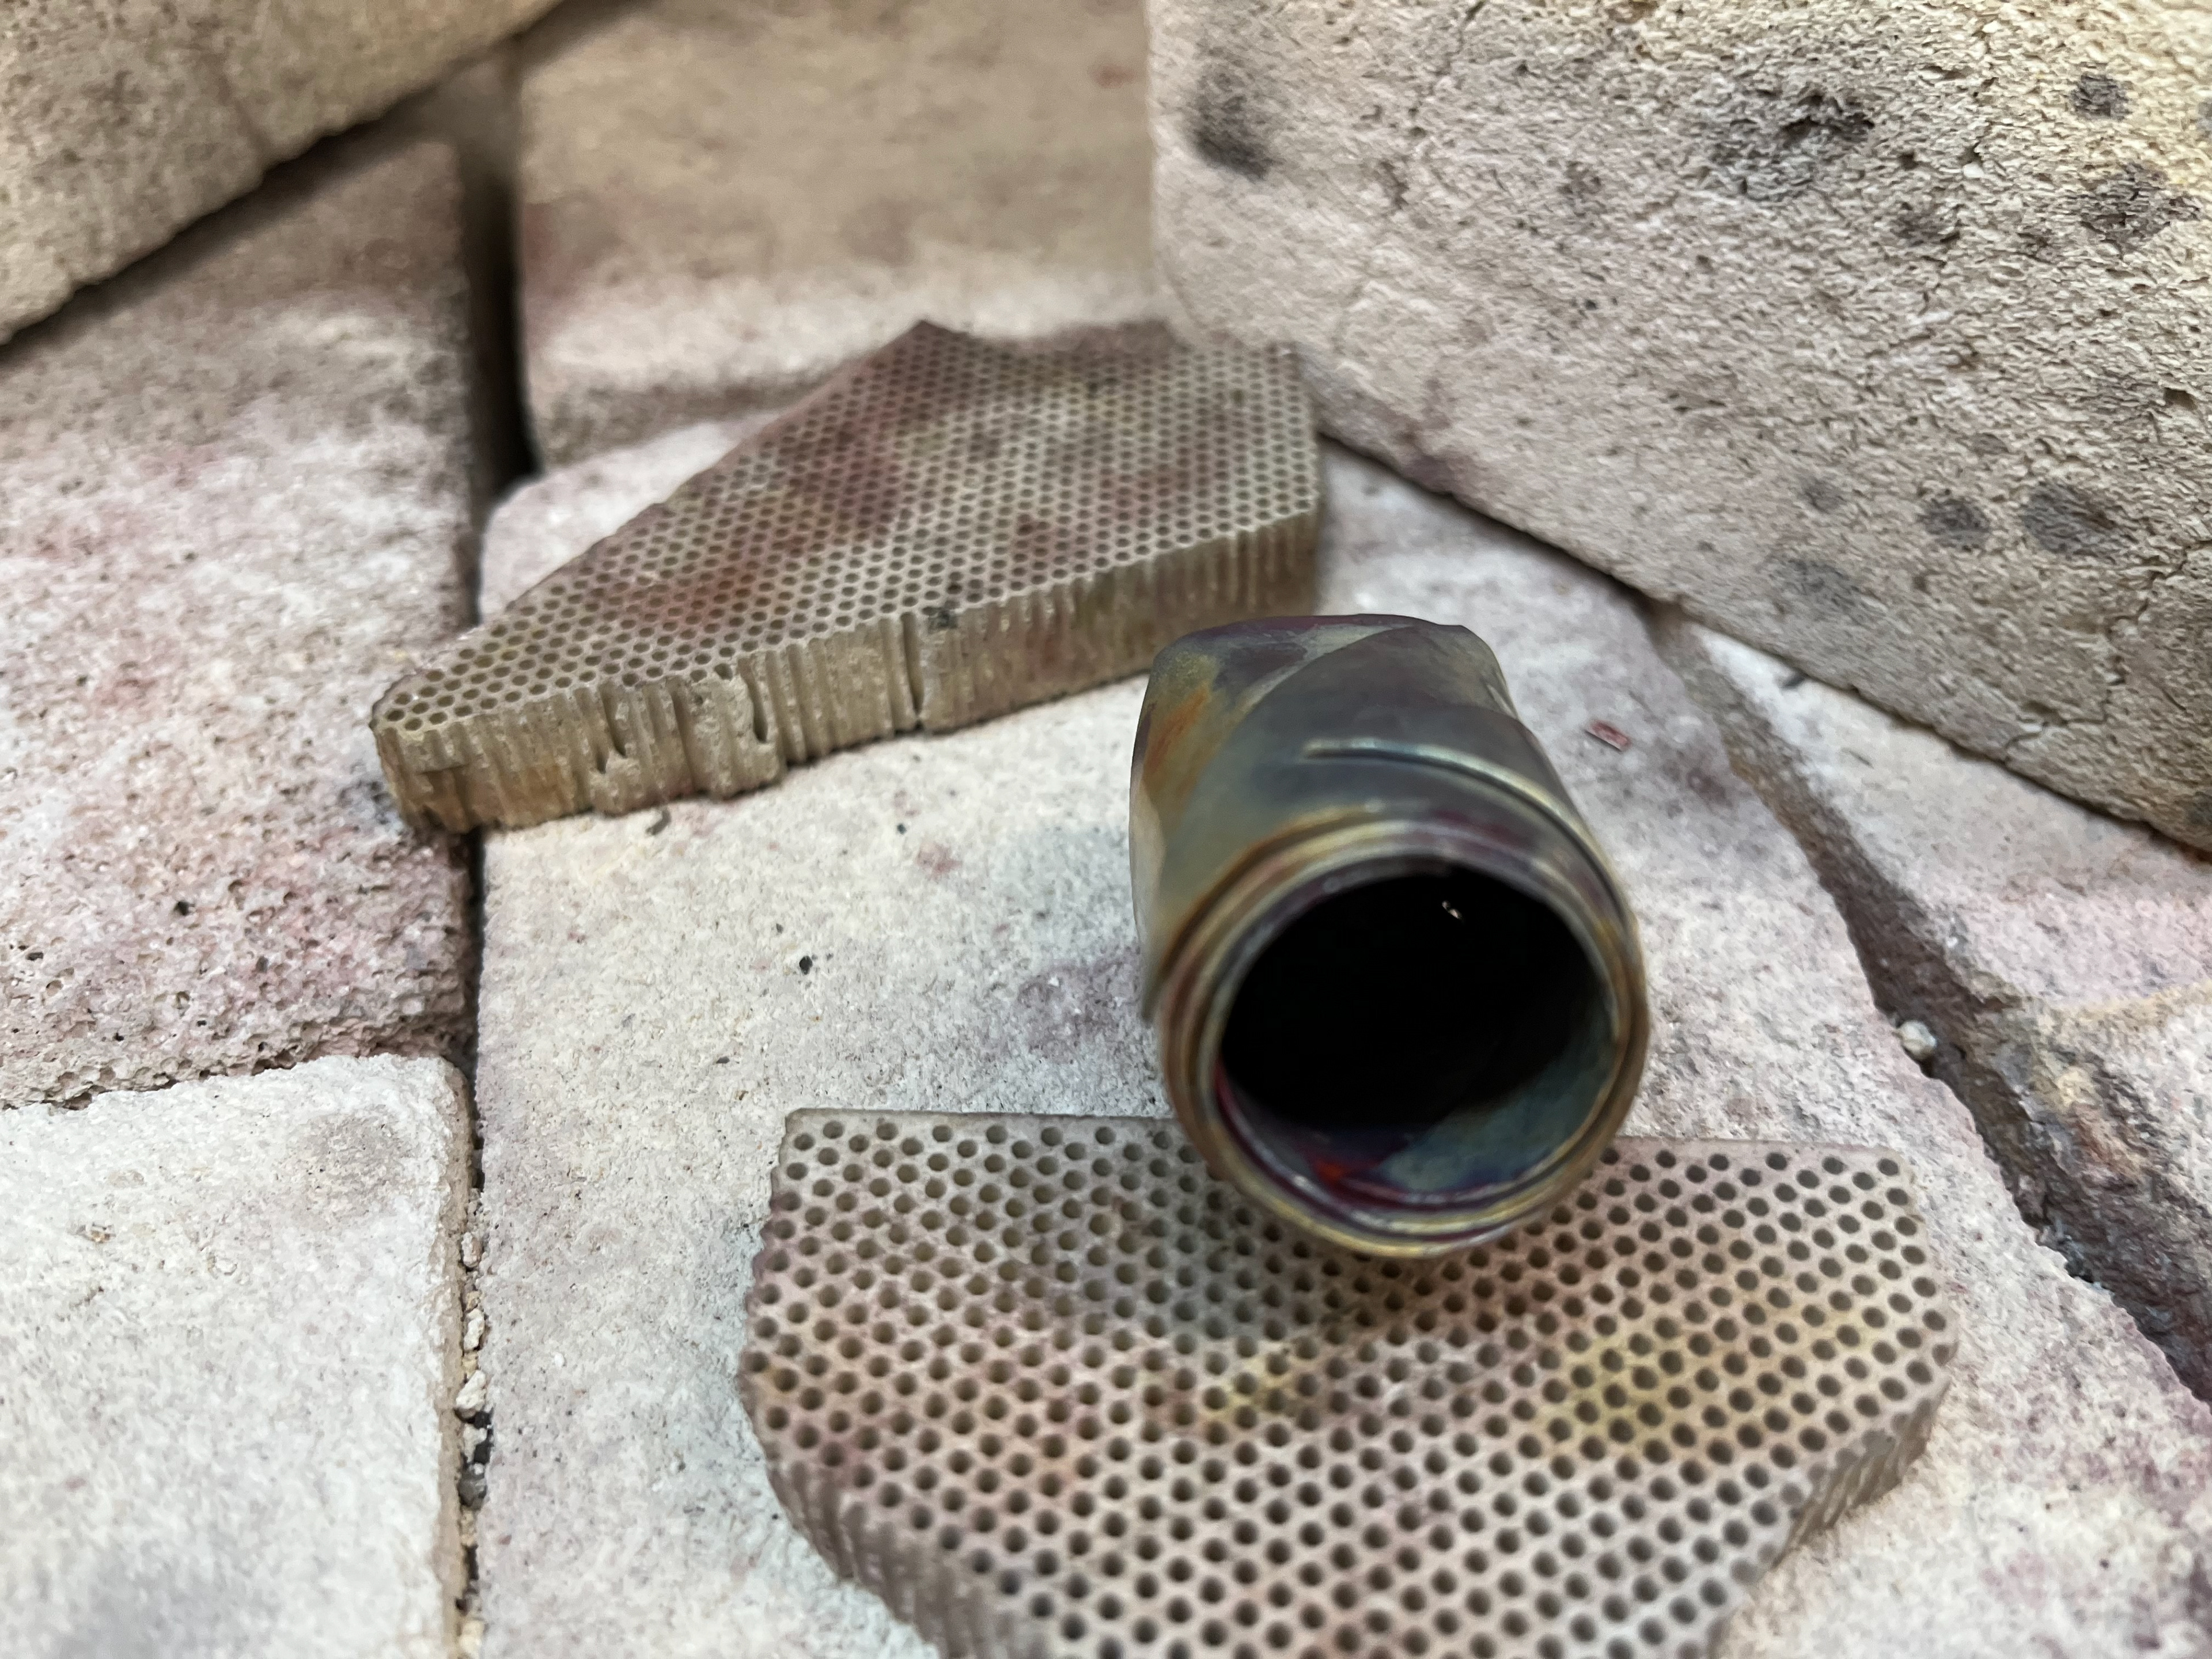
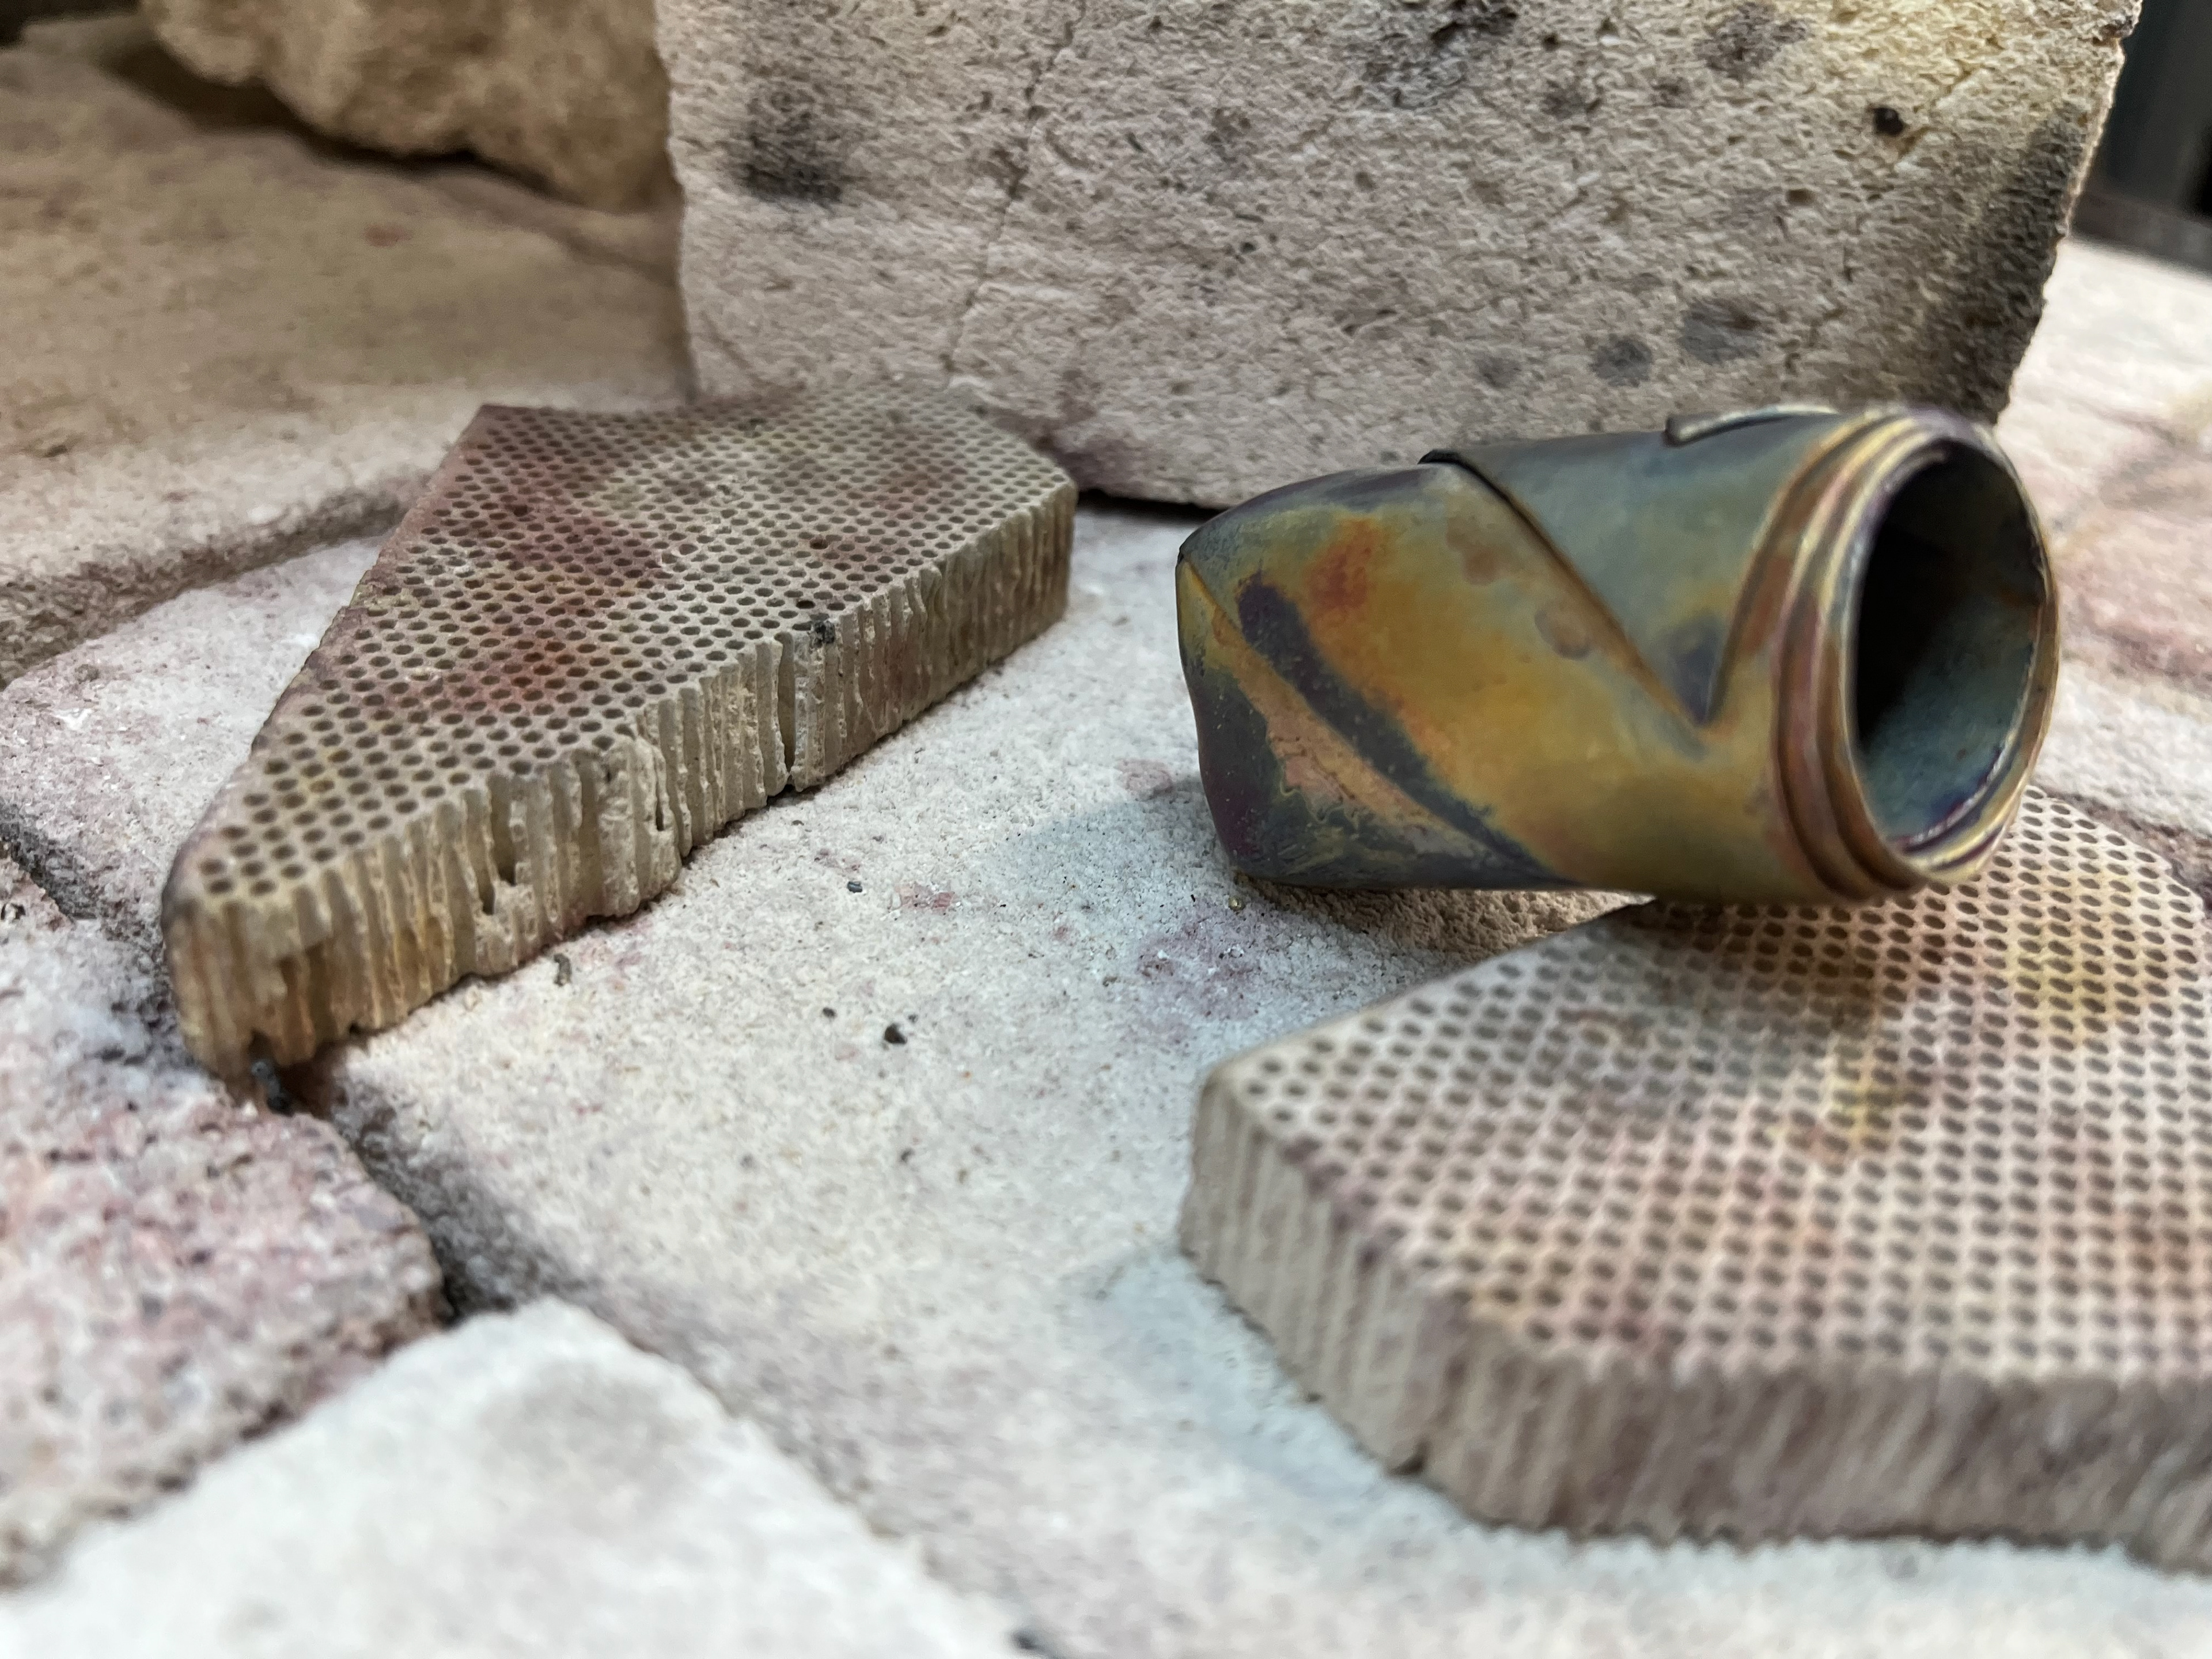
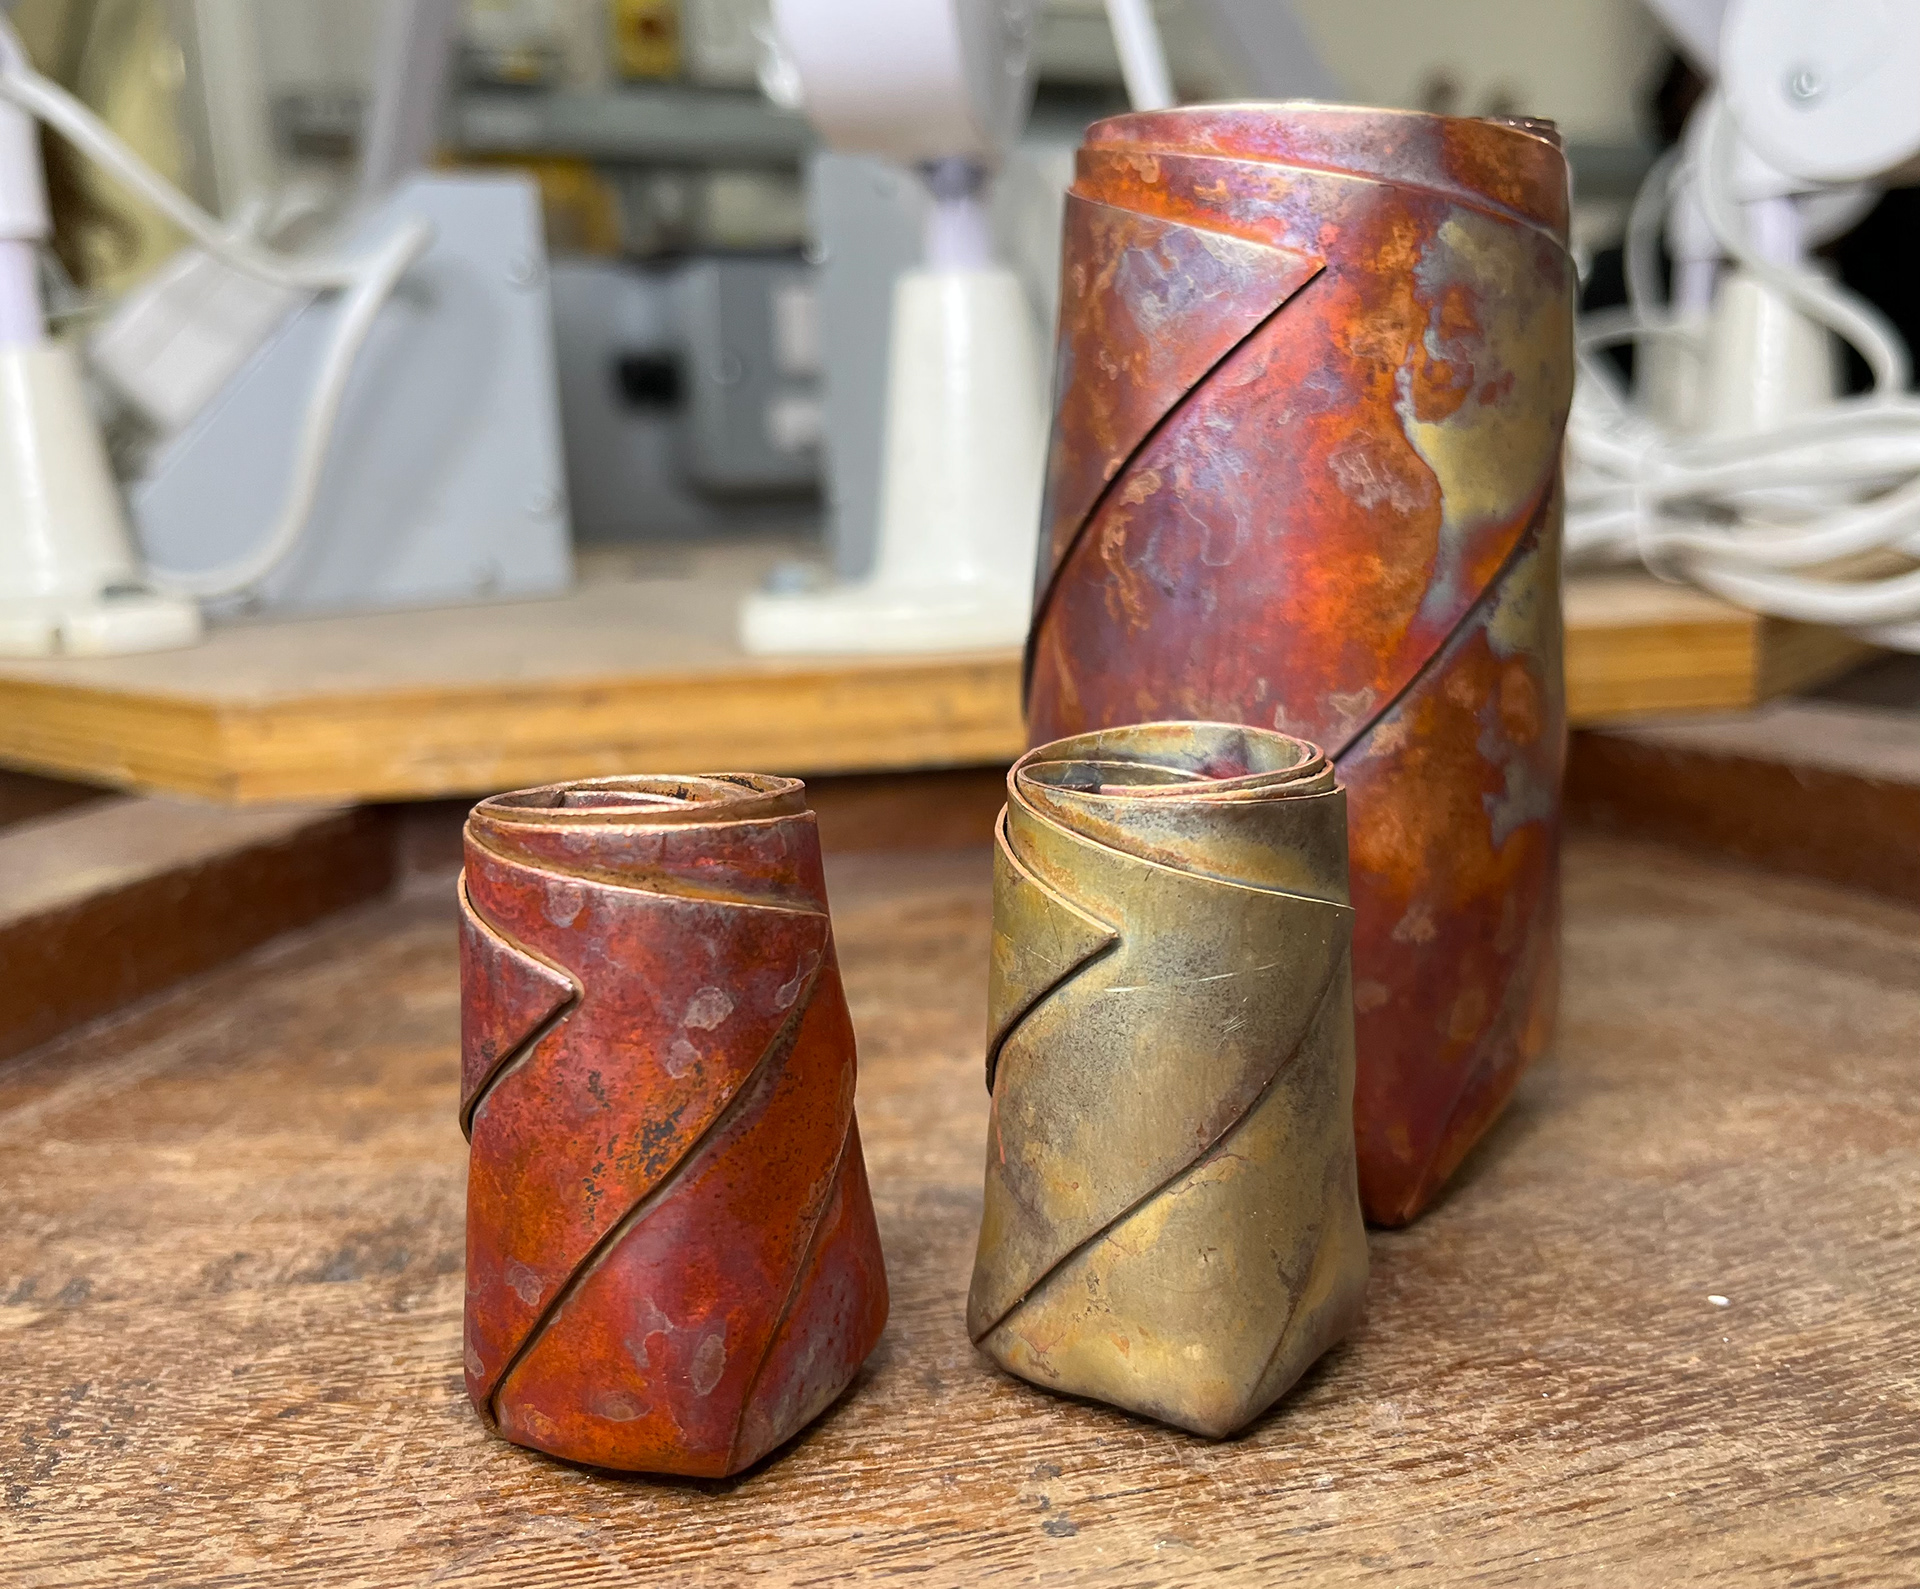
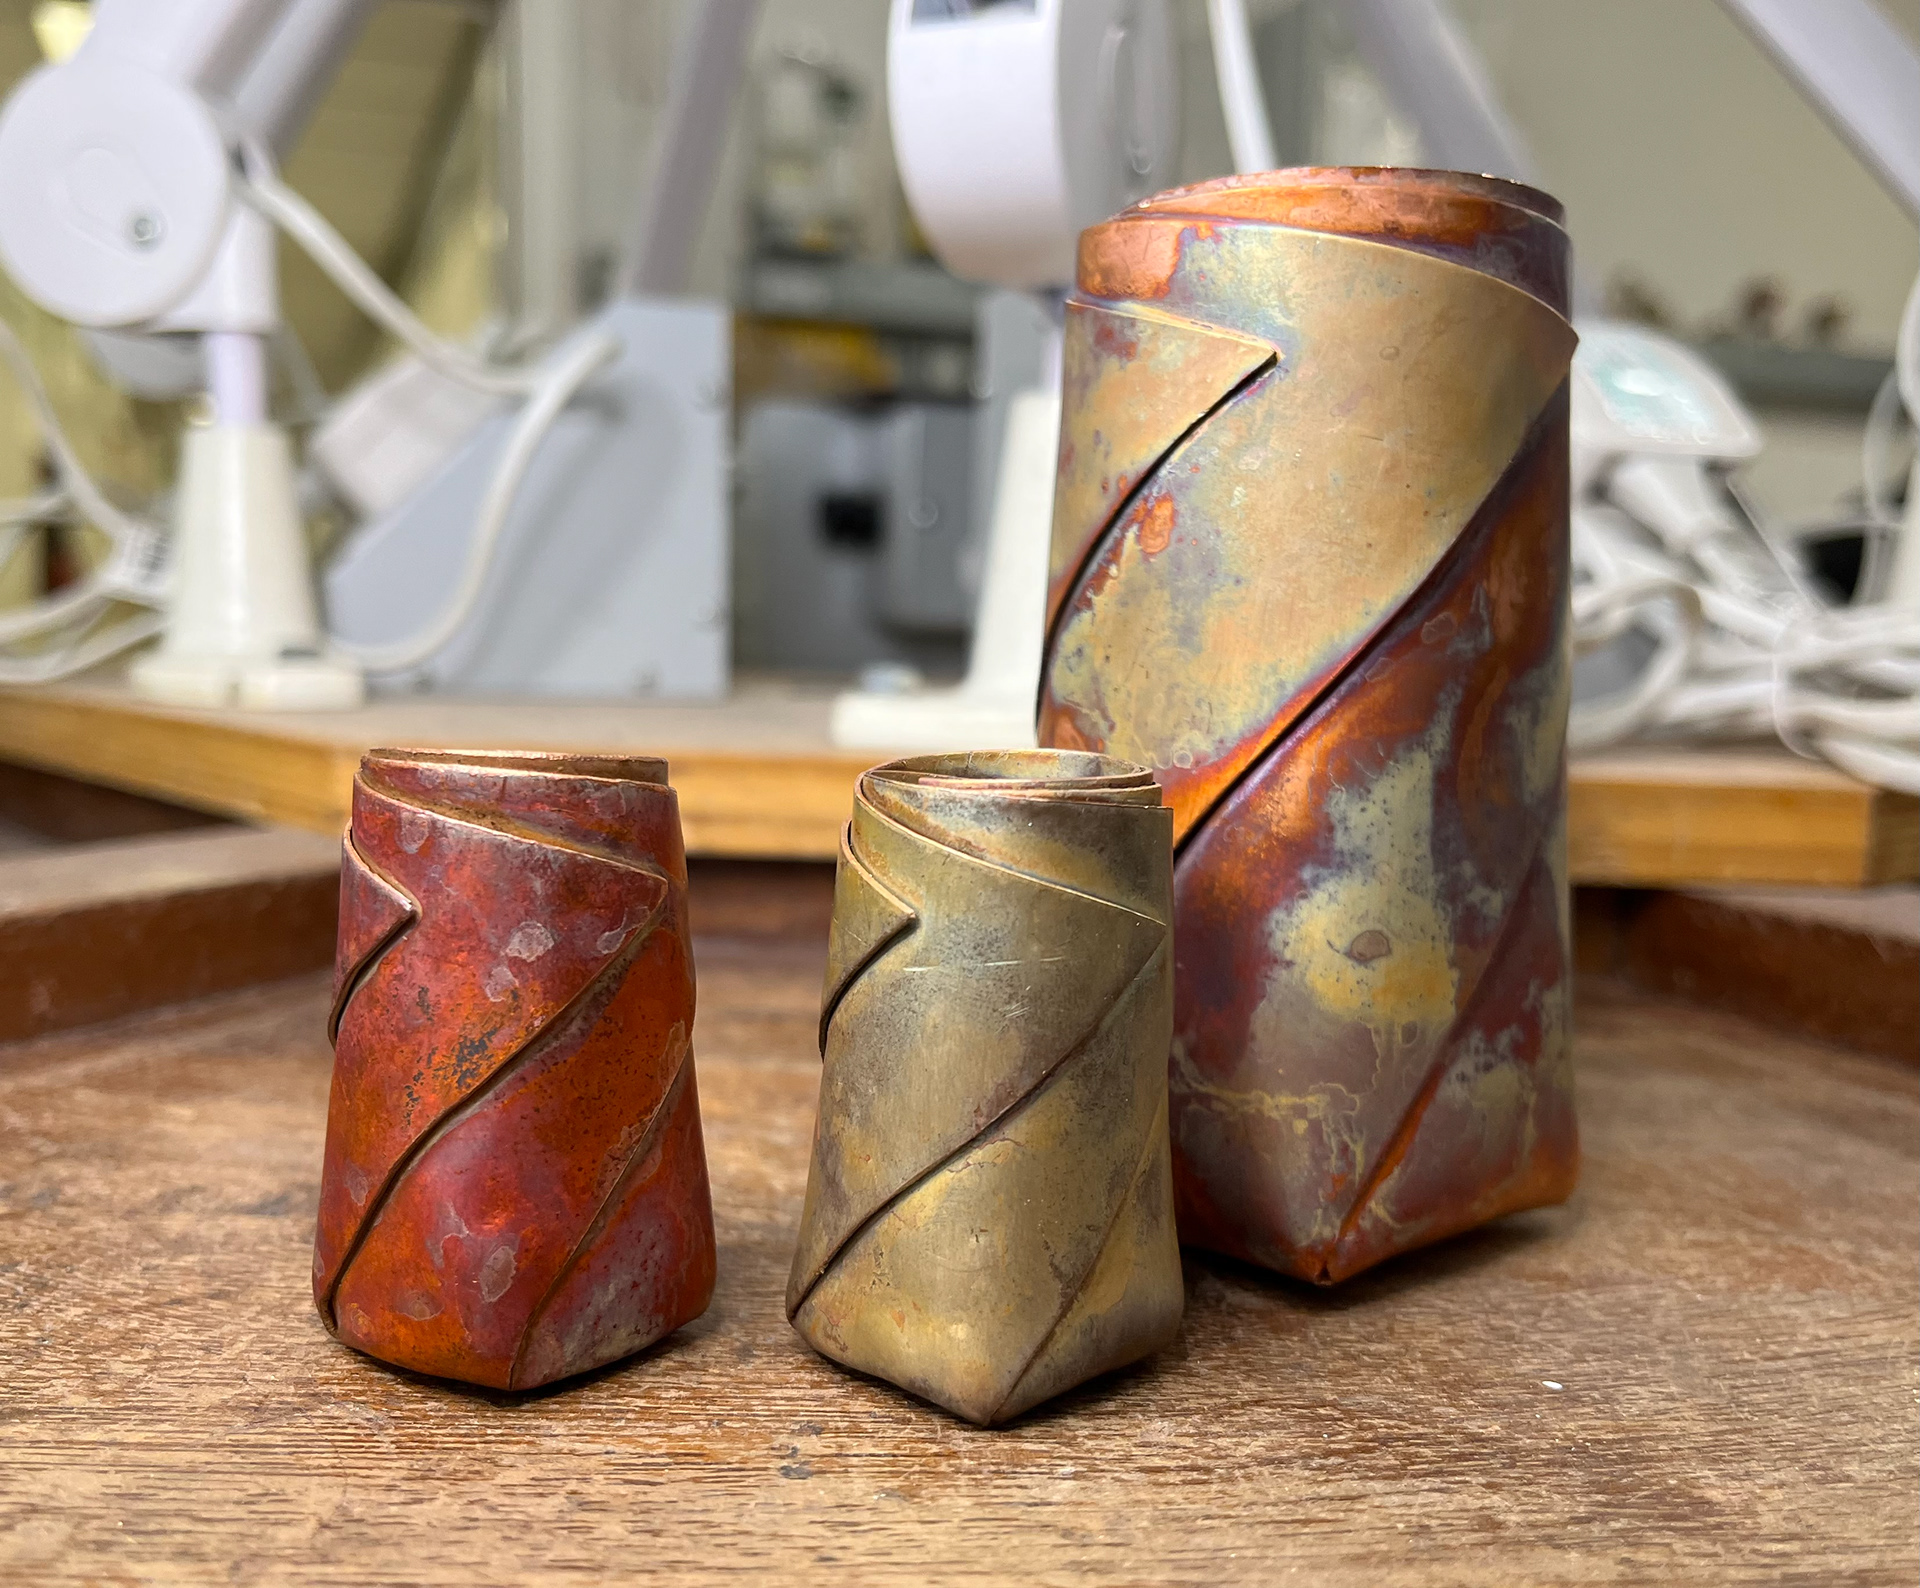
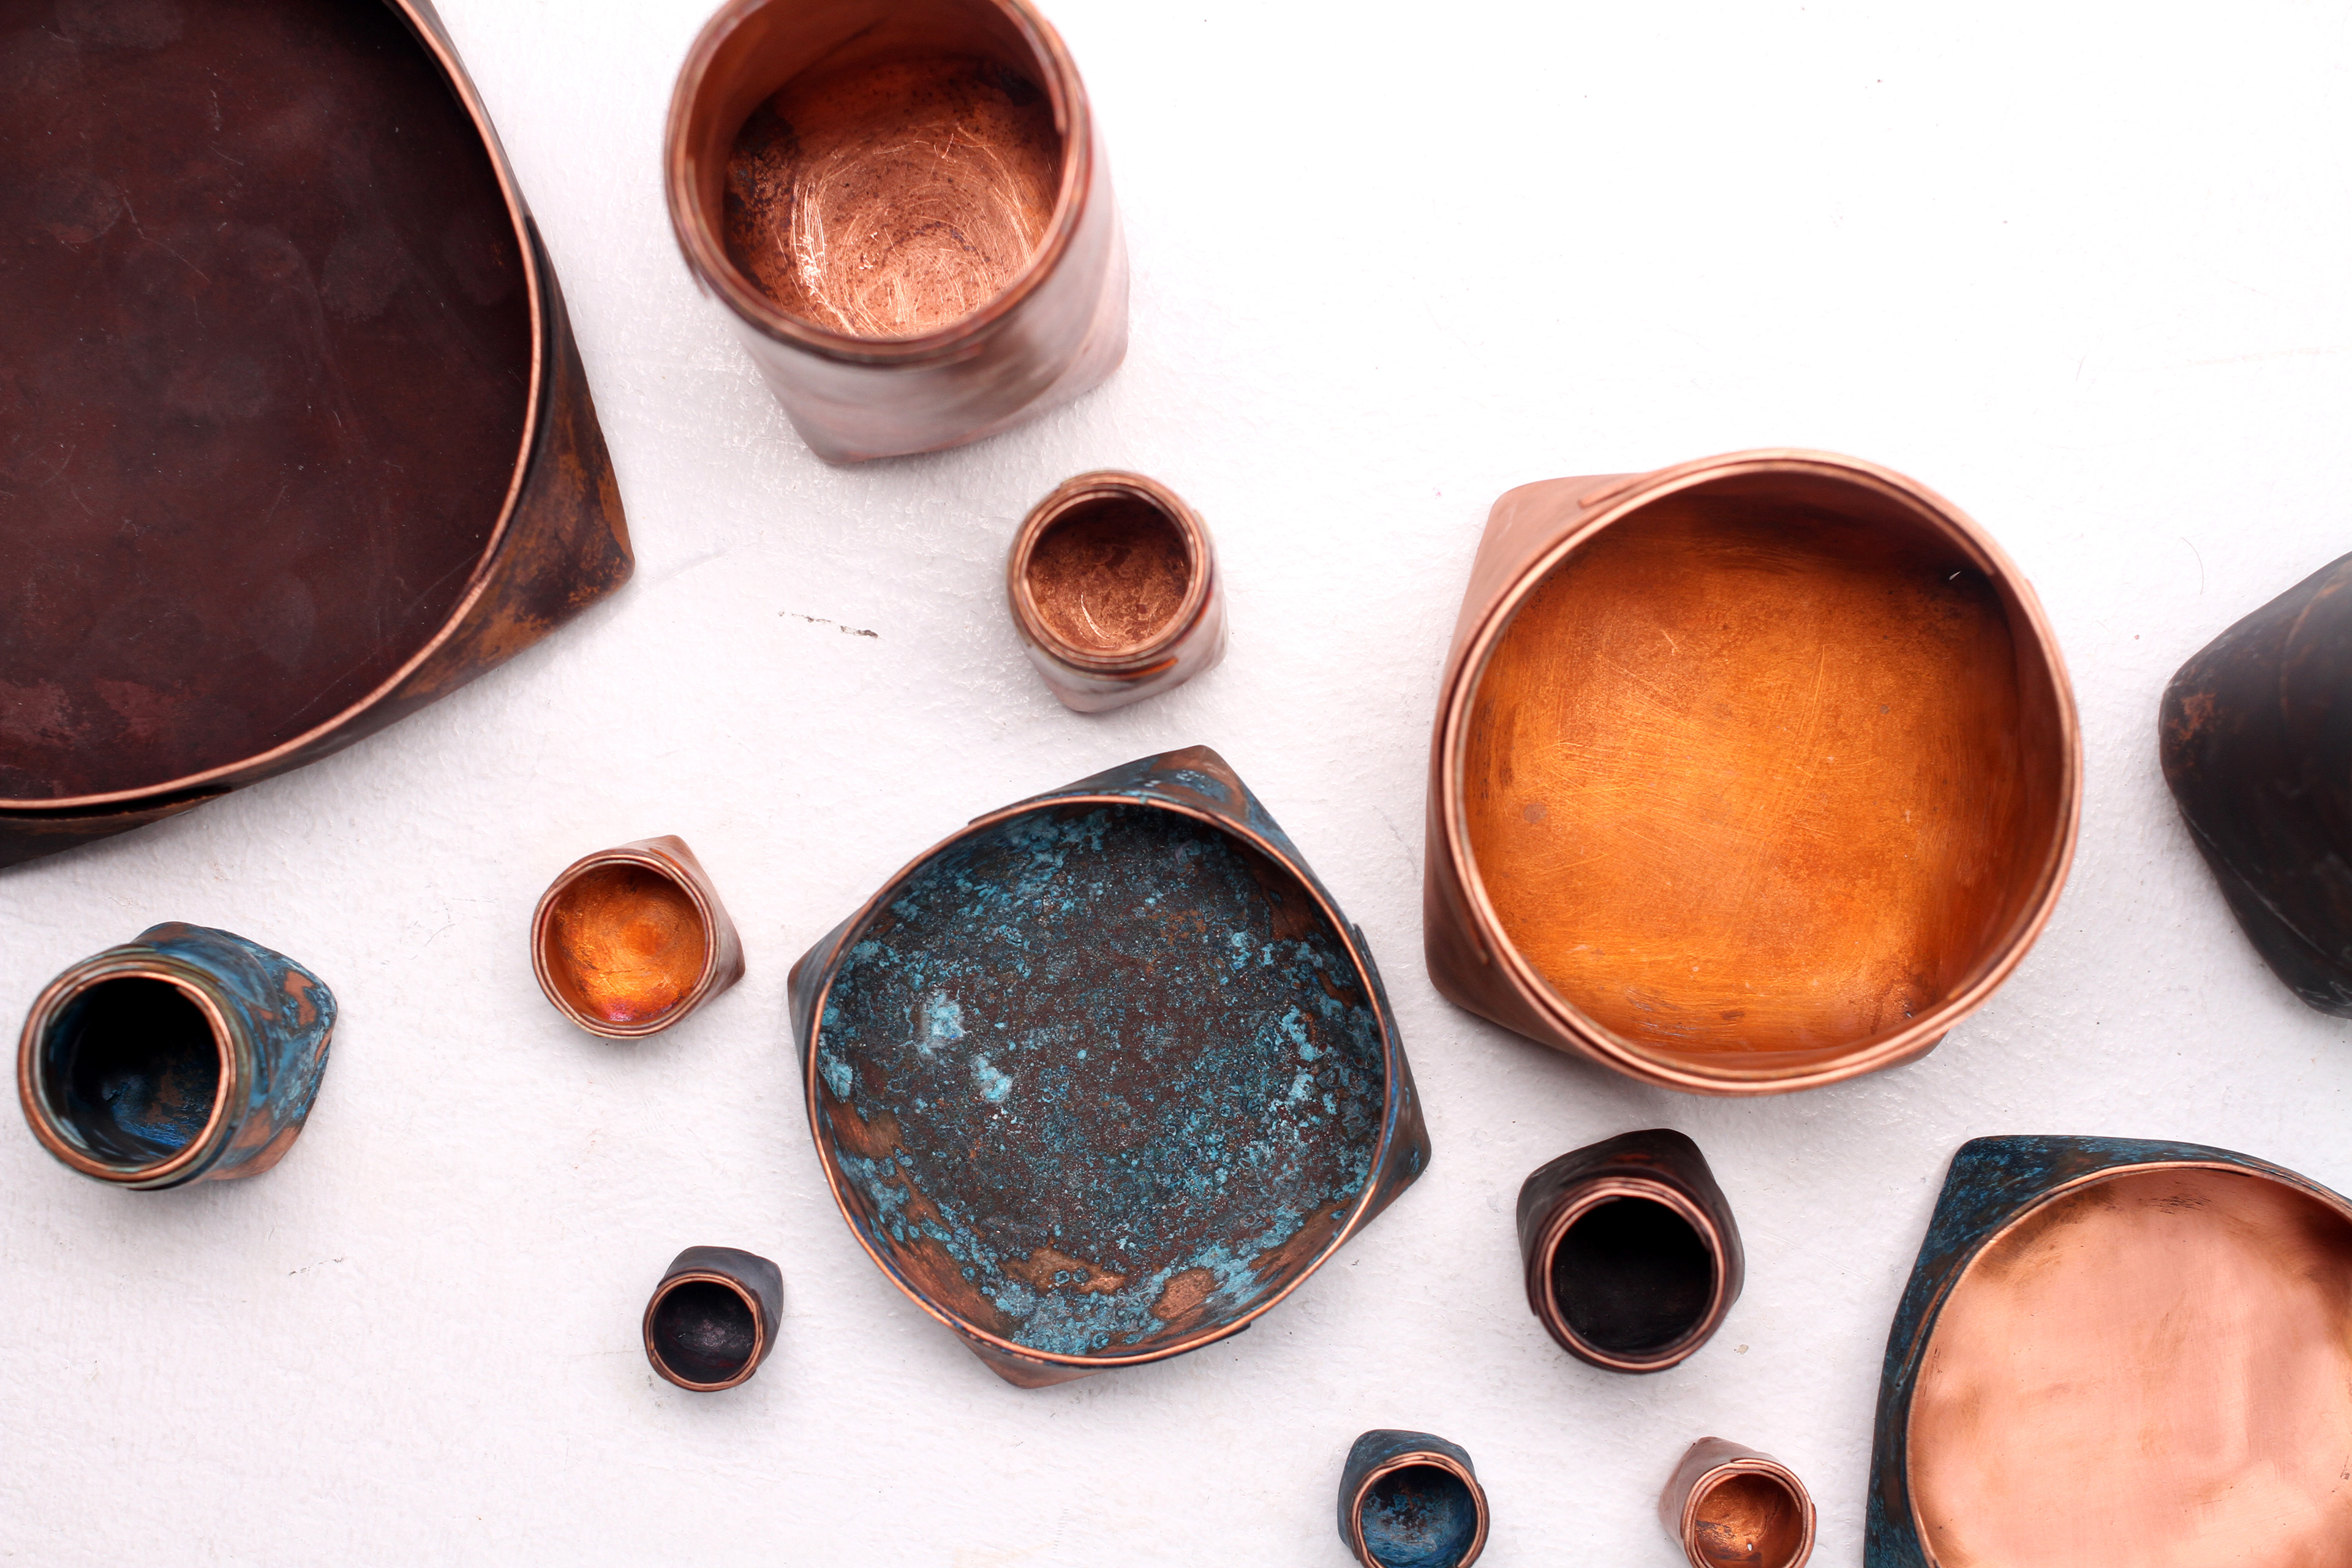
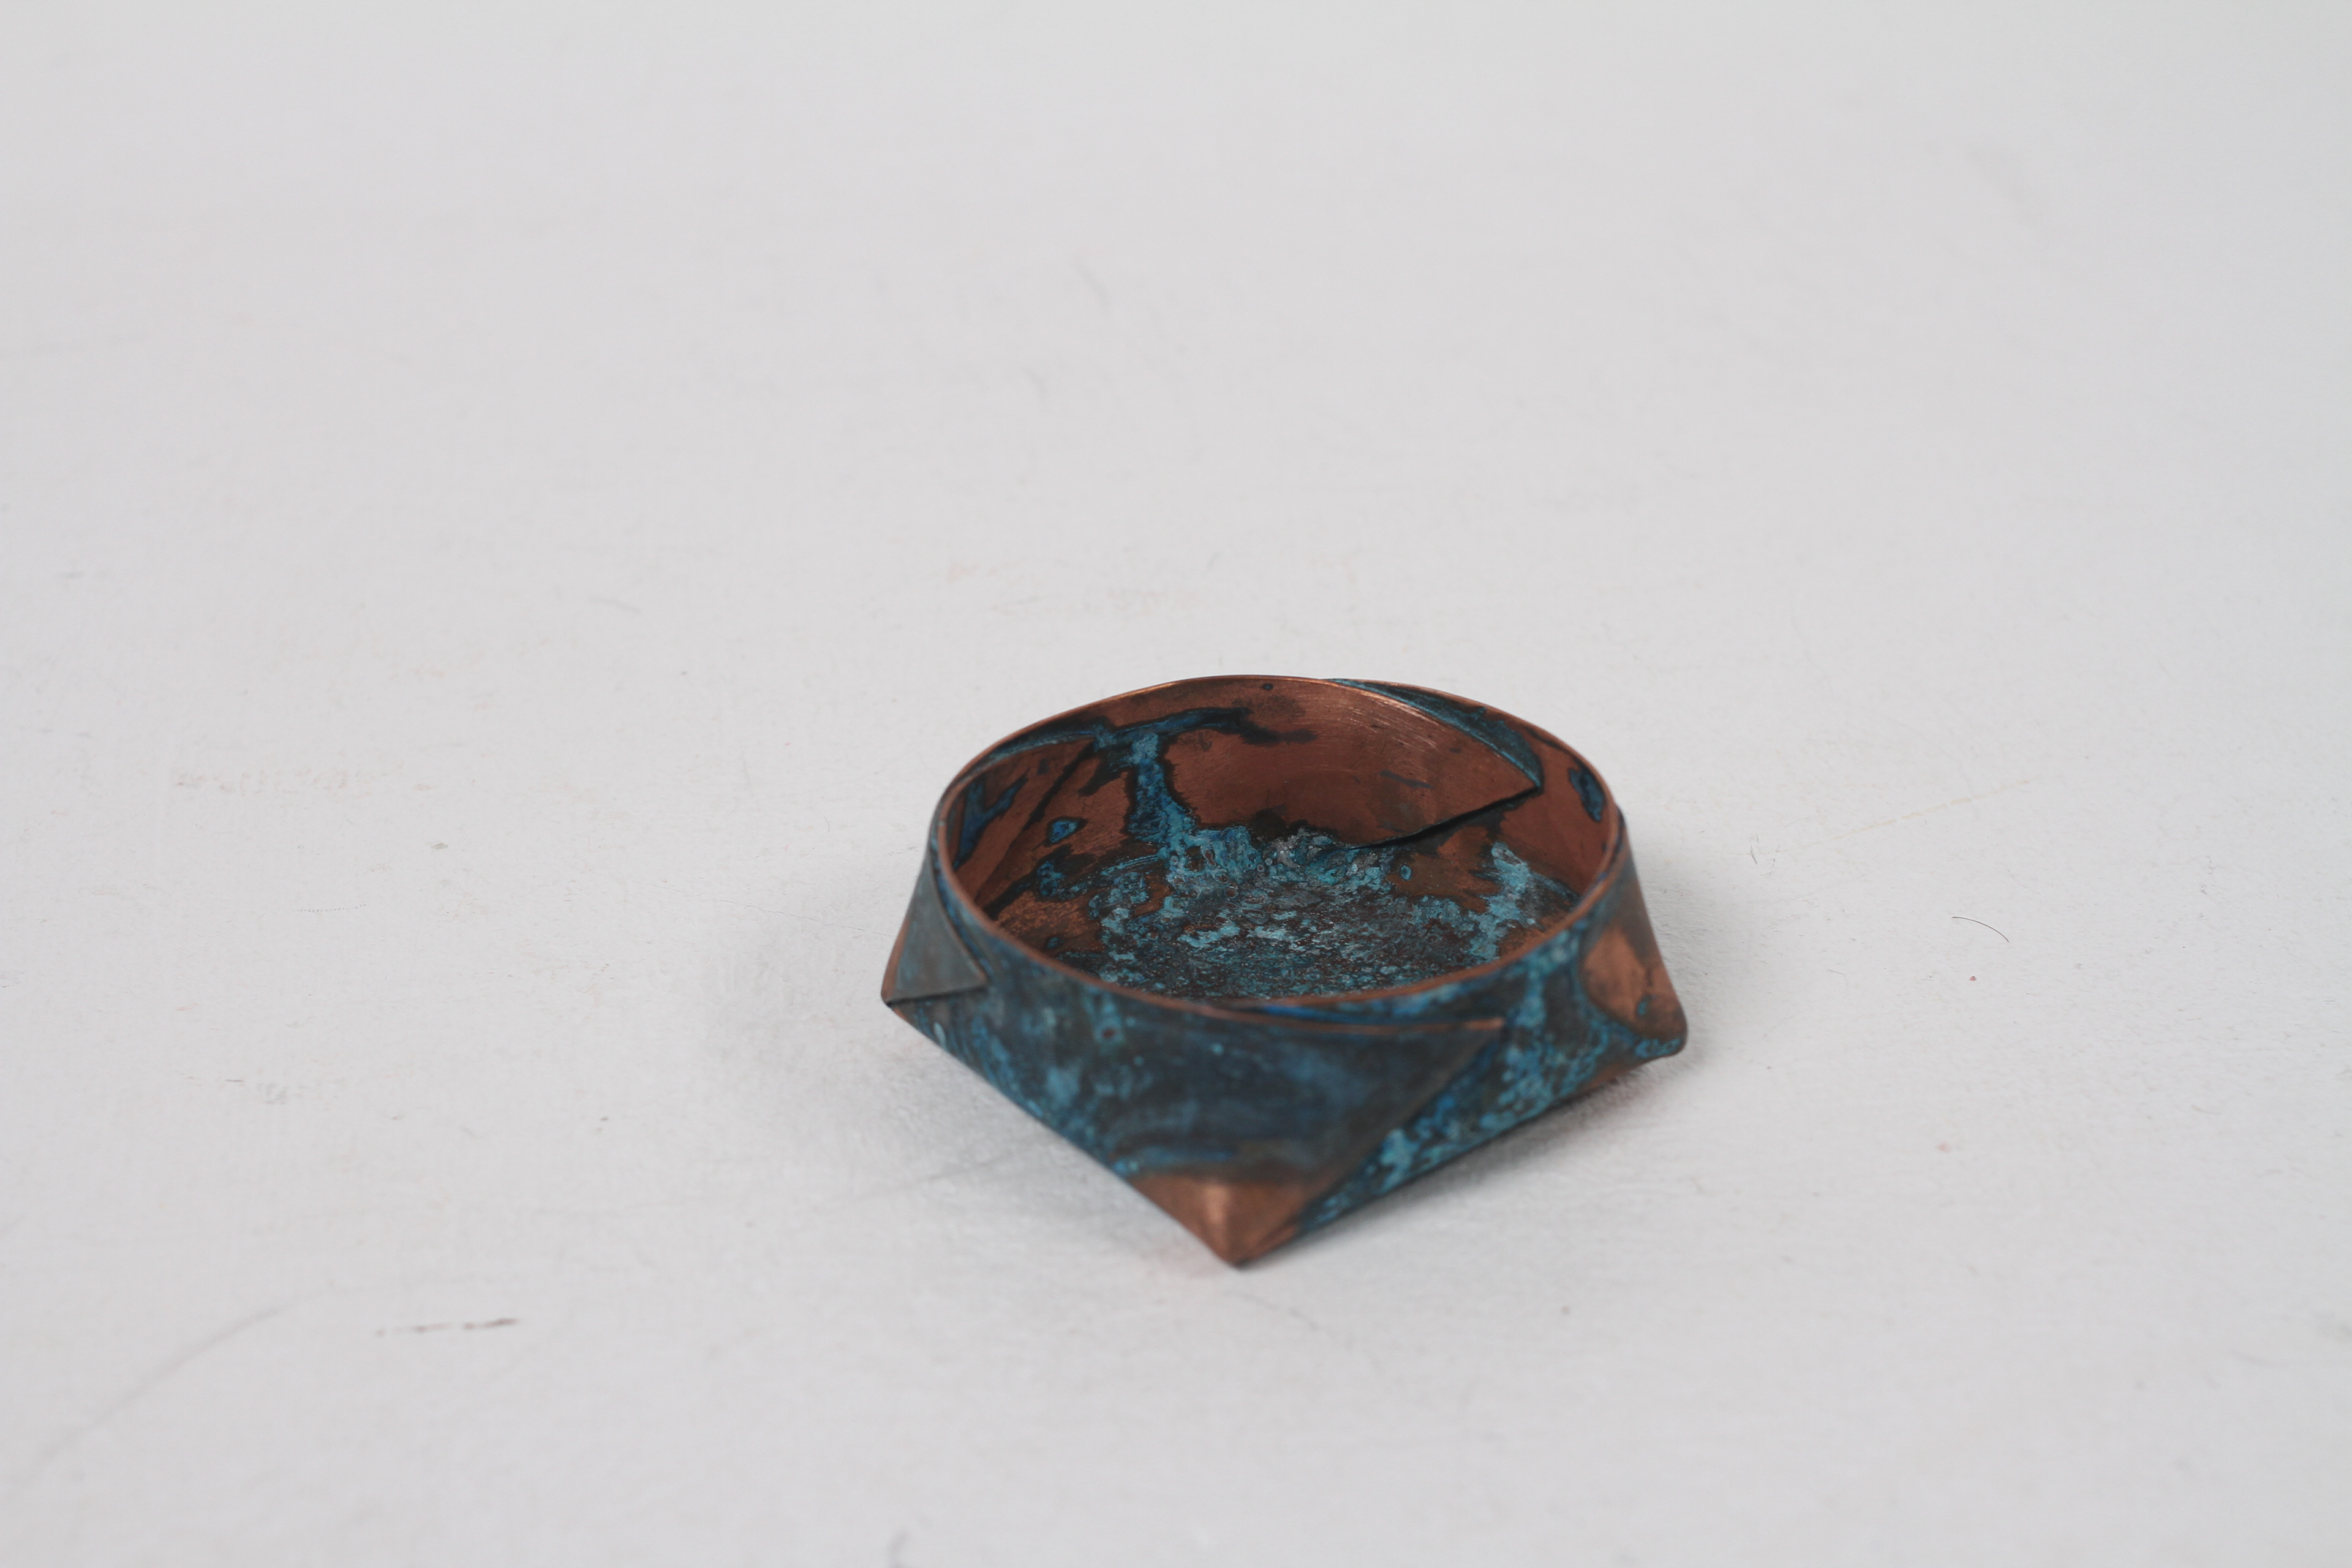
It is not exactly a patina, but it is a layer of coloured oxide of the surface of a metal so I’m going to count it. The pieces above show the range of colours I can produce on copper. And one of them is the colour red! For my final pieces, I would like to include heat treating as a surface colouration for some of my pieces.
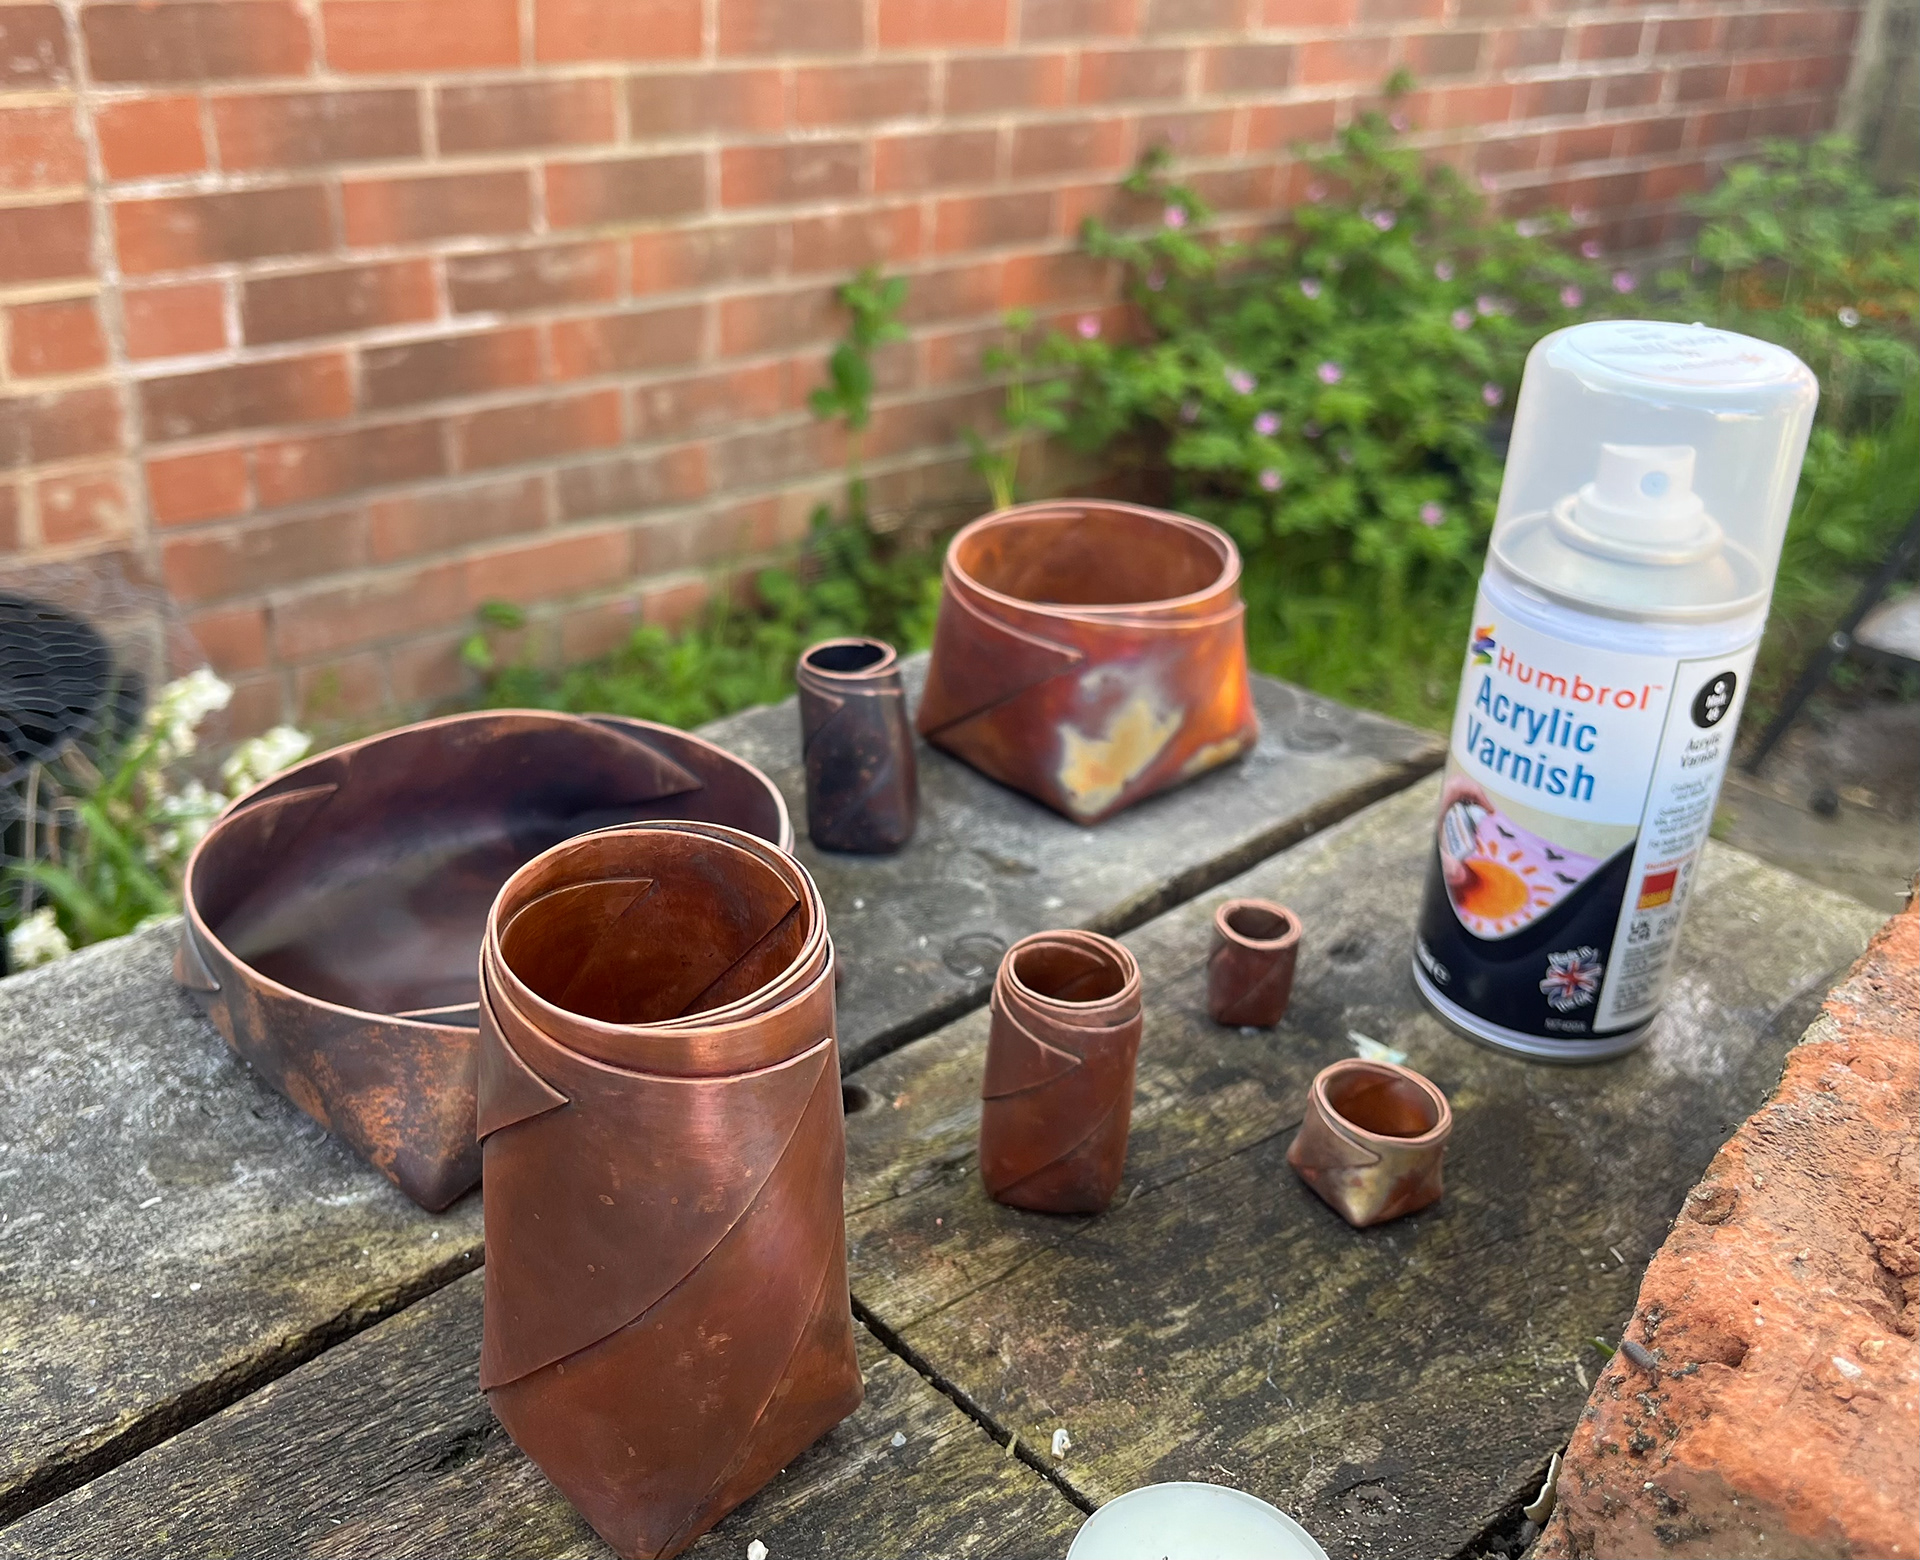
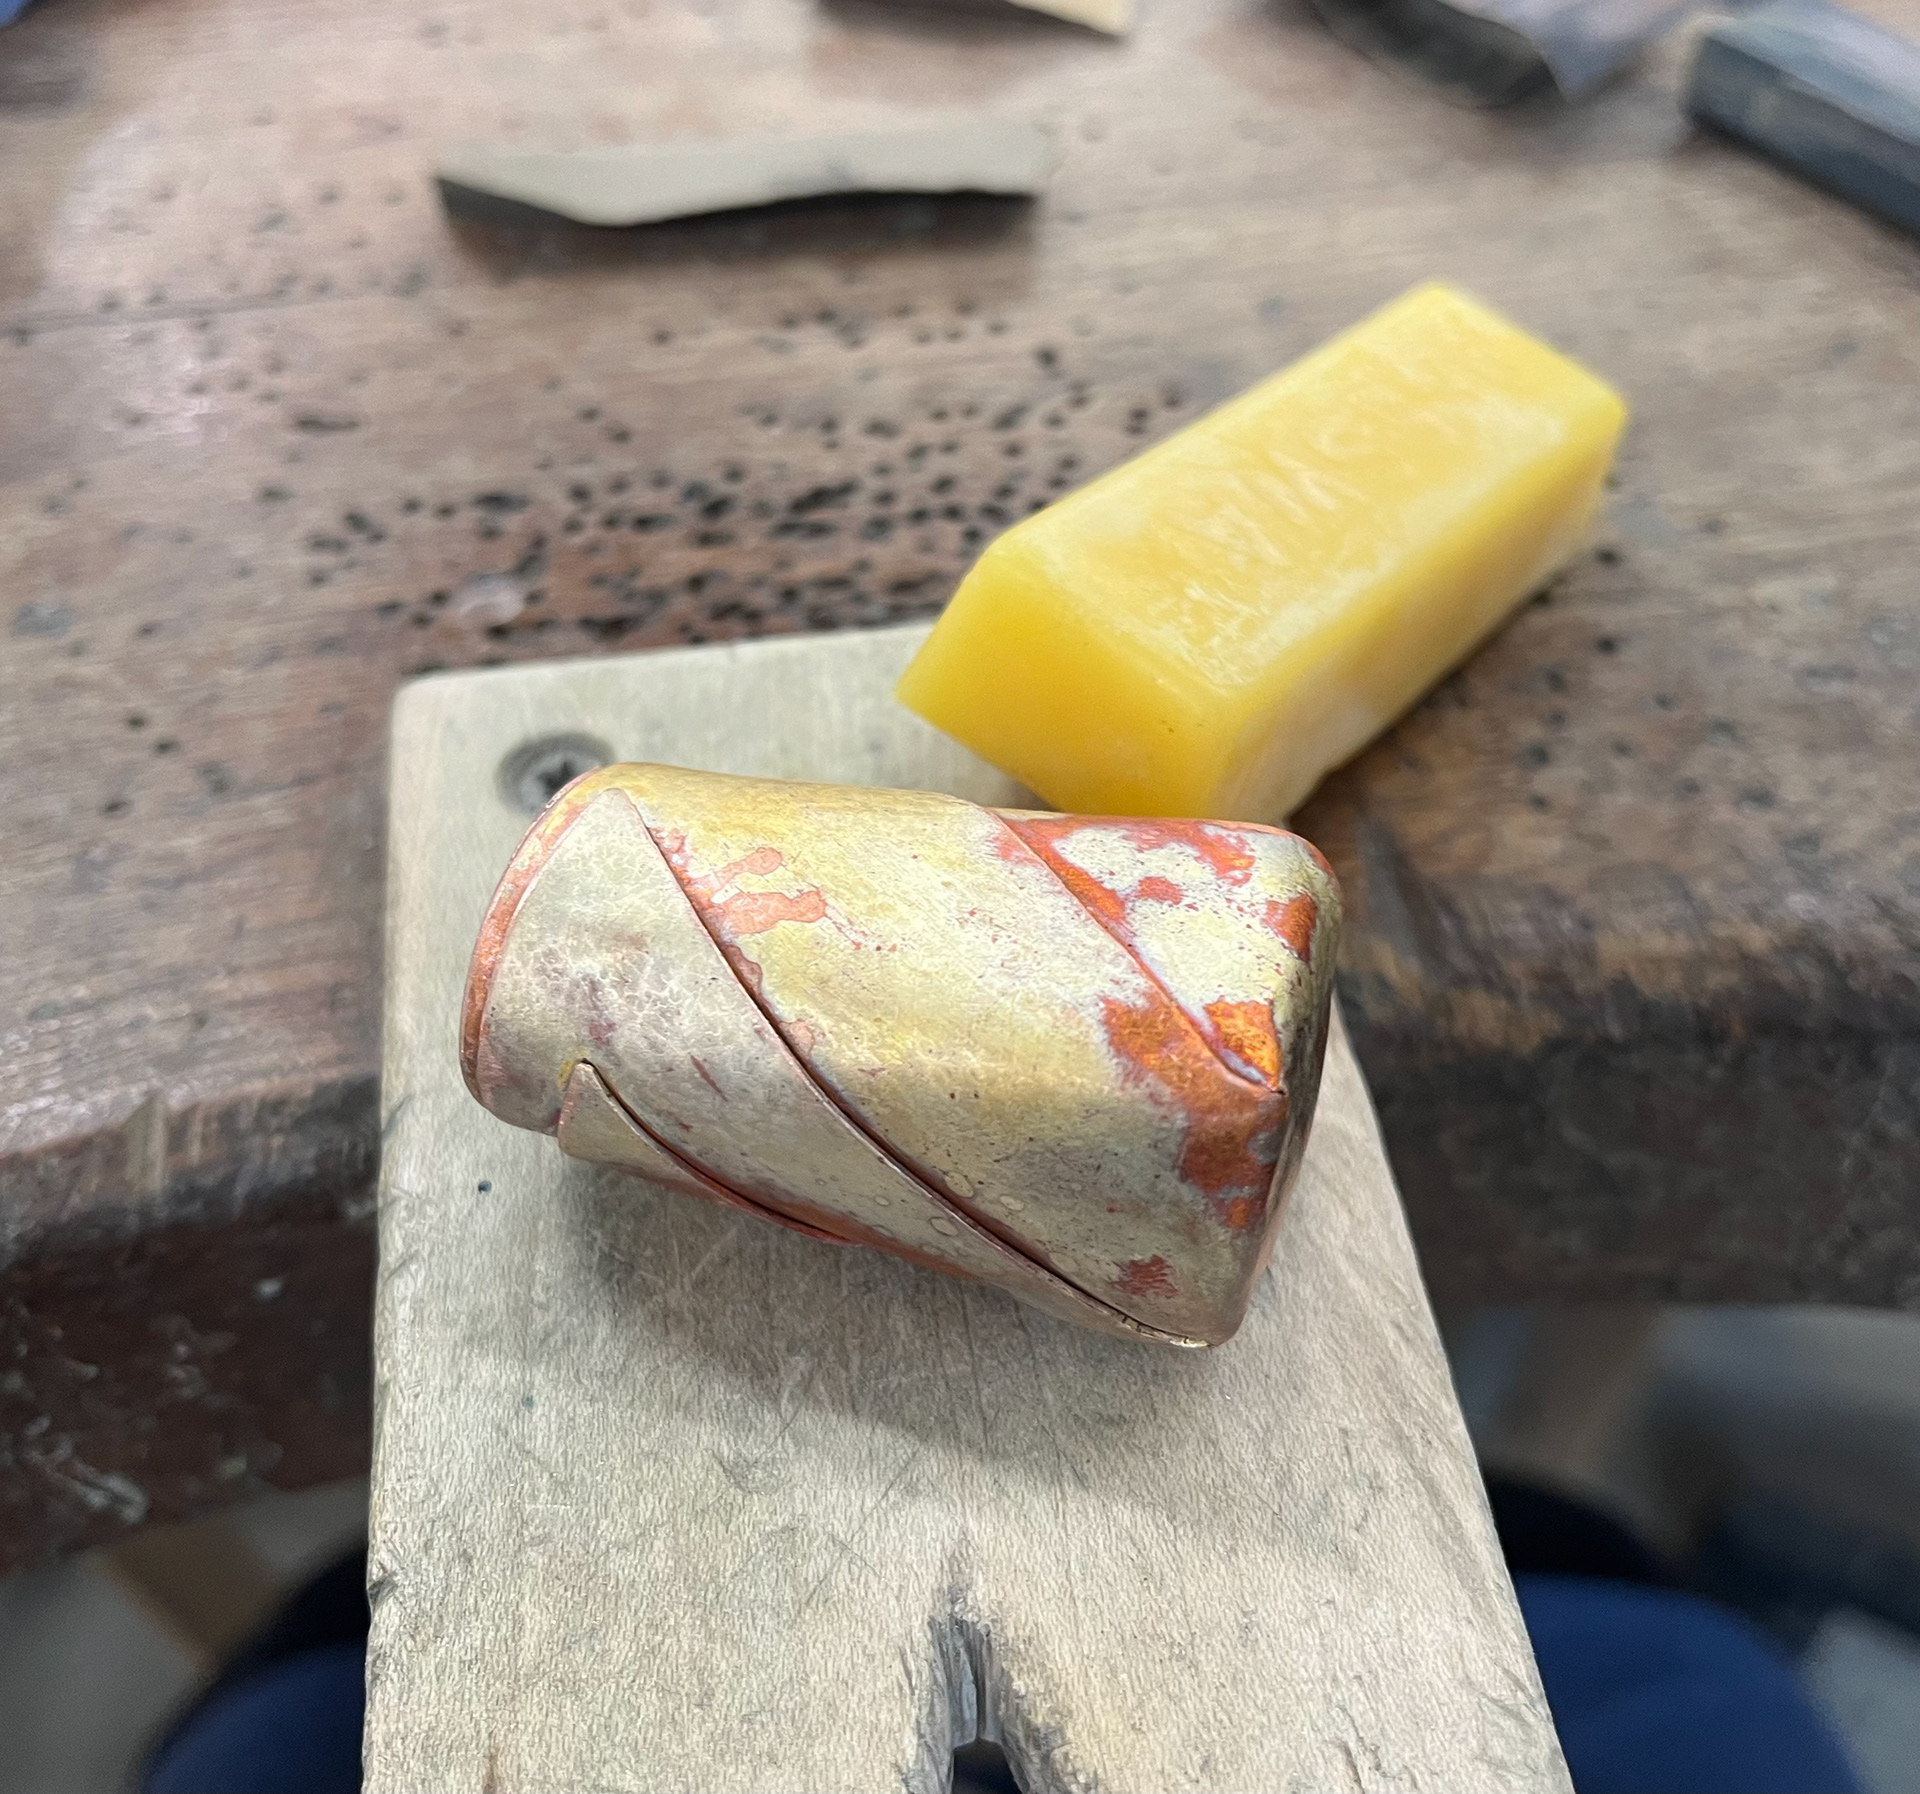
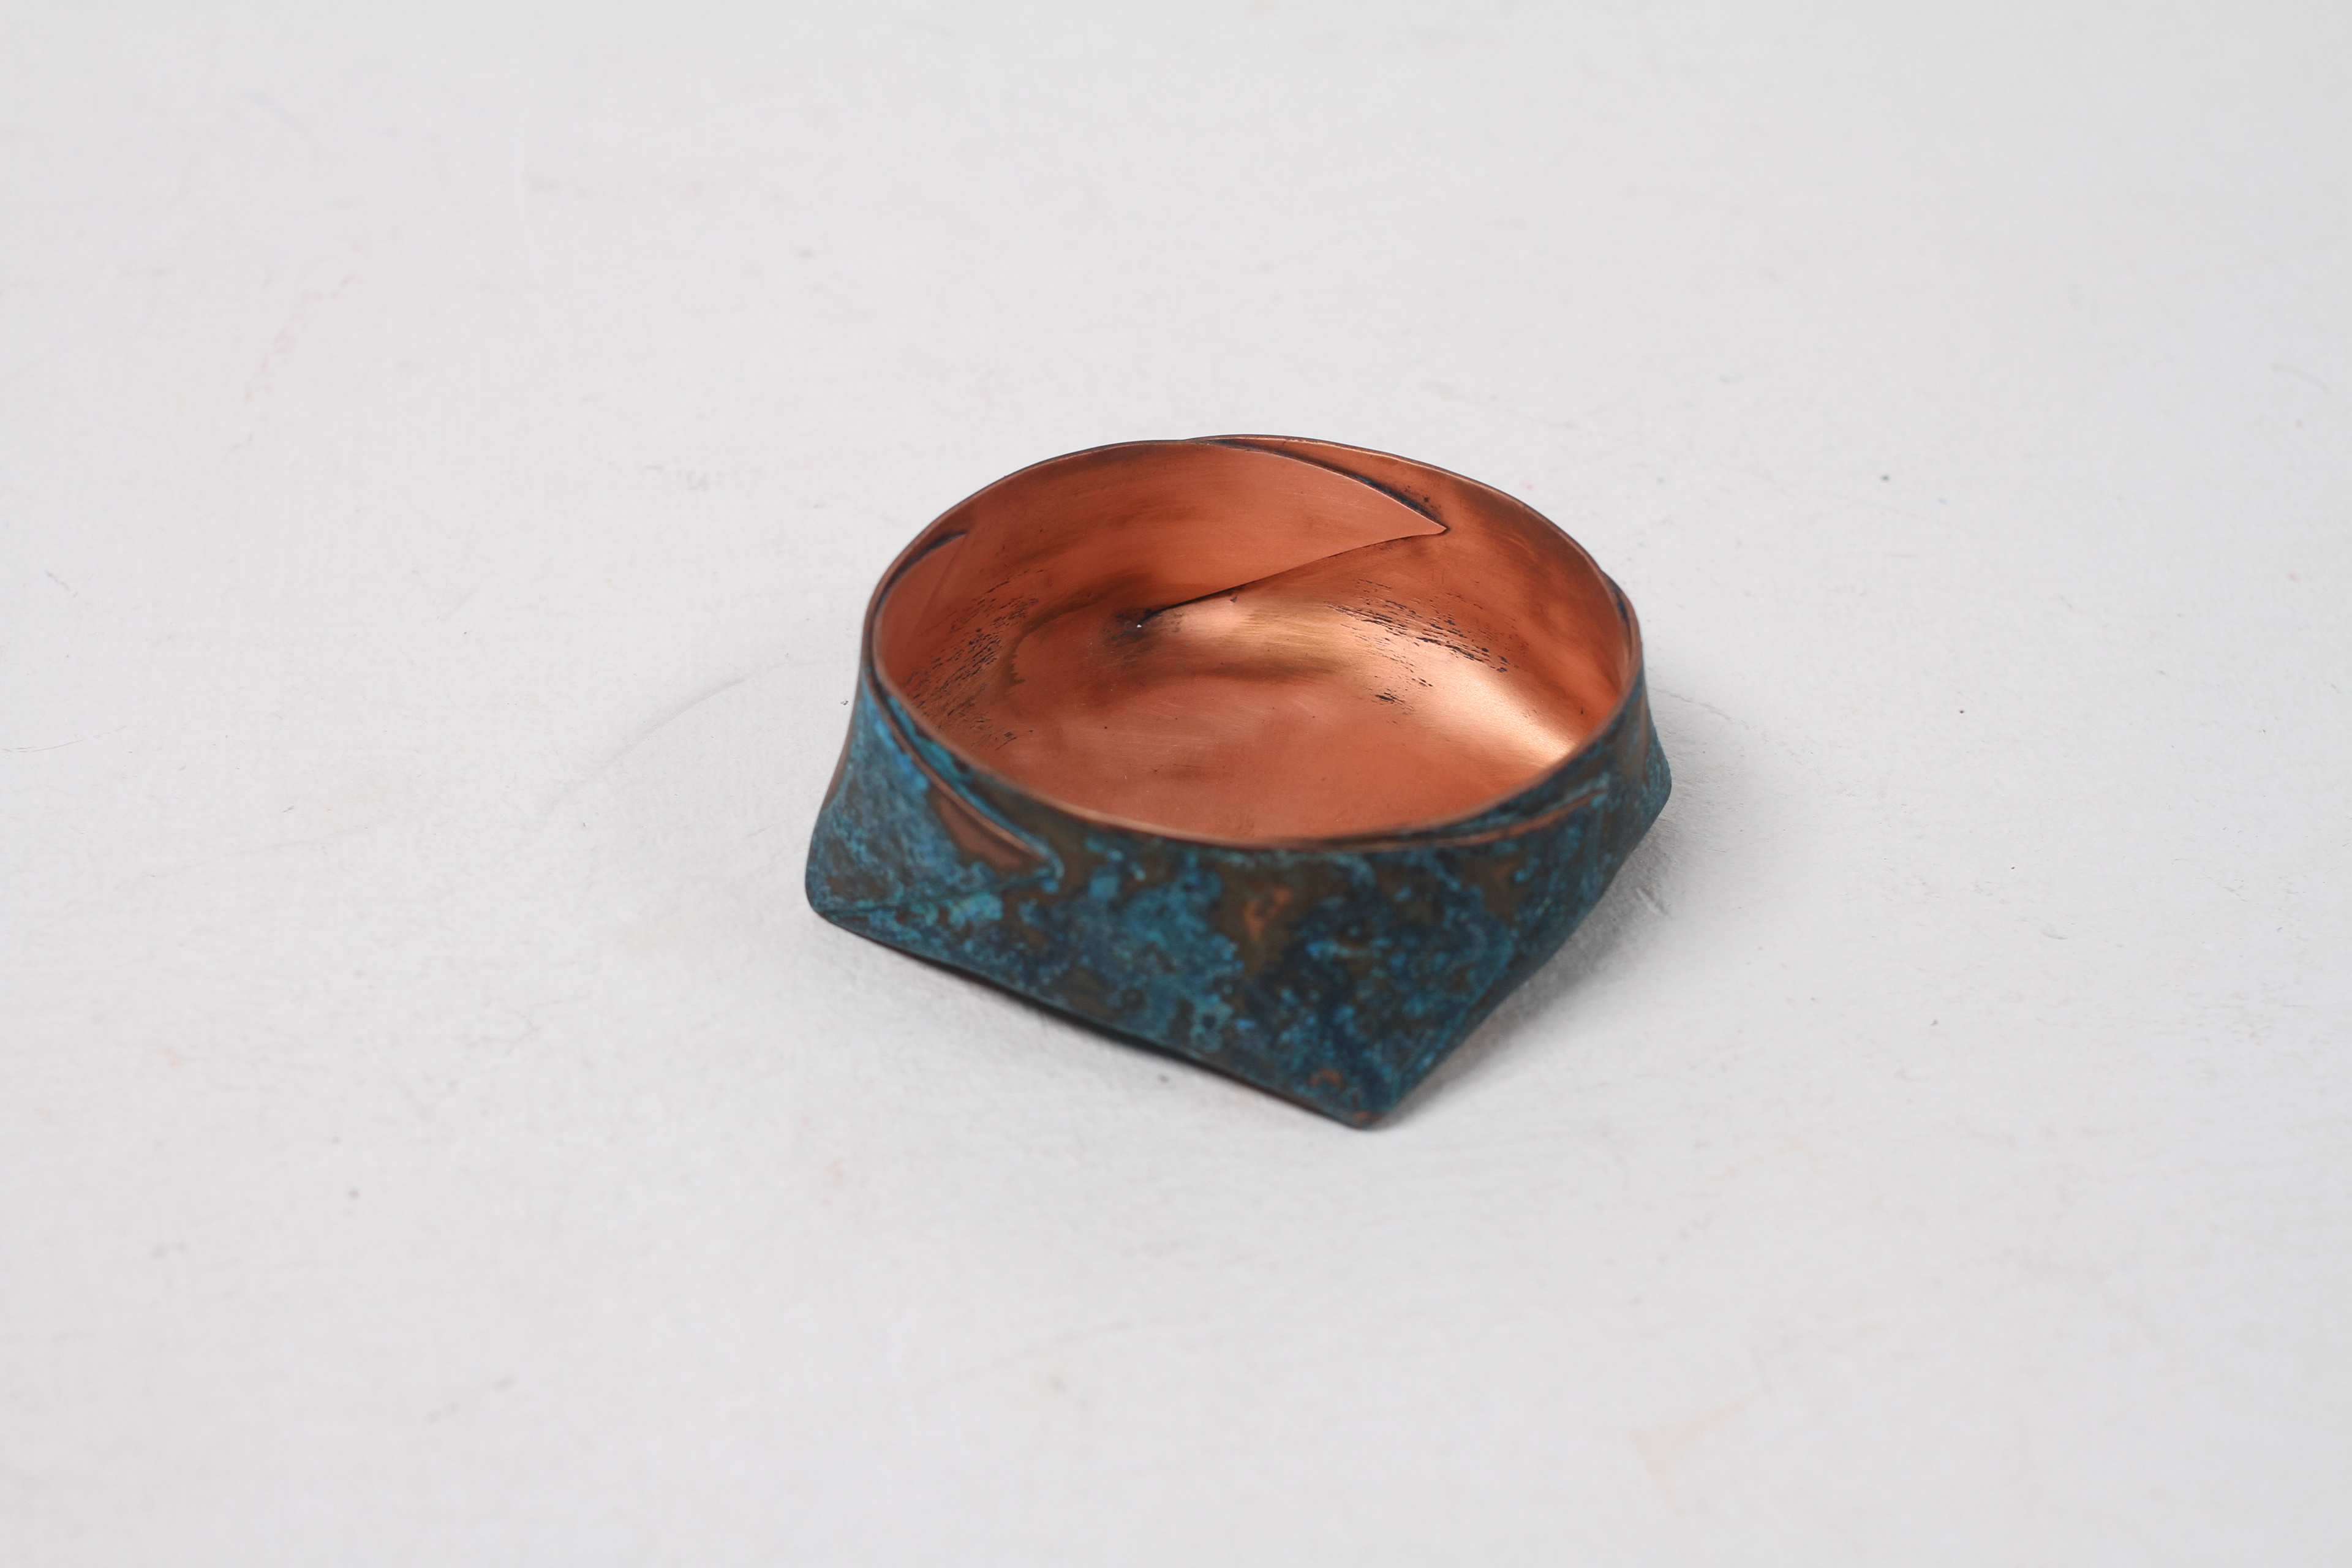
Sealing Problems
When I used my acrylic spray on my heat treated pieces, I was surprised to see the colour completely drain from my vessels and turn a dull orange. The spray works wonders on my patina pieces keeping the blue vibrant while also retaining a matte finish; it was the perfect spray! So I never expected my heat treated pieces to fail so badly. This meant I had to go back into the workshop the next day and re heat treat my vessels but this time I decided to try bees wax which worked a lot better. It still muted the tones more than I wanted but still retained most of the colour.
Quake hold test
I bought and tried out some Quake-hold because I read online it was very strong and and could deter theft. I was very disappointed by the results as it was basically just blue tac. It didn't remove any patina when I tested it though which is probably because the hold is so week. This means that I will have to put an acrylic cover over my collection for the degree show and New Designers.

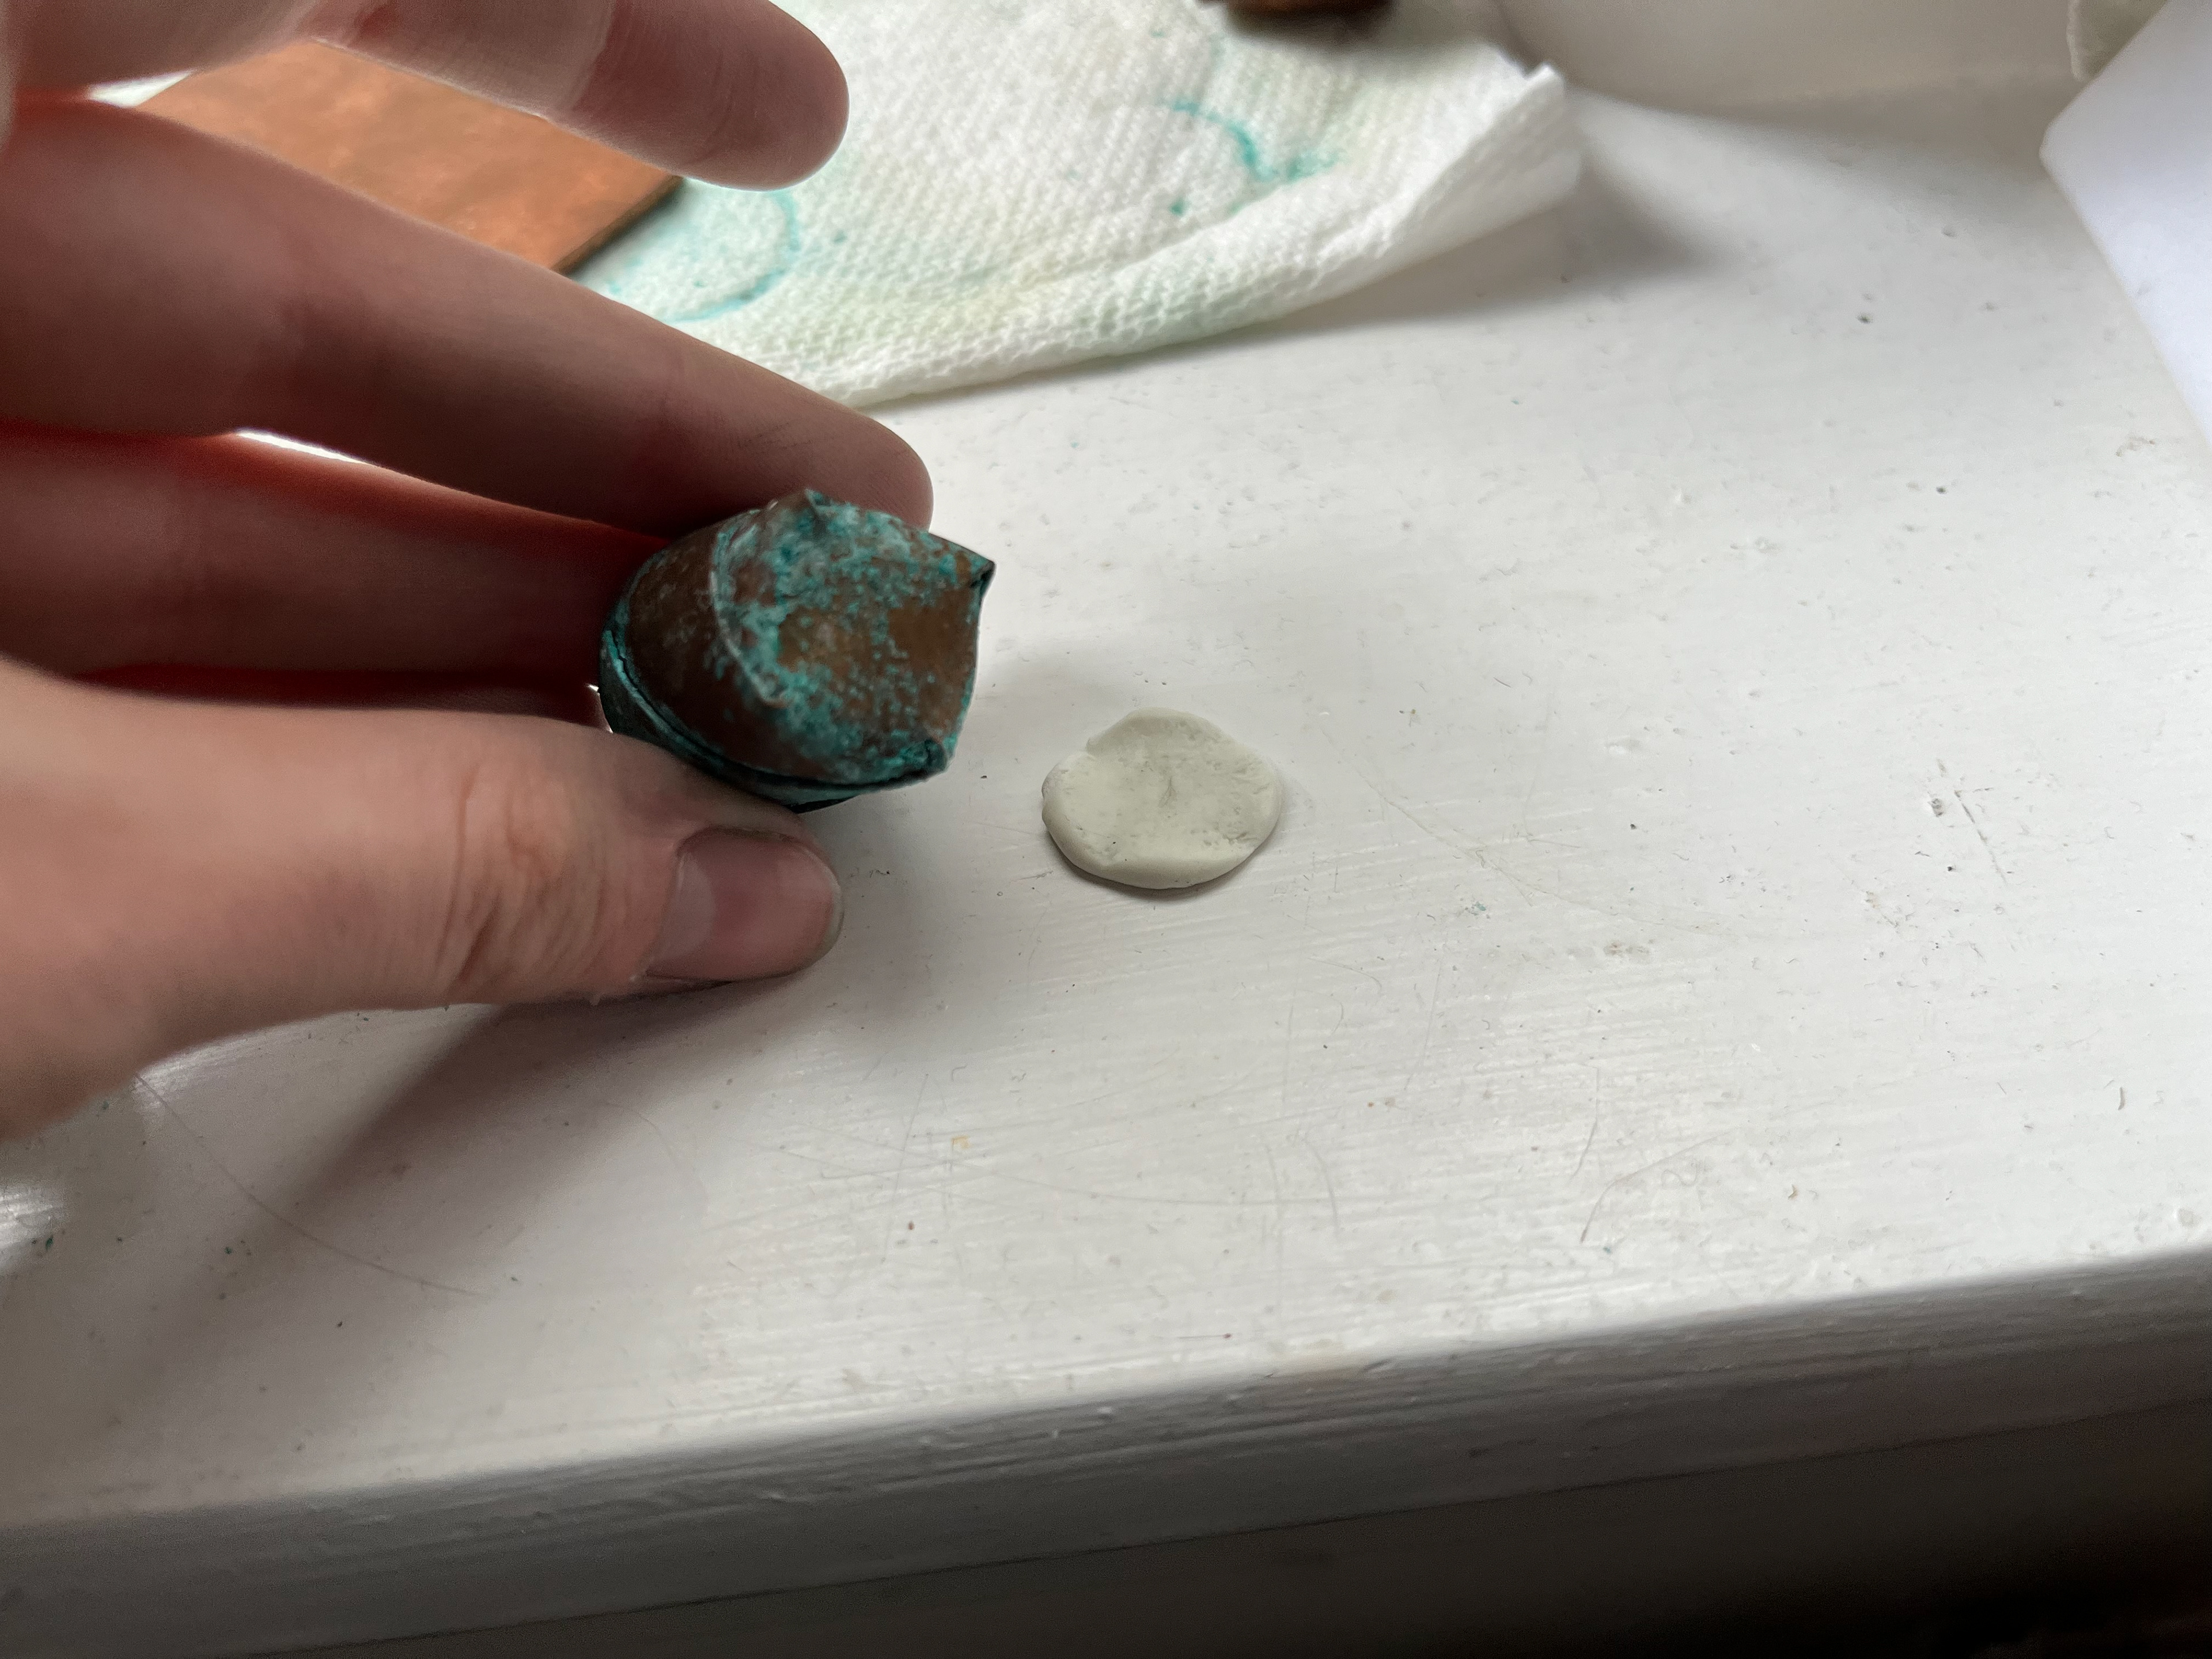
The Foot
The bases of my vessels have a slight wobble to them as they are not completely flat. In S&R I liked this feature as it allowed them to spin and I quite liked this feature. However, If my pieces were to sit in a gallery, I would need them to be earthquake proof as the wobble could be off putting to some people. To solve this, with the help of Jack in my course, I 3D printed small feet for my vessels to sit on. I made 2 sizes to fit the small vessels and the larger ones. They are simply very thin doughnut shaped rings to stabilize my pieces. They are also clear so that they are less visible giving the pieces a bit of lift off the table.
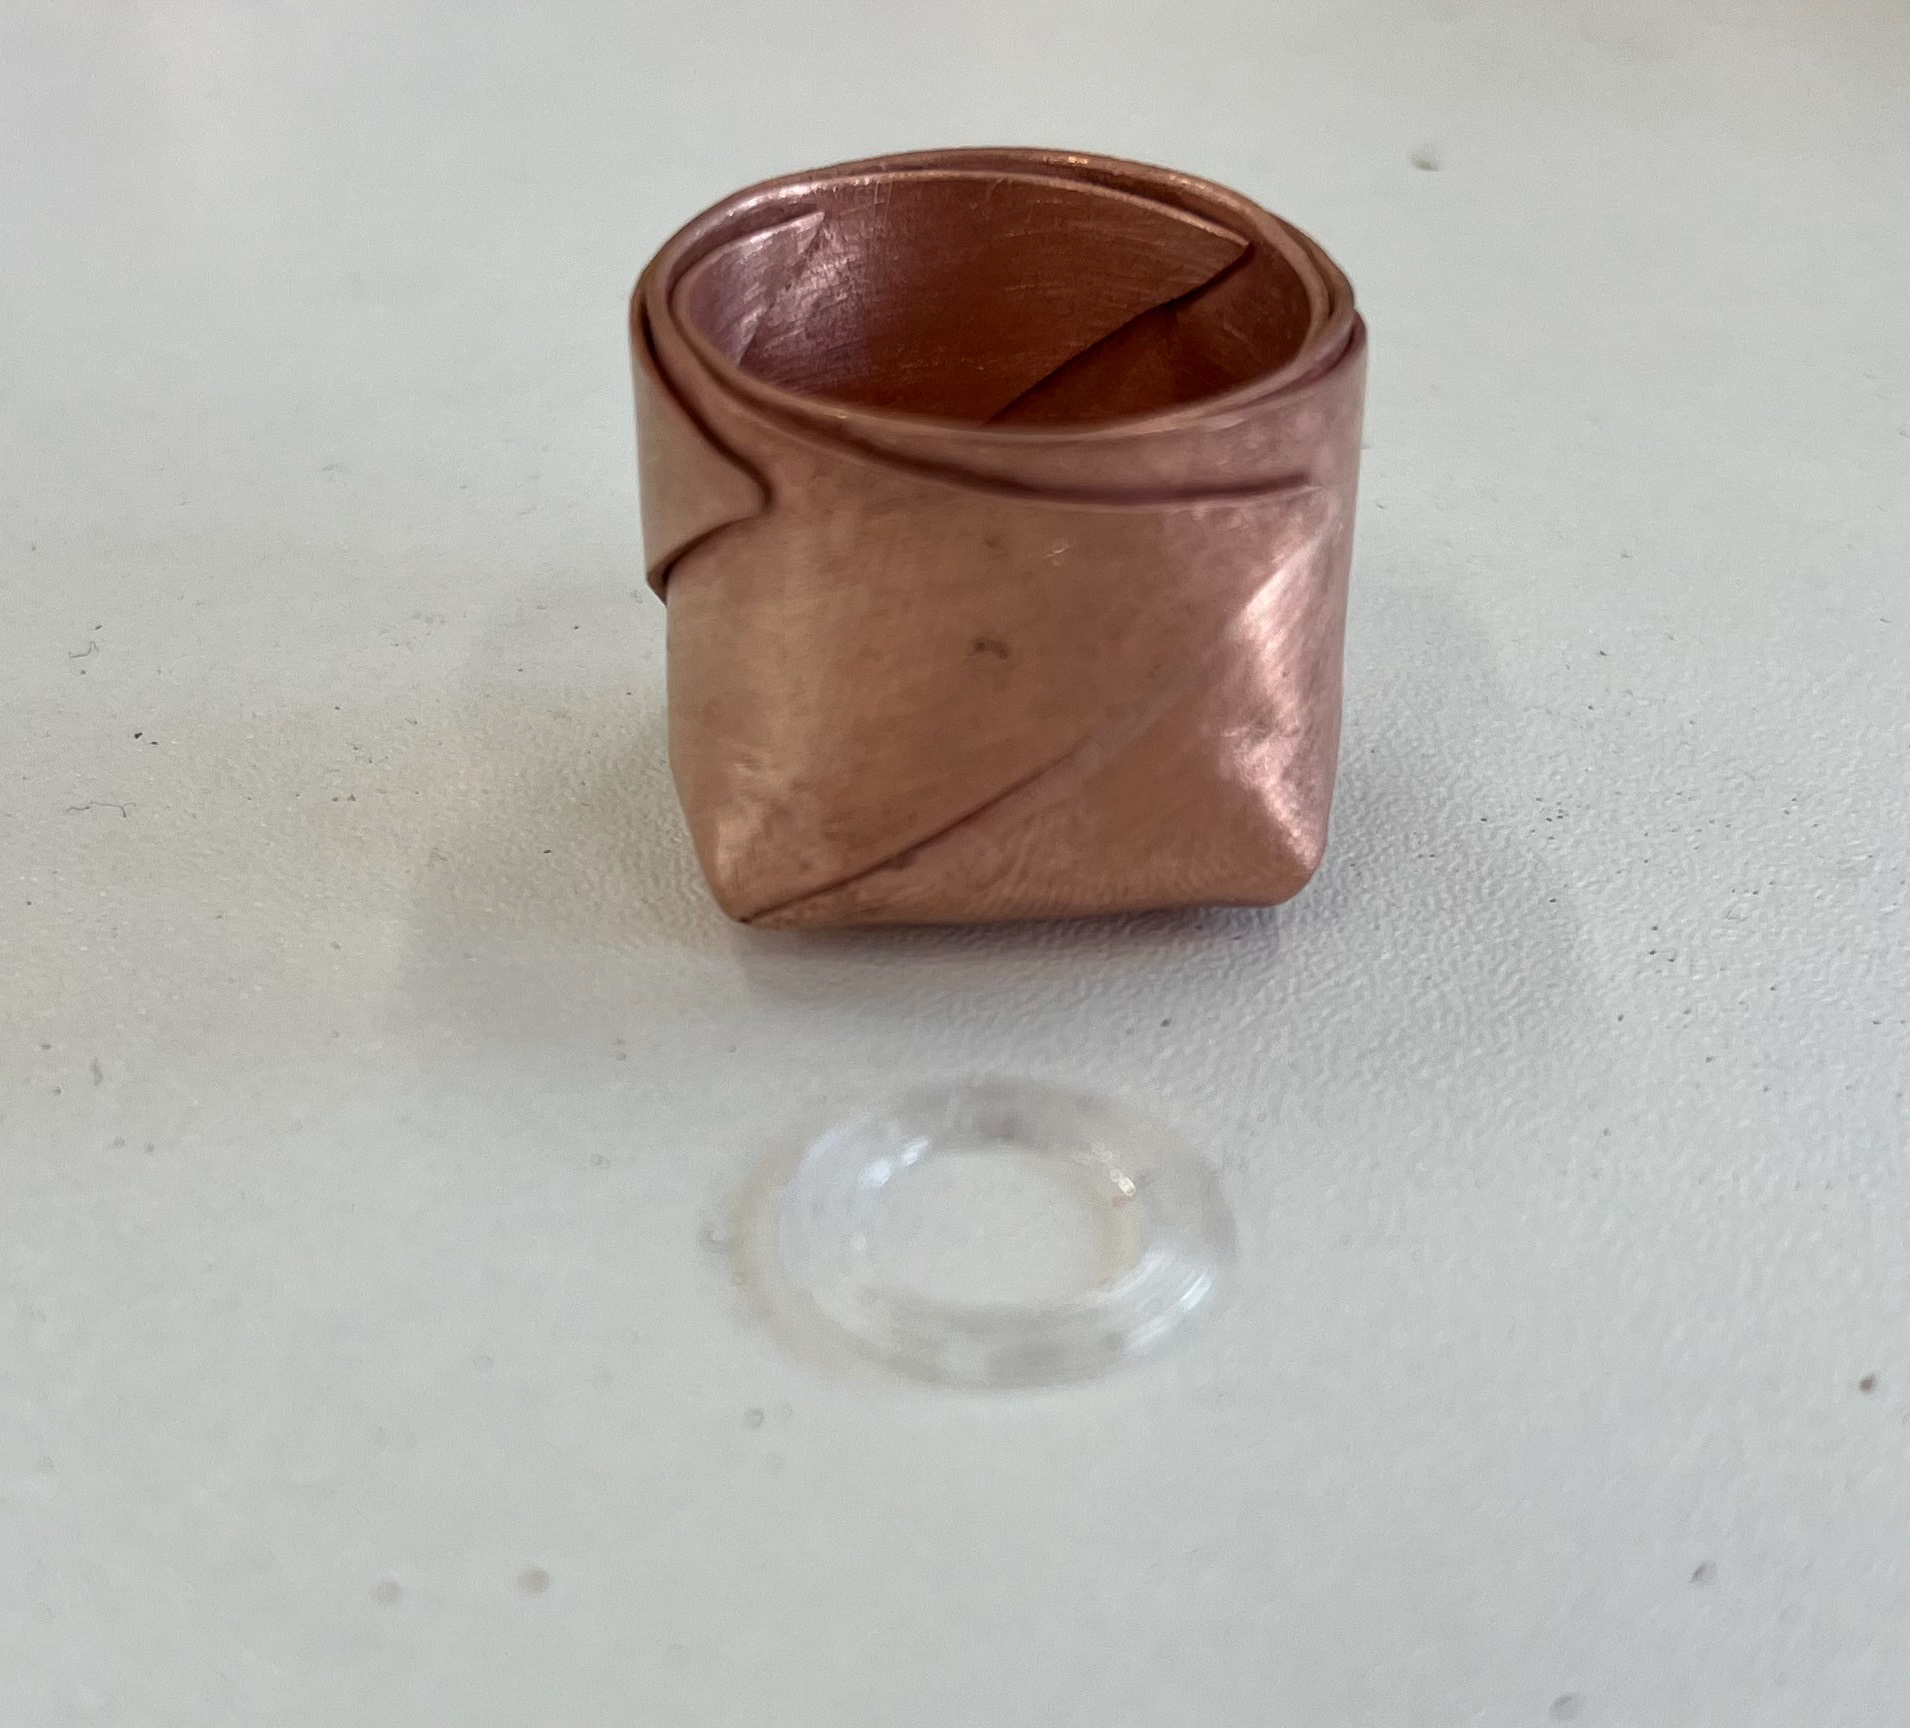
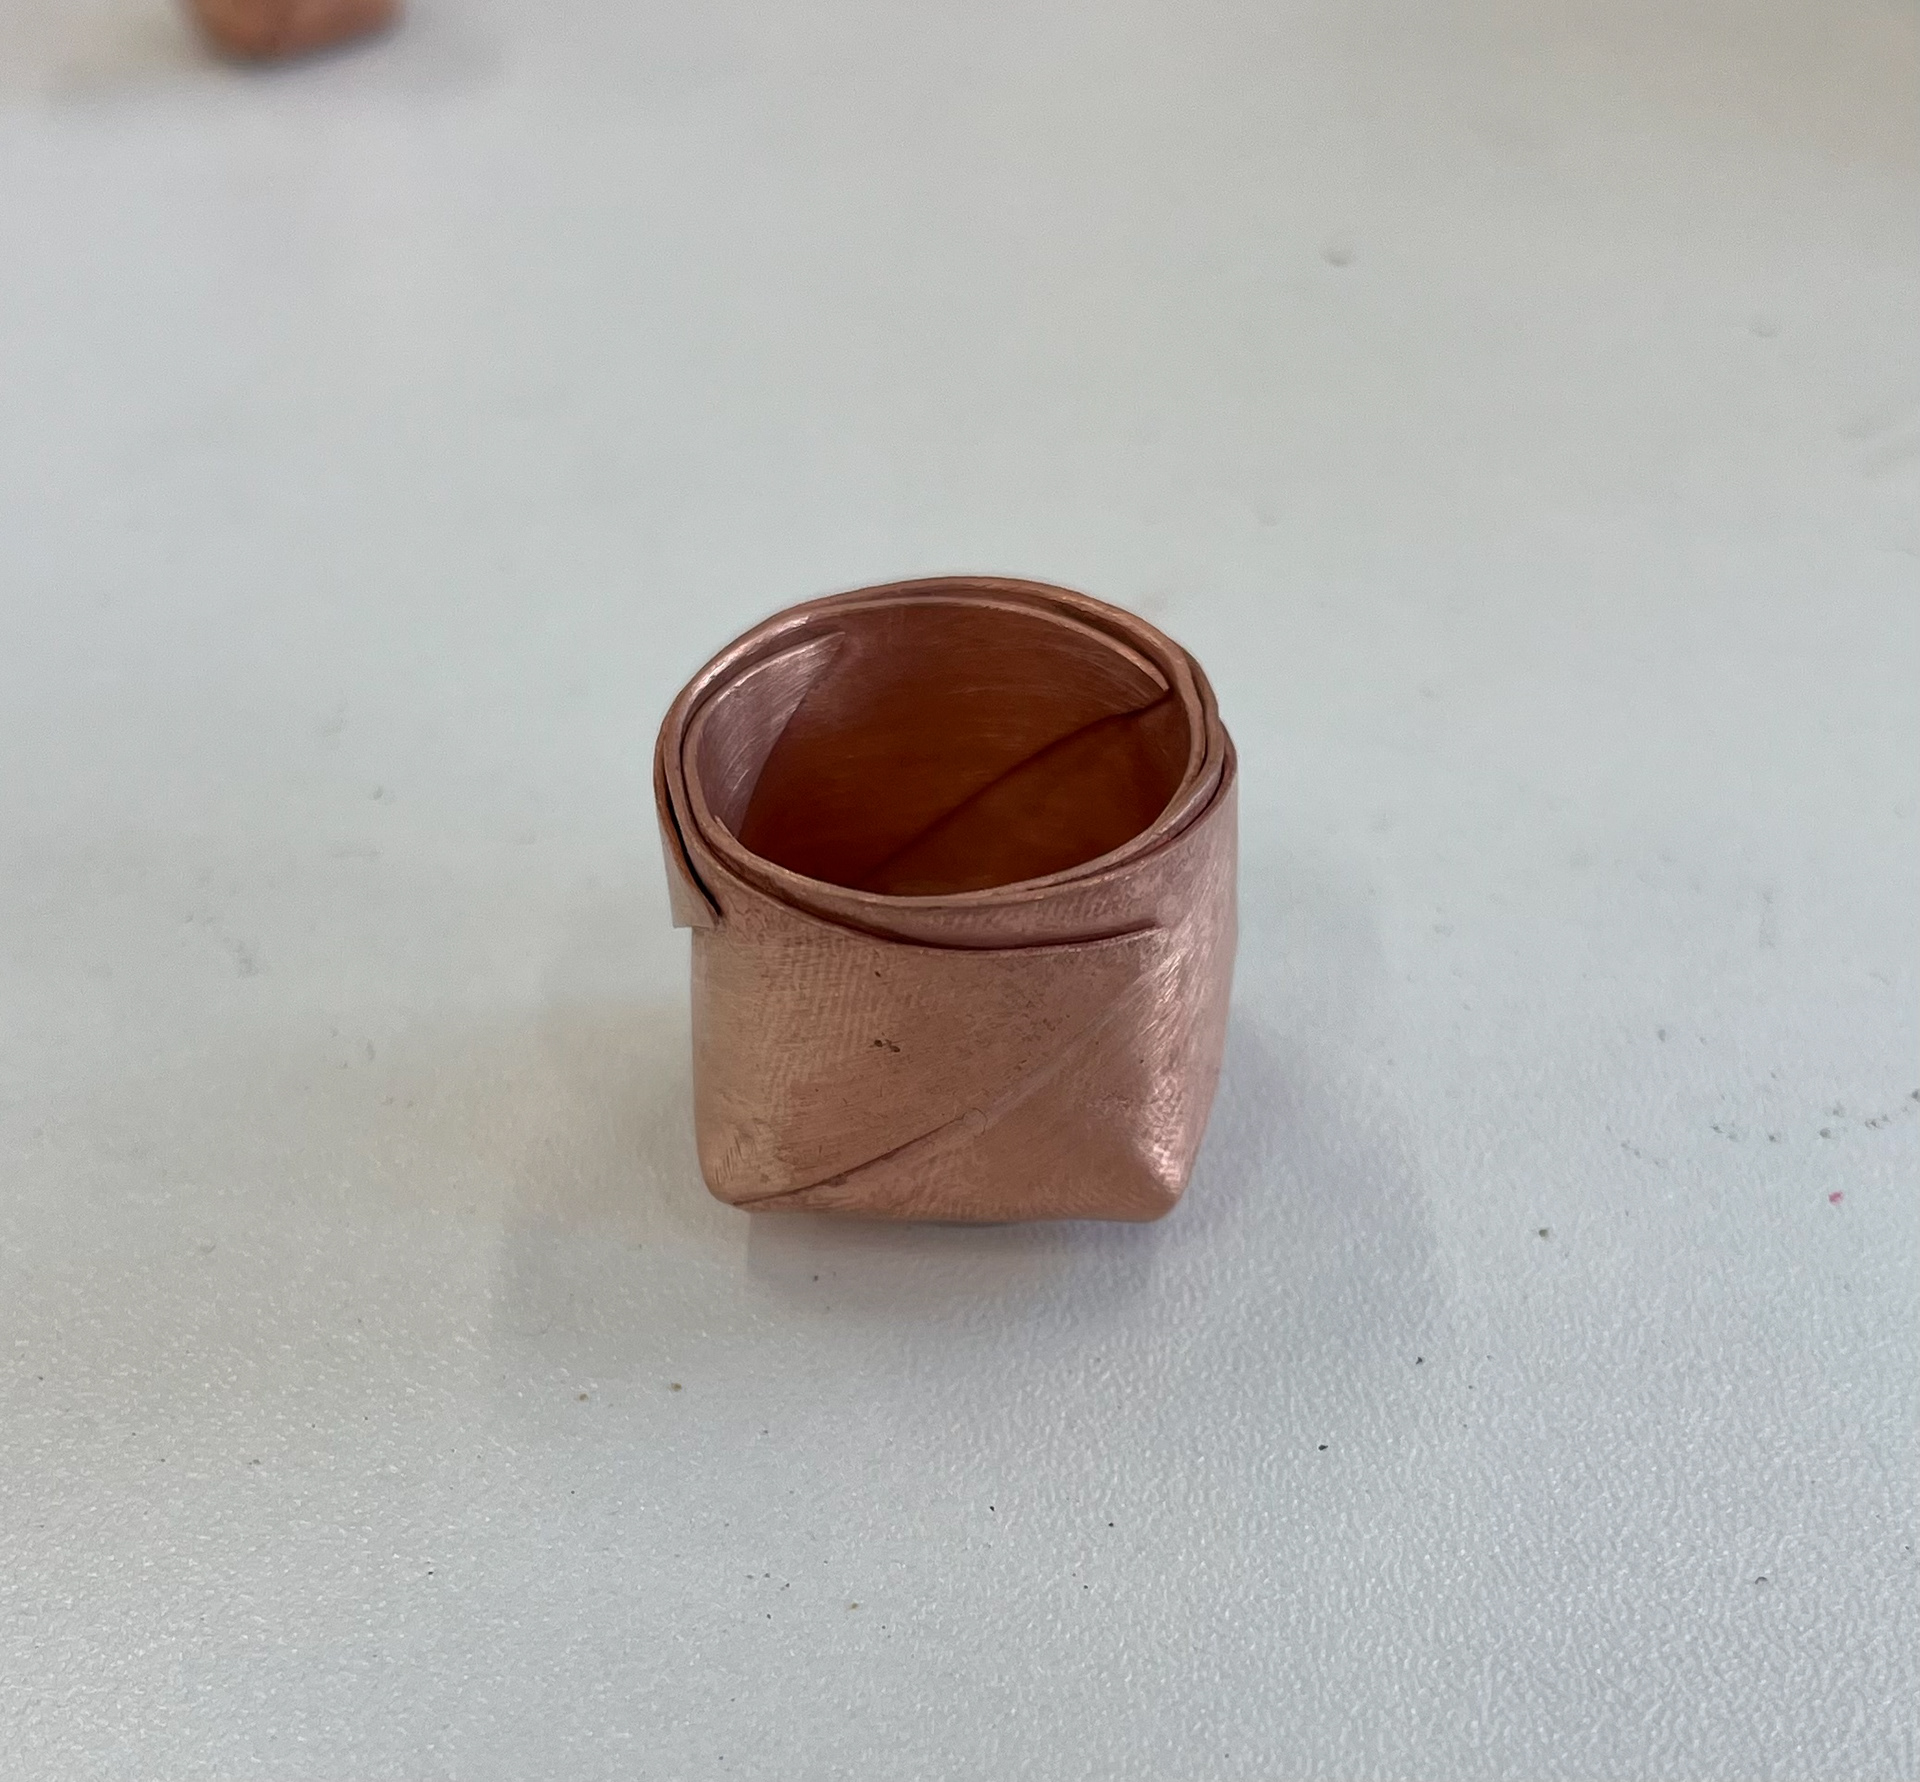
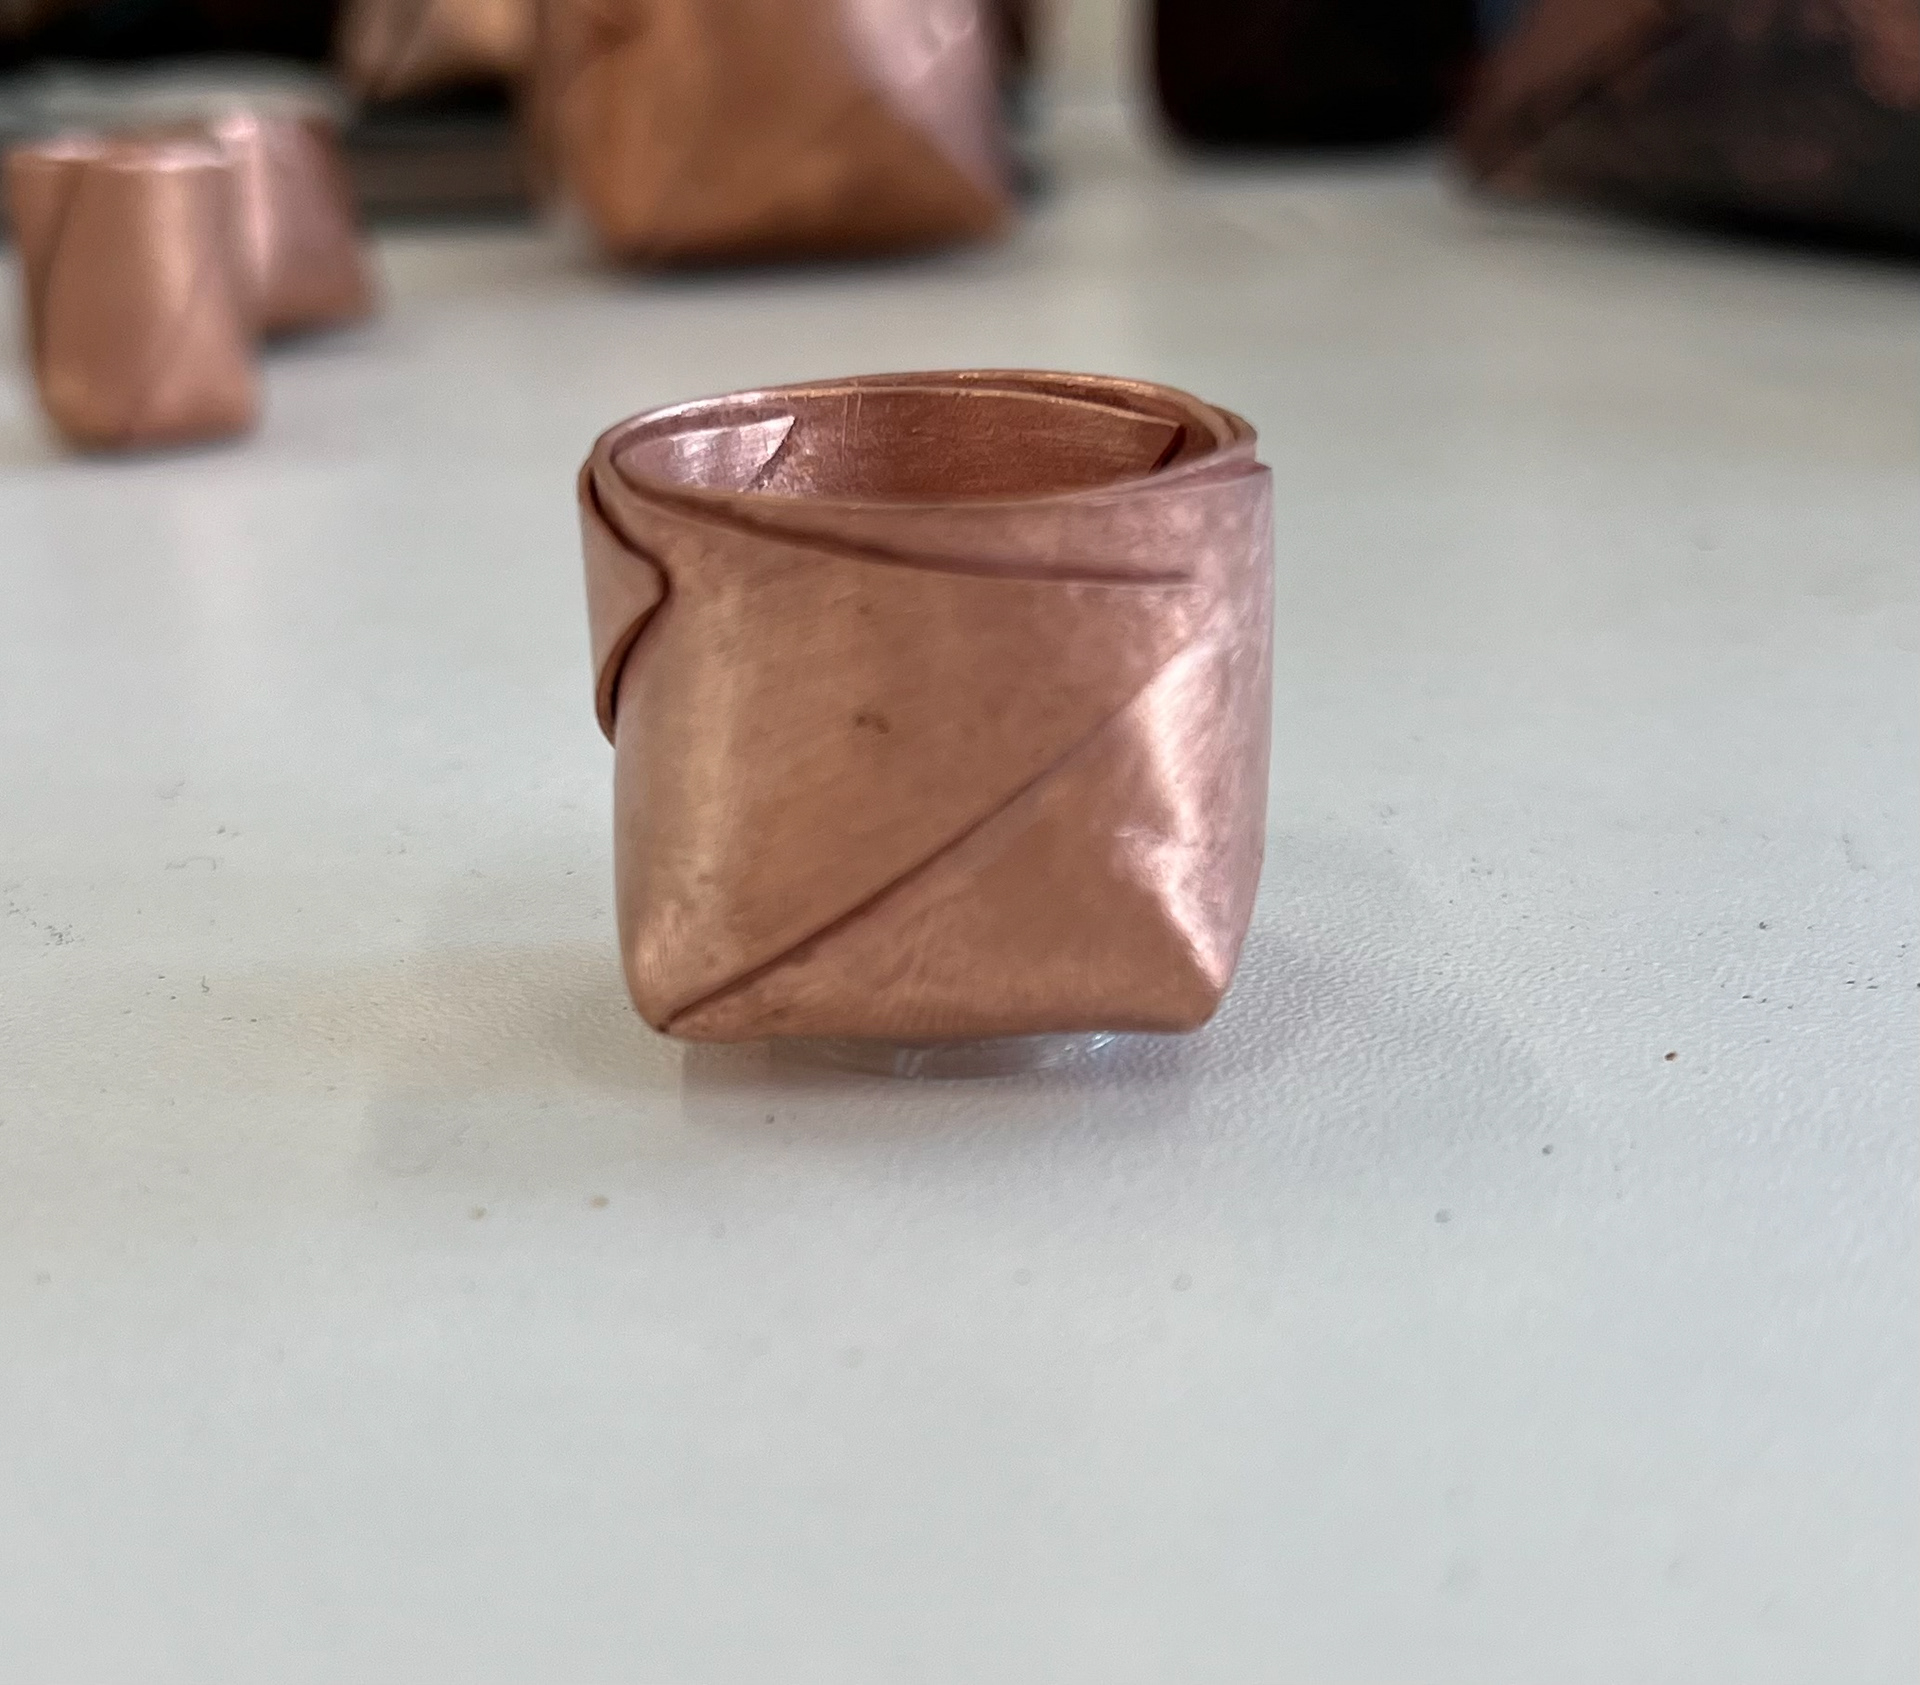
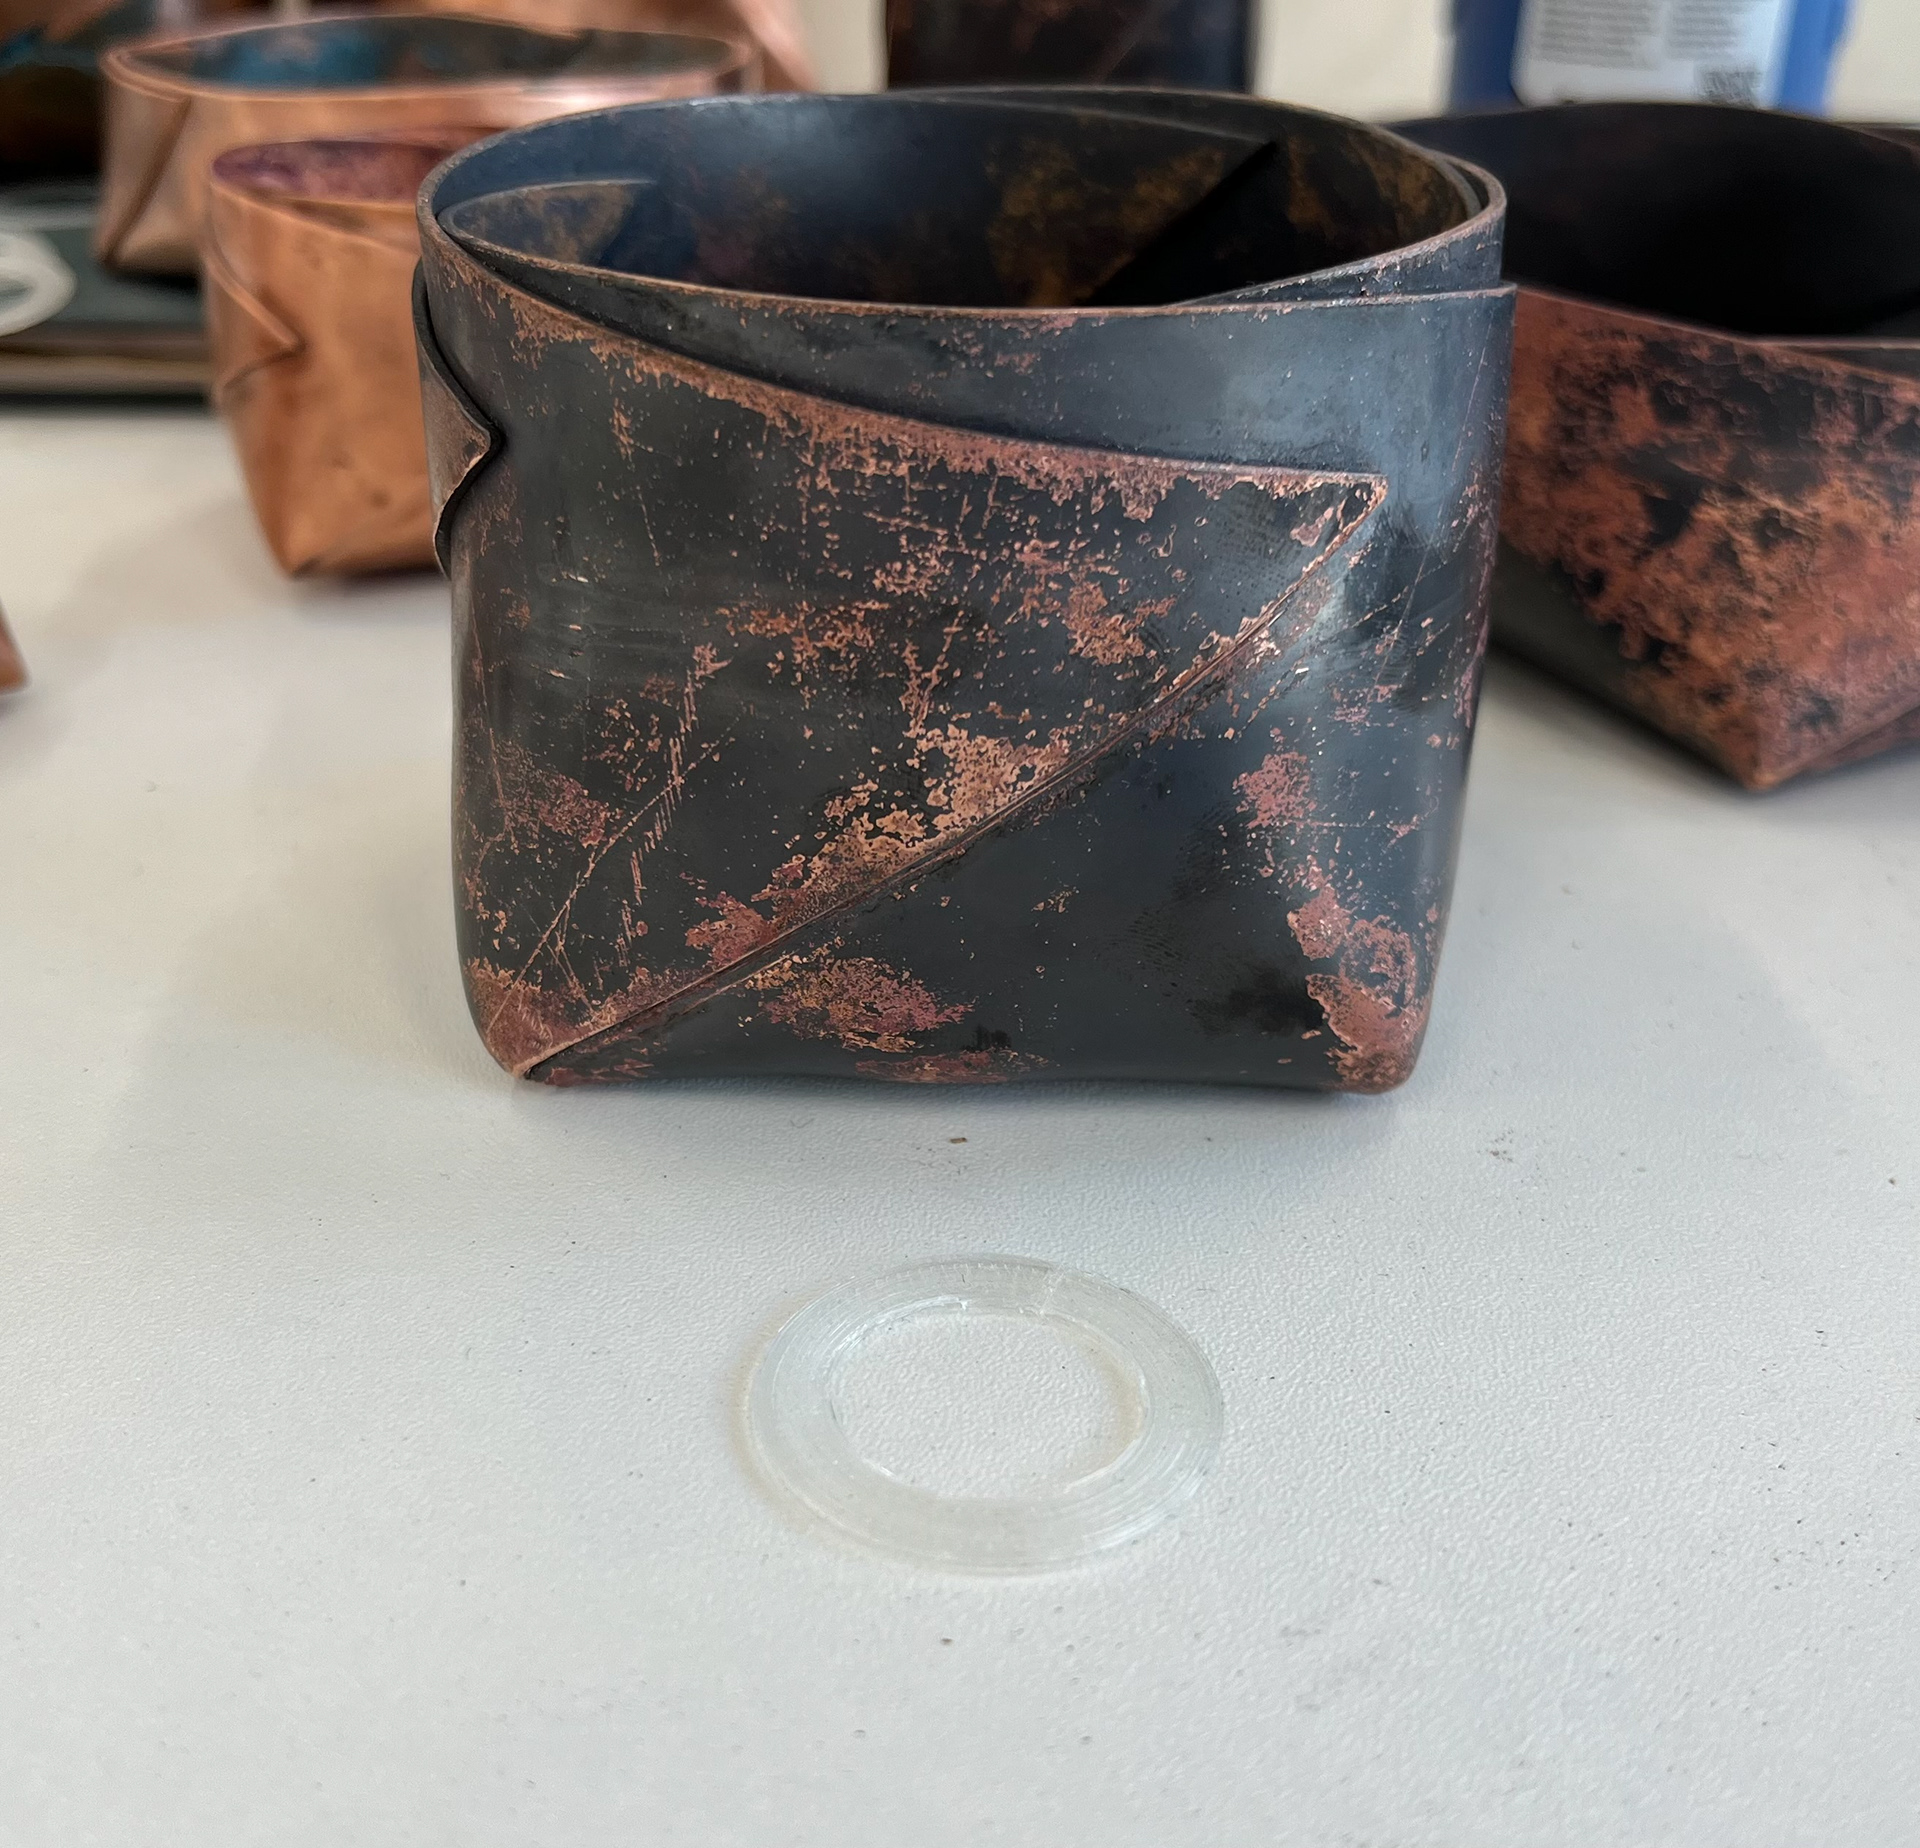

Below is a demonstration of how these feet work, showing the difference between the pieces on and off the tiny pedestal.
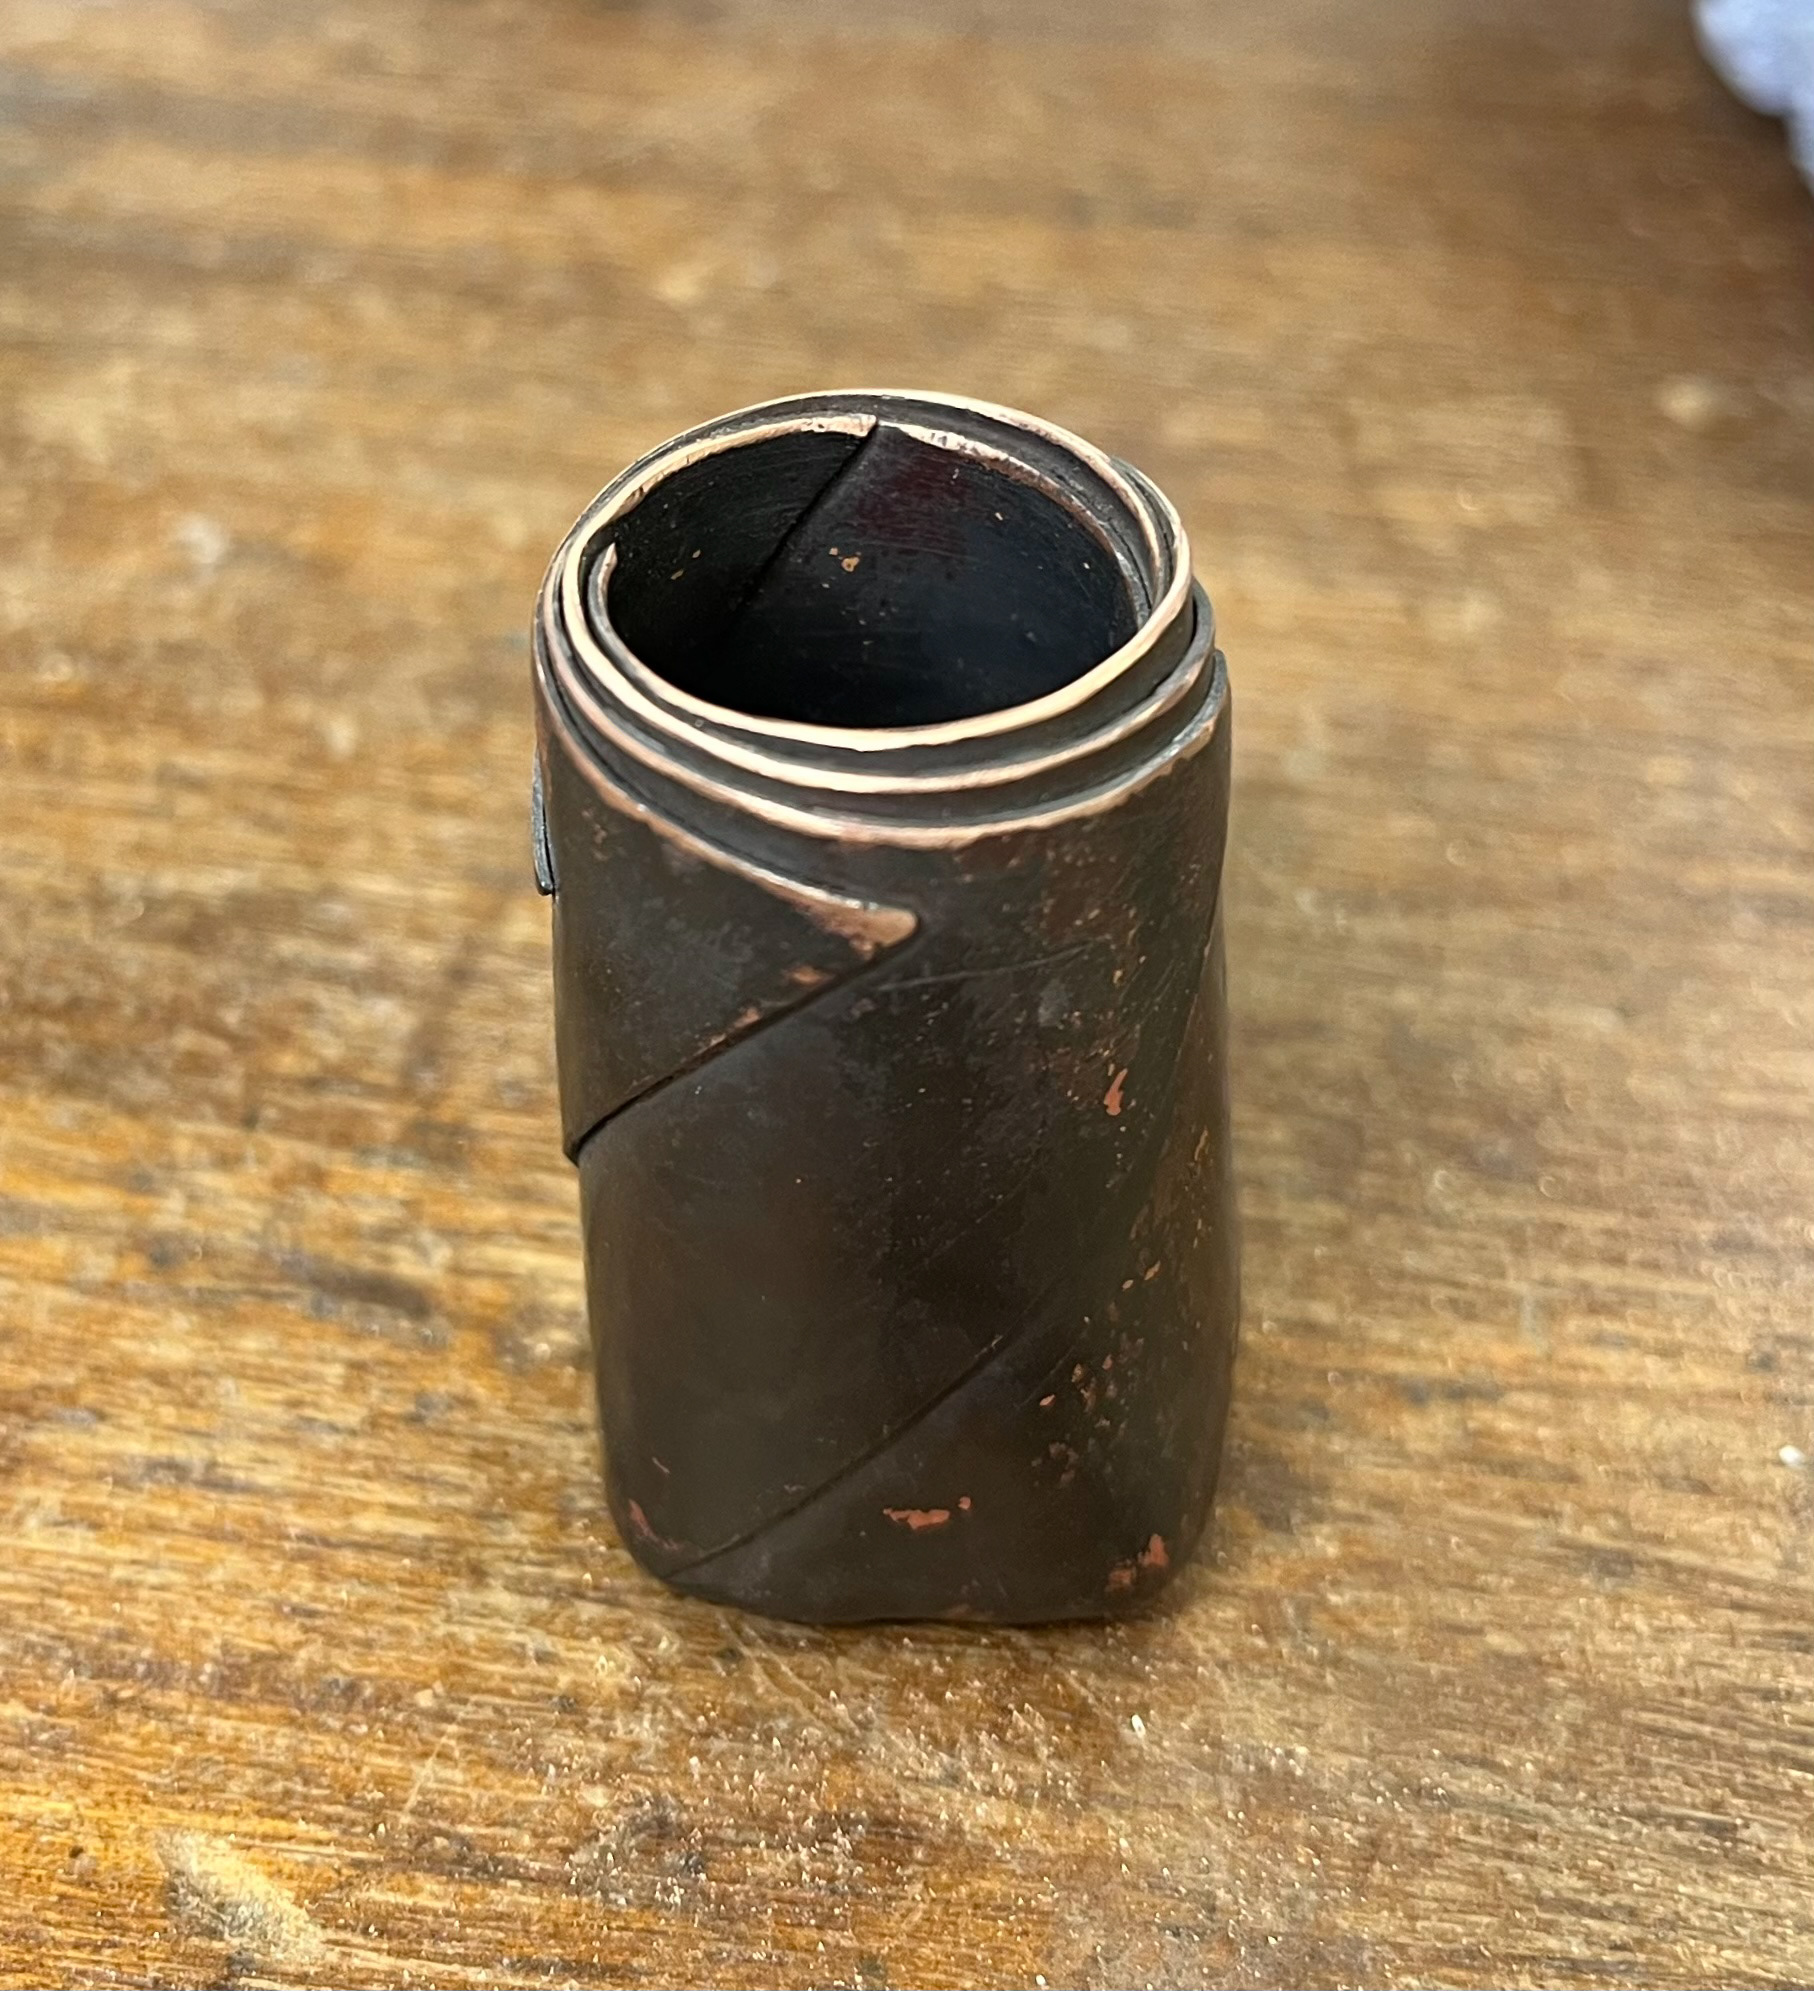
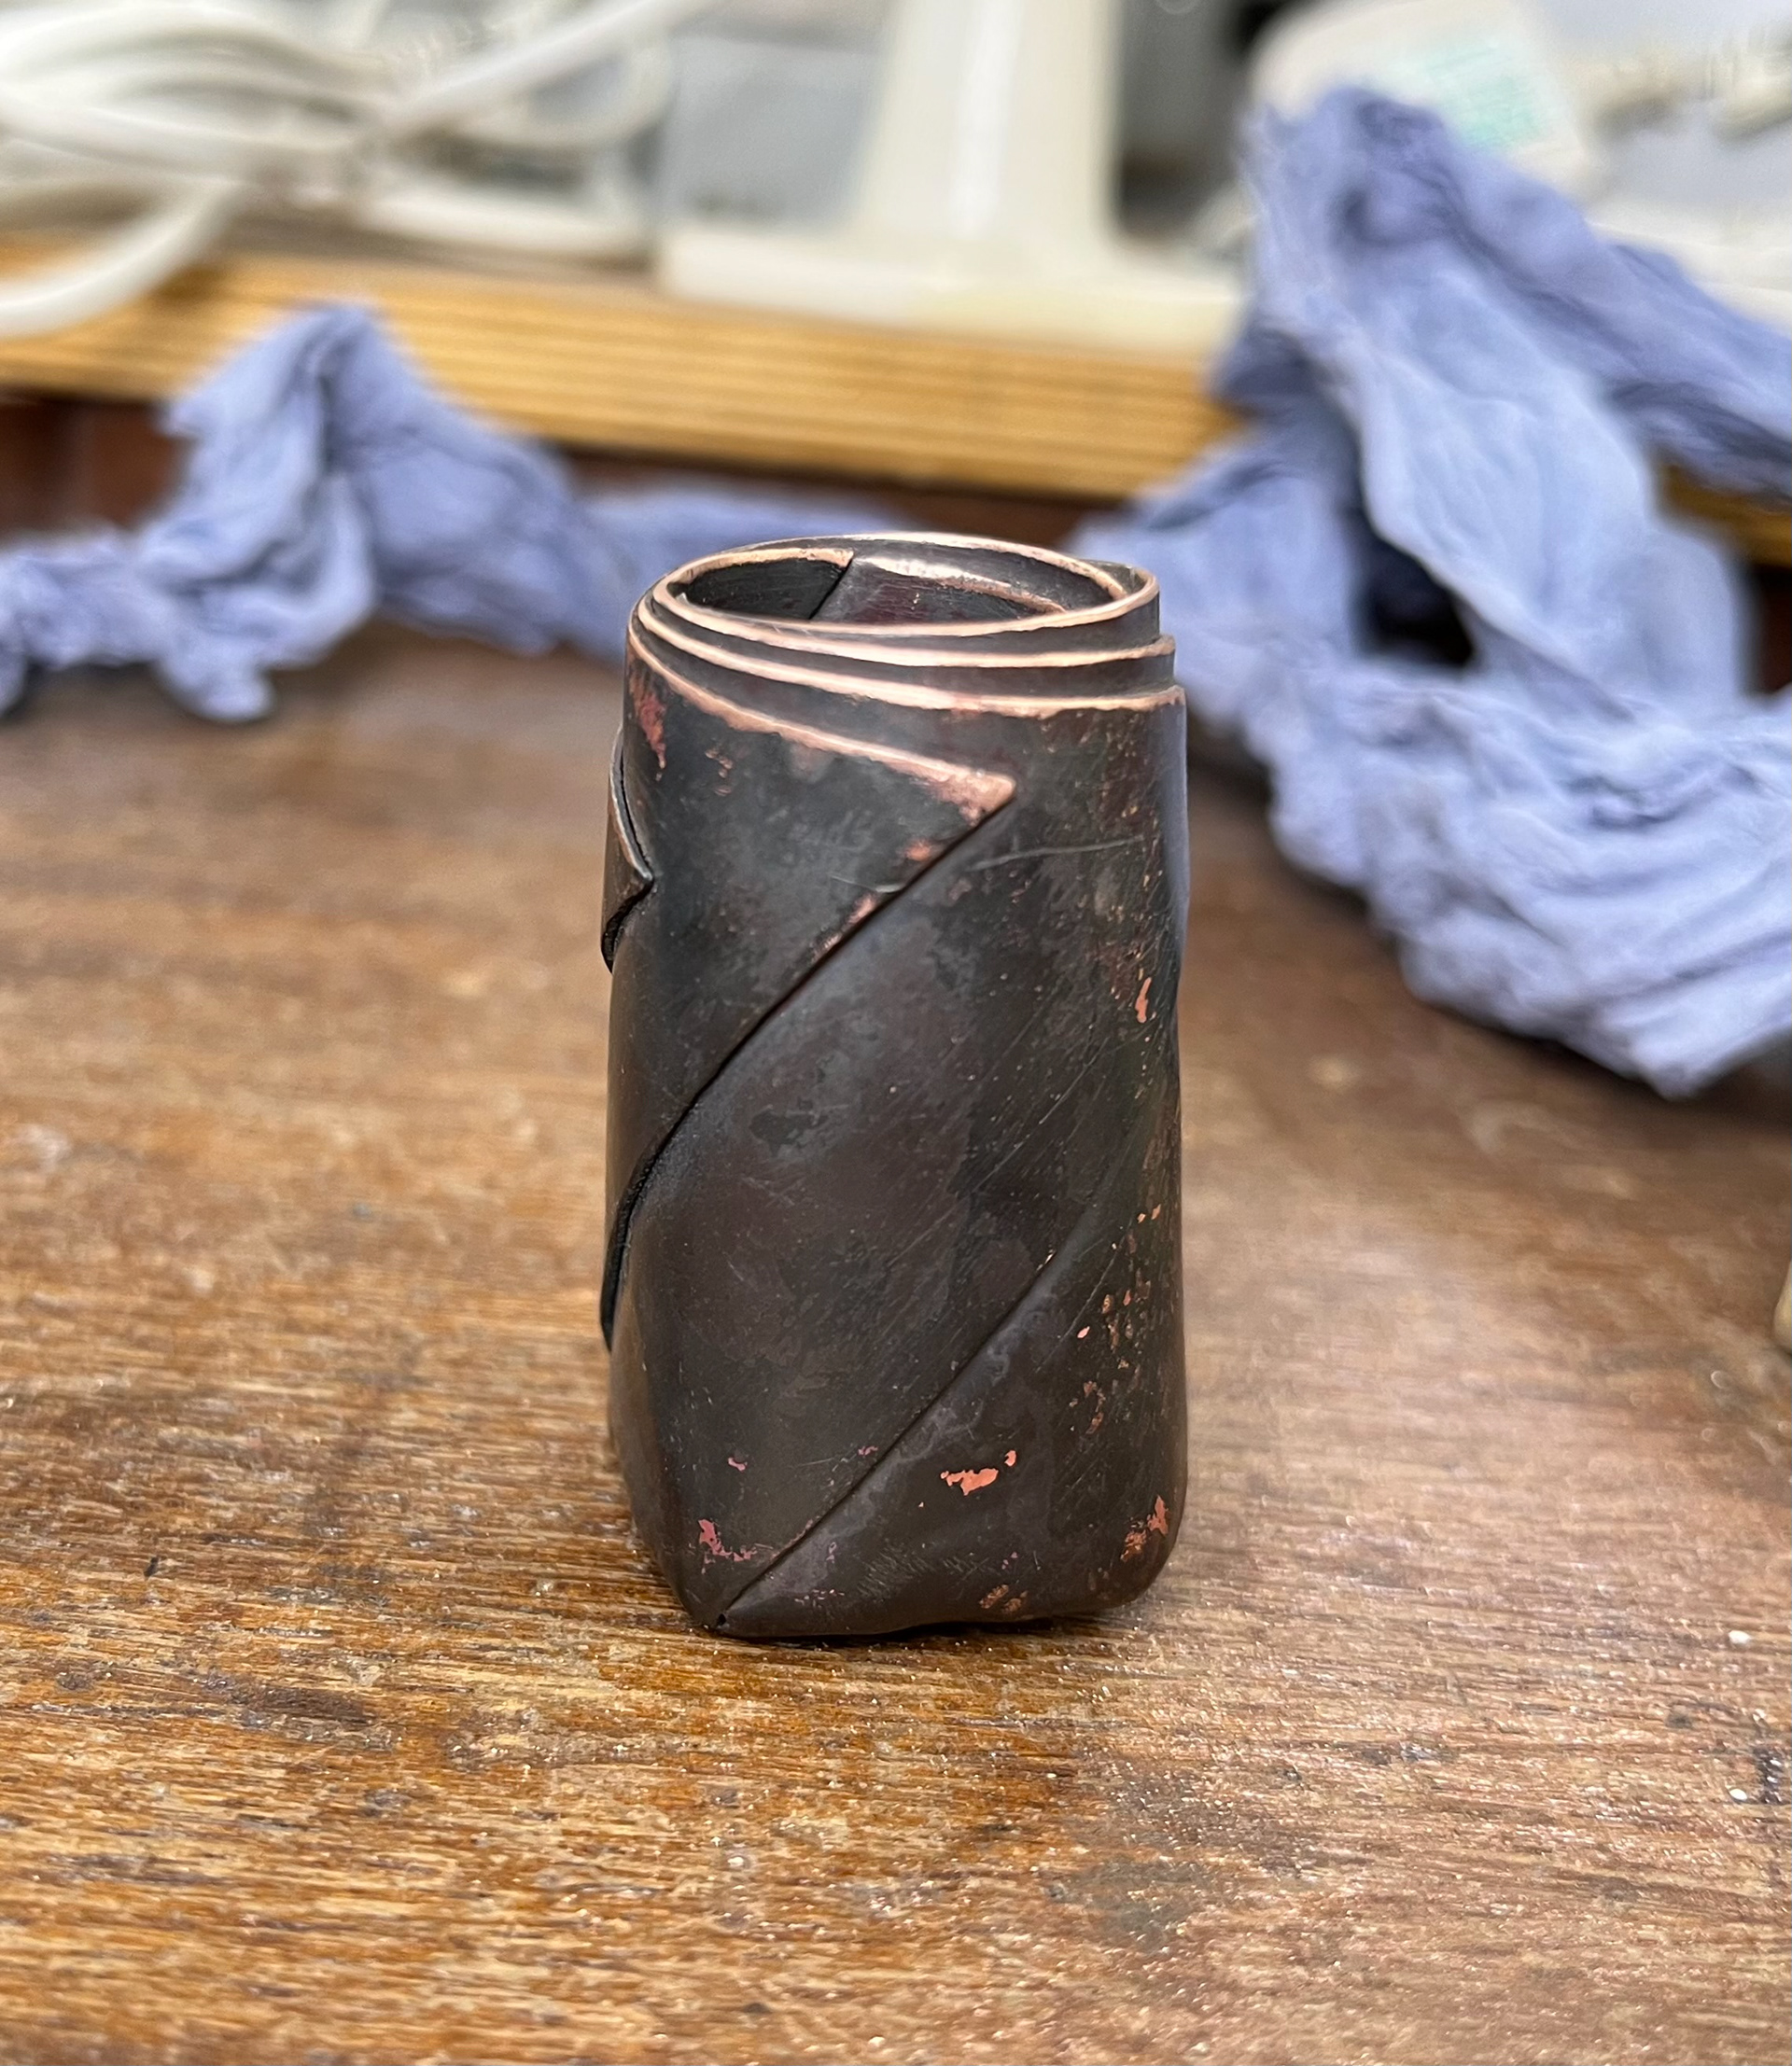
Buffing the edge
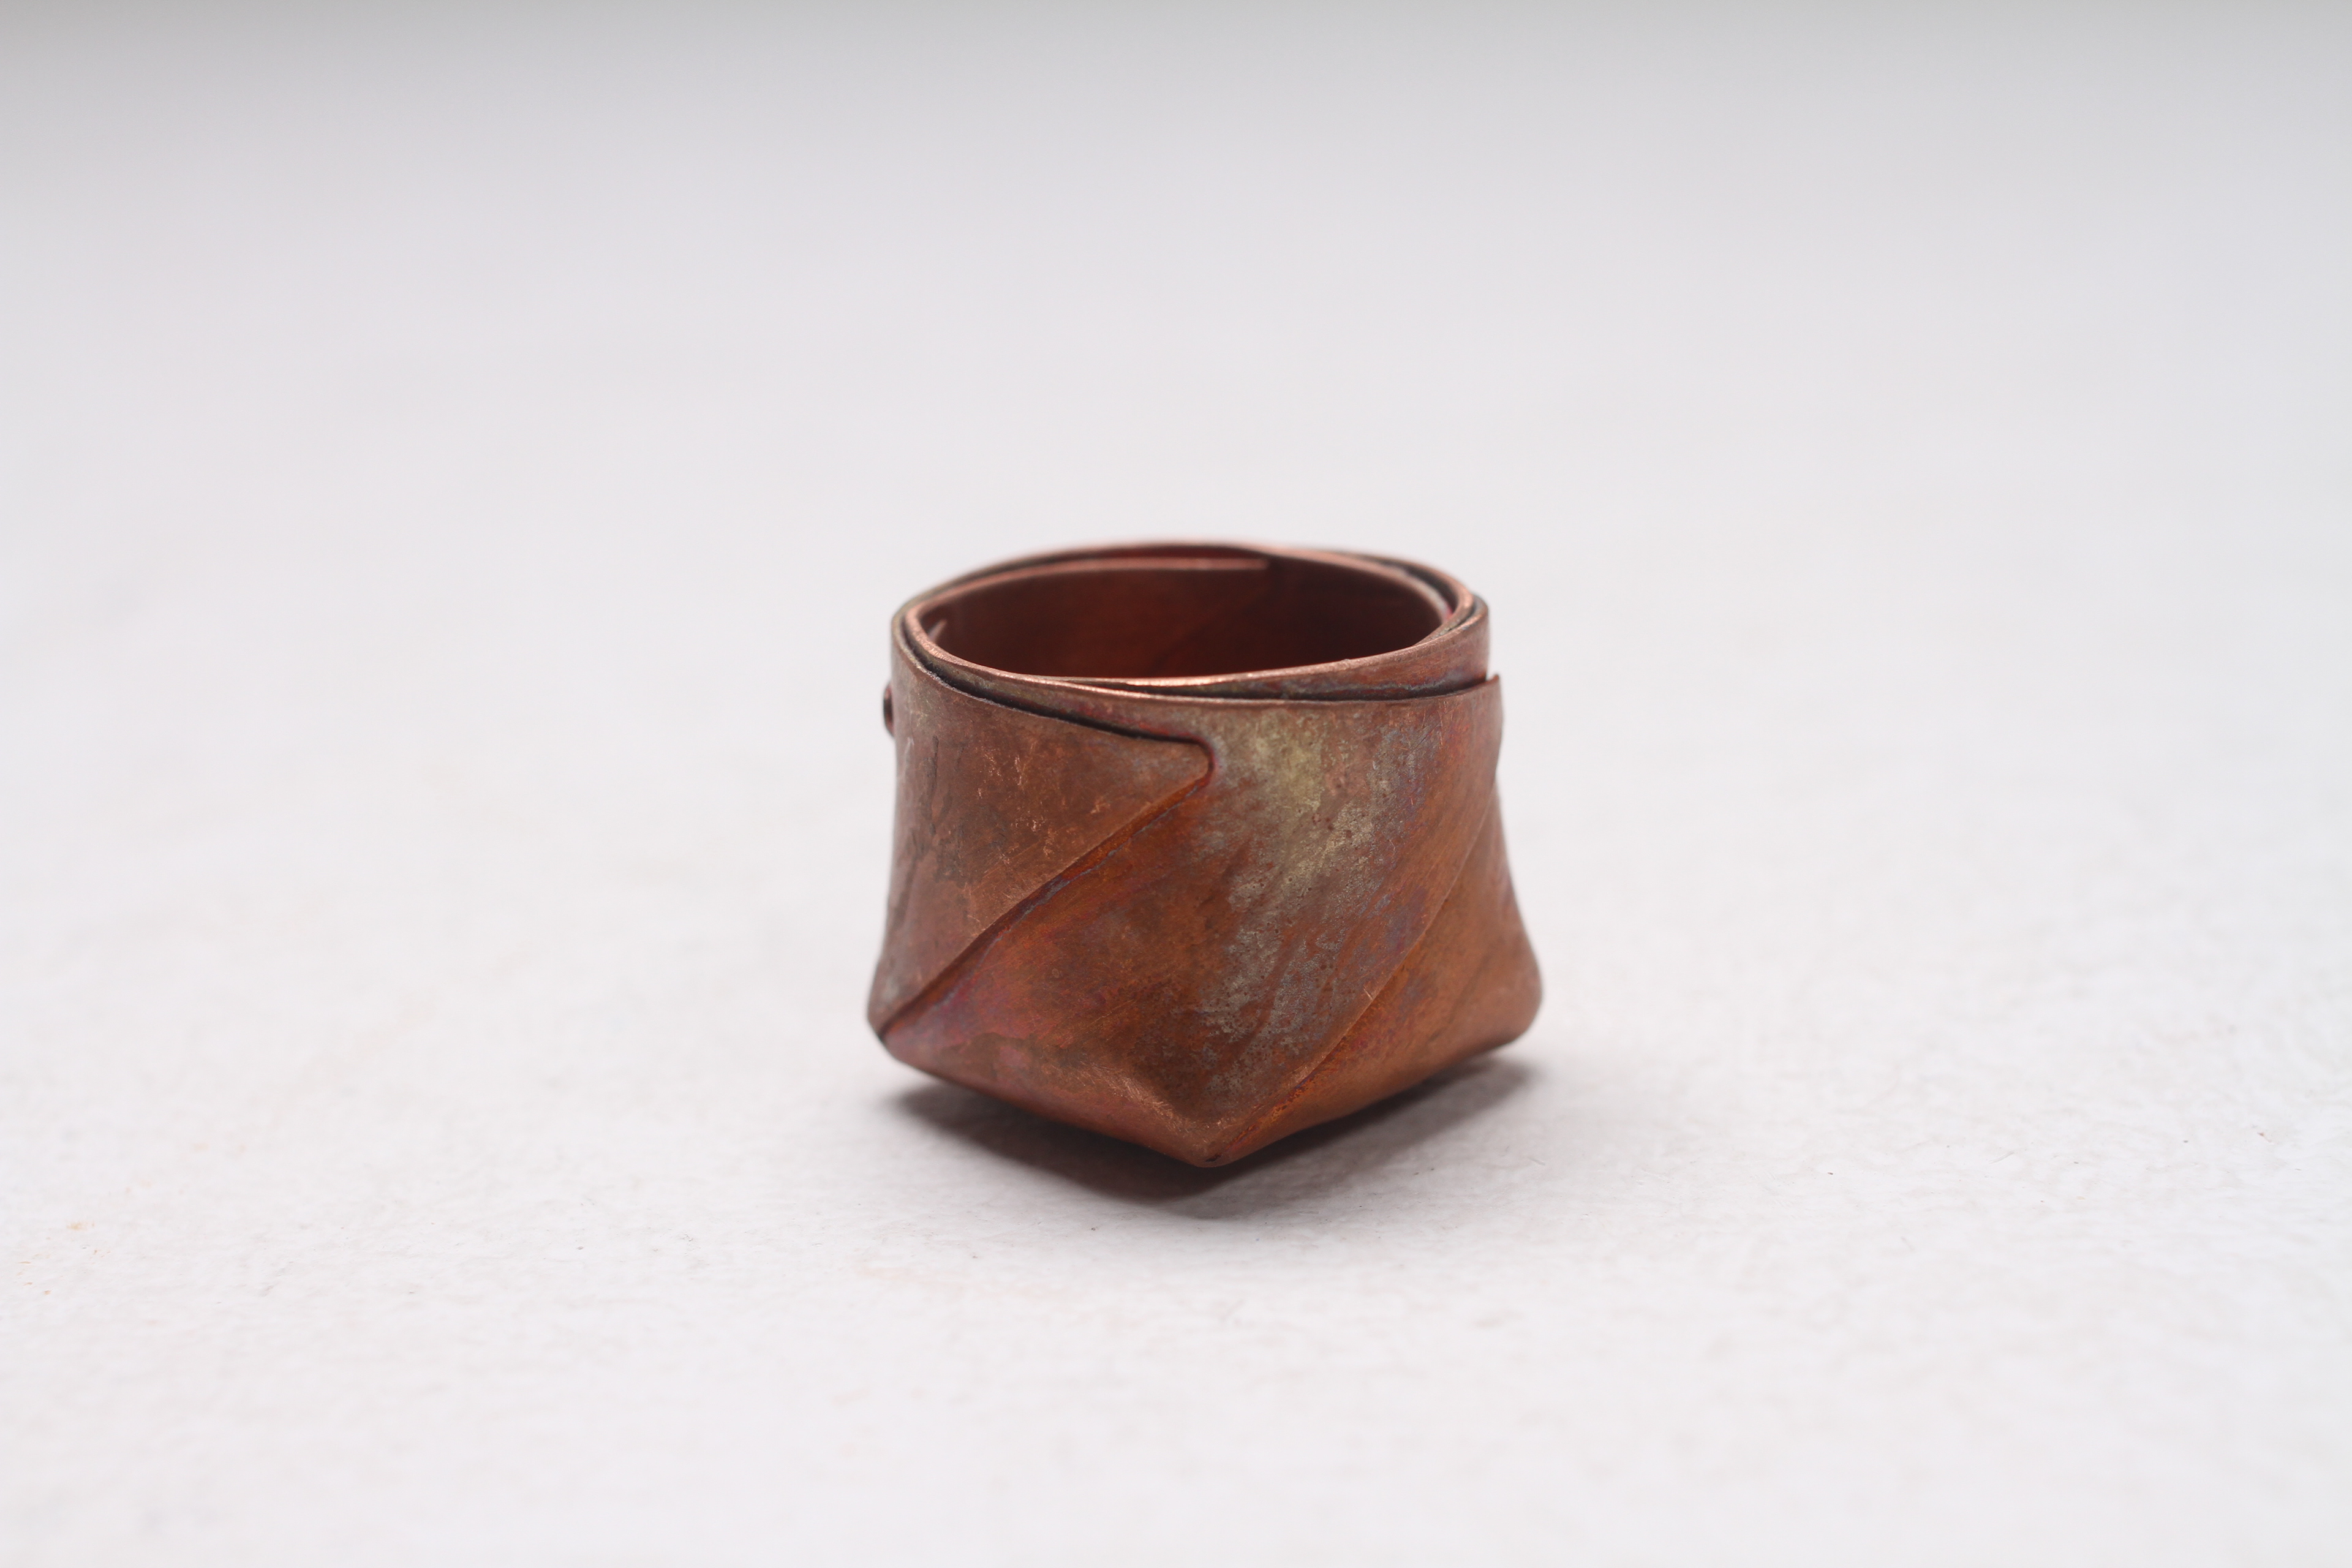
I thought it would be a nice touch if I buffed the edges of my vessels to make the fold lines stand out. I always thought the folds were a lovely feature of my vessels and wanted them to have more presence within my pieces.
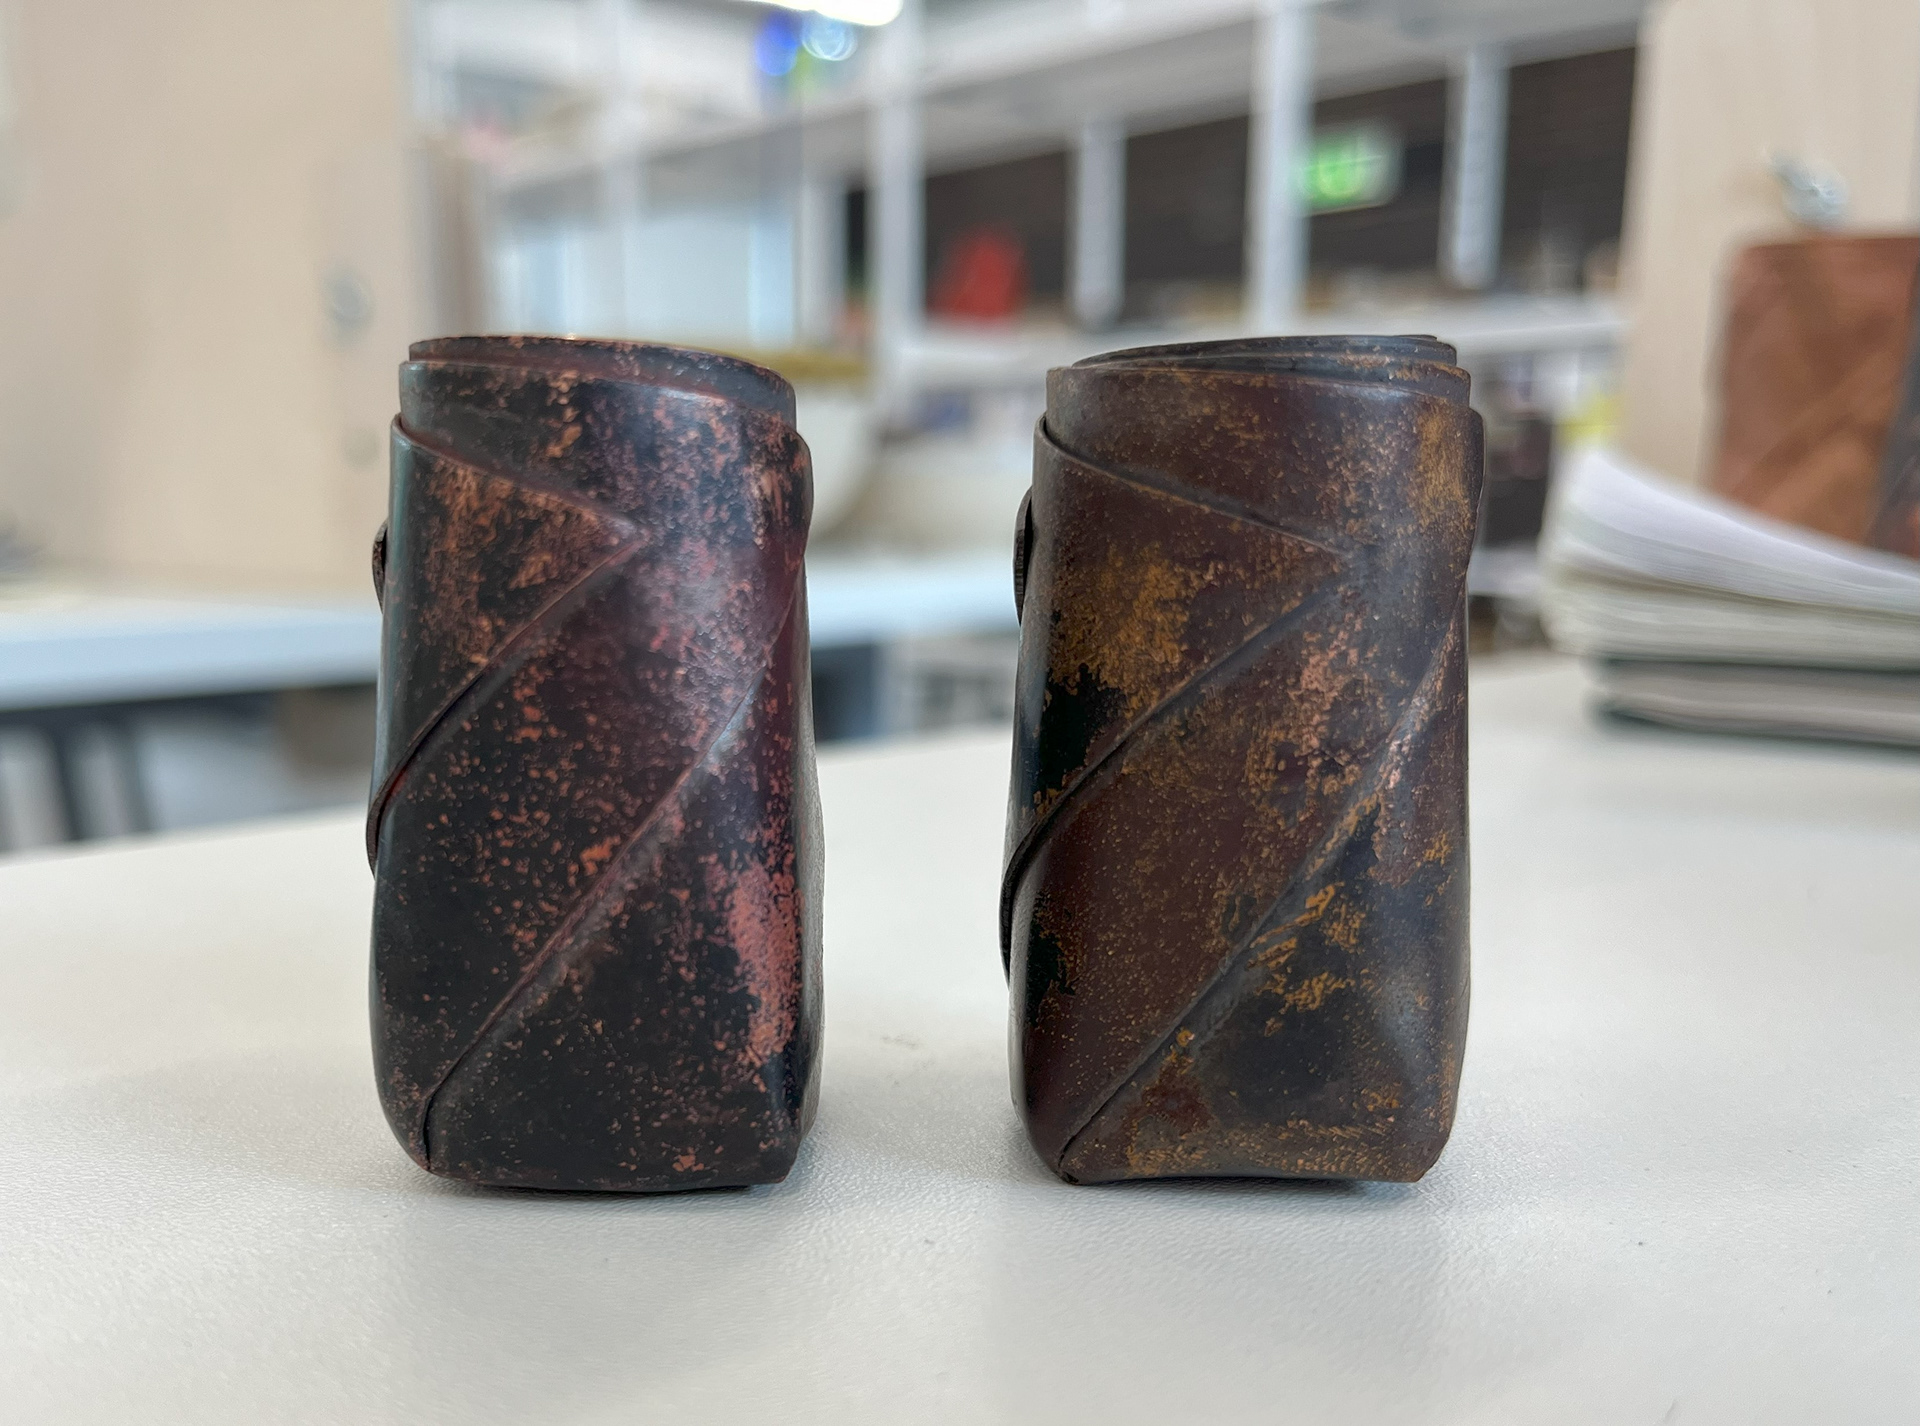
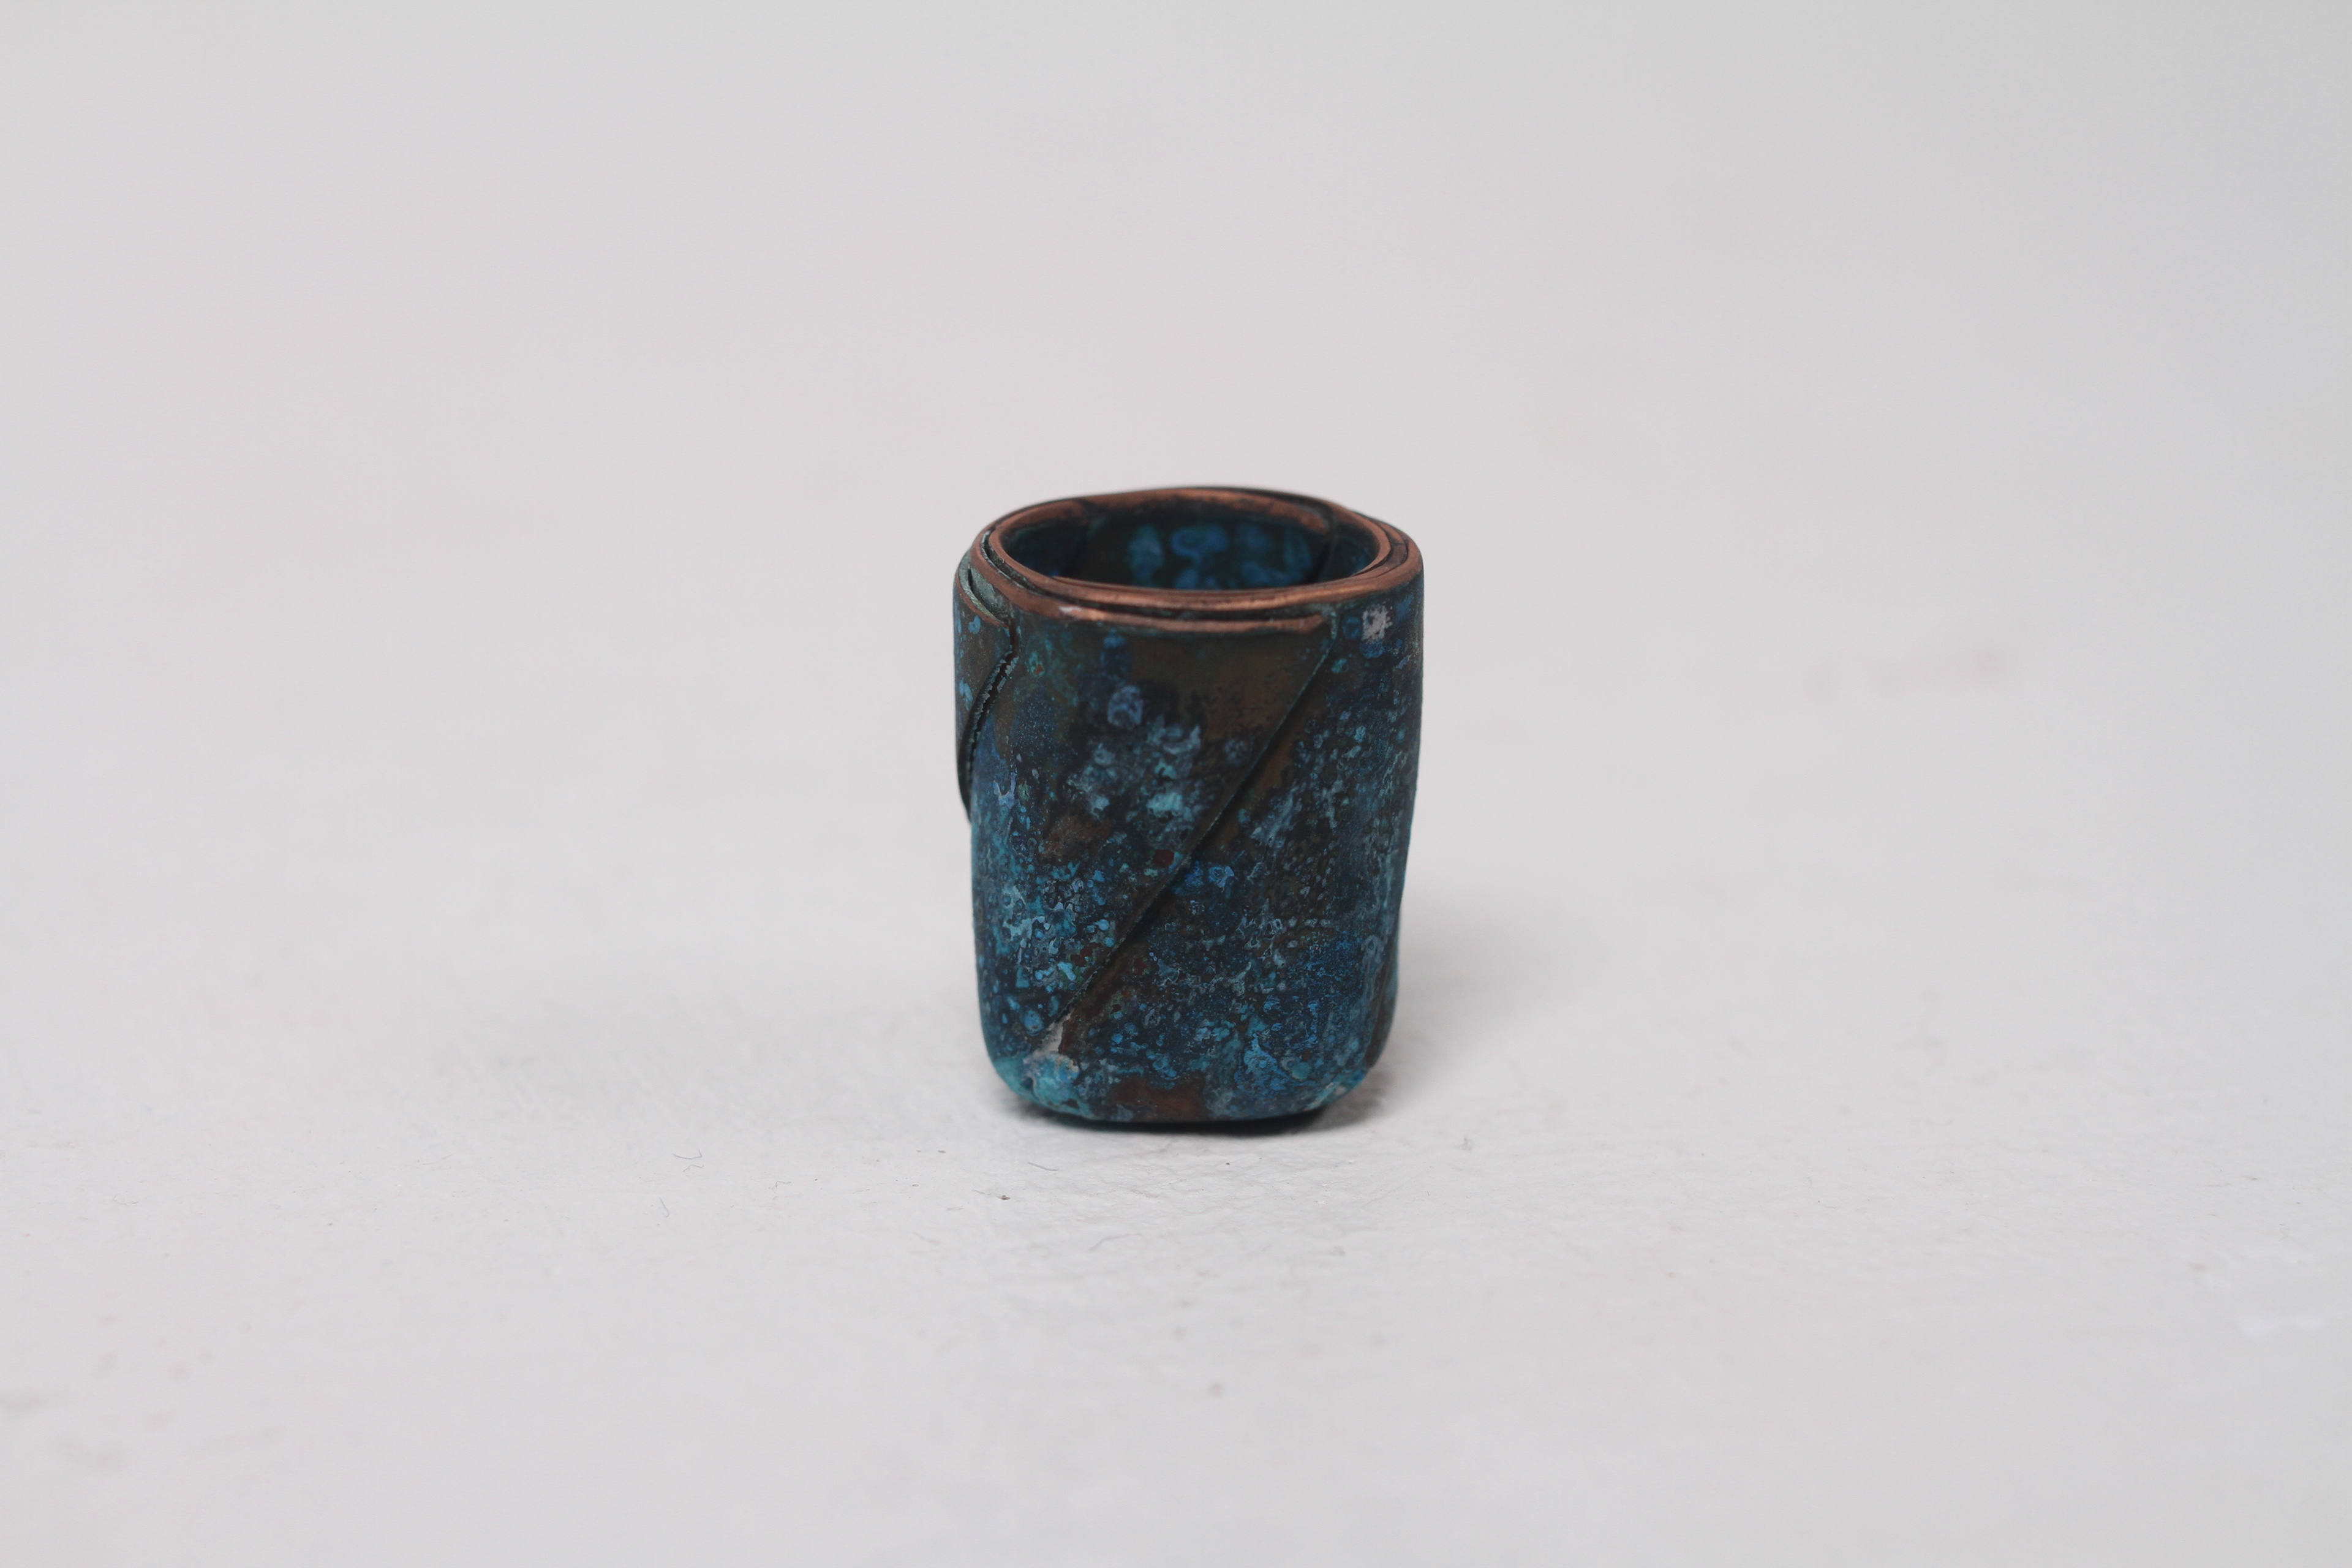
I really like how this subtle line really highlights the edges of the pieces. I think this is particularly effective on the black ones as they stand out more and you can really see how the vessel wraps around itself.
The Video
To contextualize my project, I made a video that I thought encompassed the different elements of my projects. Bellow is a mind-map of my plan for this video.
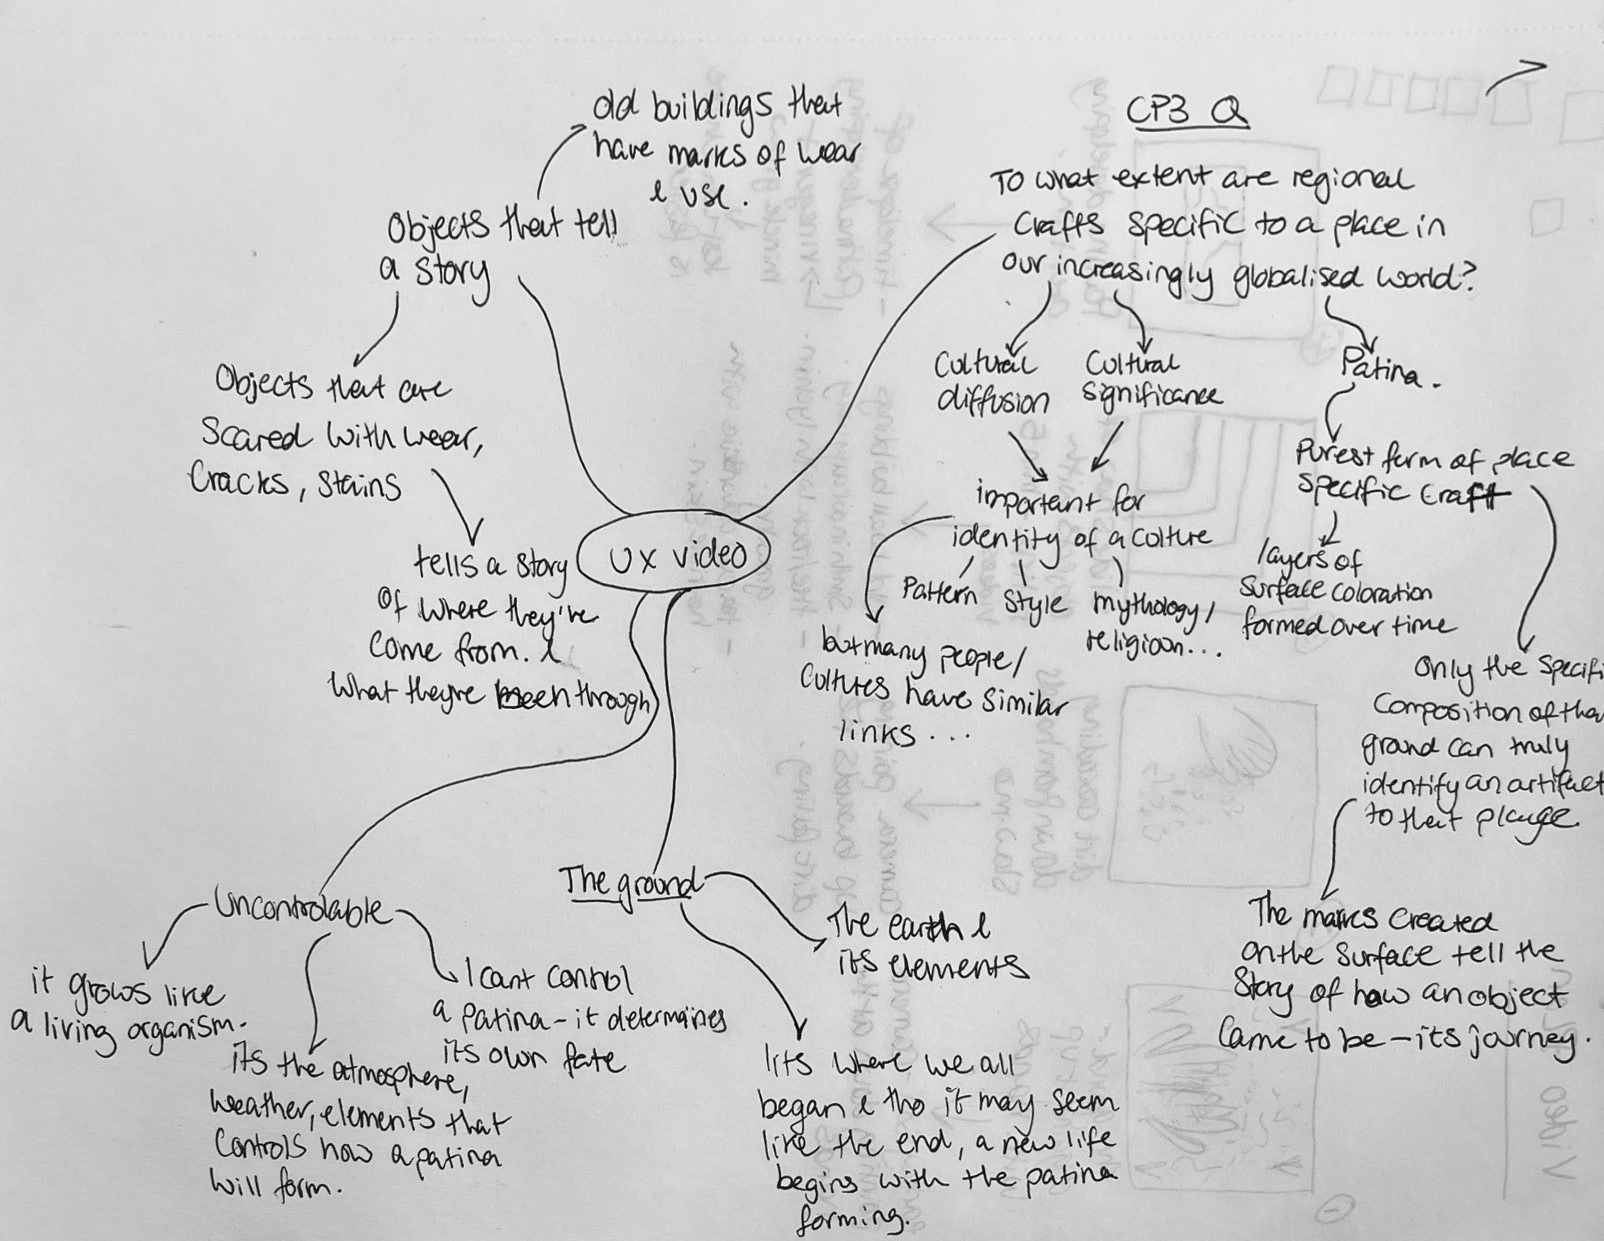
Below is the video:
Mock Degree Show
We did a practice degree show using our objects from S&R to experiment how we would present our pieces in a gallery. I decided I wanted to get wooden blocks to create layers to show my collection of vessels and thought they would look nice displayed as a small family. I went to the wood workshop to cut up some wood but I realized when I started to set up my display, the wood wasn't thick enough and many of the bigger vessels didn't fit comfortably on my blocks. Below are some of the display tests I made to see how my family of vessels could look.
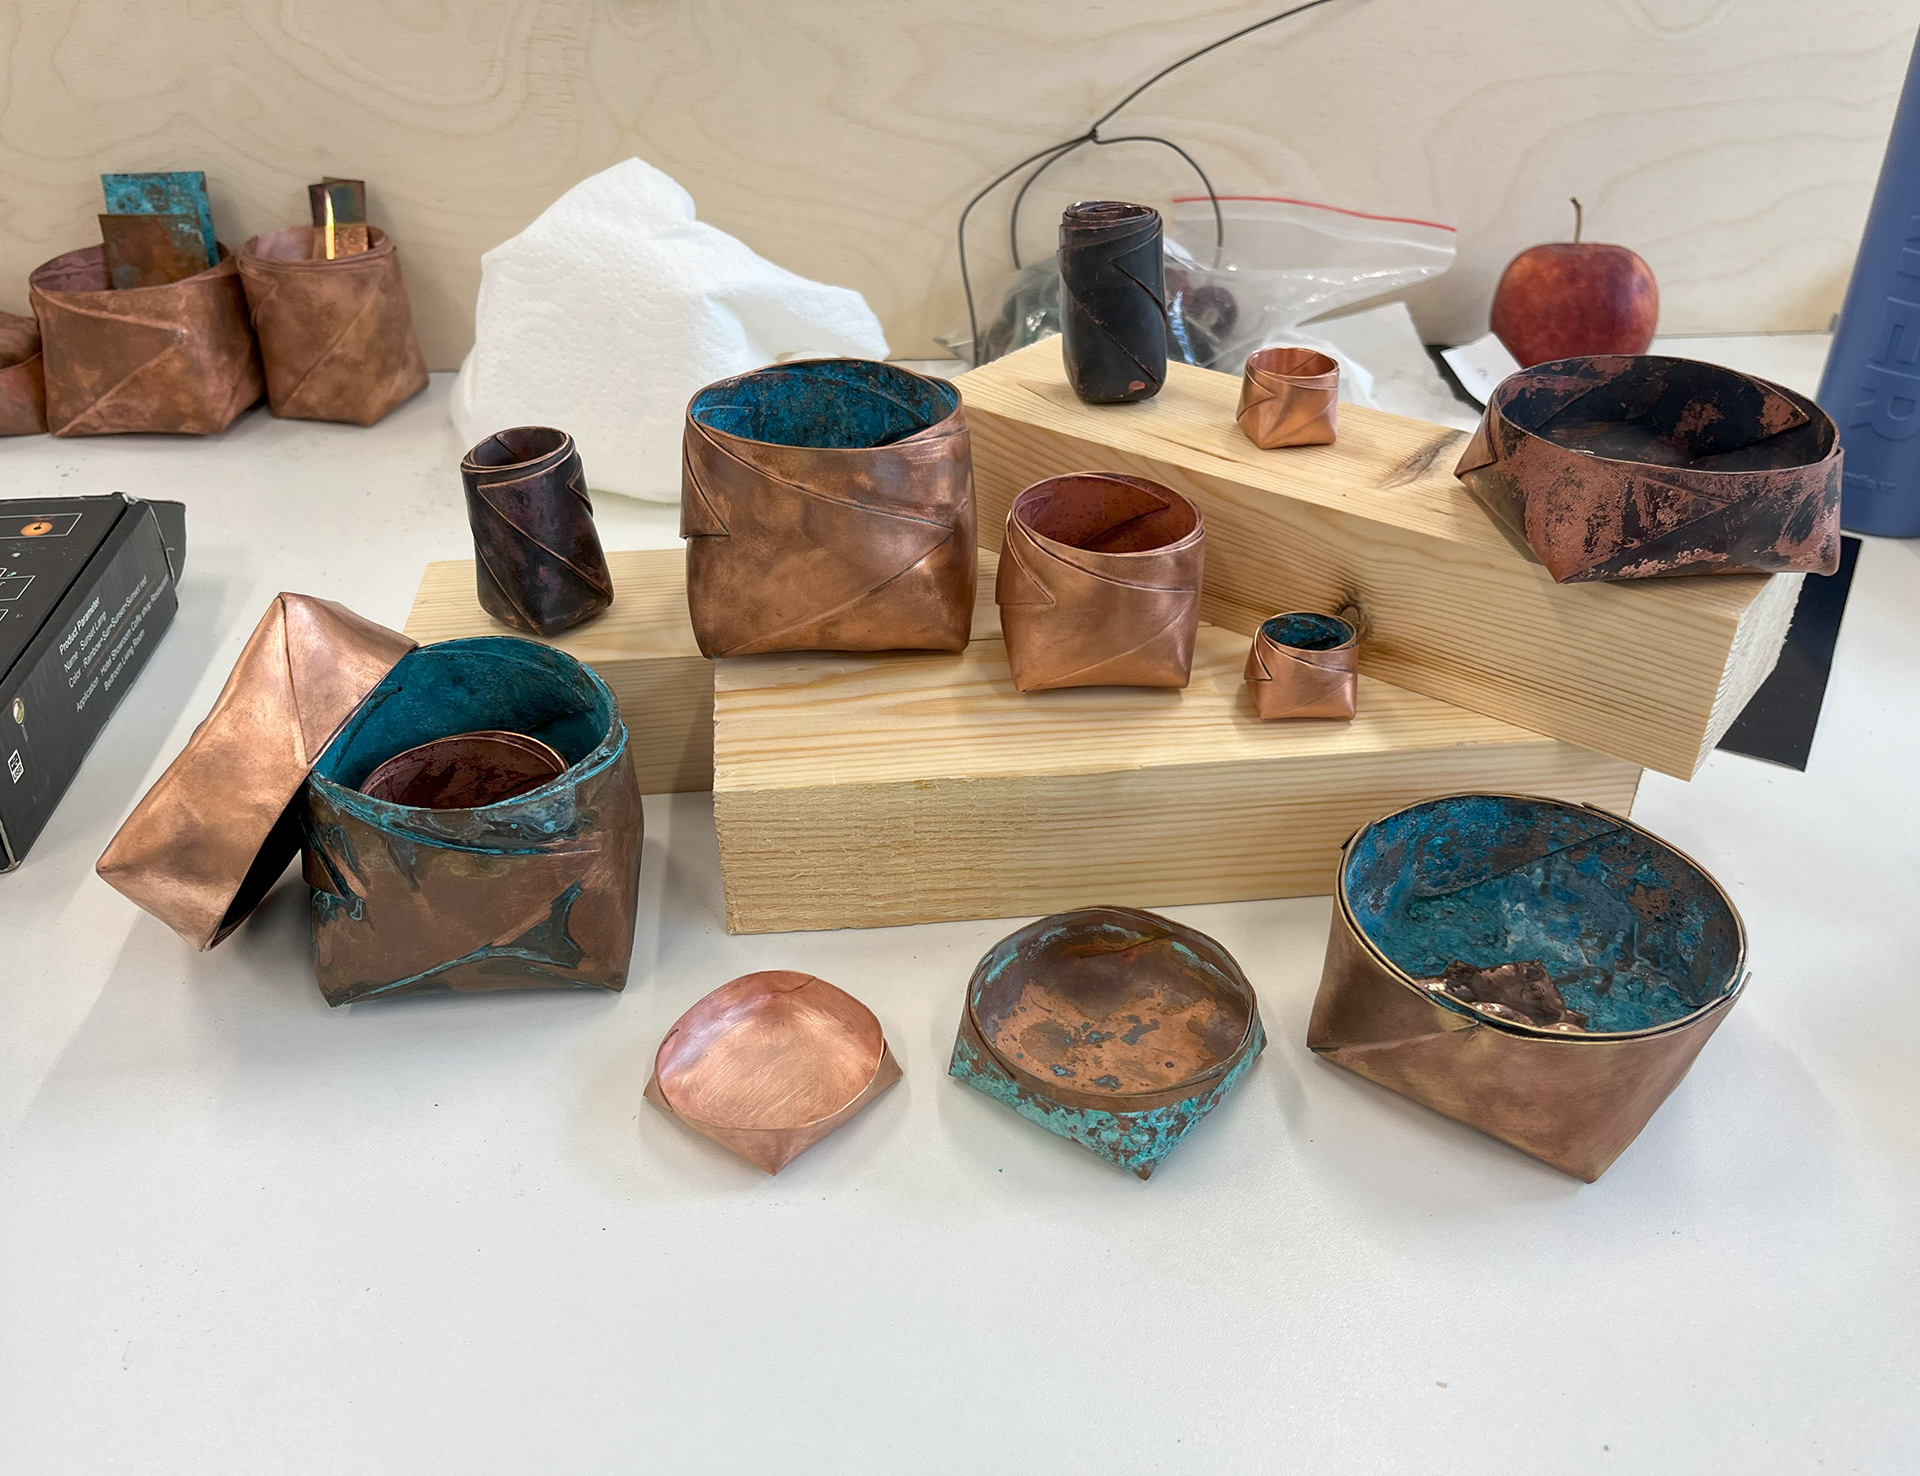

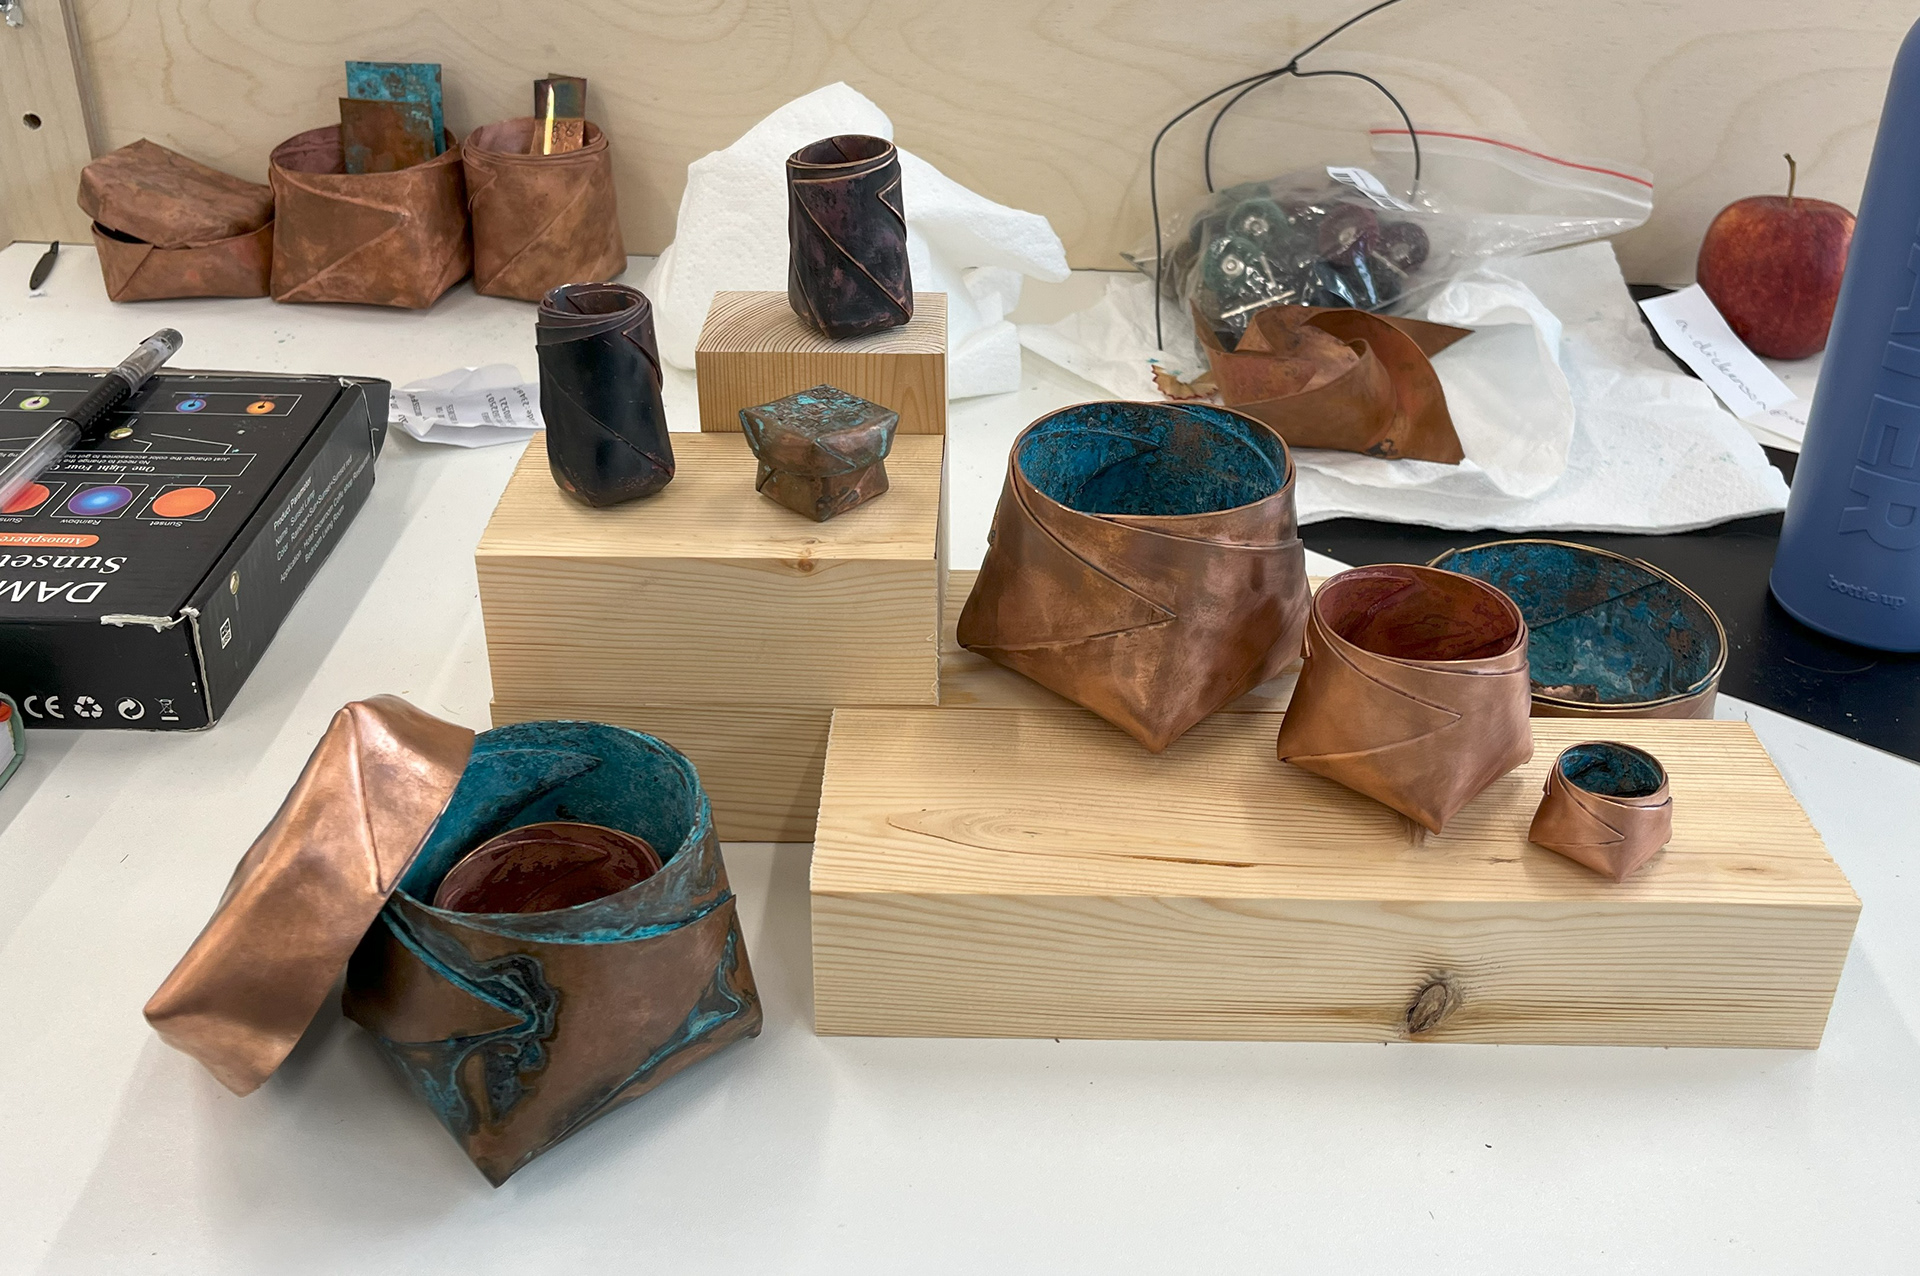
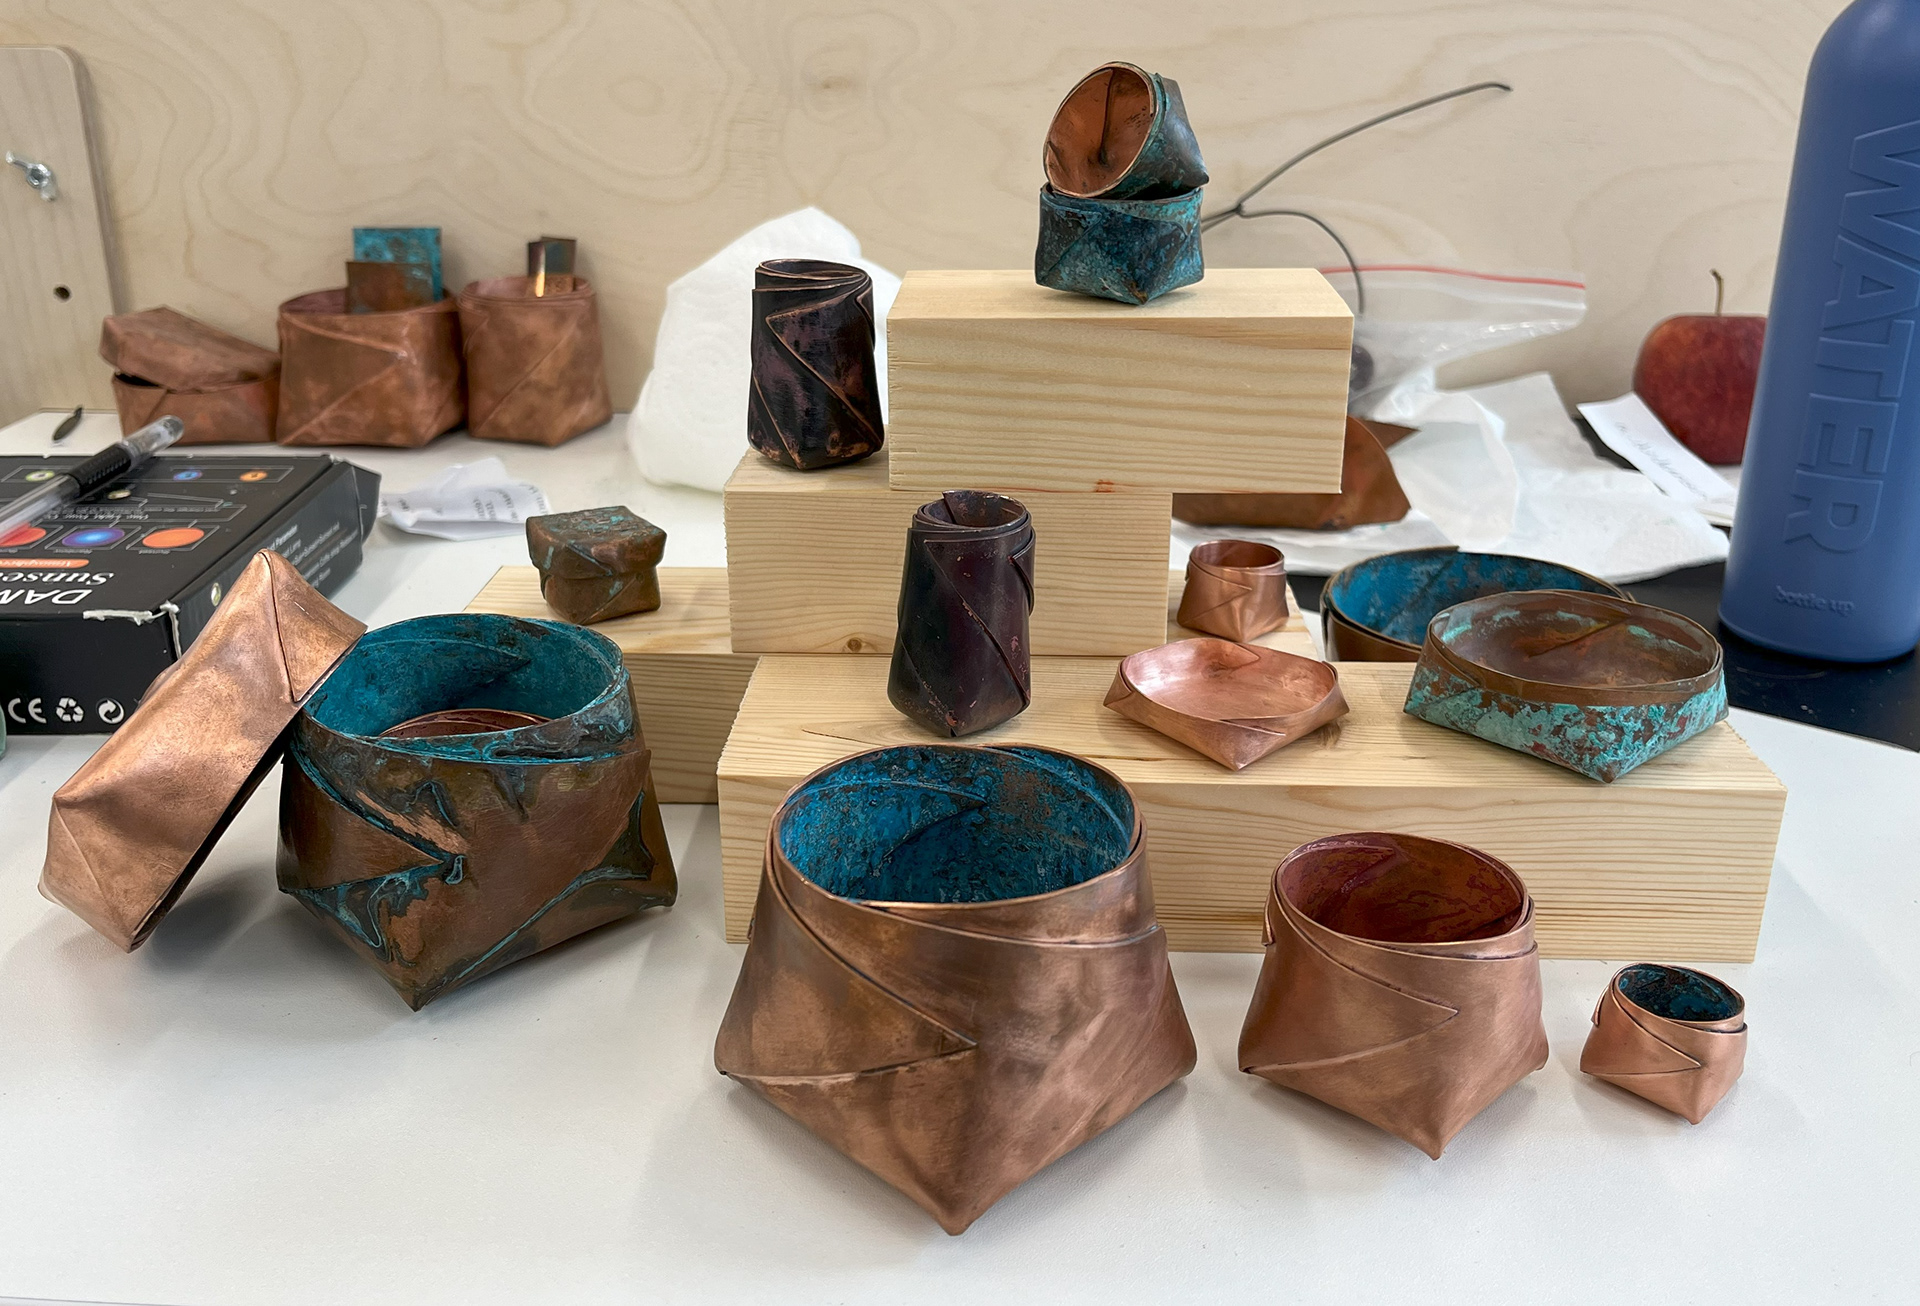
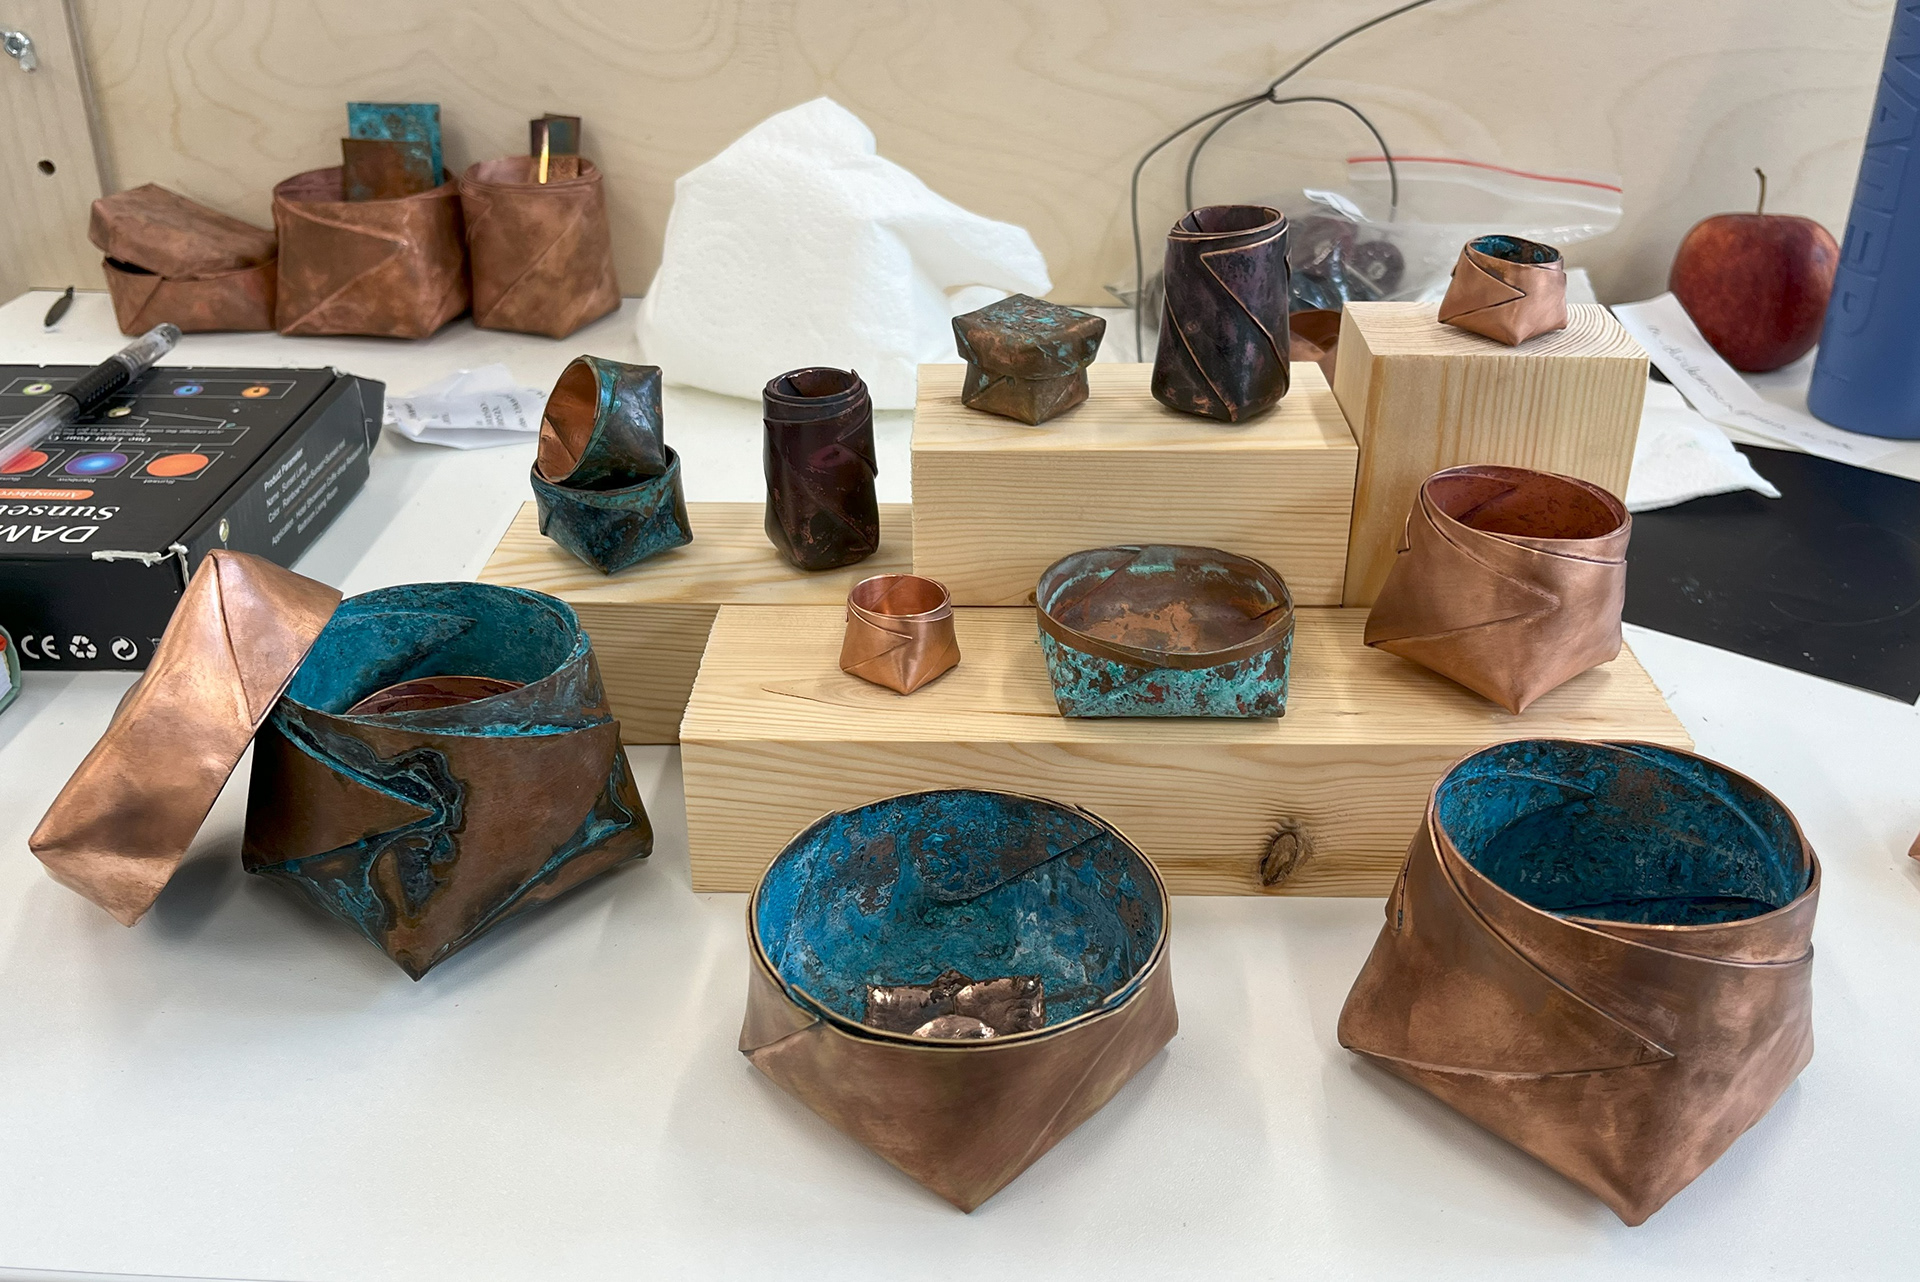
The feedback I received was 1 the wood blocks are too small. 2 the colour of the wood is distracting and should be painted white. 3 there is too much there- I have to be selective with what I display. 4 working on a larger plinth- spread the pieces out and give them more space to breath.
For the degree show, I will want to get bigger white blocks and reduce the amount of vessels from my collection. Once all my pieces are done, I will want to pick a maximum of 5 of my best vessels and try reattempt to make a display for them.
Context
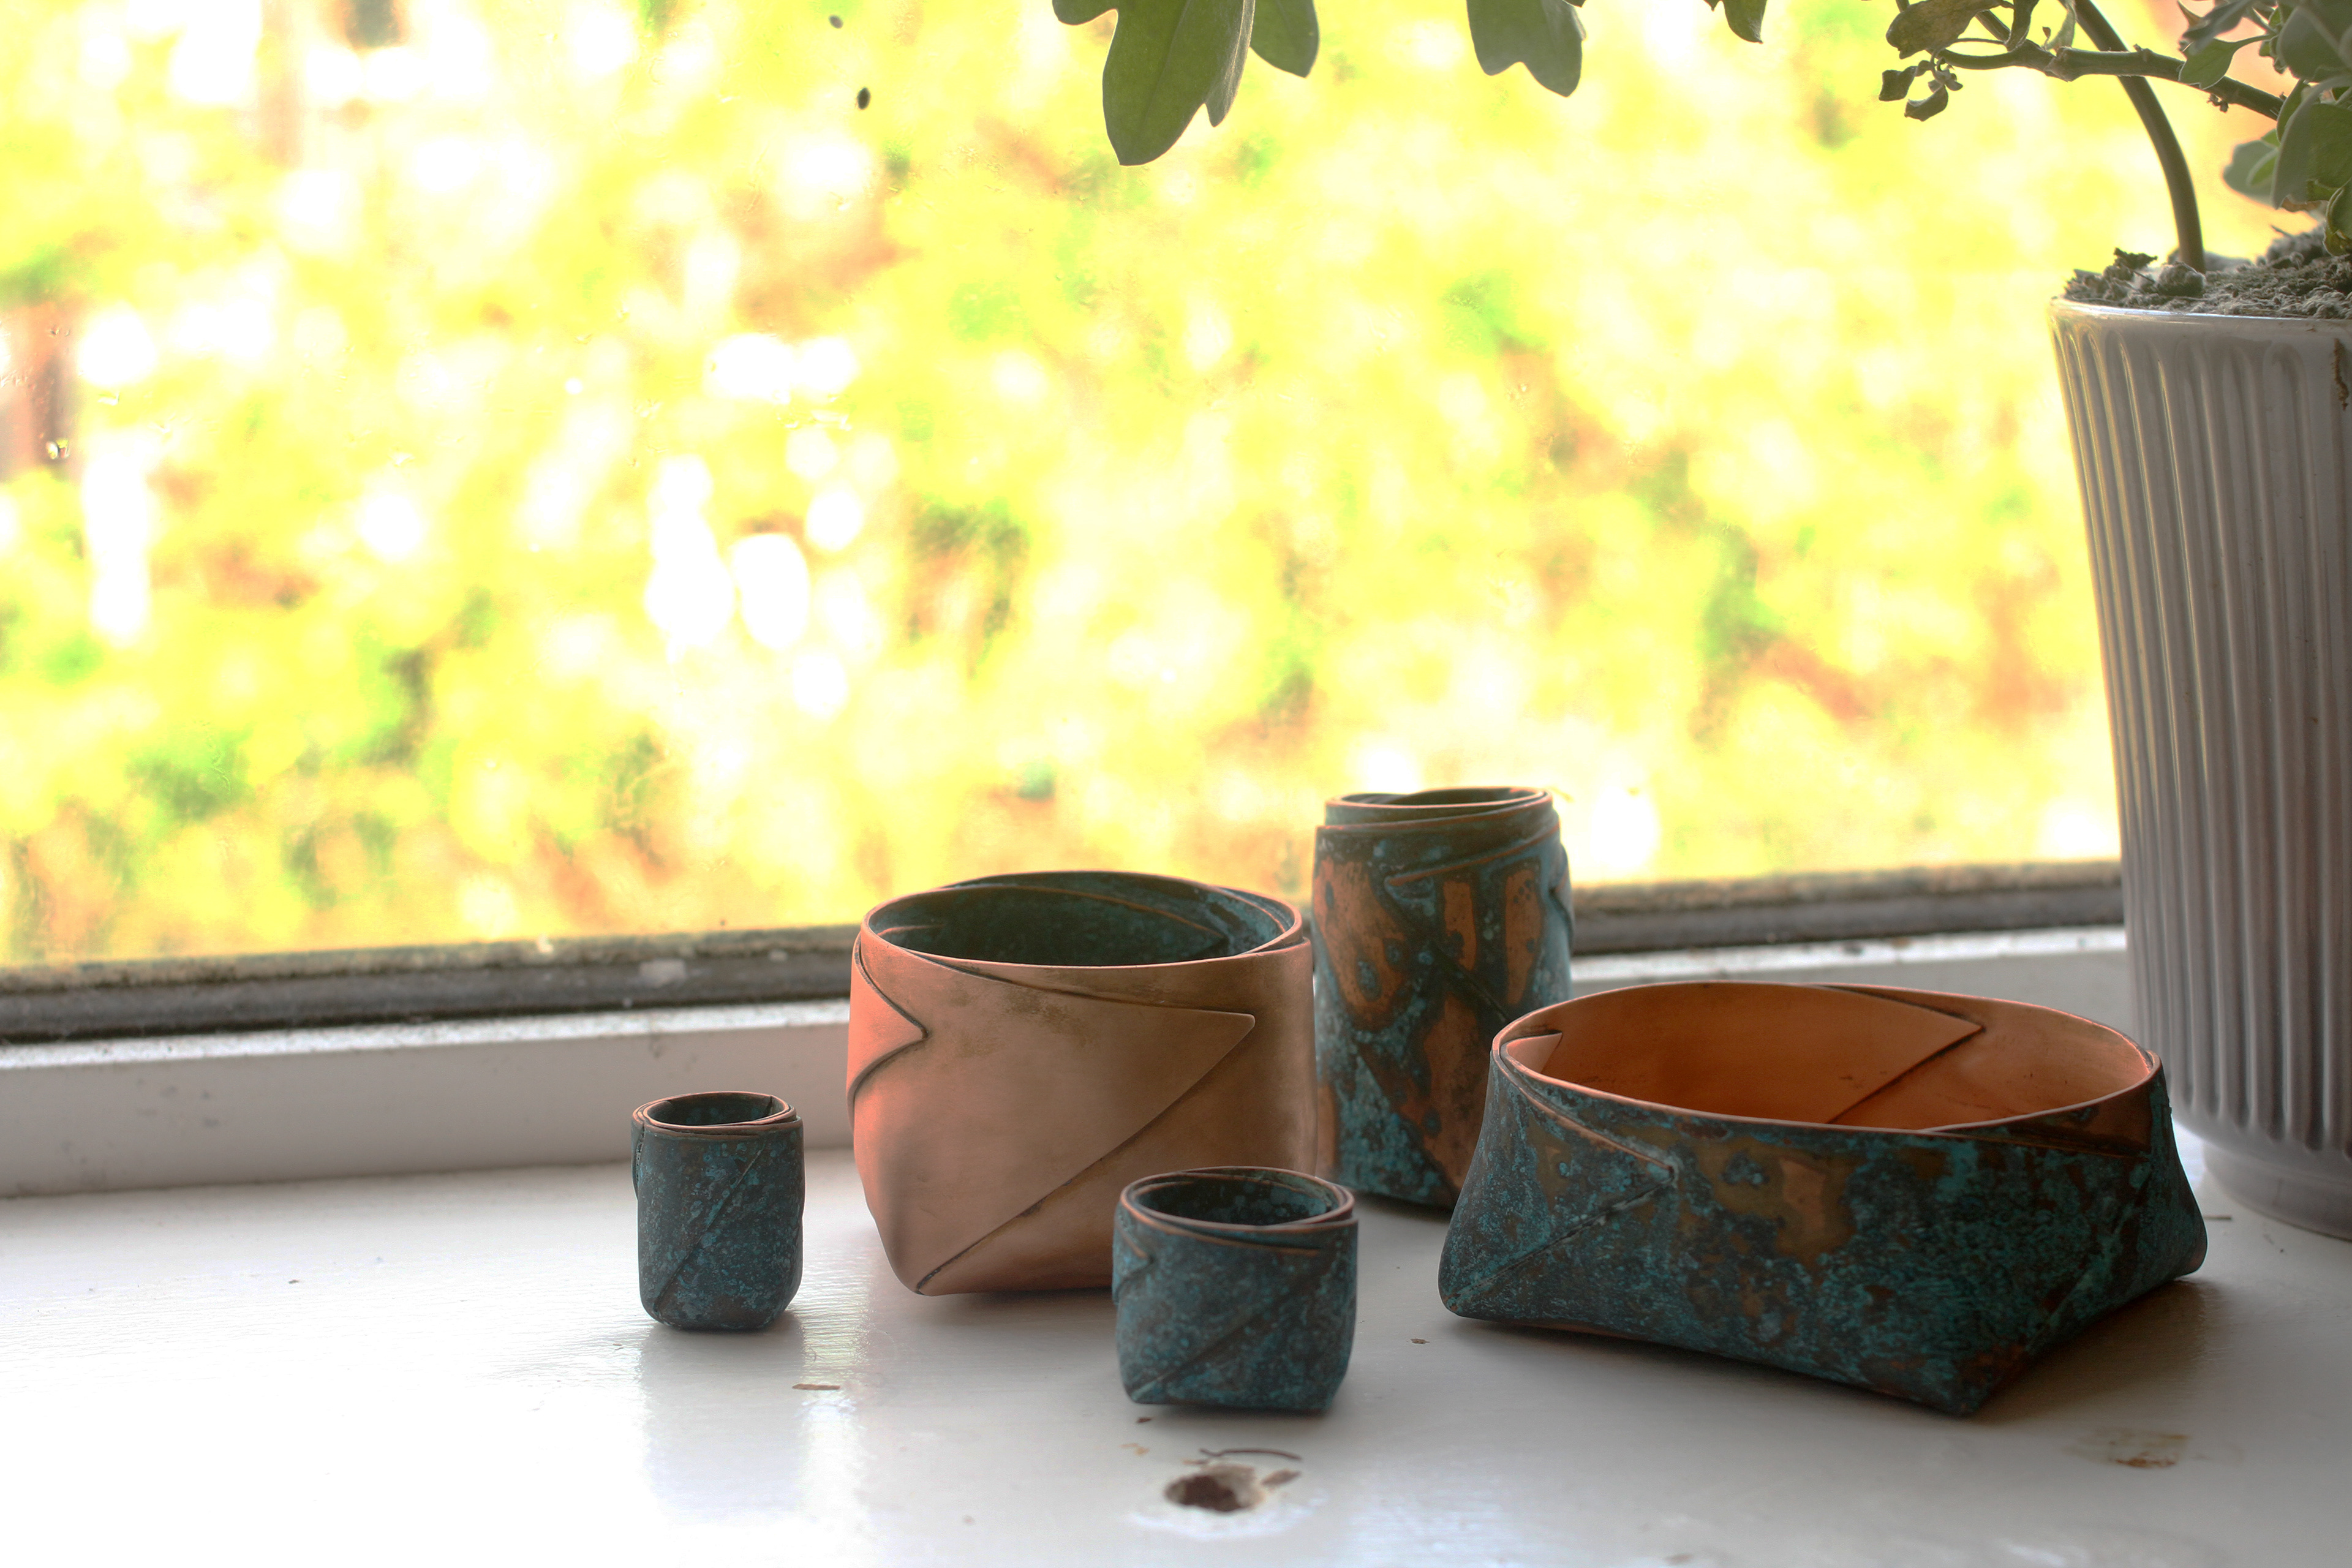
I have thought a lot about what context I should put my pieces in. My objects don’t have a real purpose and are really just decorative. I think I would like my vessels to be in the home, domestic yet ornamental. As they are vessels, I have thought about how they could be used in a functional manner. But ultimately thought that it would cheapen them if I allocated a specific function. Furthermore, putting them to use like turning them into vases, containers or plant pots could damage the patina over time. Copper tarnishes easily and when over touched or used can dull the colour or even start to rub the patina away. I would like my pieces to remain frozen in time and to retain their shine and beauty.
Gallery
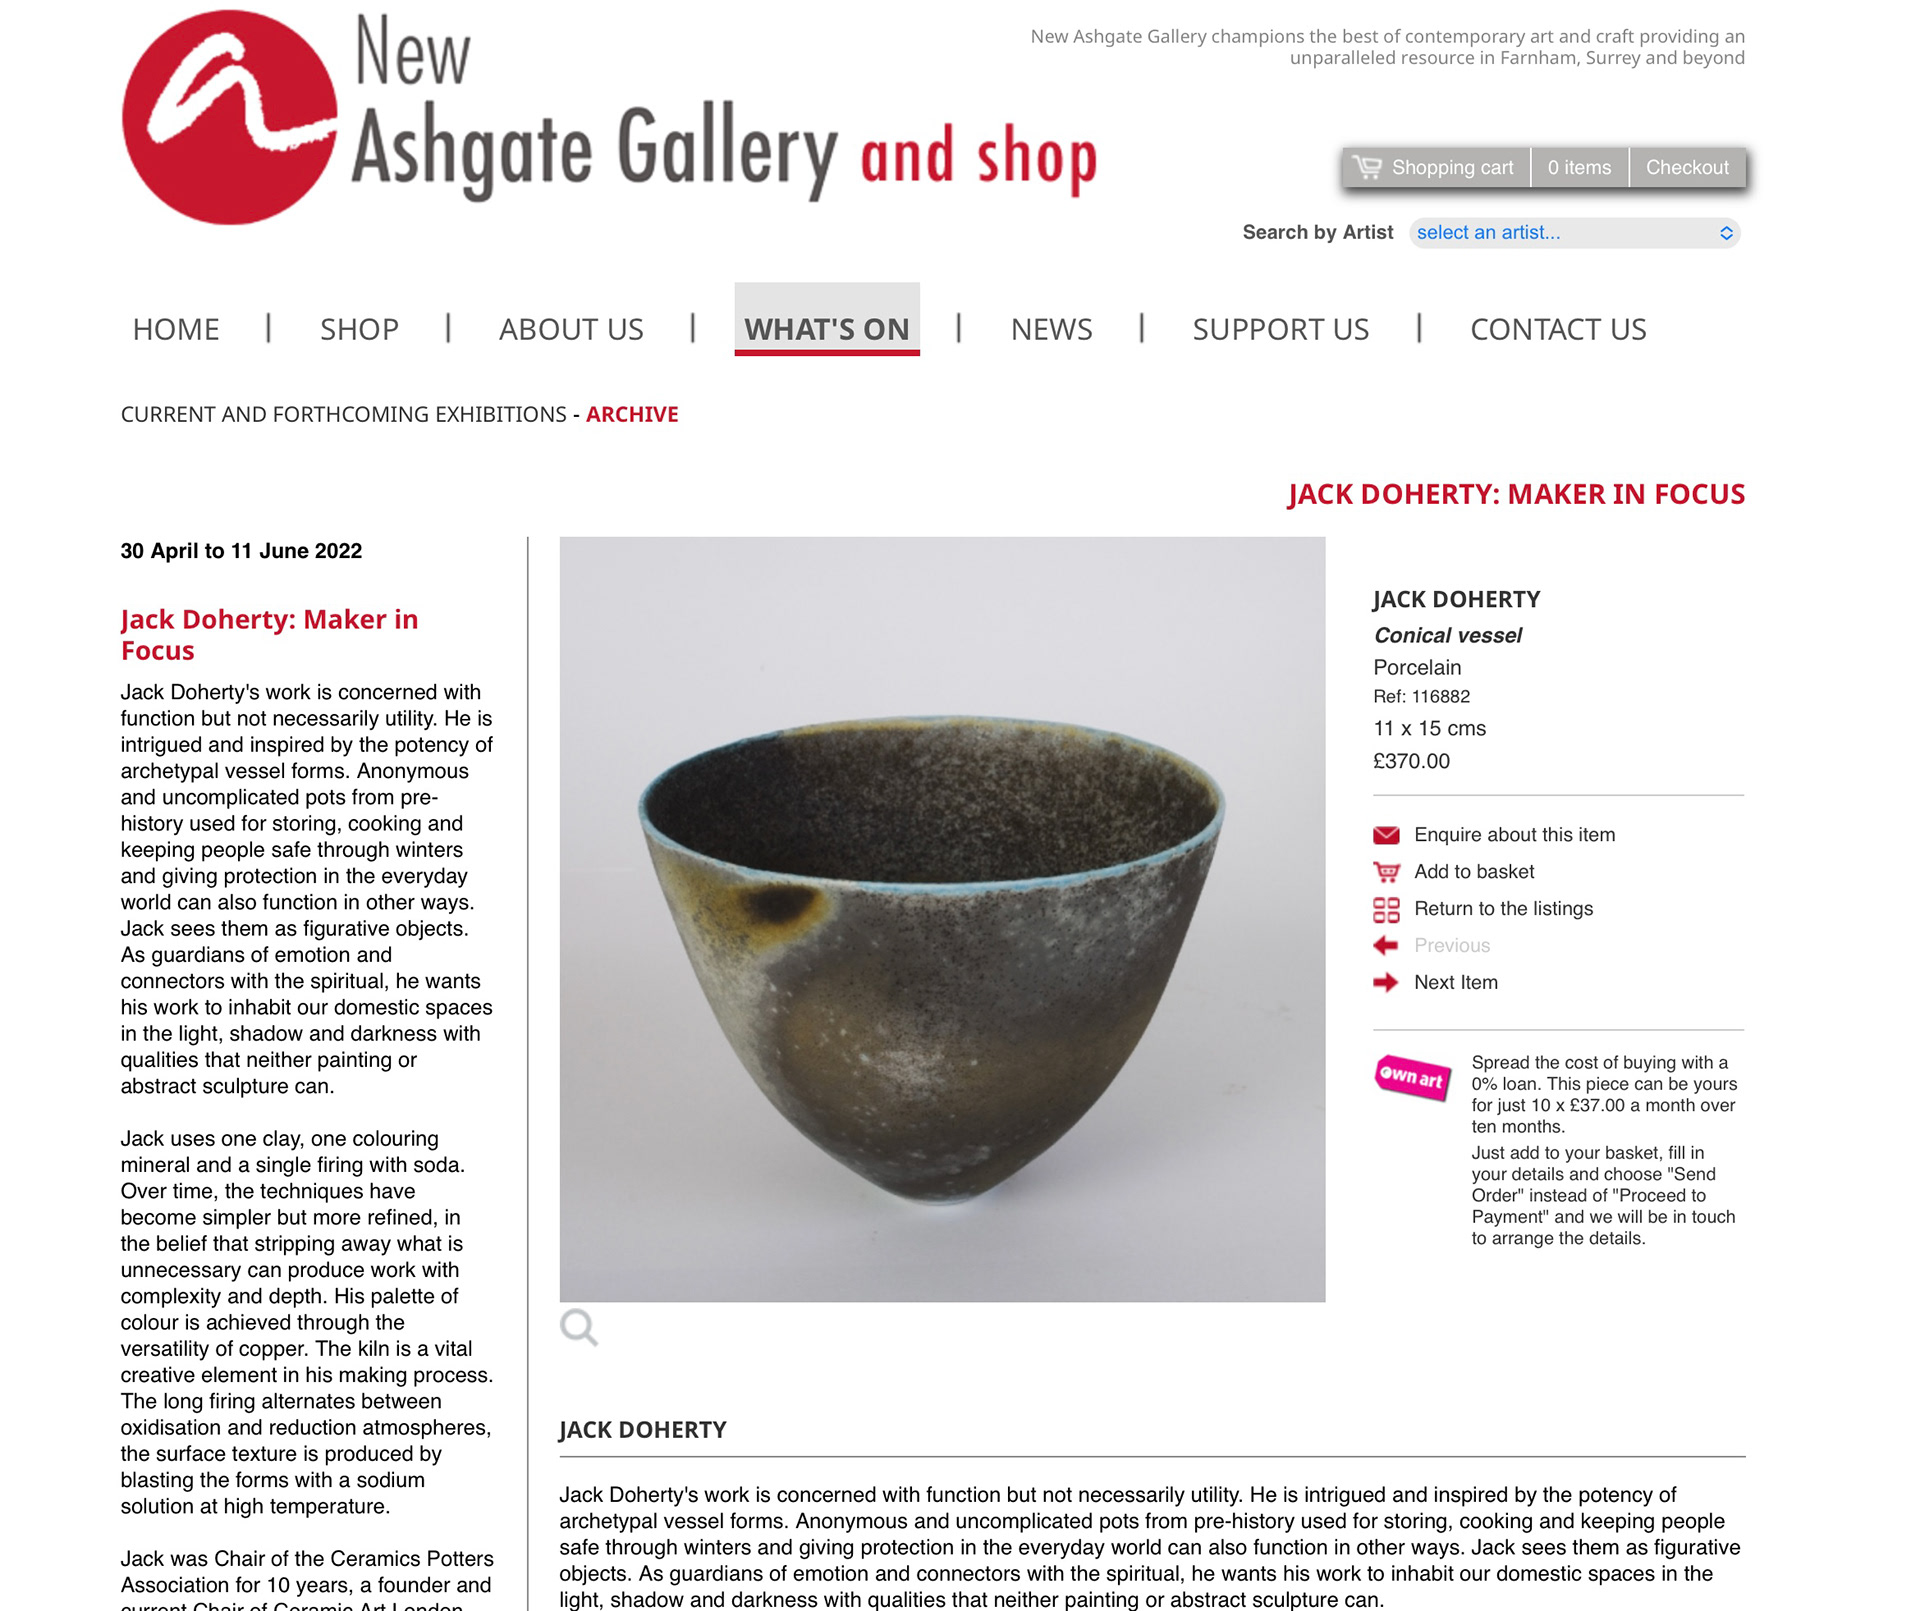
I did some research on practitioners that have similar work to me to see what sort of competition I had within the field but also to see who’s work would be next to mine in a gallery. Looking thought the members of the crafts council I found Rebecca Walklett, Jack Doherty and Adaesi Ukairo who are 3 UK based practitioners who I thought had similar artifacts to me (More details about them in my research archive).
I thought that together our work could look really nice side by side as they follow a similar theme (aesthetically) and incorporate similar colours.
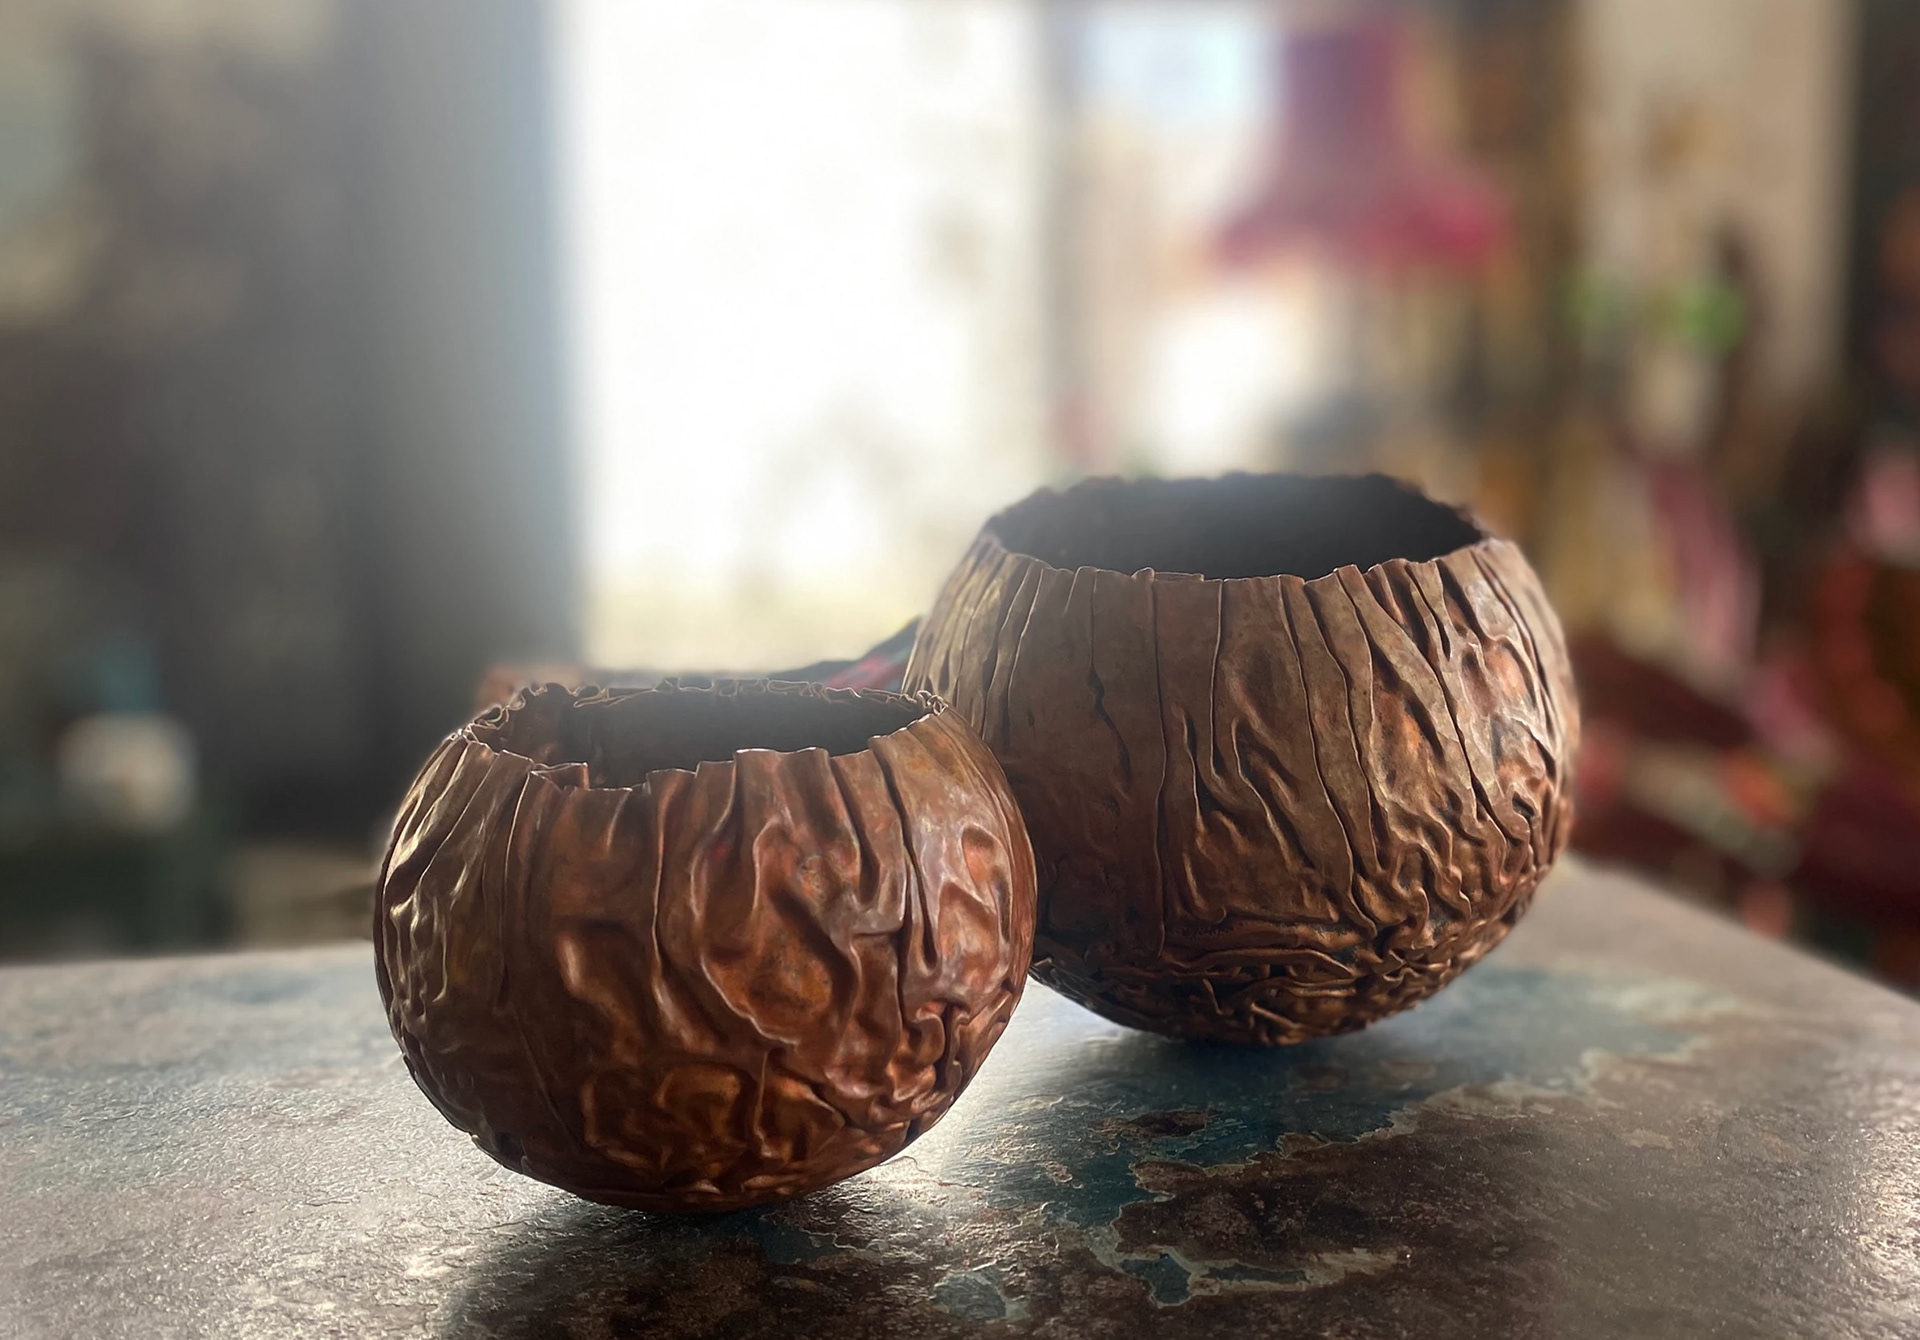
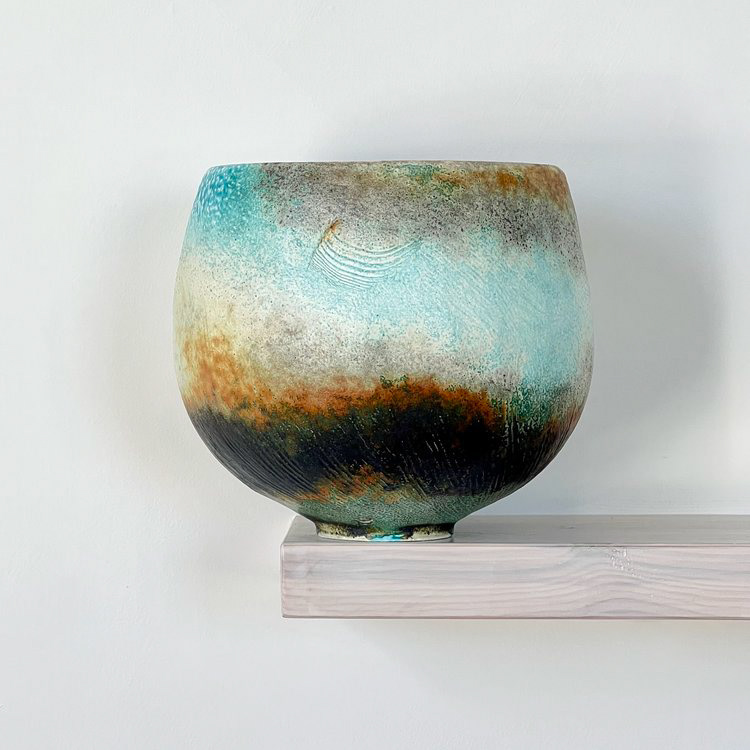

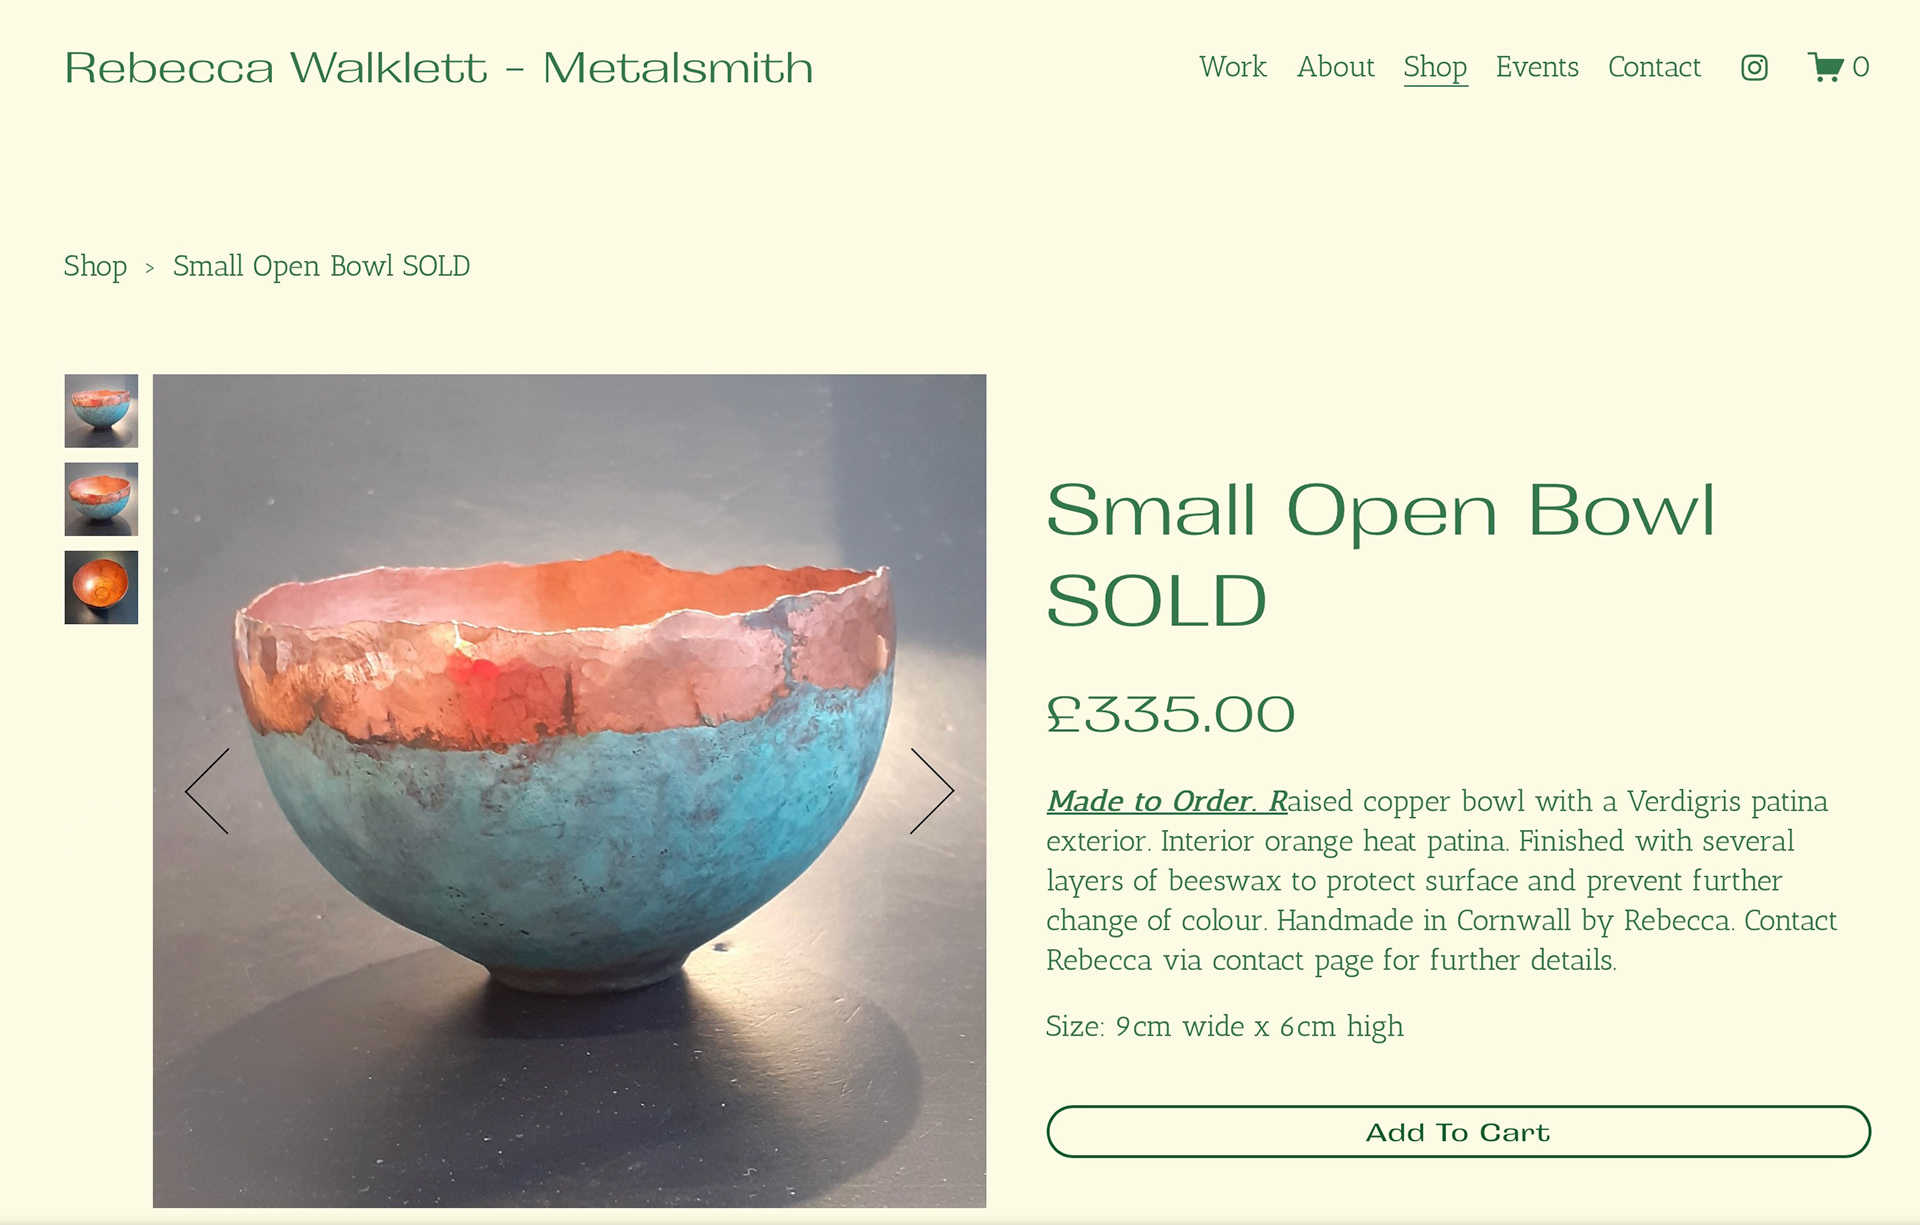
Moreover, I wanted to check the prices of their work to see if I am over or under pricing my own. Looking through their websites, I decided to pick objects that were of similar size to mine. My best reference would probably be from Rebecca Walklett as her work is all copper and patina like mine. This bowl is about the same size as my large vessel and she priced hers at £335 when I thought mine was at around the £300 mark. Jack Doherty works in porcelain and with my limited knowledge of the material I can guess that it is more expensive than copper so his vessel is £370 and is larger than mine as well. I also have to consider than Doherty is a well established maker and with a good reputation you can sell your pieces for more. Based of this research, I think I estimated my large vessel at £300 correctly. Rebecca Walklett is also an established maker pricing hers £35 more than mine which I think sounds about right.
Pricing for individual vessels
Below are the prices I thought sounded right for my vessels. These are not fixed and will probably change as I become more familiar with the industry and value of products.
Large Tall Vessel (black): £300
Large Tall Vessel (Heat treat): £300
Medium wide Vessel (blue): £125
Medium vessel (blue): £125
Large vessel (heat treat): £300
Medium wide Vessel (blue): £125
Medium tall vessel (blue): £120
Medium tall vessel (black): £120
Medium tall vessel (heat treat): £120
small tall vessel (blue): £25

small tall vessel (heat treat): £25
Small vessel (heat treat): £30
Small vessel (blue): £30
large wide vessel (black): £315
Design fairs and competitions
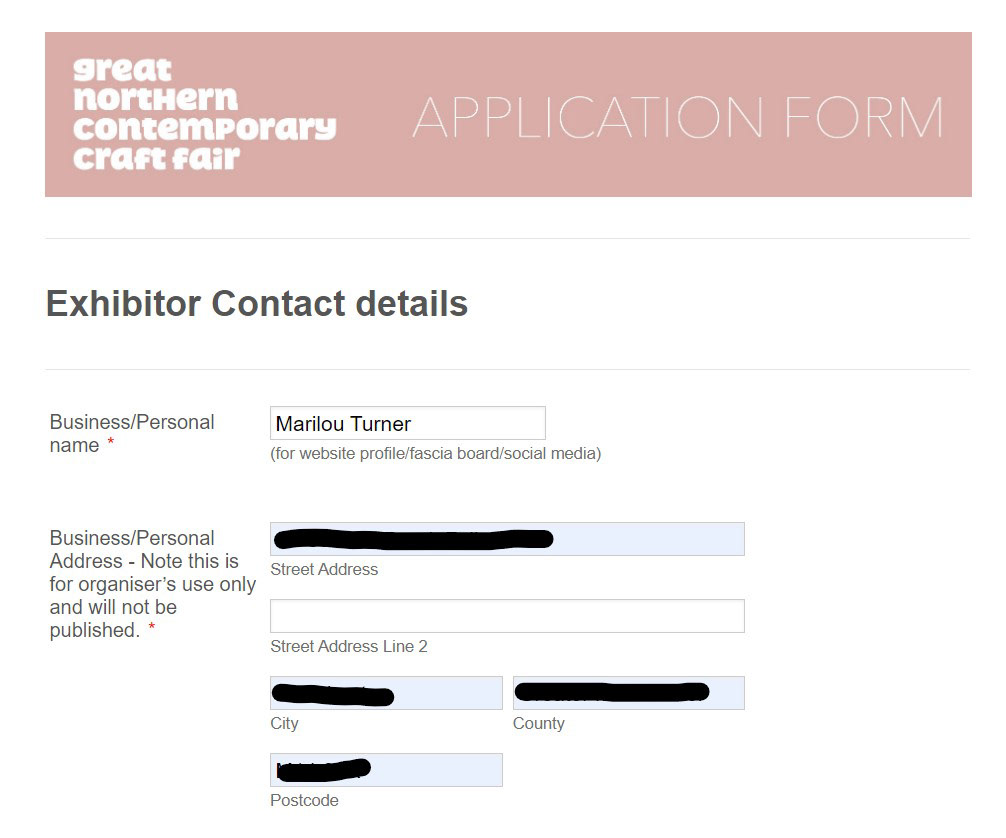
I have decided to enter into a couple design fairs to try to put my work out there and to get more recognition. In preparation for applying to these, I decided I needed to make my website look a bit more profesional. After looking at other practitioner pages for inspiration, I decided make a fairly simple welcome page with a couple sentences about myself and my work. Then I added a section named ‘current work’ which displays some of the nicer pictures of my final pieces. This too was done in the same format as established designers. And finally renamed this section as ‘Uni portfolio’ because I thought potential employers would want to see the progression and development of my work as I become more established.
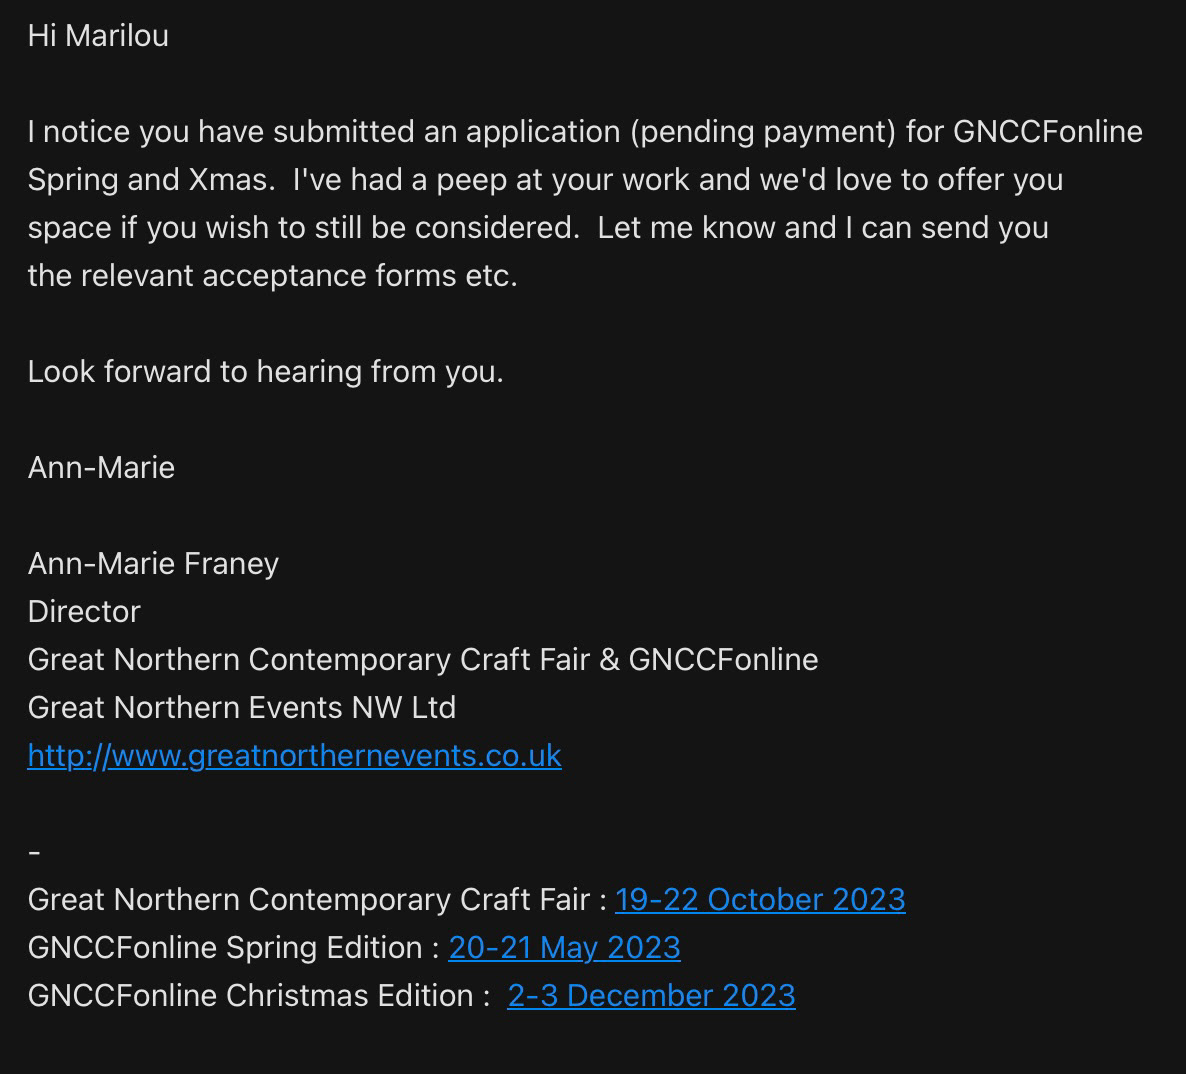
The first fair I applied to was the Great Northern Contemporary Craft Fair where I applied for the 2 online fairs in May and at Christmas. I would have applied for the in person one but was too late to apply.
The next day I received an email from the director offering me a place at the fair!
I also applied to the SNAG Metalsmith ‘Juried Student Exhibition’ competition. I struggled to find a metal smithing competition that wasn’t just about jewelry but this seemed like a good opportunity to gain some exposure and to demonstrate my work to the metal working community.
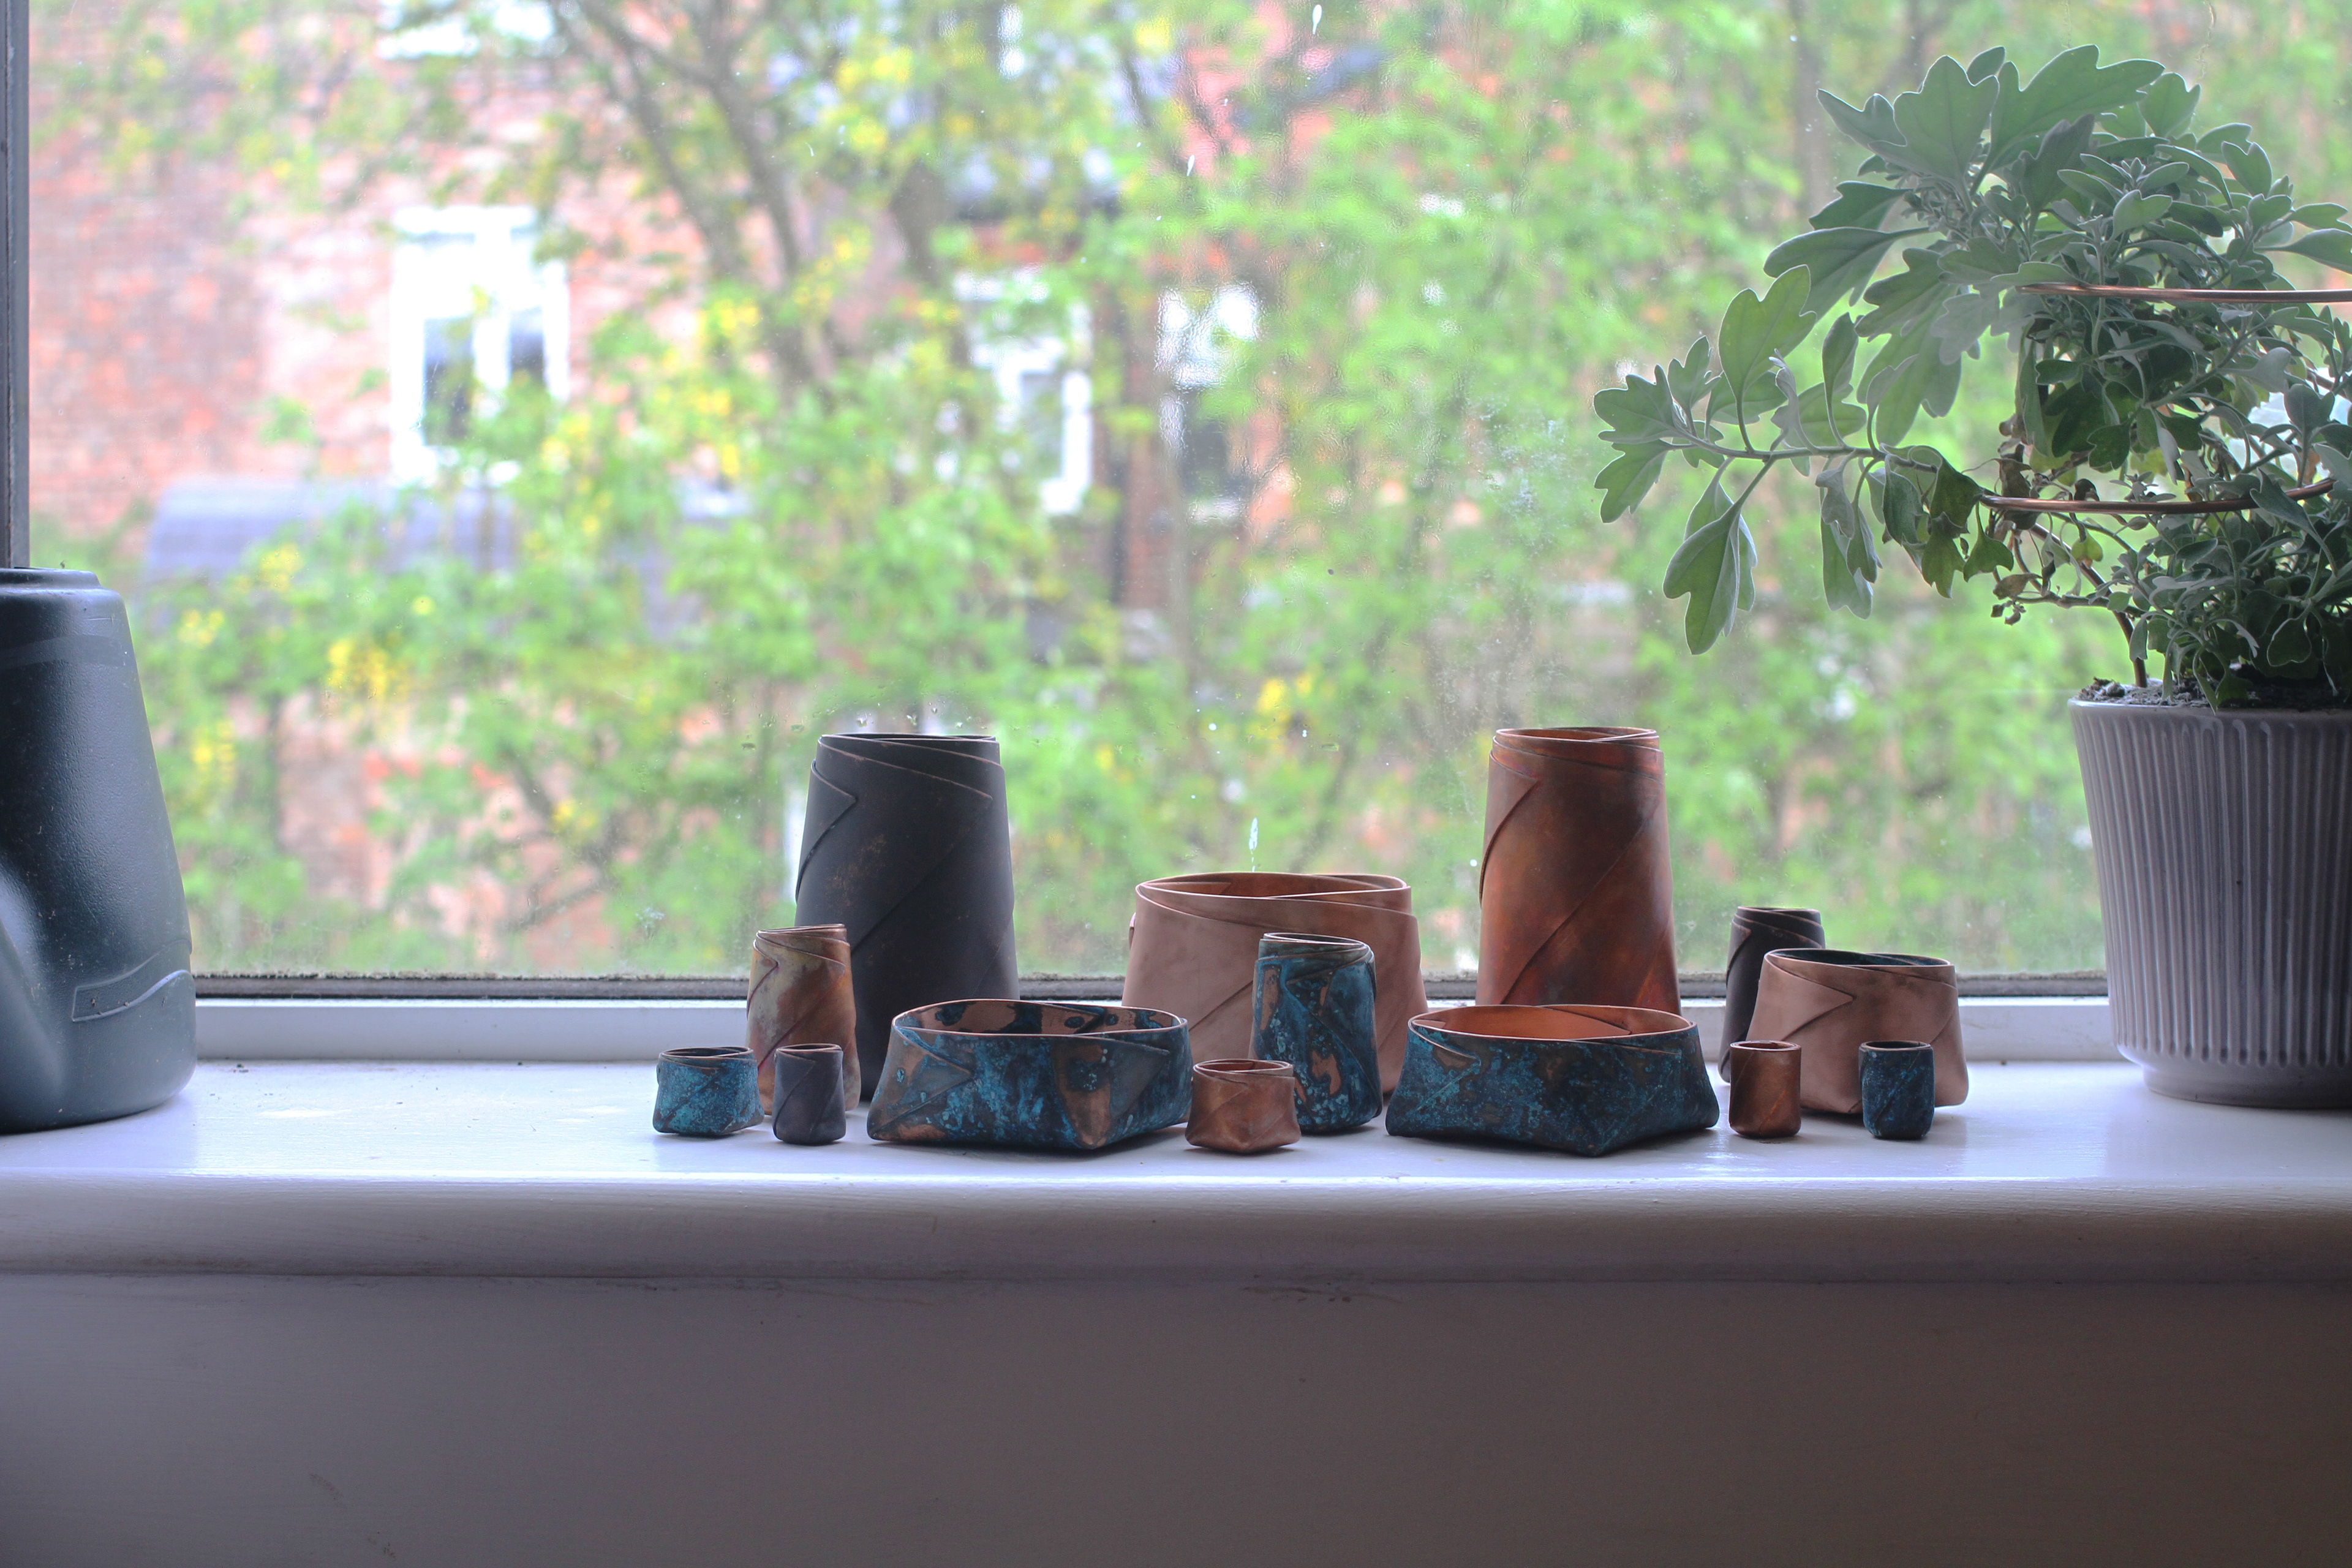
The Final Collection